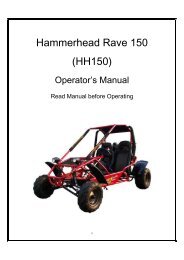
R-150 â Owners Manual - Hammerhead Off-Road
R-150 â Owners Manual - Hammerhead Off-Road
R-150 â Owners Manual - Hammerhead Off-Road

Create successful ePaper yourself
Turn your PDF publications into a flip-book with our unique Google optimized e-Paper software.
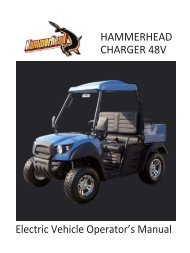
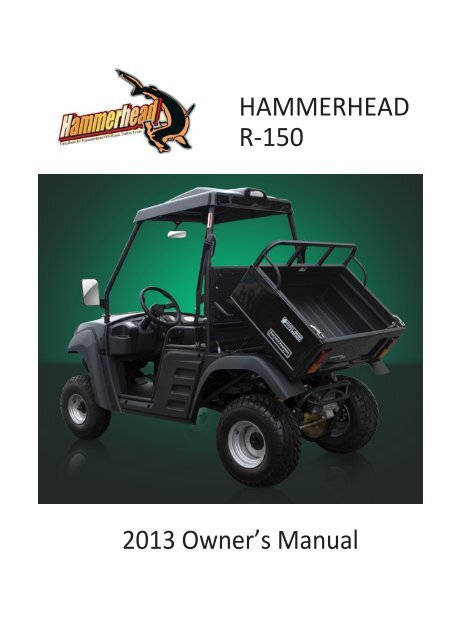
HAMMERHEAD<br />
R-<strong>150</strong><br />
2013 Owner’s <strong>Manual</strong>
WELCOME INTRODUCTION<br />
Thank you for purchasing <strong>Hammerhead</strong> R <strong>150</strong> Utility Vehicle (UTV). We hope you<br />
will enjoy it. Before you start to operate the vehicle, please read through this owner’s<br />
manual carefully as it contains important safety and maintenance information. Failure<br />
to follow the warnings contained in this manual can result in serious injuries in juries or<br />
death<br />
Be sure to follow the recommended maintenance schedule and service your vehicle<br />
accordingly. Preventive maintenance is extremely important to the longevity of your<br />
vehicle.<br />
We hope you will have a pleasant experience with our product and thank you again for<br />
choosing <strong>Hammerhead</strong> Products.<br />
1
CONTENTS<br />
WELCOME INTRODUCTION ............................................................................................................................ 1<br />
Warranty Information .................................................................................................................................... 2<br />
IMPORTANT MANUAL INFORMATION ........................................................................................................... 3<br />
LOCATION OF WARNING DECALS ................................................................................................................... 4<br />
SAFETY INFORMATION ................................................................................................................................... 6<br />
DESCRIPTION AND VEHICLE IDENTIFICATION ................................................................................................. 9<br />
CONTROL FUNCTIONS .................................................................................................................................. 12<br />
PRE‐OPERATING CHECKS .............................................................................................................................. 20<br />
OPERATION ................................................................................................................................................... 25<br />
DRIVING YOUR VEHICLE ............................................................................................................................... 29<br />
PERIODIC MAINTENANCE AND ADJUSTMENT .............................................................................................. 31<br />
Troubleshooting ........................................................................................................................................... 42<br />
Cleaning and Storage .................................................................................................................................... 43<br />
Specifications ................................................................................................................................................ 46<br />
2
Geason Enterprises, LLC dba Geason Powersports<br />
Emission Control System Warranty Statement<br />
YOUR WARRANTY RIGHTS AND OBLIGATIONS<br />
The U.S. Environmental Protection Agency and Geason Enterprises, LLC dba Geason Powersports<br />
(hereinafter “Geason Powersports”) are pleased to explain the emission control system warranty on your<br />
2013 <strong>Off</strong>-<strong>Road</strong> ATV. New off-road motor vehicles must be designed, built and equipped to meet U.S. EPA<br />
Federal anti-smog standards. Geason Powersports must warrant the emission control system on your<br />
vehicle for 5,000 km, or at least 30 months, whichever comes first, provided that there has been no abuse,<br />
neglect or improper maintenance of your vehicle. This ATV was designed to meet the emission standards<br />
for 10,000 km, or five years, whichever comes first.<br />
Your emission control system may include parts such as the carburetor or fuel injection system, the ignition<br />
system, catalytic converter and engine computer, if it is equipped. Also included may be hoses, belts,<br />
connectors and other emission-related assemblies.<br />
Where a warrantable condition exists, Geason Powersports will repair your vehicle at no cost to you,<br />
including diagnosis, parts and labor.<br />
If an emission-related part on your vehicle is defective, the part will be repaired or replaced by Geason<br />
Powersports. This is your emission control system DEFECTS WARRANTY.<br />
NOTICE! Use of any Geason Powersports vehicle in any type of competitive event completely and<br />
absolutely voids this and all other warranties offered by Geason Powersports.<br />
OWNER’S WARRANTY RESPONSIBILITIES<br />
As the vehicle owner, you are responsible for the performance of the required maintenance listed in your<br />
owner’s manual. Geason Powersports recommend that you retain all receipts covering maintenance on<br />
your vehicle, but Geason Powersports cannot deny warranty solely for the lack of receipts or for your failure<br />
to ensure the performance of all scheduled maintenance.<br />
You are responsible for presenting your vehicle to the Geason Powersports dealer as soon as a problem<br />
exists. The warranty repairs should be completed in a reasonable amount of time, not to exceed 30 days.<br />
As the vehicle owner, you should be aware that Geason Powersports may deny your warranty coverage if<br />
your vehicle or a part has failed due to abuse, neglect, improper maintenance or unapproved modifications.<br />
If you use your vehicle in any type of competitive event, this warranty is immediately and completely void.<br />
If you have any questions regarding your warranty rights and responsibilities, you should contact Geason<br />
Enterprises, LLC dba Geason Powersports, 1200 Lakeside Parkway #400, Flower Mound, TX 75028,<br />
Phone: 214-513-1700 or the U.S. Environmental Protection Agency, 2000 Traverwood Drive, Ann Arbor, MI<br />
48105.
Geason Enterprises, LLC dba Geason Powersports<br />
Limited Warranty on Emission Control System<br />
YOUR WARRANTY RIGHTS AND OBLIGATIONS<br />
Geason Enterprises, LLC dba Geason Powersports (hereinafter “Geason Powersports”) warrants that each<br />
new 2013 and later Geason Powersports off-road vehicle:<br />
A. is designed, built and equipped so as to conform at the time of initial retail purchase with all<br />
applicable regulations of the United States Environmental Protection Agency, and;<br />
B. is free from defects in material and workmanship which cause such vehicle to fail to conform to<br />
applicable regulations of the United States Environmental Protection Agency for the periods<br />
specified above.<br />
I. Coverage. Warranty defects shall be remedied during customary business hours at any<br />
authorized Geason Powersports dealer located within the United States of America in compliance<br />
with the Clean Air Act and applicable regulations of the United States Environmental Protection<br />
Agency. Any part or parts replaced under this warranty shall become the property of Geason<br />
Powersports.<br />
II. Limitations This Emission Control System Warranty shall not cover any of the following:<br />
A. Repair or replacement as a result of<br />
(1) accident,<br />
(2) misuse,<br />
(3) repairs improperly performed or replacements improperly installed,<br />
(4) use of replacement parts or accessories not conforming to<br />
specifications set forth by Geason Powersports, which adversely affect<br />
performance and/or<br />
(5) use in competitive racing or related events.<br />
B. Inspections, replacement of parts and other services and adjustments required for required<br />
maintenance.<br />
C. Any vehicle equipped with an odometer or hour meter on which the odometer mileage or<br />
hour meter reading has been changed so that actual mileage cannot be readily<br />
determined.<br />
III.<br />
Limited Liability<br />
A. The liability of Geason Powersports under this Emission Control System Warranty is<br />
limited solely to the remedying of defects in material or workmanship by an authorized<br />
Geason Powersports dealer at its place of business during customary business hours.<br />
This warranty does not cover inconvenience or loss of use of the vehicle or transportation<br />
of the vehicle to or from the Geason Powersports. Geason Powersports shall not be liable<br />
for any other expenses, loss or damage, whether direct, indidental, consequential or<br />
exemplary arising in connection with the sale or use of or inability to use the Geason<br />
Powersports vehicle for any purpose. Some states do not allow the exclusion or limitation<br />
of any incidental or consequential damages, so the above limitations may not apply to you.
Geason Enterprises, LLC dba Geason Powersports<br />
Limited Warranty on Emission Control System<br />
B. No express emission control system warranty is given by Geason Powersports, except as<br />
specifically set forth herein. Any emission control system warranty implied by law,<br />
including any warranty of mechanability or fitness for a particular purpose, is limited to the<br />
express emission control system warranty terms stated in this warranty. The foregoing<br />
statements of warranty are exclusive and in lieu of all other remedies. Some states do not<br />
allow limitations on how long an implied warranty lasts, so the above limitations may not<br />
apply to you.<br />
C. No dealer is authorized to modify this Limited Emission Control System Warranty issued by<br />
Geason Powersports.<br />
IV. LEGAL RIGHTS. This warranty gives you specific legal rights, and you may also have other rights<br />
which vary from state to state.<br />
V. This warranty is in addition to the Geason Powersports limited vehicle warranty.<br />
VI. ADDITIONAL INFORMATION. Any replacement part that is equivalent in performance and<br />
durability may be used in the performance of any maintenance or repairs. However, Geason Powersports<br />
are not liable for these parts. The owner is responsible for the performance of all required maintenance.<br />
Such maintenance may be performed at a service establishment or by any individual. The warranty period<br />
begins on the date the ATV is delivered to an ultimate purchaser.<br />
Geason Enterprises, LLC<br />
dba Geason Powersports<br />
1200 Lakeside Parkway #400<br />
Flower Mound, TX 75028<br />
Phone: 214-513-1700<br />
Fax: 214-513-1711
<strong>Hammerhead</strong> <strong>Off</strong>-<strong>Road</strong> Warranty Policy<br />
Limited Warranty for Dune Buggies<br />
/ UTV Only<br />
Should warranty service be required on your unit during the warranty period, please contact your nearest<br />
authorized dealer for repairs.<br />
IMPORTANT!<br />
ALL UNITS MUST BE REGISTERED WITHIN 14 DAYS OF PURCHASE OR WARRANTY IS VOID.<br />
To register your product a copy of the Warranty Registration Card, Buyer Safety Agreement, and<br />
sales receipt must be forwarded to <strong>Hammerhead</strong> <strong>Off</strong>-<strong>Road</strong>. Your dealer, with your assistance,<br />
will complete and forward these items to <strong>Hammerhead</strong> <strong>Off</strong>-<strong>Road</strong>. A copy of the Warranty<br />
Registration Card and Buyer Safety Agreement is attached. It is your responsibility to confirm<br />
with your dealer within 14 days of purchase that your product has been registered. If you are<br />
unable to confirm with your dealer within 14 days of purchase that your product has been<br />
registered please contact <strong>Hammerhead</strong> <strong>Off</strong>-<strong>Road</strong> within 14 days of purchase or your warranty will<br />
be void.<br />
GENERAL WARRANTY POLICY<br />
Labor Warranty is covered for the first 90 days (THREE MONTHS) from the end consumer’s date<br />
of purchase. Most parts covered under your warranty, except for the frame and engine, are<br />
covered for 30 or 90 days. Not all parts are covered. Contact your dealer for details or questions<br />
about a specific part. Warranty Parts are covered according to the schedule below from the end<br />
consumer’s date of purchase. All warranty paperwork must be received within 14 days of<br />
repair.<br />
WARRANTY PARTS COVERAGE<br />
Warranty starts from the date of purchase by end consumer:<br />
FRAME:<br />
ENGINE:<br />
CARBURETOR:<br />
MUFFLER:<br />
A-ARM, SPINDLES, AXLES:<br />
ELECTRONICS:<br />
BATTERY:<br />
SPEAKERS:<br />
SPEEDOMETER:<br />
TIRES & WHEELS:<br />
FENDERS:<br />
BRAKES:<br />
CLUTCH:<br />
SEATS:<br />
1 year<br />
180 days<br />
90 days<br />
90 days<br />
90 days<br />
90 days<br />
30 days<br />
30 days<br />
30 days<br />
30 days<br />
30 days<br />
30 days<br />
30 days<br />
30 days<br />
WHAT PARTS ARE NOT COVERED<br />
GENERAL EXCLUSION: The warranty does not cover consumable and normal wear and tear<br />
items such as, but not limited to, throttle cables, brake cables, chains, bikini tops, fasteners, air<br />
filters, brake pads, tires, oil changes, and/or problems occurring due to a lack of scheduled<br />
maintenance or consumer abuse. Modification to the vehicle, including the use of performance<br />
parts or non-original parts, will void the warranty in its entirety, unless express written approval<br />
stating that the warranty will not be voided is obtained from <strong>Hammerhead</strong>. Defective parts are
subject to recall by <strong>Hammerhead</strong> <strong>Off</strong>-<strong>Road</strong> upon failure and are required to be held by the dealer<br />
for 30 days from the time of the initial repair date.<br />
The warranty does not cover damage or faults caused by misuse, negligence, alterations,<br />
accidents or any abnormal use including the use of non genuine parts, renting or leasing,<br />
competition or racing. This warranty does not cover loss of use of the unit or loss of time, or<br />
inconvenience.<br />
NOTICE: All warranties are voided if the vehicle has been altered for use in racing or<br />
competition, rented, used under abnormal conditions, or subject to abuse, misuse, neglect or<br />
improper maintenance. <strong>Hammerhead</strong> <strong>Off</strong>-<strong>Road</strong> is not liable for any damage claim or liability<br />
claim, personal or otherwise resulting from operation of the vehicle in any way. All warranty parts<br />
will be shipped using UPS or Fed Ex ground ONLY. If the warranty part needs to shipped 2 nd day<br />
air or shipped overnight, the ordering dealership will be responsible for all shipping fees.<br />
NOTICE: <strong>Hammerhead</strong> <strong>Off</strong>-<strong>Road</strong> reserves the right to change product specifications, designs,<br />
and standard equipment without notice and without incurring obligation. These vehicles are not<br />
designed or manufactured for racing or use on rental tracks, public streets, public roads,<br />
highways, paved surfaces, or right-of-ways. Always wear an approved helmet and eye protection<br />
when riding. Always secure loose clothing and long hair. Always utilize seatbelts. Please read<br />
the operators manual before usage and go over the Buyer Safety Agreement.<br />
FAQ’s:<br />
1. FOR WHAT REASONS CAN MY WARRANTY CLAIM BE DISPUTED OR DENIED<br />
Warranty can be denied because of an out of warranty date, the unit was not a <strong>Hammerhead</strong><br />
<strong>Off</strong>-<strong>Road</strong> unit or the Warranty Registration Card was not submitted to <strong>Hammerhead</strong> <strong>Off</strong>-<strong>Road</strong><br />
within 14 days of purchase. The warranty does not apply to any part, which in opinion of<br />
seller was defective because of improper maintenance, improper assembly, alterations,<br />
abuse, negligence, or accident. The warranty does not cover loss of use of the seller vehicle,<br />
loss of time, inconvenience, or any other consequential damage which includes, but is not<br />
limited to, loss or damage to person or property or any expense of returning any damaged<br />
units to the seller, distributor, or its authorized dealer. Also, see above.<br />
2. DOES HAMMERHEAD OFF-ROAD OFFER AN EXTENDED WARRANTY<br />
No, <strong>Hammerhead</strong> <strong>Off</strong>-<strong>Road</strong> does not offer any type of extended warranty.<br />
3. IS MY KART STILL UNDER WARRANTY IF I HAVE OWNED IT FOR 1 YEAR BUT<br />
PUT ONLY 6 HOURS OF DRIVING TIME ON IT<br />
Warranty is base on the exact date of purchase, not based on how many hours it has been<br />
used.
<strong>Hammerhead</strong> <strong>Off</strong>-<strong>Road</strong> Warranty Registration Form<br />
Registration Terms & Conditions:<br />
In order to activate the warranty, please follow the instructions below:<br />
1) Make a copy of the Bill of Sale<br />
2) Make a copy of Pre-Delivery Checklist<br />
3) Make a copy of Buyer-Safety Agreement<br />
4) Fill out warranty card and send with all above documents to:<br />
<strong>Hammerhead</strong> <strong>Off</strong>-<strong>Road</strong><br />
Attn: Warranty Registration<br />
1200 Lakeside Parkway Ste. 325<br />
Flower Mound, TX 75028<br />
Or, Fax to 214-513-1738<br />
Or, ON-LINE at www.hammerheadoffroad.com under dealer’s only section<br />
<strong>Hammerhead</strong> <strong>Off</strong>-<strong>Road</strong> Warranty Registration Card<br />
(Must be sent in with a copy of sales receipt and Buyers Safety Agreement)<br />
VIN# _____________________________________Model: ______________<br />
Dealer Name: __________________________________________________<br />
Dealer Address: ________________________________________________<br />
City: _________________________ State: ________ Zip:_______________<br />
Customer Name: ________________________________________________<br />
Customer Address: ______________________________________________<br />
Customer City: __________________ State: __________________________<br />
Customer Phone: ________________ Email: _________________________<br />
Date of Purchase: ______________________________________________<br />
I Certify that all information provided is true and correct to the best of my knowledge.<br />
I understand the exceptions and limitations of the warranty coverage.<br />
Customer Signature:_________________________ Date: _______________
<strong>Hammerhead</strong> Buyers Safety Agreement (1/2)<br />
- ______Always read the owner’s manual carefully before riding and follow the operating<br />
procedures described in the owner’s manual.<br />
- ______Pay close attention to all warnings contained in the manual and on all labels.<br />
- ______These vehicles are designed for riders of ages 5 through 8 for 50cc, 9 through 15 for<br />
80cc, 16 and older for <strong>150</strong>cc, 18 and older for 250cc, 400cc, 500cc.<br />
- ______Both the parent and the child must fully understand everything in the owners manual<br />
before riding.<br />
- ______Always wear a helmet, face shield, boots, gloves, and protective clothing while riding.<br />
- ______Beginners should receive training from a certified instructor.<br />
- ______It is illegal to ride this vehicle on public roads or highways.<br />
- ______Do not allow your child to ride without supervision.<br />
- ______Do not ride under the influence of drugs or alcohol. They can affect your judgment<br />
and slow your reaction time.<br />
- ______Always maintain a safe distance between your vehicle and vehicles around you.<br />
- ______Never ride this vehicle unless it has been properly adjusted and maintained.<br />
- ______Never run the engine in closed areas. The exhaust gas contains poisonous carbon<br />
monoxide.<br />
- ______Do not touch any part of the engine, muffler, or the exhaust system during or<br />
immediately after operation of the vehicle.<br />
- ______Always check for obstacles before operating in a new area.<br />
- ______It is highly recommended that this vehicle should not be driven at night or during dark<br />
periods<br />
- ______Never attempt to operate over large obstacles, such as large rocks, or fallen trees.<br />
Always follow proper procedures when operating over obstacles as described in this manual.
<strong>Hammerhead</strong> Buyers Safety Agreement (2/2)<br />
- ______Always be careful when skidding or sliding. On extremely slippery surfaces such as<br />
ice, go slow and be very cautious in order to reduce the chance of skidding or sliding<br />
out of control.<br />
- ______Never do wheelies, jumps or any stunts.<br />
- ______Never operate the vehicle in fast flowing water. Remember that wet brakes may<br />
reduce your stopping ability. Test your brakes after leaving the water. If necessary,<br />
apply those several times to let friction dry out the linings.<br />
- ______Always use the size and type of tires specified in this manual. Always maintain<br />
proper<br />
tire pressure as described in this manual.<br />
- ______All modifications to this vehicle should be made by a qualified mechanic. Modification<br />
to the vehicle, including the use of performance parts or non-original parts, will void the<br />
warranty in its entirety, unless express written approval stating that the warranty will not be<br />
voided is obtained from <strong>Hammerhead</strong>.<br />
- ______When transporting the machine in another vehicle, be sure that it is kept upright and<br />
that the fuel cock is in the “off” position. Otherwise, fuel may leak out of the<br />
carburetor or the fuel tank.<br />
- ______Always follow the break-in-period as described in the owner’s manual. Not following<br />
the break-in period will void the engine warranty.<br />
- ______Always clean the air filter as described in the owner’s manual. Improper maintenance<br />
of the air filter will void the engine warranty.<br />
Failure to follow all warnings and unsupervised or irresponsible operation can cause serious<br />
injury or death. By initialing each item on the above checklist, I have indicated my complete<br />
understanding of these points, and I acknowledge my responsibilities regarding the<br />
contents. I also agree to explain the points on this checklist to anyone besides myself<br />
who will be operating the vehicle now and/or in the future.<br />
__________________________________<br />
Dealer’s Signature<br />
_________________________________<br />
Buyer’s Signature<br />
__________________________________<br />
Print Store Name<br />
_________________________________<br />
Print Buyer’s Name<br />
__________________________________<br />
Date<br />
_________________________________<br />
Date<br />
__________________________________<br />
VIN Number<br />
_________________________________<br />
Model
IMPORTANT MANUAL INFORMATION<br />
Note: The operator, passenger, parents or guardian must read, study and understand all the items<br />
contained within this owners/operators manual before operating this vehicle. Failure to follow these<br />
instructions could endanger the personal safety of the operator, passenger and any Bystanders.<br />
FAILURE TO FOLLOW THE WARNINGS CONTAINED IN THIS MANUAL CAN RESULT IN<br />
SERIOUS INJURY OR DEATH.<br />
! The safety alert symbol means ATTENTION! BECOME ALERT! YOUR SAFETY IS<br />
INVOLVED!<br />
! WARNING Failure to follow WARNING instructions could result in severe injury<br />
or death to the vehicle operator, a bystander or a person inspecting<br />
or repairing the vehicle.<br />
CAUTION:<br />
NOTE:<br />
A CAUTION indicates special precautions that must be taken to avoid<br />
damage to the vehicle.<br />
A NOTE provides key information to make procedures easier.<br />
3
LOCATION OF WARNING DECALS<br />
Read and understand all of the labels on your vehicle. They contain important<br />
information for safe and proper of your vehicle. Never remove any labels from your<br />
vehicle. If a label becomes difficult to read or comes off, a replacement label is available<br />
from your dealer.<br />
Operator Age Limitation Warning<br />
Seat Belt Warning<br />
!<br />
WARNING<br />
UNDER<br />
16<br />
This vehicle is not to be<br />
operated by anyone<br />
under 16 years of age.<br />
No Riding on Cargo Bed Warning<br />
Gear Selection Warning<br />
!<br />
WARNING<br />
NO RIDING<br />
This cargo bed is intended for cargo<br />
only, not exceeding the rated weight<br />
load found in the Owner's <strong>Manual</strong>.<br />
All occupants must be inside the<br />
vehicle and wearing the proper<br />
restraints and safety gear.<br />
Pinch Hazard<br />
Cargo Bed Limitation Warning<br />
Maximum Weight:<br />
250 Lbs<br />
4
Pre‐Operation Warning<br />
!<br />
WARNING<br />
OBSERVE THE FOLLOWING INSTRUCTIONS<br />
Failure to understand and follow Warnings and Instructions for the<br />
safe use and maintenance of this product may result in Death or<br />
Injury! This information is contained in the Warning Labels,<br />
Owner's <strong>Manual</strong>s & Supplements, Safety Video, and Engine<br />
<strong>Manual</strong> supplied with the product. Make sure that you understand<br />
and follow all Warnings and Instructions in this material.<br />
- Always wear a D.O.T. - approved motorcycle helmet, eye<br />
protection, and protective clothing.<br />
- Check tire pressures before operating. Refer to Owner's <strong>Manual</strong><br />
for proper operating pressure.<br />
- Do NOT operate the vehicle without the brush bars securely in<br />
place.<br />
- Keep all covers and shields properly installed.<br />
- Throttle and brake controls must work properly and freely before<br />
starting the vehicle.<br />
- Operator must be seated, safety belt must be fastened, and brake<br />
applied before operating the vehicle.<br />
- Never operate at speeds too fast for your skills or the conditions.<br />
- Never attempt jumps or other stunts.<br />
- Never ride after consuming alcohol, drugs, or other intoxicants.<br />
5
SAFETY INFORMATION<br />
This off‐highway utility vehicle handles differently from other vehicles including cars and<br />
ATVs. Where INJURY OR DEATH can result if you do not follow these instructions:<br />
- Read this manual and labels carefully and follow the operating procedures<br />
described.<br />
- This vehicle is designed to carry the driver and one passenger. Never carry<br />
passengers in the cargo bed.<br />
- Always be sure the driver and passenger are wearing seat belts.<br />
- Never give a ride to a passenger who is too small to reach and hold the handgrip on<br />
the enclosure.<br />
- Always avoid operating the vehicle on any paved surfaces, including sidewalks,<br />
driveways, parking Lots, and streets.<br />
- Never operate this vehicle in any public street, road, or highway, even a dirt or<br />
gravel one.<br />
- Never operate this vehicle without wearing an approved motorcycle helmet that fits<br />
properly. You should also wear eye protection (goggles or a face shield), gloves,<br />
over‐the‐ankle boots, long‐sleeved shirt or jacket, and long pants.<br />
- Never consume alcohol or drugs before or while operating this vehicle.<br />
- Never operate at speeds too fast for your skills or the conditions. Always go at a<br />
speed that is proper for the terrain, visibility, operating conditions, and your<br />
experience.<br />
- Never attempt jumps or other stunts.<br />
- Always inspect your vehicle each time you use it is in safe operating condition.<br />
Always follow the inspection and maintenance procedures and schedules described<br />
in this manual.<br />
6
- Always keep hands, arms, feet, and legs inside the vehicle at all times during<br />
operation. Keep your feet on the floorboard. Never hold onto the enclosure except<br />
when using the handgrip inside the enclosure. Otherwise, your hand could be<br />
injured if it is caught between the enclosure and an obstacle outside the vehicle.<br />
- Always keep both hands on the steering wheel when driving.<br />
- Never wrap your thumbs and fingers around the steering wheel. This is particularly<br />
important when driving in rough terrain. The front wheels will move right and left as<br />
they respond to the terrain, and this movement will be felt in the steering wheel. A<br />
sudden jolt could wrench the steering wheel around, and your thumbs or fingers<br />
could be injured if they are in the way of the steering wheel spokes.<br />
- Always go slowly and be extra careful when operating on unfamiliar terrain. Always<br />
be alert to changing terrain conditions when driving the vehicle.<br />
- Never operate on excessively rough, slippery, or loose terrain until you have learned<br />
and practiced the skills necessary to control the vehicle on such terrain. Always be<br />
especially cautious on these kinds of terrain.<br />
- Never turn at excessive speed. Practice turning at slow speeds before attempting to<br />
turn at faster speeds. Do not attempt turns on steep inclines.<br />
- Never operate the vehicle on hills that are too steep for it or for your abilities. Go<br />
straight up and down hills where possible. Maximum slope angle:15°<br />
- Never operate on hills that are slippery or ones where you will not be able to see far<br />
enough ahead of you. Never go over the top of a hill at speed if you cannot see what<br />
is on the other side.<br />
- Always follow proper procedures for going uphill. If you lose momentum and cannot<br />
continue up a hill, back down the hill with the engine in reverse gear. Use engine<br />
braking to help you go slowly. If necessary, use the brakes gradually to help you go<br />
slowly.<br />
- Always check terrain carefully before going down hills. Go as slowly as possible.<br />
Never go down a hill at high speed.<br />
7
- Always check for obstacles before operating in a new area.<br />
- Never operate the vehicle in fast flowing water or water deeper than the<br />
floorboards on this model. Remember that wet brakes may have reduced stopping<br />
ability. Test your brakes after leaving water. If necessary, apply them several times<br />
to let friction dry out the linings.<br />
- Always be sure these are no obstacles or people behind you when you operate in<br />
reverse. When it is safe to proceed in reverse, go slowly. Do not brake abruptly<br />
when carrying loads in the cargo bed.<br />
- Always use the size and type of tire specified in this manual.<br />
- Always maintain proper tire pressure as described in this manual.<br />
Never exceed the stated load capacity. Cargo should be as far forward in the bed as<br />
possible, and distributed evenly from side to side. Be sure cargo is secured so that it<br />
cannot move around during operation. Reduce speed and follow instructions in thin<br />
manual for carrying cargo or pulling a trailer. Allow greater distance for braking.<br />
8
DESCRIPTION AND VEHICLE IDENTIFICATION<br />
Side View<br />
1. Head lights 2. Front ABS Plastic Bumper<br />
3. Front Tire 4. Brush Guards<br />
5. Side Mirrors 6. ABS Plastic Top<br />
7. Transmission Shifter 8. Steering Wheel<br />
9. Cup Holder 10. Parking Brake<br />
11. Seat Bottom (fold to access gas tank) 12. Seatbelts<br />
13. Dump Bed Handle 14. Dump Bed<br />
15. Dump Bed Latch 16. Tail Gate<br />
17. Rear Shock (adjustable) 18. Dump Bed Lever (to open dump bed)<br />
19. Rear Fender 20. Rear Tires<br />
9
Inside View<br />
21. Shifter Lever (F/N/R) 22. LCD Indicator (Speedometer, Turn<br />
23. Glove Compartment 24. Brake Pedal<br />
25. Throttle Pedal 26. Key Ignition<br />
27. Hazard Warning Lights 28. Head Lights<br />
29. Horn / Turn Signals 30. Auxiliary12V Plug<br />
10
Under the Seat<br />
31. Vehicle Identification Plate 32. Gas Tank Cap<br />
33. Gas Tank (unleaded gas only) 34. Engine<br />
35. Battery<br />
Rear View<br />
37. Taillights (Running Lights and Brake 38. Rear Axle<br />
39. Electrical Box 40. Air Filter Assembly<br />
41. Rear Brake System 42. Adjustable Rear Shocks<br />
11
CONTROL FUNCTIONS<br />
Main Switch<br />
Functions of respective switch position are as<br />
follows:<br />
OFF:<br />
All electrical circuits are switch off.<br />
be removed in this position.<br />
The key can<br />
ON:<br />
All electrical circuits are supplied with power, and<br />
the headlights and taillights comes on when the<br />
light switch is on.<br />
Ignition:<br />
The electric starter is engaged by turning and<br />
holding the key in this position. Release the key<br />
when the engine starts.<br />
CAUTION:<br />
- Do not operate the electric starter continuously for more than 5 seconds, or starter damage could<br />
occur. Wait at least 5 seconds between each operation of the electric starter to let it cool.<br />
- Do not turn the key to the “START” position with the engine running, or damage to the electric<br />
starter can result<br />
- See Starting instructions prior to starting the engine.<br />
12
Indicator and warning lights.<br />
1. Speed indicator in MPH.<br />
2. Left turning light indicator<br />
3. Headlight Indicator<br />
4. Parking Brake Indicator<br />
5. Right turning light indicator<br />
6. Mileage odometer (miles)<br />
Control Panel<br />
1. Hazard Lights Switch<br />
2. Headlight switch (High/Low Beam)<br />
3. Turning Light switch<br />
4. Horn<br />
5. Auxiliary Power Plug (12 Volts)<br />
Caution: Do not use the headlights with the<br />
engine turned off for an extended period of time.<br />
The battery may discharge to the point that the<br />
starter motor will not operate properly. If this<br />
should happen, remove the battery and recharge<br />
it.<br />
13
Accelerator Pedal<br />
1. Accelerator Pedal<br />
Press the accelerator pedal down to increase<br />
engine speed. Spring pressure returns the<br />
pedal to the rest position when released.<br />
Always check that the accelerator pedal returns<br />
normally before starting the engine.<br />
Brake Pedal<br />
Press the brake pedal to slow or stop the vehicle.<br />
This vehicle is equipped with front and rear disc<br />
brakes press the brake pedal will apply pressure<br />
on each brake disc.<br />
1. Brake Pedal<br />
Parking Brake Lever<br />
The parking brake lever is located in between the<br />
driver seat and passenger seat.. It will help hold<br />
the vehicle from moving while parked.<br />
1. Parking Brake Lever<br />
To set the parking brake, press the release button<br />
and pull up on the lever. To release the parking<br />
brake, press the release button and release the<br />
lever. Spring pressure helps return the lever to<br />
the released position. Be sure to fully release<br />
the parking brake before starting out. Failure to<br />
do so may result in poor performance and<br />
premature wearing of the rear brake and Drive<br />
Belt.<br />
14
Drive Select Lever<br />
The drive select lever is used to shift your vehicle<br />
into Forward, Neutral and Reverse position.<br />
(D,N,R). Always STOP the vehicle completely<br />
before select into a different drive.<br />
1. Drive selector (Forward, Neutral,<br />
Reverse)<br />
NOTE: Sometimes it may be difficult to select into<br />
the drive that is because the gears might be<br />
locked up in the transmission. Try to move the<br />
vehicle with your weight to unlock the gears.<br />
Fuel tank cap<br />
The Fuel tank is located underneath the vehicle’s<br />
seat bottom. Pull vehicle’s seat bottom up to<br />
reveal the fuel tank. Remove the fuel tank cap<br />
by turning it counterclockwise.<br />
1. Fuel tank cap<br />
Warning: Only use unleaded grade gasoline<br />
Seat Belts<br />
This vehicle is equipped with three‐point seat<br />
belts for both the operator and passenger.<br />
Always wear the seat belt while riding the<br />
vehicle.<br />
1. Hold the latch plate as you pull the belt<br />
1. Buckle<br />
2. Latch Plate<br />
across your lap and chest. Make sure the belt<br />
is not twisted and is not caught on any<br />
portion of the vehicle, your clothing, or any<br />
equipment you are carrying.<br />
2. Push the latch plate into the buckle until it<br />
clicks. Pull up on the latch plate to make sure<br />
it is secure.<br />
3. Put the lap portion of the belt low on your<br />
15
hips. Push down on the buckle end of the<br />
belt as you pull up on the shoulder part so<br />
the belt is snug across your hips.<br />
1. Buckle<br />
2. Release Button<br />
4. Position the shoulder belt over your shoulder<br />
and across your chest. The shoulder belt<br />
should fit against your chest. If it is loose,<br />
pull the belt out all the way and then let it<br />
retract.<br />
5. To release the buckle, firmly press the<br />
release button.<br />
WARNING<br />
POTENTIAL HAZARD<br />
Not wear the seatbelt, and wear the seat belt<br />
improperly.<br />
WHAT CAN HAPPEN<br />
There is increased risk of being killed or<br />
seriously injured in an accident.<br />
HOW TO AVOID THE HAZARD<br />
Always wear your seat belt when riding in the<br />
vehicle. Be sure the seat belt is close‐fitting<br />
across your hips and chest and is latched<br />
securely.<br />
16
Glove Compartment<br />
To protect from damages, do not put metal<br />
products, like tools or sharply edged products<br />
directly in the glove compartment. If they must<br />
be stored, wrap them in appropriate cushion<br />
materials.<br />
Cargo Bed<br />
Cargo bed weight capacity is 250 Lbs.<br />
To open the tailgate, you need to unlatch two<br />
tailgate latches on either side of the tailgate.<br />
Do not put any extra weight on the tailgate as it<br />
might break the latches. Weight capacity is 30<br />
Lbs.<br />
1. Cargo Bed Release<br />
2. Bed Handles<br />
3. Tailgate Latch<br />
4. Tailgate<br />
Cargo Bed Release<br />
To Lift<br />
Push the cargo bed release lever down, and then<br />
slowly lift up the cargo bed until it stops.<br />
To Lower<br />
1. Cargo Bed Release<br />
Lower the cargo bed slowly to its original position<br />
by pressing on the side of the bed handles. Be<br />
sure it is locked into the place. The maximum<br />
17
2. Bed Handles<br />
load capacity is 250 Lbs.<br />
3. Tailgate Latch<br />
4. Tailgate<br />
! WARNING<br />
POTENTIAL HAZARD<br />
Pinch Points<br />
WHAT CAN HAPPEN<br />
You or someone else could be pinched between the cargo bed and the frame when the bed is being<br />
lowered.<br />
HOW TO AVOID THE HAZARD<br />
Before closing the bed, be sure others are standing away from the vehicle.<br />
away from the pinch points between the bed and the frame.<br />
Keep hands and fingers<br />
! WARNING<br />
POTENTIAL HAZARD<br />
Overloading the cargo bed<br />
WHAT CAN HAPPEN<br />
Could cause changes in vehicle handling which could lead to an accident<br />
HOW TO AVOID THE HAZARD<br />
Never exceed the stated maximum load limit for the cargo bed.<br />
Cargo should be properly distributed and securely attached.<br />
Reduce speed when carrying cargo.<br />
Allow greater distance for braking.<br />
! WARNING<br />
18
POTENTIAL HAZARD<br />
Carrying a passenger in the cargo bed.<br />
WHAT CAN HAPPEN<br />
The passenger could fall, be thrown out, or be struck by objects in the cargo bed.<br />
HOW TO AVOID THE HAZARD<br />
Never carry a passenger in the cargo bed.<br />
The cargo bed is designed to carry cargo only.<br />
Rear shock absorber adjustment<br />
The spring preload can be adjusted to suit the<br />
operating conditions.<br />
You can reduce preload for a softer ride, or<br />
increase preload if frequent bottoming occurs.<br />
1. Spring preloaded adjusting ring<br />
2. Position indicator<br />
Adjust the spring preload as follows.<br />
- To increase the spring preload, turn the<br />
adjusting ring in direction of ”A”.<br />
- To decrease the spring preload, turn the<br />
adjusting ring in direction “B”<br />
!WARNING<br />
Frequent or severe bottoming can cause<br />
increased wear or damage to the vehicle.<br />
19
PRE‐OPERATING CHECKS<br />
Before using this Vehicle, check the following Items:<br />
ITEM<br />
ROUTINE<br />
Brakes Check operation, free play, fluid level and fluid leakage. Fill<br />
with DOT 4 brake fluid if necessary.<br />
Parking Brake<br />
Check for proper operation, condition and free play<br />
Fuel Check fuel level. Fill with fuel if necessary.<br />
Engine Oil<br />
Check oil Level<br />
Fill with oil if necessary.<br />
Coolant reservoir<br />
Check coolant level.<br />
Fill with coolant if necessary<br />
Final Gear Oil<br />
Accelerator Pedal<br />
Seat belts<br />
Steering<br />
Fitting and fasteners<br />
Lights and switches<br />
Wheels and tires<br />
Axle Boots<br />
Check for leakage<br />
Check for proper accelerator pedal operation.<br />
Check for proper operation and belt wear.<br />
Check for proper operations.<br />
Check all fittings and fasteners.<br />
Check for proper operation.<br />
Check tire pressure, wear and damage.<br />
Check for damage.<br />
! WARNING<br />
POTENTIAL HAZARD:<br />
20
Failure to inspect the vehicle before operating.<br />
vehicle.<br />
Failure to properly maintain the<br />
WHAT CAN HAPPEN:<br />
Increase the possibility of an accident or equipment damage.<br />
HOW TO AVOID THE HAZARD:<br />
Always inspect your vehicle each time you use it to make sure vehicle is in safe operating condition.<br />
Always follow the inspection and maintenance procedures and schedules described in the Owner’s<br />
<strong>Manual</strong>.<br />
BRAKE PEDAL<br />
Check for correct brake pedal free play. If the brake pedal free play is incorrect, have a dealer adjust it.<br />
Check the operation of the brake pedal. It should move smoothly and three should be a firm feeling when<br />
the brake are applied. If not, have the vehicle inspected by a dealer.<br />
Brake Fluid Level<br />
Check the brake fluid level.<br />
Add fluid if necessary.<br />
Recommended Brake Fluid: DOT 4.<br />
Brake Fluid Leakage<br />
Check to see if any brake fluid is leaking out of the pipe joints or the brake fluid reservoir.<br />
brakes firmly for one minute. IF there is any leakage, have the vehicle inspected by a dealer.<br />
Apply the<br />
Brake Operation<br />
Test the brakes at slow speed after starting out to make sure they are working properly.<br />
not provide proper braking performance, inspect the brake system.<br />
If the brakes do<br />
! WARNING<br />
POTENTIAL HAZARD:<br />
21
Driving with improperly operating brakes.<br />
WHAT CAN HAPPEN:<br />
You could lose braking ability, which could lead to an accident.<br />
HOW TO AVOID THE HAZARD:<br />
Always check the brakes at the start of every ride. Do not operate the vehicle if you find any<br />
problem with the brakes. If a problem cannot be corrected by the adjustment procedures<br />
provided in this manual, have the vehicle inspected by a dealer.<br />
Fuel<br />
Make sure there is sufficient gasoline in the tank.<br />
Recommended fuel: Unleaded Gasoline ONLY<br />
Fuel Tank Capacity: 10L or 2.6 US Gallon<br />
Your engine has been designed to use regular unleaded gasoline with a pump octane number of ([R+M]/2)<br />
86 or higher, or research octane number of 91 or higher. If knocking or pinging occurs, use a different<br />
brand of gasoline or premium unleaded fuel. Unleaded fuel will give you longer spark plug life and<br />
reduced maintenance cost.<br />
! WARNING<br />
POTENTIAL HAZARD:<br />
Improper case when refueling.<br />
WHAT CAN HAPPEN:<br />
Fuel can spill, which can cause a fire and severe injury.<br />
Fuel expands when it heats up. If the fuel tank is overfilled, fuel could spill put due to heat from the<br />
engine or the sun.<br />
HOW TO AVOID THE HAZARD:<br />
22
Do not overfill the fuel tank. Be careful not to spill fuel, especially on the engine or exhaust pipe.<br />
Wipe up any spilled fuel immediately. Be sure the fuel tank cap is closed securely.<br />
Engine Oil<br />
Make sure the engine oil is at the specified level.<br />
Add oil as necessary.<br />
CAUTION:<br />
- Make sure that no foreign material enters the crankcase.<br />
Accelerator Pedal<br />
Check to see that the accelerator pedal operates correctly. It must operate smoothly and fully spring<br />
back to the idle position when released. Have a dealer repair as necessary for the proper operation.<br />
Seat belts<br />
Make sure that both seat belts are not frayed or damaged.<br />
The seat belt must move smoothly when pulled out and retract on its own when released. The latch<br />
plate should click securely into the buckle and release when the release button is pushed firmly. Wash<br />
off any dirt or mud which could affect operation. Have a dealer repair as necessary for proper<br />
operations.<br />
Steering<br />
Pack on level ground. Turn the steering wheel right and left. Check for excessive free play, abnormal<br />
noise, or a rough feeling. Have a dealer repair as necessary for proper operation.<br />
Fittings and fasteners<br />
Always check the tightness of chassis fittings and fasteners before a ride.<br />
refer to the service manual for correct tightening torque.<br />
Take a vehicle to a dealer or<br />
23
Lights<br />
Check the headlights and tail/brake lights to make sure they are in working condition.<br />
necessary for proper operation.<br />
Repair as<br />
Switches<br />
Check the operation of all switches.<br />
Have a dealer repair as necessary for proper operation.<br />
Tires<br />
! WARNING<br />
POTENTIAL HAZARD:<br />
Operating this vehicle with improper tire, or with improper or uneven tire pressure.<br />
WHAT CAN HAPPEN:<br />
Use of improper tires on this vehicle, or operation of this vehicle with improper or uneven tire<br />
pressure, may cause loss of control, increasing your risk of accident.<br />
HOW TO AVOID THE HAZARD:<br />
1. Use Proper Tires:<br />
Front Tire: 20 x 8 ‐ 8<br />
Rear Tire: 22 x 11 ‐ 10<br />
2. The tires should be set to the recommended pressure.<br />
Front 15 PSI<br />
Rear 15 PSI<br />
24
OPERATION<br />
! WARNING<br />
POTENTIAL HAZARD:<br />
Operating vehicle without being familiar with all controls<br />
WHAT CAN HAPPEN:<br />
Loss of control, which could cause an accident or injury.<br />
HOW TO AVOID THE HAZARD:<br />
Read the <strong>Owners</strong> manual carefully.<br />
your dealer.<br />
If there is a control or function you do not understand, ask<br />
Start a cold engine<br />
1. Apply the brake.<br />
2. Shift the drive select lever into the neutral position.<br />
NOTE:<br />
- When the drive select lever is in the neutral position.<br />
- The engine can be started in any gear if the brake is applied. However, it is recommended to shift<br />
into neutral before starting the engine.<br />
3. With your foot off the accelerator pedal, start the engine by turning the key to “START” position.<br />
NOTE: If the engine fails to start, release the key, and then try starting again. Wait a few seconds<br />
before the next attempt. Each cranking could be as short as possible to preserve battery. Do not<br />
crank the engine more than 5 seconds on each attempt.<br />
4. See the “Engine Brake In” section prior to operating the engine for the first time.<br />
25
Warming Up<br />
To get the maximum engine life, always warm up the engine before starting off. Never accelerate hard<br />
with a cold engine! To see whether or not the engine is warm, check if it responds to the throttle<br />
normally with the starter (choke) turned off.<br />
Caution: Before shifting, you must stop the vehicle and take your foot off the accelerator pedal,<br />
otherwise the transmission may be damaged.<br />
Shifting: Neutral to High and High to Low<br />
1. Drive Select Lever<br />
1. Stop the vehicle. Keep your foot off the<br />
accelerator pedal.<br />
2. Apply the brakes, then shift by moving the<br />
drive select lever along the shift guide.<br />
3. Release the brakes and press the accelerator<br />
pedal gradually.<br />
NOTE: Make sure the drive select lever is<br />
completely in the shifted position.<br />
Shifting: Neutral to Reverse<br />
1. Stop the vehicle. Keep your foot off the<br />
accelerator pedal.<br />
2. Apply the brake pedal.<br />
3. Shift from neutral to reverse or vise verse by<br />
moving the drive select lever along the shift<br />
guide.<br />
4. Check behind for people or obstacles, then<br />
release the brake pedal.<br />
5. Press the accelerator pedal gradually and<br />
continue to watch your rear view while<br />
26
! WARNING<br />
backing.<br />
POTENTIAL HAZARD:<br />
Improperly operating in reverse<br />
WHAT CAN HAPPEN:<br />
You could hit an obstacle or person standing behind you, resulting in serious injury.<br />
HOW TO AVOID THE HAZARD:<br />
When you shift into reverse, make sure there are no obstacles or people behind you.<br />
safe to proceed, go slowly.<br />
When it is<br />
Parking<br />
When parking, stop the engine and shift the drive select lever into the neutral position. Apply the parking<br />
brake to help prevent the vehicle from rolling.<br />
Parking on a slope<br />
! WARNING<br />
POTENTIAL HAZARD:<br />
Parking on a hill or other incline.<br />
WHAT CAN HAPPEN:<br />
The vehicle could roll out of control, increasing the chance of an accident.<br />
HOW TO AVOID THE HAZARD:<br />
Avoid parking on hills or other inclines. If you must park on an incline, apply the parking brake,<br />
and block the front and rear wheels with rocks or other objects. Do not park the vehicle at all on<br />
hills that are so steep you could not walk up them easily.<br />
27
1. Bring the vehicle to stop by applying the brakes.<br />
2. Stop the engine.<br />
3. With the brake applies, set parking brake by pulling up the parking brake lever.<br />
28
DRIVING YOUR VEHICLE<br />
Getting to know your vehicle<br />
This off‐highway utility vehicle will handle and maneuver differently from an ordinary passenger car or<br />
other vehicle.<br />
Before you begin to use your vehicle, be sure you have read this Owner’s <strong>Manual</strong> completely and<br />
understand the operation of the controls. Pay particular attention to the safety information and warning<br />
labels on the vehicle. Please also read all caution and warning labels on your vehicle.<br />
This vehicle is designed for the operator and one passenger. The driver and passenger must always wear a<br />
seat belt. Never carry passengers in the cargo bed.<br />
The total weight of operator, passenger, accessories, cargo, trailer tongue weight, and the vehicle itself<br />
must not exceed 340 kg (750 lb). Carrying a passenger and cargo can affect vehicle handling.<br />
The driver and passenger must always wear a seat belt and an approved motorcycle helmet. Also wear<br />
eye protection and protective clothing, including over‐the‐ankle boots, gloves, along‐sleeved shirt or<br />
jacket, and long pants. Keep hands and feet inside the vehicle at all times.<br />
Going Uphill<br />
Do not attempt to climb hills until you have mastered basic maneuvers on flat ground. Use proper<br />
driving techniques to avoid overturns on hills and slopes. Drive straight up hills, and avoid slopes.<br />
Avoid crossing the side of a hill, which increases your chance of rollover. Practice first on gentle slopes<br />
before attempting steeper hills. Always check the terrain carefully before attempting any hill. Use<br />
common sense and avoid hills that are too steep for you to climb.<br />
Maximum slope angle: 15 Degrees<br />
Choose carefully which hills you attempt to climb.<br />
will not be able to see far enough ahead of you.<br />
Avoid hills with slippery surfaces or ones where you<br />
29
Going Down Hill<br />
Check the terrain carefully before going down a hill. When possible, choose a path that lets you drive<br />
your vehicle straight downhill. Avoid sharp angles that could allow the vehicle to pitch or roll over.<br />
Carefully choose your path and drive no faster than you will able to react to obstacles that may appear.<br />
Riding over Rough Terrain<br />
Operating over rough terrain should be done with caution. Look for obstacles that could cause damage<br />
to the vehicle or could lead to a rollover or accident. Avoid jumping the vehicle as injury, loss of control,<br />
and damage to the vehicle could occur.<br />
Tip over warnings and recovery<br />
This vehicle CAN be rolled over in case of reckless driving, going too fast, jumping or making sharp turn.<br />
! WARNING<br />
POTENTIAL HAZARD:<br />
Driving recklessly, going too fast, jumping vehicle or sharp turns.<br />
WHAT CAN HAPPEN:<br />
The vehicle could tip over and fall on driver or operators body parts.<br />
disfigurements and maimed bodies.<br />
Injuries may lead to<br />
HOW TO AVOID THE HAZARD:<br />
Avoid driving recklessly, going too fast, jumping vehicle or make sharp turns. IN CASE OF TURN<br />
OVER, keep all limbs inside the vehicle. DO NOT extend any body parts outside of the vehicle.<br />
Wait until the vehicle stops rolling, get out of the vehicle and call for HELP.<br />
30
PERIODIC MAINTENANCE AND ADJUSTMENT<br />
Periodic inspection, adjustment and lubrication will keep your vehicle in the safest and most efficient<br />
condition possible. Safety is an obligation of the vehicle owner. The most important points of vehicle<br />
inspection, adjustment and lubrication are explained on the following pages.<br />
! WARNING<br />
POTENTIAL HAZARD:<br />
Servicing an engine while its running<br />
WHAT CAN HAPPEN:<br />
Moving Parts can catch clothing or parts of the body, causing injury.<br />
Electrical components can cause shocks or can start fires.<br />
HOW TO AVOID THE HAZARD:<br />
Turn off the engine when performing maintenance unless otherwise specified.<br />
perform service if you are not familiar with vehicle services.<br />
Have a dealer<br />
31
PERIODIC MAINTENANCE / LUBRICATION<br />
ITEM ROUTINE Which<br />
INITIAL<br />
EVERY<br />
ever<br />
Comes<br />
Month 1 3 6 6 12<br />
First<br />
KM<br />
320<br />
1200<br />
2400<br />
2400<br />
4800<br />
(MI)<br />
(200)<br />
(750)<br />
(<strong>150</strong>0)<br />
(<strong>150</strong>0)<br />
(3000)<br />
Hours 20 75 <strong>150</strong> <strong>150</strong> 300<br />
Valves Check vales clearance adjust if<br />
YES YES YES YES<br />
necessary<br />
Spark Plug<br />
Check condition<br />
YES YES YES YES YES<br />
Adjust gap and clean<br />
Replace if necessary<br />
Air Filter(engine and air<br />
intake duct)<br />
Clean<br />
Replace if necessary<br />
Carburetor<br />
Check idle speed/starter operation<br />
YES YES YES YES<br />
Adjust if necessary<br />
Crankcase<br />
breather<br />
Check breather hose for cracks or<br />
YES YES YES<br />
system<br />
damage<br />
Replace if necessary<br />
Exhaust System<br />
Check for leakage<br />
YES YES YES<br />
Replace gasket if necessary<br />
Tighten if necessary<br />
Sparks Arrester Clean YES YES YES<br />
32
Fuel Line<br />
Check fuel hose for cracks or damage<br />
YES YES YES<br />
Replace if necessary<br />
Engine Oil Replace (warm engine before<br />
YES YES YES YES<br />
draining)<br />
Engine Oil Filter cartridge Replace YES YES YES<br />
Final Gear Oil Check oil level / oil leakage YES YES<br />
Front Brake Check operation / brake pad wear /<br />
YES YES YES YES YES<br />
fluid leakage<br />
Correct if necessary. Replace pads if<br />
worn to the limit.<br />
ITEM ROUTINE Which<br />
INITIAL<br />
EVERY<br />
ever<br />
Comes<br />
Month 1 3 6 6 12<br />
First<br />
KM<br />
320<br />
1200<br />
2400<br />
2400<br />
4800<br />
(MI)<br />
(200)<br />
(750)<br />
(<strong>150</strong>0)<br />
(<strong>150</strong>0)<br />
(3000)<br />
Hours 20 75 <strong>150</strong> <strong>150</strong> 300<br />
Rear Brake Check operation / brake pad wear /<br />
YES YES YES YES YES<br />
fluid leakage<br />
Correct if necessary. Replace pads if<br />
worn to the limit.<br />
Accelerator Pedal Check operation and free play YES YES YES YES YES<br />
V‐Belt<br />
Check operation<br />
YES YES YES<br />
Repair for wear, cracks, of damage<br />
33
Wheels Check balance/damage/run out. YES YES YES YES<br />
Wheels bearing Check bearing assemblies for<br />
YES YES YES YES<br />
looseness/damage<br />
Replace if damaged.<br />
Front and Rear<br />
Check operation and for leakage<br />
YES<br />
YES<br />
Suspension<br />
Correct if necessary<br />
Steering System Check operation and for<br />
YES YES YES YES YES<br />
looseness/replace if necessary.<br />
Engine Mount<br />
Check for cracks or damage<br />
YES YES YES<br />
Check bolts tightness<br />
Fittings and Fasteners<br />
Check all chassis fittings and fasteners<br />
YES YES YES YES YES<br />
Correct of necessary<br />
Items may require special tools, data and technical skills may require a dealer to perform the service.<br />
34
Engine Oil and Oil Filter Cartridge<br />
The Engine oil level should be checked before each operation. In addition, the oil must be changed and<br />
oil filter cartridge replaced at the intervals specified in the periodic maintenance and lubrication chart.<br />
Service Engine Crankcase Oil<br />
This vehicle comes with external oil cooler for the<br />
engine. Make sure to replace the oil cooler with<br />
authentic filter from your dealer.<br />
You must change the oil in the crankcase after the<br />
first 5 hours of operating of your new engine and<br />
after 10 hours of use thereafter. This will ensure<br />
proper lubrication of the internal parts and prevent<br />
costly repairs due to excessive wear.<br />
1) Remove the screen cap drain plug located<br />
forward of the engine oil fill plug on the bottom<br />
right side of the engine. Upon removal of the<br />
plug, a filter screen will be visible. Elevating<br />
the front of the vehicle slightly will help drain all<br />
of the oil out.<br />
2) Empty all of the oil into a suitable container.<br />
3) Remove and clean the oil screen<br />
4) With the oil completely drained, replace the<br />
screen and drain plug, then tighten securely.<br />
1. Oil Cooler<br />
2. Oil Filter<br />
3. Oil Filter Gasket<br />
5) The external oil filter is located behind the<br />
driver’s seat in front of the battery tray. The<br />
screw on the oil filter should be replaced when<br />
oil is changed. With the oil drained from the<br />
crankcase, unscrew the oil filter and replace with<br />
a new one. Ensure that the oil filter gasket is<br />
properly seated, lubricated with oil and in good<br />
35
condition.<br />
Do not over tighten the oil filter.<br />
6) Replace the vehicle back on a flat surface to<br />
level the engine, and refill the crankcase with 30<br />
oz of SAE 10W40 motor oil.<br />
7) Check the oil level using the dipstick attached to<br />
the oil plug cap. Be sure to the check oil level<br />
before each use of the vehicle.<br />
8) Add oil when necessary to keep the oil level<br />
between then bottom of the dipstick and the<br />
“O” mark.<br />
Service Spark Plug<br />
1) Remove the spark plug and inspect it each time<br />
you change the oil. (use a spark plug wrench).<br />
The electrodes should be kept clean and free of<br />
carbon. The presence of the carbon or excess<br />
oil will greatly reduce proper engine<br />
performance. If possible, check the spark plug<br />
gap (area between the electrodes) using a wire<br />
feeler gauge. This specification is 0.6‐0.7mm.<br />
2) Before installing spark plug, coat threads lightly<br />
with graphite grease if possible to ensure easy<br />
removal next time the spark plug needs<br />
inspection.<br />
3) It is advisable to replace the spark plug at least<br />
once a year to insure easy starting and good<br />
engine performance.<br />
36
Chain Lubrication<br />
To increase the chain life, it should be lubricated<br />
with a spray on type chain lubricant.<br />
Chain Adjustment<br />
Check the chain adjustment after the first two hours<br />
of use. Readjust if it has more than 1/2” flex.<br />
1) Loose Nut #1<br />
2) Adjust Nut #2. Turn Nut #2 clockwise in 1/2<br />
turn increments, then turn Nut #1 until tight.<br />
Follow this procedure until chain is at proper<br />
tension.<br />
3) Repeat the above two steps until chain is<br />
adjusted to the desired fit.<br />
Adjustment of Front and Rear Shocks<br />
There are five adjustable positions on each shock.<br />
The default position is in the middle set by the<br />
manufacturer.<br />
Use a round nut wrench as you adjust the shock, the<br />
tension of the shock spring will increase as you screw<br />
to the left, decrease as you screw to the right.<br />
Adjust accordingly to the weight and riders.<br />
37
Service Air Filter<br />
Service air filter every 20 hours of use<br />
1) Remove cleaner cover by removing the Phillips<br />
head screws<br />
1. Air filter cleaner cover<br />
2. Air filter element<br />
3. Air filter right Cover<br />
2) Clean any excess dirt, oil or dust from the air<br />
cleaner box with a mild detergent and water<br />
solution<br />
3) Thoroughly dry the air box.<br />
4) Replace the air cleaner element.<br />
5) Carefully align the gasket between the air box<br />
halves during re‐assembly.<br />
Service Shifter Adjustment<br />
Your unit might require an occasional adjustment in<br />
the shifter cables due to physical stretch found<br />
during normal operation of the vehicle. To make<br />
shift adjustments, follow the below instructions.<br />
1) Push the shifter lever to forward or “D” position<br />
2) Check the shifter control disc found just behind<br />
the oil level dipstick to ensure that it has rotated<br />
forward all the way. Look for any slack in<br />
control cable 1.<br />
3) Loosen adjustment nuts #1 and #2, pulling the<br />
housing to draw the cable tight until the cable is<br />
properly tensioned.<br />
4) Shift the lever to the “R” position and check the<br />
control disc to ensure that it has rotated full<br />
towards the rear of the vehicle.<br />
38
5) Loosen adjustment nut #3 and #4, pulling the<br />
cable housing to draw #2 control cable right.<br />
6) Realign nut #2 and #4 when the cable is properly<br />
tensioned.<br />
Front Wheel Replacement<br />
Do not disassemble the castle nuts when you<br />
replace the front wheels.<br />
It is only necessary to remove the four lug nuts to<br />
remove the wheel. Tighten the nuts after replacing<br />
the wheels.<br />
Rear Wheel Replacement<br />
Do not disassemble the castle nuts when you<br />
replace the rear wheels and hub assembly.<br />
Remove the cotter pin and then 24mm nut. Then<br />
slide off wheel and hub assembly. It is only<br />
necessary to remove the four lug nuts to remove the<br />
wheels by itself.<br />
Front Wheel Alignment<br />
The front wheels should be set with a “toe‐in” from<br />
1/4” to 3/8”. At the centerline of the tires,<br />
measure the Distance A and the Distance B. For<br />
proper toe adjustment, Dimension A should be 1/4”<br />
– 3/8” greater than Dimension B.<br />
39<br />
1) Loosen the lock nuts on both sides of Front Tie<br />
Rods.<br />
2) Ensure the steering wheel is centered, and
adjust Dimension B by equally rotating the tie<br />
rods in or out with a 12mm wrench.<br />
3) After adjusting to the desired length, tighten the<br />
lock nuts against the rod end.<br />
4) Recheck the dimensions for proper alignment.<br />
Service Brake Fluid Level<br />
Insufficient brake fluid may let air enter the brake<br />
system, possibly causing the brakes to become<br />
ineffective.<br />
Before riding, check that the brake fluid is above the<br />
minimum level mark and replenish if necessary. A<br />
low brake fluid level may indicate worn brake pads<br />
or brake system leakage. IF the brake fluid level is<br />
low, be sure to check the brake pads for wear and<br />
the brake system for leakage.<br />
The brake fluid reservoir is located under the hood.<br />
Use only the recommended quality brake fluid.<br />
Otherwise, the rubber seals may deteriorate, causing<br />
leakage and poor braking performance.<br />
1) Refill with the same brake fluid. Mixing fluids<br />
may result in a harmful chemical reaction and<br />
lead to poor braking performance.<br />
2) Be careful water does not enter the brake fluid<br />
reservoir when refilling. Water will significantly<br />
lower the boiling point of the fluid and may<br />
result in vapor lock.<br />
3) Brake fluid may deteriorate painted surfaces or<br />
plastic parts. Always clean up spilled fluid<br />
immediately.<br />
40
4) Have a dealer inspect the brake system if the<br />
brake fluid level goes down.<br />
Brake fluid replacement<br />
Complete fluid replacement should be done by<br />
trained service personnel. Have a dealer replace<br />
the following components during periodic<br />
maintenance or when they are damaged or leaking.<br />
5) Replace the oil seals every two years<br />
6) Replace the brake hoses every four years.<br />
Battery<br />
The vehicle is equipped with a sealed type battery. Therefore it is not necessary to check the electrolyte or add<br />
distilled water in the battery. IF the battery seems to have discharged, consult a dealer.<br />
1. When vehicle is not used for a month or longer, remove the battery and store it in a cool, dark place.<br />
Completely recharge the battery before reinstallation.<br />
Warning: A special battery charger is required for recharging a sealed battery.<br />
Always make sure the connections are correct when putting the battery back in the vehicle.<br />
Fuse Replacement<br />
Your unit is equipped with inline fuses to protect the electrical system from excessive load conditions.<br />
Main fuse (15 amp) inline fuse is located inside the electrical box located on the drivers side, under the bed and on<br />
the top of the rear swing arm. Replace main fuse by removing the electrical cover and opening the fuse holder.<br />
A spare fuse is located inside the fuse holder.<br />
41
TROUBLESHOOTING<br />
Although vehicles receive a rigid inspection before shipment from the factory, trouble may occur during<br />
operation. Any problem in the fuel, compression, or ignition system can cause poor starting and loss of<br />
power. The troubleshooting chart describes quick, easy procedures for making checks. If your vehicle<br />
requires any repair, take it to a dealer.<br />
Your skilled technician at a dealership has the tools, experience and know‐how to properly service your<br />
vehicle. Use only genuine parts on your vehicle.<br />
42
CLEANING AND STORAGE<br />
A. CLEANING<br />
Frequent, thorough cleaning of your vehicle will not only enhance its appearance but<br />
will improve its general performance and extend the useful life of many components.<br />
1. Before cleaning the vehicle:<br />
a. Block off the end of the exhaust pipe to prevent water entry. A plastic bag and<br />
strong rubber band may be used.<br />
b. Make sure the spark plug and all filler caps are properly installed.<br />
2. If the engine case is excessively greasy, apply degreaser with a paint brush. Do not<br />
apply degreaser to the wheel axles.<br />
3. Rinse the dirt and degreaser off with a garden hose. Use only enough pressure to do<br />
the job.<br />
CAUTION: Excessive water pressure may cause water seepage and deterioration of<br />
wheel bearings, brakes, transmission seals and electrical devices. Many expensive<br />
repair bills have resulted from improper high pressure detergent applications such as<br />
those available in coin‐operated car washers.<br />
4. Once the majority of the dirt has been hosed off, wash all surfaces with warm water<br />
and mild, detergent‐type soap. An old toothbrush or bottle brush is handy for<br />
hard‐to‐get‐at places.<br />
5. Rinse the vehicle off immediately with clean water and dry all surfaces with a<br />
chamois, clean towel or soft absorbent cloth.<br />
6. Clean the seats with a vinyl upholstery cleaner to keep the cover pliable and glossy.<br />
7. Automotive type wax may be applied to all painted and chrome plated surfaces.<br />
Avoid combination cleaver‐waxes. Many contain abrasives which may scratch the<br />
paint or protective finish. When finished, start the engine and let it idle for several<br />
minutes.<br />
43
! WARNING<br />
POTENTIAL HAZARD<br />
Operation with wet brakes after washing.<br />
WHAT CAN HAPPEN<br />
Wet brakes may have reduced stopping ability, increasing the chance of an accident.<br />
B. STORAGE<br />
Long term storage (60 days or more) of your vehicle will require some preventive<br />
procedures to guard against deterioration. After thoroughly cleaning the vehicle,<br />
prepare for storage as follows:<br />
1. Fill the fuel tank with fresh fuel and add the specified amount of Fuel Stabilizer and<br />
Conditioner or equivalent product. Operate the vehicle for at least 5 minutes to<br />
distribute treated fuel through the fuel system.<br />
2. Drain the fuel from the carburetor float chamber into a clean container by loosening<br />
the drain dolt; this will help prevent fuel deposits from building up. Pour the drained<br />
fuel into the fuel tank.<br />
Specified amount:<br />
NOTE: Use of fuel stabilizer and conditioner eliminates the need to drain the fuel system.<br />
Consult a dealer if the fuel system needs to be drained instead.<br />
3. Remove the spark plug, pour about one tablespoon of SAE 10W30 or 20W40 motor<br />
oil in the spark plug. Ground the spark plug wire and turn the engine over several<br />
times to coat the cylinder wall with oil.<br />
4. Lubricate all control cables.<br />
5. Block up the frame to raise all wheels off the ground.<br />
44
6. Tie a plastic bag over the exhaust pipe outlet to prevent moisture from entering.<br />
7. If storing in a humid or salt‐air atmosphere, coat all exposed metal surfaces with a<br />
light film of oil. Do not apply oil to any rubber parts pr the seat covers.<br />
8. Remove the battery and charge it. Store it in a dry place and recharge it once a<br />
month. Do not store the battery in an excessively warm or cold place (less than 0℃<br />
(30°F) or more than 30℃ (30°F)).<br />
NOTE: Make any necessary repairs before storing the vehicle.<br />
45
SPECIFICATIONS<br />
Dimensions<br />
Overall length<br />
Overall width<br />
Overall height<br />
Wheel base<br />
Ground clearance<br />
Minimum turning radius<br />
Basic weight<br />
91 inch<br />
51 inch<br />
68 inch<br />
63 inch<br />
8.6 inch<br />
78 inch<br />
700 lbs.<br />
Engine<br />
Type<br />
Single cylinder oil & cooled 4 stroke<br />
Engine Displacement<br />
<strong>150</strong>cc<br />
Bore x Stroke 57.4 x 57.8<br />
Carburetor<br />
Deni<br />
Output Power<br />
9.0 HP @ 7500 rpm 13 ft‐lbs @ 5500 rpm<br />
Starting<br />
Keyed Electric<br />
Ignition<br />
CDI<br />
Lubrication SAE 10W/40<br />
Transmission<br />
CVT automatic with Neutral and Reverse<br />
Spark Plug / Gap<br />
C7HSA (NGK) / 0.6 – 0.7 mm<br />
Fuel Type Only use mid‐grade unleaded (89‐93<br />
Octane)<br />
Chassis<br />
Front Tire<br />
Rear Tire<br />
Front Brakes<br />
Rear Brake<br />
Front Suspension<br />
20 x 8 – 8 @ 15 psi<br />
22 x 11 – 10 @ 15 psi<br />
Hydraulic Disc Brake<br />
Hydraulic Disc Brake<br />
Dual A‐Arm with 1.8” of travel<br />
46
Rear Suspension<br />
Dry Weight<br />
Spring over shock with 2.0” of travel<br />
700 Lbs<br />
Capacities<br />
Maximum Bed Load<br />
Climbing Angle<br />
Fuel Tank<br />
Engine Oil<br />
Battery<br />
Top Speed<br />
Total Vehicle Weight Capacity (including<br />
passenger)<br />
250 Lbs<br />
15‐20 Degree<br />
10 L / 2.6 Gal<br />
36 Oz<br />
12 V 9 AH<br />
25‐28 MPH<br />
800 Lbs<br />
47