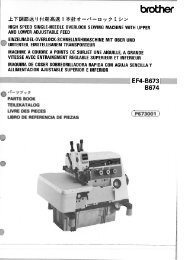
Instruction manual for Kansai WX series - Superior Sewing Machine ...
Instruction manual for Kansai WX series - Superior Sewing Machine ...
Instruction manual for Kansai WX series - Superior Sewing Machine ...

You also want an ePaper? Increase the reach of your titles
YUMPU automatically turns print PDFs into web optimized ePapers that Google loves.
<strong>WX</strong>8800<br />
<strong>WX</strong>8700<br />
LX5801<br />
<strong>WX</strong>8842<br />
<strong>WX</strong>8842-1<br />
MC30<br />
First published : August 1991<br />
Third edition : August 2004<br />
No. 040037
INTRODUCTION<br />
Thank you <strong>for</strong> your purchasing <strong>Kansai</strong> Special's <strong>WX</strong> Series.<br />
Read and study this instruction <strong>manual</strong> carefully be<strong>for</strong>e beginning any of the<br />
procedures and save it <strong>for</strong> later use.<br />
1. This instruction <strong>manual</strong> describes adjustments and maintenance procedures on this<br />
machine.<br />
2. Be<strong>for</strong>e starting the machine check to make sure the pulley cover, safety cover, etc.<br />
are secured.<br />
3. Be<strong>for</strong>e adjusting, cleaning, threading the machine or replacing the needle, be sure to<br />
turn off the power.<br />
4. Never start the machine with no oil in the reservoir.<br />
5. Refer to the parts list as well as this instruction <strong>manual</strong> be<strong>for</strong>e maintenance. If the<br />
machine includes a thread trimmer, read and study the instruction <strong>manual</strong> <strong>for</strong> the<br />
thread trimmer carefully.<br />
6. The contents described in this instruction <strong>manual</strong> are subject to change without<br />
notice.<br />
Indication of serial number<br />
Model<br />
0 4 0 0 0 0 1<br />
Serial number<br />
The date of manufacture<br />
Zip code
CONTENTS<br />
1. NEEDLES & THREADING THE MACHINE<br />
1-1 Needles ··················································· 1<br />
1-2 Replacing the needle ································· 1<br />
1-3 Threading the machine ····························· 1<br />
2. MACHINE SPEED<br />
2-1 <strong>Machine</strong> speed & direction in which the machine<br />
pulley runs ·············································· 2<br />
2-2 Motor & belt ············································ 2<br />
3. LUBRICATION<br />
3-1 Oil ························································· 3<br />
3-2 Oiling ····················································· 3<br />
3-3 Replacing the oil and the oil element ··········· 3<br />
4. SEWING MACHINE INSTALLATION<br />
4-1 <strong>Machine</strong> head dimension ··························· 4<br />
4-2 Installing the machine ······························ 4<br />
4-3 Cutting the machine table··························· 5<br />
5. TIMING OF THE LOOPER TO THE NEEDLES<br />
5-1 Angle and height <strong>for</strong> installing the looper ···· 6<br />
5-2 Looper left-to-right movement ···················· 6<br />
5-3 Looper setting distance ····························· 7<br />
5-4 Needle height ·········································· 7<br />
5-5 Needle/looper front-to-back relationship ······ 8<br />
5-6 Changing the looper orbit ·························· 8<br />
5-7 Changing the amount of the looper front-to-back<br />
movement ··············································· 9<br />
6. FRONT AND REAR NEEDLE GUARDS<br />
6-1 Position of the needle guard (rear) ·············· 9<br />
6-2 Position of the needle guard (front) ··········· 10<br />
7. SPREADER<br />
7-1 Position of the spreader ··························· 11<br />
7-2 Position of the spreader guide ·················· 11<br />
7-3 Timing of the spreader ···························· 12<br />
7-4 Position of the spreader (<strong>WX</strong>8842, 8842-1)···· 12<br />
7-5 Position of the spreader guide (<strong>WX</strong>8842, 8842-1)<br />
······························································· 13<br />
8. FEED DOGS & STITCH LENGTH<br />
8-1 Feed dog height & tilt ····························· 13<br />
8-2 Stitch length ·········································· 14<br />
8-3 Differential feed ····································· 15<br />
9. PRESSER FOOT<br />
9-1 Presser foot pressure ······························ 15<br />
9-2 Position of the presser foot & foot lift ········· 16<br />
10. STITCH FORMATION<br />
10-1 Position of the needle thread guides ········· 16<br />
10-2 Position of the thread guide on the needle<br />
thread take-up ······································ 17<br />
10-3 Timing of the needle thread take-up ········ 17<br />
10-4 Position of the needle thread guard ·········· 17<br />
10-5 Position of the thread guide of the spreader<br />
thread take-up ······································ 18<br />
10-6 Position of the thread guide of the looper thread<br />
take-up ················································ 18<br />
10-7 Position of the looper thread take-up ········ 18<br />
11. EMK ELASTIC FEEDER<br />
11-1 To insert the lace/elastic ························· 19<br />
11-2 Lace/elastic guide on the presser foot ······· 19<br />
11-3 Adjusting the front of the presser foot ······ 19<br />
11-4 To install the tape guide ························· 19<br />
11-5 Feeding amount of the lace/elastic ··········· 20<br />
11-6 Pressure of the elastic feed small roller ·· 20<br />
11-7 Checking the per<strong>for</strong>mance of the elastic<br />
feeder ·················································· 20<br />
11-8 Oiling each part ···································· 21<br />
12. EMK FRONT KNIFE DEVICE<br />
12-1 Adjusting and oiling the lower knife holder 21<br />
12-2 Replacing the lower knife ······················· 21<br />
12-3 Replacing the upper knife ······················· 21<br />
12-4 Overlap of the upper and lower knives ····· 22<br />
12-5 To sharpen the knife ······························ 22<br />
13. REPLACING THE TIMING BELT<br />
13-1 To remove the timing belt ······················· 22<br />
13-2 To place the timing belt ························· 23<br />
14. MC30 (TAPE CUTTER)<br />
14-1 Power supply cord ································· 23<br />
14-2 Intermediate cord ································· 24<br />
14-3 Adjustment (Electric type) ······················ 24<br />
14-4 Air piping & wiring (Air type) ················· 25<br />
14-5 Air pressure ········································· 26<br />
14-6 Adjustment (Air type) ···························· 26<br />
15. CLEANING THE MACHINE ··················· 27
1NEEDLES & THREADING THE MACHINE<br />
1-1 Needles<br />
UY128GAS of Schmetz or Organ<br />
Select the proper needle <strong>for</strong> the fabric and thread.<br />
< Needles and needle size ><br />
Schmetz UY128GAS Nm65 Nm70 Nm75 Nm80 Nm90<br />
Organ UY128GAS # 09 #10 #11 #12 #14<br />
1-2 Replacing the needle<br />
To replace the needle, check the needle carefully to see<br />
that the scarf is turned to the rear of the machine (see the<br />
illustration). Then install the needle correctly.<br />
< Note ><br />
Be<strong>for</strong>e replacing the needle, be sure to turn off the machine.<br />
A clutch motor continues running <strong>for</strong> a while after the machine is turned off.<br />
There<strong>for</strong>e keep on pressing the pedal until the machine stops.<br />
1-3 Threading the machine<br />
Thread the machine correctly by referring to the illustration below.<br />
Threading the machine incorrectly may cause skip stitching, thread breakage and/or<br />
uneven stitch <strong>for</strong>mation. Thread tension should be changed according to various kinds of<br />
conditions such as the thread to be used and/or the feeding amount (see Chapter 10 <strong>for</strong><br />
"Stitch <strong>for</strong>mation").<br />
A, B, C ... Needle threads<br />
D............. Top cover thread<br />
E ............ Looper thread<br />
For stretchable threads<br />
such as woolly thread<br />
1
2MACHINE SPEED<br />
2-1 <strong>Machine</strong> speed & direction in which the machine pulley runs<br />
Refer to the table below <strong>for</strong> maximum and standard<br />
speeds of the Series. To extend machine life, run<br />
the machine approximately 15~20% below the<br />
maximum speed <strong>for</strong> the first 200 hours of operation<br />
(approx. 1 month). Then run the machine at the<br />
standard speed. The machine pulley turns<br />
clockwise as the handwheel does as seen from the<br />
machine pulley.<br />
2-2 Motor & belt<br />
Motor : 3-phase, 2-pole, 400W clutch motor<br />
Belt : M type V belt<br />
Select the proper motor pulley according to the<br />
machine speed (refer to the motor pulley outer<br />
diameter on the table below). Adjust where to<br />
position the motor by pressing the finger onto the<br />
middle of the belt so that 1~2cm deflection can be<br />
obtained (see the illustration on the right).<br />
< <strong>Machine</strong> speed ><br />
TYPE MAXIMUM SPEED STANDARD SPEED<br />
<strong>WX</strong>8803 6000SPM 5500SPM<br />
<strong>WX</strong>8803EMK 5000SPM 4500SPM<br />
LX5801 6500SPM 6000SPM<br />
< Motor pulley selection table ><br />
Motor pulley <strong>Machine</strong> speed (SPM)<br />
outer diameter (mm) 50Hz 60Hz<br />
80 3300 3900<br />
90 3700 4400<br />
100 4100 4900<br />
110 4500 5400<br />
120 5000 5900<br />
130 5300 6400<br />
140 5800 (6900)<br />
150 6200<br />
< Ref. Data ><br />
1. Seam Type JIS 602605401408<br />
2. Noise Value ISO/DIS 10821 con<strong>for</strong>mity<br />
<strong>Machine</strong> speed<br />
(SPM)<br />
Average dB(A)<br />
4500 74.7<br />
5400 82.8<br />
2
3LUBRICATION<br />
3-1 Oil<br />
Use <strong>Kansai</strong> Special’s genuine oil.<br />
(Part No. 28-613 : 1000cc)<br />
3-2 Oiling<br />
To fill the machine with oil<br />
Remove rubber plug A from the oil hole.<br />
Fill the machine with oil until the oil level is at the<br />
top line (see H in the illustration) on oil gauge C.<br />
After the first lubrication, add oil so that the oil<br />
level will be between H and L.<br />
To check <strong>for</strong> proper oil flow<br />
After filling the machine with oil, run the machine<br />
to check the oil is splashing to oil flow sight window<br />
B.<br />
3-3 Replacing the oil and the oil element<br />
To extend machine life, be sure to replace the oil<br />
after the first 250 hours of operation.<br />
To replace the oil, follow the procedures below.<br />
1. Remove the V belt from the motor pulley and<br />
then remove the machine from the table.<br />
2. Remove screw D and then drain the oil.<br />
Be careful not to stain V belt with the oil.<br />
3. After draining the oil, be sure to tighten screw<br />
D.<br />
4. Fill the machine with oil by referring to 3-2<br />
shown above.<br />
If element E is contaminated, proper oiling may not<br />
be per<strong>for</strong>med. Clean the filter element every six<br />
months. If just a little or no oil flows out from the<br />
nozzle with the proper amount of oil in the machine,<br />
check the element. To do so, remove oil filter cap F.<br />
Replace the element if necessary.<br />
< Note ><br />
When the oil filter cap is removed, the oil collected<br />
on the element drips. Be careful.<br />
3
4SEWING MACHINE INSTALLATION<br />
Use a machine table and stand which can fully withstand the weight of the machine and<br />
the reaction <strong>for</strong>ce at the operation.<br />
4-1 <strong>Machine</strong> head dimension<br />
< Ref. ><br />
<strong>WX</strong>8803D<br />
New Weight<br />
Gross Weight<br />
56 <br />
59 <br />
4-2 Installing the machine<br />
Install the machine correctly by<br />
referring to the illustration below.<br />
Secure the bolts in place with the<br />
nuts tightened against the<br />
underside of the machine table.<br />
Fit the rubber cushions onto the<br />
bolts. Then mount the machine<br />
properly onto the rubber cushions.<br />
Install the chute <strong>for</strong> the EMK type.<br />
4
4-3 Cutting the machine table<br />
Cut the diagonally shaped area <strong>for</strong> the EMK type.<br />
Hole A shown below is <strong>for</strong> installing the electric presser foot lift.<br />
5
5TIMING OF THE LOOPER TO THE NEEDLES<br />
5-1 Angle and height <strong>for</strong> installing the looper<br />
To obtain the proper angle and height, insert the looper fully into looper holder A and<br />
then tighten screw B. <strong>WX</strong> Series Angle : 3° Distance at 25mm from the point of the<br />
looper between the bottom of the looper blade and the extension line from the point of the<br />
looper : Approximately 1.3mm. LX Series Angle : 3.5° Distance at 20mm from the point<br />
of the looper between the bottom of the looper blade and the extension line from the point<br />
of the looper : Approximately 1.2mm.<br />
5-2 Looper left-to-right movement<br />
The point of the looper should pass the center of the left needle and 1.3~1.6mm above the<br />
top of its needle's eye when the looper moves to the left or right on the front or back side of<br />
the needles (see the illustration below). Refer to 5-4 <strong>for</strong> the height of the needle.<br />
To adjust the timing of the looper to the needles,<br />
1. Remove the machine cover.<br />
2. Loosen screws A on the timing pulley (upper).<br />
3. Shift the timing pulley (upper) by turning the handwheel while holding the timing<br />
pulley (upper) by hand.<br />
6
5-3 Looper setting distance<br />
Set the looper so that the distance from the point of the<br />
looper to the center of the needle bar is 6mm when the<br />
looper is at its farthest position to the right.<br />
For 1-needle machines, this distance is 4mm.<br />
To make the fine adjustment of each gauge size, please<br />
refer to 5-4 Needle height.<br />
5-4 Needle height<br />
The point of the looper should be 1.3~1.6mm above the top<br />
of the left needle's eye on the back side of the needle when<br />
the point of the looper has reached the center of the left<br />
needle with the machine pulley turning in the operating<br />
direction (see 5-2). To adjust the height of the needle,<br />
1. Set the needle bar at the top of its stroke.<br />
2. Remove the plug on the head cover.<br />
3. Loosen screw A.<br />
4. Move the needle bar up or down.<br />
< Note ><br />
After the above adjustment, check to make sure each<br />
needle drops into the center of each needle hole .<br />
<br />
LOOPER SETTING<br />
Needle height (Bmm)<br />
DISTANCE<br />
(mm)<br />
(Amm)<br />
Gauge<br />
Without<br />
UTC<br />
UTC<br />
All common<br />
(INCH)<br />
31 33 31 33<br />
3.2 (1/8) 9.8 10.8 9.1 10.1 4.4~4.7<br />
4.0 (5/32) 9.3 10.4 8.6 9.7 4.0~4.3<br />
4.8 (3/16) 8.9 10 8.2 9.3 3.6~3.9<br />
5.6 (7/32) 8.5 9.6 7.8 8.9 3.2~3.5<br />
6.4 (1/4) 8.1 9.2 7.4 8.5 2.8~3.1<br />
7
5-5 Needle/looper front-to-back relationship<br />
The point of the looper is 1.3~1.6mm above the top<br />
of the left needle's eye on the back side of the needle<br />
when it has reached the center of the left needle.<br />
With the point of the looper at this position, set the<br />
clearance between the left needle and the point of<br />
the looper at approximately 0.2mm.<br />
Then the looper should barely touch the right needle<br />
(approximately 0.2mm). On 3-needle machines, the<br />
clearance between the point of the looper and the<br />
middle needle should be 0mm.<br />
To make the above adjustment,<br />
1. Loosen screw C (see 5-1).<br />
2. Move the looper holder front or back.<br />
< Note ><br />
When moving the looper holder front or back, be<br />
careful not to change the looper setting distance.<br />
5-6 Changing the looper orbit<br />
When the looper moves around the needles, the point of the looper on 2-needle and<br />
3-needle machines barely touches the right needle and the clearance between the point of<br />
the looper and the left needle is approximately 0.2mm.<br />
< Note ><br />
To sew under good conditions, adjust the looper orbit after changing the amount of the<br />
looper front-to-back movement by moving the timing mark slightly to X or Y.<br />
To change the looper's orbit,<br />
1. Loosen screw B on eccentric A.<br />
2. Shift the timing mark by moving eccentric A<br />
front or back.<br />
The timing mark is factory-set <strong>for</strong> standard.<br />
Do not change the orbit extremely.<br />
The timing mark is at the standard position.<br />
The 3 o'clock end of the orbit is at a slightly up<br />
position.<br />
To advance the timing of the looper to the needle<br />
Shift the timing mark to X. Skip stitching may<br />
occur when the looper moves to the right.<br />
A thread chain is not produced smoothly.<br />
To delay the timing of the looper to the needle Shift<br />
the timing mark to Y.<br />
Skip stitching may occur when the looper moves to<br />
the left. The needle extremely touches the back of<br />
the looper, causing needle breakage.<br />
8
5-7 Changing the amount of the looper font-to-back movement<br />
The clearance between the point of the left needle<br />
and the back side of the looper when the looper<br />
moves to the right from the extreme left end of its<br />
travel should be 0.05~0.1mm.<br />
The clearance between the point of the right needle<br />
and the back side of the looper should be 0.2~0.3mm.<br />
The amount of the looper front-to-back movement is<br />
factory-set properly <strong>for</strong> needle counts 9~11.<br />
If you use needle counts 12~14, adjust the amount<br />
as required (see below).<br />
1. Remove rear bed cover A.<br />
2. Loosen the nut on the looper front-to-back rod<br />
pin.<br />
To decrease the amount, move the rod pin to X.<br />
To increase the amount, move the rod pin to Y.<br />
The amount range is from 2.3 to 3.1mm.<br />
The amount is factory-set at 2.7 to 2.8mm.<br />
Adjust according to the needle count.<br />
If the amount is excessively decreased, the needle<br />
will rub against the back of the looper, causing<br />
needle breakage. If the amount is excessively<br />
increased, the clearance between the needle and the<br />
back of the looper will increase and then skip<br />
stitching may occur when the looper moves to the<br />
left.<br />
6FRONT AND REAR NEEDLE GUARDS<br />
6-1 Position of the needle guard (rear)<br />
Align line (a) on needle guard (rear) A with the<br />
center of the right needle hole when the needle<br />
guard (rear) is at the bottom of the stroke.<br />
When point of the looper passes the back side of the<br />
needles, the needle guard (rear) should push the<br />
right needle slightly toward the front and the<br />
clearance between the point of the looper and the<br />
left needle should be approximately 0.2mm.<br />
9
Set the clearance between the right needle and the<br />
point of the looper at 0~0.05mm when the point of<br />
the looper has reached the center of the right needle<br />
from the extreme right end of its travel.<br />
When the point of the looper has reached the center<br />
of the left needle, make sure the left needle does not<br />
touch the looper by pressing the left needle<br />
backward. Then turn the needle guard (rear) with<br />
screw B to set the clearance between the needle<br />
guard (rear) and the needle at 0.1~0.15mm.<br />
Adjust the needle guard (rear) front to back with<br />
screw C.<br />
6-2 Position of the needle guard (front)<br />
Set the clearance between the needles and needle<br />
guard (front) A when the point of the looper has<br />
reached the center of the right and left needles at<br />
0~0.05mm. To make this adjustment, loosen screw<br />
B.<br />
10
7SPREADER<br />
7-1 Position of the spreader<br />
Height<br />
The distance between the top surface of the needle plate<br />
and the bottom surface of the spreader should be 9~11mm.<br />
Left-to-right position:<br />
When the spreader is at the extreme left end of its travel,<br />
the distance between the center of the left needle and the<br />
point of the thread carrying notch should be 4.5~5.5mm.<br />
When the spreader passes the left needle, the distance<br />
between the point of the thread carrying notch and the left<br />
needle should be 0.5~0.8mm.<br />
To make the above adjustment, loosen screws A and B.<br />
Adjust the amount of the spreader movement according to the number of spreader threads<br />
and/or the fabric weight to make this adjustment, remove the arm top cover, loosen nut C<br />
and then move the adjusting lever pin in direction (a) or (b).<br />
To decrease the amount, move the pin in the direction of (a).<br />
To increase the amount, move the pin in the direction of (b).<br />
7-2 Position of the spreader thread guide<br />
The clearance between spreader thread guide B and<br />
spreader A should be 0.5~0.8mm.<br />
When the spreader is at the extreme right end of its travel,<br />
point (a) of the spreader thread carrying notch should be<br />
aligned with the center line of the slot of spreader thread<br />
guide B. When the needle bar is at the bottom of its<br />
stroke, the clearance between the spreader thread guide<br />
and spreader thread guide C should be 1mm and the eyelet<br />
of spreader thread guide C should be approximately<br />
0.5mm left to the center line of the slot of spreader thread<br />
guide B. To make the above adjustment, loosen two<br />
screws D and screw E and move each thread guide up or<br />
down, left or right, or front or back as required.<br />
11
7-3 Timing of the spreader<br />
The timing of the spreader is factory-set by referring to<br />
the previous procedure (see 7-2).<br />
Adjust according to the thread to be used or other<br />
conditions. To make this adjustment,<br />
1. Remove the top arm cover.<br />
2. Loosen two screws <strong>for</strong> looper eccentric A on the upper<br />
shaft.<br />
3. Shift alignment mark C front or back while referring<br />
to alignment mark B.<br />
To advance the timing of the spreader to the needle, shift mark C in the direction of D.<br />
To delay the timing of the spreader to the needle, shift mark C in the direction of E.<br />
7-4 Position of the spreader (<strong>WX</strong>8842,8842-1)<br />
Height<br />
The distance between the top surface of the needle plate<br />
and the bottom surface of the spreader should be 8mm.<br />
Left-to-right position:<br />
When the spreader is at the extreme left end of its travel,<br />
the distance between the center of the left needle and the<br />
point of the thread carrying notch should be 4.5~5.5mm.<br />
When the spreader passes the left needle, the distance<br />
between the point of the thread carrying notch and the left needle should be 0.5~0.8mm.<br />
To make the above adjustment, loosen screws A and B.<br />
Adjust the amount of the spreader movement according to the number of spreader threads<br />
and/or the fabric weight to make this adjustment, remove the arm top cover, loosen nut C<br />
and then move the adjusting lever pin in direction (a) or (b).<br />
To decrease the amount, move the pin in the direction of (a).<br />
To increase the amount, move the pin in the direction of (b).<br />
12
7-5 Position of the spreader thread guide (<strong>WX</strong>8842,8842-1)<br />
The clearance between spreader thread guide B and<br />
spreader A should be 0.5~0.8mm. When the spreader<br />
is at the extreme right end of its travel, point (a) of the<br />
spreader thread carrying notch should be aligned with<br />
the center line of the slot of spreader thread guide B.<br />
When the needle bar is at the bottom of its stroke, the<br />
clearance between the spreader thread guide and<br />
spreader thread guide C should be 1mm and the eyelet<br />
of spreader thread<br />
guide C should be<br />
approximately 0.5mm<br />
left to the center line<br />
of the slot of spreader<br />
thread guide B.<br />
To make the above<br />
adjustment, loosen<br />
two screws D and<br />
screw E and move<br />
each thread guide up<br />
or down, left or right,<br />
or front or back as<br />
required.<br />
8FEED DOGS & STITCH LENGTH<br />
8-1 Feed dog height & tilt<br />
Height<br />
When the feed dogs are at the top of their stroke, the<br />
feed dog teeth should be parallel with and 0.8~1mm<br />
above the top surface of the needle plate.<br />
To make this adjustment, loosen screw A and move the<br />
main and differential feed dogs up or down.<br />
13
Tilt<br />
Remove the cover from the rear side of the bed.<br />
Loosen screw D from hole C with a 2.5mm hex. Wrench.<br />
When the feed dogs are at their top of their stroke, the<br />
feed dogs should be parallel with the top surface of the<br />
needle plate. Adjust by turning eccentric pin E with a<br />
screwdriver.<br />
< Note ><br />
When turning the eccentric pin, tighten screw D with the<br />
pin slightly touching feed bar B while checking that the<br />
shaft is not shifted to the left.<br />
When sewing <strong>for</strong> little bit thicker fabric and also <strong>for</strong><br />
elastic fabric, in order to feed such fabric well, Adjust the tilting position of the feed dog.<br />
The front feed dog is to be positioned upper height than rear feed dog, after adjusting of<br />
eccentric pin.<br />
8-2 Stitch length<br />
The stitch length is adjustable from 1.4~4.2mm as<br />
follows<br />
Stitch length(mm) No. of stitches (within 1")<br />
4.2 6.0<br />
3.6 7.0<br />
2.4 10.5<br />
1.4 18.0<br />
To adjust the stitch length<br />
1. Press push button A lightly until its end touches<br />
the inside part and clicks.<br />
2. Turn the handwheel by hand while pressing the<br />
push button lightly until the push button goes<br />
further into the depth.<br />
3. Then press down the push button strongly again.<br />
Adjust the stitch length as required by turning the<br />
handwheel.<br />
4. Align the required stitch length with alignment<br />
mark B. Then release the push button.<br />
< Note ><br />
To adjust the stitch length, be sure to turn off the power<br />
first.<br />
14
8-3 Differential feed<br />
Normal differential feed (to gather the fabric)<br />
To make this adjustment, loosen nut A, move lever B up<br />
or down and tighten nut A at the required position.<br />
To obtain a feed ratio of 1:1, align lever B with reading C.<br />
To obtain the normal differential feed, raise lever B above<br />
reading C. To obtain a feed ratio of 1:2, set lever B at 2.<br />
Reverse differential feed (to stretch seam the fabric)<br />
To obtain the reverse differential feed, lower lever B below<br />
reading C. To obtain a feed ratio of 1:0.7, set lever B at<br />
0.7. To adjust the differential feed ratio during sewing<br />
Connect a chain, etc. to the lever.<br />
Set the upper and lower limits with two stoppers (D).<br />
To adjust the differential feed ratio during sewing, move<br />
lever B up or down within this range and then set lever B<br />
at the required position. The differential feed ratio<br />
varies according to the stitch length.<br />
See the table below.<br />
< Differential feed ratio ><br />
Stitch length<br />
(mm)<br />
Max. normal<br />
diff. feed<br />
Max. reverse<br />
diff. feed<br />
3.6 1:1.2 1:0.7<br />
2.5 1:1.6 1:0.7<br />
2.0 1:1.8 1:0.7<br />
1.4 1:2.0 1:0.7<br />
< Note ><br />
To use the machine with the normal differential feed, check to make sure the feed<br />
dogs do not touch the needle plate.<br />
9PRESSER FOOT<br />
9-1 Presser foot pressure<br />
The presser foot pressure should be as light as possible,<br />
yet be sufficient to feed the fabric and produce uni<strong>for</strong>m<br />
stitches. To increase the presser foot pressure, turn the<br />
adjusting knob clockwise.<br />
15
9-2 Position of the presser foot & foot lift<br />
Fit the presser foot onto the presser bar so that the<br />
needle can drop correctly to the center of the presser<br />
foot needle drop hole.<br />
Position of the presser foot<br />
Loosen screw A.<br />
Adjust by moving the presser foot left or right while<br />
checking to make sure the needle drops correctly to<br />
the center of the presser foot needle drop hole.<br />
Foot lift<br />
For machines with the spreader, the presser foot<br />
should be 6mm above the top surface of the needle<br />
plate. Check to make sure presser foot does not<br />
touch the spreader with the presser foot in the above<br />
position. For machines without the spreader, the<br />
presser foot should be 8mm above the top surface of<br />
the needle plate.<br />
Set stopper B at the required position.<br />
Fasten the presser foot lift lever with nut C so that<br />
the lever cannot be lowered.<br />
10STITCH FORMATION<br />
10-1 Position of the needle thread guides<br />
The distance from the center of the eyelet of the<br />
needle thread guide to that of the set screw should<br />
be approximately 17.5mm (see the illustration).<br />
Adjust the height of the thread guides by loosening<br />
screws A and moving each thread guide up or down<br />
(refer to the distances shown in the illustration).<br />
If the stitch <strong>for</strong>mation cannot be changed extremely<br />
by adjusting the height of the thread guides because<br />
of the thread to be used, unravel the thread after<br />
test sewing and adjust the height of the thread<br />
guides while checking the tension of the needle<br />
thread.<br />
16
10-2 Position of the thread guide on the needle thread take-up<br />
When the needle bar is at the bottom of its stroke,<br />
needle thread take-up bracket A should be level and<br />
the distance from the center of the shaft to the<br />
thread guide of needle thread take-up B should be<br />
75mm. To make this adjustment, loosen screws C<br />
and D. To tighten the needle thread, move needle<br />
thread take-up to Y. To loosen the needle thread,<br />
move needle thread take-up to X.<br />
10-3 Timing of the needle thread take-up<br />
The timing of the needle thread take-up in relation<br />
to the up-and-down movement of the needles can be<br />
adjusted. This timing is factory-set to synchronize<br />
with the up-and-down movement of the needle bar.<br />
< Note ><br />
The rod ball is factory-set at 5.5mm from the rear end<br />
of the shaft. To make the needle thread loop small,<br />
move the rod ball to the front.<br />
To make the needle thread loop large, move the rod<br />
ball to the back. Remove the rubber top plug.<br />
Loosen the screw of (A) with a 5mm wrench.<br />
Then move the rod ball to the front or back.<br />
10-4 Position of the needle thread guard<br />
When the needle bar is at the bottom of its stroke,<br />
the center of the eyelet of thread guide A should be<br />
level with the top surface of needle thread guard B.<br />
In addition, A should be parallel with B.<br />
To adjust the height of needle thread guard B, loosen<br />
screw C and move needle thread guard B up or down.<br />
To tighten the needle thread, move up B.<br />
To loosen the needle thread, move down B.<br />
For cotton threads (non-stretchable threads)<br />
Bring the needle thread guard 2.0mm below the<br />
standard, or remove it. Loosen screw C and move<br />
down the needle thread guard.<br />
For woolly threads (stretchable threads)<br />
Raise the needle thread guard as high as possible.<br />
17
10-5 Position of the thread guide of the spreader thread take-up<br />
When the needle bar is at the top of its stroke,<br />
thread any one of parts A, B and C on the spreader<br />
thread take-up with the spreader thread.<br />
For woolly threads: Thread B or C.<br />
For cotton threads or spun threads<br />
Thread A and adjust the spreader thread take-up<br />
according to the thread or fabric to be used.<br />
Adjust by moving up or down the spreader thread<br />
take-up with screws D.<br />
10-6 Position of the thread guide of the looper thread take-up<br />
The eyelets on thread guides B and C should be<br />
aligned with mark X on thread guide A.<br />
To increase the amount of the looper thread supplied<br />
by the looper thread take-up, loosen screws of thread<br />
guides B and C and move the thread guides to the<br />
front. To decrease it, move the thread guides to the<br />
back. Adjust according to the thread and stitch<br />
length to be used.<br />
For woolly threads, move thread guides B and C to<br />
the front. Do not thread the tension disk.<br />
10-7 Position of the looper thread take-up<br />
Thread guide D should be at the center of the groove<br />
of looper thread take-up A.<br />
When the point of the left needle has reached<br />
0.5~1mm above the bottom surface of the looper<br />
blade while the looper is moving from the extreme<br />
left end of its travel, the looper thread should be<br />
removed from position C on the looper thread<br />
take-up. To make this adjustment, loosen screw B<br />
and adjust the looper thread take-up.<br />
To adjust the height of thread guide D, loosen screw<br />
E and then align the bottom of the slot of thread<br />
guide D with the top surface of the bracket.<br />
18
11EMK ELASTIC FEEDER<br />
11-1 To insert the lace/elastic<br />
Insert the lace/elastic correctly by referring to the<br />
illustration. The rollers are opened by pressing<br />
rubber adjusting lever A.<br />
11-2 Lace/elastic guide on the presser foot<br />
Loosen screw A. Adjust the position of the tape<br />
guide according to the needle space and/or width of<br />
the tape. Adjust the position of upper knife guide B<br />
according to the hem width cut by the knife.<br />
Install upper knife guide B by tightening screw C<br />
while checking upper knife guide B does not touch<br />
the knife.<br />
11-3 Adjusting the front of the presser foot<br />
Adjust the front of the presser foot according to the<br />
type of fabric and/or elastic to be used.<br />
To sew heavy weight elastic onto the fabric, raise<br />
the front of the presser foot.<br />
This reduces resistance and feeds the fabric<br />
smoothly. Loosen nut D and turn screw E as<br />
required.<br />
11-4 To install the tape guide<br />
Install tape guide shaft A as close to the needle as<br />
possible, but the machine must sew the fabric<br />
smoothly. To adjust the tape guide, loosen screw<br />
B and turn eccentric collar C clockwise or<br />
counterclockwise. The eccentric collar serves as a<br />
stopper, so install the eccentric collar properly so<br />
that it does not touch the needle holder and<br />
spreader thread guide, etc.<br />
19
11-5 Feeding amount of the lace/elastic<br />
To adjust the feeding amount of the lace / elastic, loosen wing nut A and turn adjusting<br />
screw C while checking the readings on lever B. To increase the amount, turn screw C<br />
clockwise. To decrease the amount, turn screw C counterclockwise.<br />
Adjustable from 0.9 to 2.3mm. Adjust according to the fabric and/or elastic to be used.<br />
Adjust the pressure of the elastic feed small roller (see 11-6) simultaneously.<br />
To increase the amount a little more, loosen two eccentric set screws from hole D.<br />
Turn the handwheel all the way to MAX with the wrench inserted until the handwheel<br />
stops and then tighten the set screws. This increases the adjustable range from 1.4 to<br />
3.6mm.<br />
11-6 Pressure of the elastic feed small roller<br />
To adjust the pressure of small roller A, loosen<br />
adjusting nut B as required.<br />
To increase the pressure, turn clockwise.<br />
To decrease the pressure, turn counterclockwise.<br />
Adjust the pressure according to the elastic to be<br />
used.<br />
< Note ><br />
Decrease the pressure <strong>for</strong> stretchable lace elastic.<br />
Increase the pressure <strong>for</strong> non-stretchable lace elastic.<br />
11-7 Checking the per<strong>for</strong>mance of the elastic feeder<br />
If the elastic feeder does not work well, it will not feed elastic uni<strong>for</strong>mly, causing various<br />
kinds of trouble such as burned elastic, jammed elastic, needle breakage, uneven sewing.<br />
Check the following.<br />
1. Adjust small roller A so that it can turn easily.<br />
If it does not, the tape cannot be fed neatly.<br />
2. The roller link and its shaft should move smoothly.<br />
3. The small roller spring pressure should be as light as possible, yet be sufficient to<br />
follow the roller speed.<br />
20
11-8 Oiling each part<br />
The clutch has been greased at the factory. Add grease be<strong>for</strong>e it runs out.<br />
Turn the handwheel to align mark A on the housing with mark B on the lever.<br />
Remove screw C of the oil hole and then supply grease.<br />
Remove screw D and grease the bearing.<br />
12EMK FRONT KNIFE DEVICE<br />
12-1 Adjusting and oiling the lower knife holder<br />
Loosen screw A to change the position of the lower<br />
knife holder. The upper and lower knife holders can<br />
be adjusted left to right simultaneously.<br />
When changing the distance from the right needle to<br />
the fabric edge, adjust the lower knife holder.<br />
< Note ><br />
Add a small amount of oil to oil hole B periodically.<br />
12-2 Replacing the lower knife<br />
1. Loosen screw C on the collar. Move the shaft to<br />
the right to provide clearance up and down.<br />
2. Tighten screw C on the right collar temporarily.<br />
3. Loosen screw D.<br />
Remove lower knife E downward.<br />
4. Align the blade of new lower knife E with the top<br />
surface of the needle plate. Tighten screw D.<br />
5. The upper and lower knives are overlapped by<br />
loosening screw C on the collar.<br />
6. Place a thread between the knives and check <strong>for</strong><br />
the proper cutting action by turning the handwheel by hand. Tighten screw C.<br />
7. Check <strong>for</strong> the proper cutting action again.<br />
12-3 Replacing the upper knife<br />
1. Create clearance up and down between the upper and lower knives (see 12-2 1).<br />
2. Loosen screw F and remove upper knife G.<br />
3. Secure a new knife and then check <strong>for</strong> the proper cutting action (see 12-2 6).<br />
21
12-4 Overlap of the upper and lower knives<br />
When the upper knife is at the bottom of its travel, there should be approximately 0.5mm<br />
overlap of the upper and lower knives. To make this adjustment, loosen screw A on the<br />
upper knife shaft lever. Then the upper knife and upper knife holder can be moved up<br />
and down simultaneously. Tighten screw A when 0.5mm overlap of the upper and lower<br />
knives is obtained. Secure bushing D with upper knife shaft lever B and washer C so<br />
that there is no left-to-right shake on upper knife shaft E. Then tighten screw A.<br />
12-5 To sharpen the knife<br />
The upper knife is made of an extra hard alloy.<br />
When the knives become dull, sharpen the lower knife<br />
first (see the illustration). If cutting is still not<br />
per<strong>for</strong>med properly, replace the upper knife.<br />
< Note ><br />
The max. space between the chip guard (H) and the<br />
shooter (I) is adjusted under 8mm at the delivery of the<br />
factory. If re-adjustment is needed due to repairing job<br />
etc., please make sure to adjust it under 8mm.<br />
13REPLACING THE TIMING BELT<br />
13-1 To remove the timing belt<br />
1. Loosen the eight arm cover set screws and the six oil reservoir set screws (see the<br />
illustration). Remove each part.<br />
2. Loosen two screws A. Remove the handwheel to the right while turning it slowly<br />
(see the illustration).<br />
3. Remove the pulley, plates and bearing in sequence by referring to the illustration<br />
below. Then remove the timing belt from the hole <strong>for</strong> the bearing.<br />
22
13-2 To place the timing belt<br />
1. Install the timing belt, bearing, plates space collar, pulley and cover by per<strong>for</strong>ming<br />
the reverse procedure of 13-2 3.<br />
2. Position the bearing so that the point of the screw is fitted correctly into the<br />
positioning hole on the lower shaft. Then tighten the screw to secure the bearing.<br />
3. Move the looper to the extreme right end of its travel by turning the pulley.<br />
Bring the needle bar down to the bottom of its stroke by hand.<br />
4. Then place the belt onto the timing pulley on the upper shaft.<br />
Tighten two screws A.<br />
5. Bring the needle bar up to the top of its stroke by turning the pulley.<br />
Check to make sure mark "P" on the handwheel is aligned with alignment mark "O"<br />
on the bed.<br />
6. To make a fine adjustment <strong>for</strong> the timing of the needle and looper, refer to 5-2.<br />
14MC30 (TAPE CUTTER)<br />
14-1 Power supply cord<br />
Connect electric cord A to ON/OFF switch of machine<br />
head. Connect the cords with blue and brown color to<br />
2 of 3 terminal of B, C, D.<br />
The cord with green/yellow color is earth cord which<br />
should be connected to earth terminal.<br />
Note <br />
When connecting electric cord, make sure to turn off<br />
the switch of main power source.<br />
Note <br />
Be careful in connecting electric cord A to control box.<br />
Check the mark of electric cord A and control box.<br />
Then, connect them.<br />
23
14-2 Intermediate cord<br />
Connect the cords with referring to the following picture. (also refer to the parts list.)<br />
After connecting, fix the cords with bands to the proper place under the table.<br />
14-3 Adjustment (Electric type)<br />
Note <br />
Make sure to turn off the power (electric and<br />
compressed air), be<strong>for</strong>e adjusting, cleaning etc.<br />
a) Height of Cutter<br />
Loosen screw E and adjust lever F in order to<br />
set 24 mm of the distance between lower cutter<br />
and upper cutter at the top position (top dead<br />
point). During this adjustment, do not <strong>for</strong>get to<br />
align between surface G (surface of lever F) and<br />
edge surface of solenoid shaft.<br />
Note <br />
After adjusting, drop down upper cutter at the bottom<br />
position (bottom dead point) in pulling lever F<br />
direction to H. Then, confirm whether upper cutter<br />
and lower cutter shall meet each other at 1mm<br />
distance or not.<br />
24
) Overlapping of Cutter<br />
1. Loosen screw I, then loosen screw J until<br />
disappearing of pressurized power of upper<br />
cutter.<br />
2. Loosen screw K, then adjust screw L in<br />
order to overlap properly between upper<br />
cutter and lower cutter.<br />
Note <br />
When checking the proper overlapping between upper<br />
cutter and lower cutter, move upper cutter by your<br />
hand.<br />
c) Power of Upper Cutter<br />
After loosen screw I, then adjust the pressurized<br />
power of upper cutter against lower cutter by<br />
screw J.<br />
14-4 Air piping & wiring ( Air type )<br />
Connect the air tube and the electric cords with referring to the following picture. (also<br />
refer to the parts list.) After connecting, fix the air tube and the electric cords with bands<br />
onto the proper place under the table.<br />
25
14-5 Air pressure<br />
Set the air pressure at 4~5 kg/cm2 by regulator.<br />
Do not increase the air pressure over 5kg/cm 2 , which<br />
may cause trouble.<br />
Note <br />
Be careful about the remaining compressed air.<br />
Even if stopping the air source at compressor, it is<br />
possible to remain compressed air in tube.<br />
Release the remaining compressed air by regulator.<br />
14-6 Adjustment (Air type)<br />
Note <br />
Make sure to turn off the power (electric and<br />
compressed air), be<strong>for</strong>e adjusting, cleaning etc.<br />
a) Height of Cutter<br />
Loosen screw K and adjust lever L in order to set<br />
24 mm of the distance between lower cutter and<br />
upper cutter at the top position (top dead point).<br />
Note <br />
After adjusting, drop down upper cutter at the bottom<br />
position ( bottom dead point ).<br />
Then, confirm whether upper cutter and lower cusster<br />
shall meet each other at 1 mm distance or not.<br />
b) Overlapping of Cutter<br />
1. Loosen screw M, then loosen screw N until<br />
disappearing of pressurized power of upper<br />
cutter.<br />
2. Loosen screw O, then adjust screw P in order<br />
to overlap properly between upper cutter and<br />
lower cutter.<br />
Note <br />
When checking the proper overlapping between upper<br />
cutter and lower cutter, move upper cutter by your<br />
hand.<br />
c) Power of Upper Cutter<br />
After loosen screw M, then adjust the pressurized power of upper cutter against lower<br />
cutter by screw N.<br />
26
15CLEANING THE MACHINE<br />
At the end of each day, remove the needle plate and clean the slots of the needle plate and<br />
the area around the feed dogs.<br />
27