Montage- und Bedienungsanleitung für ... - EOS Werke Günther GmbH
Montage- und Bedienungsanleitung für ... - EOS Werke Günther GmbH
Montage- und Bedienungsanleitung für ... - EOS Werke Günther GmbH

You also want an ePaper? Increase the reach of your titles
YUMPU automatically turns print PDFs into web optimized ePapers that Google loves.
Druck Nr. 29342681 / - 08.08<br />
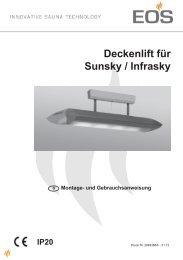
<strong>Montage</strong>- <strong>und</strong> <strong>Bedienungsanleitung</strong><br />
<strong>für</strong> feuchtraumgeeignete Leuchte (aus Alu-Druckguss)<br />
Hinweis<br />
Bevor Sie mit der <strong>Montage</strong> beginnen, lesen Sie<br />
dieses Blatt bitte aufmerksam durch.<br />
Technische Daten<br />
Nennspannung: 230 V, 50Hz<br />
max. Leistung bei Saunabetrieb: 40 W<br />
Lampenfassung: E27<br />
Aufbau <strong>und</strong> Oberfl ächen-<br />
Beschaffenheiten<br />
• Druckgussgehäuse aus Aluminiumlegierung,<br />
dadurch haltbar<br />
• Gehäuse pulverbeschichtet, verwindungssteif,<br />
hitze- <strong>und</strong> korrosionsbeständig<br />
• hitzbeständige Silikondichtung gegen Eindringen<br />
von Staub <strong>und</strong> Spritzwasser (IP54)<br />
• ansprechendes Äußeres<br />
Anwendungsgebiete<br />
Saunen <strong>und</strong> Wärmekabinen.<br />
<strong>Montage</strong>anweisung<br />
Bitte prüfen Sie als erstes, ob die Leuchte während<br />
des Transportes beschädigt wurde. Falls<br />
ein Transportschaden entstanden ist, bitte Ihren<br />
Händler benachrichtigen.<br />
Vor <strong>Montage</strong>beginn schalten Sie zunächst den<br />
Strom aus <strong>und</strong> gehen Sie wie nachfolgend beschrieben<br />
vor:<br />
(1) Führen Sie die Zuführleitung durch den Schutzring<br />
des Lampensockels.<br />
(2) Führen Sie die Drähte durch die da<strong>für</strong> vorgesehenen<br />
Schutzröhrchen.<br />
Die Drähte, die sich in der Nähe der Lampenfassung<br />
befi nden, müssen komplett bedeckt<br />
sein, d.h. es muss sichergestellt sein, dass ein<br />
Ende des Schutzröhrchens bis zum Schutzring<br />
geht <strong>und</strong> das andere Ende bis zur Öffnung der<br />
Schutzplatte an der Lampenfassung.<br />
(3) Verbinden Sie die Drähte vorschriftsmäßig<br />
mit der Lampenfassung, wobei das Lampengehäuse<br />
geerdet werden muss.<br />
(4) Befestigen Sie das Lampengehäuse mit<br />
Schrauben an der <strong>Montage</strong>fl äche.<br />
(5) Setzen Sie eine Glühlampe mit maximal 40 W<br />
<strong>und</strong> Sockel E27 ein.<br />
(6) Fixieren Sie Schutzglas <strong>und</strong> Dichtungen auf<br />
dem Lampenrahmen <strong>und</strong> befestigen Sie diese<br />
Teile mit zwei Schrauben am Gehäuse.<br />
Installation and operating instructions for lights<br />
suitable for damp areas (of cast aluminium)<br />
Note<br />
Please read these instructions carefully before<br />
starting with the installation.<br />
Technical Data<br />
Nominal voltage: 230 V, 50Hz<br />
Max. power consumption during sauna operation:<br />
40 W<br />
Lamp holder: E27<br />
Construction and surface properties<br />
• Cast housing of durable aluminium alloy<br />
• Housing powder-coated, resistant to torsion,<br />
heat and corrosion<br />
• Heat-resistant silicon seal against penetration<br />
by dust and spray water (IP 54)<br />
• Attractive design<br />
Areas of application<br />
Saunas and heating cabinets<br />
Installation instructions<br />
Please check fi rst that the lamp has not been<br />
damaged during transport. If any damage has<br />
occurred, please notify your dealer.<br />
First switch the power off before starting with the<br />
installation, and then proceed as follows:<br />
(1) Feed the supply cable through the protecting<br />
ring of the lamp base.<br />
(2) Feed the wires through the protecting tubes<br />
provided.<br />
The wires in the area of the lamp holder must<br />
be completely covered, i.e. it must be ensured<br />
that one end of the protecting tube extends as<br />
far as the protecting ring, and the other end to<br />
the opening of the protection plate on the lamp<br />
holder.<br />
(3) Connect the wires to the lamp holder according<br />
to regulations. The lamp housing must be<br />
earthed.<br />
(4) Attach the lamp housing to the installation<br />
surface using appropriate screws.<br />
(5) Insert a bulb into the holder: max. wattage 40<br />
W, E27 fi tting.<br />
(6) Fix the protective glass dome and seals to the<br />
lamp frame, and attach to the housing using<br />
two screws.<br />
Sicherheitsvorschriften<br />
• Nach dem Einschalten des Stroms wird die<br />
Lampe extrem heiß. Ist die Leuchte eingeschaltet<br />
oder nicht vollständig abgekühlt, berühren<br />
Sie sie bitte nicht mit der bloßen Hand.<br />
• Beim Lampenwechsel schalten Sie bitte zuerst<br />
den Strom ab <strong>und</strong> wechseln die Lampe erst,<br />
wenn sie ausreichend abgekühlt ist (beachten<br />
Sie genau die Anweisungen zum Lampenwechsel).<br />
Anweisung zum Lampenwechsel<br />
• Schalten Sie den Strom ab.<br />
• Entfernen Sie die zwei Schrauben <strong>und</strong> das<br />
Schutzglas vom Lampenrahmen.<br />
• Schrauben Sie die abgekühlte Lampe vorsichtig<br />
heraus.<br />
• Die neue, saubere Lampe sorgfältig in die<br />
Lampenfassung schrauben.<br />
• Vor dem Wiedereinschalten des Stroms,<br />
bringen Sie das Schutzglas <strong>und</strong> den Lampenrahmen<br />
mit den Dichtungen wieder an.<br />
Service Adresse:<br />
<strong>EOS</strong>-<strong>Werke</strong> <strong>Günther</strong> <strong>GmbH</strong>, Adolf-Weiß-Str.43,<br />
35759 Driedorf, Germany<br />
tel +49 (0)2775 82-240, fax +49 (0)2775 82-455<br />
servicecenter@eos-werke.de<br />
www.eos-werke.de<br />
Safety regulations<br />
• The lamp becomes extremely hot after switching<br />
on the power. Do not touch the lamp with your<br />
bare hands when it is switched on, or has not<br />
cooled down completely.<br />
• When changing the bulb, fi rst switch off the<br />
power, and only replace the bulb when it has<br />
cooled down suffi ciently (follow the instructions<br />
on changing the bulb carefully).<br />
Changing the bulb<br />
• Switch the power off<br />
• Remove the two screws and the protective<br />
glass dome from the lamp frame.<br />
• Carefully unscrew the bulb when it has cooled<br />
down.<br />
• Screw the new bulb carefully into the lamp<br />
holder.<br />
• Before switching on the power again, refi t the<br />
protective glass dome and seals to the lamp<br />
frame.<br />
Service address:<br />
<strong>EOS</strong>-<strong>Werke</strong> <strong>Günther</strong> <strong>GmbH</strong>, Adolf-Weiß-Str.43,<br />
35759 Driedorf, Germany<br />
tel +49 (0)2775 82-240, fax +49 (0)2775 82-455<br />
servicecenter@eos-werke.de<br />
www.eos-werke.de
Notice pour le montage et l'utilisation d'éclairage pour<br />
ambiance humide (en aluminium coulé sous pression)<br />
Remarque<br />
Lire cette notice attentivement avant de procéder<br />
au montage.<br />
Caractéristiques techniques<br />
Tension nominale: 230 V, 50 Hz<br />
Puissance max. en ambiance sauna : 40 W<br />
Douille pour culot de lampe : E 27<br />
Structure et qualité de la surface<br />
• boîtier en alliage d'aluminium moulé sous<br />
pression, d'où grande robustesse<br />
• boîtier avec revêtement poudre, résistant à la<br />
chaleur et à la corrosion<br />
• joint d'étanchéité silicone, résistant à la chaleur,<br />
contre les poussières et les projections d'eau<br />
(IP54)<br />
• présentation esthétique<br />
Указание<br />
Перед началом монтажа внимательно<br />
прочитайте данную инструкцию.<br />
Технические характеристики<br />
Номинальное напряжение: 230 В, 50 Гц<br />
Макс. мощность в режиме сауны: 40 Вт<br />
Ламповый патрон: Е27<br />
Структура и характеристики<br />
поверхности<br />
• Корпус изготовлен из литого под давлением<br />
алюминиевого сплава, что обеспечивает его<br />
прочность<br />
• Корпус с порошковым напылением, крутильножесткий,<br />
термо- и коррозионно-стойкий<br />
• Термостойкое силиконовое уплотнение для<br />
защиты от проникновения пыли и водных брызг<br />
(IP54)<br />
• Привлекательный дизайн<br />
Domaine d'application<br />
Saunas, bains-douches et assimilés<br />
Instructions pour le montage<br />
Vérifi er d'abord l'absence de tout dommage suite<br />
au transport. Aviser votre distributeur en cas de<br />
dommage constaté.<br />
Avant de commencer le montage, couper la tension<br />
secteur et procéder comme suit:<br />
(1) Passer le câble par la bague de protection du<br />
socle de lampe.<br />
(2) Passer les fi ls par les petits conduits prévus à<br />
cet effet.<br />
Les fi ls à proximité du socle de lampe doivent<br />
être totalement couverts : s'assurer qu'une des<br />
extrémité du petit conduit soit sur la bague de<br />
protection et que l'autre soit sur l'ouverture de<br />
la platine sur le socle de lampe.<br />
(3) Brancher les fi ls comme prescrit sur le socle<br />
avec mise à la terre du boîtier.<br />
(4) Fixer avec les vis le boîtier de la lampe sur le<br />
plan de pose.<br />
(5) Monter une lampe à incandescence de puissance<br />
maxima de 40 W (culot type E27).<br />
(6) Fixer le verre de protection et les garnitures<br />
d'étanchéité sur le cadre de lampe et fi xer le<br />
tout sur le boîtier avec deux vis.<br />
Consignes de sécurité<br />
• La lampe devient extrêmement chaude sous<br />
tension. Ne pas toucher avec la main une lampe<br />
sous tension ou éteinte mais non complètement<br />
refroidie.<br />
• Si la lampe doit être remplacée, couper d'abord<br />
la tension secteur et ne remplacer la lampe<br />
que si elle est suffi samment refroidie (suivre<br />
les instructions pour le remplacement de la<br />
lampe).<br />
Pour remplacer la lampe<br />
• Couper la tension secteur.<br />
• Dévisser les deux vis et enlever le verre de<br />
protection.<br />
• Dévisser avec précaution la lampe (une fois<br />
refroidie).<br />
• Visser la nouvelle lampe dans le socle.<br />
• Avant de remettre sous tension, remettre en<br />
place le verre de protection et le cadre avec<br />
les garnitures d'étanchéité.<br />
Инструкция по монтажу и обслуживанию светильника<br />
для влажных помещений (из литого под давлением алюминия)<br />
Области применения<br />
Сауны и парные кабины<br />
Инструкция по монтажу<br />
В первую очередь проверьте, не был ли<br />
поврежден светильник во время транспортировки.<br />
При наличии повреждений, полученных при<br />
перевозке, сообщите об этом продавцу.<br />
Перед началом монтажа отключите питание и<br />
действуйте, как описано ниже:<br />
(1)Введите подающий провод через<br />
предохранительное кольцо цоколя лампы.<br />
(2) Вставьте провода в предусмотренные для этого<br />
защитные трубки.<br />
Провода, находящиеся вблизи патрона лампы,<br />
должны быть полностью закрыты, т.е. один<br />
конец защитной трубки должен доходить до<br />
предохранительного кольца, а другой - до<br />
отверстия защитной пластины на патроне<br />
лампы.<br />
(3) В соответствии с предписаниями соедините<br />
провода с патроном лампы, корпус лампы<br />
должен быть заземлен.<br />
(4) Болтами закрепите корпус лампы на монтажной<br />
поверхности.<br />
(5) Установите лампу накаливания максимальной<br />
мощностью 40 Вт и цоколь Е27.<br />
(6) Зафиксируйте защитное стекло и уплот-нения<br />
на раме лампы и с помощью двух болтов<br />
закрепите эти детали на корпусе.<br />
Adresse de service:<br />
<strong>EOS</strong>-<strong>Werke</strong> <strong>Günther</strong> <strong>GmbH</strong>, Adolf-Weiß-Str.43,<br />
35759 Driedorf, Germany<br />
tel +49 (0)2775 82-240, fax +49 (0)2775 82-455<br />
servicecenter@eos-werke.de<br />
www.eos-werke.de<br />
Правила техники безопасности<br />
• После включения питания лампа сильно<br />
нагревается. Если светильник включен<br />
или полностью не остыл, не касайтесь его<br />
незащищенными руками.<br />
• При замене лампы сначала отключите питание<br />
и меняйте лампу только, когда она достаточно<br />
остынет (точно соблюдайте указания по замене<br />
лампы).<br />
Инструкция по замене лампы<br />
• Отключите питание<br />
• Извлеките два болта и снимите защитное<br />
стекло с рамы лампы<br />
• Осторожно выкрутите остывшую лампу<br />
• Осторожно вкрутите новую чистую лампу<br />
• Перед повторным включением питания установите<br />
на место защитное стекло и раму лампы с<br />
уплотнениями.<br />
Адрес сервисного центра:<br />
ООО „Др.Керн-ЭОС“<br />
117454, Москва, проспект Вернадского, 78,<br />
строение 9<br />
Телефоны: +7 (495) 564-8772, 564-8773,<br />
995-9744, 775-9965<br />
Факс: +7 (495) 564-8773<br />
info@eos-werke.ru<br />
www.eos-werke.ru