Leg Exercises - Sport-Thieme
Leg Exercises - Sport-Thieme
Leg Exercises - Sport-Thieme

Create successful ePaper yourself
Turn your PDF publications into a flip-book with our unique Google optimized e-Paper software.
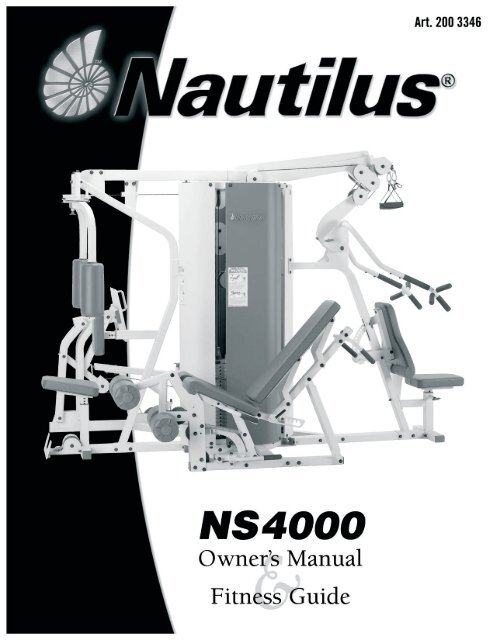
Art. 200 3346<br />
~ I.<br />
-,<br />
I<br />
I:<br />
•<br />
• L..:!I~..<br />
l .. • :::-<br />
.~).._~-.-._~~.<br />
. .. ~<br />
•<br />
••<br />
•<br />
NS4000<br />
Owner's Manual<br />
Fitness Guide
WARNING!<br />
Before beginning any exercise program consult<br />
your physician or health care professional. Only he<br />
or she can determine the exercise program that is<br />
appropriate for your particular age and condition.<br />
If you experience any lightheadedness, dizziness,<br />
or shortness of breath while exercising, stop the<br />
exercise and consult your physician.<br />
For Your Safety<br />
Please Follow These Instructions<br />
• Since reading and understanding all warnings and<br />
instructions contained in the owner’s manual is essential<br />
to safe operation, you must read and understand this<br />
owner’s manual prior to using your machine.<br />
• Keep your body weight centered on the machine or bench<br />
while exercising.<br />
• Be certain that weight pins are completely inserted prior<br />
to exercising.<br />
• Make sure the weight stack or top plate is never pinned<br />
in an elevated position. Do not use the machine if it is<br />
found in this position. Call your repair facility or consult<br />
your assembly guides if this occurs.<br />
• Inspect all cables, belts or chains and their connections<br />
prior to every exercising. Do not use the machine if any<br />
component is found worn or damaged.<br />
• Never use dumbbells or any other means to incrementally<br />
increase the machine’s weight resistance, other than those<br />
means provided by Nautilus.<br />
• Never allow children on the machine. Teenagers should<br />
always have parental supervision in the use of this<br />
machine .<br />
• Never move or adjust the bench while sitting or lying on<br />
the bench. Never stand on the bench.<br />
• Before exercising, make sure the spring lock seat pin is<br />
securely fastened and the bench is firmly in place.<br />
• Inspect your machine before each workout. Periodically<br />
check all fasteners to make sure none have loosened with<br />
use. Tighten if necessary.<br />
• Never attempt to exercise with more resistance than you<br />
are physically able to handle.
Getting To Know Your Machine<br />
When you buy any exercise equipment, you need stability.<br />
You want durability. But these two qualities alone are not<br />
enough. You need equipment that’s designed by people who<br />
understand the importance of anatomical correctness during<br />
exercise.<br />
At Nautilus, our expertise in the science of human<br />
performance goes into every piece of equipment we offer. We<br />
design our machines to be stable, comfortable and to provide<br />
the body support you need to exercise with proper form,<br />
while avoiding injury.<br />
As a supplier of fitness equipment to health clubs worldwide,<br />
the Nautilus name has become synonymous with<br />
• Ultimate performance<br />
• Optimum results, and<br />
• Maximum durability.<br />
As you pursue your fitness goals, you trust that the same care<br />
and craftsmanship goes into our full line of home gym<br />
equipment, too.<br />
Nautilus ® ... Making the world stronger since 1970.<br />
THE NAUTILUS NS 4000 WEIGHT MACHINE<br />
Dual Pull<br />
Down Station<br />
Pec Dec<br />
Station<br />
Press Arm<br />
Station<br />
<strong>Leg</strong> Press<br />
1<br />
Low Pulley<br />
Station<br />
<strong>Leg</strong> Extension/<br />
<strong>Leg</strong> Curl Station
Using Your Machine<br />
Weight Selection and<br />
Adjustment<br />
To adjust weight, make certain<br />
weight stack is not in use or lifted.<br />
Simply pull the weight pin from<br />
the weight stack and select the<br />
desired weight. Insert pin<br />
completely and make certain it is<br />
locked into place before lifting. In<br />
general, always start with lower weights and work up to<br />
find the weight most appropriate for your goals and capacity.<br />
Seat Height Adjustment<br />
To adjust the seat, pull the seat<br />
pin from the side of the machine.<br />
Facing the machine, the<br />
adjustment is on the right side,<br />
under the seat. This adjustment<br />
cannot be done while you are<br />
sitting on the seat, so you’ll want<br />
to position yourself back on the<br />
seat after the adjustment to ensure<br />
proper seat alignment. Proper seat<br />
alignment ensures exercise<br />
efficiency and comfort, while<br />
reducing the risk of injury.<br />
Seat Back Adjustment<br />
Proper arm length extension for<br />
seated rows, chest presses, rear<br />
delts, etc. Completed through<br />
using the commercial-grade<br />
adjustment. Simply pull the<br />
pop pin and place seat back in<br />
desired position.<br />
Dual Pull Down Station<br />
This innovative station allows for<br />
complete freedom of movement<br />
which will more effectively target the<br />
muscles. This station also has the<br />
ability to perform many of the<br />
exercises in this manual using each<br />
arm separately. You may find this<br />
helpful if an injury prevents the use<br />
of both arms.<br />
Pec Dec Arm Adjustment<br />
Pop pin adjustment allows proper<br />
arm positioning on Pec Dec<br />
exercises. Also allows arms to move<br />
out of the way for storage. Simply<br />
pull pin up and place in proper<br />
position.<br />
Press Arm Adjustment<br />
This pop pin adjustment allows<br />
proper positioning of all chest<br />
exercises, seated rows, and moves the<br />
arms out of the way for storage.<br />
Simply pop the pin out and move it<br />
until you reach a comfortable arm<br />
position. As a general rule, never<br />
start chest exercises behind your<br />
shoulders.<br />
2
Using Your Machine<br />
Using Cable Station Hand Grips<br />
These handgrips offer a variety of grips detailed below as<br />
well as two length adjustments.<br />
For the longer length adjustment simply attach the longer of<br />
the two D-rings to the cable attachment clip. For the shorter<br />
adjustment, attach the shorter D-ring as shown.<br />
Regular Grip<br />
Grasp the handle and cuff together to form a grip without<br />
inserting your hand through the cuff portion. Most of the<br />
exercises you perform utilize this grip.<br />
Hand Cuff Grip<br />
Slip your hand through the cuff portion of the grip so that<br />
the foam pad rests on the back of your hand. Then grasp the<br />
remainder of the grip that is sitting in your palm.. This method<br />
of gripping is great for exercises like front shoulder raises or any<br />
exercise where your palm is facing down.<br />
Grips manufactured under license agreement with Hands-On<br />
<strong>Sport</strong>s & Gym Accessories Inc. Patent # 4756527<br />
Machine Maintenance<br />
Daily – Before each use you should inspect your weight machine to ensure that the cables and pulleys are in good condition<br />
and operating smoothly. If cable appears to have any damage, including bulging, discoloration or any wires are exposed,<br />
DO NOT USE MACHINE. Contact your authorized Nautilus Fitness Dealer to service machine. After each use, wipe machine<br />
free of sweat with a clean, dry cloth. Upholstery can be cleaned with a mild detergent or spray cleaner.<br />
Weekly – If used often, your machine should be thoroughly cleaned using a clean cloth and an ammonia-based cleaner. Wipe<br />
machine down completely and be sure to touch up any scratches with touch-up paint to prevent rusting.<br />
Twice Yearly – To keep your machine operating smoothly and looking good for many years to come, you want to clean and<br />
lubricate the machine’s Guide Rods. Clean the long chrome rods thoroughly using a clean cloth and ammonia cleaner. Wipe<br />
rods completely dry. Spray a generous amount of silicon lubricant on the rods.<br />
3
Defining Your Goals<br />
Your body will do what you train it to do. That’s why it’s important to define your goals and focus on those goals. Here are<br />
some fitness components that will help you define your goals and choose your fitness program.<br />
MUSCLE STRENGTH is the maximum force you can exert<br />
against resistance at one time. Your muscle strength comes<br />
into play when you pick up a heavy bag of groceries or lift<br />
a small child. It is developed when a localized muscle is<br />
worked both positively (concentric) and negatively<br />
(eccentric) at a resistance great enough to perform only five<br />
to eight repetitions of the exercise before the muscle fails.<br />
Each set of repetitions is followed by a rest interval that<br />
typically runs three times longer than the set. Later,<br />
between exercise sessions, the muscle overcompensates for<br />
the stress and usually increases in both strength and size.<br />
MUSCLE ENDURANCE is the ability to perform repeated<br />
contractions. It comes into play when you cross-country<br />
ski or work on your feet all day. Endurance training<br />
addresses the slow twitch, endurance muscle fibers, which<br />
depend on oxygen for energy. To develop muscle<br />
endurance, use low resistance and high repetitions — about<br />
15-20 repetitions in each set, three sets to each exercise,<br />
working the muscle only to fatigue.<br />
MUSCLE POWER is the combination of strength and<br />
speed of the muscular contraction. This is often<br />
misinterpreted as:<br />
a) Being directly associated with certain skill or sport<br />
and/or<br />
b) Meaning that you must move fast.<br />
Load is actually a more important factor than speed when<br />
attempting to improve power. When training to achieve<br />
muscular power, pick a resistance that fatigues you in the 3-<br />
5 repetition range. When performing these reps, it is more<br />
important to think of contracting the muscles faster rather<br />
than attempting to move faster. Performing sport simulation<br />
exercises usually results in a deterioration of the motor<br />
pattern or skill. The biomechanically sound method of<br />
improving power in your sport is to train for power using<br />
the correct joint movements, as described in this manual.<br />
Then practice the skill associated with your sport, learning<br />
to apply this newly achieved power.<br />
BODY COMPOSITION is the ratio of fat weight (fat) to<br />
lean weight (muscles, bones and tissue). As you age, the<br />
ratio shifts. The fat weight increases and the lean weight<br />
decreases. Training for muscle strength will generally<br />
increase muscle size and aerobic conditioning will help burn<br />
extra calories. Performing these two forms of exercise, either<br />
at different times or together, will create the greatest changes<br />
in body fat weight.<br />
BALANCED STRENGTH and alignment is the result of<br />
equal strength developed in all parts of the body. It comes<br />
into play in your standing and sitting posture, and in your<br />
ability to perform just about any activity safely and<br />
effectively. An over-development of the back will round the<br />
shoulders; weak or stretched abdominals can cause lower<br />
back pain. You want a balance of muscle strength in front<br />
and back. In addition, you need a balance of strength<br />
between your middle, lower, and upper body.<br />
FLEXIBILITY is the ability of a muscle or group of muscles<br />
to move the joint through a full range of motion. Flexibility<br />
comes into play when you execute an overhand serve or<br />
stretch for the top shelf in the kitchen. It is a cooperative<br />
movement of opposite muscle groups. When a muscle<br />
contracts, its opposite muscle group must relax for the<br />
action to occur. Increased flexibility means an increased<br />
range of motion, made possible by this simultaneous<br />
contracting and relaxing. Good flexibility is important in<br />
protecting the body from injury and can be achieved<br />
through the balanced strength training programs included<br />
in this manual.<br />
CARDIOVASCULAR ENDURANCE is the ability of the<br />
heart and lungs to supply oxygen and nutrients to<br />
exercising muscles over an extended period of time. It<br />
comes into play when you jog a mile or ride a bike. It is a<br />
critical component of overall fitness and health. Any<br />
exercise program must be supplemented with<br />
cardiovascular training.<br />
4
Reaching Your Goals<br />
To reach your goals you must follow a consistent, well<br />
designed program that provides balanced development to<br />
all parts of the body and includes both aerobic and strength<br />
exercise. Only then will you meet your goals safely and<br />
efficiently.<br />
The workout routines found in this manual are<br />
professionally designed and written to target specific fitness<br />
goals. Should you not find one specific program to your<br />
liking, you can design your own, based on sound<br />
information and the principles found in this manual.<br />
Designing Your Own Program<br />
You may want to design your own personal program<br />
specifically geared to your goals and lifestyle. Designing a<br />
program is easy, as long as you follow these guidelines.<br />
Understand fitness and its components: Improperly<br />
designed programs can be dangerous. Take some time to<br />
review this manual as well as other fitness guides.<br />
Know your current fitness level: Before you start any<br />
fitness program you should consult a physician who will<br />
help you determine your current abilities.<br />
Identify your goals: Goals are critical to choosing and<br />
designing an exercise program that fits and enhances your<br />
lifestyle, but so is strategy. It’s important not to rush the<br />
process and try to accomplish too much too soon. That will<br />
lead to setbacks and discouragement. Instead, set a series of<br />
smaller achievable goals.<br />
Select complementary exercises: Be sure to pair exercises<br />
that address compound joint movements and single joint<br />
movements. In addition, select exercises that address<br />
complementary muscle groups.<br />
Put first things first: During each session, first work those<br />
muscle groups that need the most training.<br />
Defining Your Goals<br />
Remember your cardiovascular component: Any fitness<br />
program must contain a cardiovascular fitness component<br />
to be complete. So complement your resistance training<br />
with aerobic exercise such as walking, running, or<br />
bicycling.<br />
Training variables: When designing your own program<br />
there are several variables that, when mixed properly, will<br />
equal the right fitness formula for you. In order to find the<br />
best formula, you must experiment with several<br />
combinations of variables. The variables are as follows:<br />
• Training Frequency: The number of times you train per<br />
week. We recommend daily activity but not daily<br />
training of the same muscle group.<br />
• Training Intensity: The amount of resistance used during<br />
your repetition.<br />
• Training Volume: The number of repetitions and sets<br />
performed.<br />
• Rest intervals: The time you rest between sets and the<br />
time you rest between workouts.<br />
Once you’ve established a base of fitness, follow these basic<br />
principles:<br />
• Isolate muscle groups: Focus work on specific muscle<br />
groups.<br />
• Progressive Loading: The gradual systematic increase of<br />
repetitions, resistance and exercise period.<br />
5
The Workouts<br />
20 MINUTE BETTER BODY WORKOUT<br />
FREQUENCY: 3 DAYS PER WEEK (M-W-F) TIME: ABOUT 20 MINUTES<br />
Start by performing one set of each exercise. Warm up with a light resistance exercise that you can perform easily for 5 -10 reps without fatiguing. Focus<br />
on practicing and learning your technique before increasing the resistance. Then move to a more challenging resistance you can perform for no less than<br />
10 reps and no more than 15 reps without your form deteriorating. As you become stronger, you can advance to two sets for each exercise. Complete all<br />
sets of each exercise before moving on to the next. Rest 30 to 45 seconds between sets. Move slowly on each rep. Use a pace that will allow you to stop the<br />
movement instantly at any point in the rep. Count three seconds up and three seconds down and work to fatigue during each set.<br />
Body Part<br />
Chest<br />
Back<br />
Shoulders<br />
Arms<br />
<strong>Leg</strong>s<br />
Trunk<br />
Exercise<br />
Chest Press<br />
Seated Low Rows<br />
Standing Lateral Shoulder Raise<br />
Standing Biceps Curl<br />
Triceps Pushdown<br />
<strong>Leg</strong> Press<br />
<strong>Leg</strong> Curl<br />
Calf Extension<br />
<strong>Leg</strong> Extension<br />
Abdominal Crunch<br />
Sets<br />
1-2<br />
1-2<br />
1-2<br />
1-2<br />
1-2<br />
1-2<br />
1-2<br />
1-2<br />
1-2<br />
1-2<br />
Reps<br />
10-15<br />
10-15<br />
10-15<br />
10-15<br />
10-15<br />
10-15<br />
10-15<br />
10-15<br />
10-15<br />
10-15<br />
ADVANCED GENERAL CONDITIONING<br />
FREQUENCY: 4 DAYS PER WEEK (M-T-Th-F) TIME: ABOUT 35-45 MINUTES<br />
When you are proficient in performing the exercise techniques of the above routine and are no longer realizing results, or if you become bored, it is time to<br />
change your program. You can increase your training with this “split system” routine that works opposing muscle groups on different days. To do this,<br />
you’ll increase your resistance when you can perform 12 reps perfectly, and you’ll increase your volume by performing more sets and more exercises. Move<br />
slowly on each rep. Use a pace that will allow you to stop the movement instantly at any point in the rep. Count three seconds up and three seconds down<br />
and work to fatigue during each set.<br />
Day 1 & 3<br />
Body Part<br />
Chest<br />
Shoulders<br />
Arms<br />
<strong>Leg</strong>s<br />
Exercise<br />
Chest Press<br />
Chest Fly<br />
Seated Shoulder Press<br />
Seated Triceps Pushdown<br />
Triceps Pushdown<br />
<strong>Leg</strong> Press<br />
<strong>Leg</strong> Extension<br />
<strong>Leg</strong> Curl<br />
Calf Extension<br />
Sets<br />
1-3<br />
1-3<br />
1-3<br />
1-3<br />
1-3<br />
1-3<br />
1-3<br />
1-3<br />
1-3<br />
Reps<br />
10-12<br />
10-12<br />
10-12<br />
10-12<br />
10-12<br />
10-12<br />
10-12<br />
10-12<br />
10-12<br />
Day 2 & 4<br />
Body Part<br />
Back<br />
Shoulders<br />
Arms<br />
Trunk<br />
Exercise<br />
Seated Lat Rows<br />
Wide Pulldowns<br />
Standing Lateral Shoulder Raise<br />
Standing Biceps Curl<br />
Abdominal Crunch<br />
Sets<br />
1-3<br />
1-3<br />
1-3<br />
1-3<br />
1-3<br />
Reps<br />
10-12<br />
10-12<br />
10-12<br />
10-12<br />
10-12<br />
6
The Workouts<br />
COMPLETE CONDITIONING<br />
FREQUENCY: 3 DAYS ON, 1 DAY OFF<br />
TIME: ABOUT 45-60 MINUTES<br />
Body building requires focused concentration and dedication to training, as well as proper eating habits. Train each muscle group to failure before moving<br />
on to the next exercise. Do not neglect any muscle group. If needed, include an aerobic activity to increase your caloric expenditure and help to reduce<br />
your body fat levels to achieve a defined muscular look. Rest 30-60 seconds between each set and exercise. Focus on proper form. Tighten the muscle<br />
before you move, squeeze the muscle as you move, cramp the muscle at the point of full contraction, and resist the movement as you lower the weight.<br />
Move slowly on each rep. Use a pace that will allow you to stop the movement instantly at any point in the rep. Count three seconds up and three<br />
seconds down and work to fatigue during each set.<br />
DAY 1<br />
Body Part<br />
Chest<br />
Shoulders<br />
Exercise<br />
Chest Press<br />
Chest Fly<br />
Incline Chest Press<br />
Seated Shoulder Press<br />
Seated Low Rows<br />
Shoulder Raise<br />
Sets<br />
2-4<br />
2-4<br />
2-4<br />
2-4<br />
2-4<br />
2-4<br />
Reps<br />
8-12<br />
8-12<br />
8-12<br />
8-12<br />
8-12<br />
8-12<br />
DAY 2<br />
Body Part<br />
Back<br />
Arms<br />
Exercise<br />
Seated Lat Rows<br />
Wide Pulldowns<br />
Standing Biceps Curl<br />
Triceps Pushdown<br />
Sets<br />
2-4<br />
2-4<br />
2-4<br />
2-4<br />
Reps<br />
8-12<br />
8-12<br />
8-12<br />
8-12<br />
DAY 3<br />
Body Part<br />
<strong>Leg</strong>s<br />
Trunk<br />
Exercise<br />
<strong>Leg</strong> Press<br />
<strong>Leg</strong> Extension<br />
Standing Hip Extension<br />
<strong>Leg</strong> Curl<br />
Calf Extension<br />
Abdominal Crunch<br />
Sets<br />
2-4<br />
2-4<br />
2-4<br />
1-3<br />
2-4<br />
2-4<br />
Reps<br />
8-12<br />
8-12<br />
8-12<br />
8-12<br />
12-15<br />
8-12<br />
7
The Workouts<br />
STRENGTH TRAINING<br />
FREQUENCY: 3 DAYS PER WEEK (M-W-F)<br />
TIME: ABOUT 45-60 MINUTES<br />
This program is designed to emphasize overall strength development. This is an advanced routine to be used only after you have progressed from the<br />
advanced general conditioning routine and only after you have perfected your exercise techniques. Work each set to near exhaustion. If you can perform<br />
more than 5 to 8 reps, you should increase your resistance 10 lbs. and decrease your reps to 5. Rest 60 - 120 seconds between each set and exercise. Focus<br />
on proper form. Tighten the muscle before you move, squeeze the muscle as you move, cramp the muscle at the point of full contraction, and resist the<br />
movement as you lower the weight. Move slowly on each rep. Use a pace that will allow you to stop the movement instantly at any point in the rep. Count<br />
two seconds up and four seconds down and work to fatigue during each set.<br />
Day 1<br />
Body Part<br />
Chest<br />
Shoulders<br />
Exercise<br />
Chest Press<br />
Shoulder Press<br />
Standing Lateral Raise<br />
Shoulder Raise<br />
Sets<br />
2-4<br />
2-4<br />
2-4<br />
2-4<br />
Reps<br />
5-8<br />
5-8<br />
5-8<br />
5-8<br />
Day 2<br />
Body Part<br />
Back<br />
Arms<br />
Exercise<br />
Low Row<br />
Wide Pulldowns<br />
Standing Biceps Curl<br />
Triceps Extension<br />
Standing Triceps Kickback<br />
Sets<br />
2-4<br />
2-4<br />
2-4<br />
2-4<br />
2-4<br />
Reps<br />
5-8<br />
5-8<br />
5-8<br />
5-8<br />
5-8<br />
Day 3<br />
Body Part<br />
<strong>Leg</strong>s<br />
Trunk<br />
Exercise<br />
<strong>Leg</strong> Press<br />
<strong>Leg</strong> Extension<br />
<strong>Leg</strong> Curl<br />
Calf Extension<br />
Low Back Extension<br />
Abdominal Crunch<br />
Sets<br />
2-4<br />
2-4<br />
2-4<br />
2-4<br />
2-4<br />
2-4<br />
Reps<br />
5-8<br />
5-8<br />
5-8<br />
5-8<br />
8-12<br />
5-8<br />
8
Chest <strong>Exercises</strong><br />
CHEST PRESS<br />
Muscles worked: This exercise emphasizes the<br />
chest muscles (pectoralis major). It also involves<br />
the front shoulder muscles (anterior deltoid, a<br />
portion of the middle deltoid) and the triceps,<br />
which are located on the back of the upper arm.<br />
Starting Position:<br />
• In the seated position, reach to the side of<br />
your body and grasp the handles at chest<br />
level. Bend your elbows until your hands are<br />
near your chest. Rotate your upper arms away<br />
from your torso so that your elbows are<br />
pointing outward to each side and your palms<br />
are facing forward.<br />
• Raise your chest and slightly "pinch" your<br />
shoulder blades together. Maintain a very<br />
slight, comfortable, arch in your lower back.<br />
Motion:<br />
• Slowly move your elbows outward,<br />
simultaneously bending your arms so that<br />
your forearms remain parallel to each other<br />
and the hands remain over the elbows<br />
throughout the movement.<br />
• Stop when your upper arms are<br />
approximately straight out to your side<br />
(elbows should be about level with your<br />
shoulders).<br />
• Slowly return to the starting position with<br />
arms straight to the front at shoulder width<br />
and in line with your chest. Keep your chest<br />
muscles tightened during the entire motion.<br />
Key points:<br />
• Limit and control the range of motion so that<br />
your elbows only travel slightly below the<br />
shoulders if at all.<br />
START<br />
FINISH<br />
INCLINE CHEST PRESS<br />
Muscles worked: This exercise emphasizes the<br />
chest muscles (pectoralis major), especially the<br />
upper portion. It also involves the front<br />
shoulder muscles (anterior deltoid, a portion<br />
of the middle deltoid) and the triceps, which<br />
are located on the back of the upper arm.<br />
Starting position:<br />
• In the seated position, grasp the handles,<br />
and bend your elbows until your hands are<br />
near your chest. Rotate your upper arms<br />
away from your torso so that your elbows<br />
are pointing outward to each side and your<br />
palms are facing down.<br />
• Adjust the seat back tilt forward to the third<br />
or fourth incline position depending on your<br />
comfort level.<br />
• Hands are positioned just outside of your<br />
upper chest, with palms facing down and<br />
wrists straight.<br />
Motion:<br />
• Slowly move your elbows outward at a<br />
45 degree angle to your body, simultaneously<br />
bending your arms so that your forearms<br />
remain parallel to each other and the<br />
hands remain over the elbows throughout<br />
the movement.<br />
• Stop when your upper arms are<br />
approximately straight out to the sides (your<br />
elbows will be level with your shoulders or<br />
very slightly below).<br />
Key points:<br />
• Limit and control the range of motion so<br />
that your elbows travel only slightly behind<br />
your shoulders — if at all.<br />
• For normal pressing/pushing patterns of<br />
movement you may choose to allow the<br />
shoulder blades to "float" forward and<br />
backward naturally with the arm movement,<br />
or for increased pec involvement you may<br />
keep the shoulder blades "pinched" together<br />
throughout both the upward and downward<br />
movements.<br />
START<br />
FINISH<br />
10
Chest <strong>Exercises</strong><br />
CHEST FLY — Shoulder Horizontal Adduction<br />
Muscles Worked: This exercise emphasizes the<br />
chest muscles (pectoralis major), also involving the<br />
front shoulder muscles (anterior deltoid).<br />
Starting Position:<br />
• Adjust the seat so that your upper arm is level<br />
with the floor.<br />
• Keeping your back straight, place your forearms<br />
against the roller pads.<br />
• Be sure that your upper arms are level with your<br />
chest, palms facing forward and wrists straight.<br />
• Raise your chest and slightly “pinch” your<br />
shoulders together. Maintain a very slight,<br />
comfortable, arch in your lower back.<br />
Motion:<br />
• Slowly move your hands together, maintaining<br />
the elbow in a bent position throughout<br />
the movement.<br />
• Slowly return to the starting position keeping<br />
your chest muscles tightened during the entire<br />
motion.<br />
Key Points:<br />
• Maintain a 90 degree angle between the upper<br />
arms and the torso throughout the exercise.<br />
• Limit and control the range of motion so that<br />
your elbows travel only slightly behind your<br />
shoulders if at all.<br />
START<br />
FINISH<br />
Abdominal <strong>Exercises</strong><br />
ABDOMINAL CRUNCH — Spinal Flexion<br />
Muscles worked: This exercise emphasizes the<br />
abdominal area including the upper and lower<br />
front abs (rectus abdominous) and the side abs<br />
(obliques).<br />
Starting position:<br />
• Seat back should be adjusted to the farthest<br />
back position.<br />
• Grasp the Ab Crunch handles with palms<br />
facing together and elbows close together.<br />
• Your lower back can start out flat or in a<br />
normal arch, knees and hips are bent and<br />
your feet are on the support pegs.<br />
Motion:<br />
• Tighten your abs and curl only your torso,<br />
slowly moving your ribs toward your hips.<br />
Move as far as you can without moving the<br />
hips or neck.<br />
• Slowly reverse the motion returning to the<br />
starting position, without relaxing.<br />
Key points:<br />
• Allow exhalation up and inhalation down,<br />
don’t exaggerate it.<br />
• Do not lift your head/chin. Your head should<br />
follow the rib motion, not lead, allowing you<br />
to maintain normal neck posture.<br />
• Tighten your abdominals throughout the<br />
entire exercise range of motion. Do not let<br />
your abs relax until the set is over.<br />
• MOVING SLOWLY to eliminate momentum<br />
is critical.<br />
START<br />
FINISH<br />
11
Shoulder <strong>Exercises</strong><br />
REAR DELT<br />
Muscles worked: This exercise emphasizes the back<br />
of the shoulder muscles (rear deltoid) as well as the<br />
posterior rotator cuff. Also works the trapezius and<br />
rhomboid muscles in the upper back.<br />
Starting position:<br />
• Sit on the bench facing the machine, knees bent<br />
and feet flat on the floor.<br />
• Adjust the range of motion pin so that arms are<br />
in the first or second adjustment hole depending<br />
on your flexibility.<br />
• Adjust the seat back so that the center of<br />
your shoulder is aligned with the pivot point<br />
of the machine.<br />
• Your back should be straight and your chest<br />
should be against the seat back pad.<br />
• Place the back of your upper arm against the roller<br />
pads. Both your upper and lower arms should be<br />
flat and level to the floor.<br />
Motion:<br />
• Moving at the shoulders, move your elbows as<br />
far back as possible pinching your shoulder<br />
blades together at the end of the movement.<br />
• With elbows bent, return slowly to the<br />
starting position.<br />
Key points:<br />
• Do not move your back or hips during exercise.<br />
• Do not allow the weights to come to rest<br />
during exercise.<br />
• Move only at shoulders, your arms should remain<br />
bent and level with the floor at all times.<br />
START<br />
FINISH<br />
FRONT SHOULDER RAISE — Shoulder Flexion (elbow stabilized near extension)<br />
Muscles worked: This exercise emphasizes the<br />
front portion of the shoulder muscles (front<br />
deltoids as well as the front part of the middle<br />
deltoids).<br />
Starting position:<br />
• Stand facing away from the machine.<br />
• Keep your chest up, abdominals tight and<br />
maintain a slight arch in your lower back.<br />
• Grasp handles with your palms facing<br />
backward and arms straight at your sides.<br />
Motion:<br />
• Keeping your arms straight, move them<br />
forward then upward to shoulder height.<br />
• Slowly return the arms beside the torso and<br />
repeat.<br />
START<br />
Key points:<br />
• Keep the chest lifted and the abdominals<br />
tightened throughout the entire motion and<br />
maintain good spinal alignment.<br />
• Do not increase the arch in your lower back<br />
while lifting your arms.<br />
FINISH<br />
12
Shoulder <strong>Exercises</strong><br />
SEATED SHOULDER PRESS — Shoulder Abduction (and elbow extension)<br />
Muscles worked: This exercise emphasizes<br />
the front shoulder muscles (anterior deltoid,<br />
a portion of the middle deltoid) and the<br />
triceps, which are located on the back of the<br />
upper arm.<br />
Starting position:<br />
• In the seated position, grasp the handles,<br />
and bend your elbows until your hands are<br />
near your chest. Rotate your upper arms<br />
away from your torso so that your elbows<br />
are pointing outward to each side and your<br />
palms are facing down.<br />
• Adjust the seat back tilt forward to the fifth or<br />
sixth incline position depending on our<br />
comfort level<br />
• Hands are positioned just outside of your<br />
upper chest, with palms facing together<br />
and wrists straight.<br />
• Stop when your upper arms are<br />
approximately straight out to the sides (your<br />
elbows will be level with your shoulders or<br />
very slightly below).<br />
Key points:<br />
• Limit and control the range of motion so<br />
that your elbows travel only slightly behind<br />
your shoulders — if at all.<br />
• For normal pressing/pushing patterns of<br />
movement you may choose to allow the<br />
shoulder blades to "float" forward and<br />
backward naturally with the arm movement,<br />
or for increased pec involvement you may<br />
keep the shoulder blades "pinched" together<br />
throughout both the upward and downward<br />
movements.<br />
START<br />
Motion:<br />
• Slowly move your elbows outward,<br />
simultaneously bending your arms so that<br />
your forearms remain parallel to each other<br />
and the hands remain over the elbows<br />
throughout the movement.<br />
FINISH<br />
LATERAL SHOULDER RAISE — Shoulder Abduction (and elbow extension)<br />
Muscles worked: This exercise emphasizes the<br />
side shoulder muscles (middle deltoids), the<br />
top muscles of the rotator cuff (supraspinatus)<br />
and the upper trapezius muscles.<br />
Starting position:<br />
• Stand facing perpendicular to the low pulley<br />
station, grasp the handle with your farthest<br />
hand, palm facing the machine.<br />
• Place your opposite hand on your hip<br />
• Feet should be spaced shoulder width<br />
Motion:<br />
• Raise your arm so that it is level with the<br />
floor, do not go beyond this range.<br />
• Keep your elbow slightly bend during the<br />
movement.<br />
• Slowly lower your arm to the starting<br />
position without relaxing or resting the<br />
weight.<br />
START<br />
Key points:<br />
• Do not twist your trunk during this<br />
movement.<br />
• Do not bend your elbow during the exercise.<br />
• If you are unable to reach a full range of<br />
motion, lower the weight.<br />
FINISH<br />
13
Back <strong>Exercises</strong><br />
WIDE PULLDOWN — Shoulder Adduction (with elbow flexion)<br />
Muscles worked: This exercise emphasizes the<br />
latissimus dorsi, teres major and rear deltoid<br />
which make up the large pulling muscles of<br />
your upper back. It also involves the muscles<br />
on the front of your upper arms (the biceps<br />
group) which are responsible for bending<br />
your elbows.<br />
Starting position:<br />
• Facing the machine, grasp the handles with<br />
palms facing forward.<br />
• Position your knees directly under the<br />
seatback and sit upright with your arms<br />
extended up. NOTE: You may position<br />
your hips directly under the pulley but make<br />
sure to lean back slightly from the hips (not<br />
the waist)<br />
• Maintain good spinal alignment, chest lifted,<br />
abs tight and maintain a very slight arch in<br />
your lower back.<br />
Motion:<br />
• Initiate the movement by pulling your<br />
shoulder blades down and together while<br />
simultaneously drawing your elbows<br />
downward to the sides, and then inward,<br />
toward your trunk.<br />
• At the end of the motion your arms should<br />
be drawn near your sides, your shoulder<br />
blades should be fully depressed toward<br />
your hips and your forearms must be in<br />
line with the direction of the cables (not<br />
rotated forward).<br />
• Slowly return to the starting position<br />
allowing your arms and shoulder blades<br />
to move fully upward, without relaxing<br />
the muscles.<br />
Key points:<br />
• From the side view the forearms should<br />
appear to remain in line with the cable.<br />
• Do not lose spinal alignment.<br />
• Do not lean backward as you pull.<br />
• Keep the chest up, especially at the bottom<br />
of the movement.<br />
• Keep the lats tightened throughout the<br />
entire motion.<br />
• Do not move your elbows posteriorly on<br />
the way down.<br />
START<br />
FINISH<br />
REVERSE GRIP PULLDOWN — Shoulder Extension (with elbow flexion)<br />
Muscles worked: This exercise emphasizes the<br />
latissimus dorsi, teres major and rear deltoid<br />
which make up the large pulling muscles of<br />
your upper back. It also involves the muscles<br />
on the front of your upper arms (the biceps<br />
group) which are responsible for bending<br />
your elbows.<br />
Starting position:<br />
• Facing the machine, grasp the handles with<br />
an underhand grip.<br />
• Position your knees directly under the<br />
seatback and sit upright with your arms<br />
extending upward.<br />
• Maintain good spinal alignment, chest lifted,<br />
abs tight and maintain a very slight arch in<br />
your lower back.<br />
Motion:<br />
• Initiate the movement by pulling your<br />
shoulder blades down and together while<br />
simultaneously drawing your elbows<br />
downward to the front, and then back<br />
toward the sides of your body.<br />
• At the end of the motion, your arms should<br />
be drawn near your sides (although may<br />
not be touching your sides), your shoulder<br />
blades should be fully depressed toward<br />
your hips and your forearms must be<br />
upward in line with the direction of the<br />
cables (not forward).<br />
• Slowly return to the starting position<br />
allowing your arms and shoulder blades<br />
to move fully upward, without relaxing<br />
the muscles.<br />
Key points:<br />
• Do not lose spinal alignment.<br />
• Keep the lats tightened throughout the<br />
entire motion.<br />
• Do not lean backward as you pull.<br />
• Keep the chest up, especially at the bottom<br />
of the movement.<br />
• You will want to rotate your wrists during<br />
the movement so that your palms are facing<br />
away at the beginning, and facing up at the<br />
finish point.<br />
START<br />
FINISH<br />
14
Back <strong>Exercises</strong><br />
SEATED LOW ROW — Shoulder extension (with elbow flexion)<br />
Muscles worked: This exercise emphasizes the<br />
latissimus dorsi, teres major and rear deltoid<br />
muscles which make up the large pulling<br />
muscles of your upper back as well as the<br />
trapezius and rhomboids. The biceps muscles<br />
on the front of the upper arm are also involved<br />
in the movement.<br />
Starting position:<br />
• Sit on the floor facing the machine.<br />
• Grasp the hand grips with both hands in a<br />
overhand or palms down grip.<br />
• Place your heels on the footplate, with your<br />
knees bent comfortably.<br />
• Sit up straight with your spine in good<br />
alignment.<br />
Motion:<br />
• Initiate the movement by pinching your<br />
shoulder blades together while<br />
simultaneously drawing your elbows down<br />
and backward toward the sides of your body.<br />
• Continue moving the arms past the sides of<br />
the body.<br />
• Slowly return to the starting position,<br />
straightening the arm and letting the<br />
shoulder blades slide forward without<br />
slouching.<br />
Key points:<br />
• Try to maintain upright alignment at all<br />
times during the movement.<br />
• You will want to rotate your wrists during<br />
the movement so that your palms are facing<br />
away at the beginning, and facing up at the<br />
finish point.<br />
START<br />
FINISH<br />
REAR DELTOID ROWS/COMPOUND ROW — Shoulder Horizontal Abduction (with elbow flexion)<br />
Muscles worked: This exercise emphasizes the<br />
back portion of the shoulder muscles (the rear<br />
deltoids, as well as the rear portion of the<br />
middle deltoids, the posterior rotator cuff,<br />
upper lat and teres major) as well as the<br />
trapezius and rhomboids.<br />
Starting Position:<br />
• Sit on the bench facing the machine, knees<br />
bent and your feet flat on the floor.<br />
• Grasp the upper handles with your palms<br />
facing down and arms straight.<br />
• Sit up straight with your chest on the seat<br />
back and until arms/cables are in front of<br />
body at a 90 degree angle to your torso.<br />
• Lift your chest and slightly pinch your<br />
shoulder blades together.<br />
Motion:<br />
• Allowing your arms to bend as you go, move<br />
your elbows outward and backward keeping<br />
a 70-90 degree angle between your upper<br />
arms and the sides of your torso.<br />
• Move until your elbows are slightly behind<br />
your shoulders, then slowly reverse the<br />
motion keeping the rear shoulder muscles<br />
tightened during the entire motion.<br />
Key points:<br />
• Maintain a 90 degree angle between your<br />
upper arms and the sides of your torso<br />
during the exercise.<br />
• For normal pulling /rowing patterns of<br />
movement you may choose to allow the<br />
shoulder blades to "float" forward and<br />
backward naturally with the arm movement,<br />
or for increased rear deltoid involvement you<br />
may keep the shoulder blades "pinched"<br />
together throughout both the forward and<br />
backward movements.<br />
START<br />
FINISH<br />
15
Back <strong>Exercises</strong><br />
SINGLE ARM ROW — Shoulder Extension (with elbow flexion)<br />
Muscles worked: This exercise emphasizes the<br />
latissimus dorsi, teres major and rear deltoid<br />
muscles which make up the large pulling<br />
muscles of your back. The biceps muscles on<br />
the front of the upper arm are also involved in<br />
this exercise.<br />
Starting position:<br />
• Stand facing the low pulley station, grasp the<br />
hand grip in one hand while bracing your<br />
other hand on the machine<br />
• Your back should be at a 45 degree angle to<br />
the ground and knees should be slightly<br />
bend.<br />
• Keep your shoulders and head up and back<br />
arched.<br />
Motion:<br />
• Pull the handle straight back to your hip<br />
making sure not to rotate your hips during<br />
the last part of the movement<br />
• Slowly return the handle forward but do<br />
allow the weight to stretch your shoulder to<br />
far forward or cause your back to round.<br />
Key points:<br />
• Do not lose spinal alignment – keep chest<br />
lifted.<br />
• Release your shoulder blade at the end of<br />
each rep and initiate each new rep by<br />
retracting your shoulder blade.<br />
• Keep the Lat muscles tightened throughout<br />
the entire exercise.<br />
START<br />
FINISH<br />
UPRIGHT ROW — Shoulder Horizontal Abduction (and elbow flexion)<br />
Muscles worked: This exercise emphasizes the<br />
latissimus dorsi, teres major and rear deltoid<br />
muscles which make up the large pulling<br />
muscles of your upper back as well as the<br />
trapezius and rhomboids. The biceps muscles<br />
on the front of the upper arms are also<br />
involved in this movement.<br />
Key points:<br />
• Keep your shoulder blades “pinched”<br />
together during the movement.<br />
• Make sure your back is straight throughout<br />
the exercise.<br />
Starting position:<br />
• Stand facing the low pulley station with feet,<br />
shoulder width apart.<br />
• Grasp the hand grips with your palms facing<br />
down, back straight and head up.<br />
Motion:<br />
• Pull the bar straight upwards keeping in as<br />
close to the body as possible.<br />
• Elbows should bend outward until the hand<br />
grips are just below the chin.<br />
START<br />
FINISH<br />
16
Arm <strong>Exercises</strong><br />
TRICEPS KICKBACK<br />
Muscles worked: This exercise emphasizes the<br />
triceps muscles located on the back of the<br />
upper arms.<br />
Starting position:<br />
• Face the machine. Bend forward at the hips<br />
(not the waist). Bending one knee slightly,<br />
flatten your back by sticking your hips out<br />
and lifting your chest.<br />
• Grasp the handle.<br />
• Keeping your elbow bent, bring your upper<br />
arm to your side, parallel to the ground.<br />
• Place your other hand on the machine<br />
for stability.<br />
Motion:<br />
• Straighten elbow while keeping your upper<br />
arm completely still.<br />
• When arm is completely straight, slowly<br />
return to the starting position.<br />
Key points:<br />
• Maintain spinal alignment.<br />
• Keep your arm at your side and your wrist<br />
straight throughout entire motion.<br />
• Tighten the triceps throughout the exercise<br />
and control the motion.<br />
START<br />
FINISH<br />
TRICEPS PUSHDOWN — Elbow Extension<br />
Muscles worked: This exercise emphasizes the<br />
triceps muscles located on the back of the<br />
upper arms. These muscles are responsible for<br />
straightening your arms and assist in any<br />
upper body pushing or pressing motion.<br />
Starting position:<br />
• Grasp the handles, with your palms down.<br />
• Keeping your arms bent, bring your upper<br />
arms to your side and maintain.<br />
• Lift your chest and tighten your abdominals<br />
to stabilize your spine while maintaining a<br />
very slight arch in the lower back.<br />
Motion:<br />
• Keeping your upper arms stationary and<br />
your elbows next to the sides of your torso,<br />
slowly straighten your arms by arcing<br />
downward toward your legs.<br />
• Straighten your arms fully.<br />
• Controlling the motion, allow your elbows<br />
to bend, returning to the starting position<br />
without moving your upper arm.<br />
Key points:<br />
• Keep your upper arms motionless.<br />
• Keep wrists straight.<br />
• Tighten the triceps throughout the exercise<br />
and control the motion on the way up.<br />
• Maintain good posture by keeping your chest<br />
lifted, abs tight and maintain a very slight<br />
arch in your lower back.<br />
START<br />
FINISH<br />
17
Arm <strong>Exercises</strong><br />
STANDING BICEPS CURL — Elbow Flexion (in supination)<br />
Muscles worked: This exercise emphasizes<br />
and develops the biceps muscles, which are<br />
located on the front of your upper arms and<br />
are primarily responsible for bending your<br />
elbows, as well as the brachialis and<br />
brachioradialis.<br />
Starting position:<br />
• Facing the machine.<br />
• Bend down and grasp the handles with your<br />
palms facing forward.<br />
• Stand with your upper arms by your sides<br />
(although not "smashed" against them). Lift<br />
your chest, tighten your abdominals and<br />
maintain a very slight arch in your lower<br />
back.<br />
Motion:<br />
• Curl handles forward, then upward, and<br />
then in toward shoulders while keeping your<br />
elbows at your sides and your upper arms<br />
completely still.<br />
• Slowly lower to the starting position by<br />
performing the same arcing motion.<br />
Note: This exercise may be performed using<br />
both arms simultaneously, or by alternating<br />
between right and left arm.<br />
Key points:<br />
• Keep elbows at your sides.<br />
• Keep wrists straight.<br />
• Keep your trunk muscles tight and maintain<br />
a very slight arch in your lower back.<br />
START<br />
FINISH<br />
LEG PRESS<br />
Muscles worked: This exercise works all the<br />
major muscle groups in upper leg including<br />
the quadriceps which are the muscles on the<br />
front of the leg, the gluteus muscles of the<br />
buttock and the hamstring muscles on the<br />
back of the upper leg.<br />
Starting position:<br />
• Adjust the seat back so that your leg is bent<br />
at a 90-degree angle with your feet on the<br />
foot plate.<br />
• Place your feet on the foot plate at shoulder<br />
width apart with toes pointing straight up.<br />
• Back should be straight and hips should be<br />
firmly against the back pad. Grasp handles<br />
lightly at your side.<br />
<strong>Leg</strong> <strong>Exercises</strong><br />
Motion:<br />
• Bending at the knees, slowly extend your<br />
legs until legs are straight but knees are not<br />
locked out.<br />
• Knees should remain in line with the rest of<br />
your leg. Do not allow knees to bow in or out.<br />
• Slowly bend the knees back to a 90-degree<br />
angle and repeat.<br />
Key points:<br />
• Keep movement slow and controlled.<br />
• Do not allow the weight plates to rest during<br />
movement.<br />
• Do not bend legs more than 90 degrees or<br />
lock them out at the end of the rep.<br />
• Feet should remain flat against foot plate and<br />
should not move during exercise.<br />
START<br />
FINISH<br />
18
<strong>Leg</strong> <strong>Exercises</strong><br />
LEG EXTENSION<br />
Muscles worked: This exercise emphasizes<br />
the muscles on the front of the upper thigh<br />
(quadriceps muscle group) which are<br />
responsible for straightening your leg against<br />
resistance. This powerful muscle group helps<br />
provide stability for the knee joint and is<br />
essential for producing power in running,<br />
jumping and lifting activities.<br />
Starting position:<br />
• Sit on the seat facing away from the machine<br />
with your knees near the pivot point and the<br />
lower roller pads on the front of your<br />
shins/ankle.<br />
• Position your thighs at hip width pointing<br />
your knee caps straight to the front.<br />
• Grasp handles below the seat.<br />
• Sit up straight with your chest lifted, abs<br />
tight and maintain a very slight arch in your<br />
lower back.<br />
Motion:<br />
• Tighten your quads and straighten your legs<br />
by moving your feet forward and then<br />
upward until your legs are completely<br />
straight and your kneecaps are pointing up<br />
toward the ceiling (not turned outward).<br />
• Then slowly return to the starting position<br />
keeping tension in your quads during the<br />
entire movement.<br />
Key points:<br />
• Use slow controlled motion. Do not "kick"<br />
into extension.<br />
• Do not let your knees rotate outward during<br />
the exercise. Keep your kneecaps pointing<br />
up and straight forward.<br />
START<br />
FINISH<br />
LEG CURL — Knee stabilized in flexion<br />
Muscles worked: This exercise strengthens<br />
and develops the muscles of your buttocks<br />
area (gluteus maximus). Remember, there is<br />
no such thing as spot reduction. This exercise<br />
will not remove fat from this area, but it will<br />
strengthen and build these muscles.<br />
Starting position:<br />
• Adjustment level should be in the leg<br />
curl position.<br />
• Lay face down on cushion. Seat back should<br />
be adjusted all the way flat.<br />
• Place both ankles under the leg rollers with<br />
knees near the pivot point.<br />
• Grasp handles to stabilize your upper body.<br />
• Keep your spine in good posture, abs tight<br />
and maintain a very slight arch in your<br />
lower back.<br />
Motion:<br />
• Initiate the movement by tightening<br />
your glutes.<br />
• Slowly bend your legs as far as you can,<br />
without allowing ANY movement to<br />
occur at your waist.<br />
• Then slowly return to the starting position.<br />
Key points:<br />
• Do not “kick”when performing exercise.<br />
Move slow and controlled.<br />
• Keep your abs tight throughout the<br />
entire exercise.<br />
START<br />
FINISH<br />
19
<strong>Leg</strong> <strong>Exercises</strong><br />
STANDING HIP EXTENSION — Knee stabilized in flexion<br />
Muscles worked: This exercise strengthens<br />
and develops the muscles of your buttocks<br />
area (gluteus maximus). Remember, there is<br />
no such thing as spot reduction. This exercise<br />
will not remove fat from this area, but it will<br />
strengthen and build these muscles.<br />
Starting position:<br />
• Facing the machine.<br />
• Secure the cuff around the foot.<br />
• Bend over 30 - 45 degrees from your hips<br />
(not your waist) and very slightly bend the<br />
knee of your support leg.<br />
• Keep your spine in good posture, with your<br />
chest lifted, abs tight and maintain a very<br />
slight arch in your lower back.<br />
Key points:<br />
• Make sure all of your motion occurs at your<br />
hip, NOT your waist or low back.<br />
• Keep your abs tight throughout the entire<br />
exercise.<br />
• Maintain exactly the same bend in the knee<br />
of your moving leg throughout the entire<br />
exercise.<br />
START<br />
Motion:<br />
• Initiate the movement by tightening your<br />
glutes. Extend your hip by moving your<br />
entire leg backward.<br />
• Slowly move your leg as far as you can,<br />
without allowing ANY movement to occur at<br />
your waist.<br />
• Then slowly return to the starting position.<br />
FINISH<br />
CALF EXTENSION — Ankle Plantarflexion (knee stabilized in slight flexion)<br />
Muscles worked: This exercise is great for<br />
emphasizing the muscles of your lower leg<br />
or calf (gastrocnemius and soleus), which<br />
are responsible for raising and lowering your<br />
heels at the ankle joint. Strength and power<br />
in these muscles are essential for all sports<br />
and daily activities.<br />
Starting position:<br />
• Seated in leg press station.<br />
• Feet should be at shoulder width apart with<br />
the balls of your feet just below the foot plate.<br />
• <strong>Leg</strong>s should be straight but knees<br />
not locked.<br />
Motion:<br />
• Bending only at the ankles, allow the foot<br />
plate to come back to a comfortable stretch<br />
position on the calf muscles.<br />
• Extend your toes as far as possible as if<br />
standing on your toes to reach for something.<br />
• Slowly return to the starting position always<br />
maintaining proper posture.<br />
Key points:<br />
• Do not allow foot plate to fall back quickly.<br />
• Do not change your hip or knee position,<br />
ONLY ankle motion should be allowed.<br />
START<br />
FINISH<br />
20
<strong>Leg</strong> <strong>Exercises</strong><br />
STANDING HIP ABDUCTION<br />
Muscles worked: This exercise will not burn<br />
off fat from your hips or outer thigh! There is<br />
no exercise that will burn fat from a specific<br />
area. This exercise will, however, strengthen<br />
the muscles on the sides of your hips (gluteus<br />
medius), especially on the standing/support<br />
side. Use light resistance and controlled range<br />
of motion on this exercise. You may also<br />
think of this exercise as a tool for challenging<br />
your ability to stabilize your hip on the<br />
supportive leg.<br />
Starting position:<br />
• Stand perpendicular to the low pulley<br />
station, attach the ankle strap to the ankle<br />
furthest from the machine<br />
(outside leg).<br />
• Stand up straight, lift your chest, tighten<br />
your abs and maintain a very slight arch in<br />
your lower back.<br />
• Adjust your position so that there is some<br />
resistance in the cables.<br />
• In the beginning, you may hold on to the<br />
machine for stability.<br />
Motion:<br />
• Slowly move the attached leg outward to the<br />
side away from the pulley (30-45 degrees),<br />
keeping your hips and spine perfectly still.<br />
• Keep you abs tight throughout the exercise.<br />
Key points:<br />
• Do not use this exercise for losing fat from<br />
your hips. It will not make your hips<br />
smaller. Use it to develop hip strength and<br />
stability.<br />
• Use a very small range of motion. More is<br />
not better.<br />
• Keep your spine straight and your hips level.<br />
Try not to raise your hips when raising your<br />
leg to the side<br />
START<br />
FINISH<br />
STANDING HIP ADDUCTION<br />
Muscles worked: This exercise will not burn<br />
off fat from your inner thighs or make them<br />
smaller! There is no exercise that will burn fat<br />
from a specific area. This exercise will,<br />
however, strengthen the muscles on the<br />
insides of your thighs (adductor muscle<br />
groups). It also works the muscles on the<br />
outside of your hip (gluteus medius) on the<br />
side that you are standing on. Use very light<br />
resistance and small range of motion on this<br />
exercise. Think of this exercise as a tool for<br />
challenging your ability to stabilize your hip<br />
and stand on one leg.<br />
Starting position:<br />
• Stand perpendicular to the low pulley station<br />
• Attach ankle strap to the ankle nearest the<br />
machine.<br />
• Adjust your position away from the machine<br />
so that tension is created.<br />
• Stand straight, lift your chest, tighten your<br />
abs and maintain a very slight arch in your<br />
lower back.<br />
Motion:<br />
• Keeping your hips and spine perfectly still,<br />
slowly move your attached leg toward the<br />
center/midline, away from the pulley.<br />
• Slowly control the leg back toward the<br />
pulley, returning to the starting position.<br />
Key points:<br />
• Do not use this exercise for losing fat<br />
from your thighs. It will not make your<br />
thighs smaller. Use it to develop hip<br />
strength and stability.<br />
• Keeping your hips and spine perfectly still.<br />
• Do not bend at knee.<br />
START<br />
FINISH<br />
21