soy candle brochure web 02 05.pdf - AURI
soy candle brochure web 02 05.pdf - AURI
soy candle brochure web 02 05.pdf - AURI

You also want an ePaper? Increase the reach of your titles
YUMPU automatically turns print PDFs into web optimized ePapers that Google loves.
Candle Making Directions<br />
Prior to proceeding with <strong>candle</strong> making, make sure you have all of your supplies on hand – including a notebook.<br />
1. Set your pre-tabbed wick in the container by using a hot glue gun. Press the tab firmly in the center of the<br />
bottom of the container using both tips of a scissor. Allow the hot glue to cool before heating the containers.<br />
2. Thread the wicks through the hole in the craft sticks and allow the stick to lie flat on top of the container.<br />
Alternative: Slightly heat the wicked containers and roll the wick around a dowel or pencil until the utensil rests on top of the container.<br />
3. Heat the containers in an oven to approximately 150ºF.<br />
4. While the containers are heating, weigh out all of your waxes and additives. Add them to a double boiler and<br />
heat the materials to 180ºF. Slowly stir the wax as it melts (rapid stirring can cause air bubbles).<br />
Note: 2.5 lb.s of wax will make six 8-ounce <strong>candle</strong>s.<br />
5. When the melted wax reaches 180ºF, remove the double boiler from heat. Add the dye and stir until the<br />
liquid appears to be uniform in color.<br />
6. Add the fragrance (7-8% by total weight of your wax and additives) and stir the liquid.<br />
7. Remove containers from the oven and place them in an area that is away from drafts. Slowly and carefully<br />
pour (or ladle) the wax into the containers. Save some of the liquid in case the <strong>candle</strong>s need to be topped off.<br />
8. Center the wicks via the craft stick or dowel and allow the <strong>candle</strong>s to cool and solidify (10-15 hours). Trim<br />
excess wick leaving approximately ½”. Remove the craft stick or dowel from the excess and save it for re-use.<br />
9. After 10-15 hours, the <strong>candle</strong>s are ready to burn. If the surface is not smooth and you need to “top them<br />
off”, re-melt the original wax and carefully pour it on top of the <strong>candle</strong> until it has a smooth surface.<br />
10. Test-burn your <strong>candle</strong>. Record burn time, scent throw, color, etc. Make necessary changes.<br />
Troubleshooting<br />
The Surface Is Not Smooth<br />
Here’s a couple of natural suggestions to try:<br />
1. Cool the <strong>candle</strong> slowly and away from drafts. Use a water bath and avoid bumping the surface your <strong>candle</strong>s are on.<br />
2. Add beeswax – just remember that you may have to use a slightly larger wick.<br />
3. Experiment with other additives that are not listed here.<br />
4. Keep some of the wax from your original formula and re-melt it. Top off the <strong>candle</strong>s as directed in #9 above<br />
The Candle Burns A Hole Right Down The Center Of The Wick<br />
Your wax is too hard. Add additional lower melting point wax or reduce the quantity of the higher melting wax.<br />
The Candle Burns Too Quickly<br />
Your wax may not be hard enough. Add higher melting point waxes at one half of one percent increments.<br />
The Candle Has A White/Frosty Appearance<br />
This is a very common occurrence with <strong>soy</strong> based <strong>candle</strong>s. Some reasons this occurs include:<br />
1. “Fat bloom” may be occurring (similar to chocolate when it gets melted and then re-solidifies).<br />
2. Incompatible fragrances and/or dyes with the wax.<br />
3. The <strong>candle</strong> cools too quickly.<br />
4. Incompatible crystalline structures between the <strong>soy</strong> wax and additives.<br />
SO – what can you do<br />
• There are many additives to try that are available from industry/wax suppliers and from around the home.<br />
• Try cocoa butter equivalents or hydrogenated milkfat. They assist the melt pool of the <strong>candle</strong> to spread evenly.<br />
• Heat the containers to higher temperatures than the melted wax.<br />
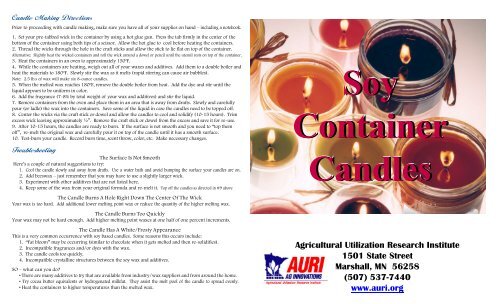
Soy<br />
Container<br />
Candles<br />
Agricultural Utilization Research Institute<br />
1501 State Street<br />
Marshall, MN 56258<br />
(507) 537-7440<br />
www.auri.org
Soy Container Candles<br />
Candle making can be a simple process when you aren’t attempting to make the perfect <strong>candle</strong>. You simply<br />
melt the wax, add the dye and fragrance, and pour the liquid into a container with a centered and anchored<br />
wick. Then leave it stand for approximately 15 hours, and it’s ready to burn. It’s that simple.<br />
Producing that perfect <strong>candle</strong> is a process of trial and error. We’ll be the first to admit that it is possible to<br />
purchase and mix everything just right the first time. However, rest assured that the purchased blended <strong>candle</strong><br />
waxes went through a series development and testing long before they entered the market.<br />
This information guides you through some basic instructions for producing <strong>soy</strong> wax container <strong>candle</strong>s.<br />
Experiment with different formulations and methods and remember to keep a notebook!<br />
Benefits<br />
* Renewable resource * Minnesota grown * Non-toxic<br />
* Essentially sootless * Burns more slowly and at lower temperatures<br />
Terms<br />
Hydrogenated Soy is <strong>soy</strong>bean oil that has been processed from a liquid state to a semi-solid state.<br />
Melting Point (m.p.) is the temperature at which the solid turns to liquid. Hydrogenated oils will melt over a<br />
range of temperatures.<br />
Iodine Value (IV) is a measure of the unsaturation of fats and oils. Lower iodine values indicate harder fats<br />
(and higher melting points).<br />
Supplies and Equipment<br />
Wax Double Boiler Containers Hot pads Fragrance<br />
Wicks Oven Dye Scale Scissors<br />
Thermometer Glass measuring cup(s) Hot glue gun & glue sticks Large spoon or ladle Pen & notebook<br />
Additional Equipment:<br />
Water bath Craft sticks Natural additives<br />
Wax For container wax, purchase a <strong>soy</strong> or blended wax with melting points ranging from 123-130 O F.<br />
Note: Lower m.p. temperatures tend to burn longer and tend to have better scent-throwing characteristics.<br />
Containers A variety of containers are available, including glass, metal, clay and ceramic.<br />
Note: Some containers could discolor from absorbing the dye and/or fragrance.<br />
Fragrance There are a multitude of fragrances available. When ordering, ask if they are compatible with <strong>soy</strong><br />
wax. The general rule for the amount of fragrance in your formulation is 6-8% by weight of the wax.<br />
Note: Too much fragrance may “sweat” out at the surface of the <strong>candle</strong>.<br />
Dye Dye is available in both solid and liquid form. It is also available in a variety of colors. The color of the<br />
melted wax will be much darker than a solidified <strong>candle</strong>. An indicator test for the color is to place a small<br />
drop of melted wax on a piece of white paper. Allow it to solidify to determine whether your shade is acceptable.<br />
Note: Steer clear from using pigment because it tends to clog the wicks of container <strong>candle</strong>s.<br />
Wicks Three types of wicks are available commercially: flat, square, and cored. Use the paper or cotton<br />
cored wicks for container <strong>candle</strong>s. Metal cored wicks may be available, but these tend to smoke more after<br />
extinguishing. For ease of use, purchase those that are pre-tabbed. Remember that wick size plays an<br />
important role in how your <strong>candle</strong>s burn. When ordering from a supplier, tell them the diameter of your<br />
containers so they can help you get the correct wick.<br />
Note: Slight changes in the <strong>candle</strong> formulation may require changing the wick size.<br />
Craft Sticks Wicks can be centered easily when the wide craft sticks are used. Drill a hole equal to the size of<br />
the wick in the center of the craft stick. After wicks have been set with hot glue, thread them through the hole<br />
in the craft stick. Carefully slide the stick along the wick until it rests on the lip of the container, then center<br />
easily after pouring the liquid wax into the container.<br />
Option: Another trick for centering wicks is to wrap the wick around wood dowels, pens, pencils or clean sticks so that the<br />
dowel lays on top of the container. This works nicely if you overlap the starting point of the wick when it is wound on the stick.<br />
Waterbath This is not absolutely necessary, but by using one, you can have beautiful results in the final<br />
product when you use a waterbath. A bucket, a sink, or dish pan can work well for this. If you use one of<br />
the suggested options, keep an inch of space between your <strong>candle</strong>s and add hot water carefully. The key is<br />
to maintain a level of water equal to the height of the melted wax in your containers. By using hot water,<br />
your <strong>candle</strong>s will temper at a slower rate than if you left them on the counter.<br />
Natural Additives<br />
Each one offers unique attributes to wax blends. Remember that additives can contribute differently to your<br />
<strong>candle</strong> composition each time you change one or more of the ingredients. These changes can affect how the<br />
<strong>candle</strong> burns, burning time, and scent throw. Something to keep in mind is that additives also add additional<br />
costs to the final product.<br />
Beeswax One of the most popular natural <strong>candle</strong> additives is beeswax. It is available in sheets, block, or in bead<br />
form and melts at 145-149ºF. Even though it has a high melting point range, its sticky characteristics allows for<br />
up to 25% inclusion in container <strong>candle</strong>s. A larger wick may be necessary when beeswax is included in the<br />
<strong>candle</strong> composition.<br />
Bayberry (or Myrtle Wax) This wax melts over a 115-120ºF range. Because of its brittle tendencies, its use in<br />
container <strong>candle</strong>s should be limited to