testo 350 M/XL - MurCal, Inc.
testo 350 M/XL - MurCal, Inc.
testo 350 M/XL - MurCal, Inc.

You also want an ePaper? Increase the reach of your titles
YUMPU automatically turns print PDFs into web optimized ePapers that Google loves.
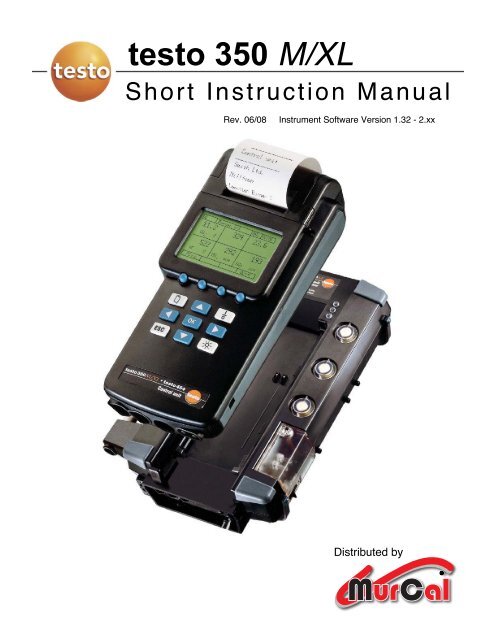
<strong>testo</strong> <strong>350</strong> M/<strong>XL</strong><br />
Short Instruction Manual<br />
Rev. 06/08<br />
Instrument Software Version 1.32 - 2.xx<br />
Distributed by<br />
<br />
<strong>MurCal</strong>
Contents<br />
1 Description of the system components.................................................1<br />
1.1 The Analyzer Box ............................................................................................................... 1<br />
1.2 The Control Unit ................................................................................................................. 3<br />
Operate the instrument with the Control Unit ..................................................................... 4<br />
The Display......................................................................................................................... 4<br />
1.3 The probes ......................................................................................................................... 5<br />
1.4 Attach the probe and the hose ........................................................................................... 5<br />
Flue gas probe.................................................................................................................... 5<br />
Ambient temperature probe................................................................................................ 6<br />
1.5 Connect the Control Unit and the Analyzer Box................................................................. 6<br />
1.6 Remove the Control Unit from the Analyzer Box ............................................................... 6<br />
1.7 AC Power and Battery Recharge ....................................................................................... 7<br />
2 How to operate .........................................................................................8<br />
2.1 First steps ........................................................................................................................... 8<br />
2.2 Quick measurement procedure.......................................................................................... 9<br />
2.3 Print data .......................................................................................................................... 10<br />
Print out current data ........................................................................................................ 10<br />
Customize printout............................................................................................................ 11<br />
2.4 Change date and time ...................................................................................................... 14<br />
2.5 Customize the display ...................................................................................................... 16<br />
3 Function keys.........................................................................................18<br />
3.1 Assign a function to a function key................................................................................... 18<br />
3.2 Display the second set of 4 function keys ........................................................................ 18<br />
4 Select a fuel ............................................................................................19<br />
4.1 Change the fuel ................................................................................................................ 19<br />
4.2 CO dilution system ........................................................................................................... 20<br />
4.3 Select O 2 reference value for automatic corrected NOx and CO..................................... 20<br />
5 Memory ...................................................................................................21<br />
5.1 Save data ......................................................................................................................... 21<br />
5.2 View & print data from memory........................................................................................ 21<br />
5.3 Delete one reading ........................................................................................................... 23<br />
5.4 Delete entire memory ....................................................................................................... 24<br />
6 Data management ..................................................................................25<br />
6.1 Data storage in the Analyzer Box..................................................................................... 25<br />
6.2 Set up a new file or location ............................................................................................. 26<br />
6.3 Delete a file or location..................................................................................................... 27<br />
7 Program automatic measurements ......................................................28<br />
7.1 Set up an automatic measurement program.................................................................... 28<br />
7.2 Manually start an automatic program............................................................................... 32<br />
7.3 Stop the automatic program ............................................................................................. 32<br />
7.4 Rerun a program .............................................................................................................. 33<br />
<strong>testo</strong> inc. 40 White Lake Road, Sparta, NJ 07871 (800) 227-0729 Fax (862) 354-5020
8 Maintenance ...........................................................................................34<br />
8.1 Calibration of gas sensors................................................................................................ 35<br />
Warm-up........................................................................................................................... 36<br />
Connect to calibration gas................................................................................................ 38<br />
Adjust gas flow ................................................................................................................. 38<br />
8.2 CO-Measuring ranges with different dilution steps .......................................................... 39<br />
8.3 Changing batteries in the Analyzer Box ........................................................................... 40<br />
8.4 Changing batteries in the Control Unit ............................................................................. 40<br />
8.5 Change printer paper ....................................................................................................... 41<br />
8.6 Changing filters................................................................................................................. 41<br />
8.7 Remove condensate water............................................................................................... 41<br />
8.8 Changing measurement sensors ..................................................................................... 41<br />
8.9 Condensate pump service................................................................................................ 43<br />
9 Appendix.................................................................................................44<br />
9.1 Function key list................................................................................................................ 44<br />
9.2 Screen display parameters............................................................................................... 45<br />
9.3 Menu structure for Control Unit <strong>350</strong>/454 .......................................................................... 46<br />
(Continue) Menu structure for Control Unit <strong>350</strong>/454 ........................................................ 47<br />
9.4 Menu structure for Testo <strong>350</strong>S Control Unit..................................................................... 47<br />
9.5 Menu structure for Analyzer Box...................................................................................... 47<br />
9.6 Sample measuring and rinsing cycle times...................................................................... 49<br />
9.7 Error codes/diagnostics.................................................................................................... 50<br />
9.8 Status and error indicators ............................................................................................... 51<br />
9.9 Principles of calculations .................................................................................................. 52<br />
Units conversions ............................................................................................................. 52<br />
Calculations ...................................................................................................................... 53<br />
9.10 Technical data .................................................................................................................. 56<br />
9.11 Warranty periods .............................................................................................................. 57<br />
<strong>testo</strong> inc. 40 White Lake Road, Sparta, NJ 07871 (800) 227-0729 Fax (862) 354-5020
Precautions<br />
<strong>testo</strong> <strong>350</strong> M/<strong>XL</strong> (Analyzer Box)<br />
Power supply<br />
Do not ever disrupt the electric contacts either inside or outside of the<br />
instrument! Check the ID label to ensure that the model, power<br />
voltage and output coincide with the actual conditions!<br />
Water / Condensation<br />
Never expose electronics to water. Protect from rain. Never place<br />
analyzer on wet surface. Avoid having cold instrument being placed<br />
Storing the measuring instrument<br />
Never store the measuring instrument in rooms with solvents. Doing<br />
so runs the risk of destroying the measuring cells! Ensure that you<br />
observe the specified storage, transport and operating temperatures!<br />
Rechargeable battery<br />
Fully charge battery before starting the initial measurement and after<br />
the instrument has not been used for several days. Recharge the<br />
battery every 4 weeks after longer periods of<br />
in-operation. The <strong>testo</strong> rechargeable battery pack should be inserted<br />
so that the label faces outward. Otherwise, there is the danger of a<br />
short circuit or reverse polarity should the isolation jacket become<br />
damaged.<br />
Operating the probe<br />
Don’t touch probe after removing it from the flue.<br />
Condensate outlet<br />
Aggressive condensate (acid) exits the condensate outlet. If the<br />
corresponding drainage facility (e.g. hose) is not attached, there is a<br />
hazard for person and property!<br />
Service and maintenance<br />
The power plug must always be removed before opening the housing.<br />
Danger of electric shock! Accessing the instrument internals must only<br />
be done by authorized personnel!<br />
Non-permissible measurements<br />
Explosive or ignitable gas mixtures as well as gases that form<br />
ignitable mixtures when exposed to air must not be measured.<br />
Test gas pressure<br />
A maximum of 20.1 “H 2 O is permissible. Higher pressures increase<br />
the risk of destroying the gas sensors! Additionally, calibration gas<br />
must only be used in well-ventilated rooms!<br />
Cleaning the instruments<br />
Do not permit water to enter the instrument!<br />
Differential pressure probe<br />
When conducting measurements, observe the permissible measuring<br />
ranges; exceeding tolerance leads to destruction of the sensor!<br />
Water / Condensation<br />
Never expose electronics to rain, water or condensation. Never place<br />
analyzer on wet surface.<br />
Persons System Instrument<br />
<br />
<br />
<br />
<br />
<br />
<br />
<br />
<br />
<br />
<br />
<br />
<br />
<br />
<br />
<br />
<br />
<br />
<strong>testo</strong> inc. 40 White Lake Road, Sparta, NJ 07871 (800) 227-0729 Fax (862) 354-5020
Precautions<br />
<strong>testo</strong> <strong>350</strong> M/<strong>XL</strong> <strong>testo</strong> 454 (Control Unit)<br />
Alarm contact<br />
The alarm contact must not be integrated into safety-related process,<br />
as the contact poses a hazard for persons and property, the system<br />
and the instrument.<br />
Analog output<br />
The analog outputs must not be used to control/regulate safetyrelated<br />
processes. They are designed to supply data to recorders, etc.<br />
Danger of system malfunction!<br />
Logger, powerbox<br />
Operating loggers and powerboxes beyond their specified limits can<br />
lead to expulsion of hydrogen (H 2 ) from the battery pack. Danger of<br />
explosion!<br />
Entire system<br />
Do not connect any part of the system to live objects (i.e. supplied<br />
with voltage) for measurement. Danger of electrical shock!<br />
CO measurement<br />
Ensure that there is sufficient ventilation when measuring toxic gases<br />
(CO). Danger of poisoning!<br />
Power supply to entire system<br />
Always ensure that the entire system is supplied with sufficient power<br />
(fully charged batteries/rechargeable batteries, mains unit). Danger of<br />
the entire system becoming unstable!<br />
EMC<br />
Exceptionally high amounts of electromagnetics interference can lead<br />
the deviations in reading accuracy that no longer conform to standard.<br />
Danger with connected analog/switch outputs!<br />
Process security for analog monitoring<br />
Very dynamic signals can overload processes. In order to stabilize<br />
process security for system with dynamic signals we recommend<br />
observing Namur recommendation NE43, which makes specifications<br />
regarding signal conditions. Danger of overloading systems!<br />
Condensation<br />
Avoid exposing the instrument and instrument electronics to<br />
condensation.<br />
Persons System<br />
<br />
<br />
<br />
<br />
<br />
<br />
<br />
Instrument<br />
<br />
<br />
<br />
<strong>testo</strong> inc. 40 White Lake Road, Sparta, NJ 07871 (800) 227-0729 Fax (862) 354-5020
1 Description of the system components<br />
The modular system <strong>testo</strong> <strong>350</strong> contains of 3 main components<br />
Control Unit Analyzer Box Probe<br />
1.1 The Analyzer Box<br />
The Analyzer Box includes, sensors, pumps, batteries, electronics, Peltier gas cooler,<br />
peristaltic pumps, filters, memory and all necessary hardware for flue gas and stack gas<br />
measurements. The Analyzer Box performs the gas analysis and is self-contained for<br />
long-term testing.<br />
<strong>testo</strong> inc. 40 White Lake Road, Sparta, NJ 07871 (800) 227-0729 Fax (862) 354-5020 1
Top view:<br />
Power status LED<br />
Measuring mode LED<br />
Battery LED<br />
Flue gas filter<br />
Fresh air inlet filter<br />
Dilution air filter<br />
Condensate trap<br />
Integrated<br />
Δpressure for<br />
flow/velocity<br />
Sample probe connector<br />
Side view:<br />
110.230 V AC<br />
50/60 Hz<br />
Data<br />
Dilution air inlet<br />
Trigger/Alarm<br />
Combination connection for flue gas<br />
probe and differential pressure nipple<br />
Temperature probe for<br />
flue gas temperature<br />
Additional ambient temperature probe<br />
Description<br />
<strong>testo</strong> <strong>350</strong> S or <strong>XL</strong><br />
Max. gas sensors 6<br />
Basic version equipped with O 2 , CO, NO, NO 2<br />
Optimal sensors<br />
SO 2 , H 2 S, HC, NO Low , CO Low , CO 2 (NDIR)<br />
Fresh air valve<br />
Standard<br />
Trigger input<br />
Option<br />
2 <strong>testo</strong> inc. 40 White Lake Road, Sparta, NJ 07871 (800) 227-0729 Fax (862) 354-5020
1.2 The Control Unit<br />
The Control Unit displays all flue gas measurements, up to 6 parameters simultaneously<br />
per page, as well as all instrument diagnosis and operating information. The Analyzer<br />
Box can be controlled by the Control Unit or through the software. The Control Unit can<br />
operate the analyzer box remotely using standard cables 6’, 16’ and 65’, custom lengths<br />
up to 3,000’, or with Blue tooth 2.0 up to 325’ away (<strong>testo</strong> <strong>350</strong>S only). The integrated<br />
printer provides a record of the emissions data. You operate the instrument with userdefined<br />
function keys, the keypad. The <strong>350</strong>/454 Control Unit has a multi probe input and<br />
an integrated Δ pressure probe.<br />
Integrated<br />
printer<br />
<strong>350</strong>/454 Only<br />
Touch screen (option)<br />
Back-lit<br />
screen<br />
Menu button<br />
Function keys<br />
Escape button<br />
On/off button<br />
RS 232 Input<br />
Cursor keys<br />
Back-light<br />
switch<br />
Data connection<br />
to Analyzer Box<br />
<strong>350</strong>/454 Only<br />
Multi-probe<br />
input<br />
<strong>350</strong>/454 Only<br />
Δ pressure<br />
probe<br />
Power supply<br />
connection<br />
<strong>testo</strong> inc. 40 White Lake Road, Sparta, NJ 07871 (800) 227-0729 Fax (862) 354-5020 3
Operate the instrument with the Control Unit<br />
You operate the instrument by pull-down menu driven selections. Customize the<br />
function keys with the most needed functions you desire, i.e. “Pump” or “Zero”. The<br />
keyboard allows quick alphanumeric input, with the cursor keys or optional by touch<br />
screen pen.<br />
The Control Unit is used for simple data management as well.<br />
Data input…<br />
…by key pad<br />
… by touch screen (<strong>350</strong>/454 optional)<br />
The Display<br />
The Control Unit displays all flue gas measurements up to 6 parameters simultaneously<br />
on one screen.<br />
Sample Pump indicator<br />
Measurement<br />
location<br />
Box (Bus) name<br />
Analyzer Box (003)<br />
Control Unit (001)<br />
Display page<br />
Status bar<br />
Fault indication<br />
&<br />
program status<br />
Display next range<br />
of function keys<br />
Measurement<br />
variable<br />
Function bar<br />
User defined function keys<br />
4 <strong>testo</strong> inc. 40 White Lake Road, Sparta, NJ 07871 (800) 227-0729 Fax (862) 354-5020
1.3 The probes<br />
The probe removes hot sample gas from stack and<br />
transports it to the Analyzer Box. A thermocouple is<br />
integrated for a flue gas temperature measurement.<br />
Hose for<br />
transporting the flue<br />
gas to the analyzer<br />
Pressure<br />
relief cap<br />
Fitting cone to attach<br />
probe in the flue gas<br />
stack<br />
A heat shield is<br />
supplied with all<br />
high temperature<br />
probes<br />
Hose for pressure &<br />
flow measurement<br />
1.4 Attach the probe and the hose<br />
Flue gas probe<br />
1) Simply attach the probe as shown. 2)<br />
Press the connector firmly until<br />
the connector snaps into place.<br />
3) Connect the probe thermocouple 4) Probe and thermocouple properly<br />
connected<br />
<strong>testo</strong> inc. 40 White Lake Road, Sparta, NJ 07871 (800) 227-0729 Fax (862) 354-5020 5
Ambient temperature probe<br />
For most applications, the mini ambient air probe is connected. For simultaneous inlet<br />
air temperature readings, a remote thermocouple can be connected here in this port.<br />
1.5 Connect the Control Unit and the Analyzer Box<br />
For a remote control measurement plug the<br />
data cable in one of the two “DATA” sockets at<br />
the Analyzer Box and in the “DATA” socket of<br />
the control unit. Different length connection<br />
cables between 6’ and 65’ and more are<br />
available. When the Control Unit is attached<br />
to the Analyzer Box, communication is<br />
maintained without the data cable.<br />
1.6 Remove the Control Unit from the Analyzer Box<br />
Press the tab on the left to release the hand held Control Unit from the Analyzer Box.<br />
To replace the Control Unit, line up the arrows and press it on the Analyzer Box until you<br />
hear a “click”.<br />
6 <strong>testo</strong> inc. 40 White Lake Road, Sparta, NJ 07871 (800) 227-0729 Fax (862) 354-5020
1.7 AC Power and Battery Recharge<br />
The Analyzer Box has Nickel-Metal-Hydride rechargeable<br />
batteries that will last approximately 2-3 hours with all<br />
systems operating. For long-term measurements, or for<br />
recharging the batteries, attach the power cable as<br />
shown. The current voltage will be displayed on the<br />
Control Unit screen:<br />
9.5 to 10 Volts = full battery<br />
7.0 to 7.3 Volts = need to charge<br />
Note: Battery charging does not take place<br />
when the analyzer is operating.<br />
Analyzer Box status (depends on the printed label icon next to the LEDs)<br />
LED 1<br />
Label Icon:<br />
LED 2<br />
Label Icon:<br />
(Old Versions)<br />
green/steady: AC operation / trickle charge<br />
yellow/steady: Charge battery / rapid charge<br />
yellow/flashing: Low battery<br />
green/flashing: Rechargeable battery operation<br />
red/flashing: Error<br />
green/flashing: Measuring<br />
yellow/flashing: Fresh air operation / calibration<br />
LED 1<br />
Label Icon:<br />
LED 2<br />
Label Icon:<br />
(New Versions)<br />
green/permanent: AC operation<br />
green/flashing: Battery operation (battery full)<br />
red/flashing: Battery operation (battery empty)<br />
Off: Battery recharging, Off mode<br />
green/permanent: Measuring<br />
green/flashing: Fresh air / Zeroing<br />
red/flashing: Defect<br />
LED 3<br />
Label Icon:<br />
Unassigned LED 3<br />
Label Icon:<br />
green/flashing: Battery recharging (fast charge)*<br />
green/permanent: Battery full (trickle charge)*<br />
Control Unit <strong>350</strong>/454 charge status<br />
*Only when analyzer is off and charging<br />
Note: This display only shows the charge status of the Control Unit batteries.<br />
This screen is shown when the batteries are<br />
charging in the Control Unit. 100% appears (all<br />
4 segment are black) when batteries are fully<br />
charged. The voltage of the Control Unit<br />
batteries is indicated on the screen.<br />
Note:<br />
The battery symbols don’t change regardless<br />
of charge condition. Newer analyzers with<br />
Firmware 1.34 and greater do not have<br />
battery symbols.<br />
LOAD BATTERY<br />
5.59 V<br />
Control Unit <strong>350</strong>S contains non-rechargeable<br />
batteries. When the Analyzer Box is plugged<br />
into AC, the display will show the charge in the<br />
Analyzer Box. A fully charged Analyzer Box is<br />
approximately 10 volts.<br />
<strong>testo</strong> inc. 40 White Lake Road, Sparta, NJ 07871 (800) 227-0729 Fax (862) 354-5020 7
2 How to operate<br />
2.1 First steps<br />
(1) Connect the probe to the instrument<br />
as seen in 1.4.<br />
(2) Connect the Control Unit and the<br />
Analyzer Box, see chapter 1.5.<br />
(3) Switch on the instrument by pressing<br />
the button.<br />
(4) This screen appears.<br />
(5) After approximately 20 seconds the<br />
Instrument starts to run the “zero<br />
phase”.<br />
(6) The zero phase lasts ≈ 60 seconds.<br />
(7) During the zero-phase the sample<br />
probe thermocouple temperature is<br />
measured and displayed in the lower<br />
screen.<br />
8 <strong>testo</strong> inc. 40 White Lake Road, Sparta, NJ 07871 (800) 227-0729 Fax (862) 354-5020
Note: Your screen might be slightly different to this screen because most of<br />
the displayed order is user defined.<br />
(8) This screen appears after the zerophase.<br />
(9) The instrument is ready to measure.<br />
(10) You may change to the other<br />
pages by using the up or the down<br />
cursor.<br />
For set up function keys see chapter 3<br />
to customize the display see chapter<br />
2.5.<br />
Note:<br />
For C x H y measurements you need 15 minutes for the sensor to reach stable<br />
operating temperature. Zero the analyzer before using.<br />
2.2 Quick measurement procedure<br />
For a quick measurement, the function keys “Pump”, “Mem.” and “Print” are<br />
recommended as shown below, however these can be customized see chapter 3.<br />
Note:<br />
Remember to rinse with fresh air<br />
at end of measurement.<br />
For “how to” program and start<br />
a measurement program for<br />
long-term measurements see<br />
section 7.1.<br />
(1) To run a spot measurement press<br />
the function key below “Pump”, here<br />
the left function key.<br />
(2) The pump begins to run and a bull's<br />
eye will blink in the upper left status<br />
bar.<br />
(3) If you want to save the data, press<br />
the function key below “Mem.”, here<br />
the second on the right.<br />
(4) To stop the measurement press the<br />
function key below “PStop”, here the<br />
left function key (the same as for<br />
starting the pump).<br />
(5) When the pump stops, the values<br />
freeze on the screen.<br />
(6) To print out the data press the<br />
function key below “Print” (here the<br />
second on the left).<br />
(7) The print out appears.<br />
<strong>testo</strong> inc. 40 White Lake Road, Sparta, NJ 07871 (800) 227-0729 Fax (862) 354-5020 9
2.3 Print data<br />
Print out current data<br />
“Box” Address<br />
(1) To print out the current data<br />
displayed use the function key “Print”.<br />
Here the first function key on the right.<br />
Chapter 3.1 shows how to assign a<br />
function to a function key.<br />
(2) See Chapter 3 for general use of the<br />
function keys.<br />
Boxes and Addresses<br />
This Analyzer can have more than<br />
two brains.<br />
003<br />
001<br />
The <strong>testo</strong> <strong>350</strong> Control<br />
Unit can control and<br />
communicate with<br />
many devices such as<br />
multiple Analyzer boxes<br />
and remote data<br />
logging “Boxes”.<br />
When “001” is indicated<br />
in “Box” Address on the<br />
display, the Control Unit<br />
values are shown.<br />
When “003” is indicated<br />
in “Box” Address on the<br />
display (for this example)<br />
the analyzer on the left is<br />
in communication and<br />
the combustion values<br />
are shown.<br />
Note:<br />
The Control Unit address is always “001”<br />
To identify each “Box”, a<br />
unique address is<br />
assigned and shown on<br />
the display. Use the<br />
or button to scroll<br />
and see the Control Unit<br />
or Analyzer Box display<br />
screen.<br />
10 <strong>testo</strong> inc. 40 White Lake Road, Sparta, NJ 07871 (800) 227-0729 Fax (862) 354-5020
Customize printout<br />
You can customize 3 lines of text (i.e. company address, phone number…) on the<br />
top of the printout and one line as a footnote.<br />
Note:<br />
This number may differ with different Analyzer Boxes<br />
1) To customize the printout you must<br />
change the screen from the Analyzer<br />
view (003) to control unit view (001).<br />
Access the screen by pressing the<br />
or button.<br />
2) Use the button, to scroll<br />
through the Analyzer screens.<br />
Note:<br />
The page changes as you scroll.<br />
A maximum of 6 user-defined screens<br />
are available.<br />
(3) The “Switch devices” screen<br />
quickly appears in preparation to<br />
display the Control Unit view.<br />
Note:<br />
The “Switch device” function can be<br />
disabled by pressing the menu button<br />
and by following the screens:<br />
System Configuration Device<br />
scroll Active device<br />
(see 9.3 Menu structure for Control Unit<br />
on page 46).<br />
<strong>testo</strong> inc. 40 White Lake Road, Sparta, NJ 07871 (800) 227-0729 Fax (862) 354-5020 11
Note:<br />
This change shows the Control Unit Address<br />
(4) The screen of the control unit<br />
appears.<br />
(5) Press the menu button .<br />
(6) Highlight “System” by using the<br />
cursor keys up and down .<br />
(7) Continue with ”OK” .<br />
(8) The main menu screen of the<br />
Control Unit appears.<br />
(9) Press the menu button .<br />
(10) Highlight “System” by using the<br />
cursor keys up and down .<br />
(11) Continue with ”OK” .<br />
(12) A submenu appears.<br />
(13) Highlight “Printer” by using the<br />
cursor keys up and down .<br />
(14) Continue with ”OK” .<br />
12 <strong>testo</strong> inc. 40 White Lake Road, Sparta, NJ 07871 (800) 227-0729 Fax (862) 354-5020
(15) A submenu appears.<br />
(16) Highlight “Print text” by using the<br />
cursor keys up and down .<br />
(17) Continue with ”OK” .<br />
(18) A submenu appears.<br />
(19) Highlight the line you want to<br />
insert a text by using the cursor keys<br />
up and down .<br />
(20) Continue with ”OK” .<br />
(21) Now input the text. Highlight the<br />
letter by using the cursor keys up<br />
, down , right and left<br />
.<br />
(22) Accept the highlighted letter over<br />
with “OK” .<br />
The letter is displayed in the field<br />
below the letter field.<br />
Function keys:<br />
Shift, alternates between upper<br />
and lowercase character selections<br />
Delete the last letter<br />
Space<br />
(23) To exit the screen and save the<br />
text press “SAVE”, the right function<br />
key.<br />
<strong>testo</strong> inc. 40 White Lake Road, Sparta, NJ 07871 (800) 227-0729 Fax (862) 354-5020 13
2.4 Change date and time<br />
(1) To change date and time you must<br />
change the screen from analyzer view<br />
(003) to Control Unit view (001). Change<br />
the screen by pressing the “OK” button<br />
.<br />
(2) This screen appears.<br />
(3) Highlight “Control Unit” by using<br />
the cursor keys up and down .<br />
(4) Continue with ”OK” .<br />
(5) The initial screen of the control unit<br />
appears.<br />
(6) Press the menu button .<br />
(7) Highlight “System” by using the<br />
cursor keys up and down .<br />
(8) Continue with ”OK” .<br />
(9) A submenu appears.<br />
(10) Highlight “Change date” by using<br />
the cursor keys up and down .<br />
(11) Continue with ”OK” .<br />
14 <strong>testo</strong> inc. 40 White Lake Road, Sparta, NJ 07871 (800) 227-0729 Fax (862) 354-5020
(12) This screen appears.<br />
(13) To set date or time highlight the<br />
date or the time by using the cursor<br />
keys up and down.<br />
(14) Continue with “Change” the<br />
second left function key.<br />
(15) This screen appears.<br />
(16) Highlight the figure of the<br />
date/time you want to change by using<br />
the function keys right and left<br />
, the two in the middle.<br />
(17) Continue with “Change” the<br />
second left function key.<br />
(18) Pick the figure in the numeric pad,<br />
which is displayed by using the cursor<br />
buttons of the keypad.<br />
(19) To confirm the number press the<br />
“OK” button.<br />
(20) Continue with “Save”, the right<br />
function key.<br />
(21) Return to the initial screen with<br />
“End” and “ESC”.<br />
Note:<br />
You are still in the Control Unit view.<br />
To get back to the analyzer view press<br />
“OK” and choose the Analyzer Box<br />
(003 etc.) and continue with “OK”.<br />
<strong>testo</strong> inc. 40 White Lake Road, Sparta, NJ 07871 (800) 227-0729 Fax (862) 354-5020 15
2.5 Customize the display<br />
You’ll be able to customize your screen so that the six most important parameters<br />
are displayed on the first screen in the units you need.<br />
(1) Press the menu button .<br />
(2) Highlight “System” by using the<br />
cursor keys up and down .<br />
(3) Continue with “OK” .<br />
(4) This screen appears.<br />
(5) Highlight “Display” by using the<br />
cursor keys up and down .<br />
(6) Continue with “OK” .<br />
(7) This screen appears.<br />
(8) The square with the black bar is<br />
the current square, where you can<br />
set up a parameter.<br />
(9) Use the cursor keys to select a<br />
square.<br />
(10) Continue with “OK”<br />
Note:<br />
You can change to other screens if you use the function keys up<br />
.<br />
and down<br />
16 <strong>testo</strong> inc. 40 White Lake Road, Sparta, NJ 07871 (800) 227-0729 Fax (862) 354-5020
(11) A submenu appears.<br />
(12) Highlight “Parameter” by using<br />
the cursor keys up and down<br />
.<br />
(13) Continue with “OK” .<br />
(14) A submenu appears where all<br />
possible parameter are listed.<br />
(15) Highlight the parameter you<br />
want to set up by using the cursor<br />
keys up and down .<br />
(16) Continue with “OK” .<br />
(17) You are then asked to choose a<br />
unit for the parameter. Highlight a<br />
unit and continue with “OK” .<br />
(18) Press “SAVE” to complete and<br />
save the display.<br />
Press “ESC” to ignore all changes<br />
and return to original display.<br />
Note:<br />
You can change to other screen pages if you use the function keys up<br />
down on the left side.<br />
and<br />
<strong>testo</strong> inc. 40 White Lake Road, Sparta, NJ 07871 (800) 227-0729 Fax (862) 354-5020 17
3 Function keys<br />
With the function keys you can operate some of the main functions of the <strong>testo</strong> <strong>350</strong>.<br />
You can select up to 8 functions (2 screens of 4 each).<br />
3.1 Assign a function to a function key<br />
(1) To assign a function to a function<br />
key first press the menu button ,<br />
releasing and immediately press the<br />
function key you want to assign or<br />
change. Wait a few seconds for the<br />
screens to change.<br />
Function key display box<br />
(2) This selection menu appears on the<br />
screen. It displays the different<br />
“function” choices you have.<br />
(3) Highlight the function, you want to<br />
assign to the function key by using the<br />
cursor keys up and down of<br />
the keypad or the two function keys on<br />
the left.<br />
(4) Confirm your selection with OK<br />
.<br />
(5) The main screen appears and<br />
displays the function you have<br />
assigned above the function key.<br />
3.2 Display the second set of 4 function keys<br />
If the function, you need, is not visible in the current function key assignment, move<br />
to the second set of function keys with the right or the left cursor key.<br />
Shown by the tiny triangle in the screen above the right or left function key.<br />
18 <strong>testo</strong> inc. 40 White Lake Road, Sparta, NJ 07871 (800) 227-0729 Fax (862) 354-5020
4 Select a fuel<br />
The instrument comes with a pre-programmed selection of common fuels. The fuel<br />
parameters are used in calculating values such as efficiency, excess air, and CO 2 .<br />
Note:<br />
Base parameters like O 2 , CO, NO x , SO 2 etc. are not affected by fuel choice.<br />
4.1 Change the fuel<br />
(1) To choose a fuel presses the menu<br />
button.<br />
(2) The main menu appears.<br />
(3) Highlight the item “Input” by using<br />
the cursor keys up and down .<br />
(4) Confirm your selection with “OK”<br />
.<br />
(5) A sub menu appears.<br />
(6) Highlight the item “Fuel” by using<br />
the cursor keys up and down .<br />
(7) Confirm your selection with “OK”<br />
.<br />
(8) A sub menu appears with a<br />
selection of most common fuels.<br />
(9) Highlight the correct fuel. Use the<br />
cursor keys up and down .<br />
(10) Confirm your selection with “OK”<br />
.<br />
(11) The main screen will appear and<br />
the fuel is saved.<br />
(12) If you burn fuels other than<br />
standard fuels, use “Userfuel“ and<br />
insert the specific fuel factor data, see<br />
4.3 Select O2 reference value<br />
<strong>testo</strong> inc. 40 White Lake Road, Sparta, NJ 07871 (800) 227-0729 Fax (862) 354-5020 19
4.2 CO dilution system<br />
If you are using the CO dilution system, see section 9.6 and the appendix for more<br />
information.<br />
4.3 Select O 2 reference value for automatic corrected NOx and CO<br />
For comparative purposes, many industries use values for emissions outputs that<br />
have been corrected to a standard O 2 reference value.<br />
Note: The cNOx and/or cCO should be in display to see the corrected value.<br />
Follow these steps to change the O 2 reference values.<br />
(1) Select “Input ” from the main menu<br />
using the up and down keys.<br />
(2) Select “O 2 ref/CO 2 max and confirm<br />
with OK .<br />
(3) Open the main menu and select<br />
“O 2 ref/CO 2 max” by using the cursor<br />
keys up and down .<br />
(4) Confirm your selection with “OK”<br />
.<br />
(5) A sub menu appears.<br />
(6) Highlight the item “O 2 reference” by<br />
using the cursor keys up and down<br />
.<br />
(7) Confirm your selection with “OK”<br />
.<br />
(8) A sub menu appears.<br />
(9) Highlight the required value by<br />
using the cursor keys up, down, left<br />
and right.<br />
(10) Confirm your selection with “OK”<br />
then choose next value.<br />
(11) Press “SAVE” to confirm and store<br />
value<br />
Note:<br />
The next screen for CO 2 max is<br />
automatically displayed. Do not confuse<br />
this with the O 2 reference screen.<br />
Note:<br />
O2 reference only affects the<br />
readings of parameters like cNO, and<br />
cCO. The lower case “c” refers to<br />
corrected by the reference value.<br />
20 <strong>testo</strong> inc. 40 White Lake Road, Sparta, NJ 07871 (800) 227-0729 Fax (862) 354-5020
5 Memory<br />
You can save the current data displayed on the screen. They will be saved in the<br />
location shown on the status bar, in this case “NONAME”.<br />
5.1 Save data<br />
Note:<br />
This shows your location<br />
1) To save the current data on the<br />
displayed on the screen you have to<br />
press “Mem.”, here the second right<br />
function key.<br />
5.2 View & print data from memory<br />
Note:<br />
Printing data is only possible when the automatic measuring program is not<br />
active.<br />
See chapter 7.3 “Stop the automatic program” to stop or delete a measurement<br />
program.<br />
1) To access the memory first press<br />
the menu button .<br />
2) The main menu appears.<br />
3) Highlight the item “Memory” by<br />
using the cursor keys up and<br />
down .<br />
4) Confirm your selection with “OK”<br />
.<br />
<strong>testo</strong> inc. 40 White Lake Road, Sparta, NJ 07871 (800) 227-0729 Fax (862) 354-5020 21
5) A submenu appears.<br />
6) Highlight the item “Read out<br />
memory” by using the cursor keys up<br />
and down .<br />
7) Confirm your selection with “OK”<br />
.<br />
Note:<br />
Here could appear a list of all saved readings, depending on<br />
your measurement.<br />
(8) The saved reading in the present<br />
location, here: NONAME appears.<br />
(9) Highlight the reading to display by<br />
using the cursor keys up and<br />
down .<br />
(10) Confirm your selection with “OK”<br />
.<br />
(11) If you need more information about<br />
the reading press “Info” the right<br />
function key.<br />
A screen with some information<br />
appears.<br />
(12) The values are displayed on the<br />
screen.<br />
(13) To display the next page use the<br />
cursor keys up and down .<br />
(14) To print the reading press the right<br />
function key “Print”.<br />
(15) To return to the initial screen press<br />
“ESC” .<br />
22 <strong>testo</strong> inc. 40 White Lake Road, Sparta, NJ 07871 (800) 227-0729 Fax (862) 354-5020
5.3 Delete one reading<br />
You have the choice between deleting only one reading and deleting the whole<br />
memory. Data files and locations may be deleted as well.<br />
(1) To delete a reading go to display<br />
saved readings. You get there via the<br />
main menu, “Memory”, “Read out<br />
memory”. For details see “View & print<br />
data from memory”.<br />
(2) Highlight the reading you want to<br />
delete by using the cursor keys up<br />
and down .<br />
(3) To delete the reading press “Info”<br />
the right function key.<br />
(4) The Info field/memory appears.<br />
(5) To turn the pages use the cursor<br />
keys up and down .<br />
(6) To delete the reading press<br />
“Delete” the right function key.<br />
(7) The reading is deleted.<br />
(8) To return to the initial screen press<br />
“ESC” .<br />
<strong>testo</strong> inc. 40 White Lake Road, Sparta, NJ 07871 (800) 227-0729 Fax (862) 354-5020 23
5.4 Delete entire memory<br />
Caution: the entire memory of the Analyzer Box or the control unit will be deleted<br />
regardless of which location or file the readings are stored. The memory that will be<br />
deleted depends on the unit in which you are currently working (e.g. Analyzer,<br />
Control Unit, etc.)<br />
(1) To delete the memory press the<br />
menu button .<br />
(2) The main menu appears.<br />
(3) Highlight the item “Memory” by<br />
using the cursor keys up and<br />
down .<br />
(4) Confirm your selection with “OK”<br />
.<br />
5) To delete the memory highlight<br />
“Erase memory” by using the cursor<br />
keys up and down .<br />
6) Confirm your selection with “OK”<br />
.<br />
24 <strong>testo</strong> inc. 40 White Lake Road, Sparta, NJ 07871 (800) 227-0729 Fax (862) 354-5020
6 Data management<br />
With the <strong>testo</strong> <strong>350</strong> you can organize your measurement data in an easy to use<br />
structure. The structure contains files and locations for measurement data.<br />
The Control Unit is the master of the system meaning every file or location you set<br />
up is also displayed in the Control Unit. For flue gas measurements only, use<br />
locations found in the analyzer box.<br />
Recommendation:<br />
If you measure flue gas parameters, use locations in the Analyzer Box.<br />
Measurement data can only be saved in locations.<br />
6.1 Data storage in the Analyzer Box<br />
(1) Emission data is stored in the<br />
Analyzer Box.<br />
(2) To view the data press “OK”<br />
and then the “Left arrow” or, if you<br />
have a Touch-screen option, select the<br />
“Location” name, in this case<br />
“NONAME”, located on the status bar<br />
on the top of the screen.<br />
Note:<br />
Data can only be stored in a location, not in a file.<br />
(3) A similar screen appears to create<br />
file and location names.<br />
(4) On this screen the files and location<br />
of the 1 st level are displayed.<br />
(5) To open a folder or select a location<br />
highlights the file/location and press<br />
“OK” .<br />
(6) You’ll return to the main screen.<br />
(7) The current location is displayed in<br />
the status bar, here “Test 1”.<br />
Explanation:<br />
= file<br />
= location = data storage location<br />
* = location contains data<br />
+ = file contains locations or data<br />
HINT:<br />
We recommend using only locations – the<br />
upper file structure will not be downloaded<br />
from the Analyzer Box into the computer.<br />
<strong>testo</strong> inc. 40 White Lake Road, Sparta, NJ 07871 (800) 227-0729 Fax (862) 354-5020 25
6.2 Set up a new file or location<br />
(1) To set up a new file or location<br />
press “Change”, the right function<br />
key.<br />
(2) To get to the 1 st level of files and<br />
locations press “ESC”.<br />
(3) The menu appears.<br />
(4) Highlight “New file” or “New<br />
location” by using the up and<br />
down cursor key.<br />
(5) Continue with “OK” .<br />
(6) Now you’ll be able to put in the<br />
text.<br />
(7) Highlight the letter by using the<br />
cursor keys up , down , right<br />
and left .<br />
(8) Accept the highlighted letter with<br />
“OK” .<br />
The letter is displayed in the field<br />
below the letter field.<br />
Function keys:<br />
Shift, enables capital letter<br />
Delete the last letter<br />
Space<br />
(9) To exit the screen and save the<br />
text press “SAVE”, the right function<br />
key.<br />
26 <strong>testo</strong> inc. 40 White Lake Road, Sparta, NJ 07871 (800) 227-0729 Fax (862) 354-5020
6.3 Delete a file or location<br />
If you delete a location all data that are stored in the location will be deleted as well.<br />
You can just delete a location or an empty file. If you want to delete a file with all the<br />
locations you must delete first the locations and afterwards the file.<br />
(1) Pick the file or location you want to<br />
delete.<br />
How to get to the 1 st level of files and<br />
locations and how to select a file or<br />
location, see 6.1 and 6.2.<br />
(2) To delete an empty file or a location<br />
pick the file or location and press<br />
“Change”, the right function key.<br />
(3) The menu appears.<br />
(4) To delete the file or location you<br />
picked up highlight “Delete” by using<br />
the cursor keys up and down .<br />
(5) Continue with “OK” .<br />
(6) A note appears.<br />
(7) If you are sure to delete the file or<br />
location continue with “OK” .<br />
8) If you don’t want to delete a file or a<br />
location, press the escape button<br />
“ESC” .<br />
9) Return to the initial screen with<br />
“ESC” .<br />
<strong>testo</strong> inc. 40 White Lake Road, Sparta, NJ 07871 (800) 227-0729 Fax (862) 354-5020 27
7 Program automatic measurements<br />
You can operate the <strong>testo</strong> <strong>350</strong> automatically by setting up a measurement program.<br />
Measurement program configures the measurement start + stop-cycle and the fresh<br />
air purge cycle, calculates average values etc.<br />
A program can be set-up in the Analyzer Box or Control Unit. Be sure to select the<br />
Analyzer Box for combustion testing.<br />
7.1 Set up an automatic measurement program<br />
(1) To set up a program press the<br />
menu button .<br />
(2) Pick “Memory” by using the cursor<br />
keys up and down .<br />
(3) Continue with “OK” .<br />
(4) A submenu appears.<br />
(5) Highlight “Program” by using the<br />
cursor keys up and down .<br />
(6) Continue with “OK” .<br />
(7) A submenu appears.<br />
(8) Pick “Start” by using the cursor<br />
keys up and down .<br />
(9) Continue with “OK” .<br />
(10) You will be guided thru the menu<br />
to set up an automatic measurement<br />
program.<br />
28 <strong>testo</strong> inc. 40 White Lake Road, Sparta, NJ 07871 (800) 227-0729 Fax (862) 354-5020
Cont. 7.1 Set up an automatic measurement program<br />
(11) Decide how to start the program<br />
whether by keystroke (function key<br />
“Start”) or by date/time.<br />
(12) Make your decision by using the<br />
cursor keys up and down .<br />
(13) Continue with “OK” .<br />
(14) If you have chosen “Manual start”<br />
go to step # 22.<br />
(15) If you have chosen “Date/Time”<br />
this screen appears.<br />
(16) To set the start date/time highlight<br />
the date or the time by using the<br />
function keys up and down<br />
and continue with “Change” the<br />
second function key on the left.<br />
(17) This screen appears.<br />
(18) Highlight the figure of the date/time<br />
you want to set up by using the function<br />
keys right and left .<br />
(19) Pick the figure in the numeric pad,<br />
which is displayed by using the cursor<br />
buttons of the keypad.<br />
(20) To accept a figure, press the “OK”<br />
button.<br />
21) Continue with “SAVE”, here the right<br />
function key.<br />
(22) Navigate with the curser button up<br />
and down .<br />
(23) Only the average-mean value is<br />
calculated and stored, if you choose<br />
“Yes”. The average is based on data<br />
logged every second for the selected<br />
time interval.<br />
(24) Continue with “OK”.<br />
<strong>testo</strong> inc. 40 White Lake Road, Sparta, NJ 07871 (800) 227-0729 Fax (862) 354-5020 29
Cont. 7.1 Set up an automatic measurement program<br />
(25) This screen appears.<br />
(26) Insert the data acquisition rate<br />
(seconds) by using the curser keys to<br />
highlight a number and the “OK”<br />
button to confirm.<br />
The minimum and the maximum value<br />
are displayed on the left and on the<br />
right upper screen. In the middle of<br />
these, the current value is displayed.<br />
To accept over the current value press<br />
“Curr.” the second function key on the<br />
right.<br />
(27) To confirm your settings press the<br />
function key “SAVE”, the right function<br />
key.<br />
(28) The following screen determines<br />
how many values should be saved.<br />
(29) You have the choice: until the<br />
memory is full or set up a No. of values<br />
saved or by time and date.<br />
(30) Highlight your choice and continue<br />
with “OK”.<br />
(31) If you’ve set “Memory full” go to<br />
step # 35.<br />
Note:<br />
# Values saved – will determine how<br />
long the program will operate<br />
according to the data acquisition rate,<br />
i.e.:<br />
three 15 min tests saving every one<br />
minute = 45 values saved.<br />
(32) Insert the number of values until<br />
the program ends.<br />
(33) Use the cursor buttons to highlight<br />
a number and “OK” to take it over.<br />
(34) Continue with “SAVE” the right<br />
function key.<br />
30 <strong>testo</strong> inc. 40 White Lake Road, Sparta, NJ 07871 (800) 227-0729 Fax (862) 354-5020
Cont. 7.1 Set up an automatic measurement program<br />
(35) Select the sample time cycle.<br />
(36) Use the cursor buttons to highlight<br />
a number and press ”OK” to<br />
confirm.<br />
(37) Continue with “SAVE” the right<br />
function key.<br />
(38) Select the rinse time cycle.<br />
(39) Use the cursor buttons to highlight<br />
a number and press ”OK” to<br />
confirm.<br />
(40) Continue with “SAVE” the right<br />
function key.<br />
(41) The info screen shows all set<br />
parameters.<br />
(42) To display the second screen use<br />
the up or down button.<br />
(43) Accept the program and continue<br />
with the function key “OK” the right<br />
function key.<br />
Note:<br />
Select the program delete function<br />
button (PDEL) to quickly stop the<br />
program to make parameter<br />
changes.<br />
<strong>testo</strong> inc. 40 White Lake Road, Sparta, NJ 07871 (800) 227-0729 Fax (862) 354-5020 31
7.2 Manually start an automatic program<br />
(1) For running a measurement<br />
program put the function key “Start”<br />
on the screen, see chapter 3 Function<br />
keys.<br />
(2) To start the measurement program<br />
press “Start”, here the right function<br />
key.<br />
(3) When the program is running the<br />
function key “Start” changes to “Stop”.<br />
7.3 Stop the automatic program<br />
There are two ways to stop a<br />
measurement program; by the function<br />
key or with the menu item “Delete”.<br />
(1) To stop the measurement program<br />
press the function key “Stop”<br />
(2) To delete the measurement<br />
program press the menu button .<br />
(3) Continue with “OK” .<br />
(4) A submenu appears.<br />
(5) Highlight “Program” by using the<br />
cursor keys up and down .<br />
(6) Continue with “OK” .<br />
(7) A submenu appears.<br />
(8) Highlight “Delete” by using the<br />
cursor keys up and down .<br />
(9) Continue with “OK” .<br />
(10) The measurement program is now<br />
inactive.<br />
(11) Press “ESC” to return to the<br />
initial screen.<br />
32 <strong>testo</strong> inc. 40 White Lake Road, Sparta, NJ 07871 (800) 227-0729 Fax (862) 354-5020
7.4 Rerun a program<br />
Push the “START” function key again or do the following.<br />
(1) Open the main menu with the<br />
button.<br />
(2) Select Memory with .<br />
(3) Highlight Program with .<br />
(4) Select with<br />
(5) Use the to select Info<br />
NOTE!<br />
Info appears on page 2 of the<br />
drop down menu<br />
(6) Select Info with<br />
(7) Use the function key or the<br />
touch pad to select “OK”<br />
Note:<br />
The program is now pending as<br />
indicated by the symbol in the<br />
status section of the task bar.<br />
(8) Press the Start function key to<br />
begin the program.<br />
Note:<br />
Analyzer functions such as calibration cannot be accessed if a program is<br />
“pending” in the Analyzer Box or Control Unit. A message will appear<br />
“Measuring program – Configuration not possible”.<br />
The program must be deleted to proceed with these functions.<br />
<strong>testo</strong> inc. 40 White Lake Road, Sparta, NJ 07871 (800) 227-0729 Fax (862) 354-5020 33
8 Maintenance<br />
For a long lifetime of your <strong>testo</strong> <strong>350</strong> you should do some simple service procedures.<br />
Each analyzer has complete equipment information listed on the bottom.<br />
Bottom view of the Analyzer Box with opened catches:<br />
Condensate pump<br />
(Transfer water from<br />
chiller to condensate<br />
trap)<br />
Battery pack<br />
Measuring cells<br />
(slots for 4 or 6 cells)<br />
Label of the back shows the<br />
type of the installed sensors<br />
and other analyzer modules<br />
34 <strong>testo</strong> inc. 40 White Lake Road, Sparta, NJ 07871 (800) 227-0729 Fax (862) 354-5020
8.1 Calibration of gas sensors<br />
! CAUTION ! Calibration gas handling and precautions<br />
• Observe safety regulation and accident prevention regulations when<br />
using or handling test gases.<br />
• Use test gases in well-ventilated areas only.<br />
Note:<br />
• Calibration can only be performed with calibration gas of a known<br />
composition and concentration. Gas that has exceeded its certification<br />
date should not be used.<br />
• For most accurate results, the value of the calibration gas should be<br />
between 75% to 125% of expected value.<br />
Required equipment:<br />
Calibration gas, non-reactive regulators, non-reactive/non-absorbing tubing, a<br />
by-pass vent for excess calibration gas, flow regulating needle valve.<br />
Example:<br />
Stainless Steel Flow Controlled<br />
Regulator with Overflow Vent<br />
Testo Calibration Kit w/ Regulator<br />
! CAUTION !<br />
Do not pressurize the analyzer greater than 12” H 2 O (0.5 PSI) with<br />
calibration gas as faulty readings and damage may occur. Use a<br />
bypass vent.<br />
<strong>testo</strong> inc. 40 White Lake Road, Sparta, NJ 07871 (800) 227-0729 Fax (862) 354-5020 35
Note:<br />
• Hydrocarbons gas should be in a carrier of O 2 at 5% to facilitate<br />
calibration.<br />
• Gases like NO 2 and SO 2 should only be used with non-reactive, nonabsorbent<br />
materials such as stainless steel, Teflon and C-Flex.<br />
• Use single component gases to eliminate and/or identify cross<br />
interference.<br />
• Calibration time should not need to exceed 5 minutes per gas exposure<br />
to reach stability (exception of old sensors and NO 2 and SO 2 which have<br />
slower response)<br />
Teflon tube<br />
Vent/flow<br />
indicator<br />
VENT<br />
1-2 l/min<br />
Rotameter<br />
(Shows slight<br />
excess<br />
flow rate)<br />
High Pressure<br />
Calibration Gas<br />
Needle valve<br />
Analyzer<br />
Sample<br />
Probe<br />
Needle Valve<br />
To analyzer<br />
Calibration procedure<br />
Preparation<br />
(1) Ensure the analyzer is fully charged or operating on AC current<br />
(2) Ensure the ambient air is free from background gas contaminants.<br />
Warm-up<br />
(3) Start analyzer and operate pump for 15 minutes to purge residual gases from<br />
sensors and to fully achieve operating stability<br />
(4) Zero the analyzer by pressing the<br />
function key “Zero” (here the second<br />
on the left).<br />
(5) Press to enter the menu.<br />
36 <strong>testo</strong> inc. 40 White Lake Road, Sparta, NJ 07871 (800) 227-0729 Fax (862) 354-5020
(6) Press to highlight “Sensors”<br />
and press .<br />
(7) Highlight “Calibrate” and press<br />
.<br />
Example: CO Calibration<br />
(8) Select the sensor to calibrate with<br />
and (here CO) and press<br />
to accept.<br />
(9) Input the indicated value of the<br />
calibration gas (e.g. 100).<br />
<strong>testo</strong> inc. 40 White Lake Road, Sparta, NJ 07871 (800) 227-0729 Fax (862) 354-5020 37
Connect to calibration gas<br />
(10) Connect the sample probe to the calibration apparatus.<br />
(11) Ensure the needle valve to the calibration gas is closed.<br />
(12) Press the “Start” function key.<br />
Note:<br />
The total calibration gas flow will be approximately 2 liters/minute. 1 liter/minute<br />
to the analyzer; less than 1 liter/minute vented to assure adequate supply.<br />
Adjust gas flow<br />
(13) Start the flow of the calibration gas to the analyzer by adjusting the needle<br />
valve.<br />
(14) Carefully adjust the flow to provide ≈ 1-2 liters/minute flow through the<br />
bypass vent.<br />
(15) When the sensor reading indicates a change, time the process for 3-5 minutes<br />
and wait for the readings to stabalize.<br />
(16) During the calibration this screen<br />
appears and shows the values.<br />
Test<br />
Apply<br />
For a new adjustment of the<br />
analyzer!<br />
At the end of the 3-5 minutes,<br />
press the “Apply” function key<br />
to adjust the sensor. Then press<br />
“Apply” a second time and<br />
enter the Cal gas values to save<br />
the values into the memory.<br />
Note:<br />
For checking the<br />
analyzer only!<br />
Selecting “Test” will<br />
save the values but<br />
not calibrate (adjust)<br />
the sensor.<br />
Escape will not<br />
calibrate (adjust)<br />
the sensor.<br />
Prepare to calibrate other sensors<br />
(17) Purge the analyzer on fresh air for 5 minutes before beginning the next<br />
gas<br />
Printing calibration data<br />
Note:<br />
If there is no calibration data in the sensor (e.g. sensors with a manufacturing<br />
date before January 2003) dashes are printed instead of the target and actual<br />
values. Only the serial number and date of adjustment are printed.<br />
Calibration of CO dilution with calibration gas<br />
Note:<br />
If you need high accuracy in CO dilution mode, the system can be calibrated.<br />
Call <strong>testo</strong> for details.<br />
38 <strong>testo</strong> inc. 40 White Lake Road, Sparta, NJ 07871 (800) 227-0729 Fax (862) 354-5020
8.2 CO-Measuring ranges with different dilution steps<br />
Note:<br />
If the ambient air contains interfering gases, push the hose onto the dilution<br />
inlet ( ) next to the Trigger Input and place hose in a clean atmosphere.<br />
1/x<br />
Possible dilution factors<br />
Dilution Ratio of<br />
diluting<br />
factor gas : measured gas<br />
1 no dilution<br />
2 1 : 1<br />
5 4 : 1<br />
10 9 : 1<br />
20 19 : 1<br />
40 39 : 1<br />
Auto<br />
5 : 1 when CO reaches 1000 ppm<br />
when H 2 reaches 1000 ppm<br />
Our recommended dilution factors when testing:<br />
Dilution<br />
factor<br />
CO concentration in<br />
flue gas with CO standard<br />
Dilution<br />
factor<br />
CO concentration in flue<br />
gas with CO low<br />
1 0 to 500 1 0 to 100<br />
2 300 to 2,000 2 50 to 500<br />
5 500 to 10,000 5 250 to 1,500<br />
10 1,500 to 20,000 10 400 to 3,000<br />
20 3,000 to 80,000 20 1,000 to 6,000<br />
40 6,000 to 400,000 40 2,000 to 20,000<br />
Technical data:<br />
Dilution Measuring range Resolution Measuring range Resolution<br />
factor with CO standard<br />
with CO low<br />
0 0 to 10,000 ppm 1 ppm 0 to 500 ppm 0.1 ppm<br />
2 0 to 20,000 ppm 2 ppm 300 to 2,000 ppm 0.2 ppm<br />
5 0 to 50,000 ppm 5 ppm 500 to 10,000 ppm 0.5 ppm<br />
10 0 to 100,000 ppm 10 ppm 1,500 to 20,000 ppm 1 ppm<br />
20 0 to 200,000 ppm 20 ppm 3,000 to 80,000 ppm 2 ppm<br />
40 0 to 400,000 ppm 40 ppm 6,000 to 400,000 ppm 4 ppm<br />
Note: Calibrate dilution system every 6 months @ 5X. Put the analyzer in the<br />
5X dilution mode and calibrate the CO sensor as normally performed.<br />
Examples of when to use the dilution system:<br />
• when combustion source is “out of tune” or improperly controlled<br />
• in reduced burner atmosphere<br />
• adjustment of industrial burners (from high to low CO…)<br />
• optimization and tuning of gas turbines<br />
• engine measurement at high H 2 levels (controlled motors)<br />
• during long-term measurements to keep a low load on the CO sensor<br />
<strong>testo</strong> inc. 40 White Lake Road, Sparta, NJ 07871 (800) 227-0729 Fax (862) 354-5020 39
8.3 Changing batteries in the Analyzer Box<br />
(1) Disengage catch<br />
(2) Remove battery pack and pull plug from<br />
socket after disengaging<br />
(3) Insert new battery pack, ensure that the plug<br />
engages.<br />
(4) Put on and close cover<br />
8.4 Changing batteries in the Control Unit<br />
(1) Disengage catch<br />
(2) Remove batteries<br />
(3) Insert new batteries<br />
(4) Ensure that the batteries are<br />
inserted the right way (+ to +)<br />
(5) Put on and close cover<br />
8.5 Change printer paper<br />
(1) Switch on the device<br />
(2) Assign the line feed to the function<br />
key Lfeed<br />
(3) Open the printer cover<br />
(4) Insert paper<br />
(5) Draw in the paper by pressing Lfeed<br />
(6) Place the paper roll in the cover and<br />
close it<br />
40 <strong>testo</strong> inc. 40 White Lake Road, Sparta, NJ 07871 (800) 227-0729 Fax (862) 354-5020
8.6 Changing filters<br />
If the filters are visibly dirty, they need to be changed or replaced. If the pump<br />
performance drops audibly or you see a drop in the pump rate display, the filters<br />
should be checked and replaced if necessary. In most cases, it is sufficient to only<br />
replace the flue gas filter.<br />
(1) To replace a filter, remove the filter<br />
cover by twisting to the left<br />
(2) Take out the used filter and insert<br />
the new filter<br />
(3) Ensure that the o-ring is still in<br />
place.<br />
(4) Screw on the filter cover<br />
(5) The cross strut of the filter housing<br />
must be aligned with the markings on<br />
the housing of the measuring unit<br />
8.7 Remove condensate water<br />
To drain the water, remove the cap. You<br />
can also install a tube over the nipple for<br />
water drainage.<br />
8.8 Changing measurement sensors<br />
If an error message occurs that a measurement sensor is “spent” you have to<br />
replace that sensor. The analyzer may do further measurements but you will not get<br />
a value of the spent sensor (i.e. O 2 ) and the calculated values relates to it (i.e.<br />
efficiency, excess air).<br />
To change sensors, open cover on the<br />
rear of the Analyzer Box.<br />
<strong>testo</strong> inc. 40 White Lake Road, Sparta, NJ 07871 (800) 227-0729 Fax (862) 354-5020 41
Cont. 8.8 Changing measurement sensors<br />
The measuring cells come with a personalized circuit board on which sensor data<br />
are stored. After the new sensor is installed, calibration is not necessary because the<br />
circuit board contains all necessary information.<br />
(1) Switch off the unit and isolate from<br />
the power.<br />
(2) Open the large cover on the rear of<br />
the analyzer box.<br />
(3) Remove, the black plastic, outer<br />
cover sensor heater bar.<br />
(4) Pull the hose connections from the<br />
used sensor.<br />
(5) Insert and connect a new<br />
measuring sensor. Make sure the tab<br />
and cars on the side of the sensor align<br />
with the tabs in the sensor slot.<br />
(6) Push on the measuring cell heater.<br />
Note:<br />
The O 2 measuring cell requires a<br />
compensation period of approx. 60<br />
min. after replacement in the <strong>testo</strong> <strong>350</strong>.<br />
The unit must be plugged into AC<br />
power, but not be switched on during<br />
this time.<br />
When clipping the heating bar onto the<br />
CO measuring cell, ensure that the<br />
temperature sensor (orange bead) is<br />
covered by the sensor heater cap.<br />
42 <strong>testo</strong> inc. 40 White Lake Road, Sparta, NJ 07871 (800) 227-0729 Fax (862) 354-5020
Installing CO-/NO 2 -/SO 2 -/H 2 S measuring cell<br />
! Caution !<br />
Remove the short-circuit bridge when installing a<br />
new measuring cell (see drawing).<br />
Installing NO measuring cell<br />
! Caution !<br />
Remove the auxiliary circuit board before installing<br />
the NO cell.<br />
Pull the additional circuit board from the NO cell<br />
(see drawing).<br />
8.9 Condensate pump service<br />
1) Empty the condensate-collecting<br />
vessel<br />
2) Remove the cover<br />
3) Disengage and pull off the pump<br />
cassette<br />
4) Remove the bend protection spring<br />
and push onto the hose at the suction<br />
side of the new pump cassette.<br />
5) Push on the hose (see illustration)<br />
6) Ensure that the hoses are not<br />
trapped or constrained<br />
7) Push the replacement cassette onto<br />
the motor shaft until it engages<br />
8) Attach cover.<br />
<strong>testo</strong> inc. 40 White Lake Road, Sparta, NJ 07871 (800) 227-0729 Fax (862) 354-5020 43
9 Appendix<br />
9.1 Function key list<br />
Note: Function key labels indicate what will happen if you push the button, not<br />
what is currently active.<br />
Key<br />
Analyzer Box Function Key Description<br />
Free, unassigned function key<br />
Zoom<br />
Magnified display of the readings (3 readings on one display screen [magnified] or<br />
6 readings [standard]).<br />
Pump Starts the gas pump. Status bar shows blinking bull’s eye.<br />
PStop<br />
When Pump is pressed, the function key changes to PStop (pump stop),<br />
pump stops and the readings are static on the display.<br />
v On Switches on and zeros velocity measurement. To use with pitot tube.<br />
Mem. Memory. Manually store the current values into the displayed location name.<br />
DeltaT<br />
Use of the two temperature inputs of the Analyzer Box as separate 2-channel<br />
temperature measurement with dT display<br />
DeltaP Activates the separate differential pressure measurement in the Analyzer Box.<br />
Start/ Starts a previously programmed measuring program.<br />
No prog<br />
Print Prints all displayed readings.<br />
Lfeed Printer line feed.<br />
Zero<br />
Initiates fresh air and zeroing phase (1 minute). The Analyzer Box draws fresh air<br />
through the measurement gas inlet or the fresh air valve (if fitted).<br />
Gas/Air Manually change internal valve from probe to fresh air port.<br />
CO off Deactivation CO sensor and purge with fresh air.<br />
CO on Activate CO sensor in the gas path.<br />
HC on/off Turn Hydrocarbons (CxHy) sensor on and off.<br />
1/X Change the CO dilution factor in steps from 1/X up to 40/X and auto dilution<br />
PDEL Stops the active measuring program<br />
Key<br />
Control Unit Function Key Description<br />
Zoom Zoom readings<br />
Hold Hold current value<br />
Max Display max. values since switching on<br />
Min Display min. values since switching on<br />
Mean Calculate average<br />
Vol<br />
Activate velocity measurement (with a velocity or differential pressure probe or<br />
integrated differential pressure probe)<br />
Veloc.<br />
Activate/deactivate velocity (with external differential pressure probe or for the<br />
integrated differential pressure probe)<br />
dP 1 Measuring range 16” H 2 0 for integrated differential pressure probe<br />
dP 2 Measuring range 80” H 2 O for integrated differential pressure probe<br />
P=0 Zero pressure probe<br />
ppm=0 Zero the CO probe<br />
Start/Stop Start/Stop measuring program<br />
Search Determine system configuration<br />
Mem. Save the readings<br />
Print Print the readings<br />
Lfeed Printer line feed<br />
Diag. Diagnosis (searches for errors in the Control Unit)<br />
44 <strong>testo</strong> inc. 40 White Lake Road, Sparta, NJ 07871 (800) 227-0729 Fax (862) 354-5020
9.2 Screen display parameters<br />
Testo <strong>350</strong> <strong>XL</strong> - Available Screen Parameters<br />
Parameter<br />
Definition<br />
O 2 oxygen 0 - 25%<br />
CO<br />
* carbon monoxide (0 - 10,000 ppm)<br />
CO low * carbon monoxide (0 - 500 ppm, low-range sensor)<br />
NO<br />
* nitrogen monoxide (0 - 3000 ppm)<br />
NO low * nitrogen monoxide (0 - 300 ppm, low-range sensor)<br />
NO 2<br />
* nitrogen dioxide (0 - 500 ppm)<br />
SO 2<br />
* sulfur dioxide (0 - 5000 ppm)<br />
CxHy * total hydrocarbons ( 0 - 4%)<br />
H 2 S<br />
* hydrogen sulfide ( 0 - 300 ppm)<br />
H 2<br />
hydrogen<br />
NOx nitrogen oxides (NO + NO 2 )<br />
Tf<br />
temperature flue (stack temperature)<br />
Ta<br />
temperature of ambient air / temp of 2nd probe socket<br />
Delta T temperature difference<br />
T1<br />
temperature of primary air<br />
T2<br />
temperature of secondary air<br />
Eff.<br />
combustion efficiency<br />
CO 2 carbon dioxide (calculated %)<br />
ExA<br />
excess air<br />
dCO undiluted CO (in relation to O 2 %)<br />
Htt<br />
heat transfer temperature<br />
O 2 ref<br />
oxygen reference value<br />
CO 2 m<br />
theoretical CO 2 maximum for selected fuel<br />
delta P pressure difference<br />
Drft draft in stack (psi or "H 2 O)<br />
batt<br />
battery charge (volts)<br />
Tana<br />
temperature of analyzer<br />
Op.h.<br />
operating hours on analyzer<br />
Pump<br />
pump flow rate through analyzer<br />
cNO<br />
corrected NO (according to O 2 ref.)<br />
cCO<br />
corrected CO (according to O 2 ref.)<br />
cSOx<br />
corrected SOx (according to O 2 ref.)<br />
cNOx<br />
corrected NOx (according to O 2 ref.)<br />
Vel<br />
stack gas velocity in feet/min (pitot tube)<br />
FLOW flow in cfm (vane anemometer, hot wire)<br />
tdew<br />
temperature dew point<br />
mCO<br />
mass CO (lbs/hr, ton/yr)<br />
mSO 2<br />
mass CO (lbs/hr, ton/yr)<br />
mNOx mass CO (lbs/hr, ton/yr)<br />
Fuel<br />
fuel selected (used for calculations)<br />
DilF<br />
Dilution factor used on CO channel<br />
RTim<br />
Remaining time in automatic program<br />
* Items marked with symbol will only display if installed in analyzer<br />
<strong>testo</strong> inc. 40 White Lake Road, Sparta, NJ 07871 (800) 227-0729 Fax (862) 354-5020 45
9.3 Menu structure for Control Unit <strong>350</strong>/454<br />
Read out memory<br />
Program<br />
Memory Common Program Start<br />
Erase memory<br />
Data rate<br />
Free memory<br />
End<br />
Sample Time<br />
Rinse Time<br />
Save<br />
Start<br />
Data rate<br />
End<br />
Info<br />
Save<br />
Delete<br />
Date / Time<br />
Manual start<br />
Date/Time<br />
Below threshold<br />
Above threshold<br />
Memory full<br />
#/ values saved<br />
Date/Time<br />
No<br />
Yes<br />
Memory full<br />
#/values saved<br />
Date/Time<br />
Probes<br />
Display speed<br />
Surface correction<br />
Probe adjustment<br />
Calibrate<br />
Probe scaling<br />
Reset<br />
Info<br />
Internal sensor<br />
Probe input 1<br />
Internal sensor<br />
Probe input 1<br />
All probes<br />
Internal sensor<br />
Probe input 1<br />
‘n’ values<br />
Off<br />
min. input<br />
max. input<br />
min. output<br />
max. output<br />
Unit<br />
Decimal point<br />
Info<br />
Save<br />
Delete<br />
0<br />
1<br />
2<br />
ºC<br />
%<br />
m/s<br />
m 3 /h<br />
hPa<br />
ppm<br />
η<br />
Ω<br />
mΩ<br />
µΩ<br />
kHz<br />
pH<br />
mS<br />
µS<br />
bar<br />
A<br />
mA<br />
V<br />
mV<br />
0<br />
1<br />
2<br />
Input<br />
Parameter<br />
Temperature<br />
Humidity<br />
Pressure<br />
Air density<br />
Pitot factor<br />
Cross section<br />
Correction factor<br />
Info<br />
Barometric P<br />
P absolute<br />
Circle<br />
Square<br />
Rectangle<br />
Area<br />
Pressure<br />
Feet above sea level<br />
Differential pressure<br />
Length a<br />
Length b<br />
46 <strong>testo</strong> inc. 40 White Lake Road, Sparta, NJ 07871 (800) 227-0729 Fax (862) 354-5020
(Continue) Menu structure for Control Unit <strong>350</strong>/454<br />
System<br />
Change date<br />
Auto Off<br />
Printer<br />
Light<br />
Diagnostic<br />
Units<br />
Configuration<br />
Off<br />
5 min.<br />
10 min.<br />
15 min.<br />
20 min.<br />
25 min.<br />
30 min.<br />
Temperature<br />
Humidity<br />
Velocity<br />
Vol. -Flow<br />
Pressure<br />
Gas<br />
Contrast<br />
Print text<br />
On/off<br />
Automatic<br />
º C<br />
º F<br />
Pressure sensor<br />
Device scroll<br />
m/s<br />
f/m<br />
m 3 /h<br />
Line 1 cfm<br />
Line 2 m 3 /m<br />
Line 3 m /s<br />
Footnote l/s<br />
M 3 /h<br />
cfm<br />
Off<br />
M 3 /m<br />
td ºC<br />
g/m 3<br />
M 3 /s<br />
L/s<br />
g/kg<br />
cfs<br />
J/g<br />
cfh<br />
Psyc º C cfd<br />
mbar<br />
cfy<br />
Show Pressure sensor<br />
Hide Pressure sensor<br />
hPa<br />
inW<br />
mbar<br />
Pa<br />
bar<br />
psi<br />
mmW<br />
Torr<br />
inHg<br />
kPa<br />
ppm<br />
%<br />
Ops info<br />
Op. values<br />
Restore default<br />
Display address<br />
Device data<br />
Language<br />
No<br />
Yes<br />
French<br />
English (US)<br />
Active device<br />
All devices<br />
Peripherals<br />
Touch screen cal.<br />
9.4 Menu structure for Testo <strong>350</strong>S Control Unit<br />
The Testo <strong>350</strong>S Control Unit does not have menus. All functions have been added<br />
into the Analyzer Box.<br />
<strong>testo</strong> inc. 40 White Lake Road, Sparta, NJ 07871 (800) 227-0729 Fax (862) 354-5020 47
9.5 Menu structure for Analyzer Box<br />
Memory<br />
Read out<br />
Program<br />
Erase memory<br />
Free memory<br />
Measurement Program<br />
Meas. Program 1<br />
Meas. Program 2<br />
Meas. Program 3<br />
Meas. Program 4<br />
No<br />
Yes<br />
Start<br />
Calc. Mean value<br />
Data rate<br />
End<br />
Sample time<br />
Rinse time<br />
Info<br />
Save<br />
Delete<br />
Manual start<br />
Date/Time<br />
Memory full<br />
#/values saved<br />
Date/Time<br />
No<br />
Yes<br />
No<br />
Yes<br />
Sensors<br />
Input<br />
System<br />
Calibrate<br />
Print cal. data<br />
Sensor Status<br />
Fuel<br />
O2ref/CO2max<br />
Parameter<br />
Dilution<br />
Dew point of ambient air<br />
Change date*<br />
Printer*<br />
Password*<br />
Display<br />
Diagnostic<br />
Configuration<br />
*Testo <strong>350</strong>S only<br />
O2<br />
CO<br />
NO lo<br />
NO2<br />
SO2<br />
O2 reference<br />
CO2max<br />
1x<br />
2x<br />
5x<br />
10x<br />
20x<br />
40x<br />
Auto<br />
Temp. of ambient air<br />
Humidity of ambient air<br />
Dew point of ambient air<br />
Spot number / HCT menu<br />
Pressure<br />
Pitot factor<br />
Cross section<br />
Correction factor<br />
Info<br />
Natur. gas<br />
Propane<br />
Butane<br />
Fueloil #2<br />
Fueloil #5<br />
Fueloil #6<br />
Kerosene<br />
Anthr.coal<br />
Bitum.coal<br />
Distill. #1<br />
Wood 10%M.<br />
Wood 20%M.<br />
Wood 30%M.<br />
Wood 40%M.<br />
Bark 15%M.<br />
Bark 30%M.<br />
Bark 45%M.<br />
Bark 60%M.<br />
Test Gas<br />
Userfuel 1<br />
Userfuel 2<br />
Barometric P<br />
P absolute<br />
Circle<br />
Square<br />
Rectangle<br />
Area<br />
Pressure<br />
Feet above<br />
sea level<br />
Differential -<br />
pressure<br />
Length a<br />
Length b<br />
Ops Info<br />
Op. values<br />
Set limits<br />
Device data<br />
Bus Address<br />
Language<br />
CO<br />
NO lo<br />
NO2<br />
SO2<br />
48 <strong>testo</strong> inc. 40 White Lake Road, Sparta, NJ 07871 (800) 227-0729 Fax (862) 354-5020
9.6 Recommended sample measuring and fresh air rinsing times<br />
For long-term measurements and maximum sensor survivability, the following<br />
measuring and rinsing cycles are recommended.<br />
Sensor<br />
CO<br />
(H 2 comp.)<br />
CO low<br />
(H 2 comp.)<br />
NO<br />
NO low<br />
NO 2<br />
SO 2<br />
H 2 S<br />
Gas concentration<br />
(PPM)<br />
50<br />
100<br />
200<br />
500<br />
1,000<br />
2,000<br />
4,000<br />
8,000<br />
10,000<br />
10<br />
20<br />
50<br />
100<br />
200<br />
500<br />
50<br />
100<br />
200<br />
500<br />
1,000<br />
2,000<br />
3,000<br />
10<br />
20<br />
50<br />
100<br />
200<br />
300<br />
10<br />
20<br />
50<br />
100<br />
200<br />
500<br />
50<br />
100<br />
200<br />
500<br />
1,000<br />
2,000<br />
5,000<br />
10<br />
20<br />
50<br />
100<br />
200<br />
300<br />
Measurement<br />
min<br />
60<br />
30<br />
20<br />
10<br />
10<br />
10<br />
5<br />
5<br />
5<br />
60<br />
30<br />
20<br />
10<br />
10<br />
10<br />
60<br />
45<br />
30<br />
20<br />
10<br />
10<br />
5<br />
60<br />
45<br />
30<br />
20<br />
10<br />
10<br />
60<br />
45<br />
30<br />
20<br />
10<br />
10<br />
60<br />
30<br />
20<br />
15<br />
10<br />
10<br />
5<br />
40<br />
30<br />
20<br />
10<br />
5<br />
5<br />
Rinse<br />
min<br />
5<br />
5<br />
10<br />
10<br />
15<br />
20<br />
30<br />
45<br />
60<br />
5<br />
5<br />
10<br />
10<br />
15<br />
20<br />
5<br />
5<br />
5<br />
10<br />
10<br />
20<br />
30<br />
5<br />
5<br />
5<br />
10<br />
10<br />
20<br />
5<br />
5<br />
5<br />
10<br />
10<br />
20<br />
5<br />
5<br />
10<br />
10<br />
10<br />
20<br />
40<br />
5<br />
5<br />
10<br />
10<br />
10<br />
20<br />
<strong>testo</strong> inc. 40 White Lake Road, Sparta, NJ 07871 (800) 227-0729 Fax (862) 354-5020 49
9.7 Error codes/diagnostics<br />
Error messages Cause Remedy<br />
NO value drifts Loss of aux. voltage for NO Measurement only after 2<br />
hours<br />
Double module<br />
Measuring module already Install correct sensor<br />
Dilution<br />
O 2<br />
CO<br />
NO<br />
NO 2<br />
SO 2<br />
H 2 S<br />
installed<br />
Gas flow rate in dilution path<br />
too high/too low<br />
Check for overpressure<br />
and obstructions at<br />
dilution inlet<br />
Cell spent Value above 20.9% Switch unit off/on<br />
Signal too high<br />
Replace O 2 cell<br />
Switch-off Cell drifts excessively Replace cell if necessary<br />
Signal unstable Signal not at zero Fresh air until regenerated<br />
Signal too high<br />
Activate “Air” cycle to<br />
Value above selected shut-off<br />
regenerate sensor<br />
threshold<br />
Battery low Insufficient power reserves Connect instrument to the<br />
AC power outlet<br />
Unit temperature<br />
Unit temperature is outside the<br />
operating temperature<br />
If low, permit analyzer to<br />
warm up. If too hot,<br />
operate within limits.<br />
Cell temperature too high Cell temperature outside<br />
specifications<br />
Operate analyzer within<br />
temperature limits<br />
Pump flow rate Too low/too high. Gas flow rate Check pump / gas path /<br />
filter / probe connection<br />
Gas conditioning system Gas cooler / Peltier cooler not<br />
working<br />
Peltier temp.<br />
Invalid parameter<br />
Probe failure or probe not<br />
connected<br />
Ambient air temperature<br />
saved<br />
Configuration not possible<br />
Note: bus supply is<br />
switched off<br />
Information that participant<br />
was cut off from the bus<br />
Temperature probe not<br />
connected or thermocouple<br />
damaged<br />
No AT probe connected. The<br />
measured temperature of the<br />
flue gas probe is saved as an<br />
ambient air temperature.<br />
Refers to a saved program. For<br />
example, end criteria is invalid<br />
because starting criteria was<br />
changed<br />
If the internal voltage is too low,<br />
the bus supply power is turned<br />
off (protection for internal<br />
battery/rech. battery).<br />
Instrument was cut off from<br />
bus, e.g. by pulling out BUS<br />
plug or the power supply is too<br />
low.<br />
Purge with air, check filters<br />
(replace them when<br />
necessary), check the<br />
condensate trap and then<br />
call for service<br />
Connect temperature<br />
probe or exchange<br />
thermocouple<br />
- Do nothing, or<br />
- insert ambient air probe<br />
Delete program in Analyzer<br />
Box and Control Unit<br />
Attach additional bus<br />
power supply unit<br />
Check plug-in connections<br />
or recharge battery units<br />
power supplies<br />
Won’t calibrate To delete program = Delete Delete program in Control<br />
Unit and Analyzer Box<br />
50 <strong>testo</strong> inc. 40 White Lake Road, Sparta, NJ 07871 (800) 227-0729 Fax (862) 354-5020
9.8 Status and error indicators<br />
Low Battery<br />
Program Pending<br />
(Analyzer standby)<br />
Program Running<br />
Pump Running<br />
(animated)<br />
AC Operation<br />
Searching for attached<br />
components (rotates)<br />
NONAME 03 01/06<br />
ERROR<br />
(check diagnostics<br />
for error description<br />
and codes)<br />
21.0<br />
O2 %<br />
0.0<br />
NO ppm<br />
0<br />
CO ppm<br />
0.0<br />
NO2 ppm<br />
---------<br />
NOx ppm<br />
69.3<br />
Tf F<br />
Pump Mem Zero Print<br />
Note:<br />
• Batteries do not charge when analyzer is operating.<br />
• Program pending errors – may need to also look for a program pending<br />
in the Control Unit.<br />
<strong>testo</strong> inc. 40 White Lake Road, Sparta, NJ 07871 (800) 227-0729 Fax (862) 354-5020 51
9.9 Principles of calculations<br />
Units conversions<br />
%<br />
Unit Resolution Description of formula<br />
% 0,1<br />
x<br />
0,01 [ ]<br />
[ ppm]<br />
x % =<br />
10000<br />
O 2 reference (cCO,cNOx,…)<br />
Unit Resolution Description of formula<br />
ppm c 1<br />
20,94 20.94 − O2ref<br />
x[ ppmc<br />
] = x[ ppm]<br />
⋅<br />
20.94 20,94 − O<br />
2<br />
lbs/mBTU<br />
Unit Resolution Description of formula<br />
⎡ lbs ⎤ 1 ⎡ lbs ⎤<br />
20,94 FBr<br />
⎢ ⎥<br />
⎣mBTU<br />
⎦<br />
x<br />
⎢ x[ ppm]<br />
Gas ⋅<br />
mBTU ⎥ = ⋅ ρ ⋅<br />
20.94<br />
⎣ ⎦<br />
20.94 20,94 − O 430.0269<br />
2<br />
52 <strong>testo</strong> inc. 40 White Lake Road, Sparta, NJ 07871 (800) 227-0729 Fax (862) 354-5020
Calculations<br />
CO 2<br />
Parameter Unit Resolution Description of formula<br />
CO 2 % 0.01 %<br />
20,94%<br />
− O2[%]<br />
CO 2 = CO 2 max ⋅<br />
20,94%<br />
The constans CO 2 max are fuel specific and are listed in the table below<br />
Flue gas loss “loss”<br />
Parameter Unit Resolution Description of formula<br />
loss % 0.1 % see below<br />
⎛ A<br />
⎞<br />
loss [%] = ⎜<br />
+ B ⋅ FT − AT + C<br />
O<br />
⎟ (<br />
⎝20.94<br />
20,94% − [%]<br />
)<br />
2 ⎠<br />
A, B, C: fuel specific factors, for values see table below<br />
FT: flue gas temperature<br />
AT: ambient temperature<br />
Combustion Efficiency “Eff”<br />
Parameter Unit Resolution Description of formula<br />
loss % 0.1 % Eff [%] = 100 − loss[%]<br />
if loss is negative, Eff becomes greater than 100 %<br />
Fuel values for USA and its formula number for the diversion into Eff:<br />
USA CO 2max O 2ref A B C F Br<br />
Smoke<br />
spot no.<br />
natur. gas 11,7 3,0 0,5910 0,0011 9,66 0,2182 no<br />
propane 15,12 3,0 0,5970 0,0013 8,00 0,2182 no<br />
butane 14,1 3,0 0,6000 0,0013 7,68 0,2182 no<br />
fueloil #2 15,70 3,0 0,6395 0,0016 6,15 0,2302 no<br />
fueloil #5 16,3 3,0 0,6265 0,0021 5,24 0,2302 no<br />
fueloil #6 16,7 3,0 0,6375 0,0018 4,85 0,2302 no<br />
kerosene 15,12 3,0 0,6160 0,0015 6,63 0,2302 no<br />
anthr. coal 19,90 7,0 0,6970 0,0027 2,21 0,2505 no<br />
bitum. coal 18,50 7,0 0,6725 0,0024 3,58 0,2450 no<br />
distill. #1 15,40 3,0 0,6300 0,0018 6,45 0,2332 no<br />
wood 10% m. 20,0 7,0 0,6175 0,0025 8,14 0,2314 no<br />
wood 20% m. 20,0 7,0 0,6200 0,0025 9,23 0,2314 no<br />
wood 30% m. 20,0 7,0 0,6200 0,0025 10,43 0,2314 no<br />
wood 40% m. 20,0 7,0 0,6190 0,0025 11,63 0,2314 no<br />
bark 15% m. 20,0 7,0 0,6655 0,0028 7,88 0,2404 no<br />
bark 30% m. 20,0 7,0 0,6655 0,0028 9,71 0,2404 no<br />
bark 45% m. 20,0 7,0 0,6655 0,0027 11,55 0,2404 no<br />
bark 60% m. 20,0 7,0 0,6655 0,0027 13,40 0,2404 no<br />
test gas 0,0 0,0 0,0 0,0 0,0 0,0 no<br />
userfuel 1;2 0,0 0,0 0,0 0,0 0,0 0,0 no<br />
<strong>testo</strong> inc. 40 White Lake Road, Sparta, NJ 07871 (800) 227-0729 Fax (862) 354-5020 53
Dew point “Tdew”<br />
Parameter Unit Resolution Description of formula<br />
Tdew °C/°F 0,1 °C see below<br />
⎛ FH<br />
2O<br />
⋅ PAbs<br />
⎞<br />
ln⎜<br />
⎟ ⋅ 234.175<br />
610.78<br />
TpAG = −<br />
⎝ ⎠<br />
⎛ FH<br />
2O<br />
⋅ PAbs<br />
⎞<br />
ln⎜<br />
⎟ −17.08085<br />
⎝ 610.78 ⎠<br />
TpAG: Dew point temperature of flue gas<br />
F H2O : Fuel dependent steam factor (Vol %)<br />
PAbs: absolute pressure in mbar<br />
Hint:<br />
If the dew point temperature is higher than AT, AT is displayed.<br />
Excess Air „ExA“<br />
Parameter Unit Resolution Description of formula<br />
ExA % 0.1 % see below<br />
O<br />
λ = ExcessAir = 100 ⋅<br />
0,2682 ⋅ (100 − O<br />
Hint: O 2 , CO, CO 2 in %<br />
2<br />
CO<br />
2−<br />
2<br />
− CO<br />
2<br />
⎛<br />
− CO)<br />
− ⎜O<br />
⎝<br />
2<br />
CO ⎞<br />
− ⎟<br />
2 ⎠<br />
Flow velocity “Vel”<br />
Parameter Unit Resolution Description of formula<br />
vel m/s 0,01 see below<br />
⎡m⎤<br />
V ⎢ ⎥<br />
=<br />
⎣ s ⎦<br />
741,9 741.9 ⋅ Δp<br />
⋅ ( FT + 273.15)<br />
⋅α<br />
ρ *<br />
p Ort<br />
The calculation for the gas density ρ depends on the concentration, only O 2 and<br />
CO 2 will be considered:<br />
⎡ kg ⎤<br />
ρ⎢<br />
m<br />
⎥<br />
⎣ ⎦<br />
( O 0,0143 + CO *0,0197 + ( 100 − O − CO )*0.0125)*( 100 − F H )/100<br />
+ F *0, 00833<br />
= *<br />
3 2<br />
2<br />
2 2<br />
2O<br />
H 2O<br />
FH2O: fuel dependent steam factor (Vol %)<br />
O2, CO2 in Vol%<br />
P Ort : costumary absolute pressure in mbar<br />
Δp: measured differential pressure in mbar<br />
AT: measured fluegas temperature (velocity temperature) in °C<br />
α: entered pitot tube coefficient in the range from 0.00 to 1.50<br />
FT: Fuel temperature<br />
54 <strong>testo</strong> inc. 40 White Lake Road, Sparta, NJ 07871 (800) 227-0729 Fax (862) 354-5020
Volume flow “FLOW”<br />
Unit Resolution Description of formula<br />
m 3 /s 1 m 3 /s see below<br />
⎡m<br />
V ⎢<br />
⎣ s<br />
3<br />
⎤<br />
⎥<br />
⎦<br />
2<br />
[ ]<br />
⎡m⎤<br />
= v⎢<br />
⎥<br />
⋅ A cm<br />
⎣ s ⎦<br />
⋅<br />
cm<br />
2<br />
2<br />
m<br />
⋅10000<br />
A: calculated surface consisting of entered coefficients A1and A2 in cm<br />
V: calculated volume flow in m 3 /s<br />
Mass flow “m XXX ”<br />
Parameter Unit Resolution Description of formula<br />
m xxx kg/h 1kg/h see below<br />
M = x<br />
[ ppm]<br />
⎛ 100 − FH 2O<br />
⎞<br />
273.15 273,15⋅<br />
Pabs −<br />
⋅⎜<br />
⎟ ⋅ ρ Gas ⋅V<br />
⋅<br />
⋅10<br />
3600<br />
100<br />
( 273,15 )<br />
6 ⋅<br />
⎝ ⎠<br />
273.15+<br />
FT ⋅1013,0<br />
1013.0<br />
FH2O: fuel dependent steam factor (Vol %)<br />
ρGas: standard density of gas to be measured<br />
CO: 1.25 kg/m 3<br />
NOx: 2.05 kg/m 3<br />
SO 2 : 2.858 kg/m 3<br />
H 2 S: 1.54 kg/m 3<br />
CO 2 : 1.963 kg/m 3<br />
1 kg/h = 2,205 lb/h<br />
1 lb/h = 0,4536 kg/h<br />
V: calculated volume flow in m 3 /s<br />
Pabs: absolute pressure in mbar<br />
FT: fluegas temperature<br />
<strong>testo</strong> inc. 40 White Lake Road, Sparta, NJ 07871 (800) 227-0729 Fax (862) 354-5020 55
9.10 Technical data<br />
Probe type Temperature O 2<br />
CO (H 2<br />
compensated) COlow CO 2<br />
NO NOlow<br />
Measuring<br />
range<br />
Accuracy<br />
± 1 digit<br />
-40... +2192 °F 0... +25 Vol.% O 2<br />
0... +10000 ppm CO 0... +500 ppm CO 0... CO 2<br />
max Vol. %<br />
CO2<br />
9.11 Warranty periods<br />
<strong>350</strong><strong>XL</strong> Analyzer Box and Control Unit: 2 years<br />
(apart from wear parts and measuring<br />
cells)<br />
O 2 measuring cell:<br />
1 1 / 2 years<br />
CO/NO/NO 2 /SO 2 /H 2 S/HC sensors:<br />
Probes:<br />
Rechargeable battery:<br />
Accessories:<br />
Printer:<br />
1 year<br />
1 year (apart from filter)<br />
1 year<br />
1 / 2 year<br />
1 year<br />
10.0<br />
Distributor Contact Information<br />
CALL MURCAL TO PLACE YOUR ORDER<br />
<br />
<strong>MurCal</strong><br />
www.murcal.com<br />
P:(661)272-4700<br />
F:(661)947-7570<br />
e-mail: sales@murcal.com<br />
<strong>testo</strong> inc. 57