EAC 97 SERIES 2006 - Air Systems International
EAC 97 SERIES 2006 - Air Systems International
EAC 97 SERIES 2006 - Air Systems International

You also want an ePaper? Increase the reach of your titles
YUMPU automatically turns print PDFs into web optimized ePapers that Google loves.
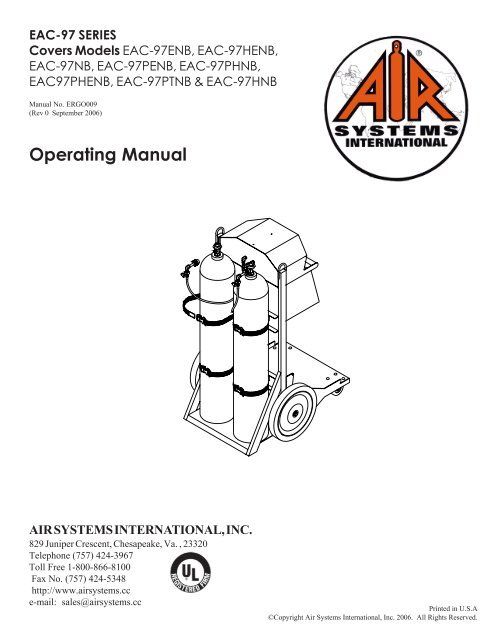
<strong>EAC</strong>-<strong>97</strong> <strong>SERIES</strong><br />
Covers Models <strong>EAC</strong>-<strong>97</strong>ENB, <strong>EAC</strong>-<strong>97</strong>HENB,<br />
<strong>EAC</strong>-<strong>97</strong>NB, <strong>EAC</strong>-<strong>97</strong>PENB, <strong>EAC</strong>-<strong>97</strong>PHNB,<br />
<strong>EAC</strong><strong>97</strong>PHENB, <strong>EAC</strong>-<strong>97</strong>PTNB & <strong>EAC</strong>-<strong>97</strong>HNB<br />
Manual No. ERGO009<br />
(Rev 0 September <strong>2006</strong>)<br />
Operating Manual<br />
AIR SYSTEMS INTERNATIONAL, INC.<br />
829 Juniper Crescent, Chesapeake, Va. , 23320<br />
Telephone (757) 424-3967<br />
Toll Free 1-800-866-8100<br />
Fax No. (757) 424-5348<br />
http://www.airsystems.cc<br />
e-mail: sales@airsystems.cc<br />
Printed in U.S.A<br />
©Copyright <strong>Air</strong> <strong>Systems</strong> <strong>International</strong>, Inc. <strong>2006</strong>. All Rights Reserved.
-2-<br />
OVERVIEW<br />
The Ergo-<strong>Air</strong> ® Cart is an ergonomically designed mobile cylinder cart for long duration<br />
breathing air applications. The unique design helps reduce back/shoulder injuries and<br />
allows movement by people of small stature. Low pressure warning alarm is standard.<br />
Deck mounted hose reels and storage cabinets are just a few of the options available.<br />
SPECIFICATIONS FOR<br />
MODELS <strong>EAC</strong>-<strong>97</strong>ENB, <strong>EAC</strong>-<strong>97</strong>HENB, <strong>EAC</strong>-<strong>97</strong>PENB & <strong>EAC</strong><strong>97</strong>PHENB<br />
Cart Dimensions<br />
Weight without<br />
Cylinders<br />
Frame<br />
Cylinder Straps<br />
Wheels/Casters<br />
Whip Assemblies<br />
Bleeder Valves<br />
Check Valves<br />
Warning Alarm<br />
Primary Regulator<br />
Pressure<br />
(Model <strong>EAC</strong>-<strong>97</strong>ENB &<br />
<strong>EAC</strong>-<strong>97</strong>PENB)<br />
Primary Regulator<br />
Pressure<br />
(Model <strong>EAC</strong>-<strong>97</strong>HENB &<br />
<strong>EAC</strong><strong>97</strong>PHENB)<br />
Primary Regulator<br />
Flow Rate<br />
Relief Valve<br />
<strong>Air</strong> Distribution<br />
Transportation<br />
Ergo Design<br />
32"W x 55"H x 38¼" D<br />
(81cm W x 140cm H x <strong>97</strong>cm D)<br />
250 lbs (114 kg)<br />
Steel Powder Coated<br />
Four (4) adjustable straps to accommodate<br />
different size cylinders<br />
Standard: 16" semi-pneumatic (front)<br />
6" soft tread swivel casters with brake (rear)<br />
Optional: 16" pneumatic (front)<br />
10" pneumatic casters with brake (rear)<br />
Thermo plastic 5000psi (345 bar) rated 4:1<br />
safety factor<br />
Allows depressurization of hand tight nut before<br />
cylinder removal. Model <strong>EAC</strong>-<strong>97</strong>HENB only<br />
Allows independent cylinder operation and removal<br />
without complete system shutdown.<br />
9 VDC audible and visual alarms for low pressure warning<br />
Set at approximately 500psi (34.5 bar)<br />
0-3000 psi (205 bar) inlet<br />
0-125psi (8.6 bar) discharge<br />
0-5500psi (379 bar) inlet<br />
0-125psi (8.6 bar) discharge<br />
80cfm (2260 LPM) @ 125psi (8.6 bar) discharge pressure<br />
125psi (8.6 bar) ASME preset<br />
Four (4) regulated quick connect fittings<br />
2 eyelets for sling attachment--vertical lifting<br />
Raising Cart: 15lbs. of force<br />
Lowering Cart: 35lbs. of force
-3-<br />
PARTS IDENTIFICATION<br />
MODELS <strong>EAC</strong>-<strong>97</strong>ENB, <strong>EAC</strong>-<strong>97</strong>HENB, <strong>EAC</strong>-<strong>97</strong>PENB & <strong>EAC</strong><strong>97</strong>PHENB<br />
Models<br />
<strong>EAC</strong>-<strong>97</strong>ENB & <strong>EAC</strong>-<strong>97</strong>PENB<br />
Models<br />
<strong>EAC</strong>-<strong>97</strong>HENB & <strong>EAC</strong>-<strong>97</strong>PHENB<br />
ITEM # DESCRIPTION PART #<br />
1 RESPIRATOR COUPLING, HANSEN QDH3SL6M<br />
1A RESPIRATOR COUPLING, SCHRADER QDSSL6M<br />
2 DUST CAP, HANSEN QDH3DCAP<br />
2A DUST CAP, SCHRADER QDSDCAP<br />
3 PRESSURE REGULATOR, 3000 PSI (<strong>EAC</strong>-<strong>97</strong>ENB, <strong>EAC</strong>-<strong>97</strong>PENB) REG-3000<br />
3A PRESSURE REGULATOR, 5000 PSI (<strong>EAC</strong>-<strong>97</strong>HENB, <strong>EAC</strong>-<strong>97</strong>PHENB) REG-5000<br />
4 PRESSURE GAUGE, 0-200 PSI GA25200SRG<br />
5 PRESSURE GAUGE, 0-4000 PSI GA254KSREG<br />
5A PRESSURE GAUGE, 0-6000 PSI GA256KSREG<br />
6 LOW PRESSURE ALARM ON/OFF SWITCH ELSW005<br />
7 STORAGE BOX <strong>EAC</strong>-<strong>97</strong>SBU<br />
8 CYLINDER STRAP HDWR113B<br />
9 CGA-346 NUT (<strong>EAC</strong>-<strong>97</strong>ENB, <strong>EAC</strong>-<strong>97</strong>PENB) HPBR025<br />
10 CGA-346 STEM WITH CHECK VALVE (<strong>EAC</strong>-<strong>97</strong>ENB, <strong>EAC</strong>-<strong>97</strong>PENB) HPBR027<br />
11 BLEEDER VALVE (<strong>EAC</strong>-<strong>97</strong>HENB, <strong>EAC</strong>-<strong>97</strong>PHENB) VAL030<br />
12 CGA-347 HAND-TIGHT (<strong>EAC</strong>-<strong>97</strong>HENB, <strong>EAC</strong>-<strong>97</strong>PHENB) SS347HT<br />
13 16" WHEEL, SEMI-PNEUMATIC HDWR145<br />
14 16" WHEEL, PNEUMATIC (<strong>EAC</strong>-<strong>97</strong>PENB & <strong>EAC</strong>-<strong>97</strong>PHENB) HDWR120<br />
15 5" CASTER HDWR122<br />
16 BRAKE KIT FOR 5" CASTER HDWR122A<br />
17 10" PNEUMATIC CASTER (<strong>EAC</strong>-<strong>97</strong>PENB & <strong>EAC</strong>-<strong>97</strong>PHENB) HDWR101<br />
18 12 VDC BULB ELDS001<br />
19 RED LENS ELDS005<br />
20 AUDIBLE ALARM ELLS004<br />
21 REMOTE ALARM JACK ELJP004<br />
22 REMOTE ALARM JACK COVER ELJP005<br />
23 BATTERY HOLDER MONC006
-4-<br />
SETUP FOR MODELS MODELS <strong>EAC</strong>-<strong>97</strong>ENB,<br />
<strong>EAC</strong>-<strong>97</strong>HENB, <strong>EAC</strong>-<strong>97</strong>PENB & <strong>EAC</strong><strong>97</strong>PHENB<br />
Step 1)<br />
Remove clevis pin. Push the handle up and forward to situate the cart in an upright position. Reinstall the clevis pin.<br />
Step 2)<br />
Install, arrange and index the air cylinders so that the valve outlets are facing away from the control panel. Secure cylinders<br />
by tightening the straps at the buckle and mating the velcro sections.<br />
Step 3)<br />
Model <strong>EAC</strong>-<strong>97</strong>HENB & <strong>EAC</strong>-<strong>97</strong>PHENB: Install CGA-347 hand tight nuts on the cylinder valves, and tighten. Insure<br />
both bleeder valves are closed by turning fully clockwise.<br />
Model <strong>EAC</strong>-<strong>97</strong>ENB & <strong>EAC</strong><strong>97</strong>PENB: Install CGA-346 wrench tight nuts on the cylinder valves, and tighten.<br />
Step 4)<br />
Place the “on/off” toggle switch to the “on” position. The lights and alarms should should. Note: The alarm preset to<br />
sound at approximately 500psi (35 bar) descending pressure. If alarms do not activate, replace the 9-volt batteries.<br />
Step 5)<br />
LOW PRESSURE ALARM TEST<br />
Make sure the bleeder valves are closed; open one cylinder:<br />
a. At this time the alarm should shut off when system pressure reaches 500psi (35bar) or greater.<br />
b. Check the cylinder pressure on the high pressure gauge.<br />
c. Set required respirator pressure with the regulator control knob<br />
d. Close the cylinder valve and slowly bleed off pressure through one of the respirator outlets.<br />
e. The low pressure alarm should sound and the light should come on at approximatly 500psi (35 bar).<br />
f. Open the other cylinder and check its pressure on the high pressure gauge.<br />
Step 6)<br />
Couple respirators and lengths of hoses to the manifold, and readjust regulator control knob if necessary. The system is<br />
now operational. When a cylinder in use has been depleted to approximately 500psi (35 bar), the low<br />
pressure warning alarm will sound, indicating that the cylinder needs to be replaced.<br />
Optional)<br />
A variety of hose reel options are available. If the lower reel is to be used, open the valve located near the inlet. This will<br />
pressurize the hose reel.<br />
To change a cylinder while the cart is still in use:<br />
a. Open the second cylinder and note the gauge pressure to assure that the cylinder is full.<br />
b. Close the drained cylinder and open the bleeder valve (high pressure version) on the whip to relieve the<br />
remaining pressure on the hand tight nut.<br />
c. The system's check valves will prevent back flow from the other cylinder in use<br />
d. Replace or fill the drained cylinder and reinstall connecting whip.
-5-<br />
SETUP FOR MODELS <strong>EAC</strong>-<strong>97</strong>ENB,<br />
<strong>EAC</strong>-<strong>97</strong>HENB, <strong>EAC</strong>-<strong>97</strong>PENB & <strong>EAC</strong><strong>97</strong>PHENB
-6-<br />
SPECIFICATIONS FOR<br />
MODELS <strong>EAC</strong>-<strong>97</strong>NB, <strong>EAC</strong>-<strong>97</strong>HNB, <strong>EAC</strong>-<strong>97</strong>PTNB, & <strong>EAC</strong>-<strong>97</strong>PHNB<br />
32"W x 55"H x 38¼" D<br />
Cart Dimensions<br />
(81cm W x 140cm H x <strong>97</strong>cm D)<br />
Weight without<br />
Cylinders<br />
250 lbs (114 kg)<br />
Frame<br />
Steel Powder Coated<br />
Four (4) adjustable straps to accommodate<br />
Cylinder Straps<br />
different size cylinders<br />
Standard: 16" semi-pneumatic (front)<br />
6" soft tread swivel casters with brake (rear)<br />
Optional: 16" pneumatic (front)<br />
Wheels/Casters<br />
10" pneumatic casters with brake (rear)<br />
Thermo plastic 5000psi (345 bar) rated 4:1<br />
Whip Assemblies<br />
safety factor<br />
Allows depressurization of hand tight nut before<br />
Bleeder Valves<br />
cylinder removal. Model <strong>EAC</strong>-<strong>97</strong>HENB only<br />
Allows independent cylinder operation and removal<br />
Check Valves<br />
without complete system shutdown.<br />
Pneumatic whistle alarms for low pressure warning<br />
Warning Alarm<br />
Set at approximately 500psi (34.5 bar)<br />
Primary Regulator<br />
Pressure<br />
(Model <strong>EAC</strong>-<strong>97</strong>NB & <strong>EAC</strong>-<br />
0-3000 psi (205 bar) inlet<br />
<strong>97</strong>PTNB)<br />
0-125psi (8.6 bar) discharge<br />
Primary Regulator<br />
Pressure<br />
(Model <strong>EAC</strong>-<strong>97</strong>HNB &<br />
0-5500psi (379 bar) inlet<br />
<strong>EAC</strong>-<strong>97</strong>PHNB)<br />
0-125psi (8.6 bar) discharge<br />
Primary Regulator<br />
Flow Rate 80cfm (2260 LPM) @ 125psi (8.6 bar) discharge pressure<br />
Relief Valve<br />
125psi (8.6 bar) ASME preset<br />
<strong>Air</strong> Distribution<br />
Four (4) regulated quick connect fittings<br />
Transportation<br />
2 eyelets for sling attachment--vertical lifting<br />
Raising Cart: 15lbs. of force<br />
Ergo Design<br />
Lowering Cart: 35lbs. of force
-7-<br />
PARTS IDENTIFICATION<br />
MODELS <strong>EAC</strong>-<strong>97</strong>NB, <strong>EAC</strong>-<strong>97</strong>HNB, <strong>EAC</strong>-<strong>97</strong>PTNB, & <strong>EAC</strong>-<strong>97</strong>PHNB<br />
ITEM # DESCRIPTION PART #<br />
1 RESPIRATOR COUPLING, HANSEN QDH3SL6M<br />
1A RESPIRATOR COUPLING, SCHRADER QDSSL6M<br />
2 DUST CAP, HANSEN QDH3DCAP<br />
2A DUST CAP, SCHRADER QDSDCAP<br />
3 PRESSURE REGULATOR, 3000 PSI (<strong>EAC</strong>-<strong>97</strong>NB) REG-3000<br />
3A PRESSURE REGULATOR, 5000 PSI (<strong>EAC</strong>-<strong>97</strong>HNB) REG-5000<br />
4 PRESSURE GAUGE, 0-200 PSI GA25200SRG<br />
5 PRESSURE GAUGE, 0-4000 PSI GA254KSREG<br />
5A PRESSURE GAUGE, 0-6000 PSI GA256KSREG<br />
6 LOW PRESSURE WHISTLE AC-PA25<br />
7 CYLINDER STRAP HDWR113B<br />
8 CGA-346 STEM WITH CHECK VALVE HPBR027<br />
9 CGA-346 NUT HPBR025<br />
10 BLEEDER VALVE VAL030<br />
11 CGA-347 HAND-TIGHT SS347HT<br />
12 16" WHEEL, SEMI-PNEUMATIC HDWR145<br />
13 16" WHEEL, PNEUMATIC HDWR120<br />
14 5" CASTER HDWR122<br />
15 BRAKE KIT FOR 5" CASTER HDWR122A<br />
16 10" PNEUMATIC CASTER HDWR101
-8-<br />
SETUP FOR MODELS <strong>EAC</strong>-<strong>97</strong>NB, <strong>EAC</strong>-<strong>97</strong>HNB,<br />
<strong>EAC</strong>-<strong>97</strong>PTNB, & <strong>EAC</strong>-<strong>97</strong>PHNB<br />
Step 1)<br />
Remove clevis pin. Push the handle up and forward to situate the cart in an upright position. Reinstall the clevis pin.<br />
Step 2)<br />
Install, arrange and index the air cylinders so that the valve outlets are facing away from the control panel. Secure cylinders<br />
by tightening the straps at the buckle and mating the velcro sections.<br />
Step 3)<br />
Model <strong>EAC</strong>-<strong>97</strong>HNB: Install CGA-347 hand tight nuts on the cylinder valves, and tighten. Insure both bleeder valves are<br />
closed by turning fully clockwise.<br />
Model <strong>EAC</strong>-<strong>97</strong>NB: Install CGA-346 wrench tight nuts on the cylinder valves, and tighten.<br />
Step 4)<br />
Open one cylinder. At this time the low pressure warning alarm will sound, until it sets itself at approximately 1000psi (69<br />
bar). Check reading on gauge to verify that it is full. Close the cylinder.<br />
Step 5)<br />
Set required respirator pressure with the regulator control knob, and bleed pressure by partially engaging a male plug into<br />
one of the respirator fittings. This despressurizes the manifold, and simulates low cylinder pressure. The low pressure<br />
warning alarm should sound at approximately 500psi (35 bar).<br />
Step 6)<br />
Open the second cylinder. At this time the low pressure warning alarm will resound until it sets itself at approximately<br />
1000psi (69bar). Check reading on gauge to verify that it is full.<br />
Step 7)<br />
Couple respirators and lengths of hoses to the manifold, and readjust regulator control knob if necessary. The system is<br />
now operational. When a cylinder in use has been depleted to approximately 500psi (35 bar), the low<br />
pressure warning alarm will sound, indicating that the cylinder needs to be replaced.<br />
Optional)<br />
A variety of hose reel options are available. If the lower reel is to be used, open the valve located near the inlet. This will<br />
pressurize the hose reel.<br />
To change a cylinder while the ERGO-AIR ® CART is still in use:<br />
1. Open second cylinder and note the gauge pressure to assure that it is full.<br />
2. Close the drained cylinder.<br />
3. Model <strong>EAC</strong>-<strong>97</strong>HNB & <strong>EAC</strong>-<strong>97</strong>PHNB: Open the bleeder valve of the drained cylinder.<br />
Remove CGA-347 hand tight nut. Replace with full cylinder. Reinstall connect whip. Close<br />
bleeder valve.<br />
Model <strong>EAC</strong>-<strong>97</strong>NB & <strong>EAC</strong>-<strong>97</strong>PTNB: Loosen CGA-346 wrench tight nut to relieve<br />
pressure. Replace with a full cylinder. Reinstall connect whip.<br />
Note: The system is equipped with check valves that will prevent back flow from the other<br />
cylinder in use.
-9-<br />
SETUP FOR MODELS <strong>EAC</strong>-<strong>97</strong>NB, <strong>EAC</strong>-<strong>97</strong>HNB,<br />
<strong>EAC</strong>-<strong>97</strong>PTNB, & <strong>EAC</strong>-<strong>97</strong>PHNB
-10-<br />
HIGH PRESSURE AIRLINE GENERAL MAINTENANCE & INSPECTION<br />
FOR ALL MODELS<br />
Monthly<br />
1. Check regulators, gauges, and valves for external leakage.<br />
2. Inspect cylinder valves for proper closure.<br />
3. Check cylinder pigtails for cleanliness, flexibility, wear, leakage, blisters on hose, thread<br />
damage, and O-rings on CGA fittings. Replace damaged items immediately.<br />
Annually<br />
1. Check relief valve’s pressure setting.<br />
2. Check regulator function by opening and closing regulator valve knob fully.<br />
Every 4 years<br />
1. Replace all flexible pigtails.<br />
SHUTDOWN FOR ALL MODELS<br />
Make sure all personnel have egressed the hazardous area and have disconnected from the breathing<br />
air system.<br />
1. Close cylinder valves.<br />
2. Depressurize manifold pressure by partially engaging male plug into one of the respirator<br />
fittings.<br />
3. Close the regulator by turning the control knob counterclockwise.<br />
4. Reinstall dust caps.<br />
5. Remove connections from cylinders. Reinstall cylinder valve covers (if applicable).<br />
6. If transportation of cart is required, remove clevis pin, place foot on base and pull handle<br />
until movement stops. Replace clevis pin.
-11-<br />
Warranty Disclaimer<br />
<strong>Air</strong> <strong>Systems</strong>’ manufactured equipment is warranted to the original user against defects in workmanship<br />
or materials under normal use for one year after date of purchase. Any part which is determined<br />
by <strong>Air</strong> <strong>Systems</strong> to be defective in material or workmanship will be, as the exclusive remedy,<br />
repaired or replaced at <strong>Air</strong> <strong>Systems</strong>’ option. This warranty does not apply to electrical systems or<br />
electronic components. Electrical parts are warranted, to the original user, for 90 days from the<br />
date of sale. During the warranty period, electrical components will be repaired or replaced at <strong>Air</strong><br />
<strong>Systems</strong>’ option.<br />
NO OTHER WARRANTY, EXPRESSED OR IMPLIED, AS TO DESCRIPTION, QUAL-<br />
ITY, MERCHANTABILITY, FITNESS FOR A PARTICULAR PURPOSE, OR ANY<br />
OTHER MATTER IS GIVEN BY AIR SYSTEMS IN CONNECTION HEREWITH. UN-<br />
DER NO CIRCUMSTANCES SHALL THE SELLER BE LIABLE FOR LOSS OF<br />
PROFITS, ANY OTHER DIRECT OR INDIRECT COSTS, EXPENSES, LOSSES OR<br />
DAMAGES ARISING OUT OF DEFECTS IN, OR FAILURE OF THE PRODUCT OR<br />
ANY PART THEREOF.<br />
The purchaser shall be solely responsible for compliance with all applicable Federal, State and<br />
Local OSHA and/or MSHA requirements. Although <strong>Air</strong> <strong>Systems</strong> <strong>International</strong> believes that its<br />
products, if operated and maintained as shipped from the factory and in accordance with our “operations<br />
manual”, conform to OSHA and/or MSHA requirements, there are no implied or expressed<br />
warranties of such compliance extending beyond the limited warranty described herein. Product<br />
designs and specifications are subject to change without notice. Rev 2 12/98<br />
<strong>Air</strong> leaks are not covered under warranty except when they result from a defective system<br />
component, i.e. an on/off valve or regulator or upon initial delivery due to poor workmanship.<br />
<strong>Air</strong> leaks due to poor delivery or damage will be covered under delivery claims. Minor<br />
air leaks are part of routine service and maintenance and are the responsibility of the customer<br />
just as are filters and oil changes.