Pool Closing Guide - Island Recreational
Pool Closing Guide - Island Recreational
Pool Closing Guide - Island Recreational

You also want an ePaper? Increase the reach of your titles
YUMPU automatically turns print PDFs into web optimized ePapers that Google loves.
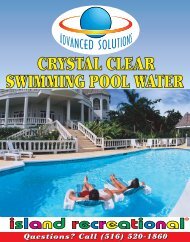
TM<br />
BUY YOUR<br />
WINTER COVER<br />
NOW AND<br />
SAVE!<br />
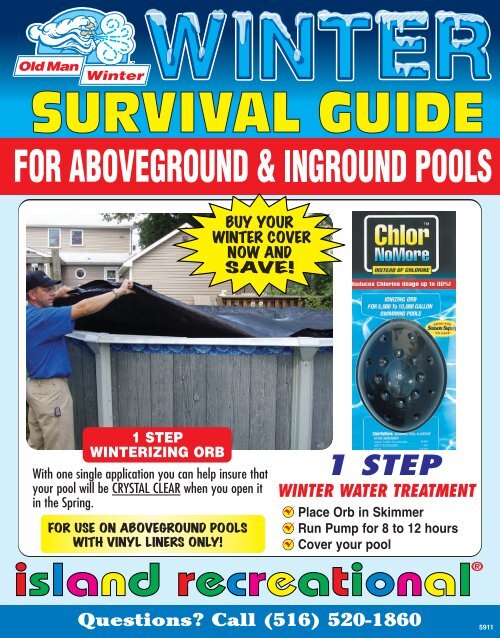
1 STEP<br />
WINTERIZING ORB<br />
With one single application you can help insure that<br />
your pool will be CRYSTAL CLEAR when you open it<br />
in the Spring.<br />
FOR USE ON ABOVEGROUND POOLS<br />
WITH VINYL LINERS ONLY!<br />
1 STEP<br />
WINTER WATER TREATMENT<br />
Place Orb in Skimmer<br />
Run Pump for 8 to 12 hours<br />
Cover your pool<br />
Questions Call (516) 520-1860<br />
5911
HOW TO WINTERIZE YOUR ABOVEGROUND<br />
SKIMMER & POOL RETURN<br />
NOW AVAILABLE FOR<br />
WIDE MOUTH SKIMMERS<br />
FOR<br />
STANDARD<br />
RETURN<br />
WINTERIZING<br />
PLATE<br />
$<br />
5<br />
• Seals and protects your Thru Wall Skimmer or Skim Filter System from the elements<br />
• Reduces Winter Cover Stress by allowing you to keep water level<br />
higher in the pool during the cold winter months.<br />
• Assorted Sizes available to fit most Aboveground Skimmer Boxes including:<br />
Seasonmaster TM , Blue Seal TM , Olympic TM and Hayward TM<br />
INSTALLATION INSTRUCTIONS:<br />
1. Remove only those screws from the skimmer face plate that match the holes in the ICE GUARD<br />
winter plate.<br />
WARNING: DO NOT REMOVE ALL SCREWS FROM SKIMMER.<br />
2. Place gasket and ICE GUARD winter plate over skimmer face plate and align properly.<br />
3. Secure gasket and ICE GUARD plate to skimmer face plate with screws supplied in this package.<br />
WARNING: DO NOT OVER TIGHTEN SCREWS.<br />
4. Select the correct size plug. Plug return fitting from INSIDE of pool.<br />
5. Detach all hoses from skimmer and return fitting. Remove and store all internal skimmer<br />
components (basket, weir, cartridge, etc.)<br />
6. IMPORTANT: Apply a piece of Duct Tape (not supplied) to hole in top of skimmer cover.<br />
OFF<br />
Remove directional return from pool wall.<br />
Your directional return consists of<br />
3 components: (1) Locking Ring; (2) Ball;<br />
(3) Ball seat<br />
a. Remove locking ring<br />
b. Remove eyeball<br />
c. Insert seat removal tool into ball seat<br />
Turn counter clockwise until ball seat is<br />
completely removed<br />
After directional return has been removed,<br />
you should have a 1-1/2” opening with<br />
female threads exposed.<br />
Prepare your hose adapter fitting by putting<br />
Teflon Tape around the<br />
threads. Then screw fitting into opening in<br />
wall. HAND TIGHTEN ONLY.<br />
d. Insert either a threaded plug or a #10<br />
Expandable Rubber Plug and tighten.<br />
ALL SEASON<br />
FRAME AND PLATE KIT<br />
• FRAME - Eliminates removing skimmer screws to install<br />
winter plate.<br />
• STAINLESS STEEL INSERTS - Eliminates leaks caused<br />
by leaking seal at face plate.<br />
• WINTER PLATE AND PLUG - Eliminates purchasing<br />
after market winterizing accessories.<br />
• TRIM RING - Eliminates unsightly hardware.<br />
SEAT<br />
REMOVAL<br />
TOOL<br />
Using seat removal tool<br />
Directional Return<br />
c.<br />
a.<br />
b.<br />
$<br />
5OFF<br />
The right tool<br />
always makes the<br />
job easier. Ball Seat<br />
Removal Tools<br />
in Stock Now!<br />
2<br />
Insert seat removal tool into ball seat<br />
Turn counter clockwise until ball seat is completely removed<br />
JOIN THE VIP CLUB • FREE MEMBERSHIP
HOW TO WINTERIZE YOUR<br />
ABOVEGROUND AQUABLENDER SYSTEM<br />
2<br />
1<br />
2<br />
Remove the domed Anti-Vortex Cover from the drain unit.<br />
There will be 1 1-/2 inch openings, one of which will be plugged.<br />
Place the #8 plug in the open port and tighten.<br />
Install winter plate over skimmer as per winter plate instructions<br />
and plug pool return with #10 plug.<br />
1<br />
@@@@@@@@@<br />
<br />
<br />
<br />
yyyyyyyyy<br />
@@@@@@@@@<br />
<br />
<br />
<br />
yyyyyyyyy<br />
@@@@@@@@@<br />
<br />
<br />
<br />
yyyyyyyyy<br />
3<br />
4<br />
3<br />
4<br />
Remove the valve manifold from the poly pipe.<br />
Siphon water from poly pipe. Pour pipe line Anti-Freeze into poly<br />
pipe Cover pipe with a plastic bag and fasten with tape.<br />
HELPFUL HINTS:<br />
• Disassemble valves. Clean and lubricate with O ring lube. Reassemble.<br />
• Store all parts in a warm dry place. (Above Freezing Temperatures).<br />
SUPPLIES<br />
TO WINTERIZE POOLS WITH AQUABLENDER SYSTEM<br />
PLUGS ANTI-FREEZE WINTER PLATE<br />
EASY<br />
TO<br />
INSTALL<br />
SAFE<br />
FOR ALL<br />
PIPES<br />
Questions Call (516) 520-1860<br />
3
ICE EQUALIZERS<br />
ROUNDS<br />
USE 4’ x 4’<br />
ICE EQUALIZER ON THE<br />
FOLLOWING SIZE ROUND POOLS<br />
12’ ROUND<br />
15’ ROUND<br />
18’ ROUND<br />
21’ ROUND<br />
USE 4’ x 4’<br />
ICE EQUALIZER ON THE<br />
FOLLOWING SIZE OVAL POOLS<br />
10’ x 15’ OVAL<br />
12’ x 18’ OVAL<br />
12’ x 24’ OVAL<br />
15’ x 21’ OVAL<br />
USE 4’ x 8’<br />
ICE EQUALIZER ON THE<br />
FOLLOWING SIZE ROUND POOLS<br />
24’ ROUND<br />
27’ ROUND<br />
30’ ROUND<br />
33’ ROUND<br />
OVALS<br />
USE 4’ x 8’<br />
ICE EQUALIZER ON THE<br />
FOLLOWING SIZE OVAL POOLS<br />
15’ x 25’ OVAL<br />
18’ x 24’ OVAL<br />
15’ x 30’ OVAL<br />
• Reduces stress on<br />
Winter Cover<br />
• Reduces ice pressure<br />
on liner and walls<br />
• Creates stress channel<br />
for easy water removal<br />
OVALS<br />
USE 4’ x 15’<br />
ICE EQUALIZER ON THE<br />
FOLLOWING SIZE OVAL POOLS<br />
16’ x 32’ OVAL<br />
18’ x 33’ OVAL<br />
18’ x 45’ OVAL<br />
ALL AIR PILLOWS & WATER BAGS<br />
ARE WARRANTIED AS<br />
FOLLOWS:<br />
4<br />
HELPFUL HINTS:<br />
• Always inflate Ice Equalizer 2 days prior to covering pool to check for leaks.<br />
• Inflate Ice Equalizer (air pillow) and secure by loosely tying to pool frame. Ice Equalizer should be approximately<br />
2/3 full of air. DO NOT FILL TO CAPACITY. Lubricate valve plug with O-Ring Lube. Place an “X” of Duct Tape over<br />
the valve. Install the Equalizer with the air valve facing up.<br />
• Never allow too much water to build up on top of your pool cover. Water can be easily removed by using a<br />
submersible pump or cover siphon.<br />
0-30 DAYS FROM DATE OF PURCHASE ............100%<br />
31-180 DAYS FROM DATE OF PURCHASE ..........50%<br />
WARRANTIES COVER MANUFACTURERS DEFECTS ONLY.<br />
THEY DO NOT COVER PUNCTURES OR TEARS. FOR YOUR<br />
CONVENIENCE WE SUGGEST THAT YOU FILL EITHER BAGS<br />
OR PILLOWS PRIOR TO INSTALLATION TO BE SURE THAT<br />
THEY ARE DEFECT FREE. RECEIPT MUST ACCOMPANY ALL<br />
WARRANTY CLAIMS.<br />
JOIN THE VIP CLUB • FREE MEMBERSHIP
Auto Draining Winter Cover<br />
FOR ABOVEGROUND POOLS<br />
If it doesn’t have a continuous barrier then it’s not an EZ Drain TM<br />
TM<br />
Au<br />
THE CONTINUOUS<br />
BARRIER<br />
Is designed to maintain the correct amount<br />
of water on your pool cover. Maintaining<br />
water on top of your cover protects it from<br />
harmful UV rays as well as prevents<br />
damage caused by wind flap<br />
THE FILTER<br />
SCREEN<br />
Is designed to prevent your automatic<br />
drain from becoming clogged. It also allows<br />
any debris that is collected to dry and be<br />
blown away<br />
DRAIN BASIN AND<br />
DRAIN PORT<br />
Are pre-assembled and are designed to<br />
collect water and direct it towards the<br />
external wall drain via a drain hose,<br />
which is supplied with the cover<br />
STRATEGICALLY PLACED<br />
COVER STABILIZERS<br />
Direct excess water towards the EZ DRAIN TM<br />
in the center of your pool. These foam<br />
flotation devices are encapsulated in the<br />
same material as the pool cover and are<br />
permanently attached to your cover. This<br />
eliminates the need for a bubble saving you<br />
both time and money<br />
TENSION ADJUSTMENT<br />
CLIPS<br />
To ensure proper drainage<br />
additional adjustments can<br />
be made by adding these<br />
clips in areas where you<br />
have excess cover material.<br />
Simply pull the cover over<br />
the top rail and snap the<br />
clip in place<br />
3 IN 1<br />
WINTER COVER AND<br />
POOL PROTECTION<br />
REINFORCED SOLID POOL COVER<br />
#1 CARBON BLACK SUNBLOCK<br />
TOP LAYER<br />
#2 CARBON BLACK 14 X 14<br />
WOVEN INNERCORE<br />
#3 CARBON BLACK<br />
CHEMBLOCK LAYER<br />
LOCK TITE CABLE<br />
FASTENER AND LOCK<br />
• Extra Large Spool<br />
• Extra Large Handle for more leverage<br />
• Extra Strong Lock and 2 keys for<br />
added security<br />
PROTECTED BY THE U.S. GOVERNMENT<br />
UNDER PATENT # 6487733<br />
NO BUBBLE<br />
REQUIRED<br />
NEVER BUY A<br />
BUBBLE AGAIN<br />
NEVER BUY<br />
A PUMP AGAIN<br />
NO PUMP<br />
REQUIRED<br />
Questions Call (516) 520-1860<br />
5
WINTER COVER<br />
FASTENING SYSTEMS<br />
CLOSE YOUR POOL RIGHT WITH<br />
THE CRANK ’N LOCK SYSTEM<br />
ICE GUARD<br />
LOCK COVER<br />
FEATURES<br />
• Extra Large Spool<br />
• Extra Large Handle for more leverage<br />
• Extra Strong Lock and 2 keys for added security.<br />
WINTER<br />
COVER CLIPS<br />
• Revolutionary device secures your cover<br />
in place<br />
to prevent WIND DAMAGE.<br />
• Used in addition to standard cover cable.<br />
• Install clip on top ledge on either side of<br />
caps to keep cover in place<br />
• Extends cover life and helps reduce<br />
Spring Cleanup<br />
PACKAGE<br />
OF<br />
6<br />
COVER SIPHON<br />
PUMP FOR<br />
ABOVEGROUND POOLS<br />
WINTER COVER<br />
REPLACEMENT<br />
CABLE<br />
NOW AVAILABLE<br />
RATCHET<br />
STYLE WINCH<br />
• All Aluminum construction<br />
• Offset spindle<br />
• Spring loaded ratchet lock<br />
• Extends the life of your Aboveground cover<br />
• Non-electric<br />
• Attaches to any standard garden hose (not supplied)<br />
350 GPH<br />
SUBMERSIBLE<br />
COVER PUMP<br />
• 25’ power cord<br />
• Completely submersible<br />
• Built in filter pad<br />
• Hooks up to any garden hose<br />
• 1 year warranty<br />
6 JOIN THE VIP CLUB • FREE MEMBERSHIP
The Web Lock TM<br />
WINTER COVER SYSTEM<br />
Exclusively at <strong>Island</strong> <strong>Recreational</strong><br />
ABSOLUTELY THE STRONGEST WINTER COVER AVAILABLE FOR ABOVEGROUND POOLS<br />
AVAILABLE FOR BOTH ROUND AND OVAL POOLS<br />
BEST COVER<br />
MONEY<br />
CAN BUY!<br />
LOWER WEB SYSTEM<br />
2” WIDE<br />
DOUBLE STITCHED<br />
REINFORCING WEB<br />
UPPER WEB SYSTEM<br />
2” WIDE<br />
DOUBLE STITCH<br />
REINFORCING WEB<br />
WEB<br />
REINFORCED HEM<br />
3<br />
WINTER COVER AND<br />
IN 1POOL PROTECTION<br />
REINFORCED SOLID POOL COVER<br />
#1 CARBON BLACK SUNBLOCK<br />
TOP LAYER<br />
#2 CARBON BLACK 14 x 14<br />
WOVEN INNERCORE<br />
#3 CARBON BLACK<br />
CHEMBLOCK LAYER<br />
LOCK TITE CABLE<br />
FASTENER AND LOCK<br />
• Extra Large Spool<br />
• Extra Large Handle for more leverage<br />
• Extra Strong Lock and 2 keys for<br />
added security<br />
VINYL COATED<br />
STEEL CABLE<br />
Questions Call (516) 520-1860<br />
DUAL<br />
GROMMETS<br />
7
HELPFUL HINTS<br />
1. Always inflate Ice Equalizer 2 days prior to covering pool to check for leaks.<br />
(You may use a shop-vac on reverse or a hair dryer on a COOL setting to inflate)<br />
2. If you use water bags fill them only 2/3 full to allow for ice expansion. Test water<br />
bags by filling prior to pool closing.<br />
3. Never allow too much water to build up on top of your pool cover. Water can be easily<br />
removed by using a submersible pump or cover siphon.<br />
4. Check conditions of water after the first extended warm weather spell in the Spring.<br />
Add chlorine if necessary.<br />
5. Periodically check your skimmer box to make sure that it remains completely empty<br />
and dry through the winter months.<br />
HOW TO CLOSE YOUR ABOVEGROUND POOL<br />
1 STEP<br />
WINTERIZING ORB<br />
1. Vacuum dirt and debris from the bottom of your pool.<br />
2. OPTIONAL: If water is cloudy use OLD MAN WINTER ®<br />
LIQUID WINTERIZER.<br />
3. Check the pH level and correct to 7.2 - 7.6 range.<br />
4. Check the chlorine level and adjust to 1.0 to 2.0 range<br />
(DO NOT USE A CHLORINE SHOCK!)<br />
5. Place Black WINTER ORB in your Thru-wall skimmer. Run your filter for<br />
8-12 hours to allow for complete distribution of winterizing chemicals.<br />
If cartridge filter it is recommended that you remove the cartridge.<br />
Optional: Add 1 Qt. of Jump Start to enhance as well as accelerate<br />
water chemistry for pool closing.<br />
6. Remove ORB and dispose of empty canister.<br />
7. Backwash your filter (does not apply for cartridge filters) and thoroughly<br />
clean all internal components.<br />
8. Winterize your aboveground pool skimmer using an OLD MAN WINTER ®<br />
ALL SEASON WINTER PLATE KIT. Winterize Bottom Drains, <strong>Pool</strong> Lights,<br />
Underground Pipes etc. as per manufacturers instructions.<br />
9. Disconnect, drain and store filter and pump according to directions<br />
provided by the manufacturer. Lubricate all o-rings with Blue Seal ®<br />
O-RING LUBE prior to storing for the winter.<br />
10. Inflate Ice Equalizer (air pillow) and secure by loosely tying to pool<br />
frame. Ice Equalizer should be approximately 2/3 full of air.<br />
DO NOT FILL TO CAPACITY. Lubricate valve plug with<br />
O-RING LUBE. Place an ‘X’ of Duct Tape over the valve. Install<br />
the Equalizer with the air valve facing up.<br />
11. Put cover in place and secure with an OLD MAN WINTER ®<br />
CRANK and LOCK for maximum security.<br />
8 JOIN THE VIP CLUB • FREE MEMBERSHIP
CONCENTRATED<br />
SWIMMING POOL CHEMICALS<br />
QUICK REFERENCE CHART<br />
ESTIMATED CHEMICALS NEEDED FOR POOL CLOSING<br />
All dosages based on closing a clean pool with an established<br />
chlorine level of 1.0 - 2.0 ppm at time of closing<br />
SIZE OF<br />
POOL<br />
GALLONS<br />
WATER<br />
JUMP<br />
START<br />
1 STEP<br />
WINTER<br />
ORB<br />
MINIMUM SIZE<br />
ICE EQUALIZER<br />
(AIR PILLOW)<br />
ROUND POOLS (ABOVEGROUND)<br />
QTY.<br />
DIMENSIONS<br />
10' 2,400 1 1 2-1/2’ x 4’<br />
12' 3,600 1 1 4’ x 5’<br />
15' 5,300 1 1 4’ x 5’<br />
18' 7,600 1 1 4’ x 5’<br />
21' 10,400 1 1 4’ x 5’<br />
24' 13,600 1 1 4’ x 8’<br />
27' 17,300 1 1 4’ x 8’<br />
30' 21,300 1 1 4’ x 8’<br />
OVAL POOLS (ABOVEGROUND)<br />
QTY.<br />
8' x 12' 2,400 1 1 2-1/2’ x 4’<br />
10' x 15' 3,900 1 1 4’ x 5’<br />
12' x 18' 5,600 1 1 4’ x 5’<br />
12' x 24' 8,000 1 1 4’ x 5’<br />
15' x 21' 8,000 1 1 4’ x 5’<br />
15' x 25' 10,000 1 1 4’ x 8’<br />
15' x 27' 10,900 1 1 4’ x 8’<br />
15' x 30' 12,200 1 1 4’ x 8’<br />
16' x 32' 14,500 1 1 4’ x 15’<br />
18' x 33' 15,700 1 1 4’ x 15’<br />
18' x 36' 17,500 1 1 4’ x 15’<br />
REMEMBER: You must begin normal chlorination in the Spring<br />
after first period of extended heat<br />
Questions Call (516) 520-1860<br />
9
ICE EQUALIZER<br />
FOR INGROUND POOLS<br />
USE 4’ x 15’<br />
ICE EQUALIZER ON<br />
THE FOLLOWING SIZE<br />
RECTANGULAR POOLS<br />
• Reduces stress on<br />
Winter Cover<br />
• Reduces ice pressure<br />
on liner and walls<br />
• Creates stress channel<br />
for easy water removal<br />
16’ x 24’ RECTANGULAR<br />
16’ x 32’ RECTANGULAR<br />
16’ x 36’ RECTANGULAR<br />
18’ x 36’ RECTANGULAR<br />
20’ x 40’ RECTANGULAR<br />
ALL AIR PILLOWS ARE WARRANTIED AS FOLLOWS:<br />
0-30 DAYS FROM DATE OF PURCHASE..............100%<br />
31-180 DAYS FROM DATE OF PURCHASE............50%<br />
WARRANTIES COVER MANUFACTURERS DEFECTS ONLY. THEY DO NOT COVER PUNCTURES OR TEARS. FOR<br />
YOUR CONVENIENCE WE SUGGEST THAT YOU FILL EITHER BAGS OR PILLOWS PRIOR TO INSTALLATION TO BE<br />
SURE THAT THEY ARE DEFECT FREE. RECEIPT MUST ACCOMPANY ALL WARRANTY CLAIMS.<br />
HELPFUL HINTS:<br />
• Always inflate Ice Equalizer 2 days prior to covering pool to check for leaks.<br />
• Inflate Ice Equalizer (air pillow) and secure by loosely tying to pool. Ice Equalizer<br />
should be approximately 2/3 full of air. DO NOT FILL TO CAPACITY. Lubricate<br />
valve plug with O-Ring Lube. Place an “X” of Duct Tape over the valve. Install<br />
the Equalizer with the air valve facing up.<br />
• Never allow too much water to build up on top of your pool cover. Water can be<br />
easily removed by using a submersible pump.<br />
10<br />
JOIN THE VIP CLUB • FREE MEMBERSHIP
INGROUND POOL<br />
WINTERIZING SUPPLIES<br />
PIPE LINE<br />
ANTI-FREEZE<br />
NON TOXIC<br />
SAFE FOR<br />
ALL PIPES<br />
WIZZMO<br />
• Installs in thru wall skimmers with threaded bottoms.<br />
• Protects your skimmer from ice damage<br />
Use 1 gallon per 10 ft. of<br />
pipe 1-1/2”<br />
FOR STANDARD RETURN<br />
Remove directional return from pool wall. Your directional return<br />
consists of 3 components: (1) Locking Ring; (2) Ball; (3) Ball seat<br />
a) Remove locking ring<br />
b) Remove eyeball<br />
c) Insert seat removal tool into ball seat<br />
Turn counter clockwise until ball seat is completely removed<br />
After directional return has been removed, you should have a<br />
1-1/2” opening with female threads exposed.<br />
Prepare your hose adapter fitting by putting Teflon Tape around the<br />
threads. Then screw fitting into opening in wall. HAND TIGHTEN ONLY.<br />
d) Insert either a threaded plug or a #10 Expandable Rubber Plug and tighten.<br />
SEAT<br />
REMOVAL<br />
TOOL<br />
Directional Return<br />
c.<br />
a.<br />
b.<br />
Using seat removal tool<br />
The right tool<br />
always makes the<br />
job easier. Ball Seat<br />
Removal Tools<br />
in Stock Now!<br />
Insert seat removal tool into ball seat<br />
Turn counter clockwise until ball seat is<br />
completely removed<br />
Questions Call (516) 520-1860<br />
11
WATER BAGS<br />
8 FT. SINGLE<br />
CHAMBER<br />
8 FT. DUAL<br />
CHAMBER<br />
• Secures Cover around <strong>Pool</strong><br />
• Extra large spout for easy fill up<br />
• Full 8’ length<br />
• Non abrasive<br />
ALL WATER BAGS<br />
ARE WARRANTIED<br />
AS FOLLOWS:<br />
• Secures Cover around <strong>Pool</strong><br />
• Extra large spouts for easy fill up<br />
• Full 8’ length<br />
• Non abrasive<br />
• Second chamber for added support reliability<br />
• Second chamber to prevent rolling<br />
0-30 DAYS FROM DATE OF PURCHASE ..........100%<br />
31-180 DAYS FROM DATE OF PURCHASE ........50%<br />
WARRANTIES COVER MANUFACTURERS DEFECTS ONLY. THEY DO NOT COVER PUNCTURES OR TEARS. FOR<br />
YOUR CONVENIENCE WE SUGGEST THAT YOU FILL EITHER BAGS OR PILLOWS PRIOR TO INSTALLATION TO BE<br />
SURE THAT THEY ARE DEFECT FREE. RECEIPT MUST ACCOMPANY ALL WARRANTY CLAIMS.<br />
SUBMERSIBLE PUMP<br />
350 GPH<br />
SUBMERSIBLE COVER PUMP<br />
• 25’ power cord<br />
• Completely submersible<br />
• Built in filter pad<br />
• Hooks up to any garden hose<br />
• 1 year warranty<br />
12<br />
JOIN THE VIP CLUB • FREE MEMBERSHIP
HOLD UM DOWNS TM 13<br />
Tired of replacing<br />
your water bags<br />
every year due to<br />
deterioration and<br />
animal damage<br />
THESE HOLD UM DOWNS TM<br />
ARE THE ANSWER<br />
• These Hold Um Downs TM are the answer.<br />
• Constructed of a High density black polyethylene material with walls that are five times<br />
thicker than standard water tubes.<br />
• Hold Um Downs TM feature a snap lock lid for a tight fit, and are nestable for convenient storage.<br />
Easy to store when not in use.<br />
• Just fill them with water, close them with the Hold Um Downs TM cover provided and relax until Spring<br />
THE HIGH TECH ALTERNATIVE TO WATER BAGS<br />
Questions Call (516) 520-1860
HOW TO CLOSE<br />
YOUR INGROUND POOL<br />
1. Vacuum dirt and debris from the bottom of your pool<br />
2. OPTIONAL: If water is cloudy use OLD MAN WINTER ® WINTERIZER.<br />
3. Check the pH level and correct to 7.2 - 7.6 range<br />
4. Check the chlorine level and adjust to 1.0 to 2.0 range<br />
(DO NOT USE A CHLORINE SHOCK!)<br />
5. Add OLD MAN WINTER BLACK ALGAE OUT by pouring directly into your pool (chart below<br />
chart proper for dosage). Run filter 6 hours to help distribute BLACK ALGAE OUT evenly<br />
throughout the pool<br />
6. Backwash your filter (does not apply for cartridge filters) and thoroughly clean<br />
all internal components<br />
7. Lower water level of pool as per manufacturer’s instructions. Blow out all skimmer and return<br />
lines with a shop-vac or air compressor. Close pool return lines with winterizing plugs and seal<br />
off skimmer lines with a Wizzmo ® . Winterize pipe using Blue Seal Pipe Line Anti-Freeze<br />
8. Disconnect, drain and store filter and pump according to directions provided by the<br />
manufacturer. Lubricate all o-rings with Blue Seal ® o-ring lube prior to storing for the winter<br />
9. Suspend OLD MAN WINTER ® TABLET DISPENSER(S) by tying a NYLON ROPE across<br />
your pool. Dispenser must be a minimum of 2 feet from pool liner in all directions. Punch out<br />
all holes on both sides of the dispenser. Dispenser MUST BE TIED. IT IS NOT A FLOAT.<br />
(See chart below for proper dosages)<br />
10. Inflate Ice Equalizer (air pillow) and secure by loosely tying to pool frame.<br />
Ice Equalizer should be approximately 2/3 full of air. DO NOT FILL TO CAPACITY.<br />
Lubricate valve plug with O-Ring Lube. Place an ‘X’ of Duct Tape over the valve. Install the<br />
Equalizer with the air valve facing up<br />
11. Put cover in place and secure with HOLD UM DOWNS TM<br />
SIZE OF<br />
POOL<br />
GALLONS<br />
WATER<br />
JUMP<br />
START<br />
STEP 1<br />
OLD MAN WINTER TM<br />
BLACK ALGAE OUT<br />
STEP 2<br />
OLD MAN WINTER TM<br />
WINTER TABLETS<br />
ICE<br />
EQUALIZER<br />
HOLD UM<br />
DOWNS TM<br />
INGROUND POOLS (With Standard Hoppers)<br />
16' x 24' 15,300 1 2 2 4’ x 15’ 24<br />
16' x 32' 20,400 1 2 2 4’ x 15’ 24<br />
16' x 36' 22,000 1 3 3 4’ x 15’ 28<br />
18' x 36' 25,000 1 3 3 4’ x 15’ 28<br />
20' x 40' 31,000 2 3 3 4’ x 15’ 32<br />
22' x 44' 37,000 2 4 4 (2) 4’ x 15’ 36<br />
25' x 50' 47,000 2 5 5 (2) 4’ x 15’ 40<br />
14<br />
REMEMBER: You must begin normal chlorination in the Spring after first period of extended heat.<br />
JOIN THE VIP CLUB • FREE MEMBERSHIP
THE WEB LOCK TM<br />
INGROUND COVER SYSTEM<br />
Exclusively at <strong>Island</strong> <strong>Recreational</strong><br />
HOLD UM DOWN<br />
ANCHOR LOOPS<br />
LOWER WEB SYSTEM<br />
2” WIDE<br />
DOUBLE STITCHED<br />
REINFORCING WEB<br />
UPPER WEB SYSTEM<br />
2” WIDE<br />
DOUBLE STITCH<br />
REINFORCING WEB<br />
WEB REINFORCED<br />
HEM<br />
3 IN 1<br />
WINTER COVER AND<br />
POOL PROTECTION<br />
REINFORCED SOLID POOL COVER<br />
#1 CARBON BLACK SUNBLOCK<br />
TOP LAYER<br />
#2 CARBON BLACK 14 X 14<br />
WOVEN INNERCORE<br />
#3 CARBON BLACK<br />
CHEMBLOCK LAYER<br />
THE<br />
HIGH TECH<br />
ALTERNATIVE TO<br />
WATER BAGS<br />
HOLD UM DOWNS TM<br />
• Constructed of a High density black polyethylene material with walls that are five times<br />
thicker than standard water tubes<br />
• Hold Um Downs TM feature a snap lock lid for a tight fit, and are nestable for convenient storage.<br />
Easy to store when not in use<br />
• Just fill them with water, close them with the Hold Um Downs TM cover provided and relax until Spring<br />
Questions Call (516) 520-1860<br />
15
SAFETY COVERS<br />
We SELL and INSTALL every Size and Shape SAFETY COVER IMAGINABLE! Rectangles, Lazy L,<br />
Figure 8, Oval, Free Form, Waterfalls, “T”s “L”s and more.<br />
• No matter what size or shape Inground pool you’ve got,<br />
we’ve got the Safety Cover to fit it.<br />
• Available in Solid or Mesh fabric.<br />
CALL (516) 520-1860 TO BOOK<br />
YOUR FREE AT HOME<br />
MEASUREMENT AND PRICING<br />
AT HOME<br />
MEASUREMENT<br />
AND PRICING<br />
NO DEPOSIT REQUIRED<br />
AT HOME<br />
MEASUREMENT<br />
AND PRICING<br />
Yes, that’s right. Unlike most other dealers who require you to place a minimum<br />
50% Down Payment BEFORE they will even come to your home to properly measure<br />
your pool, WE REQUIRE NO DOWN PAYMENT. All you have to do is visit any<br />
<strong>Island</strong> <strong>Recreational</strong> and a salesperson will be happy to schedule an In Home Measure<br />
for you - NO DEPOSIT REQUIRED.<br />
Why do we do this Because we’re so sure that you’ll be happy with our service,<br />
our cover and our price that we know we’re going to get your order anyway. So why<br />
hassle you with a minimum deposit prior to the measure<br />
5911