Cottage Industry Manuals Bamboo Mat Weaving Techniques and ...
Cottage Industry Manuals Bamboo Mat Weaving Techniques and ...
Cottage Industry Manuals Bamboo Mat Weaving Techniques and ...

You also want an ePaper? Increase the reach of your titles
YUMPU automatically turns print PDFs into web optimized ePapers that Google loves.
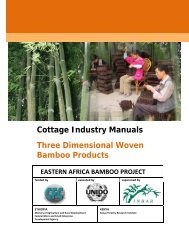
<strong>Cottage</strong> <strong>Industry</strong> <strong>Manuals</strong><br />
<strong>Bamboo</strong> <strong>Mat</strong> <strong>Weaving</strong><br />
<strong>Techniques</strong> <strong>and</strong> Applications<br />
EASTERN AFRICA BAMBOO PROJECT<br />
funded by executed by supervised by<br />
ETHIOPIA<br />
Ministry of Agriculture <strong>and</strong> Rural<br />
Development<br />
Federal Micro <strong>and</strong> Small Enterprise<br />
Development Agency<br />
KENYA<br />
Kenya Forestry Research Institute
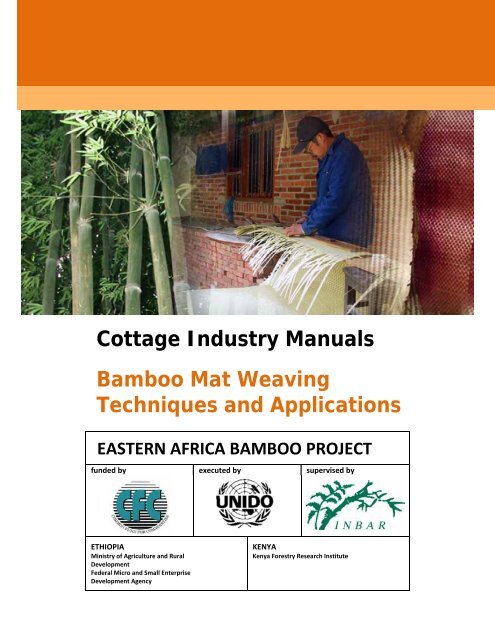
COTTAGE INDUSTRY MANUALS<br />
BAMBOO MAT WEAVING<br />
TECHNIQUES AND APPLICATIONS<br />
EASTERN AFRICA BAMBOO PROJECT<br />
funded by executed by supervised by<br />
ETHIOPIA<br />
Ministry of Agriculture <strong>and</strong> Rural Development<br />
Federal Micro <strong>and</strong> Small Enterprise Development<br />
Agency<br />
KENYA<br />
Kenya Forestry Research Institute
This project is being financed by the Common Fund for Commodities, an<br />
intergovernmental financial institution established within the framework of the<br />
United Nations, headquartered in Amsterdam, the Netherl<strong>and</strong>s.<br />
Copyright ©2008 by the United Nations Industrial Development Organization.<br />
First published in 2008.<br />
This manual is based on the work of Mr. Yunhua Chen, edited <strong>and</strong> revised by Dr.<br />
Victor Brias, UNIDO Consultant <strong>and</strong> Dr. Jinhe Fu (INBAR), in cooperation with the<br />
EABP‐project team <strong>and</strong> under the supervision of UNIDO Project Manager, Mr.<br />
Juergen Hierold.<br />
Designations employed <strong>and</strong> the presentation of material in this publication do not<br />
imply the expression of any opinion whatsoever on the part of the Secretariat of the<br />
United Nations Industrial Development Organization (UNIDO) concerning the legal<br />
status of any country, territory, city, or area, or of its authorities or concerning the<br />
delimitation of its frontiers <strong>and</strong> boundaries. The opinions, figures <strong>and</strong> estimates set<br />
forth are the responsibility of the authors <strong>and</strong> should not necessarily be considered<br />
as reflecting the views or carrying the endorsement of UNIDO. The mention of firm<br />
names or commercial products does not imply endorsement by UNIDO.<br />
This document has not been formally edited.<br />
ii
Table of Contents<br />
I. BAMBOO MAT APPLICATIONS ............................................................ 1<br />
II. BAMBOO MAT DESIGNS AND PATTERNS ............................................ 4<br />
III. PRIMARY PROCESSING OF MATERIALS ............................................... 5<br />
A. Seven Steps of Primary Processing .................................................. 5<br />
B. Removal of <strong>Bamboo</strong> Skin ................................................................. 8<br />
C. Edge flattening ............................................................................... 10<br />
D. Dividing the culm sections into slivers ........................................... 10<br />
E. Separating the Slivers ..................................................................... 11<br />
F. Cut the Slivers into Fine Layers ...................................................... 11<br />
G. Separate the layers into Fine Strips ............................................... 14<br />
H. Classifying the strips by Color ........................................................ 15<br />
IV. MACHINE STRIPPING ......................................................................... 15<br />
V. SECONDARY PROCESSING ................................................................. 17<br />
A. Bleaching ........................................................................................ 17<br />
1. Sulfur Smoking Method ........................................................... 17<br />
2. Hydrogen Peroxide Soaking Method ....................................... 17<br />
3. Hydrogen Peroxide Boiling Method ........................................ 18<br />
4. Other Chemical Methods ......................................................... 19<br />
VI. WEAVING BAMBOO MATS ................................................................ 19<br />
A. Preparing the Mold ........................................................................ 19<br />
B. <strong>Weaving</strong> <strong>Techniques</strong> ...................................................................... 20<br />
C. Large <strong>Bamboo</strong> <strong>Mat</strong>s ....................................................................... 23<br />
VII. FINISHING BAMBOO MATS ............................................................... 24<br />
A. Smoothing ...................................................................................... 24<br />
B. Hot Pressing .................................................................................... 24<br />
C. Dyeing ............................................................................................. 26<br />
VIII. REFINING MATS FOR USE AS WALL PANELS ............................... 27<br />
iii
I. BAMBOO MAT APPLICATIONS<br />
<strong>Bamboo</strong> mats are plane woven bamboo products that are designed <strong>and</strong><br />
finished for numerous applications, especially interior design <strong>and</strong><br />
furniture.<br />
Some examples are shown below.<br />
<strong>Bamboo</strong> mats used in making furniture<br />
1
H<strong>and</strong>icrafts made with <strong>Bamboo</strong> <strong>Mat</strong><br />
<strong>Bamboo</strong> <strong>Mat</strong>s for Wall Paneling<br />
2
<strong>Bamboo</strong> <strong>Mat</strong> Panels or “Wall Paper”<br />
3
II.<br />
BAMBOO MAT DESIGNS AND PATTERNS<br />
Below are some samples of bamboo mat designs <strong>and</strong> patterns.<br />
4
III. PRIMARY PROCESSING OF MATERIALS<br />
A. Seven Steps of Primary Processing<br />
There are 7 steps in the primary processing of materials needed for<br />
weaving bamboo. These are shown in the pictures below <strong>and</strong> will be<br />
explained step by step in the next section.<br />
Step 1: Scrape off the green skin of the culm<br />
Step 2: Flatten the edge of the culm<br />
5
Step 3: Divide the culm into slivers of an equal width<br />
Step 4: Separate the slivers<br />
6
Step 5: Cut the slivers into fine layers<br />
Step 6: Separate the layers into fine strips<br />
7
Step 7: Classify <strong>and</strong> group the strips by color<br />
B. Removal of <strong>Bamboo</strong> Skin<br />
Removing the green skin of the bamboo culm is the first step in the<br />
primary processing of materials required for woven bamboo products.<br />
The removing the green skin involves scraping off the green colloid on<br />
the surface of bamboo culms as follows:<br />
1. Place a section of bamboo culm at the angle of 45°on the ground<br />
2. Press your thumb of the left h<strong>and</strong> on the edge that has been<br />
sawed, <strong>and</strong> use your first finger <strong>and</strong> second finger to hold the<br />
section. Three fingers should be placed in the shape of a triangle<br />
to increase the stability.<br />
8
The right way of holding bamboo<br />
3. Slide the blade in a downward motion along the culm section<br />
without scratching the skin; then position the blade to scrape the<br />
skin in an upward motion along the culm section.<br />
4. In other words, the technique involves sliding the blade<br />
downwards <strong>and</strong> scraping upwards.<br />
5. When scraping the skin, apply force evenly along the culm surface<br />
in order to ensure a uniform color.<br />
The right way of scraping<br />
Before <strong>and</strong> after<br />
9
C. Edge flattening<br />
After removing the green skin, the next step is to flatten the edge of the<br />
culm section to facilitate stripping. To do this, hold the bamboo section<br />
firmly, <strong>and</strong> use a sharp knife to cut evenly around the edge so that it<br />
becomes flat <strong>and</strong> smooth.<br />
Flattening the culm edge<br />
Before <strong>and</strong> After flattening<br />
D. Dividing the culm sections into slivers<br />
The next step is to divide the culm section into slivers of an equal width.<br />
The number of slivers will depend on the diameter of the culm. It is<br />
important that the slivers are as flat as possible.<br />
1. Before cutting measure equal<br />
sections that cross the central<br />
point of the culm section.<br />
2. Each section should be divided<br />
at equal angles from the<br />
center of the culm to the<br />
edge. This method will help<br />
ensure that the culm is split<br />
into slivers of the same width.<br />
3. Cutting should be done carefully from the edge downwards along<br />
the length of the culm section.<br />
10
Splitting the culm section into slivers<br />
E. Separating the Slivers<br />
After the culm has been divided, the<br />
slivers should be complete separated<br />
into individual pieces.<br />
This should be done carefully in order<br />
to have slivers of a uniform width.<br />
F. Cut the Slivers into Fine Layers<br />
The next step is to strip the slivers into fine layers.<br />
1. Hold the sliver using your thumb <strong>and</strong> index finger about 1 cm<br />
away from the flattened edge.<br />
2. Hold the knife with the blade horizontally against the upper 1/3 of<br />
the cross section sliver.<br />
11
3. Make the first cut by nipping<br />
the blade into the sliver, as<br />
shown in the image to the<br />
right.<br />
4. Be very careful in<br />
manipulating the knife.<br />
Your fingers can be easily<br />
injured if you cut too deep<br />
into edge of the sliver.<br />
The 1 st Cut<br />
5. Press the bamboo sliver firmly, <strong>and</strong> twist the knife to cut the first<br />
layer.<br />
6. Position the blade 0.5 mm to 1 mm away from the first layer along<br />
the radian in order to cut another layer of an equal thickness as<br />
the first one.<br />
The 2 nd cut<br />
After the first two cuts<br />
7. Hold the layer for further stripping; keep the end without<br />
flattening upwards; <strong>and</strong> use your thumb <strong>and</strong> index finger to twist<br />
the front 2cm to make it soft.<br />
8. Make a cut 2cm into the sliver <strong>and</strong> then carefully peel off the first<br />
layer with measured force in order to avoid breaking it.<br />
9. Strips will be thicker if the cut is deep, <strong>and</strong> strips will be thinner if<br />
the cut is shallow. The thickness of the strips need will depend on<br />
the requirement of the woven products.<br />
12
_________________<br />
Cutting the sliver<br />
4 times makes<br />
5 thin layers<br />
_________________<br />
Make cuts into the sliver<br />
After the 1 st cut<br />
After the 2 nd cut<br />
After the 3 rd cut<br />
After the 4 th cut there are 5 layers<br />
13
G. Separate the layers into Fine Strips<br />
1. In order to strip the layers without breaking them:<br />
‣ Pay attention to the coordination between left h<strong>and</strong> <strong>and</strong><br />
right h<strong>and</strong> in stripping, the angle of the index finger of the<br />
right h<strong>and</strong> in pressing.<br />
‣ Make sure that the cut length of each layer protrudes by<br />
about 2 cm in order to have a firm grip <strong>and</strong> separate each<br />
layer properly.<br />
2. Separate the layers using 2 h<strong>and</strong>s:<br />
‣ Use the thumb <strong>and</strong> the index finger of left h<strong>and</strong> to hold the<br />
4 layers together <strong>and</strong> pull them.<br />
‣ Use the thumb <strong>and</strong> the index finger of right h<strong>and</strong> to hold<br />
the fifth layer, <strong>and</strong> the middle finger <strong>and</strong> the little finger to<br />
hold the bottom part of the strip to adjust the direction<br />
during stripping.<br />
Stripping with both h<strong>and</strong>s<br />
Use 4 fingers<br />
3. Use 4 fingers to separate the layers into fine strips as follows:<br />
‣ Hold the 1 st <strong>and</strong> 2 nd layers using the index finger <strong>and</strong> the<br />
middle finger of the left h<strong>and</strong>.<br />
‣ Hold the 3 rd <strong>and</strong> 4 th layers using the thumb <strong>and</strong> the third<br />
finger of the left h<strong>and</strong>.<br />
‣ Hold the bottom part of the strip with the right h<strong>and</strong>.<br />
14
‣ Simultaneously move the left h<strong>and</strong> downwards <strong>and</strong> the<br />
right h<strong>and</strong> upwards to strip the layers.<br />
A very fine bamboo strip can be translucent!<br />
H. Classifying the strips by Color<br />
1. After making the strips arrange<br />
them properly<br />
2. Some strips may be lighter or<br />
darker than others.<br />
3. Separate <strong>and</strong> classify them<br />
according to their color.<br />
IV.<br />
MACHINE STRIPPING<br />
The process of bamboo stripping can be achieved more rapidly with the<br />
aid of special machinery as shown below.<br />
15
For a high scale production, machine stripping is done in a workshop<br />
with several machines as shown in the photo above.<br />
16
V. SECONDARY PROCESSING<br />
A. Bleaching<br />
Bleaching bamboo strips can be achieved by several methods as<br />
discussed below.<br />
1. Sulfur Smoking Method<br />
‣ Choose a place far away from households.<br />
‣ Cover the bamboo strips using a plastic sheet.<br />
‣ Burn the sulfur in a bowl (wear masks during the operation) <strong>and</strong><br />
cover the fire so that only smoke come outs.<br />
‣ Put the bowl under the plastic sheet with the bamboo strips.<br />
‣ Immediately seal the plastic sheet using mud <strong>and</strong> allow the<br />
smoking process to continue for 12 hours.<br />
‣ Open the plastic sheet <strong>and</strong> fan out the smoke, <strong>and</strong> then take out<br />
the bamboo strips.<br />
‣ The result of the bleaching is directly affected by the size of the<br />
covering area, the amount of bamboo strips <strong>and</strong> the burning<br />
condition of the sulfur.<br />
2. Hydrogen Peroxide Soaking Method<br />
‣ Mix 30% hydrogen peroxide (H 2 0 2 ) solution with water using a<br />
proportion of 1:2 (e.g. 1 liter H 2 0 2 for every 2 liters of water).<br />
‣ Dip bamboo strips into the mixture <strong>and</strong> allow them to soak.<br />
‣ Use bricks to hold down bamboo strips in the liquid to prevent<br />
them from floating.<br />
‣ Allow the strips to soak for 24 hours <strong>and</strong> then wash them with<br />
water.<br />
‣ Dry the strips in a shaded area.<br />
17
3. Hydrogen Peroxide Boiling Method<br />
‣ Mix 30% H 2 0 2 solution with water using a proportion of 1:3, (e.g. 1<br />
liter H 2 0 2 for every 3 liters of water).<br />
‣ Dip the bamboo strips into the mixture <strong>and</strong> boil the mixture for<br />
approximately 30 minutes, or until they are fully bleached.<br />
‣ Use bricks to hold down bamboo strips in the mixture to prevent<br />
them from floating.<br />
‣ During the boiling process turn the strips over twice so that both<br />
sides of the strip are bleached properly.<br />
‣ After bleaching, wash the strips with water.<br />
‣ Allow the strips to dry in a shaded area.<br />
Heating Tank for H 2 0 2 Bleach<br />
Boil strips in H 2 0 2 mixture<br />
18
Washing Dyed Stripes<br />
Air Drying Strips<br />
4. Other Chemical Methods<br />
<strong>Bamboo</strong> strips can also be bleached with other chemical bleaching<br />
agents. If other chemical methods are used, follow the instructions<br />
provided by the manufacturer of the bleaching agent.<br />
VI.<br />
WEAVING BAMBOO MATS<br />
A. Preparing the Mold<br />
The size of the mold can depend on the size <strong>and</strong> design of the weaving<br />
pattern, but it is usually determined by the length of the internodes of<br />
the bamboo species that is used for making the strips.<br />
In China, when Neosinocalamus affinis is used for mat making, 2 sizes of<br />
molds are generally used in mass production. The regular mold size is<br />
45cm x 45cm (48cm x 48cm after putting the finishing edge). A larger<br />
size of 2.5m (length) * 1.3m (width) is also used.<br />
The mold is usually made of plywood with the thickness of 9mm.<br />
19
Above: Mold size of 45cm x45cm. Note that a 1.5 cm allowance on<br />
each edge makes the total size 48cm x 48cm.<br />
B. <strong>Weaving</strong> <strong>Techniques</strong><br />
The pattern <strong>and</strong> the color of bamboo mats can be selected <strong>and</strong> designed<br />
according to the preferences of customers. <strong>Bamboo</strong> mats have to be<br />
woven strictly in accordance with a predefined pattern in order to<br />
achieve the desired ornamental effect.<br />
‣ The first step, prior to<br />
weaving, is to make sure<br />
that all the strips have the<br />
same width.<br />
‣ Use a needle row to even<br />
the width of all the strips.<br />
‣ Place 9 strips on the desk<br />
vertically <strong>and</strong> hold them on<br />
the desk with a steel rod.<br />
20
‣ Insert one strip horizontally<br />
under the vertical strip in<br />
the middle, <strong>and</strong> then insert<br />
the horizontal strip under<br />
two vertical strips after<br />
every two strips. Usually<br />
second horizontal strip<br />
determines the direction of<br />
the pattern, so special<br />
attentions should be paid to<br />
the second strip.<br />
‣ Note that the above mentioned procedure only applies to<br />
patterns that have a middle line.<br />
‣ Some patterns, such as those in the image below, have no middle<br />
line. The placement of strips will therefore depend on the<br />
particular pattern.<br />
21
‣ When the weaving is finished, measure the st<strong>and</strong>ard sizes of the<br />
mat by using the mold, <strong>and</strong> then cut off the extra edges, as shown<br />
below.<br />
Cutting off edges<br />
22
C. Large <strong>Bamboo</strong> <strong>Mat</strong>s<br />
A batch of bamboo mats<br />
Large size bamboo mats need to be made on big working tables. The<br />
strips need to be connected together during weaving to lengthen <strong>and</strong><br />
widen the size of the mat.<br />
Production of large bamboo mats<br />
23
VII. FINISHING BAMBOO MATS<br />
A. Smoothing<br />
‣ Machine made bamboo strips<br />
are generally more bristly or<br />
thornier than the h<strong>and</strong><br />
stripped ones.<br />
‣ After the mat has been<br />
woven, use a torch to burn<br />
off bristles <strong>and</strong> extra fibers to<br />
make the mat smooth. The<br />
fire needs to be carefully<br />
adjusted such that only<br />
protruding fibers are burned,<br />
but not the mat. Use a strong<br />
flame <strong>and</strong> sweep it over the<br />
surface very quickly to avoid<br />
burning <strong>and</strong> discoloration of<br />
the mat.<br />
B. Hot Pressing<br />
Hot pressing usually involves very expensive equipment. However, for a<br />
small workshop, it is possible to use a self‐assembled manual pressing<br />
machine.<br />
A self assembled pressing machine costs a fraction of an electronic hot<br />
pressing machine.<br />
The productivity of such a machine is about 56 mats per hour.<br />
24
A self‐assembled Hot Press<br />
‣ To press 4 mats<br />
simultaneously,<br />
prepare 5 pieces of<br />
armor plate (3mm<br />
thick) to separate<br />
each mat.<br />
25
‣ The 4 mats should<br />
be s<strong>and</strong>wiched by<br />
the 5 armor plates.<br />
‣ Pre‐heat the<br />
machine to 100°C.<br />
‣ Place the armor<br />
plates <strong>and</strong> mats<br />
into the machine.<br />
‣ Press for 3<br />
minutes.<br />
C. Dyeing<br />
‣ Boil water to 50°C <strong>and</strong> then mix the dyes into the water until the<br />
required color is obtained.<br />
‣ It is quite difficult to obtain the exact same color every time. It is<br />
26
therefore advisable to dye as many pieces as needed at one time.<br />
‣ When the batch of mats has been colored, hang them out to dry.<br />
VIII. REFINING MATS FOR USE AS WALL PANELS<br />
<strong>Bamboo</strong> mats can be used as wall panels. Some refinements are usually<br />
required for this application. The most common refinements involve<br />
painting, s<strong>and</strong>ing, <strong>and</strong> foam backing.<br />
‣ To pain the mats you<br />
will need a polyester<br />
paint, a good working<br />
table, a paintbrush,<br />
<strong>and</strong> a face mask to<br />
protect you from the<br />
breathing the fumes of<br />
the paint.<br />
‣ Paint both sides of<br />
bamboo mat evenly<br />
using polyester paint.<br />
‣ Apply 2 coats of paint<br />
if necessary.<br />
27
‣ When the paint has<br />
dried, s<strong>and</strong> the<br />
mats using very fine<br />
s<strong>and</strong> paper until<br />
they are smooth.<br />
‣ Apply glue to the<br />
back of the mat, if<br />
possible using a<br />
compressor spray.<br />
‣ Stick the bamboo<br />
mat to a 2mm thick<br />
piece of foam.<br />
28
‣ Cut off the edges so<br />
that a st<strong>and</strong>ard size<br />
is obtained for all<br />
mats.<br />
‣ After cutting the<br />
mats into the<br />
st<strong>and</strong>ard size, the<br />
wallpaper will be<br />
sprayed with<br />
finishing paint.<br />
‣ Allow the painted<br />
mats to dry in a<br />
shaded <strong>and</strong> dust<br />
free area.<br />
29