Visual C++ 6 Programming Tutorial
Visual C++ 6 Programming Tutorial
Visual C++ 6 Programming Tutorial
Create successful ePaper yourself
Turn your PDF publications into a flip-book with our unique Google optimized e-Paper software.
Activity 1: Welcome screen and Menu editor<br />
Event handlers and scroll bars<br />
<br />
Activity 2: Colour Changer<br />
Datatypes, Variables and functions<br />
<br />
Activity 3: Dialog boxes<br />
Activity 4: Create a calculator and avoid division by zero<br />
<br />
Sequence<br />
Binary Selection<br />
<br />
Activity 5: Measurement Converter (Binary Selection)<br />
Multiway Selection<br />
<br />
Activity 8: Random number generator<br />
Activity 10: Post-test loop to display Fibonacci numbers<br />
<br />
Activity 11: Nested For loops.<br />
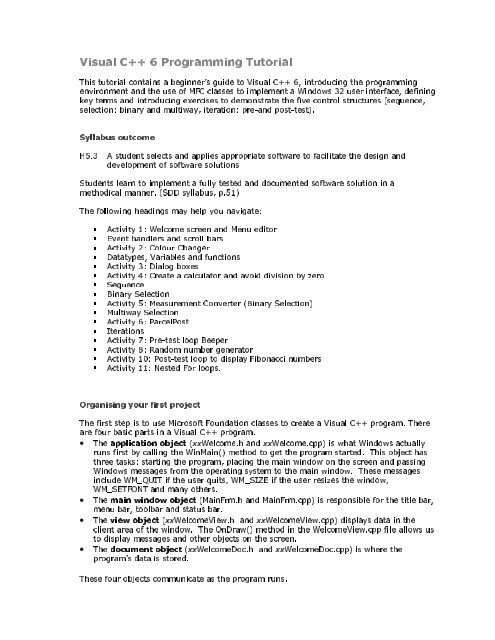
<strong>Visual</strong> <strong>C++</strong> 6 <strong>Programming</strong> <strong>Tutorial</strong><br />
This tutorial contains a beginner’s guide to <strong>Visual</strong> <strong>C++</strong> 6, introducing the programming<br />
environment and the use of MFC classes to implement a Windows 32 user interface, defining<br />
key terms and introducing exercises to demonstrate the five control structures (sequence,<br />
selection: binary and multiway, iteration: pre-and post-test).<br />
Syllabus outcome<br />
H5.3 A student selects and applies appropriate software to facilitate the design and<br />
development of software solutions<br />
Students learn to implement a fully tested and documented software solution in a<br />
methodical manner. (SDD syllabus, p.51)<br />
The following headings may help you navigate:<br />
Activity 6: ParcelPost<br />
Iterations<br />
Activity 7: Pre-test loop Beeper<br />
<br />
Organising your first project<br />
The first step is to use Microsoft Foundation classes to create a <strong>Visual</strong> <strong>C++</strong> program. There<br />
are four basic parts in a <strong>Visual</strong> <strong>C++</strong> program.<br />
• The application object (xxWelcome.h and xxWelcome.cpp) is what Windows actually<br />
runs first by calling the WinMain() method to get the program started. This object has<br />
three tasks: starting the program, placing the main window on the screen and passing<br />
Windows messages from the operating system to the main window. These messages<br />
include WM_QUIT if the user quits, WM_SIZE if the user resizes the window,<br />
WM_SETFONT and many others.<br />
• The main window object (MainFrm.h and MainFrm.cpp) is responsible for the title bar,<br />
menu bar, toolbar and status bar.<br />
• The view object (xxWelcomeView.h and xxWelcomeView.cpp) displays data in the<br />
client area of the window. The OnDraw() method in the WelcomeView.cpp file allows us<br />
to display messages and other objects on the screen.<br />
• The document object (xxWelcomeDoc.h and xxWelcomeDoc.cpp) is where the<br />
program’s data is stored.<br />
These four objects communicate as the program runs.
Activity 1: Creating a welcome screen and adding a menu item<br />
• Open <strong>Visual</strong> <strong>C++</strong><br />
• Click New in the File menu, select the MFC AppWizard (exe) entry under the projects tab<br />
in the New dialog box.<br />
• Give the new program the name your initialsWelcome in the Project name box, choose<br />
a location and click OK to start the MFC AppWizard.<br />
• In Step 1, select Single document. Then accept the defaults for all the other steps.<br />
• Use the FileView tab in the Workspace window to look for the files belonging to each of<br />
the four objects described above.<br />
• Start by declaring two string variables welcome_string and enjoy_string in the<br />
document’s header file. Open xxWelcomeDoc.h by double clicking in the Workspace<br />
view, find this section of the code and add the two lines in bold font.
• Now initialize the welcome_string and enjoy_string objects in the documents class’s<br />
• To display the messages on the screen, open the xxWelcomeView.cpp file. Add the lines<br />
// xxWelcomeDoc.h : interface of the xxWelcomeDoc class<br />
//<br />
/////////////////////////////////////////////////////////////////////////////<br />
#if<br />
!defined(AFX_xxWELCOMEDOC_H__9442116A_C7A7_11D3_BBC0_0000E883F891__INCLUDED_)<br />
#define AFX_xxWELCOMEDOC_H__9442116A_C7A7_11D3_BBC0_0000E883F891__INCLUDED_<br />
#if _MSC_VER > 1000<br />
#pragma once<br />
#endif // _MSC_VER > 1000<br />
class xxWelcomeDoc : public CDocument<br />
{<br />
protected: // create from serialization only<br />
xxWelcomeDoc();<br />
DECLARE_DYNCREATE(xxWelcomeDoc)<br />
CString welcome_string;<br />
CString enjoy_string;<br />
constructor in the file xxWelcomeDoc.cpp by adding the bold lines of code. Don’t forget<br />
to be very fussy about copying exactly and placing the ; at the end of each line as<br />
shown.<br />
// xxWelcomeDoc construction/destruction<br />
xxWelcomeDoc:: xxWelcomeDoc ()<br />
{<br />
welcome_string = "Welcome to <strong>Visual</strong> <strong>C++</strong>";<br />
enjoy_string = "Enjoy!";<br />
}<br />
// TODO: add one-time construction code here<br />
as shown. This code will centre your text (getting the window dimensions with the<br />
GetWindowRect() method and the text with the GetDocument() method), colour half the<br />
screen blue and add an ellipse filled with greeny-blue cross hatching.<br />
// xxWelcomeView drawing<br />
void xxWelcomeView::OnDraw(CDC* pDC)<br />
{<br />
xxWelcomeDoc* pDoc = GetDocument();<br />
ASSERT_VALID(pDoc);<br />
CRect rect;<br />
//Declare a pointer variable<br />
//An error handler macro<br />
GetWindowRect(&rect);<br />
int x = rect.Width()/2;<br />
int xx = rect.Width()/2;<br />
int xxx = rect.Width()/2;<br />
int y = rect.Height();<br />
int yy = rect.Height()/2;<br />
int yyy = rect.Height()- 20;<br />
CBrush myBrush;<br />
CBrush backBrush;<br />
//Find the Windows dimensions<br />
//and create some variables to<br />
//position text<br />
// Construct brushes to do the<br />
cross hatching and background<br />
colour<br />
// Then initialize and use them.<br />
if(myBrush.CreateHatchBrush(HS_DIAGCROSS, RGB(0, 200, 240)))<br />
{<br />
CBrush* pOldBrush = pDC->SelectObject( &myBrush );
• Build your program with the F7 function key. if you have any errors, double click to take<br />
• Use the ClassWizard (found under the View menu) to connect the new menu item to an<br />
• Then open xxWelcomeDoc.cpp and initialize the string object in the document’s<br />
pDC->Ellipse(CRect(50, 100, 250, 250));<br />
pDC->SelectObject( pOldBrush );<br />
}<br />
if(backBrush.CreateSolidBrush(RGB(0,0,250)))<br />
{<br />
CBrush* pOlderBrush = pDC->SelectObject (&backBrush);<br />
pDC->Rectangle (x*2,y,x,0);<br />
pDC-> SelectObject(pOlderBrush);<br />
}<br />
//Centre and display welcome_string<br />
CSize size = pDC->GetTextExtent(pDoc->welcome_string);<br />
x -= size.cx/2;<br />
pDC->TextOut(x, 0, pDoc->welcome_string);<br />
// TODO: add draw code for native data here<br />
}<br />
//Position and display enjoy_string<br />
CSize size2 = pDC->GetTextExtent(pDoc->enjoy_string);<br />
xx += (size2.cx/2 + 50);<br />
pDC->TextOut(xx, yy, pDoc->enjoy_string);<br />
you to the line of code and check carefully for missing brackets, semicolons, miss typing,<br />
etc. and build again. Run you program with red exclamation mark icon OR execute from<br />
the Build Menu.<br />
• To add a menu item, use the menu editor. Click the resources tab in the Workspace<br />
window, click the + beside menu, then double click IDR_MAINFRAME. Click on the File<br />
menu to open and grab the box at the bottom (use Insert key to add a box if necessary)<br />
and drag it up to between Print Preview and Print Setup menu items. Double click to<br />
the Menu Item Properties box, place the caption Print Welcome in the caption box<br />
open<br />
close the box. This gives the new menu item the ID ID_FILE_PRINTWELCOME.<br />
and<br />
event handler. Make sure xxWelcomeView is the class selected in the Class name box.<br />
Find and select ID_FILE_PRINTWELCOME in the Objects Ids list, then double click<br />
Command in the Messages box. This brings up a message box suggesting the name for<br />
the event handler of OnFilePrintWelcome(). Click OK to accept it.<br />
• When the user clicks our new menu item, we will display “Welcome to menus” centered<br />
on the bottom of the screen. To do this we need to declare and initialise a variable<br />
called StringData to store the string. Open the file xxWelcomeDoc.h and add the code in<br />
bold font to declare the string object.<br />
public:<br />
virtual ~CShwelcomeDoc();<br />
CString StringData;<br />
constructor.<br />
// xxWelcomeDoc construction/destruction<br />
xxWelcomeDoc:: xxWelcomeDoc ()<br />
{<br />
welcome_string = "Welcome to <strong>Visual</strong> <strong>C++</strong>";<br />
enjoy_string = "Enjoy!";<br />
StringData = "";<br />
// TODO: add one-time construction code here<br />
}
• To add the string “Welcome to menus in the StringData object when the user clicks Print<br />
that data member or function. It is usual to declare all data members as private. The public<br />
Welcome, we add the following code in xxWelcomeView.cpp.<br />
void xxWelcomeView::OnFilePrintwelcome()<br />
{<br />
xxWelcomeDoc* pDoc = GetDocument();<br />
ASSERT_VALID(pDoc);<br />
}<br />
pDoc->StringData = "Welcome to menus!";<br />
//Invalidate calls the OnDraw()method to display the new string<br />
Invalidate();<br />
• Finally we add the code to the end of OnDraw() in xxWelcomeView.cpp to display<br />
the text in StringData<br />
void xxWelcomeView::OnDraw(CDC* pDC)<br />
{<br />
. // This represents existing code<br />
.<br />
CSize menuSize = pDC->GetTextExtent(pDoc->StringData);<br />
xxx -= menuSize.cx/2;<br />
yyy -= 20 ;<br />
pDC->TextOut(xxx, yyy, pDoc->StringData);<br />
}<br />
• Build your code with the F7 function key. When it is free of errors, run<br />
your code. What happens when you click on the Print Welcome menu item<br />
Event handlers and scroll bars<br />
Objects and classes are two fundamental concepts in object-oriented languages like <strong>C++</strong>.<br />
An object is a thing — anything that appears on the screen and contains functions and<br />
variables wrapped up together to perform a discrete task. This grouping together is called<br />
encapsulation. For example, all the screen handling parts of a program might be put<br />
together in an object called screen. This screen object could include both the data to be<br />
displayed on the screen and the functions (or methods) to handle that data, like OnDraw()<br />
or drawLine().<br />
A class is a description (or template) that is used to create an object. In the class<br />
definition, data and methods for handling the data are In <strong>C++</strong> programming, classes are<br />
defined and objects of that class (which can be thought of as variables of that class’s type)<br />
are created in the source code (.cpp) files. <strong>Visual</strong> <strong>C++</strong> comes complete with a library of<br />
predefined classes, the MFC library, which saves a great deal of work. When we create<br />
labels or command buttons, we are creating objects of those types.<br />
<strong>Visual</strong> <strong>C++</strong> also supports inheritance. Using inheritance, a derived class can inherit all the<br />
properties of its base class and have extra features added.<br />
Access modifiers are keywords used to set the scope of data members and functions<br />
within classes. The private keyword means that only objects of that class have access to<br />
keyword means that that member is available to all other parts of the program. The<br />
protected keyword is used to give access to objects of that class or derived from that class<br />
by inheritance.
• Open a new project in a new workspace using the MFC AppWizard (exe) and call it<br />
• In AppWizard Step 1, select dialog based and accept the defaults in the other steps.<br />
• Click on the TODO .. and delete. Then add three horizontal scroll bars from the toolbox.<br />
• Right click each label to bring up the properties box and for each (under the styles tab),<br />
• Use the View menu to open the Class Wizard. Make sure the Message Maps tab is<br />
• Now change to the Member Variables tab in Class Wizard. Click on IDC_EDIT1 in the<br />
• Still in the Member Variables tab of the Class Wizard, give a name to each scroll bar,<br />
Events are things that happen on the screen. Event handlers transfer data to methods<br />
that complete the task.<br />
Activity 2: Colour Changer<br />
ColourChanger.<br />
Select all and use the layout menu to make them the same size, align them and arrange<br />
them evenly. Next, add three edit boxes beside them and a label across the top.<br />
Arrange them neatly as shown in the diagram. Leave some space between the top label<br />
and the scroll bars as shown. The Layout menu will help with this.<br />
text:centre, centre vertically and give them a border. Give the top label the<br />
align<br />
Blue respectively.<br />
caption Colour Changer and the other three Red, Green and<br />
Right click the background of the dialog box to bring up its Properties and use this to<br />
select a font. Arial Black 12 works well. This will apply to each label on the dialog box.<br />
selected and that CColourChangerDlg is the class name selected. Then scroll down the<br />
Messages until you find WM_HSCROLL. Double click to add OnHScroll to the member<br />
functions. Note that this does not relate to a particular Scroll Bar.<br />
Control Ids box, then Add Variable. Name it m_text1, accept the default (value) category<br />
and choose CString for your variable type. Repeat this step for IDC_EDIT2 (using<br />
m_text2) and IDC_EDIT3 (with m_text3).<br />
using Add Variable. Name them m_slide1, m_slide2 and m_slide3 respectively, choose<br />
Control for the Category and CscrollBar for the Variable type. This will be used to find<br />
which scroll bar is moved each time.
• Add a button and change its Caption to Click to see the colour by right clicking and<br />
• Now add some code to the CColourChangerDlg.cpp source code file. Find the class<br />
• Add the following code to the void CColourChangerDlg::OnHScroll method to read the<br />
• The last step is to add code to the void CColourChangerDlg::OnButton1() method. In<br />
opening Properties. Then open the Class Wizard again, select the Message Maps tab,<br />
make sure CColourChangerDlg is the class selected, select IDC_BUTTON1 and double<br />
click the message BN_CLICKED to add the OnButton1 member function.<br />
initialisation and add the code in bold.<br />
BOOL CColourChangerDlg::OnInitDialog()<br />
{<br />
CDialog::OnInitDialog();<br />
m_slide1.SetScrollRange(1,255, true);<br />
m_text1 = "1";<br />
m_slide2.SetScrollRange(1,255, true);<br />
m_text2 = "1";<br />
m_slide3.SetScrollRange(1,255, true);<br />
m_text3 = "1";<br />
UpdateData(false);<br />
n_red = 1;<br />
n_green = 1;<br />
n_blue = 1;<br />
//Set scroll bar range and<br />
//intitialise edit boxes to 1<br />
//This updates data from the<br />
//variable to the edit box.<br />
//(True) updates data from<br />
//the textbox to the variable.<br />
//Declare and initialise three<br />
//integer variables.<br />
// Add "About..." menu item to system<br />
menu.<br />
scrollbar value into the edit boxes and into the three variables, n_red, n_green and<br />
n_blue.<br />
void CColourChangerDlg::OnHScroll(UINT nSBCode, UINT nPos, CScrollBar*<br />
pScrollBar)<br />
{<br />
if(nSBCode == SB_THUMBPOSITION)<br />
{<br />
if (pScrollBar == &m_slide1){<br />
m_text1.Format("%ld", nPos);<br />
UpdateData(false);<br />
n_red = nPos; }<br />
if (pScrollBar == &m_slide2){<br />
m_text2.Format("%ld", nPos);<br />
UpdateData(false);<br />
n_green = nPos;}<br />
if (pScrollBar == &m_slide3){<br />
m_text3.Format("%ld", nPos);<br />
UpdateData(false);<br />
n_blue = nPos;}<br />
}<br />
else<br />
{<br />
CDialog::OnHScroll(nSBCode, nPos,<br />
pScrollBar);<br />
}<br />
}<br />
this code, we construct and destruct a new device context (pDC) to draw to and declare<br />
a new object of the CBrush class to paint the colours defined in the RGB macro and<br />
determined by the n_red, n_green and n_blue variables declared earlier. Again add the<br />
code in bold.
• Now build (F7) and execute your code.<br />
void CColourChangerDlg::OnButton1()<br />
{<br />
CClientDC* pDC = new CClientDC(this);<br />
CBrush backBrush;<br />
if(backBrush.CreateSolidBrush(RGB(n_red,n_green,n_blue)))<br />
{<br />
CBrush* pOlderBrush = pDC->SelectObject (&backBrush);<br />
pDC-> Ellipse(50,70, 140,130);<br />
}<br />
delete pDC;<br />
pDC-> SelectObject(pOlderBrush);<br />
// TODO: Add your control notification handler code here<br />
}<br />
Variables, datatypes and functions<br />
Variables are named memory locations of a size determined by the declared datatype.<br />
The following table lists some of the simple datatypes available in <strong>C++</strong>.<br />
Datatype<br />
Description and Range<br />
bool<br />
One of two values only. e.g. True or False<br />
unsigned char Positive numeric values without decimals from 0-255<br />
unsigned short<br />
Integers from 0 – 65,535 (but the older int is system<br />
(OR int)<br />
dependent).<br />
short int Integers from –32,768 to 32,767<br />
unsigned long int Integer values from 0 to 4,294,967,295<br />
long int Integer values from –2,147,483,648 to 2,147,483,647<br />
float<br />
Real numbers to 3.4E +/- 38 (7 digits)<br />
double<br />
Real numbers to 1.7E +/- 308 (15 digits)<br />
(You can also have a long double<br />
at 1.2E +/- 4932 (19 digits)<br />
CString<br />
Not really a simple datatype. A predefined <strong>C++</strong> class for<br />
handling strings of alphanumeric characters<br />
enum<br />
For defining datatypes based on predefined datatypes<br />
A function is a segment of code that accepts zero, one or more arguments and returns a<br />
single result. Some perform basic mathematical tasks, e.g.<br />
//NB This code depends on using the #include header file<br />
// at the beginning of this code.<br />
unsigned long myValue = 2;<br />
unsigned long cubed = cube(myValue)<br />
unsigned long squared = square(cubed)<br />
//cubed = 8<br />
//squared = 64<br />
Classes combine data and related functions (called methods of the class).<br />
An argument is a value you pass to a function so the function has data to work with.<br />
myValue and cubed are both examples of arguments.
• Start a new program by selecting New in the File menu, select the MFC AppWizard (exe)<br />
A function is declared in a function prototype using the following syntax:<br />
return_type function_name ([type[parameterName]] …);<br />
For example, int CalculateArea(int length, int width);<br />
A function prototype tells the compiler the return type, name and parameter list. Functions<br />
are not required to have parameters but must contain the parentheses even if empty. A<br />
function may take the return type void if no value is to be returned. A prototype always<br />
ends with a semicolon.<br />
The function definition tells the compiler how the function works using this syntax:<br />
return_type function_name ([type parameterName]…)<br />
{<br />
statements;<br />
}<br />
example,<br />
For<br />
int CalculateArea(int l, int w)<br />
{<br />
return l*w;<br />
}<br />
A function definition must agree with its prototype in return type and parameter list. It<br />
must provide names for all the parameters, and braces must surround the body of the<br />
function. All statements within the braces must end in semicolons, but the function itself is<br />
not ended with a semicolon.<br />
Activity 3: Dialog boxes<br />
In this program we will use a dialog box to allow a user to input data and use that data to<br />
display a personalised message on the main client area of the screen.<br />
entry under the projects tab in the New dialog box.<br />
• Give the new program the name ComputerConversation in the Project name box,<br />
choose a location and click OK to start the MFC AppWizard. In Step 1, select Single<br />
document. Then accept the defaults for all the other steps.<br />
• To create an input dialogue box, select the Resource item from the Insert menu. This<br />
opens the Insert Resource box. Select the Dialog entry and click the new button. This<br />
opens the Dialog box editor.<br />
• Add a label, right click and open its properties. Change the caption to “Type in your<br />
name please.”<br />
• Add an edit box underneath and a button (with the caption “Talk to me!”).<br />
• Choose Class Wizard from the View menu to create a new dialog box class. Choose<br />
create a new class and name it Dlg. Click OK. To connect an event handler to the<br />
button, select IDC_BUTTON1 and double click the BN_CLICKED entry in the Messages<br />
box. This creates the new member function OnButton1().<br />
• Now change to the Member Variables tab of the Class Wizard, select IDC_EDIT1 and<br />
click the Add Variable button. Create the variable m_text of the value category as type<br />
CString.<br />
• Connect m_text to the IDC_EDIT control using the DDX_text() method 0f the<br />
DoDataExchange() class. Add the bold code to dlg.cpp.<br />
void Dlg::DoDataExchange(CDataExchange* pDX)<br />
{<br />
CDialog::DoDataExchange(pDX);
• Get the user name from the edit box using UpdateData(false) which reads from the edit<br />
• The next step is displaying the dialog box. To do this we have to include the support for<br />
• Now we can make use of our Dlg class by creating a new object of that class and<br />
• The last step is to add the message in m_text to the client screen after the dialog box is<br />
}<br />
//{{AFX_DATA_MAP(Dlg)<br />
DDX_Text(pDX, IDC_EDIT1, m_text);<br />
//}}AFX_DATA_MAP<br />
box to the variable. Add “Hello there,” with string concatenation, display a message box<br />
and display back to the main screen with UpdateData(true).<br />
void Dlg::OnButton1()<br />
{<br />
UpdateData(true);<br />
m_text = "Hello there, " + m_text + "!";<br />
UpdateData(false);<br />
AfxMessageBox(m_text);<br />
// TODO: Add your control notification handler code here<br />
}<br />
our Dlg class in the view class by including the Dlg.h header file in<br />
ComputerConversationView.cpp.<br />
// ComputerConversationView.cpp : implementation of the<br />
// ComputerConversationView class<br />
//<br />
#include "stdafx.h"<br />
#include "ComputerConversation.h"<br />
#include "ComputerConversationDoc.h"<br />
#include "ComputerConversationView.h"<br />
#include "Dlg.h"<br />
displaying it on the screen with the DoModal() method, which returns an integer value.<br />
[NB: If you add a Show Dialog item to the Program’s file menu and connect that menu<br />
choice to the view class’s method OnFileShowdialog() you can add these same lines of<br />
code to this method to enable the user to show the dialog box again after it is closed.]<br />
Use the ClassWizard to add the OnInitialUpdate method. [Make sure<br />
CcomputerConversationView is the class selected and doubleclick OnInitialUpdate in the<br />
messages box]<br />
void CComputerConversationView::OnInitialUpdate()<br />
{<br />
CView::OnInitialUpdate();<br />
Dlg dlg;<br />
int display = dlg.DoModal();<br />
// TODO: add construction code here<br />
}<br />
closed with the OK button. Use the ClassWizard to add the onOK() method to Dlg.cpp.<br />
[Find IDOK, and doubleclick BN_CLICKED]. Now add code.<br />
void Dlg::OnOK()<br />
{<br />
// TODO: Add extra validation here<br />
// to make sure m_text is holding the text from the edit box<br />
UpdateData(true);<br />
//to close the dialog box and return the value IDOK.
• Add code to CComputerConversationView.cpp to update the display.<br />
• To complete the program, draw the text from the dialog box in the view’s OnDraw()<br />
• The program is complete. Build it (debug any errors carefully) and run it.<br />
• Open a new project in a new workspace using the MFC AppWizard (exe) and call it<br />
• In AppWizard Step 1, select dialog based and accept the defaults in the other steps.<br />
CDialog::OnOK();<br />
}<br />
void CComputerConversationView::OnInitialUpdate()<br />
{<br />
CView::OnInitialUpdate();<br />
Dlg dlg;<br />
int display = dlg.DoModal();<br />
// TODO: add construction code here<br />
if(display ==IDOK){<br />
CComputerConversationDoc* pDoc = GetDocument();<br />
ASSERT_VALID(pDoc);<br />
}<br />
pDoc->StringData = dlg.m_text;<br />
Invalidate();<br />
}<br />
• Add a CString object named StringData to CComputerConversationDoc.h.<br />
class CComputerConversationDoc : public CDocument<br />
{<br />
protected: // create from serialization only<br />
CComputerConversationDoc();<br />
DECLARE_DYNCREATE(CComputerConversationDoc)<br />
// Attributes<br />
public:<br />
CString StringData;<br />
// Operations<br />
method.<br />
void CComputerConversationView::OnDraw(CDC* pDC)<br />
{<br />
CComputerConversationDoc* pDoc = GetDocument();<br />
ASSERT_VALID(pDoc);<br />
// TODO: add draw code for native data here<br />
pDC->TextOut(0,0,pDoc->StringData);<br />
}<br />
Remarks are added in code to explain the purpose of a section of code or to add<br />
information for code maintenance. If // is placed in front of the remark, that line of code is<br />
ignored completely.<br />
Activity 4: Create a calculator and avoid division by zero<br />
Use a dialog box to create a calculator that can add, subtract, multiply and divide two<br />
numbers given by the user.<br />
Calculator.
• Click on the TODO .. and delete. Add two edit boxes and line them up using tools in<br />
• Add 4 small buttons in a line and right click each to access Properties and change their<br />
• Open CalculatorDlg.cpp and add the following code to the OnAdd method. Using cut and<br />
• Now to ensure that the program does not attempt division by zero. From the Insert<br />
• Open CalculatorDlg.cpp again and add code to access the new dialog box.<br />
• Use the binary selection control structure if (condition) { [statements;] …} else {<br />
• Build and run your program. Add a remark (put // at the beginning of the line) at the<br />
Layout menu. Use the Class Wizard from the View menu to connect each to a float, value<br />
number1 or number2. Add another edit box at the bottom and connect to a float value<br />
answer.<br />
captions to Add, Subtract, Multiply and Divide. Using Class Wizard again, double click<br />
their BN_CLICKED event but change the member function names to OnAdd, OnSubtract,<br />
OnMultiply and OnDivide.<br />
paste, add the same code to OnSubtract, OnMultiply and OnDivide, changing the<br />
operator in the second line appropriately.<br />
void CCalculatorDlg::OnAdd()<br />
{<br />
UpdateData(true);<br />
answer = number1 + number2;<br />
UpdateData(false);<br />
/ /TODO: Add your control notification handler code here<br />
}<br />
menu, Resource.. add a new dialog. Place a static label across the top, right click to<br />
access the properties, change the caption to read “You cannot divide by zero! Please<br />
enter another number”. [Remember, you can access font size by right clicking the<br />
dialog box background and selecting its properties.] Double click the new dialog box and<br />
accept the defaults to create a new class called dlg.<br />
// CalculatorDlg.cpp : implementation file<br />
//<br />
#include "stdafx.h"<br />
#include "Calculator.h"<br />
#include "CalculatorDlg.h"<br />
#include "dlg.h"<br />
[statements;]… } to prevent division by zero in the OnDivide method.<br />
void CCalculatorDlg::OnDivide()<br />
{<br />
UpdateData(true);<br />
}<br />
if (number2 == 0){<br />
dlg error;<br />
int display = error.DoModal();<br />
}<br />
else {<br />
answer = number1 / number2;<br />
UpdateData(false);<br />
}<br />
// TODO: Add your control notification handler code here<br />
top of your code which includes your name and the date.
Is your measurement in Inches or Centimetres <br />
• Create a new program (again dialog based) called Converter to convert inches to<br />
• Use option buttons (from the toolbox) for the user to indicate whether the conversion is<br />
• Use If statements to determine which formula to use based on which option button is<br />
• Use an edit box (connected to a float named measurement by the ClassWizard) to obtain<br />
Sequence algorithms<br />
The programs in Activities 1 — 4 were mainly constructed from sequence algorithm<br />
constructs. Each line of code followed another with only one possible pathway for each<br />
event. So, for each member function, the algorithm would consist of input, output and<br />
void CCalculatorDlg::OnAdd()<br />
{<br />
UpdateData(true);<br />
answer = number1 + number2;<br />
UpdateData(false);<br />
}<br />
// Input user numbers<br />
// Calculate answer<br />
// Output answer<br />
process steps, e.g.<br />
Binary Selection algorithms<br />
We have also used the second algorithm construct — selection. Selection allows multiple<br />
pathways for any event and allows for choices to be made. Selection constructs can be<br />
Binary (two way) or Multiway (multiple choices). You have used binary selection in your<br />
calculator to prevent a user dividing by zero.<br />
Activity 5: Measurement Converter (Binary Selection)<br />
1<br />
Convert it!<br />
Enter the measurement<br />
The measurement in centimetres is 2.54 cms.<br />
centimetres OR centimetres to inches (using the conversion 1 inch = 2.54 centimetres).<br />
inches to centimetres or centimetres to inches.<br />
selected. Option buttons are mutually exclusive, only one can be selected at a time.<br />
i.e.<br />
the user input. Add two radio buttons labelled “cms to inches” and “inches to cms” and<br />
another edit box (connected to a float named answer). Change the caption of the OK<br />
button to Convert and the caption of the cancel button to Close.
• Use the ClassWizard to create OnRadio1(), OnRadio2() and OnOK() in ConverterDlg.cpp.<br />
• Open ConverterDlg.h and add a boolean variable named flag.<br />
• Open ConverterDlg.cpp and add the following code in bold font.<br />
Activity 5, we looked at an example of binary selection. If the selection involves more<br />
In<br />
two alternatives, you can use nested If statements but this is complicated and can lead<br />
than<br />
hard-to-read code. It is sometimes better to use Switch statements. Here is the syntax<br />
to<br />
multiple selection through Switch statements.<br />
for<br />
(integralOrEnumExpression) Statement<br />
switch<br />
{<br />
.<br />
.<br />
.<br />
default:<br />
Statement;<br />
break;<br />
// CConverterDlg dialog<br />
class CConverterDlg : public CDialog<br />
{<br />
// Construction<br />
public:<br />
CConverterDlg(CWnd* pParent = NULL);<br />
bool flag;<br />
// standard constructor<br />
void CConverterDlg::OnRadio1()<br />
{<br />
flag = true;<br />
}<br />
void CConverterDlg::OnRadio2()<br />
{<br />
flag = false;<br />
}<br />
void CConverterDlg::OnOK()<br />
{<br />
UpdateData(true);<br />
if (flag == false) {<br />
answer = float(measurement * 2.54);<br />
unit = "cms";<br />
UpdateData(false);<br />
}<br />
else {<br />
answer = float(measurement / 2.54);<br />
unit = "inches";<br />
UpdateData(false);<br />
}<br />
//CDialog::OnOK();<br />
}<br />
Build and run the application to ensure that it is working correctly.<br />
•<br />
Use your calculator to verify the results. Try it out with some test data including very<br />
•<br />
large numbers, very small numbers, zero, negative numbers, 0.000000987654.<br />
Multiway selection<br />
case ConstantExpression:<br />
statement<br />
}
– 50 $1.40<br />
0<br />
– 100 $2.70<br />
51<br />
– 250 $4.00<br />
101<br />
– 500 $7.50<br />
251<br />
a project (dialog based) that allows a user to enter the weight in an edit box<br />
Design<br />
to a float value named weight). Calculate the postage when the user clicks a<br />
(connected<br />
and display the cost in an edit box (with a connected float variable called cost)<br />
button<br />
to the information given above. Use Switch statements in your code to practise<br />
according<br />
technique. Note that only integers (or their equivalent, e.g. char) can be used for the<br />
the<br />
in a switch statement.<br />
condition<br />
statements are rarely implemented in <strong>C++</strong>. A series of ordered -else if -statements<br />
Switch<br />
the same job more elegantly. Switch statements are sometimes used to distinguish<br />
does<br />
or loops are structures that allow a statement or group of statements to be<br />
Iterations<br />
out repeatedly while some condition remains true (or for a counted number of<br />
carried<br />
Each iteration MUST contain a way of stopping the looping. There are 2<br />
times).<br />
iteration structures:<br />
basic<br />
• Pre-test iterations: In these loops, the condition to be met occurs at the beginning of<br />
Activity 6: Parcel Post<br />
The post office has the following charges for parcels based upon different weights.<br />
Weight (gram)<br />
Cost<br />
Parcels which are heavier than 500g are calculated by weight*0.02<br />
void CParcelPostDlg::OnCalculate()<br />
{<br />
UpdateData(true);<br />
int type = 0;<br />
if (weight < 51)type = 1;<br />
else if (weight < 101)type = 2;<br />
else if (weight < 251)type = 3;<br />
else if (weight < 501)type = 4;<br />
}<br />
switch (type)<br />
{<br />
case < 1:<br />
case < 2:<br />
case < 3:<br />
case < 4:<br />
default:<br />
}<br />
UpdateData(false);<br />
cost = float(1.40);<br />
break;<br />
cost = float(2.70);<br />
break;<br />
cost = float(4.00);<br />
break;<br />
cost = float(7.50);<br />
break;<br />
cost = float(weight * 0.02);<br />
between members of an enumerated list.<br />
Iterations<br />
the loop and the code will not run at all if the condition is never met.
• Post-test iterations: in these loops, the condition to be met is at the end of the loop so<br />
this project, we will create an ActiveX Control to cause a beep, then use a pre-test loop<br />
In<br />
sound as many beeps as the number the user inputs.<br />
to<br />
• First create our ActiveX control. Under New..Projects, select MFCActiveX ControlWizard<br />
Accept the defaults for Step 1, but in step 2, select BUTTON in the drop down menu<br />
•<br />
the question “Which window class, if any, should this control subclass” Click<br />
under<br />
• Give your button a caption. Open BeepCtl.cpp and insert the following code.<br />
Now we need to add a click event to the button. Open ClassWizard in the View menu<br />
•<br />
select the ActiveX events tab. Select Add event. Select Click for the external name<br />
and<br />
an internal name of FireClick) and check that the implementation is Stock and<br />
(giving<br />
Still in the class wizard, select the Message Maps tab and add the OnLButtonDown()<br />
OK.<br />
double clicking WM_LBUTTONDOWN in the messages box) event handler to the<br />
(by<br />
control. Add code to fire the click event when the user clicks the button to our<br />
ActiveX<br />
Control in BeepCtl.cpp. This code causes the control to fire a click event each<br />
ActiveX<br />
the button is clicked, and programs that use this control will be able to set up a<br />
time<br />
To finish our ActiveX control, add the method, Beep() to our control. Open ClassWizard,<br />
•<br />
tab and select Add Method. Name the method Beep and make its return<br />
Automation<br />
void. Click OK and close the ClassWizard. Add the code to make the computer<br />
type<br />
using the MFC MessageBeep() method.<br />
beep,<br />
• Now build Beep to create Beep.ocx. This also registers that control with Windows.<br />
• Create a new dialog-based program with AppWizard now, naming this program Beeper.<br />
Add your Beep control to the dialog editor’s toolbox using the Project menu (Add to<br />
•<br />
Components and Controls Gallery). Open the Registered Controls folder, find<br />
Projects,<br />
that the code always runs at least once.<br />
Activity 7: Pre-test loop Beeper<br />
and name the Project Beep.<br />
Finish and OK to create the Beep class.<br />
CBeepCtrl::CBeepCtrl()<br />
{<br />
InitializeIIDs(&IID_DBeep, &IID_DBeepEvents);<br />
}<br />
// TODO: Initialize your control's instance data here.<br />
SetText("Click Me!");<br />
event-handler to handle such clicks.<br />
Click<br />
void CBeepCtrl::OnLButtonDown(UINT nFlags, CPoint point)<br />
{<br />
// TODO: Add your message handler code here and/or call default<br />
FireClick();<br />
COleControl::OnLButtonDown(nFlags, point);<br />
}<br />
void CBeepCtrl::Beep()<br />
{<br />
// TODO: Add your dispatch handler code here<br />
MessageBeep(MB_OK);<br />
}
and Insert. Accept default name CBeep and close. You will now have an OCX<br />
Beep<br />
in your toolbox called Beep. Insert on your form, add an edit box to accept user<br />
control<br />
and a label captioned “Enter an integer between 1 and 10, then click to hear that<br />
input<br />
of beeps.”<br />
number<br />
Use ClassWizard to connect a member variable, m_beeper, to the new Beep control and<br />
•<br />
variable called counter of type int to the textbox. Set the minimum and maximum<br />
a<br />
Use ClassWizard to add an event-handler to the Beep control’s Click event. In Message<br />
•<br />
select IDC_BEEPCTRL1 and double click Click to add the new event handler<br />
Maps<br />
• Add code to OnClickBeepctrl1() to get number from the edit box and call the Beep<br />
continuous and sound like one beep. One way to solve this problem is to give the<br />
are<br />
another task to slow it down. Add an edit box, right click to Properties and<br />
processor<br />
Visible. Use ClassWizard to add a variable called pause of type long. Now add<br />
deselect<br />
following code to OnClickBeepctrl1(), using a For loop to display value of pause to<br />
the<br />
invisible edit box to slow the computer down, add code to limit the user to an integer<br />
the<br />
1 and 10 and set the edit box back to zero for next use.<br />
between<br />
• Build and run your program.<br />
a new function, rand() to generate a random number. You will also need to use<br />
Use<br />
to provide an initial seed value so that rand() does not always start at the same<br />
srand()<br />
We will tie srand() to the current time (in seconds past midnight) so that it has a<br />
place.<br />
seed value each time it is used.<br />
different<br />
Design an ActiveX control button (called Dice) to generate a random number between 1<br />
•<br />
6. Use the MFC ActiveX ControlWizard and base it on the BUTTON class in Step 2.<br />
and<br />
values to 0 and 10. Now we can use the Beep() method using m_beeper.Beep().<br />
OnClickBeepctrl1().<br />
Use a pre-test loop to call Beep() the asked for number of times.<br />
method.<br />
void CbeeperDlg::OnClickBeepctrl1()<br />
{<br />
UpdateData(true);<br />
while (counter > 0)<br />
{<br />
m_beeper.Beep();<br />
counter--;<br />
//A pre-test loop based on a<br />
//counter condition.<br />
//Changes loop condition to<br />
//terminate loop<br />
}<br />
}<br />
The only remaining problem is that most modern computers run so fast that the beeps<br />
•<br />
void CbeeperDlg::OnClickBeepctrl1()<br />
{<br />
UpdateData(true);<br />
while ((counter > 0) && (counter < 11))<br />
m_beeper.Beep();<br />
counter--;<br />
for (int pause = 0; pause
it the return type short. In ClassWizard-> Message Maps connect CDiceCtrl to<br />
giving<br />
to create the OnLButtonDown() event-handler.<br />
WM_LBUTTONDOWN<br />
• Open DiceCtl.cpp and add the following lines of code.<br />
}<br />
.<br />
Start a new dialog based application (RollTheDice) and add the new Dice Control (in<br />
•<br />
Add to projects, Components and Controls). Place on the dialog box along with<br />
Projects,<br />
Using ClassWizard->Member Variables, add m_text (as an int) to IDC_EDIT1 and<br />
•<br />
(of the CDice class) to IDC_DICECTRL1. Change to Message Maps tab and<br />
m_button<br />
IDC_DICECTRL1 to the Click event to create the event-handler<br />
connect<br />
OnClickDicectrl1().<br />
• Build the program, debug any errors and run it.<br />
In ClassWizard-> ActiveX events tab-> Add Event, select • as external name and<br />
Click<br />
In ClassWizard-> Automation tab-> Add method, add a method called Random<br />
OK.<br />
CDiceCtrl::CDiceCtrl()<br />
{<br />
InitializeIIDs(&IID_DDice, &IID_DDiceEvents);<br />
// TODO: Initialize your control's instance data here.<br />
// This line is to change the button’s caption.<br />
SetText("Roll the dice!");<br />
.<br />
void CDiceCtrl::OnLButtonDown(UINT nFlags, CPoint point)<br />
{<br />
// TODO: Add your message handler code here and/or call default<br />
FireClick();<br />
point);<br />
COleControl::OnLButtonDown(nFlags,<br />
}<br />
short CDiceCtrl::Random()<br />
{<br />
// TODO: Add your dispatch handler code here<br />
int i;<br />
/* Seed the random-number generator with current time so<br />
that the numbers will be different every time */<br />
srand( (unsigned)time( NULL ) );<br />
i = rand()% 6 + 1;<br />
return i;<br />
}<br />
an edit box to display the result each time the Dice is clicked.<br />
• Add the bold code to RollTheDiceDlg.cpp.<br />
void CRollTheDiceDlg::OnClickDicectrl1()<br />
{<br />
// TODO: Add your control notification handler code here<br />
/*Use char() to typecast integer returned by Random() so that it<br />
can be assigned to the CString variable m_text. */<br />
m_text = char (m_button.Random());<br />
UpdateData(false);<br />
}
a program to generate the first 20 Fibonacci numbers. Use a counter to control the<br />
Create<br />
of iterations in a post-test loop.<br />
number<br />
Start a new single-document project called Numbers. Open NumbersDoc.h (from the<br />
•<br />
files) and add three CString objects (data, data1 and data2) in the public section.<br />
header<br />
• Open NumbersDoc.cpp and initialise the objects.<br />
• Open NumbersView.cpp and add the code to display the Fibonacci numbers in the<br />
Activity 9: Post-test loop to display Fibonacci numbers<br />
CNumbersDoc::CNumbersDoc()<br />
{<br />
// TODO: add one-time construction code here<br />
data = "The first 20 Fibonacci numbers are:";<br />
data1 = "";<br />
data2 = "";<br />
}<br />
method.<br />
OnDraw()<br />
void CNumbersView::OnDraw(CDC* pDC)<br />
{<br />
CNumbersDoc* pDoc = GetDocument();<br />
ASSERT_VALID(pDoc);<br />
// TODO: add draw code for native data here<br />
short x = 0;<br />
short y = 1;<br />
int counter = 1;<br />
CString new1 = "";<br />
CString new2 ="";<br />
//Declare variables to<br />
//format the values as<br />
//text.<br />
do<br />
{<br />
new1.Format("%ld", x);<br />
new2.Format("%ld", y);<br />
pDoc->data1 += new1;<br />
pDoc->data1 += " ";<br />
pDoc->data1 += new2;<br />
pDoc->data1 += " ";<br />
//Use post-test loop<br />
//Format values of x, y<br />
//Concatenate to string<br />
//Add 3 spaces<br />
x+=y;<br />
y+=x;<br />
counter +=2;<br />
}<br />
while (counter < 10);<br />
//Change value of x,y<br />
//Changes loop<br />
//condition to<br />
//terminate loop.<br />
do<br />
{<br />
new1.Format("%ld", x);<br />
new2.Format("%ld", y);<br />
pDoc->data2 += new1;<br />
pDoc->data2 += " ";<br />
pDoc->data2 += new2;<br />
pDoc->data2 += " ";<br />
x+=y;<br />
y+=x;<br />
counter +=2;<br />
//This post-test loop<br />
//concatenates values<br />
//into data2
• Open a new single project with MFCAppWizard(exe) named LearnTables.<br />
• Declare a CString variable, line, in LearnTablesDoc.h.<br />
• Intialize in learnTablesDoc.cpp ( line =” ”;) and add the following code to<br />
}<br />
• Build and run.<br />
}<br />
while ((counter < 20) && (counter >= 10));<br />
pDC->TextOut(0, 0, pDoc->data);<br />
pDC->TextOut(0, 20, pDoc->data1);<br />
pDC->TextOut(0, 40, pDoc->data2);<br />
//Displays strings on<br />
//screen – each string<br />
//on a new line.<br />
Activity 10: Nested FOR Loops<br />
Write a program that uses nested For loops to display the times tables from 1 – 12 with a<br />
new line for each times table.<br />
LearnTablesView.cpp.<br />
void ClearnTablesView::OnDraw(CDC* pDC)<br />
{<br />
CLearnTablesDoc* pDoc = GetDocument();<br />
ASSERT_VALID(pDoc);<br />
// TODO: add draw code for native data here<br />
int i;<br />
int j;<br />
int y = 0;<br />
CString convert = "";<br />
}<br />
for(i=0; iline = "";<br />
for(j=0; jline+= convert;<br />
pDoc->line+=" ";<br />
}<br />
pDC->TextOut(0,y, pDoc->line);<br />
y+=20;<br />
}<br />
Bibliography<br />
Holzner, S (1998). <strong>Visual</strong> <strong>C++</strong> in record time. San Francisco: Sybex.
Further Resources<br />
Dale, N and others. (2000). <strong>Programming</strong> and Problem Solving with <strong>C++</strong>. Sudbury,<br />
Massachusetts: Jones and Bartlett.<br />
Free-Ed Net Course Catalog: http://www.free-ed.net/catalog.htm<br />
This work was prepared by<br />
Beverley Sampford


