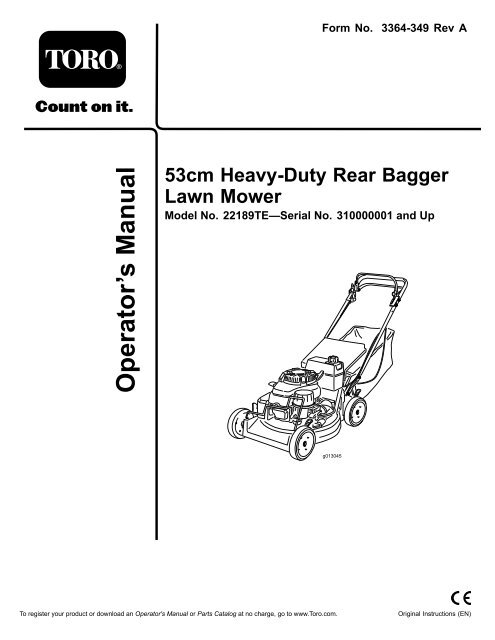
Hayter 21" HD Rotary Mower Operators Manual (pdf - 977kb)
Hayter 21" HD Rotary Mower Operators Manual (pdf - 977kb)
Hayter 21" HD Rotary Mower Operators Manual (pdf - 977kb)
Create successful ePaper yourself
Turn your PDF publications into a flip-book with our unique Google optimized e-Paper software.
Form No. 3364-349 Rev A<br />
53cm Heavy-Duty Rear Bagger<br />
Lawn <strong>Mower</strong><br />
Model No. 22189TE—Serial No. 310000001 and Up<br />
To register your product or download an Operator's <strong>Manual</strong> or Parts Catalog at no charge, go to www.Toro.com.<br />
Original Instructions (EN)
Introduction<br />
This rotary-blade, walk-behind lawn mower is<br />
intended to be used by residential homeowners<br />
or professional, hired operators. It is designed<br />
primarily for cutting grass on well-maintained lawns<br />
on residential or commercial properties. It is not<br />
designed for cutting brush or for agricultural uses.<br />
Read this information carefully to learn how to operate<br />
and maintain your product properly and to avoid injury<br />
and product damage. You are responsible for operating<br />
the product properly and safely.<br />
You may contact Toro directly at www.Toro.com for<br />
product and accessory information, help finding a<br />
dealer, or to register your product.<br />
Whenever you need service, genuine Toro parts, or<br />
additional information, contact an Authorized Service<br />
Dealer or Toro Customer Service and have the model<br />
and serial numbers of your product ready. Figure 1<br />
identifies the location of the model and serial numbers<br />
on the product. Write the numbers in the space<br />
provided.<br />
Figure 1<br />
1. Model and serial number location<br />
Model No.<br />
Serial No.<br />
This manual identifies potential hazards and has<br />
safety messages identified by the safety alert symbol<br />
(Figure 2), which signals a hazard that may cause serious<br />
injury or death if you do not follow the recommended<br />
precautions.<br />
© 2010—The Toro® Company<br />
8111 Lyndale Avenue South<br />
Bloomington, MN 55420 2<br />
1. Safety alert symbol<br />
Figure 2<br />
This manual uses 2 words to highlight information.<br />
Important calls attention to special mechanical<br />
information and Note emphasizes general information<br />
worthy of special attention.<br />
Contents<br />
Introduction................................................................. 2<br />
Safety ........................................................................... 3<br />
General Lawn <strong>Mower</strong> Safety ................................. 3<br />
Sound Pressure..................................................... 5<br />
Sound Power........................................................ 5<br />
Hand-Arm Vibration............................................ 5<br />
Safety and Instructional Decals............................. 5<br />
Setup............................................................................ 7<br />
1 Installing the Handle.......................................... 7<br />
2 Installing the Fuel Tank and the Fuel<br />
Line.................................................................. 7<br />
3 Filling the Crankcase with Oil............................. 8<br />
Product Overview ........................................................ 9<br />
Controls............................................................... 9<br />
Specifications ....................................................... 9<br />
Operation................................................................... 10<br />
Checking the Engine Oil Level............................ 10<br />
Filling the Fuel Tank with Gasoline ..................... 11<br />
Starting the Engine............................................. 12<br />
Stopping the Engine........................................... 12<br />
Operating the Blade............................................ 12<br />
Operating the Traction Drive.............................. 13<br />
Checking the Blade Brake Clutch ........................ 13<br />
Adjusting the Cutting Height .............................. 14<br />
Using the Grass Bag ........................................... 14<br />
Operating Tips ................................................... 15<br />
Maintenance............................................................... 17<br />
Recommended Maintenance Schedule(s) ................ 17<br />
Lubrication............................................................. 18<br />
Lubricating the Pivot Arms................................. 18<br />
Lubricating the Gear Case................................... 18<br />
Engine Maintenance............................................... 18<br />
Servicing the Air Filter........................................ 18<br />
Changing the Engine Oil .................................... 19<br />
Changing the Oil Filter ....................................... 20<br />
Servicing the Spark Plug ..................................... 21<br />
Fuel System Maintenance ....................................... 21<br />
Emptying the Fuel Tank and Cleaning the<br />
Fuel Filter....................................................... 21<br />
Contact us at www.Toro.com.<br />
Printed in the USA<br />
All Rights Reserved
Drive System Maintenance ..................................... 22<br />
Adjusting the Self-propel Drive........................... 22<br />
Controls System Maintenance................................. 23<br />
Adjusting the Blade Brake Cable ......................... 23<br />
Blade Maintenance ................................................. 25<br />
Maintaining the Cutting Blade............................. 25<br />
Cleaning................................................................. 26<br />
Cleaning under the <strong>Mower</strong> Housing .................... 26<br />
Cleaning the Blade Brake Clutch Shield ............... 27<br />
Storage....................................................................... 28<br />
Preparing the Fuel System................................... 28<br />
Preparing the Engine.......................................... 28<br />
General Information .......................................... 28<br />
Removing the Lawn <strong>Mower</strong> from Storage............ 28<br />
Troubleshooting......................................................... 29<br />
Safety<br />
Improperly using or maintaining this mower can<br />
result in injury. To reduce the potential for injury,<br />
comply with these safety instructions.<br />
Toro designed and tested this mower for reasonably safe<br />
service; however, failure to comply with the following<br />
instructions may result in personal injury.<br />
To ensure maximum safety, best performance, and<br />
to gain knowledge of the product, it is essential<br />
that you and any other operator of the mower read<br />
and understand the contents of this manual before<br />
the engine is ever started. Pay particular attention<br />
to the safety alert symbol (Figure 2) which means<br />
Caution, Warning, or Danger—“personal safety<br />
instruction.” Read and understand the instruction<br />
because it has to do with safety. Failure to comply<br />
with the instruction may result in personal injury.<br />
General Lawn <strong>Mower</strong> Safety<br />
The following instructions have been adapted from EN<br />
836.<br />
This cutting machine is capable of amputating hands<br />
and feet and throwing objects. Failure to observe the<br />
following safety instructions could result in serious<br />
injury or death.<br />
Training<br />
• Read the instructions carefully. Be familiar with the<br />
controls and the proper use of the equipment.<br />
• Never allow children or people unfamiliar with these<br />
instructions to use the mower. Local regulations can<br />
restrict the age of the operator.<br />
• Keep in mind that the operator or user is responsible<br />
for accidents or hazards occurring to other people or<br />
their property.<br />
• Understand explanations for all pictograms used on<br />
the mower or in the instructions.<br />
Gasoline<br />
WARNING-Gasoline is highly flammable. Take the<br />
following precautions.<br />
• Store fuel in containers specifically designed for this<br />
purpose.<br />
• Refuel outdoors only and do not smoke while<br />
refueling.<br />
• Add fuel before starting the engine. Never remove<br />
the cap of the fuel tank or add gasoline while the<br />
engine is running or when the engine is hot.<br />
3
• If gasoline is spilled, do not attempt to start the<br />
engine but move the mower away from the area of<br />
spillage and avoid creating any source of ignition<br />
until gasoline vapors have dissipated.<br />
• Replace all fuel tank and container caps securely.<br />
Preparation<br />
• While mowing, always wear substantial footwear and<br />
long trousers. Do not operate the equipment when<br />
barefoot or wearing open sandals.<br />
• Thoroughly inspect the area where the equipment is<br />
to be used and remove all stones, sticks, wires, bones<br />
and other foreign objects.<br />
• Before using, always visually inspect to see that<br />
guards, and safety devices, such as deflectors and/or<br />
grass catchers, are in place and working correctly.<br />
• Before using, always visually inspect to see that the<br />
blades, blade bolts and cutter assembly are not worn<br />
or damaged. Replace worn or damaged blades and<br />
bolts in sets to preserve balance.<br />
Starting<br />
• Do not tilt mower when starting the engine unless<br />
the mower has to be tilted for starting. In this case,<br />
do not tilt it more than absolutely necessary and lift<br />
only the part, which is away from the operator.<br />
• Start the engine carefully according to instructions<br />
and with feet well away from the blade(s) and not in<br />
front of the discharge chute.<br />
Operation<br />
• Never mow while people, especially children, or pets<br />
are nearby.<br />
• Mow only in daylight or in good artificial light.<br />
• Stay alert for holes in the terrain and other hidden<br />
hazards.<br />
• Do not put hands or feet near or under rotating parts.<br />
Keep clear of the discharge opening at all times.<br />
• Never pick up or carry a lawn mower while the<br />
engine is running.<br />
• Use extreme caution when reversing or pulling a<br />
pedestrian controlled lawn mower towards you.<br />
• Walk, never run.<br />
• Slopes:<br />
– Do not mow excessively steep slopes.<br />
– Exercise extreme caution when on slopes.<br />
– Mow across the face of slopes, never up and<br />
down and exercise extreme caution when<br />
changing direction on slopes.<br />
– Always be sure of your footing on slopes.<br />
• Reduce speed on slopes and in sharp turns to prevent<br />
overturning or loss of control.<br />
• Stop the blade if the lawn mower has to be tilted for<br />
transportation when crossing surfaces other than<br />
grass and when transporting the lawn mower to and<br />
from the area to be mowed.<br />
• Do not operate the engine in a confined space where<br />
dangerous carbon monoxide fumes can collect.<br />
• Stop the engine<br />
– whenever you leave the lawn mower.<br />
– before refueling.<br />
– before removing the grass catcher.<br />
– before making height adjustment unless<br />
adjustment can be made from the operator’s<br />
position.<br />
• Stop the engine and disconnect the spark-plug wire.<br />
– before clearing blockages or unclogging chute.<br />
– before checking, cleaning or working on the lawn<br />
mower.<br />
– after striking a foreign object, inspect the lawn<br />
mower for damage and make repairs before<br />
restarting and operating the lawn mower.<br />
– if lawn mower starts to vibrate abnormally (check<br />
immediately).<br />
• Lightning can cause severe injury or death. If you see<br />
lightning or hear thunder in the area, do not operate<br />
the machine; seek shelter.<br />
• Watch out for traffic when crossing or near roadways.<br />
Maintenance and Storage<br />
• Keep all nuts, bolts and screws tight to be sure the<br />
equipment is in safe working condition.<br />
• Do not use pressure cleaning equipment on machine.<br />
• Never store the equipment with gasoline in the tank<br />
and inside a building where fumes can reach an open<br />
flame or spark.<br />
• Allow the engine to cool before storing in any<br />
enclosure.<br />
• To reduce the fire hazard, keep the engine, silencer,<br />
battery compartment and gasoline storage are free of<br />
grass, leaves, or excessive grease.<br />
• Check grass catcher components and the discharge<br />
guard frequently and replace with manufacturer’s<br />
recommended parts, when necessary.<br />
• Replace worn or damaged parts for safety.<br />
• Replace faulty silencers.<br />
4
• If the fuel tank has to be drained, do this outdoors.<br />
• Do not change the engine governor settings or<br />
overspeed the engine. Operating an engine at<br />
excessive speed can increase the hazard of personal<br />
injury.<br />
• On multibladed lawn mowers, take care as rotating<br />
one blade may cause others to rotate.<br />
• Be careful during adjustment of the lawn mower to<br />
prevent entrapment of the fingers between moving<br />
blades and fixed parts of the lawn mower.<br />
• To ensure the best performance and safety,<br />
purchase only genuine Toro replacement parts<br />
and accessories. Do not use will fit parts and<br />
accessories; they may cause a safety hazard.<br />
Sound Pressure<br />
This unit has a sound pressure level at the operator’s<br />
ear of 90 dBA, which includes an Uncertainty Value (K)<br />
of 1 dBA. The sound pressure level was determined<br />
according to the procedures outlined in EN 836.<br />
Sound Power<br />
This unit has a guaranteed sound power level of 98 dBA,<br />
which includes an Uncertainty Value (K) of 1 dBA. The<br />
sound power level was determined according to the<br />
procedures outlined in ISO 11094.<br />
Hand-Arm Vibration<br />
Measured vibration level for the left hand = 5.3 m/s 2<br />
Measured vibration level for the right hand = 3.5 m/s 2<br />
Uncertainty Value (K) = 2.1 m/s 2<br />
The measured values were determined according to the<br />
procedures outlined in EN 836.<br />
Safety and Instructional Decals<br />
Safety decals and instructions are easily visible to the operator and are located near any area of<br />
potential danger. Replace any decal that is damaged or lost.<br />
Manufacturer’s Mark<br />
1. Indicates the blade is identified as a part from the original<br />
machine manufacturer.<br />
98-4387<br />
1. Warning—wear hearing protection.<br />
110-2115<br />
1. Read the Operator’s <strong>Manual</strong>. 3. To engage the traction control, lift the lower bail upward.<br />
2. To engage the blade, first move the safety latch forward and 4. To disengage the blade, release the upper bail.<br />
then pull the upper bail to the rear.<br />
110-4977<br />
1. Thrown object hazard—do not operate the mower with out<br />
a bag in place.<br />
5
110-4978<br />
1. Warning—read the Operator’s <strong>Manual</strong>.<br />
2. Thrown object hazard—keep bystanders a safe distance from the machine.<br />
3. Cutting, dismemberment hazard of hand or foot—stop the engine and remove the spark plug wire before performing any<br />
maintenance on the machine.<br />
4. Cutting, dismemberment hazard of hand or foot—stay away from moving parts.<br />
5. Warning—stop the engine before leaving the machine.<br />
112-8760<br />
1. Thrown object hazard—keep bystanders a safe distance<br />
from the machine.<br />
2. Cutting/dismemberment of hand or foot—stay away from<br />
moving parts.<br />
6
Setup<br />
Loose Parts<br />
Use the chart below to verify that all parts have been shipped.<br />
Procedure Description Qty. Use<br />
Handle 1<br />
Bolt (5/16 x 7/8 inch) 2<br />
Bolt (5/16 x 1-1/2 inches) 2<br />
1<br />
Washer 4<br />
Install the handle.<br />
Locknut (5/16 inch) 4<br />
Cable tie 3<br />
2<br />
Self-tapping screw 2<br />
Fuel tank 1<br />
Install the fuel tank and fuel line.<br />
3<br />
No parts required – Fill the crankcase with oil.<br />
Note: Determine the left and right sides of the machine<br />
from the normal operating position.<br />
1<br />
Installing the Handle<br />
Parts needed for this procedure:<br />
1 Handle<br />
2 Bolt (5/16 x 7/8 inch)<br />
2 Bolt (5/16 x 1-1/2 inches)<br />
4 Washer<br />
4 Locknut (5/16 inch)<br />
3 Cable tie<br />
Procedure<br />
1. Mount the handle to the mower housing with 2 bolts<br />
(5/16 x 7/8 inch), 2 bolts (5/16 x 1-1/2 inches), 4<br />
washers, and 4 locknuts (Figure 3).<br />
Figure 3<br />
1. Housing 3. Bolt (5/16 x 1-1/2 inches),<br />
washer, and locknut<br />
2. Handle 4. Bolt (5/16 x 7/8 inch),<br />
washer, and locknut<br />
Note: Install the washers with the cup side facing<br />
the handle.<br />
Note: You can adjust the handle height for more<br />
comfortable operation. Securing the lower handle<br />
end in the upper hole lowers the handle; securing the<br />
lower handle end in the lower hole raises the handle.<br />
2. Use the cable ties provided to secure the control<br />
cables to the handle.<br />
7
2<br />
Installing the Fuel Tank and<br />
the Fuel Line<br />
Parts needed for this procedure:<br />
2 Self-tapping screw<br />
1 Fuel tank<br />
Procedure<br />
1. Slide the end of the fuel line onto the elbow fitting<br />
(Figure 4).<br />
1<br />
1. Plastic clip (2)<br />
Figure 5<br />
2<br />
3<br />
4<br />
Figure 4<br />
1. Fuel tank 3. Fuel line<br />
2. Elbow fitting 4. Fuel line clamp<br />
G002527<br />
2. Secure the fuel line in place with the fuel line clamp<br />
(Figure 4).<br />
3. Slide the plastic clips on the front of the fuel tank<br />
onto the fuel tank mount (Figure 5).<br />
4. Secure the bottom of the fuel tank to the fuel tank<br />
bracket by installing the self-tapping screws from the<br />
bottom. Torque the screws to 40 to 50 in-lb (4.5<br />
to 5.6 N-m). Do not overtighten the screws.<br />
3<br />
Filling the Crankcase with Oil<br />
No Parts Required<br />
Procedure<br />
The engine crankcase is shipped without oil. You must<br />
fill it with approximately 30 oz. (0.88 l) of oil before<br />
starting the engine. Refer to Checking the Engine Oil<br />
Level in the Operation section for oil specifications and<br />
instructions.<br />
8
Product Overview<br />
Figure 7<br />
1. Blade control bar 4. Throttle control lever<br />
2. Control bar lock 5. Traction control bar<br />
3. Ground speed control<br />
lever<br />
The throttle settings are shown in (Figure 8).<br />
Figure 6<br />
1. Handle 8. Oil fill/dipstick (not shown)<br />
2. Blade control bar 9. Cutting height lever<br />
3. Control bar lock 10. Spark plug<br />
4. Ground speed control 11. Air filter<br />
lever<br />
5. Traction control bar 12. Oil filter<br />
6. Fuel tank 13. Grass bag<br />
7. Starter handle 14. Throttle control lever<br />
Controls<br />
The blade control bar, control bar lock, ground speed<br />
control lever, throttle control lever, and traction control<br />
bar are on the upper handle as shown in (Figure 7).<br />
Figure 8<br />
1. Choke 3. Slow<br />
2. Fast 4. Stop<br />
Specifications<br />
Model Weight Length Width Height<br />
22189TE<br />
123 lb<br />
(56 kg)<br />
59 in<br />
(149 cm)<br />
23 in<br />
(57 cm)<br />
38 in<br />
(97 cm)<br />
9
Operation<br />
Note: Determine the left and right sides of the<br />
machine from the normal operating position.<br />
Each time before you mow, make sure that the<br />
self-propel drive and the blade control bar operate<br />
properly. When you release the blade control bar, the<br />
blade should stop. If it does not, contact an Authorized<br />
Service Dealer.<br />
CAUTION<br />
This machine produces sound levels in excess of<br />
85dBA at the operator’s ear and can cause hearing<br />
loss through extended periods of exposure.<br />
Wear hearing protection when operating this<br />
machine.<br />
Figure 10<br />
1. Dipstick 3. Add<br />
2. Full<br />
Figure 9<br />
1. Warning—wear hearing protection.<br />
Checking the Engine Oil Level<br />
Service Interval: Before each use or daily<br />
Initially, fill the crankcase with 30 ounces (0.88 liters)<br />
of oil. Use only high-quality SAE 30 or SAE 10W30<br />
weight detergent oil that has the American Petroleum<br />
Institute (API) service classification SF, SG, SH, or SJ.<br />
Before each use, ensure that the oil level is between the<br />
Add and Full marks on the dipstick (Figure 10).<br />
Note: When the crankcase is empty, pour about 3/4<br />
of the crankcase capacity of oil in the crankcase, then<br />
follow the procedure in this section.<br />
1. Move the lawn mower to a level surface.<br />
2. Clean around the dipstick (Figure 10).<br />
3. Remove the dipstick by rotating the cap<br />
counterclockwise and pulling it out.<br />
4. Wipe the dipstick clean with a clean cloth.<br />
5. Insert the dipstick into the filler neck, but do not<br />
screw it in.<br />
6. Remove the dipstick and read the oil level on the<br />
dipstick (Figure 10).<br />
7. If the oil level reading is below the Add mark on<br />
the dipstick, slowly pour only enough oil into the<br />
filler hole to raise the oil level to the Full mark on<br />
the dipstick.<br />
Important: Do not overfill the crankcase with<br />
oil and run the engine; engine damage will<br />
result. Drain the excess oil until the oil level on<br />
the dipstick reads Full.<br />
8. Insert the dipstick into the filler neck and rotate the<br />
cap clockwise until it is tight.<br />
10
Filling the Fuel Tank with<br />
Gasoline<br />
For best results, use clean, fresh, lead-free gasoline with<br />
an octane rating of 87 or higher. To ensure freshness,<br />
purchase only the quantity of gasoline that you expect to<br />
use in 30 days. Using unleaded gasoline results in fewer<br />
combustion deposits and longer engine life. You may<br />
use leaded gasoline if unleaded gasoline is not available.<br />
Important: Do not add oil to the gasoline.<br />
Important: Do not use methanol, gasoline<br />
containing methanol, gasohol containing more<br />
than 10% ethanol, premium gasoline, or white gas.<br />
Using these fuels can damage the engine’s fuel<br />
system.<br />
Important: Do not use gasoline that has been<br />
stored since the last mowing season or longer.<br />
DANGER<br />
In certain conditions, gasoline is extremely<br />
flammable and highly explosive. A fire or explosion<br />
from gasoline can burn you and others and can<br />
damage property.<br />
• Fill the fuel tank outdoors, in an open area, and<br />
when the engine is cold. Wipe up any gasoline<br />
that spills.<br />
• Do not fill the fuel tank completely full. Add<br />
gasoline to the fuel tank until the level is 1/4 to<br />
1/2 in. (6 to 13 mm) below the bottom of the<br />
filler neck. This empty space in the tank allows<br />
the gasoline to expand.<br />
• Never smoke when handling gasoline, and stay<br />
away from an open flame or where a spark may<br />
ignite the gasoline fumes.<br />
• Store gasoline in an approved fuel container<br />
and keep it out of the reach of children.<br />
• Never buy more than a 30-day supply of<br />
gasoline.<br />
DANGER<br />
When fueling, under certain circumstances, a<br />
static charge can develop, igniting the gasoline. A<br />
fire or explosion from gasoline can burn you and<br />
others and damage property.<br />
• Always place gasoline containers on the ground<br />
and away from your vehicle before filling.<br />
• Do not fill gasoline containers inside a vehicle<br />
or on a truck or trailer bed because interior<br />
carpets or plastic truck bed liners may insulate<br />
the container and slow the loss of any static<br />
charge.<br />
• When practical, remove gasoline-powered<br />
equipment from the truck or trailer and refuel<br />
the equipment with its wheels on the ground.<br />
• If this is not possible, then refuel such<br />
equipment on a truck or trailer from a portable<br />
container, not from a gasoline dispenser nozzle.<br />
• If you must use a gasoline dispenser nozzle,<br />
keep the nozzle in contact with the rim of the<br />
fuel tank or container opening at all times until<br />
fueling is complete.<br />
Use a fuel stabilizer/conditioner regularly during<br />
operation and storage. A stabilizer/conditioner cleans<br />
the engine during operation and prevents gum-like<br />
varnish deposits from forming in the engine during<br />
periods of storage.<br />
Important: Do not use fuel additives other than<br />
a fuel stabilizer/conditioner. Do not use fuel<br />
stabilizers with an alcohol base such as ethanol,<br />
methanol, or isopropanol.<br />
1. Clean around the fuel tank cap (Figure 11).<br />
11
Operating the Blade<br />
Engaging the Blade<br />
When you start your engine, the blade does not turn.<br />
You must engage the blade to mow.<br />
1. Push the control bar lock forward (Figure 12).<br />
Figure 11<br />
1. Fuel tank cap 3. Air cleaner<br />
2. Oil fill/dipstick<br />
2. Remove the cap from the tank.<br />
3. Fill the fuel tank with unleaded gasoline to within<br />
1/4 to 1/2 inch (6 to 13 mm) from the top of the<br />
tank. Do not fill into the filler neck.<br />
Important: Do not fill the tank more than 1/4<br />
inch (6 mm) from the top of the tank because<br />
the gasoline must have room to expand.<br />
4. Install the fuel tank cap and wipe up any spilled<br />
gasoline.<br />
Starting the Engine<br />
1. Connect the wire to the spark plug (Figure 11).<br />
2. Open the fuel valve (Figure 22)<br />
3. Move the throttle control lever to the Choke<br />
position (Figure 8).<br />
4. Move the ground speed control lever to the Neutral<br />
(N) position.<br />
5. Pull the starter handle lightly until you feel<br />
resistance, then pull it sharply.<br />
6. Regulate the throttle and the ground speed control<br />
as desired when the engine starts.<br />
Note: If the engine fails to start after 3 pulls, repeat<br />
steps 3 through 6.<br />
Figure 12<br />
2. Pull the blade control bar to the handle and hold<br />
it (Figure 13).<br />
Figure 13<br />
Stopping the Engine<br />
1. Move the throttle control to the Stop position.<br />
2. Disconnect the wire from the spark plug if you do<br />
not use the lawn mower or leave it unattended.<br />
12
Disengaging the Blade<br />
Release the blade control bar.<br />
Important: When you release the blade control<br />
bar, the blade should stop within 3 seconds. If it<br />
does not stop properly, stop using your mower<br />
immediately and contact an Authorized Service<br />
Dealer.<br />
Operating the Traction Drive<br />
Engaging the Traction Drive<br />
1. Release the traction control bar (Figure 14).<br />
Figure 14<br />
2. Move the ground speed control lever to the desired<br />
gear position.<br />
3. Squeeze the traction control bar against the handle<br />
(Figure 15).<br />
Disengaging the Traction Drive<br />
Release the traction control bar.<br />
Checking the Blade Brake<br />
Clutch<br />
Check the blade control bar before each use to ensure<br />
that the blade brake clutch system is operating properly.<br />
1. Install the empty grass bag on the discharge tunnel.<br />
2. Start the engine.<br />
3. Pull the blade control bar to the normal blade<br />
engaged position. The bag should begin to inflate,<br />
indicating that the blade is engaged and rotating.<br />
4. Release the blade control bar. If the bag does not<br />
immediately deflate, it indicates that the blade<br />
is still rotating. The blade brake clutch may be<br />
deteriorating, and, if ignored, could result in an<br />
unsafe operating condition. Have the lawn mower<br />
inspected and serviced by an Authorized Service<br />
Dealer.<br />
DANGER<br />
If the blade brake clutch system is inoperative, the<br />
blade will continue to rotate when you release the<br />
blade control bail. Contact with blade could occur,<br />
causing serious injury.<br />
• Check the blade brake clutch operation before<br />
each use.<br />
• Never use a mower equipped with a blade brake<br />
clutch that has an inoperative safety system.<br />
• Take your mower to an Authorized Service<br />
Dealer for repair if the safety system fails to<br />
operate properly.<br />
Figure 15<br />
13
Adjusting the Cutting Height<br />
Each wheel is adjusted individually with a wheel height<br />
adjustment lever. Cutting heights are 1 inch (25 mm),<br />
1-1/2 inches (38 mm), 2 inches (51 mm), 2-1/2 inches<br />
(64 mm), 3 inches (76 mm), 3-1/2 inches (89 mm), and<br />
3-3/4 inches (95 mm).<br />
Using the Grass Bag<br />
Installing the Grass Bag<br />
1. Wait for all moving parts to stop.<br />
2. Raise and hold up the rear door (Figure 17).<br />
DANGER<br />
Adjusting the cutting height levers could bring<br />
your hands into contact with a moving blade and<br />
result in serious injury.<br />
• Stop the engine and wait for all movement to<br />
stop before adjusting the cutting height.<br />
• Do not put your fingers under the housing<br />
when adjusting the cutting height.<br />
1. Pull the wheel height adjustment lever toward the<br />
wheel (Figure 16) and move it to the desired setting.<br />
1. Rear door<br />
Figure 17<br />
3. Install the bag on the bag mounting posts<br />
(Figure 18).<br />
Figure 16<br />
1. Wheel height adjustment lever<br />
2. Release the wheel height adjustment lever and seat<br />
it securely in the notch.<br />
3. Adjust all the wheels to the same cutting height<br />
setting.<br />
1. Bag mounting posts<br />
Figure 18<br />
4. Lower the rear door.<br />
Removing the Grass Bag<br />
To remove the bag, reverse the steps above.<br />
14
DANGER<br />
The mower can throw grass clippings and<br />
other objects through an open discharge tunnel.<br />
Objects thrown with enough force could cause<br />
serious personal injury or death to the operator or<br />
bystander.<br />
Do not operate the mower without a grass bag<br />
installed.<br />
Mowing with the Grass Bag<br />
WARNING<br />
A worn grass bag could allow small stones<br />
and other similar debris to be thrown in the<br />
operator’s or bystander’s direction and result in<br />
serious personal injury or death to the operator or<br />
bystanders.<br />
Check the grass bag frequently. If it is damaged,<br />
install a new Toro replacement bag.<br />
Operating Tips<br />
General Tips<br />
• Maintain a sharp blade throughout the cutting<br />
season. Periodically file down nicks on the blade.<br />
• Replace the blade when necessary with an original<br />
Toro replacement blade.<br />
• Mow only dry grass or leaves. Wet grass and leaves<br />
tend to clump on the yard and can cause the mower<br />
to plug or the engine to stall.<br />
WARNING<br />
Wet grass or leaves can cause serious injury if<br />
you slip and contact the blade.<br />
Mow only in dry conditions.<br />
• Clean under the mower housing after each mowing.<br />
See Cleaning under the <strong>Mower</strong> Housing.<br />
• Keep the engine in good running condition.<br />
• Set the engine speed to the fastest position for the<br />
best cutting results.<br />
WARNING<br />
Operating a mower with its engine running at<br />
a speed greater than the factory setting can<br />
cause the mower to throw a part of the blade or<br />
engine into the operator’s or bystander’s area<br />
and result in serious personal injury or death.<br />
– Do not change the engine speed setting.<br />
– If you suspect the engine speed is faster<br />
than normal, contact an Authorized Service<br />
Dealer.<br />
• Clean the air filter frequently. Mulching stirs up<br />
more clippings and dust which clogs the air filter<br />
and reduces engine performance.<br />
Cutting Grass<br />
• Grass grows at different rates at different times<br />
of the year. In the summer heat, it is best to cut<br />
grass at the 2-1/2 inch (64 mm), 3 inch (76 mm),<br />
or 3-1/2 inch (89 mm) cutting height settings. Cut<br />
only about a third of the grass blade at a time. Do<br />
not cut below the 2-1/2 inch (64 mm) setting unless<br />
the grass is sparse or it is late fall when grass growth<br />
begins to slow down.<br />
• When cutting grass over 6 inches (15 cm) tall, first<br />
mow at the highest cutting height setting and walk<br />
slower; then mow again at a lower setting for the<br />
best lawn appearance. If the grass is too long and<br />
the leaves clump on top of the lawn, the mower may<br />
plug and cause the engine to stall.<br />
• Alternate the mowing direction. This helps disperse<br />
the clippings over the lawn for even fertilization.<br />
If the finished lawn appearance is unsatisfactory, try<br />
one or more of the following:<br />
• Sharpen the blade.<br />
• Walk at a slower pace while mowing.<br />
• Raise the cutting height on your mower.<br />
• Cut the grass more frequently.<br />
• Overlap cutting swaths instead of cutting a full<br />
swath with each pass.<br />
• Set the cutting height on the front wheels one notch<br />
lower than the rear wheels. For example, set the<br />
front wheels at 2-1/2 inches (64 mm) and the rear<br />
wheels at 3 inches (76 mm).<br />
Cutting Leaves<br />
• After cutting the lawn, ensure that half of the lawn<br />
shows through the cut leaf cover. You may need to<br />
make more than one pass over the leaves.<br />
15
• For light leaf coverage, set all the wheels at the same<br />
cutting height setting.<br />
• If there are more than 5 inches (12.7 cm) of leaves<br />
on the lawn, set the front cutting height 1 or 2<br />
notches higher than the rear cutting height. This<br />
makes it easier to feed the leaves under the mower<br />
housing.<br />
• Slow down your mowing speed if the mower does<br />
not cut the leaves finely enough.<br />
16
Maintenance<br />
Note: Determine the left and right sides of the machine from the normal operating position.<br />
Recommended Maintenance Schedule(s)<br />
Maintenance Service<br />
Interval<br />
After the first 8 hours<br />
Before each use or daily<br />
Every 25 hours<br />
Every 50 hours<br />
Every 100 hours<br />
Every 300 hours<br />
Yearly or before storage<br />
Maintenance Procedure<br />
• Change the engine oil.<br />
• Check the engine oil level.<br />
• Inspect the mower blades for wear or damage.<br />
• Clean under the mower housing.<br />
• Clean the foam pre-cleaner (more frequently in dusty conditions).<br />
• Lubricate the pivot arms.<br />
• Lubricate the gear case.<br />
• Change the engine oil (more often in dusty conditions).<br />
• Check the fuel hose and replace it if necessary.<br />
• Clean the blade brake clutch shield.<br />
• Clean the air cooling fins.<br />
• Change the oil filter.<br />
• Check the spark plug.<br />
• Clean the fuel filter.<br />
• Replace the paper air filter (more frequently in dusty conditions).<br />
• Empty the fuel tank.<br />
Important: Refer to your Engine Operator’s <strong>Manual</strong> for additional maintenance procedures.<br />
CAUTION<br />
If you leave the wire on the spark plug, someone could accidently start the engine and seriously injure<br />
you or other bystanders.<br />
Disconnect the wire from the spark plug before you do any maintenance. Set the wire aside so that it does<br />
not accidently contact the spark plug.<br />
17
Lubrication<br />
Lubricating the Pivot Arms<br />
Service Interval: Every 50 hours<br />
1. Move the rear wheel cutting height levers to the<br />
center setting.<br />
2. Wipe the grease fittings with a clean rag (Figure 19).<br />
Engine Maintenance<br />
Servicing the Air Filter<br />
Service Interval: Every 25 hours—Clean the foam<br />
pre-cleaner (more frequently in dusty<br />
conditions).<br />
Every 300 hours—Replace the paper<br />
air filter (more frequently in dusty<br />
conditions).<br />
Clean the foam pre-cleaner every 25 operating hours.<br />
Replace the paper air filter once every season or every<br />
300 operating hours; replace it more frequently in dusty<br />
conditions.<br />
Figure 19<br />
3. Install a grease gun onto the fitting and gently apply 2<br />
or 3 pumps of #2 multi-purpose lithium-base grease.<br />
Important: Excessive grease pressure may<br />
damage the seals.<br />
Important: Do not operate the engine without the<br />
air filter assembly; extreme engine damage will<br />
occur.<br />
1. Stop the engine and wait for all moving parts to stop.<br />
2. Disconnect the wire from the spark plug (Figure 11).<br />
3. Remove the cover and clean it thoroughly (Figure 21).<br />
Lubricating the Gear Case<br />
Service Interval: Every 50 hours<br />
1. Remove the grass bag.<br />
2. Install a grease gun onto the fitting through the belt<br />
cover opening (Figure 20).<br />
Figure 20<br />
3. Gently apply one to 2 pumps of #2 multi-purpose<br />
lithium-base grease.<br />
4. Install the grass bag.<br />
18
Changing the Engine Oil<br />
Service Interval: After the first 8 hours<br />
Every 50 hours<br />
With oil filter<br />
Without oil filter<br />
Oil Capacity<br />
29 ounces (0.85 liters)<br />
22 ounces (0.65 liters)<br />
Figure 21<br />
1. Cover 3. Air filter base<br />
2. Paper air filter<br />
4. Remove and inspect the paper air filter (Figure 21),<br />
and discard it if it is excessively dirty.<br />
Important: Do not try to clean a paper filter.<br />
5. Remove the foam pre-cleaner and wash it with a mild<br />
detergent and water, then blot it dry (Figure 21).<br />
6. Install the foam pre-cleaner onto the paper air filter.<br />
7. Install the air filter assembly.<br />
Note: Install a new paper air filter if you discarded<br />
the old one.<br />
8. Install the cover.<br />
Note: The oil capacities in the table above account<br />
for the empty crankcase to contain a small amount of<br />
residual oil.<br />
1. Run the engine to warm the engine oil.<br />
Note: Warm oil flows better and carries more<br />
contaminants.<br />
WARNING<br />
Oil may be hot after engine has been run, and<br />
contact with hot oil can cause severe personal<br />
injury.<br />
Avoid contacting the hot engine oil when you<br />
drain it.<br />
2. Stop the engine and wait for all moving parts to stop.<br />
3. Disconnect the wire from the spark plug (Figure 11).<br />
4. Place a suitable drain pan under the right side of<br />
the mower.<br />
5. Remove the dipstick by rotating the cap<br />
counterclockwise and pulling it out.<br />
6. Tip the mower onto its right side to drain the oil<br />
into the drain pan.<br />
Note: You can also remove the oil from the<br />
crankcase using an oil extractor.<br />
7. Return the mower to its operating position.<br />
8. Insert the dipstick into the filler neck and rotate the<br />
cap clockwise until it is tight.<br />
9. Recycle the used oil according to local codes.<br />
10. Fill the crankcase to the Full line on the dipstick with<br />
fresh oil. Refer to the Filling the Crankcase with Oil.<br />
11. Wipe up any spilled oil.<br />
19
Changing the Oil Filter<br />
Service Interval: Every 100 hours<br />
1. Run the engine to warm the oil.<br />
WARNING<br />
Oil may be hot after the engine has been run,<br />
and contact with hot oil can cause severe<br />
personal injury.<br />
Avoid contacting the hot engine oil when you<br />
drain it.<br />
9. Fill the crankcase to the Full line on the dipstick with<br />
fresh oil. Refer to Filling the Crankcase with Oil.<br />
10. Connect the wire to the spark plug.<br />
11. Run the engine for about 3 minutes.<br />
12. Stop the engine, wait for all moving parts to stop,<br />
and check for oil leakage around the filter.<br />
13. Add oil to compensate for the oil in the oil filter.<br />
Refer to Checking the Engine Oil Level.<br />
14. Recycle the used oil filter according to local codes.<br />
2. Stop the engine and wait for all moving parts to stop.<br />
3. Disconnect the wire from the spark plug (Figure 11).<br />
4. Drain the engine oil; refer to Changing the Engine<br />
Oil.<br />
5. Place a rag under the oil filter to catch any oil that<br />
may leak out as you remove the filter (Figure 22).<br />
Figure 22<br />
1. Oil filter 2. Fuel valve<br />
6. Remove the oil filter.<br />
7. Use your finger to coat the gasket on the new filter<br />
with oil (Figure 23).<br />
1. Gasket<br />
Figure 23<br />
8. Install the new filter and hand tighten it 2/3 turn<br />
only.<br />
20
Servicing the Spark Plug<br />
Service Interval: Every 100 hours—Check the spark<br />
plug.<br />
Use an NGK BPR5ES spark plug or equivalent.<br />
1. Stop the engine and wait for all moving parts to stop.<br />
2. Disconnect the wire from the spark plug (Figure 11).<br />
3. Clean around the spark plug.<br />
4. Remove the spark plug from the cylinder head.<br />
Important: Replace a cracked, fouled, or<br />
dirty spark plug. Do not clean the electrodes<br />
because grit entering the cylinder can damage<br />
the engine.<br />
5. Set the gap on the plug to 0.030 in. (0.76 mm)<br />
(Figure 24).<br />
1. Center electrode insulator<br />
2. Side electrode<br />
3. Air gap (not to scale)<br />
Figure 24<br />
6. Install the spark plug and the gasket seal.<br />
7. Torque the plug to 17 ft-lb (23 N-m).<br />
8. Connect the wire to the spark plug.<br />
Fuel System<br />
Maintenance<br />
Emptying the Fuel Tank and<br />
Cleaning the Fuel Filter<br />
Service Interval: Every 50 hours—Check the fuel hose<br />
and replace it if necessary.<br />
Every 100 hours—Clean the fuel<br />
filter.<br />
Yearly or before storage—Empty the<br />
fuel tank.<br />
The fuel filter (screen) element is located inside the fuel<br />
tank. Clean the fuel filter element every 100 operating<br />
hours.<br />
1. Stop the engine and wait for it to cool down.<br />
Important: Drain gasoline from a cold engine<br />
only.<br />
2. Disconnect the wire from the spark plug (Figure 11).<br />
3. Close the fuel valve (Figure 22).<br />
4. Disconnect the fuel line by loosening the tube clamp<br />
at the carburetor.<br />
5. Open the fuel valve.<br />
6. Drain the gasoline completely from the tank and fuel<br />
line into an approved fuel container.<br />
7. Remove the fuel tank from the mower.<br />
8. Close the fuel valve.<br />
9. Pour a small amount of fuel in the fuel tank, move<br />
the fuel around in the tank, and pour it out into an<br />
approved fuel container.<br />
10. Install the fuel tank and fuel line; refer to Installing<br />
the Fuel Tank and the Fuel Line.<br />
21
Drive System<br />
Maintenance<br />
1<br />
Adjusting the Self-propel Drive<br />
If the mower does not self-propel or has a tendency to<br />
creep forward when the control bar is more than 1-1/2<br />
inches (3.8 cm) from the handle, adjust the self-propel<br />
drive.<br />
1. Loosen the nut that secures the adjuster (Figure 25).<br />
1. Upper belt cover<br />
G012156<br />
Figure 26<br />
7. Remove the screws from the lower anchor bracket<br />
(Figure 27).<br />
Figure 25<br />
1. Adjuster 3. Cable<br />
2. Nut 4. 1-1/2 inches (3.8 cm)<br />
2. Turn the adjuster until you remove the slack in the<br />
exposed cable (Figure 25).<br />
3. Tighten the nut.<br />
Note: To check the adjustment, slowly pull the<br />
mower backward while you gradually move the<br />
control bar toward the handle. The adjustment is<br />
correct when the rear wheels stop turning and the<br />
top of the control bar is about 1-1/2 inches (3.8 cm)<br />
from the bottom of the handle.<br />
Note: If the adjuster is fully extended and the<br />
mower does not self-propel when the blade control<br />
bar is 1-1/2 inches (3.8 cm) from the handle, you<br />
will need to adjust the lower anchor bracket. Refer<br />
to steps 4 to 9.<br />
4. Move the adjuster to obtain the maximum slack in<br />
the cable.<br />
5. Remove the fuel tank.<br />
Note: You do not need to disconnect the fuel line<br />
from the fuel tank.<br />
6. Remove the upper belt cover (Figure 26).<br />
Figure 27<br />
1. Lower anchor bracket 2. Notches<br />
Note: The lower belt cover has been removed<br />
in Figure 27 for the purpose for clarity. It is not<br />
necessary to remove the lower belt cover to perform<br />
this procedure.<br />
22
8. Move the lower anchor bracket up one hole<br />
(Figure 27).<br />
9. Repeat steps 1 through 3 to adjust the control bar.<br />
Note: When you install a new belt, move the lower<br />
anchor bracket to its original factory position, which<br />
is indicated by the notches next to the holes in the<br />
bracket (Figure 27).<br />
Controls System<br />
Maintenance<br />
Adjusting the Blade Brake<br />
Cable<br />
Whenever you install a new blade brake cable assembly<br />
or replace the belt, adjust the blade brake cable.<br />
1. Stop the engine and wait for all moving parts to stop.<br />
2. Disconnect the wire from the spark plug (Figure 11).<br />
3. Remove the fuel tank from the tank bracket.<br />
Note: You do not need to disconnect the fuel line<br />
from the fuel tank.<br />
4. Reset the cable adjuster on the handle so that 1/4<br />
inch (6 mm) of the threads show, then tighten the<br />
nut (Figure 28).<br />
Figure 28<br />
1. Adjuster 3. 1/4 inch (6 mm) of threads<br />
2. Nut<br />
5. Loosen the cable clamp screw until the brake cable<br />
conduit slides (Figure 29).<br />
23
WARNING<br />
Do not overtighten the blade brake cable.<br />
Overtightening the blade brake cable could prevent<br />
the blade brake from contacting the brake drum<br />
when you release the control bar. If the blade brake<br />
does not contact the brake drum, the blade will not<br />
stop rotating, which could cause serious personal<br />
injury.<br />
• Each time you adjust the brake cable, ensure<br />
that the brake stops the blade in 3 seconds or<br />
less.<br />
• If the blade does not stop rotating in 3 seconds<br />
or less, bring the mower to an Authorized<br />
Service Dealer for inspection and repair.<br />
Figure 29<br />
1. Spring 3. Cable clamp screw<br />
2. Brake cable conduit<br />
6. Hold the blade control bar so that the outside of the<br />
bar is 5-1/2 inches (14 cm) from the outside of the<br />
handle, and pull the cable to the remove the slack,<br />
but do not put tension on the spring (Figure 30).<br />
Figure 30<br />
1. 5-1/2 inches (14 cm) 3. Blade control bar<br />
2. Handle<br />
7. Torque the cable clamp screw to 100 to 120 in-lb (11<br />
to 14 N-m) to lock the adjustment in place.<br />
8. Measure the length of the spring both before and<br />
after engaging the blade control bar. The difference<br />
between these 2 lengths is the spring stretch.<br />
Note: The spring stretch must be between 0.290<br />
and 0.310 inches (7.4 to 7.9 mm). You may need to<br />
adjust the cable adjuster to achieve this value.<br />
24
Blade Maintenance<br />
Maintaining the Cutting Blade<br />
Always mow with a sharp blade. A sharp blade cuts<br />
cleanly and without tearing or shredding the grass blades.<br />
1. Stop the engine and wait for all moving parts to stop.<br />
2. Disconnect the wire from the spark plug (Figure 11).<br />
3. Drain the gasoline from the fuel tank; refer to<br />
Emptying the Fuel Tank and Cleaning the Fuel Filter.<br />
4. Tip the mower onto its right side (Figure 31).<br />
Figure 31<br />
1. Blade 3. Anti-scalp cup<br />
2. Blade nuts<br />
Inspecting the Blade<br />
Service Interval: Before each use or daily<br />
Carefully examine the blade for sharpness and wear,<br />
especially where the flat and the curved parts meet<br />
(Figure 32A). Because sand and abrasive material can<br />
wear away the metal that connects the flat and curved<br />
parts of the blade, check the blade before using the<br />
mower. If you notice a slot or wear (Figure 32B and<br />
Figure 32C), replace the blade; refer to Removing the<br />
Blade.<br />
Figure 32<br />
1. Sail 3. Wear<br />
2. Flat part of the blade 4. Slot formed<br />
Note: For the best performance, install a new blade<br />
before the cutting season begins. During the year, file<br />
down any small nicks to maintain the cutting edge.<br />
DANGER<br />
A worn or damaged blade can break, and a piece<br />
of the blade could be thrown into the operator’s<br />
or bystander’s area, resulting in serious personal<br />
injury or death.<br />
• Inspect the blade periodically for wear or<br />
damage.<br />
• Replace a worn or damaged blade.<br />
Removing the Blade<br />
Grasp the end of the blade using a rag or a thickly<br />
padded glove. Remove the blade nuts, the anti-scalp cup,<br />
and the blade (Figure 31).<br />
Sharpening the Blade<br />
File the top side of the blade to maintain its original<br />
cutting angle (Figure 33A) and inner cutting edge radius<br />
(Figure 33B). The blade will remain balanced if you<br />
remove the same amount of material from both cutting<br />
edges.<br />
Figure 33<br />
1. Sharpen at this angle only. 2. Maintain the original radius<br />
here.<br />
Balancing the Blade<br />
1. Check the balance of the blade by placing the center<br />
hole of the blade over a nail or screwdriver shank<br />
clamped horizontally in a vise (Figure 34).<br />
25
Cleaning<br />
Figure 34<br />
Note: You can also check the balance using a<br />
commercially manufactured blade balancer.<br />
2. If either end of the blade rotates downward, file that<br />
end (not the cutting edge or the end near the cutting<br />
edge). The blade is properly balanced when neither<br />
end drops.<br />
Installing the Blade<br />
1. Install a sharp, balanced Toro blade, the anti-scalp<br />
cup, and the blade nuts. The sail of the blade must<br />
point toward the top of the mower housing for<br />
proper installation. Torque the blade nuts to 23 to<br />
27 ft-lb (32 to 37 N-m).<br />
2. Return the mower to its operating position.<br />
3. Connect the wire to the spark plug.<br />
Cleaning under the <strong>Mower</strong><br />
Housing<br />
To ensure the best performance, keep the underside of<br />
the mower housing clean.<br />
Washing Method<br />
Service Interval: Before each use or daily<br />
1. Position the mower on a flat concrete or asphalt<br />
surface near a garden hose.<br />
2. Start the engine.<br />
3. Hold the running garden hose at handle level and<br />
direct the water to flow on the ground just in front<br />
of the right rear wheel (Figure 35).<br />
1. Right rear wheel<br />
Figure 35<br />
Note: The blade will splash into the path of the<br />
blade, cleaning out the clippings.<br />
4. Stop the engine and wait for all moving parts to stop.<br />
5. Turn off the water.<br />
6. Start the mower and let it run for a few minutes<br />
to dry out the moisture on the mower and its<br />
components.<br />
Scraping Method<br />
If washing does not remove all debris from under the<br />
mower, scrape it clean.<br />
1. Disconnect the wire from the spark plug (Figure 11).<br />
2. Drain the fuel from the fuel tank. Refer to Emptying<br />
the Fuel Tank and Cleaning the Fuel Filter.<br />
WARNING<br />
Tipping the mower may cause the fuel to leak<br />
from the carburetor or the fuel tank. Gasoline<br />
is extremely flammable, highly explosive, and,<br />
under certain conditions, can cause personal<br />
injury or property damage.<br />
Avoid fuel spills by running the engine dry or by<br />
removing the gasoline with a hand pump; never<br />
siphon.<br />
26
3. Tip the mower onto its right side.<br />
4. Remove the dirt and grass clippings with a hardwood<br />
scraper. Avoid burrs and sharp edges.<br />
5. Return the mower to its operating position.<br />
6. Fill the fuel tank.<br />
7. Connect the wire to the spark plug.<br />
Cleaning the Blade Brake<br />
Clutch Shield<br />
Service Interval: Every 50 hours<br />
Clean inside the blade brake clutch shield when you<br />
change the engine oil to ensure the best performance<br />
and to prevent parts from degrading or when you<br />
sharpen the blade because you need to remove the blade<br />
in order to remove the shield.<br />
1. Stop the engine and wait for all moving parts to stop.<br />
2. Disconnect the wire from the spark plug.<br />
3. Drain the gasoline from the fuel tank; refer to<br />
Emptying the Fuel Tank and Cleaning the Fuel Filter.<br />
4. Tip the mower on its right side.<br />
WARNING<br />
Tipping the mower may cause the fuel to leak<br />
from the carburetor or the fuel tank. Gasoline<br />
is extremely flammable, highly explosive, and,<br />
under certain conditions, can cause personal<br />
injury or property damage.<br />
Avoid fuel spills by emptying the fuel tank as<br />
directed; never siphon.<br />
Figure 36<br />
1. Screws (4) 2. Blade brake clutch shield<br />
7. Remove the shield and brush or blow all the debris<br />
from under the shield and around the blade brake<br />
clutch system.<br />
8. Install the shield.<br />
9. Install the blade, the anti-scalp cup, and the 2 blade<br />
nuts.<br />
10. Return the mower to its operating position.<br />
11. Connect the wire to the spark plug.<br />
5. Remove 2 blade nuts, the anti-scalp cup, and the<br />
blade (Figure 31).<br />
6. Loosen the 4 screws that hold the shield in place<br />
(Figure 36).<br />
27
Storage<br />
To prepare the mower for off-season storage, perform<br />
the recommended maintenance procedures. Refer to<br />
Maintenance.<br />
Store the mower in a cool, clean, dry place. Cover the<br />
mower to keep it clean and protected.<br />
Preparing the Fuel System<br />
WARNING<br />
Gasoline can vaporize if you store it over long<br />
periods of time and explode if it comes into contact<br />
with an open flame.<br />
• Do not store gasoline over long periods of time.<br />
• Do not store the mower with gasoline in the fuel<br />
tank or the carburetor in an enclosure with an<br />
open flame. (For example, a furnace or a water<br />
heater pilot light.)<br />
• Allow the engine to cool before storing it in any<br />
enclosure.<br />
Empty the fuel tank when mowing the last time before<br />
storing the mower.<br />
1. Run the mower until the engine stops from running<br />
out of fuel.<br />
2. Choke the engine and start it again.<br />
3. Allow the engine to run until it stops. When you can<br />
no longer start the engine, it is sufficiently dry.<br />
Preparing the Engine<br />
1. While the engine is still warm, change the oil from<br />
the crankcase. Refer to Changing the Engine Oil.<br />
2. Remove the spark plug.<br />
3. Using an oil can, add about one tablespoon of oil to<br />
the crankcase through the spark plug hole.<br />
4. Slowly rotate the engine several times, using the<br />
starter rope, to distribute the oil.<br />
5. Install the spark plug but do not connect the wire to<br />
the spark plug.<br />
3. Remove grass clippings, dirt, and grime from the<br />
external parts of the engine, the shrouding, and the<br />
top of the mower housing.<br />
4. Check the condition of the blade. Refer to<br />
Maintaining the Cutting Blade.<br />
5. Clean the blade brake clutch shield; refer to Cleaning<br />
the Blade Brake Clutch Shield.<br />
6. Service the air filter; refer to Servicing the Air Filter.<br />
7. Lubricate the pivot arms; refer to Lubricating the<br />
Pivot Arms.<br />
8. Tighten all nuts, bolts, and screws.<br />
9. Touch up all rusted or chipped paint surfaces with<br />
paint available from an Authorized Service Dealer.<br />
Removing the Lawn <strong>Mower</strong><br />
from Storage<br />
1. Check and tighten all fasteners.<br />
2. Remove the spark plug and spin the engine rapidly<br />
using the starter to blow excess oil from the cylinder.<br />
3. Clean the spark plug or replace it if it is cracked,<br />
broken, or if the electrodes are worn.<br />
4. Install the spark plug and torque it to 17 ft-lb (23<br />
N-m).<br />
5. Perform any needed maintenance procedures; refer<br />
to Maintenance.<br />
6. Fill the fuel in the fuel tank with fresh gasoline.<br />
7. Check the engine oil level.<br />
8. Connect the wire to the spark plug.<br />
General Information<br />
1. Clean the mower housing. Refer to Cleaning under<br />
the <strong>Mower</strong> Housing.<br />
2. Clean any dirt and chaff from the cylinder, cylinder<br />
head fins, and blower housing.<br />
28
Troubleshooting<br />
Problem Possible Cause Corrective Action<br />
Engine does not start<br />
1. The fuel tank is empty or the fuel<br />
system contains stale fuel.<br />
2. The throttle lever is not in the Choke<br />
position.<br />
3. The wire is not connected to the spark<br />
plug.<br />
4. The spark plug is pitted, fouled, or the<br />
gap is incorrect.<br />
1. Drain and/or fill the fuel tank with<br />
fresh gasoline. If the problem persists,<br />
contact an Authorized Service Dealer.<br />
2. Move the throttle lever to the Choke<br />
position.<br />
3. Connect the wire to the spark plug.<br />
4. Check the spark plug and adjust the<br />
gap if necessary. Replace the spark<br />
plug if it is pitted, fouled, or cracked.<br />
Engine starts hard or loses power<br />
1. The fuel tank contains stale fuel. 1. Drain and fill the fuel tank with fresh<br />
gasoline.<br />
2. The fuel cap vent hole is plugged. 2. Clean the fuel cap vent hole or replace<br />
the fuel cap.<br />
3. The air filter element is dirty and is 3. Clean the air filter pre-cleaner and/or<br />
restricting the air flow.<br />
replace the paper air filter.<br />
4. The underside of the mower housing 4. Clean under the mower housing.<br />
contains clippings and debris.<br />
5. The spark plug is pitted, fouled, or the 5. Check the spark plug and adjust the<br />
gap is incorrect.<br />
gap if necessary. Replace the spark<br />
plug if it is pitted, fouled, or cracked.<br />
6. The engine oil level is low or the oil is<br />
dirty.<br />
6. Check the engine oil. Change the oil if<br />
it is dirty or add oil if it is low.<br />
Engine runs rough<br />
1. The wire is not connected to the spark<br />
plug.<br />
2. The spark plug is pitted, fouled, or the<br />
gap is incorrect.<br />
3. The throttle lever is not in the Fast<br />
position.<br />
4. The air filter element is dirty and is<br />
restricting the air flow.<br />
1. Connect the wire to the spark plug.<br />
2. Check the spark plug and adjust the<br />
gap if necessary. Replace the spark<br />
plug if it is pitted, fouled, or cracked.<br />
3. Move the throttle lever to the Fast<br />
position.<br />
4. Clean the air filter pre-cleaner and/or<br />
replace the paper air filter.<br />
Lawn mower or engine vibrates<br />
excessively<br />
Uneven cutting pattern<br />
1. The blade is bent or is out of balance. 1. Balance the blade. If the blade is bent,<br />
replace it.<br />
2. The blade mounting nuts are loose. 2. Tighten the blade mounting nuts.<br />
3. The underside of the mower housing 3. Clean under the mower housing.<br />
contains clippings and debris.<br />
4. The engine mounting bolts are loose. 4. Tighten the engine mounting bolts.<br />
1. All 4 wheels are not at the same height. 1. Place all 4 wheels at the same height.<br />
2. The blade is dull. 2. Sharpen and balance the blade.<br />
3. You are mowing in the same pattern 3. Change the mowing pattern.<br />
repeatedly.<br />
4. The underside of the mower housing 4. Clean under the mower housing.<br />
contains clippings and debris.<br />
<strong>Mower</strong> does not self-propel<br />
1. The self-propel drive cable is out of<br />
adjustment or is damaged.<br />
1. Adjust the self-propel drive cable.<br />
Replace the cable if necessary.<br />
29
Notes:<br />
30
International Distributor List<br />
Distributor: Country: Phone Number:<br />
Atlantis Su ve Sulama Sisstemleri Lt Turkey 90 216 344 86 74<br />
Balama Prima Engineering Equip. Hong Kong 852 2155 2163<br />
B-Ray Corporation Korea 82 32 551 2076<br />
Casco Sales Company Puerto Rico 787 788 8383<br />
Ceres S.A. Costa Rica 506 239 1138<br />
CSSC Turf Equipment (pvt) Ltd. Sri Lanka 94 11 2746100<br />
Cyril Johnston & Co. Northern Ireland 44 2890 813 121<br />
Equiver Mexico 52 55 539 95444<br />
Femco S.A. Guatemala 502 442 3277<br />
G.Y.K. Company Ltd. Japan 81 726 325 861<br />
Geomechaniki of Athens Greece 30 10 935 0054<br />
Guandong Golden Star China 86 20 876 51338<br />
Hako Ground and Garden Sweden 46 35 10 0000<br />
Hako Ground and Garden Norway 47 22 90 7760<br />
<strong>Hayter</strong> Limited (U.K.) United Kingdom 44 1279 723 444<br />
Hydroturf Int. Co Dubai United Arab Emirates 97 14 347 9479<br />
Hydroturf Egypt LLC Egypt 202 519 4308<br />
Ibea S.P.A. Italy 39 0331 853611<br />
Irriamc Portugal 351 21 238 8260<br />
Irrigation Products Int’l Pvt Ltd. India 86 22 83960789<br />
Jean Heybroek b.v. Netherlands 31 30 639 4611<br />
Lely (U.K.) Limited United Kingdom 44 1480 226 800<br />
Maquiver S.A. Colombia 57 1 236 4079<br />
Maruyama Mfg. Co. Inc. Japan 81 3 3252 2285<br />
Metra Kft Hungary 36 1 326 3880<br />
Mountfield a.s. Czech Republic 420 255 704 220<br />
Munditol S.A. Argentina 54 11 4 821 9999<br />
Oslinger Turf Equipment SA Ecuador 593 4 239 6970<br />
Oy Hako Ground and Garden Ab Finland 358 987 00733<br />
Parkland Products Ltd. New Zealand 64 3 34 93760<br />
Prochaska & Cie Austria 43 1 278 5100<br />
RT Cohen 2004 Ltd. Israel 972 986 17979<br />
Riversa Spain 34 9 52 83 7500<br />
Roth Motorgerate GmBh & Co. Germany 49 7144 2050<br />
Sc Svend Carlsen A/S Denmark 45 66 109 200<br />
Solvert S.A.S. France 33 1 30 81 77 00<br />
Spypros Stavrinides Limited Cyprus 357 22 434131<br />
Surge Systems India Limited India 91 1 292299901<br />
T-Markt Logistics Ltd. Hungary 36 26 525 500<br />
Toro Australia Australia 61 3 9580 7355<br />
Toro Europe BVBA Belgium 32 14 562 960<br />
374-0269 Rev A
The Toro Warranty<br />
Conditions and Products Covered<br />
The Toro® Company and its affiliate, Toro Warranty Company, pursuant to<br />
an agreement between them, jointly promise to repair the Toro Product<br />
listed below if used for residential purposes* if defective in materials or<br />
workmanship.<br />
The following time periods apply from the date of purchase:<br />
Products<br />
Walk Power <strong>Mower</strong>s<br />
Rear Engine Riders<br />
Lawn & Garden Tractors<br />
Electric Hand Held Products<br />
Snowthrowers<br />
Consumer Zero Turn<br />
Warranty Period<br />
2 year limited warranty<br />
2 year limited warranty<br />
2 year limited warranty<br />
2 year limited warranty<br />
2 year limited warranty<br />
2 year limited warranty<br />
*Original Purchaser means the person who originally purchased the Toro<br />
Product<br />
*Residential purposes means use of the product on the same lot as your<br />
home. Use at more than one location, or institutional or rental use, is<br />
considered commercial use, and the commercial use warranty would<br />
apply.<br />
Limited Warranty for Commercial Use<br />
Toro Consumer Products and attachments used for commercial,<br />
institutional, or rental use, are warranted against defects in materials<br />
or workmanship for the following time periods from the date of original<br />
purchase:<br />
Products<br />
Walk Power <strong>Mower</strong>s<br />
Rear Engine Riders<br />
Lawn & Garden Tractors<br />
Electric Hand Held Products<br />
Snowthrowers<br />
Consumer Zero Turn<br />
Warranty Period<br />
90 day warranty<br />
90 day warranty<br />
90 day warranty<br />
90 day warranty<br />
90 day warranty<br />
45 day warranty<br />
Instructions for Obtaining Warranty Service<br />
If you think that your Toro Product contains a defect in materials or<br />
workmanship, follow this procedure:<br />
1. Contact your seller to arrange service of the product. If for any reason<br />
it is impossible for you to contact your seller, you may contact any<br />
Toro Authorized Distributor to arrange service.<br />
2. Bring the product and your proof of purchase (sales receipt) to the<br />
Service Dealer. If for any reason you are dissatisfied with the Service<br />
Dealer’s analysis or with the assistance provided, contact us at:<br />
Customer Care Department, Consumer Division<br />
The Toro Company<br />
8111 Lyndale Avenue South<br />
Bloomington, MN 55420-1196<br />
Manager: Technical Product Support: 001–952–887–8248<br />
See attached Distributor List<br />
Owner Responsibilities<br />
You must maintain your Toro Product by following the maintenance<br />
procedures described in the Operator’s <strong>Manual</strong>. Such routine<br />
maintenance, whether performed by a dealer or by you, is at your expense.<br />
Items and Conditions Not Covered<br />
This express warranty does not cover the following:<br />
• Cost of regular maintenance service or wear parts, such as rotor<br />
blades (paddles), scraper blades, belts, fuel, lubricants, oil changes,<br />
spark plugs, cable/linkage or brake adjustments<br />
• Any product or part which has been altered or misused and requires<br />
replacement or repair due to accidents or lack of proper maintenance<br />
• Repairs necessary due to failure to use fresh fuel (less than one<br />
month old), or failure to properly prepare the unit prior to any period<br />
of non-use over one month<br />
• Engine and transmission. These are covered by the appropriate<br />
manufacturer’s guarantees with separate terms and conditions<br />
All repairs covered by these warranties must be performed by an<br />
Authorized Toro Service Dealer using Toro approved replacement parts.<br />
General Conditions<br />
The purchaser is covered by the national laws of each country. The rights<br />
to which the purchaser is entitled with the support of these laws are not<br />
restricted by this warranty.<br />
374-0268 Rev A


