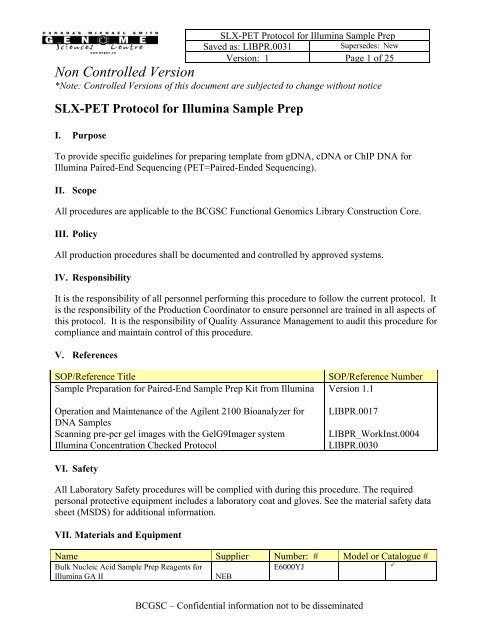
SLX-PET Protocol for Illumina Sample Prep - IHEC
SLX-PET Protocol for Illumina Sample Prep - IHEC
SLX-PET Protocol for Illumina Sample Prep - IHEC

You also want an ePaper? Increase the reach of your titles
YUMPU automatically turns print PDFs into web optimized ePapers that Google loves.
<strong>SLX</strong>-<strong>PET</strong> <strong>Protocol</strong> <strong>for</strong> <strong>Illumina</strong> <strong>Sample</strong> <strong>Prep</strong><br />
Saved as: LIBPR.0031<br />
Supersedes: New<br />
Version: 1 Page 1 of 25<br />
Non Controlled Version<br />
*Note: Controlled Versions of this document are subjected to change without notice<br />
<strong>SLX</strong>-<strong>PET</strong> <strong>Protocol</strong> <strong>for</strong> <strong>Illumina</strong> <strong>Sample</strong> <strong>Prep</strong><br />
I. Purpose<br />
To provide specific guidelines <strong>for</strong> preparing template from gDNA, cDNA or ChIP DNA <strong>for</strong><br />
<strong>Illumina</strong> Paired-End Sequencing (<strong>PET</strong>=Paired-Ended Sequencing).<br />
II. Scope<br />
All procedures are applicable to the BCGSC Functional Genomics Library Construction Core.<br />
III. Policy<br />
All production procedures shall be documented and controlled by approved systems.<br />
IV. Responsibility<br />
It is the responsibility of all personnel per<strong>for</strong>ming this procedure to follow the current protocol. It<br />
is the responsibility of the Production Coordinator to ensure personnel are trained in all aspects of<br />
this protocol. It is the responsibility of Quality Assurance Management to audit this procedure <strong>for</strong><br />
compliance and maintain control of this procedure.<br />
V. References<br />
SOP/Reference Title<br />
SOP/Reference Number<br />
<strong>Sample</strong> <strong>Prep</strong>aration <strong>for</strong> Paired-End <strong>Sample</strong> <strong>Prep</strong> Kit from <strong>Illumina</strong> Version 1.1<br />
Operation and Maintenance of the Agilent 2100 Bioanalyzer <strong>for</strong><br />
DNA <strong>Sample</strong>s<br />
Scanning pre-pcr gel images with the GelG9Imager system<br />
<strong>Illumina</strong> Concentration Checked <strong>Protocol</strong><br />
LIBPR.0017<br />
LIBPR_WorkInst.0004<br />
LIBPR.0030<br />
VI. Safety<br />
All Laboratory Safety procedures will be complied with during this procedure. The required<br />
personal protective equipment includes a laboratory coat and gloves. See the material safety data<br />
sheet (MSDS) <strong>for</strong> additional in<strong>for</strong>mation.<br />
VII. Materials and Equipment<br />
Name Supplier Number: # Model or Catalogue #<br />
Bulk Nucleic Acid <strong>Sample</strong> <strong>Prep</strong> Reagents <strong>for</strong><br />
E6000YJ<br />
<br />
<strong>Illumina</strong> GA II<br />
NEB<br />
BCGSC – Confidential in<strong>for</strong>mation not to be disseminated
Non Controlled Version<br />
<strong>SLX</strong>-<strong>PET</strong> <strong>Protocol</strong> <strong>for</strong> <strong>Illumina</strong> <strong>Sample</strong> <strong>Prep</strong><br />
Saved as: LIBPR.0031<br />
Supersedes: New<br />
Version: 1 Page 2 of 25<br />
*Note: Controlled Versions of this document are subjected to change without notice<br />
Fisherbrand Textured Nitrile gloves - large Fisher 270-058-53 <br />
Ice bucket – Green Fisher 11-676-36 <br />
Wet ice In house N/A N/A<br />
Nuclease Free 2.0 ml eppendorf tube Ambion 12400 <br />
Gilson P2 pipetman Mandel GF-44801 <br />
Gilson P10 pipetman Mandel GF-44802 <br />
Gilson P20 pipetman Mandel GF23600 <br />
Gilson P200 pipetman Mandel GF-23601 <br />
Gilson P1000 pipetman Mandel GF-23602 <br />
Neptune barrier tips 10 ul CLP Bt10XL <br />
Neptune barrier tips 20 ul CLP Bt20 <br />
Neptune barrier tips 1000 ul CLP Bt1000 <br />
Galaxy mini-centrifuge VWR 37000-700 <br />
VX-100 Vortex Mixer Rose Scientific S-0100 <br />
Large Kimwipes Fisher 06-666-117 <br />
Black ink permanent marker pen VWR 52877-310 <br />
Eppendorf BenchTop Refrigerated Centrifuge<br />
5810R Eppendorf 5810 R <br />
Bench Coat (Bench Protection Paper) Fisher 12-007-186 <br />
Small Autoclave waste bags 10”X15” Fisher 01-826-4 <br />
Qiaquick PCR Purification Kit (50) Qiagen 28104 <br />
MinElute PCR Purification Kit (50) Qiagent 28004 <br />
DNAAWAY MBS 7010<br />
<br />
Mussel Glycogen (20mg) Roche 10 901 393 001 <br />
3 M Sodium Acetate Sigma EC 211-162-9 <br />
Anhydrous Ethyl Alcohol (100% Ethanol) Commercial People Soft ID: <br />
Phenol/Chloro<strong>for</strong>m/Isoamyl Alcohol Fisher BP1752-100 <br />
2.0 mL Phase lock tubes Brinkmann 955154011 <br />
Mylar <strong>PET</strong> film, clear (40”x10’x 0.003”) McMaster- 8567K32 <br />
Plastic wrap<br />
In house<br />
NanoDrop ND-1000 Spectrophotometer NanoDrop ND-1000 <br />
Agilent DNA 1000 Series II Kit Agilent 5067-1504 <br />
DNA 1000 Gel Matrix Agilent 5067-1504 <br />
DNA 1000 Dye Concentrate Agilent 5067-1504 <br />
DNA 1000 Marker Agilent 5067-1504 <br />
DNA 1000 Ladder Agilent 5067-1504 <br />
Agilent DNA 1000 Chips Agilent 6064-8230 <br />
Agilent Chip Priming Station Agilent Chip Priming <br />
IKA Works Vortexer Agilent MS2S9-Agilent- <br />
22R Microfuge Centrifuge Beckman 22R Centrifuge <br />
GeneAmp PCR System 9700 ABI PCR System 9700 <br />
Agilent Electrode Cleaner Agilent 6064-8230 <br />
Peltier Thermal Cycler MJ Research PTC-225<br />
<br />
Power Supply, LVC2kW, 48VDCV Tyco RM200HA100<br />
<br />
Spin-X Filter Tube Fisher CS008160<br />
<br />
<br />
BCGSC – Confidential in<strong>for</strong>mation not to be disseminated
Non Controlled Version<br />
<strong>SLX</strong>-<strong>PET</strong> <strong>Protocol</strong> <strong>for</strong> <strong>Illumina</strong> <strong>Sample</strong> <strong>Prep</strong><br />
Saved as: LIBPR.0031<br />
Supersedes: New<br />
Version: 1 Page 3 of 25<br />
*Note: Controlled Versions of this document are subjected to change without notice<br />
Qubit Fluorometer Invitrogen Q32857<br />
<br />
40% Polyacrylamide (37.5:1 acrylamide:bis) BioRad 161-0148<br />
<br />
10% Ammonium Persulfate (APS) BioRad 161-0800 <br />
TEMED BioRad 161-0700<br />
<br />
Penguin Owl Electrophorosis System Owl Scientific P9 DS3-CE <br />
Gel casting Owl Scientific JGC-2<br />
<br />
Power PAC BioRad Power PAC 200<br />
<br />
50 X TAE In House N/A<br />
1 X TAE In House N/A<br />
100 bp Ladder Invitrogen 15628-019<br />
<br />
Xcell SureLock Mini-Cell Invitrogen EI0001<br />
<br />
1 X TBE In House N/A<br />
Novex 8% TBE Gel, 1.0mm, 10 Well Invitrogen EC6215BOX<br />
<br />
These sequences are <strong>for</strong> internal use only:<br />
PE adapters:<br />
5’ ACACTCTTTCCCTACACGACGCTCTTCCGATCT<br />
3’ GAGCCGTAAGGACGACTTGGCGAGAAGGCTAG<br />
PE PCR Primers<br />
5' AATGATACGGCGACCACCGAGATCTACACTCTTTCCCTACACGACGCTCTTCCGATCT<br />
5' CAAGCAGAAGACGGCATACGAGATCGGTCTCGGCATTCCTGCTGAACCGCTCTTCCGATCT<br />
PE Sequencing Primer<br />
5' ACACTCTTTCCCTACACGACGCTCTTCCGATCT<br />
5' CGGTCTCGGCATTCCTGCTGAACCGCTCTTCCGATCT<br />
VIII. Procedure<br />
1. Retrieval of reagents and equipment preparation<br />
1.1. Put on a clean pair of gloves and disposable lab coat (re-use till end of day).<br />
1.2. Wipe down the assigned specific workstation, pipetors, and small equipment.<br />
1.3. Lay down new benchcoat.<br />
1.4. Change gloves.<br />
1.5. Retrieve ice and all required reagents.<br />
1.6. Thaw all reagents; vortex and pulse spin.<br />
BCGSC – Confidential in<strong>for</strong>mation not to be disseminated
Non Controlled Version<br />
<strong>SLX</strong>-<strong>PET</strong> <strong>Protocol</strong> <strong>for</strong> <strong>Illumina</strong> <strong>Sample</strong> <strong>Prep</strong><br />
Saved as: LIBPR.0031<br />
Supersedes: New<br />
Version: 1 Page 4 of 25<br />
*Note: Controlled Versions of this document are subjected to change without notice<br />
1.7. The samples to be used <strong>for</strong> this reaction could come post sonication, gel purification (<strong>for</strong><br />
example ChIP) or cDNA synthesis.<br />
1.8. If running a PAGE gel, go to step 2.1. If not running a gel (<strong>for</strong> example, purified 200bp<br />
DNA fraction), proceed to End-Repair, step 5.1 (discuss with your supervisor if not sure.)<br />
Note: During library construction, attach sample labels / LIMS labels to the <strong>PET</strong> worksheets<br />
(Appendix B and Appendix C).<br />
2. PAGE gel Electrophoresis<br />
2.1. Use one pre-cast gel <strong>for</strong> one sample only. Cut open the Novex gel cassette pouch to remove<br />
the gel cassette, and drain away the gel packaging buffer. Handle the gel cassette by the<br />
edges only. Rinse the gel cassette with deionized water.<br />
2.2. Peel off the tape covering the slot on the back of the gel cassette.<br />
2.3. In one fluid motion, pull the comb out of the cassette.<br />
2.4. Use a 1mL pipette to gently wash the cassette wells with 1X TBE gel running buffer.<br />
Repeat twice, and then fill the sample wells with running buffer.<br />
It is important to wash wells thoroughly to remove preservative residue from wells<br />
that may impede sample running efficiently through gel.<br />
Assemble the gel apparatus as follows:<br />
2.4.1. Lower the Buffer Core into the Lower Buffer Chamber so that the negative electrode<br />
fits into the opening in the gold plate on the Lower Buffer Chamber as shown in the<br />
figure.<br />
BCGSC – Confidential in<strong>for</strong>mation not to be disseminated
Non Controlled Version<br />
<strong>SLX</strong>-<strong>PET</strong> <strong>Protocol</strong> <strong>for</strong> <strong>Illumina</strong> <strong>Sample</strong> <strong>Prep</strong><br />
Saved as: LIBPR.0031<br />
Supersedes: New<br />
Version: 1 Page 5 of 25<br />
*Note: Controlled Versions of this document are subjected to change without notice<br />
2.4.2. Insert the Gel Tension Wedge into the XCell SureLock cell behind the buffer core.<br />
Make sure the Gel Tension Wedge is in its unlocked position, allowing the wedge to<br />
slip easily into the XCell SureLock unit.<br />
2.4.3. Insert the gel cassette into the lower buffer chamber in front of the core, with the<br />
well side of the cassette facing in towards the buffer core. The slot on the back of the<br />
cassette must face out towards the lower buffer chamber. Place the Buffer Dam<br />
behind the core.<br />
2.4.4. Pull <strong>for</strong>ward on the Gel Tension Lever in a direction towards the front of the XCell<br />
SureLock unit until lever comes to a firm stop and the gel/buffer dam appear snug<br />
against the buffer core.<br />
2.4.5. Fill the Upper Buffer Chamber with 200mL of the 1X TBE running buffer. Ensure<br />
that the Upper Buffer Chamber is not leaking. If the level of the running buffer<br />
drops, the apparatus will need to be reassembled.<br />
2.4.6. Fill the Lower Buffer Chamber with approximately 200mL of running buffer<br />
through the gap between the Gel Tension Wedge and the back of the Lower Buffer<br />
Chamber as shown below:<br />
BCGSC – Confidential in<strong>for</strong>mation not to be disseminated
<strong>SLX</strong>-<strong>PET</strong> <strong>Protocol</strong> <strong>for</strong> <strong>Illumina</strong> <strong>Sample</strong> <strong>Prep</strong><br />
Saved as: LIBPR.0031<br />
Supersedes: New<br />
Version: 1 Page 6 of 25<br />
Non Controlled Version<br />
*Note: Controlled Versions of this document are subjected to change without notice<br />
2.4.7. Align the lid on the Buffer Core. The lid can only be firmly seated if the (-)<br />
electrode is aligned over the banana plug on the right.<br />
Caution: Power must be off be<strong>for</strong>e connecting the XCell SureLock Mini Cell to the power<br />
supply.<br />
2.5. <strong>Prep</strong>are your samples by adding appropriate amount of 10X loading dye.<br />
2.6. Be<strong>for</strong>e loading the sample, carefully rinse out the wells with 1X TBE running buffer using<br />
a 1mL pipette tip.<br />
2.7. Retrieve the sample as scheduled by a supervisor. Load the specified amount of sample in a<br />
well towards the centre of the gel. Be aware that some samples have a tendency to float out<br />
of the well, so load a very small volume to ensure that the sample doesn’t float out. If<br />
floating does occur, add 1μl of glycerol to the rest of the sample and retest. The loading<br />
dye is made of bromophenol blue dye only. If desired, load some loading dye consisting of<br />
both bromophenol blue and xylene cyanol beside the sample lane so that when cutting out<br />
the gel fraction later, the xylene cyanol dye (runs at ~220bp) can be used as a reference.<br />
2.8. For <strong>PET</strong> samples, load 5μl of the 100bp DNA Ladder (20ng/μl) at least 6 wells apart from<br />
the sample.<br />
For ChIP-TS samples, do not load any ladder.<br />
2.9. Replace the lid of the apparatus, and start the gel run.<br />
BCGSC – Confidential in<strong>for</strong>mation not to be disseminated
Non Controlled Version<br />
<strong>SLX</strong>-<strong>PET</strong> <strong>Protocol</strong> <strong>for</strong> <strong>Illumina</strong> <strong>Sample</strong> <strong>Prep</strong><br />
Saved as: LIBPR.0031<br />
Supersedes: New<br />
Version: 1 Page 7 of 25<br />
*Note: Controlled Versions of this document are subjected to change without notice<br />
2.10. Run the 8% TBE gel at 200V <strong>for</strong> 35 minutes. The bromophenol blue dye corresponds to<br />
the 25 nucleotide DNA marker, and it will have migrated approximately ¾ of the length<br />
of the gel. The xylene cyanol dye corresponds to the ~220 nucleotide DNA marker. If a<br />
larger size fraction (eg. 600bp) was used <strong>for</strong> library construction, discuss with supervisor<br />
to see how long to run the gel <strong>for</strong>.<br />
2.11. Using colored tape, attach a label to the gel apparatus which states the library name, start<br />
time, finish time, date, and your initials.<br />
2.12. Dispose of all waste.<br />
3. Scanning gel with GelG9Imager and cutting DNA fraction from PAGE<br />
3.1. Put on a clean pair of gloves and disposable lab coat.<br />
3.2. Pre-chill a micro-centrifuge to 4°C.<br />
3.3. Retrieve fresh ice and all reagents.<br />
3.4. For shearing the gel slices, make a hole through the bottom of 0.5ml tubes with 18 gauge<br />
needle. Place each 0.5mL tube into a 2mL tube. You will need one of these shearing<br />
devices per fraction that you will be cutting out. If sample is loaded on multiple lanes, more<br />
shearing devices might be needed per fraction. Consult with supervisor to determine how<br />
many fractions to cut out.<br />
3.5. Label each 2mL tube on the side with the library name, size fraction, date, and initials.<br />
3.6. Cover the Dark Reader screen with a fresh sheet of plastic wrap. Wrap the right-angle ruler<br />
with plastic wrap.<br />
3.7. Log onto GelG9Imager and wipe down imager bed by following LIBPR_WorkInst.0004:<br />
Scanning pre-pcr gel images with the GelG9Imager system.<br />
3.8. <strong>Prep</strong>are fresh 1X TBE / SybrGreenI stain; 6µL stock in 60mL 1x TBE in a clean tray<br />
designated <strong>for</strong> staining pre PCR gels. Minimize exposure to light.<br />
3.9. At the end of the gel run, turn off the power and disconnect the cables from the power<br />
supply. Remove the lid and unlock the Gel Tension Lever. The Gel Tension Wedge can be<br />
left in place.<br />
3.10. Remove the gel cassette from the mini-cell. Handle gel cassettes by their edges only.<br />
BCGSC – Confidential in<strong>for</strong>mation not to be disseminated
Non Controlled Version<br />
<strong>SLX</strong>-<strong>PET</strong> <strong>Protocol</strong> <strong>for</strong> <strong>Illumina</strong> <strong>Sample</strong> <strong>Prep</strong><br />
Saved as: LIBPR.0031<br />
Supersedes: New<br />
Version: 1 Page 8 of 25<br />
*Note: Controlled Versions of this document are subjected to change without notice<br />
3.11. Lay the gel cassette well side up on the benchtop. Carefully insert the Gel Knife’s<br />
beveled edge into the narrow gap between the two plates of the cassette.<br />
3.12. Push up and down gently on the knife’s handle to separate the plates. You will hear a<br />
cracking sound which means you have broken the bonds which hold the plates together.<br />
Repeat until you have broken the bonds on one side. Rotate the cassette and repeat until<br />
the two plates are completely separated.<br />
3.13. Upon opening the cassette, the gel may adhere to either side. Remove and discard the<br />
plate without the gel, allowing the gel to remain on the other plate. Place over the gel<br />
staining container with the gel facing downward. Remove the gel from the cassette plate<br />
by loosening one upper corner carefully by pulling away the gel and allow the gel to peel<br />
away from the plate.<br />
3.14. Stain the gel <strong>for</strong> 1 minute with gentle agitation.<br />
3.15. Wipe down a piece of mylar with water.<br />
3.16. Place the stained gel onto the mylar sheet.<br />
3.17. Scan gel according to LIBPR_WorkInst.0004: Scanning pre-pcr gel images with the<br />
GelG9Imager system.<br />
3.18. Move the gel on the mylar sheet over to the dark reader.<br />
3.19. Cut out different size fractions according to the following guideline:<br />
3.19.1. For Genome-<strong>PET</strong> libraries cut out 400bp, 400+ and 400- fractions. Cut each<br />
fraction out with razor blade and use the 400bp fraction <strong>for</strong> library construction. The<br />
other fractions are <strong>for</strong> backup.<br />
3.19.2. For WTSS-<strong>PET</strong> libraries cut out 200-300bp, 300-400bp, 400-500bp. Cut each<br />
fraction out with razor blade and use the 200-300bp fraction <strong>for</strong> library construction.<br />
The other fractions are <strong>for</strong> backup.<br />
3.19.3. For ChIP-<strong>PET</strong> libraries cut out 130-180bp, 180-280bp, 280-330bp fractions. Cut<br />
each fraction out with razor blade and use the 130-180bp fraction <strong>for</strong> library<br />
construction. The other fractions are <strong>for</strong> backup.<br />
3.19.4. For ChIP-TS libraries cut out 100-300bp, 300-600bp using the marked ruler. Cut<br />
each fraction out with razor blade and use the 100-300bp fraction <strong>for</strong> library<br />
construction. The 300-600bp fraction is <strong>for</strong> backup.<br />
3.19.5. For other library types, consult supervisor on what fractions to cut out.<br />
3.19.6. Label each size fractions correspondingly.<br />
BCGSC – Confidential in<strong>for</strong>mation not to be disseminated
Non Controlled Version<br />
<strong>SLX</strong>-<strong>PET</strong> <strong>Protocol</strong> <strong>for</strong> <strong>Illumina</strong> <strong>Sample</strong> <strong>Prep</strong><br />
Saved as: LIBPR.0031<br />
Supersedes: New<br />
Version: 1 Page 9 of 25<br />
*Note: Controlled Versions of this document are subjected to change without notice<br />
3.19.7. The above is only a general guideline <strong>for</strong> gel excision. Different fractions might<br />
have to be cut out depending on the sample (eg. 600bp library). Supervisors will<br />
provide the in<strong>for</strong>mation regarding which fractions to cut out.<br />
3.20. Transfer each fraction into a 0.5mL shearing device prepared earlier.<br />
3.21. Discard stain into the liquid SYBR Green waste bucket and wipe down tray.<br />
3.22. Discard mylar sheet with the leftover gel pieces into the SYBR Green waste bucket.<br />
Discard used blades in sharps container.<br />
3.23. Change gloves. Repeat steps 3.4 to 3.22 <strong>for</strong> remaining PAGE gels (other samples).<br />
3.24. With the lids tailing (left of tube position), spin all samples, including backup fractions if<br />
they were cut out, at 12,000 rpm @ RT <strong>for</strong> 3 minutes. The gel slices should shear through<br />
the holes and collect into the bottom of the 2mL tubes. Pull out unsheared material with a<br />
pipette tip and save it in the tubes of fractions.<br />
3.25. For each gel slice that was sheared into the 2mL tubes, including backup fractions, add<br />
200μL of elution buffer (5:1, LoTE:7.5M Ammonium Acetate). Ensure that there is<br />
sufficient elution buffer to cover the slurry, add more if necessary. Do not save leftover<br />
EB.<br />
3.26. Mix well by vortexing. Pulse–spin.<br />
3.27. Store all fractions in the corresponding “Gel Slurries and Starting Material” box in -<br />
20 o C. If continuing with library construction next day, store the fraction that goes into<br />
library construction at 4 o C instead of at -20 o C.<br />
3.28. If time permits, <strong>for</strong> the fraction that goes into library construction, incubate <strong>for</strong> 1 hour at<br />
65°C and go directly to step 4.4.<br />
3.29. Dispose all waste (including pipette tips waste bag), benchcoat, and partially used<br />
reagents aliquots.<br />
3.30. Place used racks in fresh decontamination soak.<br />
3.31. Wipe down the workstation, pipettes, and small equipment.<br />
3.32. Clean PAGE apparatus: Run tap water over PAGE apparatus <strong>for</strong> 2 minutes; wipe down<br />
with 2% micro90; run water over PAGE apparatus <strong>for</strong> another 2 minutes. Invert to airdry.<br />
BCGSC – Confidential in<strong>for</strong>mation not to be disseminated
Non Controlled Version<br />
<strong>SLX</strong>-<strong>PET</strong> <strong>Protocol</strong> <strong>for</strong> <strong>Illumina</strong> <strong>Sample</strong> <strong>Prep</strong><br />
Saved as: LIBPR.0031<br />
Supersedes: New<br />
Version: 1 Page 10 of 25<br />
*Note: Controlled Versions of this document are subjected to change without notice<br />
3.33. Wipe down the PAGE workstation.<br />
4. Precipitating the size fraction.<br />
4.1. To help calculation, use the <strong>SLX</strong>-<strong>PET</strong> Day 1 worksheet (Appendix B).<br />
4.2. Retrieve the gel slurries from -20 o C or from 4 o C. Vortex and pulse spin.<br />
4.3. If gel slurries are retrieved from -20 o C, incubate at 65 o C <strong>for</strong> 1hr. If gel slurries are retrieved<br />
from 4 o C, incubate at 65 o C <strong>for</strong> 15 minutes. Pulse spin.<br />
4.4. Transfer the contents of each tube into one Spin-X Filter Tube. Tap the slurry into the Spin<br />
Filter or use a new disposable spatula to aid transfer.<br />
4.5. Change gloves.<br />
4.6. Spin at 12,000 rpm/ 4 o C <strong>for</strong> 3 minutes.<br />
4.7. Check each Spin-X Filter Tube and ensure that the entire buffer has spun through the filter.<br />
Re-spin the tubes if there is still liquid trapped in the gel material.<br />
4.8. Remove and discard the filter column containing the gel material.<br />
4.9. Transfer the eluate to a single sterile 1.5mL tube and add the following. Adjust the reagent<br />
volumes proportionally but keeping mussel glycogen volume at 3μl, if the eluate is more<br />
than 200μL.<br />
4.10. Vortex and pulse spin.<br />
Reagent<br />
Volume<br />
Eluate<br />
200 μL<br />
3M Sodium Acetate<br />
20 μL<br />
Mussel Glycogen (20 mg/mL) 3 μL<br />
100 % Ethanol 500 μL<br />
TOTAL VOLUME<br />
723 μL<br />
4.11. Chill the tube at -20 o C <strong>for</strong> 20 minutes.<br />
4.12. Spin at 14,000 rpm at 4 o C <strong>for</strong> 30 minutes. .<br />
4.13. Dispose all waste and partially used reagents aliquots.<br />
4.14. Put on a clean pair of gloves.<br />
BCGSC – Confidential in<strong>for</strong>mation not to be disseminated
<strong>SLX</strong>-<strong>PET</strong> <strong>Protocol</strong> <strong>for</strong> <strong>Illumina</strong> <strong>Sample</strong> <strong>Prep</strong><br />
Saved as: LIBPR.0031<br />
Supersedes: New<br />
Version: 1 Page 11 of 25<br />
Non Controlled Version<br />
*Note: Controlled Versions of this document are subjected to change without notice<br />
4.15. Carefully decant the supernatants into clean microcentrifuge tube. Keep an eye on the<br />
pellet so that it doesn’t slide out.<br />
4.16. Wash the pellet two times with 1mL cold 70% ethanol. Spin at 14,000 rpm / 4 o C <strong>for</strong> 3<br />
minutes between each wash. Carefully decant the supernatants into new microcentrifuge<br />
tube.<br />
4.17. After removing the final wash, dab the tube rims on a KimWipe to remove ethanol.<br />
Pulse-spin the tubes and carefully remove any residual ethanol by using a 10μL pipette.<br />
4.18. Mark the outside bottom of the tube to better locate the pellets when resuspension later in<br />
Qiagen EB.<br />
4.19. Air-dry the pellet <strong>for</strong> 5–10 minutes, or until the pellet is translucent. Do not over-dry the<br />
pellet.<br />
4.20. Resuspend the pellet in a total volume of 40μL of Qiagen’s elution buffer, EB. The<br />
resuspension of the pellet may be aided by repetitive pipetting using a 10μL pipette.<br />
5. End-Repair and Phosphorylation<br />
5.1. Be<strong>for</strong>e setting up the reaction dilute Klenow DNA Polymerase 1/5 in Nuclease free water<br />
on ice.<br />
5.2. Set-up the following 50μL reaction:<br />
Reagent<br />
DNA<br />
10X Phosphorylation Buffer<br />
dNTP mix (10mM)<br />
T4 DNA polymerase (3U/μL)<br />
Klenow DNA Polymerase -1/5 diluted ( 5U/μL)<br />
T4 PNK (10U/μL)<br />
Total Volume<br />
Volume<br />
40 μL<br />
5 μL<br />
2 μL<br />
1 μL<br />
1 μL<br />
1 μL<br />
50 μL<br />
5.3. Incubate <strong>for</strong> 30 minutes at room temperature.<br />
5.4. While the incubation is proceeding, prepare one 2.0ml PLG tube <strong>for</strong> each library by<br />
spinning at 14000rpm <strong>for</strong> 1 minute at room temperature.<br />
BCGSC – Confidential in<strong>for</strong>mation not to be disseminated
Non Controlled Version<br />
<strong>SLX</strong>-<strong>PET</strong> <strong>Protocol</strong> <strong>for</strong> <strong>Illumina</strong> <strong>Sample</strong> <strong>Prep</strong><br />
Saved as: LIBPR.0031<br />
Supersedes: New<br />
Version: 1 Page 12 of 25<br />
*Note: Controlled Versions of this document are subjected to change without notice<br />
5.5. When the 30 minute incubation is complete, add 50μL of water to bring the volume up to<br />
100μl.<br />
5.6. Add sample to the pre-spun 2.0ml PLG tube.<br />
5.7. Add 100μl of Phenol/Chloro<strong>for</strong>m/Isoamyalcohol and shake well to mix until the mixture<br />
appears milky.<br />
5.8. Spin <strong>for</strong> 5 minutes at 14000rpm at room temperature.<br />
5.9. Transfer the aqueous phase to a clean 1.5mL microcentrifuge tube. Ethanol precipitate<br />
using 250μl (2.5X) cold 100% ethanol, 1μl of mussel glycogen and 10μl of sodium acetate<br />
(1/10).<br />
5.10. Mix by inverting a few times and incubate <strong>for</strong> 20min at -20 o C. Chill the centrifuge to<br />
4ºC.<br />
5.11. Centrifuge the sample <strong>for</strong> 30 minutes at 14000rpm at 4ºC.<br />
5.12. Wash the pellet twice with 1ml of cold 70% ethanol and spin <strong>for</strong> 3 minutes at 14000rpm<br />
at 4 o C.<br />
5.13. Air-dry the pellet. Resuspend the pellet in 34μl of Qiagen EB.<br />
If Section 6 will not be per<strong>for</strong>med on the same day, store samples at -20 o C, wipe down<br />
small equipment with DNAway.<br />
6. Addition of an ‘A’ Base to the 3’ End of the DNA Fragments<br />
6.1. <strong>Prep</strong>are the following reaction mix:<br />
Reagent<br />
DNA from section 5<br />
Klenow buffer (10X)<br />
dATP (1mM)<br />
Klenow fragment (3’ to 5’ exo minus)<br />
Total Volume<br />
Volume<br />
34 μl<br />
5 μl<br />
10 μl<br />
1 μl<br />
50 μl<br />
6.2. Incubate <strong>for</strong> 30 min at 37 o C. Meanwhile, prepare a 2.0ml PLG tube <strong>for</strong> each library by<br />
spinning @ 14,000 rpm, 1 minute, RT.<br />
6.3. Bring the volume up to 100μl with 50μl of water.<br />
BCGSC – Confidential in<strong>for</strong>mation not to be disseminated
Non Controlled Version<br />
<strong>SLX</strong>-<strong>PET</strong> <strong>Protocol</strong> <strong>for</strong> <strong>Illumina</strong> <strong>Sample</strong> <strong>Prep</strong><br />
Saved as: LIBPR.0031<br />
Supersedes: New<br />
Version: 1 Page 13 of 25<br />
*Note: Controlled Versions of this document are subjected to change without notice<br />
6.4. Add sample to a pre-spun 2.0ml PLG tube.<br />
6.5. Add 100μl of Phenol/Chloro<strong>for</strong>m/Isoamyalcohol and shake well to mix until the mixture<br />
appears cloudy.<br />
6.6. Spin <strong>for</strong> 5 minutes at 14000rpm at room temperature.<br />
6.7. Transfer the aqueous phase to a new 1.5mL microcentrifuge tube. Ethanol precipitate using<br />
250μl (2.5X) cold 100% ethanol, 1μl of mussel glycogen and 10μl of sodium acetate<br />
(1/10).<br />
6.8. Mix by inverting a few times and incubate <strong>for</strong> 20 minutes at -20 o C.<br />
If Section 7 will not be done on the same day, leave samples overnight precipitating in<br />
ethanol at -20 o C. If Section 7 will be done on the same day, proceed with Step 6.9.<br />
6.9. Chill the centrifuge to 4 o C.<br />
6.10. Centrifuge the sample <strong>for</strong> a minimum of 20 minutes at 14000 rpm at 4 o C.<br />
6.11. Wash the pellet twice with 1ml of cold 70% ethanol and spin <strong>for</strong> 3 minutes at 14000 rpm<br />
at 4 o C.<br />
6.12. Air dry the pellet. Do not overdry the pellet. Resuspend the pellet in 10μl of Qiagen EB.<br />
7. Ligation of Adapters to the Ends of the DNA Fragments<br />
7.1. <strong>Prep</strong>are the following mix:<br />
Reagent<br />
DNA from section 6<br />
DNA ligase buffer (2X)<br />
PE adapters<br />
DNA Quick ligase (1U/μL)<br />
Total Volume<br />
Volume<br />
10 μl<br />
15 μl<br />
1.0 μl<br />
4.0 μl<br />
30 μl<br />
7.2. Incubate <strong>for</strong> 15 min at room temperature.<br />
7.3. Purify each reaction on a QIAquick column using the components of the QIAquick spin kit<br />
following these instructions, not the kit handbook.<br />
BCGSC – Confidential in<strong>for</strong>mation not to be disseminated
Non Controlled Version<br />
<strong>SLX</strong>-<strong>PET</strong> <strong>Protocol</strong> <strong>for</strong> <strong>Illumina</strong> <strong>Sample</strong> <strong>Prep</strong><br />
Saved as: LIBPR.0031<br />
Supersedes: New<br />
Version: 1 Page 14 of 25<br />
*Note: Controlled Versions of this document are subjected to change without notice<br />
7.4. Pre-heat Qiagen elution buffer to 65 o C by placing the Qiagen elution buffer aliquot in the<br />
65 o C heat block. For each ligation, label a fresh 1.5ml tube with library name, date and<br />
your initials. Set tubes aside until later.<br />
7.5. Add 150μl of PBI to each ligation reaction and mix thoroughly.<br />
7.6. Apply the sample to the QIAquick column and centrifuge at room temperature <strong>for</strong> 1 min at<br />
13000rpm. Discard flow-through. Place the QIAquick column back into the same tube.<br />
7.7. Add 0.75ml of Buffer PE to the column and centrifuge at room temperature <strong>for</strong> 1 min at<br />
13000rpm. Discard flow-through and place the column back into the same tube.<br />
7.8. Per<strong>for</strong>m a second spin at room temperature <strong>for</strong> 2mins at 13000rpm.<br />
7.9. Use a p200 pipette to aspirate any residual ethanol trapped on the inner rim of the Qiagen<br />
column. Transfer column to the pre-labeled tubes from step 7.4.<br />
7.10. Let the column air dry <strong>for</strong> 1 minute be<strong>for</strong>e adding buffer EB (Qiagen).<br />
7.11. Add 30μl of the pre-warmed EB (Qiagen) to the centre of the column and let sit <strong>for</strong> 1<br />
minute prior to centrifugation. Spin at room temperature <strong>for</strong> 1 min at 13000rpm. Check<br />
volume of flow-through be<strong>for</strong>e discarding column. Be sure the microcentrifuge tube is<br />
accurately labeled be<strong>for</strong>e discarding the column.<br />
8. Enrichment of adapter-modified DNA fragments by PCR<br />
Note: Wipe down all surfaces and equipment with DNAway be<strong>for</strong>e and after PCR.<br />
8.1. For each library, check with the supervisor to determine the appropriate PCR program to<br />
use (10 cycles or 15 cycles). Make enough brew mix <strong>for</strong> all libraries plus the “no template”<br />
control, using the <strong>SLX</strong>-<strong>PET</strong> Day 2 worksheet (Appendix C) to calculate the total volume<br />
needed <strong>for</strong> each reagent.<br />
8.2. <strong>Prep</strong>are the following PCR reaction mix in the 5 th Floor BSC:<br />
Reagent<br />
Phusion High Fidelity Master Mix (2X Master Mix)<br />
PE PCR primer 1.0<br />
PE PCR primer 2.0<br />
Ultra pure dH 2 O<br />
Total Volume<br />
Volume/Reactio<br />
n<br />
12.5 μl<br />
1.0 μl<br />
1.0 μl<br />
0.5 μl<br />
15.00 μl<br />
BCGSC – Confidential in<strong>for</strong>mation not to be disseminated
Non Controlled Version<br />
<strong>SLX</strong>-<strong>PET</strong> <strong>Protocol</strong> <strong>for</strong> <strong>Illumina</strong> <strong>Sample</strong> <strong>Prep</strong><br />
Saved as: LIBPR.0031<br />
Supersedes: New<br />
Version: 1 Page 15 of 25<br />
*Note: Controlled Versions of this document are subjected to change without notice<br />
8.3. In the 5 th floor BSC aliquot the brew mix into the appropriate number of 0.5mL PCR tubes.<br />
For the “No Template” control sample, add 10μL of water to the tube containing brew mix.<br />
8.4. Transport the PCR tubes containing brew mix on ice to the 6 th floor BSC.<br />
8.5. In the 6 th floor BSC, <strong>for</strong> each library, add 10μL of the modified template to the reaction<br />
tubes, including the “fraction” from the blank gel if scheduled.<br />
8.6. Quick spin tubes containing fractions and brew mix <strong>for</strong> PCR.<br />
8.7. Save the remaining 20μL of template in the appropriate “PCR Template” box.<br />
8.8. Run Program TS<strong>PET</strong>10 and/or TS<strong>PET</strong>15 on Tetrad. Consult supervisor to see which PCR<br />
programs to run.<br />
TS<strong>PET</strong> PCR Parameters<br />
• 98°C 30 sec<br />
• 98°C 10 sec<br />
• 65°C 30 sec 10/15 Cycles of PCR<br />
• 72°C 30 sec<br />
• 72°C 5 min<br />
• 4°C ∞<br />
8.9. When the PCR protocol is completed, purify all PCR reactions using the Qiagen MinElute<br />
Kit components but following the instructions below.<br />
8.10. Pre-heat elution buffer to 65 o C by placing the Qiagen elution buffer aliquot in the 65 o C<br />
heat block. For each PCR product, label a fresh 1.5ml tube with library name, date and<br />
your initials. Set tubes aside until later.<br />
8.11. Add 125μl of PBI to each PCR reaction and mix thoroughly.<br />
8.12. Apply the sample to the Qiagen MinElute spin column and centrifuge at room<br />
temperature <strong>for</strong> 1 minute at 13000rpm. Discard flow-through. Place the Qiagen MinElute<br />
spin column back into the same tube.<br />
8.13. Add 0.75ml of Buffer PE to the column and centrifuge at room temperature <strong>for</strong> 1 minute<br />
at 13000rpm. Discard flow-through and place the column back into the same tube.<br />
8.14. Per<strong>for</strong>m a second spin at room temperature <strong>for</strong> 2 minutes at 13000rpm. Use a p200<br />
pipette to aspirate any additional ethanol trapped on the inner rim in the MinElute<br />
column. Transfer column to a clean tube from step 8.10.<br />
BCGSC – Confidential in<strong>for</strong>mation not to be disseminated
<strong>SLX</strong>-<strong>PET</strong> <strong>Protocol</strong> <strong>for</strong> <strong>Illumina</strong> <strong>Sample</strong> <strong>Prep</strong><br />
Saved as: LIBPR.0031<br />
Supersedes: New<br />
Version: 1 Page 16 of 25<br />
Non Controlled Version<br />
*Note: Controlled Versions of this document are subjected to change without notice<br />
8.15. Allow the column air dry <strong>for</strong> 1 minute be<strong>for</strong>e adding Elution Buffer.<br />
8.16. Add 13μl of pre-warmed EB (Qiagen) to the centre of the column and let sit <strong>for</strong> 1 minute<br />
prior to centrifugation. Centrifuge at room temperature <strong>for</strong> 1 minute at 13000rpm to elute<br />
DNA. Check volume of flow-through be<strong>for</strong>e discarding column. The yield should be<br />
approximately 12μl. Be sure the microfuge tube is accurately labeled be<strong>for</strong>e discarding<br />
the column.<br />
8.17. Run Agilent DNA 1000 Series II assay <strong>for</strong> quality assurance by following LIBPR.0017 –<br />
Operation and Maintenance of the Agilent 2100 Bioanalyzer <strong>for</strong> DNA samples; be sure<br />
to run the negative control as well.<br />
8.18. Discuss the Agilent results with Supervisors to see if Post-PCR purification is required.<br />
If post PCR purification is not required, proceed to Step 12.2.<br />
9. Post PCR Purification – <strong>Prep</strong>aring and Running a Precast 8% TBE Gel<br />
9.1. Refer to Step 2.1 to Step 2.7 <strong>for</strong> the set up of Precast 8% TBE Gel.<br />
9.2. <strong>Prep</strong>are your samples by adding appropriate amount of 10X loading dye.<br />
9.3. Be<strong>for</strong>e loading the ladder and sample, carefully rinse out the wells with 1X TBE running<br />
buffer using a 1mL pipette tip.<br />
9.4. Aliquot 1mL 1X TBE to 2mL tube and set aside. This tube is <strong>for</strong> pipette tip washing when<br />
loading ladder.<br />
9.5. Using a P10 tip, aspirate 10μl 100bp ladder. Wash pipette tip in the 1X TBE be<strong>for</strong>e loading<br />
the 10μl into a well on the left side of the gel. Leave a gap of 4-5 wells, and carefully load<br />
the sample into as many wells as required, keeping in mind that one well holds a maximum<br />
volume of 22µL.<br />
9.6. Replace the lid of the apparatus, and start the gel run.<br />
9.7. Run the 8% TBE gel at 200V <strong>for</strong> 35 minutes. The bromophenol blue dye corresponds to the<br />
25 nucleotide DNA marker, and it will have migrated approximately ¾ of the length of the<br />
gel. If a larger size fraction other than 200bp was used <strong>for</strong> library construction, discuss with<br />
supervisor to see how long to run the gel <strong>for</strong>.<br />
10. Post PCR Purification – Staining the TBE Gel and Excision of Fraction<br />
BCGSC – Confidential in<strong>for</strong>mation not to be disseminated
Non Controlled Version<br />
<strong>SLX</strong>-<strong>PET</strong> <strong>Protocol</strong> <strong>for</strong> <strong>Illumina</strong> <strong>Sample</strong> <strong>Prep</strong><br />
Saved as: LIBPR.0031<br />
Supersedes: New<br />
Version: 1 Page 17 of 25<br />
*Note: Controlled Versions of this document are subjected to change without notice<br />
10.1. <strong>Prep</strong>are sets of tubes <strong>for</strong> shearing the gel slices. One tube is needed per lane. Make a hole<br />
through the bottom of a 0.5mL RNase-free non-stick tube with an 18 gauge needle and<br />
place on top of a 2mL RNase-free tube. Label the 2mL tubes on the side with the<br />
library/sample name, date, and initials.<br />
10.2. <strong>Prep</strong>are fresh 1X TBE / SybrGreenI stain; 6µL stock in 60mL 1x TBE in a clean tray<br />
designated <strong>for</strong> staining post PCR purified gels. Minimize exposure to light<br />
10.3. At the end of the gel run, turn off the power and disconnect the cables from the power<br />
supply.<br />
10.4. Remove the lid and unlock the Gel Tension Lever. The Gel Tension Wedge can be left in<br />
place.<br />
10.5. Remove the gel cassette from the mini-cell. Handle gel cassettes by their edges only.<br />
10.6. Lay the gel cassette well side up on the benchtop. Carefully insert the Gel Knife’s<br />
beveled edge into the narrow gap between the two plates of the cassette.<br />
10.7. Push up and down gently on the knife’s handle to separate the plates. You will hear a<br />
cracking sound which means you have broken the bonds which hold the plates together.<br />
Repeat until you have broken the bonds on one side. Rotate the cassette and repeat until<br />
the two plates are completely separated.<br />
10.8. Upon opening the cassette, the gel may adhere to either side. Remove and discard the<br />
plate without the gel, allowing the gel to remain on the other plate. Place over the gel<br />
staining container with the gel facing downward. Remove the gel from the cassette plate<br />
by loosening one upper corner carefully by pulling away the gel and allow the gel to peel<br />
away from the plate.<br />
10.9. Stain the gel <strong>for</strong> 1 minute with gentle agitation. DO NOT SCAN GELS.<br />
10.10. Carefully remove the gel and lay onto a clean piece of mylar over a new sran wrap on the<br />
Dark Reader. Using a brand new razor blade cut out the appropriate fraction. Refer to the<br />
Agilent profile and cut a tight fraction at the darkest region of the smear. The darkest<br />
region should be ~120bp above the insert size.<br />
For example: If 200bp insert was used <strong>for</strong> library construction, cut a tight band around 320bp. If<br />
400bp insert was used <strong>for</strong> library construction, cut a tight band around 520bp. For<br />
ChIP-<strong>PET</strong>, if 130-180bp fraction was used, cut from 250-300bp. Confirm with<br />
supervisor if you are unsure of what range should be excised.<br />
BCGSC – Confidential in<strong>for</strong>mation not to be disseminated
Non Controlled Version<br />
<strong>SLX</strong>-<strong>PET</strong> <strong>Protocol</strong> <strong>for</strong> <strong>Illumina</strong> <strong>Sample</strong> <strong>Prep</strong><br />
Saved as: LIBPR.0031<br />
Supersedes: New<br />
Version: 1 Page 18 of 25<br />
*Note: Controlled Versions of this document are subjected to change without notice<br />
10.11. Transfer gel slices into the prepared 0.5mL tubes <strong>for</strong> gel shearing, using approximately<br />
one tube per lane loaded.<br />
10.12. Close the 0.5mL tube lids to contain the gel slices, but leave the 2mL tube lids open to<br />
centrifuge the sample. Spin at 12,000 rpm at room temperature <strong>for</strong> 3 minutes. The gel<br />
slice should shear through the hole and collect into the bottom of the 2mL tubes.<br />
10.13. After shearing the gel fractions, check that all of the gel has cleared the 0.5ml tubes.<br />
Discard the 0.5mL tubes and add 200μL of elution buffer (5:1, LoTE:7.5M Ammonium<br />
Acetate) to each gel slurry. Ensure that there is sufficient elution buffer to cover the<br />
slurry, otherwise add more if necessary.<br />
10.14. Store the tubes in the gel slurry box in the 4°C fridge <strong>for</strong> overnight incubation or if time<br />
permits, incubate <strong>for</strong> 1 hour at 65°C and go directly to step 11.3.<br />
10.15. Clean the XCell SureLock apparatus and the gel knife with tap water and 2% Micro90,<br />
and rinse thoroughly with tap water. Then rinse thoroughly with 18μΜ water.<br />
11. Post PCR Purification – Precipitating the size fraction<br />
11.1. Retrieve the gel slurries from 4 o C. Vortex and pulse spin.<br />
11.2. Incubate at 65°C <strong>for</strong> 15 minutes. Pulse spin.<br />
11.3. Transfer the contents of each tube into one Spin-X Filter Tube. Tap the slurry into the<br />
Spin Filter or use a new disposable spatula to aid transfer.<br />
11.4. Change gloves.<br />
11.5. Spin at 12,000 rpm/ 4 o C <strong>for</strong> 3 minutes.<br />
11.6. Check each Spin-X Filter Tube and ensure that the entire buffer has spun through the<br />
filter. Re-spin the tubes if there is still liquid trapped in the gel material.<br />
11.7. Remove and discard the filter column containing the gel material.<br />
11.8. Transfer the eluate to a single sterile 1.5mL tube and add the following. Add 0.1X<br />
volume of 3M Sodium Acetate, 2.5X volume cold 100% Ethanol and 2μl Mussel<br />
Glycogen. For 200μl eluate volume, add the following:<br />
BCGSC – Confidential in<strong>for</strong>mation not to be disseminated
<strong>SLX</strong>-<strong>PET</strong> <strong>Protocol</strong> <strong>for</strong> <strong>Illumina</strong> <strong>Sample</strong> <strong>Prep</strong><br />
Saved as: LIBPR.0031<br />
Supersedes: New<br />
Version: 1 Page 19 of 25<br />
Non Controlled Version<br />
*Note: Controlled Versions of this document are subjected to change without notice<br />
Reagent<br />
Eluate<br />
3M Sodium Acetate<br />
Mussel Glycogen (20mg/mL)<br />
Cold 100 % Ethanol<br />
Total Volume<br />
11.9. Vortex and pulse spin<br />
11.10. Chill the tube at -20 o C <strong>for</strong> 10 minutes.<br />
11.11. Spin at 14,000 rpm / 4 o C <strong>for</strong> 30 minutes.<br />
11.12. Dispose all waste and partially used reagents aliquots.<br />
11.13. Put on a clean pair of gloves and disposable lab coat.<br />
Volume<br />
200 μL<br />
20 μL<br />
2 μL<br />
500 μL<br />
722 μL<br />
11.14. Carefully decant the supernatants into clean microcentrifuge tube. Keep an eye on the<br />
pellet so that it doesn’t slide out.<br />
11.15. Wash the pellet two times with 1mL cold 70% ethanol. Spin at 14,000 rpm / 4 o C <strong>for</strong> 3<br />
minutes between each wash. Carefully decant the supernatants into new microcentrifuge<br />
tube.<br />
11.16. After removing the final wash, dab the tube rims on a KimWipe to remove ethanol.<br />
Pulse-spin the tubes and carefully remove any residual ethanol by using a 10μL pipette.<br />
11.17. Mark the outside bottom of the tube to better locate the pellets when resuspending later<br />
in Qiagen EB.<br />
11.18. Air-dry the pellet <strong>for</strong> 5–10 minutes, or until the pellet is translucent. Do not over-dry the<br />
pellet.<br />
11.19. Resuspend the pellet in a total volume of 9 - 13 μL* of Qiagen’s elution buffer, EB. The<br />
resuspension of the pellet may be aided by repetitive pipetting using a 10μL pipette.<br />
*Generally there is sufficient product to resuspend the pellet in 13μL volume. However<br />
occasionally, sample maybe in substantially low yield. In such a situation, a lower<br />
volume of Qiagen elution buffer should be used. If unsure of what volume to resuspend<br />
the sample in, consult with Supervisor.<br />
BCGSC – Confidential in<strong>for</strong>mation not to be disseminated
Non Controlled Version<br />
<strong>SLX</strong>-<strong>PET</strong> <strong>Protocol</strong> <strong>for</strong> <strong>Illumina</strong> <strong>Sample</strong> <strong>Prep</strong><br />
Saved as: LIBPR.0031<br />
Supersedes: New<br />
Version: 1 Page 20 of 25<br />
*Note: Controlled Versions of this document are subjected to change without notice<br />
12. Agilent and Qubit <strong>for</strong> QC<br />
12.1. Run Agilent DNA 1000 Series II assay <strong>for</strong> quality assurance of post PCR purified<br />
product by following LIBPR.0017 – Operation and Maintenance of the Agilent 2100<br />
Bioanalyzer <strong>for</strong> DNA samples. Be sure to run the negative control as well if one is<br />
available from additional PCR reactions per<strong>for</strong>med.<br />
12.2. Discuss with supervisor to see if sample is ready <strong>for</strong> submission. If sample is good <strong>for</strong><br />
submission, quantify 1μl of each sample with Qubit as per LIBPR.0030 – <strong>Illumina</strong><br />
Concentration Checked <strong>Protocol</strong>.<br />
12.3. Determine the average size from the Agilent reading and calculate the nM based on the<br />
Qubit value (ng/μL) (remember to include the x 200 dilution factor). Use the calculator<br />
on Appendix C: <strong>SLX</strong>-<strong>PET</strong> Day 2 worksheet to calculate nM and the dilution factor<br />
necessary to reach ~8nM.<br />
12.4. Dilute the DNA sample to a concentration of ~ 8nM in Buffer EB supplemented with<br />
0.1% Tween-20.<br />
Note: If possible, we should submit at least 8μl of the diluted sample. Based on the dilution<br />
factor and the library “goal”, dilute accordingly. If unsure of what final volume is<br />
needed, discuss with Supervisor.<br />
12.5. Do not label the tube with the concentration, that will be recorded by the person doing<br />
the “<strong>Illumina</strong> concentration checked” SOP.<br />
12.6. Place it in the 6 th floor, Qubit section of the “<strong>Sample</strong>s to double check” box if not<br />
proceeding to quant diluted samples on Qubit. If proceeding with quanting of diluted<br />
samples on Qubit, refer to LIBPR.0030 – <strong>Illumina</strong> Concentration Checked <strong>Protocol</strong>.<br />
12.7. Proceed to LIMS protocol in Appendix A.<br />
CHANGE HISTORY<br />
Description of Change Rev. Number Submitted by Effective Date<br />
1 Angela Tam September 21,<br />
1) <strong>Protocol</strong> drafted<br />
2009<br />
BCGSC – Confidential in<strong>for</strong>mation not to be disseminated
Non Controlled Version<br />
<strong>SLX</strong>-<strong>PET</strong> <strong>Protocol</strong> <strong>for</strong> <strong>Illumina</strong> <strong>Sample</strong> <strong>Prep</strong><br />
Saved as: LIBPR.0031<br />
Supersedes: New<br />
Version: 1 Page 21 of 25<br />
*Note: Controlled Versions of this document are subjected to change without notice<br />
Appendix A<br />
LIMS <strong>SLX</strong>-gDNA size selection<br />
1. Scanner <strong>Protocol</strong><br />
The following scanner protocol is <strong>for</strong> <strong>PET</strong> samples. If you are running TS samples through<br />
the protocol, select <strong>SLX</strong>-TS as the pipeline instead of <strong>SLX</strong>-<strong>PET</strong>, but still scanning in PE<br />
adapters.<br />
1.1. Make sure you are under the Gene Expression tab, scan the DNA sample. Save the tube<br />
set.<br />
1.2. Select “<strong>SLX</strong> gDNA size selection” from the dropdown menu and select “Continue <strong>Prep</strong>”<br />
button. Change pipeline to <strong>PET</strong>: <strong>SLX</strong>-<strong>PET</strong>. Select “Completed Aliquot to 1.5 ml Tube”. A<br />
new barcode will be produced. This barcode represents the aliquot that was loaded onto<br />
the gel. Paste it into your lab notes with the image of the gel.<br />
1.3. If the amount of starting material is known, enter the value in the appropriate field. If a<br />
sonication step has been per<strong>for</strong>med, enter the Bioruptor or Sonicator equipment ID<br />
depending on which one was used and the length of time sonicated in the appropriate field.<br />
Select the “Completed Sonication equipment and time” button.<br />
1.4. Make sure that the pipeline is “<strong>PET</strong>: <strong>SLX</strong>-<strong>PET</strong>”. Select “Completed Transfer DNA to a 2<br />
ml Tube”. This represents the gel slice cut from the PAGE gel. Collect the new barcode<br />
from the printer. This barcode will become the permanent barcode <strong>for</strong> the DNA<br />
template. It should be placed on the template tube.<br />
1.5. Enter the rack number of the Gel Slurries box.<br />
1.6. Select “Completed store size fraction after purification”.<br />
1.7. If continuing directly with <strong>SLX</strong>-<strong>PET</strong> protocol, select the <strong>SLX</strong>-<strong>PET</strong> protocol from the<br />
dropdown menu and proceed to Step 2.3 below.<br />
LIMS <strong>SLX</strong>-<strong>PET</strong> SOP<br />
2. Scanner <strong>Protocol</strong><br />
Note: In any aliquoting or resuspension steps, if different volumes were used <strong>for</strong> different<br />
libraries, separate them by commas.<br />
For any attribute, eg. Size fraction used, PCR cycles, Avg_DNA_bp_used, enter the<br />
value only. Do not enter any unit.<br />
2.1. Scan the tube(s) that will be used <strong>for</strong> this protocol and save it as a new tube set.<br />
BCGSC – Confidential in<strong>for</strong>mation not to be disseminated
Non Controlled Version<br />
<strong>SLX</strong>-<strong>PET</strong> <strong>Protocol</strong> <strong>for</strong> <strong>Illumina</strong> <strong>Sample</strong> <strong>Prep</strong><br />
Saved as: LIBPR.0031<br />
Supersedes: New<br />
Version: 1 Page 22 of 25<br />
*Note: Controlled Versions of this document are subjected to change without notice<br />
2.2. Now select the <strong>SLX</strong>-<strong>PET</strong> protocol, continue.<br />
2.3. Click on “gDNA size selection protocol is completed”. This is a reminder that the size<br />
selection protocol needs to be completed be<strong>for</strong>e running the <strong>SLX</strong> <strong>PET</strong> protocol. If size<br />
selection protocol is not done, click “skip gDNA size selection protocol is completed”.<br />
2.4. Enter the fraction size that was cut from the PAGE gel (eg. 200-300bp). Select the<br />
“Completed enter fraction size being used”.<br />
2.5. Then scan the following reagents as they come up.<br />
• T4 DNA polymerase<br />
• Klenow DNA polymerase<br />
• T4 polynucleotide Kinase (T4 PNK)<br />
• Klenow exo-<br />
• PE adapter oligo mix<br />
• DNA Quick ligase<br />
2.6. Click on “Completed Decant” to offset any pre-existing volume.<br />
2.7. Resuspend and store PCR template: Scan in Buffer EB. Enter 30μl (which is the PCR<br />
template volume). Enter the rack location <strong>for</strong> PCR template.<br />
2.8. Aliquot to 1.5ml tube: Enter the volume of the total PCR template that was used <strong>for</strong> PCR.<br />
Eg. If two rounds of PCR were done, with 10μl and 5μl in the first and second rounds,<br />
enter 15μl as the volume to be aliquoted. This will be the PPGP PCR product barcode.<br />
2.9. Scan in the following reagents as they come up:<br />
• Phusion Master Mix<br />
• PCR Primer PE 1.0<br />
• PCR Primer PE 2.0<br />
2.10. Click on “Completed Decant”. The Decant step will set the PPGP PCR product volume to<br />
0μl.<br />
2.11. Resuspend and Store PPGP PCR Product: Scan in Buffer EB. Enter the volume of the<br />
PPGP PCR Product minus Agilent and Qubit QC volume. Eg. If PPGP PCR product was<br />
BCGSC – Confidential in<strong>for</strong>mation not to be disseminated
Non Controlled Version<br />
<strong>SLX</strong>-<strong>PET</strong> <strong>Protocol</strong> <strong>for</strong> <strong>Illumina</strong> <strong>Sample</strong> <strong>Prep</strong><br />
Saved as: LIBPR.0031<br />
Supersedes: New<br />
Version: 1 Page 23 of 25<br />
*Note: Controlled Versions of this document are subjected to change without notice<br />
resuspended in 13μl, subtract 2μl <strong>for</strong> Agilent and Qubit, then enter 11μl as the volume.<br />
Enter the rack location <strong>for</strong> the stock PPGP PCR product.<br />
2.12. Enter the Agilent Run ID <strong>for</strong> the pre–PPGP PCR product.<br />
2.13. Enter the Agilent Run ID <strong>for</strong> the post-PPGP PCR product.<br />
2.14. Final DNA Quant (Agilent / Qubit)<br />
• Enter the stock PPGP PCR product concentration according to Qubit (ng/μl)<br />
• Enter the PCR cycle<br />
• Enter the Library size distribution<br />
• Enter the Average DNA bp size of the final PPGP PCR product.<br />
2.15. Aliquot DNA to 1.5ml tube: Enter the volume of the stock PPGP PCR product that was<br />
aliquoted out to make the diluted sample <strong>for</strong> submission. This will be the barcode <strong>for</strong> the<br />
sample <strong>for</strong> submission.<br />
2.16. Click on “Completed Decant”. The Decant step will set the sample <strong>for</strong> submission volume<br />
to 0μl.<br />
2.17. Resuspend <strong>Sample</strong> <strong>for</strong> Double Checking: Scan in Buffer EB. Enter in the final volume of<br />
the sample <strong>for</strong> submission.<br />
2.18. Put the final barcode on the diluted sample. Store the diluted sample in the “<strong>Sample</strong>s to<br />
Double Check” box on the 6 th floor. Do not label the tube with a concentration; that will<br />
be done after the double check is completed.<br />
Appendix B<br />
BCGSC – Confidential in<strong>for</strong>mation not to be disseminated
Non Controlled Version<br />
<strong>SLX</strong>-<strong>PET</strong> <strong>Protocol</strong> <strong>for</strong> <strong>Illumina</strong> <strong>Sample</strong> <strong>Prep</strong><br />
Saved as: LIBPR.0031<br />
Supersedes: New<br />
Version: 1 Page 24 of 25<br />
*Note: Controlled Versions of this document are subjected to change without notice<br />
<strong>SLX</strong>-<strong>PET</strong> Day 1<br />
Library Name:<br />
1<br />
2<br />
3<br />
4<br />
Date<br />
<strong>Prep</strong>ared<br />
by<br />
Size<br />
Fraction<br />
Gel Purification Sol # Volume Added<br />
number of columns used: _________<br />
100% Ethanol 2.5X volume<br />
3M NaOAc<br />
1/10<br />
volume<br />
Mussel Glycogen 3 µL<br />
Qiagen Elution Buffer 40 µL<br />
End-Repair and Phosphroylation Sol # Volume Added<br />
DNA 40 µL<br />
10X Phosphorylation Buffer 5 µL<br />
dNTP mix 2 µL<br />
T4 DNA Polymerase 1µL<br />
Klenow DNA Polymerase (1/5 diluted) 1 µL<br />
T4 PNK 1 µL<br />
30 min incubation at room temp<br />
PCI/EtOH Precipitate/resuspend in EB 34µL<br />
Addition of an 'A' Base to the 3' End Sol #<br />
DNA from section 1 34 µL<br />
10X Klenow Buffer 5 µL<br />
dATP (1mM) 10µL<br />
Klenow Fragment (3' to 4" exo minus) 1µL<br />
30 min incubation at 37 0 C<br />
PCI/EtOH Precipitate/resuspend in EB 10µL<br />
Ligation of Adapters Sol #<br />
DNA from section 6 10 µL<br />
DNA ligase buffer (2X) 15 µL<br />
PE Adapters (1x concentration) 1 µL<br />
DNA Quick Ligase 4 µL<br />
15 min incubation at room temp<br />
Qiagen Column Clean-up Elute in EB 30 µL<br />
Appendix C<br />
BCGSC – Confidential in<strong>for</strong>mation not to be disseminated
Non Controlled Version<br />
<strong>SLX</strong>-<strong>PET</strong> <strong>Protocol</strong> <strong>for</strong> <strong>Illumina</strong> <strong>Sample</strong> <strong>Prep</strong><br />
Saved as: LIBPR.0031<br />
Supersedes: New<br />
Version: 1 Page 25 of 25<br />
*Note: Controlled Versions of this document are subjected to change without notice<br />
<strong>SLX</strong>-<strong>PET</strong> Day 2<br />
Library Name:<br />
1<br />
2<br />
3<br />
4<br />
Date<br />
<strong>Prep</strong>ared<br />
by<br />
Size Fraction<br />
Enrichment PCR (solexa Regents) Sol # per rxn (uL) # of rxns Vol. (uL) Added<br />
DNA Template 10<br />
Phusion DNA Polymerase (Premix) 12.5 5 62.5<br />
PCR Primer PE 1.0 1.0 5 5<br />
PCR Primer PE 2.0 1.0 5 5<br />
Nuclease-free water 0.5 5 2.5<br />
Total 25<br />
Determine Molarity <strong>Sample</strong> 1 <strong>Sample</strong> 2<br />
Library Name<br />
PCR Cycle yielding the best result (10 or 15)<br />
<strong>Sample</strong><br />
3<br />
<strong>Sample</strong><br />
4<br />
Qubit concentration<br />
determine bp from agilent<br />
(ng/uL)<br />
(bp)<br />
calculate molarity (nM) #DIV/0! #DIV/0! #DIV/0! #DIV/0!<br />
dilute sample to 8nM (dilution factor) #DIV/0! #DIV/0! #DIV/0! #DIV/0!<br />
BCGSC – Confidential in<strong>for</strong>mation not to be disseminated