SAMPLE - CHAPTER 16 THE GUM ... - ChristopherJames-Studio.com
SAMPLE - CHAPTER 16 THE GUM ... - ChristopherJames-Studio.com
SAMPLE - CHAPTER 16 THE GUM ... - ChristopherJames-Studio.com

You also want an ePaper? Increase the reach of your titles
YUMPU automatically turns print PDFs into web optimized ePapers that Google loves.
<strong>THE</strong> BOOK OF ALTERNATIVE PHOTOGRAPHIC PROCESSES: 2 nd Edition<br />
© CHRISTOPHER JAMES<br />
2008<br />
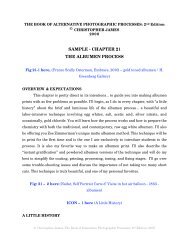
<strong>SAMPLE</strong> - <strong>CHAPTER</strong> <strong>16</strong><br />
<strong>THE</strong> <strong>GUM</strong> BICHROMATE PROCESS<br />
Fig <strong>16</strong> – 1, here, (Christopher James, John Q. w/ His own Negative, 2005, cyanotype<br />
& gum)<br />
OVERVIEW & EXPECTATIONS<br />
Here’s the truth… In gum bichromate printing there are very few absolutely<br />
correct ways to do anything. Here’s another bit of reality… In my experience, gum<br />
bichromate printers are the most passionate, and hard-headed, of all alternative process<br />
artists when it <strong>com</strong>es to their particular way of doing the process. I can just imagine<br />
many of my friends reading that last sentence and saying, "he’s talking about me!"<br />
When the gum bichromate process is broken down into its three <strong>com</strong>ponents,<br />
and explained in the simplest of ways, it appears to be amazingly un<strong>com</strong>plicated.<br />
However, to nearly every one of my students who has been seduced by the process, and<br />
for those artists who are dedicated to it, gum bichromate reveals itself to be one of the<br />
most <strong>com</strong>plex in the alternative process genre.<br />
Gum printing is ridiculously seductive, due to its limited chemistry, simple water<br />
development, unlimited color potential with watercolors of the artist’s choice, and its<br />
flexible ability to be coupled with a wide range of other alternative and graphic arts<br />
techniques. I think of gum as the photographic ambassador to the graphic and fine arts.<br />
Because of its pigment and substrate options and brush application, gum bichromate<br />
printing is one of the few photographic processes capable of achieving that wonderful<br />
element of gesture - gesture being the evidence of painterly expression, of the artist’s<br />
© Christopher James, The Book of Alternative Photographic Processes: 2 nd Edition, 2007
hand, in the creation of a mark. Sadly, in conventional photography, the element of<br />
gesture is rare (and often mistaken for camera movement).<br />
In this chapter I will, as always, offer you “a little history” and describe how the<br />
process works. I will then discuss the negative, how to generate a set of CMYK negative<br />
separations with ink-jet printer output, and relaxed registration techniques… this will<br />
allow you to place multiple applications of color on the same piece of paper without<br />
losing the original details of the image. You will also learn how to make a gum print<br />
from a single contact negative.<br />
You’ll learn about mixing the chemistry for the sensitizer and the relationship<br />
among the three primary ingredients in the technique: gum Arabic, a dichromate<br />
(potassium or ammonium) sensitizer, and pigment… generally watercolor. This will be<br />
coupled with instructions for applying the sensitized emulsion, processing the print, and<br />
re-applying sensitized coatings for subsequent layers and depth. I’ll discuss<br />
development-clearing gum prints, and conclude the chapter with a <strong>com</strong>prehensive<br />
trouble-shooting section.<br />
Considering the basic simplicity of the process you’ll notice that there seems to be<br />
an unexpected abundance of information. Part of the reason is that I want you to see the<br />
infinite menu of variables within gum printing. If you investigate the process beyond<br />
this book, you will find published evidence that will occasionally seem contrary to some<br />
of the information in this chapter. You need to be aware that gum bichromate printing<br />
suffers from the same problem as do many other alternative processes… untested and<br />
erroneous instructions that are endlessly repeated as gospel.<br />
You’ll find that you will not have trouble making good gum bichromate prints if<br />
you follow the instructions in this chapter, and the Paper chapter, (dealing with paper<br />
preparation) that precedes it. Of course you’re going to have issues to deal with,<br />
everyone does with gum, but the path I’m laying out for you is a well tested one and<br />
you’ll be fine. Just relax, take your time, keep notes of what you are doing, and realize<br />
that the gum bichromate process will reward you individually as you modify the myriad<br />
© Christopher James, The Book of Alternative Photographic Processes: 2 nd Edition, 2007
elements of the process to suit your own personal working style, imagery, and<br />
intentions.<br />
Fig: <strong>16</strong> – 2 here, (Christina Z Anderson, Crack a Girls Ribs, 2005 - gum)<br />
A LITTLE HISTORY<br />
ICON – 1 here, (A Little History)<br />
An interesting hypothesis from a book by Picknett & Prince entitled, Turin<br />
Shroud – In Whose Image? The Truth Behind the Centuries-Long Conspiracy of Silence<br />
(Acacia Press, 1994) suggests that Leonardo da Vinci (1452-1519) may have been the<br />
creator of the Shroud of Turin by using a mixture of dichromated egg with human or<br />
animal urine. Guess whose image is on the Turin shroud? … None other than Leonardo<br />
da Vinci’s of course. The book’s authors, if correct, would give Leonardo da Vinci credit<br />
for the first photographic image, several hundred years before the medium’s “official”<br />
beginning. To put this curious factoid in context, the publisher’s catalogue is rife with<br />
books dealing with conspiracy theories dating back to the fourteenth century. Who<br />
knows? Considering everything else da Vinci has ac<strong>com</strong>plished, it might very well be<br />
true.<br />
The earliest attributable considerations regarding the effect of light on<br />
bichromates seems to be the intellectual property of the French chemist, Louis-Nicolas<br />
Vauquelin (1763-1829), at the tail end of the 1700s. Although Vauquelin published over<br />
378 separate papers on chemistry, the bulk of his writing did little more than provide<br />
analytical observations and data. Interestingly, he was one of the first academics to<br />
consider instructing his students by means of actual, hands-on practice in the laboratory<br />
and for that he gets a big round of applause.<br />
Mungo Ponton (1801-1880), the Scottish inventor (with the all-time best name in<br />
the history of photography), expanded on Vauquelin’s analytical wisdom in 1839 when<br />
he discovered that paper impregnated with potassium bichromate (bichromate and<br />
© Christopher James, The Book of Alternative Photographic Processes: 2 nd Edition, 2007
dichromate are the same thing, by the way) was sensitive to light. In Ponton’s process,<br />
paper was coated with a potassium dichromate solution and exposed to sunlight using<br />
objects to create a photogram negative image. The exposed print was then washed, to<br />
remove any unexposed dichromate, and dried; leaving a light buff colored sepia print<br />
that consisted of chromium dioxide. The print was rather handsome at first, but tended<br />
to fade to a delicate gossamer-like green after several months. Ponton’s single solution<br />
Pontontype is directly related to the idea behind Poitevin’s Dusting-On process (1858)<br />
and a sizing technique for liquid emulsions on paper… both of which are covered later in<br />
this text.<br />
A year later, in 1840, Edmund Becquerel (1820-1891) added to the rapidly<br />
expanding base of photographic knowledge by producing images using iodine in<br />
<strong>com</strong>bination with starch. Specifically, he showed that he could produce electric currents<br />
by exposing certain liquids and metals to UV light and had invented a machine called an<br />
Actinometer that could calibrate and measure the response of those materials to light.<br />
This discovery eventually led to the development of the photoelectric cell. It was<br />
Becquerel, by the way, who first figured out that continuing the Daguerreotype’s<br />
exposure through a red glass filter could intensify the final plate.<br />
In 1854, William Henry Fox Talbot began working on the concept by observing<br />
the ability of potassium dichromate to have a hardening effect upon a colloidal gelatin<br />
directly proportional to the degree of UV light that the gelatin received. Fox Talbot’s<br />
modest success in this area was followed by the work of Alphonse Louis Poitevin (1819-<br />
1882), who continued the investigation of how bichromates were able to render gelatin<br />
insoluble upon exposure to light. In 1856, Honoré d’Albert Duc de Luynes, an<br />
exceedingly wealthy arts patron, put up a prize of 10,000 francs to anyone who could<br />
describe a photographic printing process that was permanent. Poitevin won the prize for<br />
two processes: the Carbon Print and the Collotype. Additional history will be<br />
forth<strong>com</strong>ing in the following Dichromate Options chapter but in the meantime, here are<br />
a few other related techniques to consider.<br />
Fig: <strong>16</strong> – 3 here (Felix Nadar, George Sand, Woodburytype – 1877)<br />
© Christopher James, The Book of Alternative Photographic Processes: 2 nd Edition, 2007
Woodburytype<br />
Walter Bentley Woodbury (1834 -1885) is credited with the creation of the<br />
Woodburytype (a.k.a. Photoglyptie – Stannotype – Photomezzotint) in 1864 -1866 - a<br />
process that was widely practiced for nearly 25 years and known for its amazing tonal<br />
range and ability to render values without any grain whatsoever. In fact, as is true of<br />
most people who invent new processes, the genius of Walter Bentley Woodbury was<br />
assisted by several decades of experimentation by a host of other artist / scientists /<br />
entrepreneurs such as Mongo Ponton, Becquerel, Fox Talbot, Poitevin, Beuregard, Paul<br />
Pretsch, and John Pouncy.<br />
To produce a Woodburytype, the artist would make a thick gelatin relief on a<br />
piece of carbon paper by exposing it to a continuous-tone negative. The relief image was<br />
dried and then <strong>com</strong>pressed into a lead intaglio plate under enormous pressure from a<br />
hydraulic press. The lead, having taken the detail of the hardened gelatin impression,<br />
would now be<strong>com</strong>e the printing plate for the next step. The lead intaglio plate was<br />
encased in a mold and pressed against a fine-quality paper. Pigmented gelatin ink was<br />
then poured into the mold, where it deposited the gelatinized ink in proportion to the<br />
depth of the plate. Interestingly, the Woodburytype is generally a dark reddish brown<br />
and seldom printed in black, even though any color could have been used.<br />
Corot’s Cliché Verre Etchings on Glass<br />
A fascinating bit from the same time period… the French painter, Jean-Baptiste-<br />
Camille Corot (1796-1875), tried his hand at processes utilizing bichromates and colloids<br />
and made cliché-verre prints on glass using pure albumen as his sizing agent. He also<br />
made colloidal etchings by coating glass plates with wet sensitized collodion emulsion.<br />
The plate was then exposed to light, which darkened it entirely. Corot then etched into<br />
the darkened emulsion, and when finished, contact printed the plate to a piece of<br />
sensitized paper for a paper print. Corot and others also utilized a technique in which<br />
they would burn a tallow candle close to a glass plate, leaving a soot-blackened sheet of<br />
glass. The soot was then drawn into with a variety of mark-making tools to create a<br />
© Christopher James, The Book of Alternative Photographic Processes: 2 nd Edition, 2007
negative plate of lines and textures. The etched soot on the glass was then used as a<br />
contact negative in conjunction with a sensitized sheet of paper.<br />
The Fish-Glue Process<br />
As an aside, there is another really interesting technique known as The Fish Glue<br />
Process that applies these same principles, but does so for use on a metal plate<br />
substrate. Alphonse Louis Poitevin is credited with the invention of this process. In the<br />
Fish Glue Process, ammonium dichromate and water-soluble fish glue were mixed and<br />
coated on a metal plate. Following exposure, the un-exposed and un-hardened glue<br />
(acting like gum Arabic does in a traditional gum process) washed off the plate, which<br />
was then dried, and heat hardened. The heat hardening produced an enamel-like<br />
surface that was subsequently acid etched (likely with dilute nitric acid or a Dutch<br />
Mordant) and used in an intaglio press, un-inked, to make a bas-relief image. Fish glue<br />
is still being manufactured and can be purchased, should you get an urge to try this<br />
seldom-used technique. You might also want to test it with household white glue. (See<br />
the Resource section in the Appendix of this book for a supplier of fish glue.)<br />
Fig: <strong>16</strong> – 4 here, (Robert Demachy, Cigarette Girl, 1902 - gum)<br />
Gum and Pictorialism<br />
In the late nineteenth, and early twentieth, centuries, photographic image makers<br />
viewed themselves as dedicated artists rather than as the gentleman scientists, as had<br />
photographers of a half-century earlier. Some even began referring to themselves as<br />
Pictorialists. They worked extensively with the gum process, due to its ability to mimic<br />
the painterly image and to express the artist’s intentions and feelings. For critics of the<br />
movement, this categorized the imagery as warm, romantic, and fuzzy.<br />
Indeed, gum bichromate was championed in America by the Photo-Secessionists,<br />
(first cousins of the UK’s The Brotherhood of the Linked Ring) a coalition of<br />
photographers such as Edward Steichen, Gertrude Käsebier, and Clarence White, and in<br />
due time, Alfred Stieglitz, who were dedicated to Pictorialist expression in the medium.<br />
Their inspiration came from the aesthetic integrity of multiple European organizations,<br />
© Christopher James, The Book of Alternative Photographic Processes: 2 nd Edition, 2007
such as the Wiener Kamera Club in Berlin, who struggled to have their photographic art<br />
appreciated within its own unique context rather than as an imitative reflection of<br />
“reality.” This is, of course, the principle argument born of the aesthetic ruckus started<br />
by Peter Henry Emerson in 1889.<br />
HOW <strong>GUM</strong> BICHROMATE WORKS<br />
John Pouncy had <strong>com</strong>e to a conclusion, the underlying principle being: a mixture<br />
of a potassium, or ammonium, bichromate salt (dichromate and bichromate describe<br />
the same thing) in a saturated solution is mixed with a colloid, such as gum arabic,<br />
gelatin, glue or starch. This UV light-sensitive liquid mixture is then applied to a<br />
substrate, such as paper, and dried. A contact negative, the same size as the finished<br />
print, is placed in direct contact with the dried sensitized coating in a contact-printing<br />
frame and exposed to sunlight. The portions of the sensitized paper affected by UV light<br />
through the negative will then be<strong>com</strong>e insoluble in direct proportion to the amount of<br />
light received.<br />
By itself, the dichromated salt and the gum Arabic (sap from an Acacia tree) will<br />
produce a buff or tan-colored image. This particular sensitizer is often employed as a<br />
preliminary sizing layer for hand-applied liquid emulsions and unique substrates. If a<br />
coloring agent, most often watercolor pigment, but occasionally a gauche or a metallic<br />
powder, is added to the dichromate and gum Arabic sensitized mixture, the color of that<br />
pigment will remain in the UV light-hardened emulsion.<br />
Again, because the dichromate / pigment / gum arabic mixture will harden in<br />
direct proportion to the degree of UV exposure received. In a first exposure, the thinnest<br />
parts of the negative (the shadows) will allow the most exposure, and will cause the<br />
image upon the coated paper to be<strong>com</strong>e the most insoluble and hardened in those areas.<br />
The densest parts of the negative (the highlights), will require more exposure and will as<br />
a result, harden less during the same exposure time. This means that during the washdevelopment<br />
stage the un-hardened pigment simply falls away from the paper leaving<br />
the highlights color-free. This is exactly why sizing is so important. It is also why, if you<br />
didn’t yet read the previous chapter on paper preparation, you probably don’t<br />
© Christopher James, The Book of Alternative Photographic Processes: 2 nd Edition, 2007
understand what you just read. The other factors that will influence the out<strong>com</strong>e of your<br />
gum print are many, but the most relevant include the dichromate sensitizer-to-pigment<br />
ratio, and the amount of pigment in the sensitizer mix, the paper you choose, water type<br />
and temperature, paint type and color, and how all of these work with the chemistry and<br />
your individual technique.<br />
Fig: <strong>16</strong> – 5 here, (Stephen Livick, Kali Mural #528, 1991 - gum)<br />
A FEW WORDS BEFORE WE BEGIN<br />
Any change in the principal <strong>com</strong>ponents of the gum process (gum type, sensitizer<br />
type and strength, ratios of one to the other, water type, temperature, paper, time of<br />
year, etc.), on any given day, may change the final results in a gum print. This is exactly<br />
what makes the process so interesting and so much fun to do. As long as you avoid<br />
investing your self-worth and abilities as an artist, in the success of every print, you will<br />
be fine. Be patient and don’t try to be<strong>com</strong>e the “best” at this process. My friend, Judy<br />
Seigel, has probably spent more time and energy exploring the variables of this gum<br />
process than anyone I know and she is still <strong>com</strong>ing face-to-face with the unexpected<br />
tricks or treats of the process. It would be a “fool’s errand” to try to conquer gum<br />
bichromate printing in a short time. Judy offers decent advice when she suggests that<br />
one can <strong>com</strong>e to a working truce with gum simply by paying attention. The gum<br />
bichromate process is amazingly fluid and flexible and should be approached with a<br />
spirit of play, adventure, and discovery.<br />
Fig: <strong>16</strong> – 6 here, (Judy Seigel, Two Men & Tree, 1983 - 2000 - gum)<br />
<strong>THE</strong> <strong>GUM</strong> BICHROMATE NEGATIVE<br />
Because gum bichromate, like other alternative processes, is a contact printing<br />
process it is necessary to work with negatives that are the same size as your final printed<br />
image. The vast majority of gum printing experiences require more than a single<br />
exposure and multiple “passes” (applications of sensitizer and subsequent exposure) of<br />
sensitized color are the norm. For this reason, it is <strong>com</strong>mon to have a set of registered<br />
negatives, fine registration, with which to successfully print a selection of highlights,<br />
© Christopher James, The Book of Alternative Photographic Processes: 2 nd Edition, 2007
mid-tones and shadow details on the same paper. Of course if you wish to be more free<br />
form than that, and not have anything match up, that’s perfectly fine as well.<br />
Registration is important if you really want to control how the print will evolve.<br />
If your intention is to have a single color gum, with many applications of the<br />
same color, one negative may be all that you will require. If your intention is to deepen<br />
the shadows of a previously made print, such as a cyanotype or platinum / palladium,<br />
then a single negative may be adequate. With a single negative, it’s only necessary to<br />
adjust the concentration of pigment, exposure, and / or amount of sensitizer in order to<br />
make a resolved image.<br />
It is advisable to have negatives that would be appropriate for a normal grade of<br />
silver gelatin paper. This means that the negative will have an average negative density<br />
of 1.0 to 1.8. This is a general suggestion, unless you intend to make gums with interdisciplinary<br />
intentions, where the tonal values are secondary to the concept. If you are<br />
looking for a full tonal range, and gum is more than capable of giving this, it is best to<br />
avoid negatives that are too high in contrast... unless, of course, that is what you’re<br />
looking for.<br />
There are a host of film varieties and developers available for nearly any type of<br />
negative interpretation you could wish for. For the last few years I have been separating<br />
transparencies into separate CMYK (C= cyan, M= magenta, Y= yellow, K= black) files<br />
in Photoshop and printing them out digitally on Pictorico OHP inkjet films. I have also<br />
been taking original color or black & white images and converting them to CMY and<br />
CMYK negative sets for gum printing. One of the workflows that you can read about in<br />
this, and the Digital Options, chapters is how to apply custom curves to your digital files<br />
that are designed for the process. You can make your own or you can go to the Internet<br />
and find many free versions to test out. Note: Please refer to Digital Options, Chapter<br />
5, for a <strong>com</strong>plete workflow regarding making a color layers on a digital negatives.<br />
Fig <strong>16</strong> – 7 here, (Applied Gum Bichromate Curve and Comparative Step Wedges)<br />
© Christopher James, The Book of Alternative Photographic Processes: 2 nd Edition, 2007
In almost every situation, digital negatives are perfectly satisfactory for gum<br />
bichromate printing and they provide a flexibility and speed in negative reproduction<br />
that only Polaroid matches. You may also wish to consider using negatives made from<br />
laser copy machines or making your own with a cliché verre technique. Refer to Chapter<br />
2, The Negative, and Chapter 3, The Digital Options, for more information. In the<br />
meantime, I am going to reproduce the instructions for CMYK and Color Layers here<br />
that are in the Digital chapter just in case you haven’t read that information yet.<br />
MAKING DIGITAL SEPARATIONS FOR <strong>GUM</strong> PRINTING<br />
Simple Workflow In Photoshop<br />
Note: I am including the following information in both this Gum Bichromate chapter<br />
and the Digital Options chapter. There is relevant information here that can be applied<br />
to many processes and it especially important to see this B&W to CMYK workflow in<br />
context with the process and related illustrations.<br />
Gum bichromate artists have always had to ac<strong>com</strong>plish a few tedious tasks before<br />
getting to the fun parts of the process with all the colors and splashing around in the<br />
sink. Along with paper sizing, making CMYK (Cyan, Magenta, Yellow, & Black) negative<br />
separations was one of my least favorite things to do for a day in the studio. In the<br />
beginning you could shoot the separations in camera or move to the darkroom with an<br />
existing negative, and do your separations there with various film types, filters, and<br />
projection. Then along came digital imaging, Adobe Photoshop and Pictorico OHP.<br />
In the first edition of this book I was all impressed with Photoshop v.5 and by the<br />
fact that I could make CMYK (cyan-magenta-yellow-black) separations from a black<br />
and white source with only 26 easy steps… I called it the “speedy, non-fussy version.”<br />
Now I’m using Photoshop CS2. Next month I’ll probably be using Photoshop CS3. No<br />
matter, the fact is that with CS 2 or 3 I can now tell you how to go from a black and<br />
white (Grayscale) source to CMYK, or from a RGB (red-green-blue) source to CMY<br />
(cyan-magenta-yellow) or Grayscale in a flash. Best of all, it really is speedy and<br />
simple… even for the technical neophyte.<br />
© Christopher James, The Book of Alternative Photographic Processes: 2 nd Edition, 2007
These sequences are a good start. They are not the last word in making digital<br />
separations on Pictorico OHP film, going from Grayscale to CMYK, or RGB to CMY, nor<br />
is it inflexible. For instance… if you flip and exchange Step E with Step C, your<br />
separation negatives will look different.<br />
These particular workflows are ones that I worked out via email exchanges with<br />
several friends - David Stinch<strong>com</strong>b, in Oklahoma, Tony Gonzalez in NY, and xtine<br />
Burrough in CA. Their brains don’t melt when they think about things digital and they<br />
have been a great help in getting this information into a simple and easy to follow<br />
workflow. Tony’s 3-color CMY workflow will <strong>com</strong>e later in this chapter.<br />
As with any alternative syntax in any medium, individuals will adjust the steps in<br />
any process to suit their individual needs. Again, these are only workflow<br />
re<strong>com</strong>mendations but they work and will certainly get you started.<br />
One other thing to consider, the separations I am offering here are simple<br />
workflows designed for those who just want to have an easy and more than adequate<br />
way to generate their digital negatives quickly. If you are really serious about perfection<br />
and knowing everything there is to know about this subject, then you will want to<br />
consider graduating to advanced level considerations such as those developed by Dan<br />
Burkholder or Mark Nelson. Dan’s web site (www.danburkholder.<strong>com</strong>) and book are<br />
amazingly <strong>com</strong>plete and he has custom profiles and instructions for just about<br />
everything you will need. You can find Mark Nelson’s advice in Dick Arentz’s Platinum<br />
and Palladium Printing: 2nd Edition.<br />
C-M-Y-K <strong>GUM</strong> SEPARATION NEGATIVES<br />
On Pictorico OHP in Photoshop<br />
Note: In this example you are starting with an RGB color file and your intention is to<br />
convert it into a set of B & W, C-M-Y-K negatives that you can use in gum bichromate<br />
© Christopher James, The Book of Alternative Photographic Processes: 2 nd Edition, 2007
printing. This information is duplicated in both the gum bichromate chapter and the<br />
Digital Options chapter.<br />
Fig <strong>16</strong> – 8 here, (John Quackenbos, 35mm Transparency, 1999)<br />
Fig <strong>16</strong> – 9 here, (C-M-Y-K Gum Separation Grayscale Sequence)<br />
Fig <strong>16</strong> – 10 here, (John Quackenbos, Cyan Mural, MPW-4 color gum, 1999)<br />
R-G-B TO GRAYSCALE C-M-Y-K SEPARATIONS<br />
On Pictorico OHP In Photoshop<br />
Step #1 - Open up your image file and work on it in Photoshop until it meets<br />
your expectations and intentions. Save it with a label that will indicate that it is<br />
specifically for the particular set of CMYK negatives you are making.<br />
Step #2 - Go to > Menu Bar, then to > Image, then to > Mode, then click ><br />
CMYK<br />
Step #3 - Go to > Image, then to > Adjustments, to > Curves and click >Load<br />
Step #4 - Find your > Gum Curve (the. sacv file) and > click Load. *<br />
Step #5 - Go to > Image, then to > Adjustments, and click > Invert<br />
Note - You have an option at this point in the process. Some gum printers want a<br />
set of negatives that are really “punchy” and have a good deal of contrast. If you<br />
are one of these gummists then this is where you will go to > Image, then to ><br />
adjustment and click > Auto Levels. If you are seeking a more true to life CMYK<br />
interpretation of an actual color set, then you might want to skip this step. Try it<br />
both ways and see what you like. At some point in the process you will be<br />
adjusting levels, and by doing so, the contrast levels of your negatives. Depending<br />
© Christopher James, The Book of Alternative Photographic Processes: 2 nd Edition, 2007
on the type of negative separation set you want, contrasty, or sort of true to life,<br />
you can adjust now or after you make your separation set.<br />
Step #6 - Next, go to the palette that is probably on your screen, indicating<br />
Layers, Channels, and Paths. Click > Channels and, using the tiny arrow on the<br />
top right corner of the palette, click > Split Channels. Presto! … Photoshop will<br />
automatically create 4 separate, and distinct, B & W negatives for you. These are<br />
your CMYK separations.<br />
Step #7 - For each of these negatives… Go to > File and to > Save As. Title your<br />
negative to as whatever you need to name the file in order to remember it. I name<br />
my sets by the title of the image and what color negative I will be applying when<br />
gum printing. i.e., Cyan, Magenta, Yellow or Black.<br />
Step #8 - Go to > Image, then to > Adjustments, and > click Levels and adjust<br />
them manually… bringing the left and right adjustment markers to the extreme<br />
ends of the Levels histogram. Do this step for each of your separations. Keep in<br />
mind that you are making a unique set of negatives here and that you can adjust<br />
the contrast of these negatives using Levels or Curves to suit your needs or the<br />
type of color you are using. This will make sense once you begin doing the actual<br />
gum printing.<br />
Step #9 - Go to > Image, to > Canvas Size, and give yourself a little white, black,<br />
or gray border to use for registration marks, pin holes, or other miscellaneous<br />
marks that will be your guide for gum registration. You can apply registration<br />
marks automatically with your printer in > Print With Preview… See Below. **<br />
Step #10 - Print out the CMYK negative separations using Pictorico OHP ink jet<br />
film.<br />
* Free Curve Profiles<br />
The most immediate, and simple, solution for getting a free Curve Profile for<br />
gum bichromate printing is to go to Malin Fabbri’s excellent alternative process web<br />
site. www.alternativephotography.<strong>com</strong> In their negatives and curves section you will<br />
© Christopher James, The Book of Alternative Photographic Processes: 2 nd Edition, 2007
find a number of free profiles that you can download and use to make negatives. I<br />
personally like David Hatton’s Gum Curve but you can easily begin with that and<br />
adjust it to fit your intentions. Then simply save it as a curve to use another day.<br />
** Adding Registration Marks<br />
If you want to add registration marks to your film make sure that you have<br />
enough room outside of the image to do so. I will add here that this is how my Epson<br />
printer software allows me to create registration marks. Most printer software<br />
packages <strong>com</strong>e with a method of adding registration marks to the printed works, but<br />
you may have to dig around in your own print dialog box to find something like<br />
“output”, “crop marks”, “printer marks”, or “registration”...isn’t that annoying?<br />
Anyway, after you check to see if you have enough room on the outside of your<br />
image... Go to File > to Print With Preview. There is a blue box under the Preview<br />
image and if you click on it you will get a choice of Color Management or Output.<br />
Choose Output and you will get a rather large menu of things you can set up before<br />
printing… one of these items is registrations marks. Check that box and if you have<br />
enough white space around your negative the marks will appear. If they don't appear,<br />
check the box that says scale to fit media and they will pop up because the program<br />
automatically resizes the image to include everything necessary.<br />
Fig <strong>16</strong> – 11 here, (Gonzalez CMY Gum Curve Profile)<br />
Fig: <strong>16</strong> – 12 here, (Tony Gonzalez, Jaclyn, CMY Separation Set)<br />
R-G-B to C-M-Y / GRAYSCALE <strong>GUM</strong> SEPARATION NEGATIVE<br />
Note: In this example you are starting with a color file, perhaps R-G-B, and your<br />
intention is to convert it into a set of C-M-Y grayscale negatives that you can use in<br />
your gum bichromate printing.<br />
© Christopher James, The Book of Alternative Photographic Processes: 2 nd Edition, 2007
Step #1 - Open up your image file and work on it in Photoshop until it meets<br />
your expectations and intentions. Save it with a label that will indicate that it is<br />
specifically for the particular set of C-M-Y negatives that you are making.<br />
Step #2 - Go to > Image on the Menu Bar, then to > Mode … then click ><br />
Multichannel<br />
Step #3 - Next, go to the palette, that is likely on your screen, indicating,<br />
“Layers,” “Channels,” and “Paths.” Click >Channels and using the tiny arrow on<br />
the top right corner of the palette, in this box, click > Split Channels. You will<br />
automatically create 3 separate, and distinct, B & W positives for your C-M-Y<br />
separations. Execute the following steps for each of the C-M-Y files.<br />
Step #4 - Go to > Image, to > Adjustments, and click > Auto Levels. Or click ><br />
Levels instead and adjust your negative manually to your own taste. At some<br />
point in the process you will be adjusting levels, and by doing so, the contrast<br />
levels of your negatives. Depending on the type of negative separation set you<br />
want, contrasty, or sort of true to life, you can adjust now… or after you make<br />
your separation set.<br />
Step #5 - Go to > Image, to > Adjustments, and click > Invert<br />
Step #6 - Go to > Image, to > Adjustments, to Curves, and click > Load<br />
Step #7 - Find your Gum Curve and click > Load. *<br />
Step #8 - Go to > Image, to > Canvas Size, and give yourself a white, or black,<br />
border to use for registration marks, pinholes, or other miscellaneous notes. **<br />
Step #9 - Go to > File and to > Save As and title your negative to whatever you<br />
need to name the file in order to remember it. I label mine by the title of the<br />
image and what color negative I will be applying when gum printing.<br />
© Christopher James, The Book of Alternative Photographic Processes: 2 nd Edition, 2007
Step #10 - Check your levels one last time and continue to print out the negative<br />
separations using Pictorico OHP ink jet film.<br />
Fig: <strong>16</strong> – 13 here, (Tony Gonzalez, Jaclyn Curtain, 2005 - CMY gum)<br />
REGISTRATION<br />
Registration is done after sizing / hardening. If you intend to make multiple<br />
passes, or if you are working on a more <strong>com</strong>plex gum, such as trying to duplicate a color<br />
transparency from 4 CMYK separations (See the workflow above), it will be necessary to<br />
register your negatives. If you don't register them, you will often get curious and<br />
unexpected results where none of the C-M-Y-K separations line up. This accident may<br />
well be a good technique if you use it intentionally.<br />
There are many ways to register negatives and paper. Some of the methods<br />
include Photoshop registration marks (see above), paper punches, pushpin holes, stickon<br />
transparent registration targets applied during negative production, or an old dye<br />
transfer punch-board that can easily be found on eBay. You can also register simply by<br />
laying your coated paper on a light table and quickly registering your negatives to the<br />
sensitized paper and locking it in with pieces of transparent tape. This is harder to do<br />
with darker color layers of course. Don’t stress about the light from the light table. Even<br />
though your dried emulsion is sensitive to light, you still have plenty of forgiveness in<br />
the emulsion speed and will have time to secure the registration without fogging the<br />
image… as long as you’re really quick about it. The point of registration is to give<br />
yourself a repeatable and mechanical way of accurately aligning your negative, or a<br />
different one, on the same piece of paper. This is especially true when a different color is<br />
assigned to each negative and where it is difficult to see the base image after recoating.<br />
A Simple Registration Technique<br />
On a light table, register all of the negatives to be used in your print. With a mat<br />
knife or sliding blade paper cutter, trim the margins at different lengths of all but one<br />
negative so that when they are in registration each piece of film will have a different<br />
© Christopher James, The Book of Alternative Photographic Processes: 2 nd Edition, 2007
height but will still be in registration with the others. Run a strip of tape across the<br />
packet of trimmed edges so they can be picked up as a set.<br />
When this is done, place the packet of taped negatives on the area of your sized<br />
paper that you will be printing on. Move the sized paper and the taped negative pack to<br />
a clean and porous surface (such as Foam Core) that will accept a pushpin and poke a<br />
pinhole through at least three margins of the negative set and paper. These holes will<br />
serve as your registration reference guides later on. Of course, if you wish to have a lot<br />
more control, then your registration techniques will have to be a lot more sophisticated<br />
than what I’ve described. If you have a strong urge to make this process more<br />
<strong>com</strong>plicated, please feel free to do so.<br />
Fig: <strong>16</strong> – 14 here, (Sarah Van Keuren, Geometric Seascape 2001 digital gum)<br />
<strong>THE</strong> <strong>GUM</strong> BICHROMATE RECIPE<br />
The sensitizer emulsion for gum bichromate printing is prepared in simple and<br />
separate steps. You begin by mixing your dichromate solution. Most gummists use<br />
either potassium or ammonium dichromate but it is also acceptable to use sodium<br />
dichromate… although I don’t know anyone who does. Potassium dichromate is a bit<br />
softer than ammonium dichromate but clears out in the highlights better than does<br />
ammonium dichromate. Potassium dichromate yields a bit more contrast, takes a little<br />
bit longer to make a <strong>com</strong>plete exposure, which is good, and usually avoids yellow<br />
dichromate staining. Most serious gummists that I know use potassium dichromate.<br />
Just for the record, the difference in saturation between ammonium dichromate (25%)<br />
and potassium dichromate (13%) may be the reason for the way they behave differently.<br />
If you were to add water to the ammonium dichromate, taking it to a 13% solution like<br />
the potassium, it is probable that you will avoid some of the less aggressive traits of<br />
ammonium dichromate, i. e., less concentration softer print.<br />
Whichever dichromate you elect to use for your sensitizer is added to a mixture of<br />
gum arabic and watercolor paint to make the <strong>com</strong>plete sensitizer solution for coating.<br />
Additional water can also be added and will help make your emulsion smoother. The<br />
© Christopher James, The Book of Alternative Photographic Processes: 2 nd Edition, 2007
proportions of gum arabic to sensitizer can be adapted to suit your contrast and<br />
exposure time requirements as well. Some gum practitioners also substitute a liquid<br />
rabbit skin glue or albumen for the gum arabic. Immediately you can begin to see that<br />
the process is not one where hard and fast rules apply.<br />
Potassium & Ammonium Dichromate<br />
Potassium, or ammonium, dichromate is your UV sensitive <strong>com</strong>ponent and is<br />
added to your mix of liquid gum Arabic and watercolor pigment to create the sensitizer<br />
emulsion that will be coated upon your paper. It is a typical alternative emulsion,<br />
suitable only for contact printing under UV light. You don't have to worry very much<br />
about working with it under normal low light conditions because your sensitizer isn’t<br />
that sensitive until it is dry. I once gave a gum printing demonstration in a motel lobby<br />
where the motel’s yellow sheets were hung over sun filled windows. I performed another<br />
gum demonstration in the back of a van in a parking lot on a rainy day - and had no<br />
problems with fogging there either. Avoid long periods of time under excessive<br />
fluorescent light as you would with other alternative processes.<br />
An Interesting Fact Regarding Dichromates:<br />
The speed of the emulsion will be slower in proportion to the pH of the water used in<br />
creating the coating solution. The more alkaline the water is, the higher its pH (above 7)<br />
and the less the dichromate’s sensitivity to UV light. Conversely, the more acidic the<br />
water, the lower the pH (less than 7) and the greater the dichromate’s sensitivity to UV<br />
light.<br />
Making a Stock Saturated Dichromate Solution<br />
Dichromates are used in gum sensitizers in a saturated solution. A saturated<br />
solution is defined as one in which no more of the dry chemical can be dissolved in<br />
water without creating insoluble sediment.<br />
As mentioned earlier, ammonium dichromate is saturated at around 25% to 30%<br />
while potassium dichromate is saturated at 10% to 13%. Ammonium dichromate is more<br />
sensitive than potassium dichromate (due to more dichromate ions in the solution) but<br />
© Christopher James, The Book of Alternative Photographic Processes: 2 nd Edition, 2007
the only differences that you might notice will be shorter exposure times and a slight<br />
increase in contrast. Potassium dichromate is a little softer and you will experience an<br />
easier time clearing the print with potassium in your sensitizer. Again, one factor will<br />
impact another, such as the pH of the water you saturate with, and you’ll need to work<br />
out your own system to accurately predict out<strong>com</strong>e.<br />
Let’s say that you are going to use potassium dichromate in your sensitizer and<br />
you need to make a saturated solution. Knowing that potassium dichromate be<strong>com</strong>e<br />
saturated between 10% and 13%. Take digital gram scale and weigh out 10 g of<br />
potassium dichromate and stir it into solution in 100 ml of water. This makes a 10%<br />
working dichromate solution… simple, huh?<br />
There is a range here and if you opted to make a saturated solution of 13% then<br />
you would be using 13 g to the 100 ml of water and this would be making a slightly faster<br />
sensitizer. In truth, you don’t need a scale at all. Just keep adding the dichromate to the<br />
water until the dry chemical ceases to dissolve any more.<br />
You can experiment and decide what strength is best for your own work. In any<br />
case, this saturated dichromate solution, whether it is potassium or ammonium, will last<br />
for a very long time when stored in a dark airtight bottle. Be sure to label the bottle with<br />
information regarding its contents, its percentage, and the date it was mixed. Be sure<br />
that the bottle has a plastic cap… no metal ever! Lastly, be sure to store it in a safe place<br />
where children cannot reach it; when mixed, dichromate solutions look a lot like a<br />
sugared drink!<br />
NOTE: Be cautious in how you handle ammonium or potassium dichromate: It is<br />
dangerous and poisonous and highly allergenic. Never put bare skin in contact with<br />
any dichromate solution. This chemical can cause lesions on your tender flesh through<br />
contact and can damage your lungs by breathing it in its dry state. Be very careful<br />
with storage and never leave the chemistry unlabeled or where children can get their<br />
hands on it. Please reference the chemical section in the Appendix before using<br />
dichromates.<br />
© Christopher James, The Book of Alternative Photographic Processes: 2 nd Edition, 2007
Fig <strong>16</strong> – 15 here, (Christopher James, Grace in Gum, 1989 - gum)<br />
WATERCOLOR PIGMENTS<br />
The watercolors you use must always be “professional” artist quality, not student<br />
or "academy" grade paint. Inferior paint often does not clear well in the highlights, or<br />
the shadows, and can be one of the reasons, besides poor paper preparation, bad gum<br />
Arabic, and too much sensitizer in the formula, for paper staining. There are almost no<br />
exceptions to this warning about academy grade paint. The best paints that I’ve used are<br />
made by Schmincke Horadam Aquarell, Winsor & Newton (professional grade only),<br />
Linel (Lefrance & Bourgeois) and Sennelier. Stephen Livick re<strong>com</strong>mends adding twice<br />
the amount of pigment to gum ratio if using Sennelier (12 g pigment for every 12 ml of<br />
potassium dichromate). Each of these manufacturers has types of paint that are better<br />
than others and you will spend a little money testing them.<br />
Watercolor paint is <strong>com</strong>posed of finely-ground pigments mixed with gum Arabic<br />
for body and glycerin or honey for viscosity and to assist in bonding the color to the<br />
substrate. The only other ingredient you’re likely to encounter will be clove oil, which is<br />
added to prevent mold growth.<br />
It would be a simple task to begin writing about watercolor paint but a much<br />
larger one to finish telling you everything there is to know about it. I’m going to explain<br />
a few basics and then leave the rest up to you. I would like to re<strong>com</strong>mend that you try to<br />
locate a book called The Wilcox Guide to the Finest Watercolour Paints, by Michael<br />
Wilcox. You may also try to access the related web site which is mind-boggling … just<br />
Google it. This site should satisfy even the most demanding scholar, which is lucky for<br />
you because copies of the book are quite rare. Just to give you an idea how precious the<br />
book is… as I write this, there were two used copies on Amazon and they are over<br />
$<strong>16</strong>5.00 each.<br />
For beginning work it is a good idea to have “primary colors” from a single maker<br />
on hand. Schmincke or Winsor & Newton are good choices. The primary colors include<br />
© Christopher James, The Book of Alternative Photographic Processes: 2 nd Edition, 2007
ed (alizarin crimson, Permanent Carmine), blue (Phthalo or cobalt), and yellow<br />
(Lemon Yellow, New Gamboge or Cadmium Yellow Medium). Winsor and Newton’s<br />
Naples yellow is also a really nice color and is creamier than the other yellows, as is<br />
Transparent Yellow. You may also wish to have a black (Lamp Black) and a gray such as<br />
Davy's Gray, which is a very pale creamy greenish slate color. If you need a stronger<br />
green I would re<strong>com</strong>mend Oxide of Chromium over a straight green, as it will clear<br />
better. You can also mix your own green from the blue and yellow you have in your<br />
primary set. Of course, you may use any color you wish from the manufacturer's stock as<br />
long as the quality is good. Be aware that some colors are suspect in regard to<br />
permanence and ability to clear in the wash development stage. Those of you who are<br />
color blind, or color-impaired, might be considered creative, so don’t avoid the gum<br />
bichromate process for those reasons.<br />
It would be numbing to provide a <strong>com</strong>plete list of re<strong>com</strong>mended paints because<br />
there are so many different brands of watercolor and gouache (watercolor with white<br />
pigment added), and a color from one manufacturer will behave quite differently than<br />
the identically “named” color from another. You will have to discover those that are best<br />
for you within the parameters you work in. Keep careful notes and you’ll work it all out<br />
eventually. I would re<strong>com</strong>mend going to the firestorm that is the alt process newsgroup<br />
and checking out their archives that discuss gum bichromate color. Note: Daniel Smith,<br />
one of the best art supplies to be found anywhere, gives information re: such things as<br />
“light-fastness” in their catalog. Daniel Smith also makes and sells their signature line of<br />
high quality watercolors and these can be found on their site… www.danielsmith.<strong>com</strong>.<br />
Testing Pigments For Gum Printing<br />
One of the best methods of testing a particular pigment for gum bichromate<br />
printing is to mix together a gum formula consisting of 12 ml gum Arabic, 12 ml<br />
saturated potassium dichromate, and 1 g of the pigment being tested. Coat and dry your<br />
sized and hardened gum paper, place an opaque object, like a coin, in the sensitized<br />
area, expose it to UV light for 15-20 minutes, and then process it normally in a soaking<br />
wash-development bath for 30 minutes. The paper under the opaque object should clear<br />
© Christopher James, The Book of Alternative Photographic Processes: 2 nd Edition, 2007
<strong>com</strong>pletely in the wash development bath. If it does not, the paint is not a suitable one<br />
for gum bichromate printing. Or, you need to work on your sizing technique<br />
The Most Often Re<strong>com</strong>mended Paints / Pigments Based on Gum<br />
Performance<br />
OK, OK… I know that I said I wasn’t going to list all of the paints but this short<br />
list will be enough to get you started on your experimentation with color and paint.<br />
Lefrance & Bourgeois / Linel: (Founded in 1720) - Natural Earth (Lightfast<br />
Raw Umber) Helios Yellow, Ruby Red, Hortensia Blue, Ivory Black, Peach Black, Cobalt<br />
Blue, Warm Green, Warm Sepia, Bayeux Violet, Naples Yellow, Viridian, Venetian Red<br />
Winsor & Newton: Cobalt Blue, Permanent Rose, Terre Verte, Oxide of<br />
Chromium, Naples Yellow, Rose Madder, Alizarin Crimson (hue), Lamp Black,<br />
Permanent Magenta<br />
Sennelier: Cobalt Blue, Phthalo Blue, Lamp Black, Phthalo Green Deep,<br />
Sennelier Red, Veridian, Warm Sepia, Permanent Magenta, Cerulean Blue (very heavy<br />
paint!), Yellow Ochre<br />
Schmincke Horadam Permanent Carmine (magenta), Cadmium Yellow<br />
Middle (yellow), Phthalo Blue (cyan)<br />
PAPER FOR <strong>GUM</strong> BICHROMATE<br />
It is important to use a paper that is well made and able to stand up to all sorts of<br />
abuse and have superior wet strength. No wimpy papers are suitable for gum<br />
bichromate printing. They must be able to withstand repeated washing times of<br />
extended duration as the process requires a <strong>com</strong>plete wash after every pass and there is<br />
no limit to the number of passes you might perform in a single print. For minimal<br />
passes, a paper with a weight of 140 lb might be adequate.<br />
© Christopher James, The Book of Alternative Photographic Processes: 2 nd Edition, 2007
For gum projects with several applications, exposures, and development<br />
experiences, a 300 lb. paper will work well. I have used 1<strong>16</strong>0 lb. Arches when I have<br />
intended to make gums where I could use power tools and sanders as part of the<br />
working process. In all cases, even with high quality watercolor papers, you must gelatin<br />
size and harden the sizing if more than a single pass is planned for. Please refer to the<br />
previous chapter for specific information and re<strong>com</strong>mendations for paper.<br />
My personal paper favorites are 300 lb Lana Aquarelle, well-sized 300 lb<br />
Fabriano Artistico (a luxury experience), and 300 lb Arches Aquarelle.<br />
<strong>GUM</strong> ARABIC<br />
Gum Arabic, or gum acacia, can be traced back in time to 2650 BC where it was<br />
harvested from the sap of various species of Acacia trees in Nigeria, Cameroon, Chad,<br />
Mali, and the Sudan. The Acacia trees grow primarily in the sub-Saharan (Sahel) areas<br />
of Africa and the Sudanese variety is considered the premium grade. In gum printing,<br />
the dichromate is added to the gum to create the liquid foundation of the gum sensitizer.<br />
Grades of Gum Arabic<br />
Gum Arabic can <strong>com</strong>e in a variety of purities. Superior Selected Sudanese /<br />
Nigerian gum Arabic is considered the premium grade and has a very pale color and<br />
clarity. This gum Arabic is hand selected, cleaned, and sifted free of any impurities and<br />
alien organic matter. This is the grade of gum Arabic that you would want to use with<br />
delicate colors such as yellow. It’s also very expensive. Winsor – Newton sells this<br />
expensive Sudanese grade.<br />
Kordofan No. 1, is a good grade of gum Arabic and quite excellent for gum<br />
printing. This grade has a slight haze and is pale to dark yellow. I believe that Bostick &<br />
Sullivan sells the slightly hazy, pale yellow, Kordofan#1. This brand is good for just<br />
about everything. After #1 <strong>com</strong>es the “Siftings” grade which can be recognized by a<br />
cloudy and yellow amber color. This is pretty <strong>com</strong>mon and a step up from the lowest<br />
grade, “Dust #3,” which is opaque and dark amber-brown. You’ll find this grade in<br />
© Christopher James, The Book of Alternative Photographic Processes: 2 nd Edition, 2007
printmaking studios in art departments with small budgets. To be considered saleable,<br />
the gum Arabic must have minimum moisture content of 12% - 14%.<br />
New Vs. Old Gum Arabic<br />
One thing that seems to make a difference is the age of the gum Arabic. I’ve heard<br />
from more than one gum bichromate worker that the way ammonium dichromate mixes<br />
with pigment, and the way it hardens during UV exposure, is better when the gum has<br />
aged a bit rather than when the gum is fresh and new. Older gum Arabic tends to adhere<br />
to the paper more effectively and is somewhat responsible for more predictable and<br />
cleaner looking prints. Tony Gonzalez told me that he has four gallons of the stuff aging<br />
in his darkroom.<br />
A few gum bichromate artists claim that different types of gum arabic have<br />
different printing speeds. They are probably correct, but I’m not sure you should lose<br />
sleep over this possibility. Gum arabic is also handy for masking.<br />
Essentially, you are buying the sap from an acacia tree and the color of it does not<br />
always determine the quality. Most art supply outlets sell it by the quart or gallon to<br />
meet the requirements of printmakers and lithographers.<br />
Preparing Gum Arabic Solution From Dry Gum<br />
Mixing gum Arabic from a dry state is relatively simple… it just takes a little<br />
longer to get to the stage where you can use the gum. The mix is essentially a 1:6, i.e., 30<br />
g of photo quality gum Arabic to 180 ml distilled water. Put the two ingredients together<br />
in a glass or plastic beaker and let them stand for several days until the gum dissolves.<br />
Any residue can be filtered or strained off leaving you with a clear gum Arabic to work<br />
with. Some of my friends add o.50 g of mercuric chloride to the solution as a way of<br />
preventing bacterial and fungal growth in the solution. I’m not an advocate of this<br />
practice if you are not extremely familiar with chemistry and related safety precautions<br />
… this amount of mercuric chloride is lethal.<br />
Using Glue as a Substitute for Gum Arabic<br />
© Christopher James, The Book of Alternative Photographic Processes: 2 nd Edition, 2007
There is a nice idea for using liquid glue as a substitute for gum arabic. This<br />
formula is from the Randall Webb and Martin Reed book, Spirits of Salts. First, make<br />
up a 5% potassium dichromate sensitizer (5 g to 100 ml of distilled water). Next, place a<br />
small amount of watercolor pigment, about the size of a #2 pencil eraser, in a ceramic<br />
cup. Then add 5 ml liquid glue to the cup and stir it into the paint. The Webb-Reed book<br />
indicates that you shouldn’t be concerned if the mixture is a “rubbery mess” but that<br />
could be their sense of humor. Add 5 ml of the 5% potassium dichromate mix to the<br />
“rubbery mess,” mix the ingredients together, quickly coat your paper with a thin<br />
coating of the solution, dry it thoroughly, put the coated paper and negative in a printing<br />
frame, and expose in UV light. Presto!<br />
ICON – 2 here, (Table Set-Up)<br />
TABLE SET UP FOR <strong>GUM</strong> BICHROAMTE PROCESS:<br />
Glyoxal – Gelatin - sized paper<br />
A small measuring beaker able to measure in single ml increments<br />
Clean paper for the table surface<br />
A selection of hake or foam brushes for coating paper<br />
Clean water in a beaker for brush washing<br />
Pencil for marking paper with procedure notes<br />
Contact printing frame<br />
A selection of professional quality watercolor paints in tubes.<br />
(Basic colors will include red, yellow, blue, and black. If separating CMYK,<br />
cyan, magenta, yellow, and black.)<br />
Gum Arabic<br />
A saturated solution of potassium or ammonium dichromate<br />
Negative / CMYK negatives for contact printing<br />
Paper towels<br />
ICON – 3 here, (Measuring Chemistry)<br />
<strong>GUM</strong> BICHROMATE SENSITIZER EMULSION<br />
© Christopher James, The Book of Alternative Photographic Processes: 2 nd Edition, 2007
The Best Gum Sensitizing Emulsion<br />
I imagine that that headline got your attention. The truth of the matter is that<br />
nearly everyone I know who is good at this process has their unique way of performing it<br />
and this includes their recipe for the sensitizer emulsion. There are also so many<br />
variables to take into consideration that it is a small wonder that anyone agrees on<br />
anything connected to the process.<br />
The general consensus among contemporary gum bichromate printers is to use a<br />
sensitizer that will expose easily and clear quickly. The gum to sensitizer ratios run from<br />
3:1 to 1:1 with variations in the proportions depending upon when the “pass” occurs in<br />
the printing sequence. We’ll get to this later but essentially what this means is that if you<br />
are making a yellow pass, your first sensitizer might be a gum to dichromate sensitizer<br />
ratio of 1:2. A second pass might then change to a gum to dichromate ratio of 1:1 and by<br />
doing this you will experience an increase in printing speed, and a reduction in contrast.<br />
If you take all of the variables out of the equation; the paper is fine, the sizing is<br />
perfect, the paint and gum is of excellent quality, and the dichromate is mixed to a<br />
perfect saturated state, then the ideal base sensitizer emulsion would be… 1 part gum to<br />
1 part dichromate sensitizer and some paint… usually �” to 1” out of the tube.<br />
A 1:1 Sensitizer Using Potassium Dichromate<br />
All variables in place and in good order, this formula is generally very successful<br />
and the proportions of potassium dichromate to gum are similar to the mix used by<br />
many of the most technically successful gum artists. Use the following ingredients and<br />
mix them according to the directions for ammonium dichromate. Pigments have<br />
different densities and different manufacturers make similar colors in different<br />
concentrations. Therefore, the amounts used in an 8” x 10” formula such as this one will<br />
fluctuate, depending upon the color and make of the paint. Figure a half-gram weight to<br />
be in the ballpark.<br />
© Christopher James, The Book of Alternative Photographic Processes: 2 nd Edition, 2007
• 6 ml of gum Arabic<br />
• �” to 1” watercolor pigment<br />
• 6 ml of saturated potassium dichromate solution<br />
Begin by taking a clean paper cup and adding 6 ml of gum Arabic to it. Then add<br />
your watercolor paint and stir it into the gum. You can add a little water if you want a<br />
less dense solution. Now it’s time to sensitize it. Add 6 ml of your saturated potassium<br />
dichromate and stir it into solution. Your sensitizer is ready to go.<br />
Fig <strong>16</strong> - <strong>16</strong> here, (Carmen Lizardo, American flag blue house, 2006 – gum)<br />
Gum bichromate artist, Carmen Lizardo, uses a thinner sensitizer and mixes her<br />
formula using simple “kitchen” measures: 1 Tsp gum, 1 Tsp ammonium dichromate, 1<br />
Tsp, pigment, and 1 Tsp distilled water. There isn’t much chance of this formula being<br />
misunderstood. Carmen says that she does alter the pigment to gum – sensitizer ratio<br />
depending on the intensity of the pigment, i.e., cadmium red vs. a Davy’s Gray.<br />
Stephen Livick, who is one of the very best gum printers around, has a very basic<br />
initial sensitizing emulsion formula that is similar to many other great gum printers.<br />
The sensitizer is based on a 1:1 ratio of gum to potassium dichromate sensitizer with<br />
varying degree of paint depending upon color. He mixes: 12 ml of gum and 12 ml<br />
saturated potassium dichromate. To this he adds:<br />
• First Coat: 2.5 grams Linel’s Helios Yellow<br />
• Second Coat: 2.5 grams Linel’s Ruby Red<br />
• Third Coat: 4 grams Linel’s Hortensia Blue<br />
Notice that Stephen doesn’t have a black (K) pass as he feels the 3-color sequence<br />
makes quite enough black for his imagery. Tony Gonzalez is another gum printer who<br />
also foregoes the black pass in favor of a cyan.<br />
© Christopher James, The Book of Alternative Photographic Processes: 2 nd Edition, 2007
3 - COLOR C-M-Y <strong>GUM</strong> BICHROMATE<br />
It isn’t always critical to have a set of CMYK separations to make a beautiful gum<br />
bichromate exposure. Tony Gonzalez, who teaches at Queens College in New York, has a<br />
terrific workflow that utilizes cyan, magenta, and yellow negatives that are made on<br />
Pictorico OHP ink jet film and an Epson 1280 printer. (See Fig <strong>16</strong> – 19)<br />
In detailing the way he works with making his CMY negatives Tony explained<br />
that he did extensive testing using his Epson 1280, Pictorico OHP film, and Media Street<br />
inks. After about a year, he determined the percentage of black ink that would be<br />
equivalent to the density of silver in the Stouffer 21 Step Tablet. Knowing that a 65%<br />
black density is equivalent to step #2, 70% black is equivalent to step #3 and so forth.<br />
Tony then based his curve profile on an 8 step (including Dmin and Dmax) tonal scale<br />
that is more or less the tonal range he concluded that he could achieve in his gum prints.<br />
As you can see in the following description of an 11-layer set of exposures, Tony is<br />
printing two very short black passes but is using his Cyan negative for the exposure. (If<br />
you forgot how to make a cyan negative, you can refer back in this chapter for<br />
instructions or go to the Digital Options chapter). In the following gum workflow set,<br />
Tony uses the following Schmincke Horadam watercolor pigments. These are not the<br />
most expensive watercolor paints but they work extraordinarily well for him and for the<br />
way he has worked out his system.<br />
Gonzalez C-M-Y-K Gum Color Equivalents<br />
• Magenta: Schmincke Horadam Permanent Carmine,<br />
• Yellow: Schmincke Horadam Cadmium Yellow Middle<br />
• Cyan: Schmincke Horadam Phthalo Blue<br />
• Black: (using the Cyan negative) Winsor Newton Lamp Black<br />
Fig: <strong>16</strong> – 17 here, (Tony Gonzalez, Rachel, Nail Polish, 2004 – CMY gum)<br />
Tony’s Gum Recipe<br />
© Christopher James, The Book of Alternative Photographic Processes: 2 nd Edition, 2007
For the sensitizer, the gum to dichromate ratio is 1:1. For his negatives, Tony uses<br />
12 full eyedroppers of gum and 12 full eyedroppers of ammonium dichromate. He uses a<br />
� inchworm squeeze of pigment for Cyan, Magenta, & Yellow paints. For the black<br />
equivalent, use a 1” worm squeeze of W & N black paint but use the cyan negative for the<br />
2 exposures.<br />
Gonzalez Exposure Unit<br />
Note: Exposures are made using an exposure unit with an outside dimension of<br />
18" x 32". Inside the unit are three 24" double fluorescent fixtures with 6 Phillips,<br />
F20T12/BL, 20-watt fluorescent UV Black Lite bulbs, with approximately 1" between<br />
each bulb. There is 4" between the bulbs and the negatives. All bulbs are controlled by<br />
an on/off toggle switch. You can purchase these bulbs inexpensively. See the Resources<br />
section in the Appendices.<br />
Gonzalez’s Gum Bichromate Workflow:<br />
• Layer #1 – Magenta Negative– at 1:2 gum to sensitizer ratio<br />
Exposed for approximately 4 minutes and develop for 1 hour.<br />
• Layer#2 – Yellow Negative - at 1:2 gum to sensitizer ratio<br />
Exposed for approximately 4 minutes and developed for 1 hour.<br />
• Layer#3 – Cyan Negative - at 1:2 gum to sensitizer ratio<br />
Exposed for approximately 4 minutes and developed for 1 hour.<br />
• Layer #4 - Magenta Negative – at 1:1 gum to sensitizer ratio<br />
Exposed for approximately 4 minutes 45 seconds and developed for 1 hour.<br />
• Layer #5 Yellow Negative - at 1:1 gum to sensitizer ratio<br />
Exposed for approximately 4 minutes 45 seconds and developed for 1 hour.<br />
• Layer #6 Cyan Negative - at 1:1 gum to sensitizer ratio<br />
Exposed for approximately 4 minutes 45 seconds and developed for 1 hour.<br />
• Layer #7 - Magenta Negative – M at 2:1 gum to sensitizer ratio<br />
Exposed for approximately 2 minutes 30 seconds and developed for 1 hour.<br />
• Layer #8 Yellow Negative - at 2:1 gum to sensitizer ratio<br />
Exposed for approximately 2 minutes 30 seconds and developed for 1 hour.<br />
© Christopher James, The Book of Alternative Photographic Processes: 2 nd Edition, 2007
• Layer #9 Cyan Negative - at 2:1 gum to sensitizer ratio<br />
Exposed for approximately 2 minutes 30 seconds and developed for 1 hour.<br />
• Layer #10 Cyan Negative - at 2:1 gum to sensitizer ratio<br />
Exposed for approximately 2 minutes and developed for 1 hour.<br />
• Layer #11 Cyan Negative - at 2:1 gum to sensitizer ratio<br />
Exposed for approximately 2 minutes and developed for 1 hour.<br />
A TRADITIONAL <strong>GUM</strong> SENSITIZER EMULSION FORMULA<br />
• 9 ml of gum Arabic<br />
• 1/2" to 1" of artist’s grade watercolor pigment<br />
• 3 ml of saturated ammonium or potassium dichromate<br />
This is a time honored formula that you’ll find in a lot of literature and one that<br />
tends to clear very well due to the abundance of gum in the sensitizer. It does, however,<br />
provide a rather soft impression in each pass. Begin by adding the 9 ml of gum Arabic<br />
to a small plastic, paper, or glass container. Next add the watercolor paint and stir the<br />
paint into the gum until it's smooth. To sensitize this paste, add 3 ml of a saturated<br />
ammonium, or potassium, dichromate solution and stir it into solution. Please be aware<br />
that this formula is one of those old “horses” that has made its way from one source to<br />
another since the beginning of time (more or less). It works perfectly well but it isn’t, by<br />
any means, the last word in gum formulas. I like it for workshops because not many<br />
things go wrong with it. Each individual will adopt his or her own personal working<br />
styles, techniques and mixes to suit their intentions and their imagery. In addition, each<br />
person’s coating technique, washing style, or purist to non-purist approach, will be<br />
different according to who they are and what it is they need from the ratios and<br />
<strong>com</strong>binations of gum, paint, and dichromate. As they say in the gum labs, “It’s not how<br />
impeccable your formula is, it’s how you use it.”<br />
An Alternative Sensitizing Formula: “The 5-10-10”<br />
Here’s another formula that I like for large pieces because the sensitizer doesn’t<br />
dry as quickly and the details are pretty nice after each pass. This sensitizer formula<br />
© Christopher James, The Book of Alternative Photographic Processes: 2 nd Edition, 2007
makes a coating that is texturally smooth and a bit pale. As I said, it's a good choice for<br />
print details that are delicate and built up patiently over subsequent exposures. This is<br />
also great formula for darker colors used to increase shadow depth in gum and<br />
<strong>com</strong>bination processes such as gum and cyanotype.<br />
• 10 ml of gum arabic<br />
• 10 ml of warm distilled water<br />
• 1" or more of quality watercolor paint<br />
• 5 ml of ammonium or potassium dichromate<br />
Fig: <strong>16</strong> – 18 here (Ernestine Ruben, Big Bird, China, 2007 – gum)<br />
Cyanotype or Sensitizer Without Pigment First Pass<br />
When your paper has been correctly sized and hardened, and you have registered<br />
your negatives with the paper so that multiple applications of exposure are possible, it is<br />
time to coat the paper. If this is your first experience with gum, or if you have not had<br />
any success with the process before, choose one of the dichromate formulas above and<br />
prepare for success.<br />
Select the color(s) you wish to mix for the first coating. Generally, a lighter value<br />
is used first so that you can get a sense of where you will be going with the print. This<br />
lighter color is often used to print for the highlights in your negative. Measure a small<br />
amount of watercolor pigment into the gum and stir it well until it is thoroughly in<br />
solution. Now add the dichromate sensitizer under low light and stir slowly until all of<br />
the ingredients are melded together as one.<br />
It is not un<strong>com</strong>mon to make a first exposure using only the gum arabic and the<br />
sensitizer. This exposure, providing it is not too long, will give you a light tan-colored<br />
image of your negative. You may also elect to begin your first gum exposure on top of<br />
another non-silver process such as cyanotype. In this case, your initial base color will be<br />
blue and will take the place of the Cyan in your C-M-Y-K sequence.<br />
© Christopher James, The Book of Alternative Photographic Processes: 2 nd Edition, 2007
It is quite permissible to work under normal room light conditions, but I<br />
generally prefer to mix my colors under a brighter light so I can better evaluate them. It<br />
is also a good idea to paint a piece of the scrap paper with your intended emulsion and<br />
blow-dry it to quickly see what the color will look like when it’s not wet. Keep in mind<br />
that when you add the dichromate to the watercolor / gum arabic solution the color will<br />
change due to the orange color of the dichromate sensitizer. Don’t worry about this<br />
change, because the orange color will wash out during processing.<br />
ICON – 4 here (Brush Coating)<br />
COATING<br />
Coating a gum bichromate emulsion on paper is not difficult but requires<br />
practice. There are several ways to coat well. The standard technique is to work on dry,<br />
gelatin-sized and hardened, watercolor paper using a hake or foam brush. Mark the<br />
printing area with light pencil registration marks, and quickly brush-coat in even<br />
vertical, and then horizontal, strokes. Work fast, lightly, and smoothly until the<br />
emulsion just begins to be<strong>com</strong>e tacky. Select the width of your hake brush by the size of<br />
the area that you are coating. Obviously, a 1” brush is a more difficult tool to work with if<br />
your coating area is large. It is much less expensive to use a hardware store type of foam<br />
brush and this type of brush <strong>com</strong>es in wide assortment of sizes. I personally prefer<br />
working with the hake brush. This is because the hake brush absorbs less of the<br />
sensitizer emulsion and can be easily washed for additional use. Judy Siegel makes a<br />
case for using a foam brush saying that all you need to do is gently moisten the brush<br />
with a dropper of distilled water and gently blot it with a paper towel. She’s probably<br />
correct, but I’ll stick with the hake because it simply feels better in my hand. Again, be<br />
careful to paint lightly, to cover the entire area that will be printed, and to be graceful<br />
with the coating.<br />
When the emulsion begins to “set up” (looks and feels more gummy than liquid),<br />
take a clean, and dry, 4" hake brush and very gently whisk it back and forth until all of<br />
your application streaks have blended into a smooth coating. Barely touch the paper<br />
© Christopher James, The Book of Alternative Photographic Processes: 2 nd Edition, 2007
when doing this and you will appreciate the results. Of course, if your intention is to<br />
have a coating that is not smooth but more “painterly,” just go with your instincts and<br />
coat gesturally to your heart’s content. When you are satisfied with the look of the<br />
coated surface, allow the sensitized paper to dry in a low light level environment; don’t<br />
force-dry it with a hairdryer unless you have it set on a cool. Write down all of the<br />
technical information, such as the coating formula, paint amounts, and type, date, time<br />
of exposure, and stage of the print. Write this information also on the back of the paper<br />
for reference. Gum printing is about strategy and acquired knowledge more than<br />
intuition and impulse.<br />
Fig: <strong>16</strong> – 19 here (Melissa Good, Occupancy / Vacancy – 1998 - gum)<br />
An Alternative Wet Coating Technique<br />
An alternative method of coating is to initially soak the prepared paper in room<br />
temperature water. After removing your paper from the water bath, gently blot it until it<br />
is slightly damp with no visible water reflection on the surface. Be careful not to abuse<br />
the paper’s fibers when blotting. Coat the paper in exactly same manner as you would<br />
with dry paper. You should notice a smoother coating, and will probably find it<br />
unnecessary to use the 4" hake brush for evening the emulsion coating. Dry the coated<br />
paper in a low-light environment, or force-dry the print with a hairdryer set on a cool<br />
setting. It is a good idea to contact print immediately after the paper’s fresh emulsion<br />
has dried. The wet coating method will give you a somewhat lighter image, which is<br />
perfectly fine because you will be building your image over time with multiple<br />
applications.<br />
An Alternative Spray Coating Method<br />
For really large gum bichromate pieces, you might want to investigate the<br />
possibility of spray coating your sensitizer. The proportions are identical to the smaller<br />
print sensitizer formulas… you just use a lot more of the stuff and it gets increasingly<br />
expensive. Don’t even think about this unless you are willing to build a ventilation spray<br />
booth with great ventilation, are willing to wear a full haz-mat body suit with goggles<br />
© Christopher James, The Book of Alternative Photographic Processes: 2 nd Edition, 2007
and dual-respirator, and are all alone. I wouldn’t dream of spray coating in a group<br />
experience due to the danger of dichromate contamination.<br />
ICON – 5 here, (Contact Printing Frame Icon)<br />
EXPOSING <strong>THE</strong> NEGATIVES<br />
It is pointless to attempt, or re<strong>com</strong>mend, a uniform gum “standard” for<br />
exposure, as the variables are too numerous to define such a paradigm. These variables<br />
include density, quality, and type of pigment, humidity, time of day, negative density,<br />
strength of sensitizer, type of gum arabic, type of paper, and / or anything else that is a<br />
part of the process. There is no such thing as a “correct” exposure. As with most<br />
elements of this process, each part of the process is a variable that will change when<br />
another variable enters the equation. To <strong>com</strong>pound the problem, you need to know what<br />
the exposure time will be as checking on the print during the exposure will tell you next<br />
to nothing about how things are going.<br />
The exposure must be made, as in every alternative processes, with a UV light<br />
source such as the sun, a 1000 watt quart lamp, or a hellaciously expensive graphic arts,<br />
vacuum frame, exposure unit with a 3000 watt ultra violet light source. I really like<br />
these units but they are really only practical for an institution or the idle rich.<br />
The advantage of a mechanical UV printing unit is that it is consistent year<br />
round, 24 hours a day. Gum artists working with a UV exposure unit are able to<br />
calibrate their work with less guesswork and they can better evaluate exposure times in<br />
a deductive manner. Other gum artists like the more organic and casual ritual of<br />
printing in the light of the sun. In my experience, sunlight appears to provide a<br />
“crispier” image and a faster exposure time. As with all of the alternative processes, you<br />
will need a hinged-back contact-printing frame for printing. You can also use 2 sheets of<br />
plate glass… especially for larger works where a contact sheet is impractical.<br />
It might be a good idea when beginning a new print to make a test strip of<br />
exposures using a Stouffers 21-step-wedge. If you don’t have one of these, lay opaque<br />
© Christopher James, The Book of Alternative Photographic Processes: 2 nd Edition, 2007
strips over the contact frame holding the negative and sensitized paper. Remove a strip<br />
every 20 to 40 seconds during the exposure. When using dark colors it is not a bad idea<br />
to increase the number of test strips. Don’t forget to keep notes of what you are doing,<br />
including formula, time of day, and test strip times. After making the test exposures,<br />
develop the test print and you will have a pretty good idea what exposure times you<br />
should use that day. Remember that the gum process is an evolving one and is more like<br />
printmaking than like traditional silver gelatin printing. Make a plan for your printing<br />
strategies and be patient. Here are a some basic starting exposure times to work with…<br />
mind you, I have no idea what your variables will be so don’t be upset if my suggestion<br />
isn’t dead-on for you.<br />
• Sun – In the middle of the day, in the summer, with a light color and a perfect<br />
coating, on a beautifully sized and hardened paper, that is perfect for gum printing, with<br />
a negative that is not too dark, and not too light, in a geographical location that is<br />
temperate and bright, with a 1:1 gum to sensitizer ratio… I have no idea. You’re going to<br />
have to test.<br />
exposure.<br />
• 1000-watt quartz lamp – Figure about 15 to 20 minutes<br />
• Tony Gonzalez’s exposure unit – If you’re using his unit figure 2 – 5 minutes of<br />
• 3000 watt Graphic Arts Exposure Unit – Figure 4 to 8 minutes - I’ve made<br />
Naples yellow exposures with this unit in a minute and a half so it is always best to run a<br />
few tests before you get too involved in thinking you have the exposures wired in. Don’t<br />
forget, every single variable is going to change things.<br />
Fig <strong>16</strong> – 20 here, (Cheryl Harmeling, Brynmore, 1998, single coat gum)<br />
Printing a Single Color Gum with a Single Negative<br />
© Christopher James, The Book of Alternative Photographic Processes: 2 nd Edition, 2007
Quite often, especially in a workshop environment that <strong>com</strong>presses many<br />
alternative processes into a very short time, it is <strong>com</strong>mon to demonstrate the techniques<br />
of gum with a single negative. This is a cost-effective, and time-efficient, method of<br />
illustrating how the gum bichromate process works without taking the time to produce<br />
multiple densities with a <strong>com</strong>plete set of C-M-Y-K negative separations.<br />
By this point you should be getting a good idea of how to think about gum<br />
printing so I’ll not take a great amount of time discussing single coat strategies.<br />
Essentially, you’re going to be using a single negative throughout the process. To get any<br />
kind of exposure diversity you’ll have to switch up the following variables; gum to<br />
sensitizer ratio, choice of colors going from lightest to darkest, length of exposure times,<br />
and amount of water in the sensitizer.<br />
In order to penetrate the highlight densities of your negative, make your first<br />
exposure a fairly lengthy one so that the highlight details will show. You may also refer<br />
to an earlier mention of printing with only a 1:1 ratio of gum Arabic and dichromate (no<br />
pigment) in order to lay down a tan-colored base to show highlight detail.<br />
In a single negative / single color gum it is advisable to make the coatings thinner<br />
and less sensitive rather than use a normal sensitizer mix, playing with the ratio theories<br />
mentioned above. On subsequent exposures you can increase the ratio of gum to<br />
dichromate, back to the standard, adjusting your elements as you see the need. One<br />
thing to keep in mind when making a gum print from a single negative is that you do not<br />
want to print for the finished image on a single pass. The reason for this is that your<br />
shadows will block up. It’s better to parcel out exposure time over several exposures,<br />
each taking a percentage of the total time necessary to <strong>com</strong>plete the finished density.<br />
Again, keep notes on everything you do.<br />
A Simple Single Negative Strategy<br />
This is really basic but it does the job of letting you teach yourself the process. I’m<br />
going to keep this vague purposely because I want you to delve into the chapter and look<br />
for the answers. If you are brand new to this technique and have one contact negative to<br />
© Christopher James, The Book of Alternative Photographic Processes: 2 nd Edition, 2007
play with, here is a possible strategy for you. First make sure that you have performed<br />
the gelatin sizing and hardening process perfectly. Now, try printing a single negative<br />
with a longish exposure and a small amount of paint. Then, for a second pass, after<br />
washing and drying the first pass, use a lot of pigment and a short exposure. For a third<br />
color pass, try using the right amount of paint, with the right amount of exposure. You<br />
should end up with your first good-looking gum print.<br />
A Dichromate First-Step Strategy From the Past<br />
A caveat: Although I haven’t done this gum variation it sounds like it might be<br />
fun and a good solution for going on a gum printing vacation in the wilderness with predichromated<br />
sensitized paper, a bottle of gum Arabic and a few tubes of paint… and<br />
making gum prints.<br />
A while ago I heard about a technique that Robert Demachy and some old time<br />
Gummists used to do. It’s a different approach to gum bichromate printing and it works<br />
in an odd kind of way. Begin by gelatin sizing and hardening your paper as you would<br />
normally. Then make up a saturated solution of potassium dichromate (10% - 13%) and<br />
coat it directly on your dry paper. The light level should be pretty low but the paper,<br />
once dry, will keep for a long time.<br />
When you are ready to print, make up your gum and pigment formula and, if you<br />
think the solution is too thick, add distilled water in place of the dichromate… since it is<br />
already on the paper. Then all you do is expose and wash-develop in the normal manner.<br />
ICON – 7 here, (Sink Set Up)<br />
SINK SET UP FOR <strong>GUM</strong> BICHROMATE<br />
Tray #1: A very clean tray filled with clean water<br />
A soft hake brush for gently feathering the print during washing<br />
© Christopher James, The Book of Alternative Photographic Processes: 2 nd Edition, 2007
Tray #2: A 1 % solution of potassium metabisulfite for clearing highlights and<br />
intensifying color values if needed.<br />
Tray #2: If you use potassium metabisulfite you will need to have a Tray #3 for a<br />
30-minute final wash in cool running water. If you opt to spray the potassium<br />
metabisulfite on the freshly washed print, you will need the tray #3 as well.<br />
Fig <strong>16</strong> - 21 here, (Lisa Elmaleh, The Long Goodbye, 2006 – gum)<br />
WASHING & CLEARING<br />
Development of the exposed gum print is very simple. You only need fresh water<br />
to <strong>com</strong>plete the process... however, there are a few things you need to pay attention to.<br />
Following exposure, immerse your paper in a tray, of ambient temperature water,<br />
that is larger than your paper. If the water is too hot you will unwittingly erase subtle<br />
details. If the water is too cold, the clearing will take forever. Gently agitate the paper,<br />
face down, for about 30 seconds and then very carefully change your water… holding on<br />
to the edge of your paper so that it stays still during the change. Place the print face<br />
down in the new fresh water bath and leave it alone.<br />
The unexposed areas of the image will soften and drop gently to the bottom of the<br />
tray. If you agitate aggressively or run water on the surface of the emulsion you will<br />
wreak havoc on wet and fragile details in the image. Look across the paper’s surface<br />
after your highlights have cleared and you will see a distinct bas-relief of the image. This<br />
relief exists because the exposed (hardened) areas of the image are still on the paper and<br />
swollen with water. The unexposed portions of the image will be lying peacefully on the<br />
bottom of your wash tray… providing your exposure was correct. If you exposed for too<br />
short a time, everything will fall off the paper. If you exposed for too long a time,<br />
nothing will.<br />
In my experience, light colors will yield a perfectly developed print within 10 to 15<br />
minutes. Black pigment prints will take much longer to clear than will prints with lighter<br />
© Christopher James, The Book of Alternative Photographic Processes: 2 nd Edition, 2007
colors. Single exposures with very thin colors such as Naples Yellow or Davy’s Gray may<br />
take only minutes to clear. Clear means that the highlights are paper-base clean and the<br />
well-exposed shadow values have tonal delineation and detail.<br />
Often you will initially see nice separation within your shadow details only to<br />
have them float away or drip off your print's surface. This indicates that you are close to<br />
having a correct exposure time but those particular areas simply haven’t had enough<br />
exposure yet. Don’t throw away the print. Wash it well, dry it and recoat with the same<br />
or a different color, and expose the negative again for a slightly longer time.<br />
Prints that have been overexposed will show less contrast, flat highlights, or<br />
blocking in the shadows. Making a bath of 15 ml of ammonia, or household bleach, to a<br />
liter of water, can often repair these flaws. Be careful because this bath is very efficient<br />
at removing a lot of detail in a hurry, especially if the solution is hot. This particular<br />
remedy often be<strong>com</strong>es a technique, like spraying your cyanotypes with a mist of Tilex®<br />
toilet bowl cleaner for an unusual reticulated effect. If you are not into really aggressive<br />
gum printing (and some people live for that effect), I would simply re-do the print.<br />
Another method for clearing heavily stained or overexposed prints is simply to let<br />
them soak overnight. Again, if you underexpose the print you only have to dry it, recoat<br />
it, register, and reprint the same color and negative. Your exposure on your second<br />
“pass” will likely require less time to achieve the effect you were going for in the original<br />
exposure because you will be building upon a layer of detail that already exists.<br />
Personally, I prefer a series of small exposures to one big exposure, but this is just a<br />
matter of personal taste and workflow.<br />
Stopping Development and Re-Exposing<br />
There will be times when you may not want to develop the print to <strong>com</strong>pletion or,<br />
conversely, when you wish to produce an image that is significantly different from one<br />
where you left the print to gently soak for a total clearing of the highlights. In<strong>com</strong>plete<br />
development, where you leave a good deal of original color behind (especially in the<br />
highlights), can be achieved by stopping the development about halfway through and<br />
© Christopher James, The Book of Alternative Photographic Processes: 2 nd Edition, 2007
laying the paper flat, face up, on a blotting surface. If you hang it to dry, the colors will<br />
run. If you decide to abruptly stop development in progress, because you like the way it<br />
looks, you can harden the image by re-exposing the paper to UV light after it has dried.<br />
Forced Wash-Development<br />
On the other hand, forced development of the print, where you wish to eliminate<br />
or transform detail, can be achieved by running water directly on specific areas of the<br />
print. You may also change the way a print will look by using a brush, gloved finger or<br />
etching tool to mark in the soft and swollen pigment. Remember, in the wet state the<br />
emulsion is very sensitive to abrasion and abrasion is not always something to avoid. I<br />
have used a <strong>com</strong>mercial handheld garden sprayer, the type that allows you to adjust<br />
water stream pressure and flow size, to “draw” into the soft emulsion. Use your<br />
imagination and have a good time with the options. If the end result is a mess, then<br />
chalk it up to experience and see if you can use the knowledge in a positive way. The<br />
fundamental wisdom of this is that the relationship of exposure and development<br />
depends upon a good marriage between the gum and the dichromate. The paint is the<br />
“unrequited suitor” and only stays in the relationship if the gum hardens and refuses to<br />
wash away.<br />
A FEW WORDS: CONVENTIONAL WISDOM & STAINING<br />
One of the “old rules” stipulates that a greater concentration of paint than<br />
“normal” (whatever that means) will result in the staining in your print’s highlights. I<br />
have generally found that a greater concentration of paint in the emulsion will actually<br />
have the opposite effect and will result in less staining. Judy Seigel confirms this point in<br />
Issue #2 of her excellent, but sadly no longer published, Post-Factory Photography<br />
Journal. Judy is still doing reprints however and if you want to have a <strong>com</strong>plete set they<br />
are available.<br />
For many years, I have been laying multiple gum arabic washes, with batik<br />
resists, on watercolor papers prior to making my watercolor paintings. By doing this I<br />
was able to paint and then return to specific sections with a wet brush to pull away<br />
painted pigment and expose highlights. This was possible because the paint was sitting<br />
© Christopher James, The Book of Alternative Photographic Processes: 2 nd Edition, 2007
on the gum Arabic rather than in paper’s fibers. It made sense, the extra paint would not<br />
be a significant factor in staining when sitting in a gum arabic solution. In fact, I have<br />
always considered extra pigment (more than an 1”, but not so much that flaking occurrs)<br />
as a quasi filter, resulting in cleaner values and less stain potential. Be aware that a<br />
greater concentration of paint may also result in a shorter tonal scale, higher print<br />
contrast, and possible flaking.<br />
Fig: 13 - 22 here (Christopher James, Sisters, Takaragawa Baths, Japan – 1986watercolor<br />
and gum Arabic)<br />
The Relationship of Sizing - Color - Staining<br />
There is a relationship between the sizing formula you select and the final colors<br />
and highlight tonalities in the print. A hardened gelatin sizing, which allows for the<br />
successful clearing of highlights, will occasionally hold fast to the potassium, or<br />
ammonium, dichromate and stain your image. This result, in some cases, is a yellow<br />
tinting of lighter values within the print. These yellowish flaws can generally be cleared<br />
with a potassium or sodium metabisulfite bath following the wash-development… but<br />
there is a better solution to this problem; a fresh water rinse directly after the 5 minute<br />
Glyoxal hardening of your gelatin sizing. (See the Paper chapter)<br />
Rinsing After Glyoxal Hardening To Prevent Staining<br />
After the (5 minute) Glyoxal (Stage #2 in the Sizing and Hardening paper<br />
preparation for gum bichromate) is allowed to permeate the gelatin sized paper<br />
<strong>com</strong>pletely, it should be rinsed for 5 minutes in a fresh, cool, water bath before it is hung<br />
to dry on a line. This removes excess Glyoxal from the surface of the paper. If you avoid<br />
doing this step, the paper may turn a little yellow-beige in the highlights down the road<br />
… sometimes even before you use the paper for an exposure.<br />
Clearing Stains with 1% Potassium Metabisulfite<br />
In the event that you have dichromate stains in your highlights or borders (the<br />
tan color) you may clear them out with a simple 1% solution of potassium metabisulfite.<br />
Simply mix together 10 grams of potassium metabisulfite into 1000 ml of distilled<br />
© Christopher James, The Book of Alternative Photographic Processes: 2 nd Edition, 2007
water. Prints can be immersed or you may elect to spray the solution on the surface of a<br />
damp print. You might even consider selectively painting the potassium metabisulfite on<br />
problem areas. You can try sodium metabisulfite if you are low on potassium<br />
metabisulfite. You can also try potassium alum but this chemical may not help the<br />
archival intentions you have for your image. In any event, this clearing step, and<br />
subsequent wash, will be your final ones after all of your color impressions have been<br />
made.<br />
Clear the print in the potassium metabisulfite bath until the stain goes away and<br />
then wash it for 30 minutes in clean running water. Be cautious of the percentage<br />
concentrations of the metabisulfite because they it may be more aggressive than you had<br />
anticipated. Also, don’t use a sodium bisulfite bath as it softens the gum too much. Be<br />
sure to do a test piece before <strong>com</strong>mitting your print to a clearing bath and adjust the<br />
percentage strength as necessary. I suspect the 1% will work fine as long as your stains<br />
are not caused by over-exposure… in which case you are out of luck.<br />
You may also spot-clear with this solution using a small brush. If you notice that<br />
your emulsion has be<strong>com</strong>e fragile in the potassium metabisulfite clearing bath, you may<br />
want to consider drying the print and going to the final wash later on. If all attempts to<br />
clear your gum print have failed you can try a few things in the next printing session to<br />
avoid the same problem.<br />
Fig: <strong>16</strong> – 23 here (Stefanie London, Tulips, 1989 – gum and mixed media)<br />
TRIOUBLE SHOOTING <strong>GUM</strong> BICHROMATE:<br />
Note: Any of these suggestions may be disregarded if they don’t fit your working style.<br />
First Rule of Fixing Gum Bichromate Problems<br />
Many of the solutions for gum problems are mentioned in the earlier sections of<br />
this chapter. There are a lot of things to consider when tracking down gum vexations<br />
and this next section will deal with a lot of them. However, there is a rule… When<br />
hunting for remedies to problems… ONLY FIX ONE THING AT A TIME.<br />
© Christopher James, The Book of Alternative Photographic Processes: 2 nd Edition, 2007
Sizing<br />
If you are experiencing staining, the very first thing I look at is my gelatin sizing<br />
and hardening materials and technique. Did I take shortcuts? Did I make do with what I<br />
had rather than use the correct solutions? Fix this part of your gum technique and you<br />
are pretty much assured of eliminating the biggest staining problem. While you’re at this<br />
thought, you might also consider using a different variety of paper. One more time…<br />
simply because it really does prevent the problem of yellow staining most of the time.<br />
After you glyoxal-harden your gelatin for 5 minutes, rinse the paper in cool running<br />
water for 5 minutes and line dry. Yes, I know, that was more than one change at a time.<br />
Paint<br />
Try duplicating your technique with a different brand of paint. Always use the<br />
highest quality watercolors you can buy. Student-grade watercolors often have little<br />
quality to speak of and will often end up staining your print or washing out in splotches.<br />
Some colors are particularly tough to clear and personally I’ve had problems with<br />
greens. When I want a green I will generally mix a safe primary blue and a yellow rather<br />
than opt for the tube green. I will also lean towards greens that I trust and that always<br />
clear well, such as, Winsor & Newton’s Oxide of Chromium.<br />
Add Pigment<br />
You might want to try adding more pigment to the sensitizer. This often is the<br />
first fix I’ll attempt and it does work… in spite of the nasty things people on the alt pro<br />
discussion groups say about the idea.<br />
Gum Arabic<br />
Another fix is to try using a higher grade (a more clear variety) of gum Arabic, or<br />
add a little more of it to your sensitizer formula.<br />
Dichromates<br />
Try re-mixing a fresh dichromate in case of contamination, using less dichromate<br />
in the sensitizer mix. In my experience, potassium dichromate (which is slower than<br />
© Christopher James, The Book of Alternative Photographic Processes: 2 nd Edition, 2007
ammonium dichromate) demonstrates evidence of staining less than ammonium<br />
dichromate.<br />
Changing Exposure Time<br />
You might consider changing your specific color exposure times (See Tony<br />
Gonzalez workflow in this chapter) for multiple, and shorter, exposures.<br />
Fig <strong>16</strong> – 24 here, (Cig Harvey, In You I Taste God, From the Icon Series, 2006 – white<br />
gum bichromate and encaustic)<br />
Curve & Color Layer<br />
Try using the custom curve and color layer described in this chapter. Simply<br />
having a negative that is less difficult to print will often eliminate the subsequent<br />
staining of your image.<br />
The Last Resort<br />
There is a chance that everything you are doing process wise is correct and that<br />
you simply need a new negative. Then again, perhaps it’s time to wave the white flag and<br />
give up on the one you’re using for this process. This begs for the Pictorico OHP solution<br />
to the problem. Last, but not least, you can be upbeat about the entire experience, think<br />
about how much fun gum printing is, and start all over again. You might also consider<br />
using the print as a base for another process or a canvas for you to paint, paste, and play<br />
on.<br />
First Impressions: Cyanotype First Pass<br />
If you are having a hard time establishing a foundation for your gum print you<br />
might want to try one of my favorite techniques… consider making a cyanotype as your<br />
first color impression. It provides a strong and finely detailed blue (or some other color<br />
if you tone it) and gives a fine visual map to work upon. You may also consider making a<br />
gum “pass” on top of a platinum or palladium print if you want to raise some eyebrows.<br />
Actually, this <strong>com</strong>bination was quite popular with many pictorialists in the early part of<br />
the century. The additional gum bichromate step helps bring out and define <strong>com</strong>plex<br />
© Christopher James, The Book of Alternative Photographic Processes: 2 nd Edition, 2007
shadow details and often provides additional depth to the image. If you intend to try<br />
this, begin with a brief green or blue gum exposure as Steiglitz did.<br />
To Darken an Image<br />
Perhaps the solution is to simply repeat the negative, in registration, but with a<br />
less intensive exposure. You can expose for a shorter time, add a little water to your<br />
sensitizer, try a darker paint, a lighter version of the negative… especially if it’s a digital<br />
negative, just adjust your curves. Also try a <strong>com</strong>plementary color, or a little more<br />
dichromate in the formula. If you add more dichromate to the sensitizer mix you will<br />
experience a reduction of contrast and an increase in your exposure time. Adding more<br />
pigment to your sensitizer, which may initially seem like a good idea, may or may not<br />
work and the success of this choice will depend on a few other variables.<br />
To Lighten an Image<br />
The easiest solution to this problem is to use a lighter color or to dilute your<br />
sensitizer formula with a little water. You can expose your print for a shorter exposure<br />
but that really isn’t the best approach to the problem because you want the exposure to<br />
be <strong>com</strong>plete enough to harden everything in the print that needs hardening. Printing a<br />
lighter, or dilute, color is better than under-exposing. Short exposures will often yield<br />
more contrast because only the thinnest parts of the negative, your shadows, will react<br />
to the hardening effects of UV exposure, i.e., more of the pigment will remain<br />
unhardened during the exposure and will wash out during the wash-development.<br />
Using less dichromate in the formula will result in a solution that is slower<br />
(reduced sensitivity) and has more contrast because only shadows will print-out. You<br />
may lighten the entire image by using less pigment in the formula and this will result in<br />
less contrast and possibly some unwanted tonalities in your highlights.<br />
The cave person approach to the problem would be to wash the image in very hot<br />
water or try using a 5% solution of potassium metabisulfite, or ammonia.<br />
© Christopher James, The Book of Alternative Photographic Processes: 2 nd Edition, 2007
To Increase Shadow Density Without Changing Highlights<br />
The first thing I would do in this situation would be to make sure my negative set<br />
would ac<strong>com</strong>plish this task for me. If you’re impatient, try decreasing the exposure<br />
times of subsequent coatings. You may also try using less dichromate in the formula.<br />
Also try adding proportionately less pigment, by half, to each subsequent formula and<br />
exposure. This allows shadows to build slowly and may help minimize staining in the<br />
highlights. Many alternative gum artists will add more pigment to subsequent coatings<br />
to increase contrast. If you have the time, try both methods and determine which works<br />
best for you.<br />
To Enhance Highlights Without Blocking the Shadows<br />
Is your gelatin sizing and hardening technique imperfect? This could be a reason<br />
your shadows are blocking. Is your negative set right for your formula and exposure<br />
time? Those are the first questions I would ask and then I would make a quick print and<br />
see if I could fix the problem by adding additional gum to the sensitizer formula. Next,<br />
try a decrease in the amount of watercolor pigment you add to your sensitizer and<br />
modestly increase the exposure time. Both of these options will result in less contrast in<br />
the print. You can also achieve a full tonal range by altering the amount of pigment<br />
added to each additional coating but the success of this tactic will be dependent on<br />
several other factors.<br />
To Reduce Contrast<br />
Use lighter colors, use potassium dichromate instead of ammonium dichromate<br />
in the sensitizer, dilute the ammonium dichromate, use a higher concentration of<br />
dichromate sensitizer and decrease the amount of pigment, expose longer, and / or<br />
develop for less time. Dilute the sensitizer with gum or water. To tone down colors, try<br />
using their <strong>com</strong>plements, instead of immediately reaching for a tube of black watercolor<br />
paint.<br />
If the Highlights Will Not Print at All<br />
This isn’t unusual, especially if you are using a pinhole camera or making your<br />
negative set with ortho film. The first thing I would re<strong>com</strong>mend would be “flashing”<br />
© Christopher James, The Book of Alternative Photographic Processes: 2 nd Edition, 2007
your entire image area without a negative in the contact printing frame… with only a 1:1<br />
sensitizer coating of gum arabic and dichromate. Expose quickly, and you should be able<br />
to inspect the exposure (as there is not paint in the formula) looking for a “whisper” in<br />
the highlights. Eliminating the color will make your highlights a tan color. And will, if<br />
you get the exposure right, give you some highlight definition.<br />
A Full Color Inventory<br />
Some gum artists like to make up their color and gum emulsions in larger batches<br />
and store them in Tupperware® or urine sample containers from the local HMO health<br />
provider. This allows you to establish a color inventory and save time. Urine sample<br />
containers are great since most have an embossed graduate scale on the side and a very<br />
secure screw cap. Next time you go in for a physical check-up, pick up a few for free. Do<br />
not add the dichromate yet. The dichromate is added just before you intend to use the<br />
color. Keep the proportions of gum to color the same as when mixing small batches, i.e.,<br />
50 ml of gum to a 15 ml tube of watercolor paint. This is not a recipe set in stone. Your<br />
gum, and the type of paint that you select, will dictate the proportions, and that will take<br />
a little testing. You are seeking a solution, so that when the sensitizer is added, and the<br />
exposure is correct, your print will clear quickly and easily with no staining.<br />
Make Color Charts<br />
Each new paper, paint type, sensitizer, sizing, hardener, and emulsion will show<br />
you a different look. Write this information on swatches, cut them into slide size shapes,<br />
and keep them in a slide sheet to use as a reference chart.<br />
Try Painting on Gum Emulsions<br />
Try painting on gum emulsions in selected areas of the print, i.e. eyes, clothing,<br />
lips, and so forth, instead of total paper coverage in the traditional manner. This allows<br />
you to add specific areas of color without affecting the entire print. To avoid a hard edge<br />
on the selective color, wet a fan-shaped watercolor brush in clean water and lightly drag<br />
it along the edge of the recently applied selected color before it dries. This "feathering"<br />
creates a softer edge line.<br />
© Christopher James, The Book of Alternative Photographic Processes: 2 nd Edition, 2007
Create Area “Masks” Using Gum<br />
Painting an extra coating of gum Arabic in the areas you do not want <strong>com</strong>pletely<br />
colored after exposure works quite well. You can also use other masking devices in<br />
conjunction with the negative, such as rubylith film or Mylar®. I like gum because it<br />
washes out well and can be blended unlike rubylith. The image in the emulsion achieves<br />
its tonalities based on the degree of its hardening. The harder it is after exposure, the<br />
less of it washes off. The less it is hardened, the more of it washes off. Pay attention to<br />
your exposure times.<br />
Fig <strong>16</strong> - 25 here, Carmen Lizardo, Santo niño de antoche, 2006 - gum<br />
Exposure<br />
Exposure is controlled by several factors that you can keep in mind when creating<br />
print strategy. What is your source of UV light, the color of the pigment in the emulsion,<br />
the expected exposure time, the proportion of dichromate to gum, the thickness of the<br />
sensitizer, and the humidity?<br />
Some practitioners find that the higher the humidity, the shorter the exposure.<br />
Others report the opposite is true in their work… go figure. Best bet in my experience is<br />
to keep the humidity above 45% and below 65%. Long exposures will result in less<br />
contrast because more of the sensitizer be<strong>com</strong>es insoluble and refuses to clear in the<br />
wash-development. Shorter exposures work in the opposite manner. Use your exposure<br />
control as a minor player in this drama.<br />
Your Print Does Not Clear<br />
There are a few things that could have caused this problem. The first, and most<br />
<strong>com</strong>mon reason, is that the idea of spending time gelatin sizing and hardening didn’t<br />
appeal to you and so you thought that maybe, just this once, you could make a nice gum<br />
print without doing that step. Sorry, if your pigment goes into the paper’s fibers, rather<br />
than sit on the surface of the hardened gelatin sizing, it will grab on and stain the paper<br />
exactly as paint is supposed to do. Other things that could have caused the print not to<br />
clear include; over-exposure or you may have used too much hair dryer heat.<br />
© Christopher James, The Book of Alternative Photographic Processes: 2 nd Edition, 2007
Your Print Washes Down the Drain<br />
This is really simple… Only a few things could have gone wrong for the print to<br />
<strong>com</strong>pletely leave the paper during the wash-development. Nearly 85 % of the time the<br />
reason is that your exposure wasn’t long enough to harden the dichromate – gum –<br />
pigment sensitizer. The other three 5% reasons; you forgot to add the dichromate to the<br />
gum and pigment, the emulsion was still wet when you made your exposure, the gum<br />
Arabic that you used is impure or rotten… don’t forget, it is vegetable matter.<br />
Your Print's Surface Texture…<br />
If your surface looks uneven, you can take a piece of fine sandpaper or steel wool<br />
and gently give it a nice matte-luster finish by softly sanding the surface in small circular<br />
swirls.<br />
Emulsion Flaking Off<br />
This problem generally happens when you have used too much paint or your<br />
sensitized emulsion was too thick when you painted it on. Add a little water to the<br />
sensitizing formula to thin it out. This will soften your image for that pass and give you a<br />
chance for some fine details.<br />
Streaks in the Print<br />
This generally means that your coating technique needs some work. It isn’t fatal.<br />
Simply get some scrap paper, say the backs of prints that you don’t like, and practice<br />
coating them with a non- sensitized mix of gum and paint. You’ll be good at it soon.<br />
Another reason you might see streaking is that you didn’t attend to your print in the<br />
wash stage… in other words, it stayed in the water but not necessarily evenly and / or<br />
<strong>com</strong>pletely.<br />
Random Last Thoughts<br />
Take your time learning gum printing and enjoy the simplicity of the process as<br />
well as its often-maddening <strong>com</strong>plexity. Unless you wish to show evidence of working<br />
stress on the surface of your print, sometimes you just have to put the print face down in<br />
© Christopher James, The Book of Alternative Photographic Processes: 2 nd Edition, 2007
the water and do something else for a while (this will make sense later on). Gum<br />
bichromate is different from others in the alternative process genre and it is unhealthy<br />
for your creative self to think that there is a perfect way to do it. I write this even though<br />
I know of at least six gum printers who claim that their technique is sublime perfection<br />
and the "only way" the process can ever be performed. They are wrong. Being dogmatic<br />
about how to make a gum bichromate print is like telling a child that only blue crayons<br />
are acceptable for coloring a sky. The variables in gum printing are infinite and each<br />
individual’s intentions will never be exactly like another’s. Play and practice are the<br />
secrets to be<strong>com</strong>ing a good gummist. Play with the myriad elements of gum and practice<br />
to make your personal technique <strong>com</strong>patible with your intentions… so that it works for<br />
you.<br />
© Christopher James, The Book of Alternative Photographic Processes: 2 nd Edition, 2007