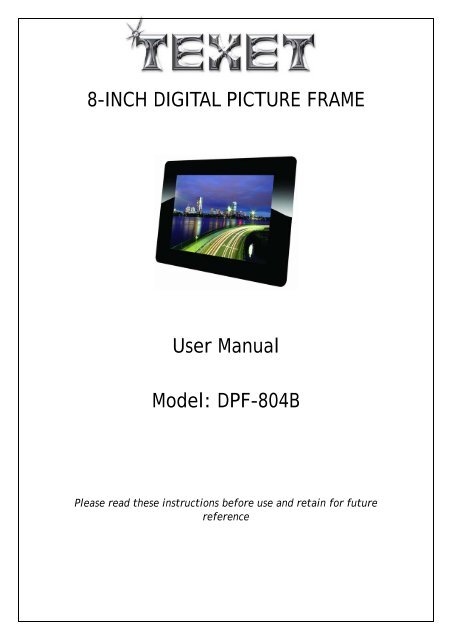
8-INCH DIGITAL PICTURE FRAME User Manual Model: DPF ... - Texet
8-INCH DIGITAL PICTURE FRAME User Manual Model: DPF ... - Texet
8-INCH DIGITAL PICTURE FRAME User Manual Model: DPF ... - Texet

Create successful ePaper yourself
Turn your PDF publications into a flip-book with our unique Google optimized e-Paper software.
8-<strong>INCH</strong> <strong>DIGITAL</strong> <strong>PICTURE</strong> <strong>FRAME</strong><br />
<strong>User</strong> <strong>Manual</strong><br />
<strong>Model</strong>: <strong>DPF</strong>-804B<br />
Please read these instructions before use and retain for future<br />
reference
Table of Contents<br />
1.INTRODUCTION……………..………………………………………………………………………………………………………………...3<br />
2. SAFETY PRECAUTION………………………….…………………………………………………………..…………………….……….4<br />
3. PRODUCT INTRODUCTION……………………………..……………………………………………..……………….…...….…...5<br />
3.1 MAIN FEATURES…………………………………………………………………………………….…….5<br />
3.2 PACKAGE CONTENTS ..………………………………………………………….……………….....5<br />
3.3 PRODUCT LAYOUT ………………………………………………………………………………...…..5<br />
4 OPERATIONS……………………………………………………………………………….……………………………….…….………....6<br />
4.1 INSERTING MEMORY………………………………………………………………………………………6<br />
4.2 THUMBNAILS…………………………………………………………………………………….………….7<br />
4.3 SLIDESHOW…………………………………………………………………………………………….…….7<br />
4.4 VIEW………………………………………………………………………………………….….………………9<br />
4.5 STORAGE…………………………………………………………………………………….……….………10<br />
4.6 SETTINGS…………………………………………………………………………….……….……….…..10<br />
5 TROUBLESHOOTING………………………………………………………………………………..……………..……….……………15<br />
6 TECHNICAL SPECIFICATIONS …………………………………………………………………..………….…………….…………15<br />
7 RECYCLING ELECTRICAL PRODUCTS……………………………………………………..………………………….…………15<br />
For further information on the TEXET range, please refer to www.texet.com<br />
PAGE 2<br />
PAGE
1. INTRODUCTION<br />
Thank you for purchasing TEXET’S Digital Photo Frame (<strong>DPF</strong>-804B). This unit lets you view<br />
digital pictures directly from your camera’s memory cards. No computer, digital camera or<br />
Internet connection is needed. You can display a single picture or a slide-show of all the<br />
pictures on a memory card.<br />
Before operating the unit, please read this manual thoroughly, and retain it for future<br />
reference. This manual will help you use many of the exciting and useful features that will<br />
make your Digital Picture Frame viewing more enjoyable.<br />
This Digital Picture Frame is compatible with the following popular memory card formats: SD,<br />
MultiMediaCardPicture, Memory Stick® Cards and USB flash drives.<br />
PAGE 3
2. SAFETY PRECAUTIONS<br />
• FOR HOUSEHOLD AND INDOOR USE ONLY<br />
• PLACE THE APPLIANCE ON A FLAT, STABLE SURFACE WITH ADEQUATE VENTILATION AND AWAY<br />
FROM OTHER SOURCES OF HEAT. MINIMUM DISTANCES AROUND THE APPLIANCE FOR ADEQUATE<br />
VENTILATION IS 5CM. DO NOT COVER OR RESTRICT VENTILATION OPENINGS.<br />
• CHILDREN SHOULD BE SUPERVISED TO ENSURE THEY DO NOT PLAY WITH THE APPLIANCE, AND THE<br />
APPLIANCE AND CABLE SHOULD BE KEPT COMPLETELY OUT OF REACH OF YOUNG CHILDREN.<br />
• THIS APPLIANCE IS NOT DESIGNED FOR USE BY CHILDREN, OR PERSONS WITH REDUCED PHYSICAL,<br />
SENSORY OR MENTAL CAPABILITIES, AND SHOULD NOT BE USED BY SUCH PERSONS UNLESS THEY<br />
CAN DO SO SAFELY. WHERE NECESSARY, SUCH PERSONS (OR ANYONE WITH LACK OF EXPERIENCE<br />
OR KNOWLEDGE) SHOULD FIRST BE GIVEN SUPERVISION OR INSTRUCTION CONCERNING USE OF<br />
THE APPLIANCE BY A PERSON RESPONSIBLE FOR THEIR SAFETY.<br />
• FULLY UNWIND THE CABLE BEFORE PLUGGING IN AND ENSURE THE CABLE IS POSITIONED AWAY<br />
FROM AREAS WHERE IT IS LIKELY TO GET DAMAGED OR CAUSE A TRIP HAZARD.<br />
• THE OUTPUT CORD OF THIS MAINS ADAPTOR CANNOT BE REPLACED. IN THE EVENT OF DAMAGE<br />
TO THE CABLE, JACK PLUG OR ADAPTOR, THE ENTIRE ADAPTOR UNIT SHOULD BE REPLACED.<br />
• CONNECTIONS MUST ONLY BE MADE VIA THE MAINS ADAPTOR SUPPLIED, NEVER CONNECT THE<br />
APPLIANCE DIRECTLY TO THE 240V MAINS SUPPLY.<br />
• NEVER USE THE ADAPTER SUPPLIED WITH ANY OTHER APPLIANCE.<br />
• THE MAINS ADAPTOR WILL BECOME WARM IN USE; DO NOT COVER OR PLACE ON OR NEAR<br />
SURFACES THAT COULD BE AFFECTED BY HEAT SUCH AS TABLE TOPS AND CARPETS.<br />
• DO NOT PULL ON CABLE TO DISCONNECT FROM MAINS SUPPLY.<br />
• KEEP APPLIANCE, CABLE, MAINS ADAPTOR PLUG DRY AND AWAY FROM AREAS WHERE IT IS LIKELY<br />
TO GET SPLASHED. AVOID USING IN HOT, HUMID ENVIRONMENTS.<br />
• DO NOT PLACE ITEMS WITH NAKED FLAMES OR CONTAINERS WITH LIQUIDS ON THIS APPLIANCE.<br />
• SWITCH OFF AND UNPLUG WHEN NOT IN USE AND BEFORE CLEANING OR SERVICING THE<br />
APPLIANCE. SERVICING OF THIS APPLIANCE MUST ONLY BE CARRIED OUT BY A QUALIFIED<br />
ELECTRICIAN.<br />
• ALWAYS ENSURE THE MAINS ADAPTOR PLUG IS READILY UNPLUGGABLE – DO NOT USE WITH<br />
‘LOCKABLE’ SOCKETS OR PERMANENTLY WIRE TO MAINS.<br />
The lightning flash with arrow-head<br />
symbol, within an equilateral triangle,<br />
is intended to alert the user to the<br />
presence of un-insulated "dangerous<br />
voltage" within the product's enclosure<br />
that may be of sufficient magnitude to<br />
constitute a risk of electric shock.<br />
WARNING: TO REDUCE THE RISK OF ELECTRIC<br />
SHOCK, DO NOT REMOVE COVER (OR BACK).<br />
NO USER SERVICEABLE PARTS INSIDE, REFER<br />
SERVICING TO QUALIFIED SERVICE<br />
PERSONNEL.<br />
PAGE<br />
4<br />
The exclamation point within an<br />
equilateral triangle is intended to alert<br />
the user to presence of important<br />
operating and maintenance (servicing)<br />
instructions in the literature<br />
accompanying the appliance
3. PRODUCT INTRODUCTION<br />
3.1 Main Features<br />
� 8” TFT-LCD panel supports 800 x 600 pixels<br />
� Image Format supported: JPEG<br />
� Supports MMC, SD, MS, memory cards and USB flash drives<br />
� Supports thumbnail browse and slideshow playback<br />
� Picture enhancement: rotate, zoom and slideshow effects.<br />
� OSD Languages: English, French, Italian, Spanish, Dutch, German, Russian, Portuguese.<br />
3.2 Package Contents<br />
Please check the gift box packing of the digital photo frame and ensure the following are included.<br />
-Digital Picture Frame<br />
-<strong>User</strong> <strong>Manual</strong><br />
-AC/DC Adapter<br />
3.3 Product Layout<br />
PAGE 5
1. (Power) button<br />
� Power on / off button when the adaptor is connected to the digital photo frame.<br />
2. Menu button<br />
� Displays the “settings” menu for the currently active screen.<br />
3. (Play/Pause/OK) button<br />
� When viewing the “thumbnails” screen, returns to the “slideshow” display mode.<br />
� When in slideshow display mode, play or pause the slideshow.<br />
� When in “settings” mode, confirms the current menu selection.<br />
4. (Right) button<br />
� When viewing the “thumbnails” screen or in “single photo” display mode, scrolls<br />
forward through the available photos.<br />
� When in “settings” mode, displays the submenu clockwise for the currently selected<br />
option.<br />
5. (Left) button<br />
� When viewing the “thumbnails” screen or in “single photo” display mode, scrolls<br />
backwards through the available photos.<br />
� When in “settings” mode, displays the submenu anticlockwise for the currently<br />
selected option.<br />
6. (Up) button<br />
� When viewing the “thumbnails” screen display mode, scrolls up through the available<br />
photos.<br />
� When in “settings” mode, scrolls backwards through the available menu options.<br />
7. (Down) button<br />
� When viewing the “thumbnails” screen display mode, scrolls down through the<br />
available photos.<br />
� When in “settings” mode, scrolls forward through the available menu options.<br />
8. Memory card slot<br />
� Slot for inserting the memory card to view photos.<br />
9. USB slot<br />
� Connector for inserting USB flash drive.<br />
4. OPERATIONS<br />
4.1 Inserting memory cards<br />
Insert the memory card or memory stick into the 3-in-1-card slot on the right side of the frame.<br />
PAGE 6
Please kindly note that only SD/MMC/MS memory cards and USB flash drives are compatible<br />
with this digital photo frame.<br />
4.2 Thumbnails<br />
Thumbnail can be activated in the main menu or other sub-menus by selecting .<br />
Thumbnail mode supports 6 picture-view once a time.<br />
4.3 Slideshow<br />
� Press Left/Right/Up/Down to navigate the thumbnail photo.<br />
� Press Play/Pause to view the photo view; refer to view photo section<br />
� Press Menu to open OSD menu.<br />
� Enter Slideshow mode; refer to Slideshow section.<br />
� Press Menu key to close OSD menu or stay 5 seconds to exit automatically.<br />
� Press direction keys to select photo. The selected photo is highlighted in yellow<br />
frame.<br />
� After power on, digital photo frame starts playing photos from the memory card if it is<br />
inserted.<br />
During the slideshow play, photo-taken date will be shown on the bottom-right. If you do<br />
not want this showing, then press Menu button, corresponding menus will be shown on the<br />
top of the screen, go to “settings” and press Play/Pause to confirm, scroll down to “photo<br />
PAGE 7
date” and using Left/Right button to select “No” to cancel the date showing.<br />
� Press Menu key to open the OSD menu and the following images; and press Menu key again<br />
to close OSD menu or stay 5 seconds to exit automatically.<br />
1, Select the View icon , press Play/Pause to confirm to view single photo, and<br />
lLft/Right to scroll photos in the memory card. Press Play/Pause to return to slideshow mode.<br />
2, Select the interval icon , press play/pause to confirm, then a slide-interval window<br />
will pop up. Press the Left/Right to increase/decrease the time interval. Press Play/Pause button<br />
to confirm and return to Slideshow.<br />
3, Select the storage icon , press Play/Pause button to choose photos from the currently<br />
inserted card to view.<br />
4, Select the settings icon , press Play/Pause button to enter the setting menu and then<br />
PAGE 8
set up your favorite interface.<br />
4.4 View<br />
5, Select the thumbnail icon , press Play/Pause button to return to thumbnail interface.<br />
In slideshow mode, press Play/Pause button; or in Thumbnail mode, press Play/Pause twice<br />
to enter single photo view mode.<br />
In Photo view mode, press direction keys to view next photo.<br />
� Press Menu to open OSD menu and press Menu key again to close OSD menu or stay 5 seconds<br />
to exit automatically.<br />
� Press Menu button, following images will be shown:<br />
1, Select the rotate icon , press Play/Pause button to confirm current picture.<br />
2, Select the zoom in icon , press Play/Pause button to zoom in the current picture.<br />
3, Select the zoom out icon , press Play/Pause button to zoom out the currently picture.<br />
4, Select the storage icon , press Play/Pause button to choose photos from the currently<br />
inserted card to view.<br />
PAGE 9
5, Select the settings icon , press Play/Pause button to enter the setting menu and then<br />
set up your favorite interface.<br />
4.5 Storage<br />
6, Select the thumbnail icon , press Play/Pause button to return to thumbnail interface.<br />
� In main menu, navigate Left/Right to “Storage” and press Play/Pause to enter.<br />
� Navigate to the storage type you prefer (SD/MMC, MS, USB) and press Play/Pause to<br />
confirm the selected memory card.<br />
� Note<br />
1. The “Storage Source” will be valid only when memory card is inserted.<br />
2. Memory card shown in grey indicates the type of memory card not inserted or no photos<br />
available in the card.<br />
3. Memory card type in blue indicates the type of memory card inserted and there are photos<br />
available in the memory card.<br />
4.6 Settings<br />
� In main menu, Navigate Left/Right to “Settings” and press Play/Pause to enter into<br />
settings. Settings including Language, Time Format, Date Format, Full image, LCD<br />
Brightness, Photo Date, Restore Defaults, System Information and Return.<br />
PAGE 10
1. OSD language<br />
There are 8 languages supported: French, English, Italian, Spanish, Dutch, German,<br />
Russian, Portuguese.<br />
� Navigate Up/Down to “Language”, and press Left/Right to select other languages.<br />
� Press Play/Pause to confirm the language you select and the language used in the <strong>DPF</strong><br />
will be changed to the one you just selected.<br />
2. Time Format<br />
Time formats: 24-hour/12-hour mode<br />
� Navigate Up/Down to “Time Format”. The right-screen shows the current time format.<br />
For example, the current format is 24-hour mode.<br />
� Navigate Left/Right to select other formats if necessary and press OK; for example, the<br />
following format is 12-hour mode.<br />
PAGE 11
3. Date Format<br />
� Navigate Up/Down to “Date Format”. The right-screen shows the current format; for<br />
example, the current format is yyyy/mm/dd.<br />
� Three date formats: yyyy/mm/dd, mm/dd/yyyy, dd/mm/yyyy are available. Navigate<br />
Left/Right to select the desired the time format and press “OK”.<br />
4. Full Image<br />
� Navigate Up/Down to “Full Image”, which will support “Original” and “Full” photo<br />
show.<br />
� All photos will be shown on the display in their original resolution and if picture is 16:9<br />
PAGE 12
then there will be black strips on the pictures. Press Left/Right to choose “Full”,<br />
photos will be displayed in full screen, and distortion of the photo may occur.<br />
5. LCD Brightness<br />
Supports 8-level brightness.<br />
� Navigate Up/Down to “LCD Brightness”. The right-screen shows the current brightness<br />
level, e. g. the current setting is the 5 th level of brightness.<br />
� Press Left/Right to adjust brightness. Press left to decrease and right to increase<br />
brightness.<br />
� After set, press OK to confirm and return to the photo date menu.<br />
6. Photo Date<br />
� Navigate Up/Down to “Photo Date”. Navigate Left/Right to show or hide the date on<br />
the photo.<br />
PAGE 13
� After set, press OK to confirm and return the photo date menu.<br />
7. Restore Defualts<br />
� Navigate Up/Down to “Restore Defaults”. Press OK and select “Yes” to reset all settings<br />
to the factory default setting. Select “No” to cancel.<br />
8. System Information<br />
� Navigate Up/Down to “System Information”, the current firmware version will be shown.<br />
The first “0000” means current year; second “0000” means current date of the firmware<br />
version. For example, V1.3.1.2010.0426 means the firmware done on that date.<br />
9. Return<br />
� Navigate Up/Down to Return and press OK to return to Main menu.<br />
PAGE 14
5. TROUBLESHOOTING<br />
If the photo frame does not function correctly, you need to read the following information<br />
carefully. Before requesting for technical assistance, you need to verify the following matters:<br />
Symptom or Problem Possible cause / solution<br />
No power<br />
1, The AC adaptor is not completely inserted into a working electrical outlet.<br />
2, The power connector is not completely inserted into the unit.<br />
No Start-up screen Insert a supported memory card<br />
The File doesn’t play<br />
Make sure there is at least one supported photo file on the memory card.<br />
Compatible Photo format: JPEG<br />
No pictures appear on the<br />
screen<br />
Why do some pictures load<br />
faster than other pictures?<br />
1, Memory card or USB device is not inserted.<br />
2, No photos are in the memory card or the USB device.<br />
3, Incompatible file format.<br />
6. TECHNICAL SPECIFICATIONS<br />
4, Some digital cameras save images into non-standard formats. Please<br />
refer to the specifications in the operating manual of your camera.<br />
Higher resolution pictures load slower. Use pictures with lower resolution<br />
to speed up the loading time.<br />
Display Screen aspect ratio: 4:3<br />
Resolution: 800*600 pixels<br />
Power supply DC 5V 1200mA<br />
Power adaptor Input: 110 ~ 240V AC, 50/60Hz<br />
Output: DC5V 1200mA<br />
USB port USB 2.0<br />
Supports USB device<br />
Supported devices SD TM (Secure Digital Card), MMC TM (Multi Media<br />
Card), MS TM (Memory Stick)<br />
Supported photo format JPEG only<br />
Operating temperature 5℃ ~35℃<br />
7. RECYCLING ELECTRICAL PRODUCTS<br />
You can now recycle your waste electrical goods and in doing so help the environment.<br />
This symbol means an electrical product is designed for recycling when finished with.<br />
Visit www.recycle-more.co.uk, click on “bank locator” and enter your postcode to find your nearest<br />
recycling site.<br />
PAGE 15