

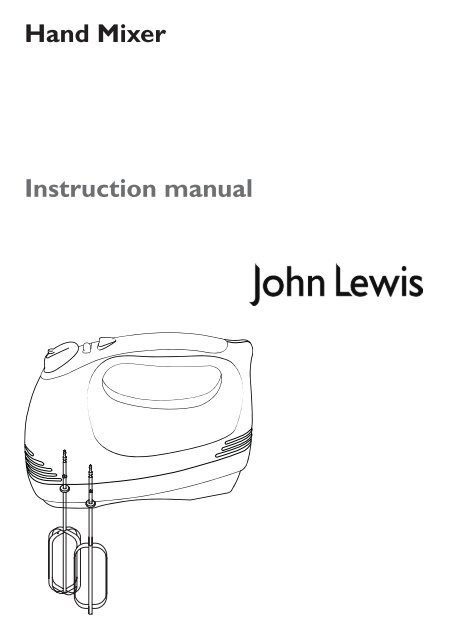
Hand Mixer Instruction manual
Hand Mixer Instruction manual
Hand Mixer Instruction manual

Create successful ePaper yourself
Turn your PDF publications into a flip-book with our unique Google optimized e-Paper software.
<strong>Hand</strong> <strong>Mixer</strong><br />
<strong>Instruction</strong> <strong>manual</strong>
Contents<br />
Description of the appliance<br />
Using your hand mixer<br />
Hints and tips<br />
Maintenance and cleaning<br />
Troubleshooting<br />
Electrical connection<br />
UK guarantee<br />
1<br />
Guide to using the<br />
instruction <strong>manual</strong><br />
The following symbols will be found<br />
in the text to guide you throughout<br />
the instructions:<br />
Safety instructions<br />
Hints and tips<br />
Environmental information<br />
This appliance complies with the<br />
basic requirements of Directives<br />
04/108/EEC (Electromagnetic<br />
Compatibility) and 06/95/EEC (Safety<br />
of domestic electrical appliances).
Important safety information<br />
It is most important that this instruction book should be retained with the<br />
appliance for future reference.<br />
These warnings have been provided in the interest of safety. You MUST read<br />
them carefully before using the appliance.<br />
If you are unsure of the meanings of these warnings contact the John Lewis<br />
branch from which you purchased the appliance.<br />
• To protect against fire, electric<br />
shock and injury to persons DO<br />
NOT IMMERSE CORD, plug or base<br />
unit in water or other liquids.<br />
• Close supervision is necessary<br />
when any appliance is used by or<br />
near children.<br />
• Unplug from the mains when not<br />
in use, before putting on or taking<br />
off parts and before cleaning.<br />
• Do not operate any appliance with<br />
a damaged cord or plug, or after<br />
the appliance malfunctions or has<br />
been damaged in any manner. Return<br />
appliance to the nearest John Lewis<br />
store.<br />
• Do not place on or near a hot gas<br />
or electric burner, or in a heated<br />
oven.<br />
• To avoid possibility of mixer being<br />
accidently pulled off work area,<br />
which could result in damage to the<br />
mixer or in personal injury, do not<br />
let cord hang over edge of table or<br />
counter.<br />
• To avoid damage to cord and<br />
possible fire or electrocution hazard,<br />
do not let cord contact hot surfaces.<br />
2<br />
• This appliance should not be used<br />
by adults or children whose lack of<br />
experience, product knowledge or<br />
disability might cause a hazard, unless<br />
they have been correctly instructed<br />
and are adequately supervised.<br />
• Children should always be<br />
supervised to ensure that they do<br />
not play with this product.<br />
• Always ensure that your hands are<br />
dry before removing the plug from<br />
the mains outlet. Never pull the<br />
plug out of the mains outlet by its<br />
lead.<br />
• To avoid injury or possible fire, do<br />
not cover the appliance when in use.<br />
• Do not connect this appliance to<br />
an external timer or remote control<br />
system.<br />
WARNING<br />
Polythene bags over the product or<br />
packaging may be dangerous. To avoid<br />
danger of suffocation, keep away<br />
from babies and children. These bags<br />
are not toys.
Use<br />
• Do not use the appliance if<br />
damaged. In the event of damage,<br />
discontinue use immediately. Return<br />
the appliance to your nearest John<br />
Lewis store.<br />
• In the event of a fault, return the<br />
appliance to your nearest John<br />
Lewis store. No repair should be<br />
attempted by the consumer.<br />
• Avoid contact with moving parts.<br />
Keep hands, hair, clothing, as well<br />
as spatulas and other utensils away<br />
from beaters during operation to<br />
reduce risk of injury to persons, and/<br />
or damage to the mixer.<br />
• Only use attachments sold with<br />
this appliance. Failure to do so may<br />
cause fire, electrical shock or risk of<br />
injury.<br />
• Do not use anywhere where the<br />
cord or mixer might come into<br />
contact with water while in use.<br />
• Do not use appliance for anything<br />
other than intended use.<br />
• The maximum operating time is<br />
5 minutes.<br />
• For household use only.<br />
• Do not use outdoors.<br />
• Save these instructions for future<br />
use.<br />
3<br />
Service<br />
• This product should only be repaired<br />
or serviced by an authorised<br />
service engineer and only genuine<br />
approved spare parts should be<br />
used.<br />
This symbol indicates that<br />
this product should not be treated<br />
as normal household waste and<br />
it should be recycled. John Lewis<br />
do not operate instore take back,<br />
but as members of the Distributor<br />
Take Back scheme have funded<br />
the development and upgrade of<br />
recycling facilities across the UK.<br />
Please take it to your nearest<br />
collection facility or for further<br />
details contact your local council<br />
or visit www.recycle-more.co.uk
Description of the appliance<br />
1. Beater release button with<br />
low/high speed switch<br />
2. Speed control switch<br />
1-5 speed selector with optional<br />
low/high switch to make 10 different<br />
speed settings<br />
3. Power boost button<br />
Allows you to increase the mixing<br />
speed to the maximum power level<br />
from any speed setting<br />
4. Stainless steel beaters<br />
Beaters are easy to clean and<br />
dishwasher safe<br />
5. Stainless steel dough hooks<br />
Suitable for kneading dough and are<br />
dishwasher safe<br />
5. Retractable cord (not shown)<br />
1<br />
2 3<br />
4<br />
4<br />
5
Using your<br />
hand mixer<br />
Before using the first<br />
time<br />
Wash all detachable parts before<br />
using for the first time; this will<br />
remove any dust or residue remaining<br />
from the manufacturing process. (See<br />
page 8 for maintenance and cleaning).<br />
Turning mixer<br />
On/Off<br />
To turn the mixer on, slide the<br />
switch from the ‘0’ (off) position<br />
to the desired speed (1-5). This<br />
mixer features an optional Low/High<br />
switch to make 10 different speed<br />
settings. This switch is located on<br />
the eject button. To turn the mixer<br />
off, slide the switch back to the ‘0’<br />
(off) position.<br />
Lo Hi<br />
Eject<br />
0 1 2 3 4 5<br />
Burst<br />
5<br />
Inserting beaters<br />
Unplug the mixer and set the speed<br />
switch to the ‘0’ (off) position.<br />
Insert beaters one at a time with<br />
a slight twisting action and push in<br />
until they click into place.<br />
Inserting dough<br />
hooks<br />
Unplug mixer and set the speed<br />
switch to the ‘0’ (off) position.<br />
Insert the dough hook with collar<br />
into the larger hole. Push in until it<br />
clicks into place.<br />
Insert the dough hook without<br />
collar into the smaller hole. Push in<br />
until it clicks into place.<br />
Removing beaters<br />
and dough hooks<br />
After mixing and before cleaning the<br />
mixer; set the speed switch to ‘0’<br />
(off) position and unplug it from the<br />
mains. Press the beater eject button<br />
and remove beaters or dough hooks<br />
from the mixer ready for cleaning.
Quick<br />
reference chart<br />
Mixing techniques<br />
The hand mixer should always be<br />
set on the lowest speed when you<br />
start mixing.<br />
As you add ingredients, the<br />
consistency of the mixture can<br />
change. It may be advisable to use<br />
the Power Boost feature for short<br />
intervals and/or to select a higher<br />
setting.<br />
Speed Function Use<br />
1 Low Blend To combine liquids,<br />
fold in dry ingredients<br />
such as egg whites and<br />
whipped cream<br />
Knead Mix dough<br />
2 Stir To prepare sauces,<br />
gravies, puddings and<br />
muffins<br />
3 Medium Mix To prepare batters and<br />
mixes<br />
4 Beat To cream butter and<br />
sugar, make biscuit<br />
mixes, cake mixes<br />
and icings<br />
5 High Whip To whip light and fluffy<br />
mixtures, cream, beat<br />
eggs and mash potatoes<br />
Power boost To obtain the maximum<br />
power level from any<br />
speed setting for tough<br />
mixing tasks<br />
6
Hints and tips<br />
• Always read entire recipe and<br />
measure all ingredients before<br />
beginning the mixing process.<br />
• For best results, do not measure<br />
flour directly from the bag. Pour<br />
into a container or bowl, scoop out<br />
the flour and level with the back of a<br />
knife or spatula. For flour stored in<br />
a container, stir before measuring.<br />
• Eggs, butter and cheese combine<br />
better at room temperature.<br />
• Remove butter for recipe first and<br />
cut into 1.5cm pieces, then measure<br />
out remaining ingredients for recipe.<br />
This will speed up the warming<br />
process. Do not warm butter for<br />
baking unless instructed to do so.<br />
Melted butter will change the final<br />
product.<br />
• The best cheesecakes are made<br />
when the eggs and cream cheese are<br />
a similar room temperature. While<br />
the hand mixer can easily mix cold<br />
cream cheese, the trick is not to<br />
add too much air, which can cause<br />
cracking.<br />
• For best results, use heavy cream,<br />
cold from the refrigerator, for<br />
whipped cream.<br />
• For best results, whip egg whites<br />
in a clean stainless steel or glass<br />
mixing bowl. If available, use a<br />
copper mixing bowl.<br />
• Chocolate chips, nuts, raisins, etc<br />
can be added using speeds 1 or 2 of<br />
your hand mixer.<br />
7<br />
• To separate eggs for any recipe,<br />
break them one at a time into a<br />
small bowl, gently remove yolks, then<br />
transfer egg whites to a clean mixing<br />
bowl. If a yolk breaks into the egg<br />
white, reserve that one for another<br />
use. Just a drop of egg yolk in the<br />
white will prevent the whites from<br />
whipping properly.<br />
• To achieve the best volume when<br />
whipping egg whites, the mixing<br />
bowl and beaters must be clean<br />
and free of any fat, oil, etc. (Plastic<br />
bowls are not recommended for<br />
whipping egg whites.) The presence<br />
of any trace of fat or oil will prevent<br />
the egg whites from increasing in<br />
volume. Wash bowl and attachments<br />
thoroughly before beginning again.<br />
• Occasionally ingredients may stick<br />
to the sides of the mixing bowl.<br />
When this occurs, turn mixer off and<br />
scrape the sides of the bowl with a<br />
rubber spatula.
Maintenance<br />
and cleaning<br />
Always disconnect the<br />
hand mixer from the mains before<br />
cleaning.<br />
Never put the motor housing<br />
in water or other liquid to clean.<br />
1. Wash the beaters and dough<br />
hooks after each use in hot, soapy<br />
water or in a dishwasher.<br />
2. Wipe housing with a damp cloth<br />
or sponge. Do not use abrasive<br />
cleaners, which could damage the<br />
surface.<br />
8
Electrical<br />
connection<br />
Your John Lewis <strong>Hand</strong> <strong>Mixer</strong><br />
includes a BS 13 amp moulded<br />
(fused) mains plug on the supply<br />
cord. Should it be necessary at any<br />
stage to remove this moulded plug<br />
and replace it with a re-wireable BS<br />
13 amp mains plug, the re-wiring<br />
should be completed as follows:<br />
(NB: The moulded plug should be<br />
disposed of safely)<br />
Class I (1) earthed appliance<br />
The wires in the mains lead are<br />
coloured in accordance with the<br />
following code:<br />
GREEN & YELLOW = EARTH<br />
BLUE = NEUTRAL<br />
BROWN = LIVE<br />
9<br />
As the colours of the wire may<br />
not correspond with the coloured<br />
markings identifying the terminals in<br />
your plug, proceed as follows:<br />
- The wire which is coloured GREEN<br />
and YELLOW must be connected<br />
to the terminal in the plug which<br />
is marked with the letter E or<br />
SYMBOL or coloured green, yellow<br />
or green and yellow.<br />
- The wire which is coloured BLUE<br />
must be connected to the terminal<br />
which is marked with the letter N<br />
or coloured black.<br />
- The wire which is coloured<br />
BROWN must be connected to the<br />
terminal which is marked with the<br />
letter L or coloured red.<br />
With this appliance, if a 13 amp<br />
plug is used, a 13 amp fuse should<br />
be fitted. If any other type of plug<br />
is used, a 10 amp fuse must be<br />
fitted, either in the plug or at the<br />
distribution board.<br />
WARNING: A cut off plug inserted<br />
into a 13 amp socket is a serious<br />
safety (shock) hazard. Ensure that<br />
the cut off plug is disposed of safely.
UK guarantee<br />
For 2 years in respect of defects<br />
found to be due to faulty workmanship<br />
or material. Proof of purchase is<br />
required for validity of the guarantee.<br />
This guarantee is no longer valid if<br />
the damage has been caused by<br />
accidental damage, alteration, poor<br />
maintenance or repair by any<br />
unauthorised persons.<br />
This guarantee in no way affects<br />
your statutory rights.<br />
John Lewis partnership<br />
171 Victoria Street<br />
London SWIE 5NN<br />
www.johnlewis.com<br />
10
