VRA novice pack 2002 - NSW Rogaining Association
VRA novice pack 2002 - NSW Rogaining Association
VRA novice pack 2002 - NSW Rogaining Association

You also want an ePaper? Increase the reach of your titles
YUMPU automatically turns print PDFs into web optimized ePapers that Google loves.
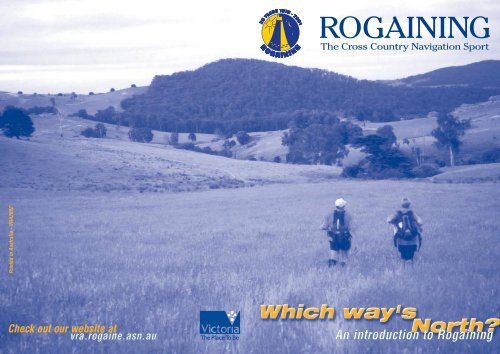
ROGAINING<br />
The Cross Country Navigation Sport<br />
Printed in Australia - <strong>VRA</strong><strong>2002</strong><br />
Check out our website at<br />
vra.rogaine.asn.au<br />
An introduction to <strong>Rogaining</strong>
Victorian <strong>Rogaining</strong> <strong>Association</strong> Inc. (A547)<br />
ABN 66 307 914 547<br />
PO Box 30<br />
Collins Street West 8007 Victoria<br />
Australia<br />
web vra.rogaine.asn.au<br />
Funding for the production of this booklet was provided by Sport and Recreation Victoria, through the State<br />
Sporting <strong>Association</strong> Development Program. SRV is gratefully acknowledged for their on-going financial<br />
assistance in the development of rogaining in Victoria.<br />
This booklet has been developed, prepared and revised by experienced rogainers over the past few years.<br />
This version was produced in <strong>2002</strong> in an attempt to make it more user friendly and easier to handle. If you<br />
have any comments or suggestions that you think will help future users of this booklet please direct them to<br />
Chris Solnordal or any member of the <strong>VRA</strong> committee. Contact details are available at the <strong>VRA</strong> website<br />
vra.rogaine.asn.au<br />
This booklet is copyright ©<strong>2002</strong> Victorian <strong>Rogaining</strong> <strong>Association</strong> Inc (A547).<br />
Contents Introduction ............................................4<br />
What is rogaining ....................................5<br />
Rogaine preparation (check list) ..................7<br />
<strong>Rogaining</strong> gear (check list) ........................8<br />
Equipment ............................................10<br />
Clothing ..................................................................................10<br />
Food ........................................................................................11<br />
Water ......................................................................................12<br />
First Aid Kit..............................................................................12<br />
Whistle, pencil and compass ..................................................12<br />
Torch........................................................................................13<br />
Miscellaneous..........................................................................14<br />
Foot preparation ......................................................................14<br />
Blisters ....................................................................................14<br />
Preparation for the rogaine ........................15<br />
Entering the event....................................................................15<br />
The night before ......................................................................15<br />
The morning of the event ........................................................16<br />
Travelling to the event..............................................................16<br />
Upon arrival at the event ..........................17<br />
Registration ............................................................................17<br />
Route Planning ........................................................................17<br />
At the Start ..............................................................................19<br />
On the course ........................................20<br />
The scorecard..........................................................................20<br />
The checkpoint ........................................................................20<br />
At the checkpoint ....................................................................21<br />
If you are lost ..........................................................................21<br />
If someone is injured ..............................................................22<br />
If there is a bushfire ................................................................22<br />
Navigation ............................................23<br />
Reading maps..........................................................................23<br />
Features of a compass ............................................................25<br />
Grid north and magnetic north ................................................25<br />
Using the compass ................................................................26<br />
Following a bearing ................................................................27<br />
Navigation hints ......................................................................27<br />
Checkpoint description sheet terminology ..............................28<br />
Night navigation ......................................................................28<br />
Final words............................................29<br />
Rules of rogaining ..................................30<br />
Page 2 Which way’s north An introduction to <strong>Rogaining</strong> Victorian <strong>Rogaining</strong> <strong>Association</strong><br />
Victorian <strong>Rogaining</strong> <strong>Association</strong> Which way’s north An introduction to <strong>Rogaining</strong> Page 3
Introduction<br />
Welcome to the sport of rogaining!<br />
The purpose of this book is to give you some idea of what to<br />
expect on your first rogaine, and also to provide some guidance<br />
in the techniques and skills required to be a happy rogainer.<br />
Inside you will find ideas on equipment, clothing, food, route<br />
planning and navigation, plus a few handy hints to help you on<br />
your way.<br />
There are two checklists pages 7, 8 and 9 to assist you in your<br />
pre-event planning. Later in the book, specific aspects of the<br />
sport are fleshed out in greater detail, so that you can find out<br />
more information in particular areas of interest.<br />
What is <strong>Rogaining</strong><br />
Many and varied definitions abound, including “competition<br />
bushwalking”, “marathon orienteering”, “a car rally on foot”,<br />
“an Easter-egg hunt for grown-ups” and “Rugged Outdoor<br />
Group Activity Involving Navigation and Endurance”. All these<br />
definitions emphasise competition, but many participants<br />
come along simply to enjoy walking in a new area and explore<br />
the bush, flowers, and views. There are also a lot of family<br />
teams who use rogaining as a way of introducing their<br />
children to the wonders of the outdoors in a controlled setting.<br />
In fact, the name rogaine was derived from the names of the<br />
three people who thought it up - ROd, GAIl, and NEil Phillips –<br />
and has nothing to do with competition or endurance.<br />
So, what’s it all about<br />
And who knows, by the time you’ve finished reading, you may<br />
even be able to answer that frequently asked question: –<br />
“Which way’s north!”<br />
<strong>Rogaining</strong> is a sport in which teams of 2-5 participants travel<br />
across country on foot to locate checkpoints using nothing but<br />
a map and magnetic compass to guide them. There is no set<br />
course, but rather a time limit. Therefore teams can visit as<br />
many or as few checkpoints as they wish, in any order they<br />
wish, as long as they get back to the administration tent before<br />
the time limit is reached. Events are typically between 6 and 24<br />
hours in duration, so they reflect either a day bushwalk (6-12<br />
hours) or a weekend hike (24 hours). Some events allow use of<br />
bikes (cyclogaines), skis (snogaines), or even canoes<br />
(paddlogaines) to travel between checkpoints. Other events are<br />
held in metropolitan areas (metrogaines).<br />
This booklet is<br />
divided into the<br />
following sections<br />
Rogaine preparation (check list)<br />
<strong>Rogaining</strong> gear (check list)<br />
Equipment<br />
Preparation for the rogaine<br />
Upon arrival at the event<br />
On the course<br />
Navigation<br />
Final words<br />
Rules of rogaining<br />
Welcome to rogaining and see you on the course!<br />
After entering your first rogaine, details of the event location and<br />
other important information will be mailed to you one week<br />
before the event. The area utilised will usually be made up of a<br />
combination of forest and farmland. The terrain may be fairly<br />
flat or very steep, and the bush may be easy to travel through or<br />
quite dense, requiring much use of existing tracks. All this<br />
information will be provided in the final instructions.<br />
Once at the rogaine you will be given a topographic map of the<br />
event area with numbered circles marked on it. These circles<br />
show the location of the checkpoints, and the numbers indicate<br />
how many points each checkpoint is worth. You can visit as<br />
many or as few checkpoints as you like in the allotted time.<br />
Checkpoints can be visited in any order, but your team must<br />
always travel together. Maps are available two hours before the<br />
start of the rogaine, which gives your team plenty of time to<br />
plan which checkpoints to visit, and in which order. The<br />
objective is to accumulate as many points as you feel capable of<br />
and return to administration before time’s up. Points are<br />
deducted from your score for each minute your team is late.<br />
Page 4 Which way’s north An introduction to <strong>Rogaining</strong> Victorian <strong>Rogaining</strong> <strong>Association</strong><br />
Victorian <strong>Rogaining</strong> <strong>Association</strong> Which way’s north An introduction to <strong>Rogaining</strong> Page 5
What is a Rogaine<br />
continued<br />
At each checkpoint you will find an orange and white marker<br />
hanging in a tree or on a fence post. Attached to the marker is a<br />
punch, which you use to punch your team’s score card to prove<br />
that your team visited the checkpoint. Also on the marker is an<br />
intentions sheet, on which you must write your team number,<br />
the time, and the checkpoint you intend to visit next.<br />
The main administration area, start, and finish point of rogaines<br />
is called the Hash House. It is at the Hash House that you plan<br />
your route, set up a tent (if you’re staying overnight), and get<br />
hot food served up at just about any time during the event. The<br />
atmosphere is generally very social, and participants are<br />
encouraged to use the Hash House facilities as part of their<br />
rogaining experience.<br />
Put out clothes to wear to/on the event<br />
(see gear checklist on p8)<br />
Prepare food<br />
Ensure walking shoes are clean/soil<br />
free<br />
Fill water bottles<br />
Pack your day <strong>pack</strong><br />
Separate bag for other clothes, etc.<br />
Pack the car<br />
Check final instructions<br />
Work out how to get to the rogaine,<br />
and how long it will take<br />
Rogaine preparation<br />
p<br />
Pack<br />
the<br />
night<br />
before!<br />
Hearty<br />
breakfast<br />
that<br />
morning<br />
Ensure a nourishing meal for<br />
breakfast – you’ll need all the<br />
energy you can get!<br />
Twenty-four hour events<br />
Twelve hour events<br />
Six hour events<br />
These events generally start at midday Saturday and finish<br />
midday Sunday, and are run on weekends close to a full moon.<br />
A subsidised bus is provided by the <strong>VRA</strong> for transport to 24<br />
hour events and it is strongly recommended that competitors<br />
who intend to get little sleep use this bus.<br />
Twelve hour events generally start at midday Saturday and finish<br />
at midnight. Breakfast is served Sunday morning and<br />
competitors are encouraged to stay overnight to reduce the risk<br />
of fatigue driving home after the event.<br />
Shorter events usually start between 10 am and midday on either<br />
Saturday or Sunday. Food is provided at the Hash House an hour<br />
or so before the end of the event. Such events tend to be closer<br />
to Melbourne to allow enough time to travel home afterwards.<br />
As you approach the rogaine site,<br />
look at the terrain and note the<br />
topology and vegetation<br />
Colour-code the checkpoints to<br />
identify high scoring areas<br />
Determine a realistic distance for<br />
your team to travel<br />
Plan a proposed route, ensuring<br />
adequate short cuts back to the<br />
hash house<br />
Listen carefully for any clues, additional<br />
information, safety information, areas of<br />
thick vegetation, etc.<br />
Locate your team’s score card on the<br />
clothesline<br />
Synchronise your watch with the<br />
rogaining clock<br />
Travel<br />
to the<br />
rogaine<br />
Check<br />
in at<br />
Administration<br />
Plan<br />
your<br />
route<br />
Final<br />
preparations<br />
Pre-event<br />
briefing<br />
Have your team number, team first<br />
aid kit, whistles, car registration<br />
number, and any money owing<br />
Collect maps and checkpoint<br />
descriptions sheets<br />
Buy contact plastic (if needed) to<br />
protect your maps<br />
Check for any map and checkpoint<br />
description sheet alterations<br />
Eat and drink<br />
Pitch your tent if you’re staying<br />
overnight<br />
Get final gear ready and in day <strong>pack</strong><br />
Make sure pencil and compass are<br />
handy<br />
Determine who will look after the<br />
score card. Make sure you have<br />
somewhere safe to keep it<br />
Get your body ready – tape feet to<br />
minimize blisters, apply sunscreen, etc.<br />
Determine the direction you intend<br />
to go at the start<br />
GO!<br />
Page 6 Which way’s north An introduction to <strong>Rogaining</strong> Victorian <strong>Rogaining</strong> <strong>Association</strong><br />
Victorian <strong>Rogaining</strong> <strong>Association</strong> Which way’s north An introduction to <strong>Rogaining</strong> Page 7
<strong>Rogaining</strong> gear<br />
check list<br />
<strong>Rogaining</strong> gear<br />
check list continued<br />
Pre-rogaine<br />
preparation<br />
■ Coloured markers<br />
■ Contact plastic and scissors (to protect your map)<br />
or a map Bag<br />
■ Chairs<br />
■ Table<br />
■ Tent<br />
■ Sleeping bag and sleeping mat<br />
■ Full water bottles<br />
Items required for<br />
after the event<br />
■ Dry Shoes<br />
■ Complete change of clothes<br />
■ Towel<br />
■ Plate, cup and cutlery (for use at Hash House)<br />
■ Food for the trip home<br />
What to wear<br />
■ Comfortable shirt<br />
■ Long pants (not jeans), and/or shorts/gaiters<br />
■ Sun hat<br />
■ Clean runners or light hiking boots (avoid new shoes/boots)<br />
■ Watch<br />
First aid kit<br />
compulsory<br />
items<br />
■ linear compression bandage<br />
■ linear conforming bandage<br />
■ triangular bandage<br />
■ sticking plaster (Elastoplast or similar)<br />
■ <strong>VRA</strong> first aid sheet (available from Administration).<br />
What to take<br />
on the course<br />
Compulsory<br />
items<br />
Other items<br />
for all events<br />
■ First aid kit<br />
■ Whistle<br />
■ Pencil<br />
■ Magnetic compass<br />
■ Day <strong>pack</strong>/bum bag<br />
■ Water bottles (with 1-2 litre of water per person)<br />
■ Sunscreen<br />
■ Thermal pants<br />
■ Snacks/energy food<br />
■ Meals for on the course (if not using Hash House)<br />
■ Sun hat<br />
■ Waterproof jacket<br />
■ Toilet paper<br />
Other<br />
first aid<br />
suggestions<br />
■ pain killers<br />
■ tweezers<br />
■ small scissors<br />
■ antiseptic cream<br />
■ matches<br />
■ tapes (such as Leukoplast)<br />
■ electrolyte replacement powder<br />
■ blister plasters (Moleskin, Compeed, Second Skin)<br />
■ space blanket<br />
■ Vaseline<br />
Additional items for<br />
cold/wet/overnight events<br />
■ Torch<br />
■ Spare globe/batteries for torch<br />
■ Waterproof overpants<br />
■ Spare thermal top/jumper<br />
■ Beanie<br />
■ Gloves<br />
Page 8 Which way’s north An introduction to <strong>Rogaining</strong> Victorian <strong>Rogaining</strong> <strong>Association</strong><br />
Victorian <strong>Rogaining</strong> <strong>Association</strong> Which way’s north An introduction to <strong>Rogaining</strong> Page 9
EQUIPMENT<br />
T <strong>Rogaining</strong> Tip<br />
Each rogainer must carry<br />
• whistle<br />
• pencil<br />
• first aid kit<br />
(one per team)<br />
You could be prevented<br />
from starting if you don’t<br />
have these items<br />
It is also strongly<br />
recommended that each<br />
team member carries and<br />
knows how to use a<br />
magnetic compass<br />
Clothing<br />
No specialist equipment is required for <strong>Rogaining</strong>, just the basic<br />
stuff you would carry for a day bushwalk. Everything you take<br />
on the course should fit into a day <strong>pack</strong> or bum bag. A checklist<br />
of items to bring on the rogaines is shown on page 8, but more<br />
detail is given here.<br />
What you actually take on the day will depend on the weather,<br />
the terrain, the duration of the event, and your team’s route<br />
plan. However, please note that there are a few items that each<br />
rogainer must carry, for safety reasons. Without these items<br />
your team may be prevented from starting (see side bar).<br />
Rogaines are held throughout the year and are only cancelled on<br />
days of Total Fire Ban in the area. They are not cancelled if the<br />
weather is bad - that’s one of the challenges. Consequently,<br />
competitors must be prepared for a range of weather<br />
conditions, bearing in mind that warm sunny days can quickly<br />
turn into cold and wet nights. Clothing required depends on the<br />
weather, the vegetation, and the duration of the event.<br />
A comfortable, sturdy pair of runners or walking boots, with<br />
good socks is essential. You will need to wear long pants (not<br />
jeans) or shorts, a t–shirt or long–sleeved shirt, and a sun hat.<br />
Food<br />
T <strong>Rogaining</strong> Tip<br />
Some suggestions for<br />
food during the event are<br />
• Potatoes<br />
• Sandwiches<br />
• Fruit<br />
(<strong>pack</strong>ed in something<br />
to cushion it)<br />
• muesli bars<br />
• scroggin<br />
Ideally, the food should<br />
be light weight and also<br />
travel well in a <strong>pack</strong>.<br />
Carry-on-event food should be high in carbohydrate, tasty and<br />
easy to eat (not too dry or crumbly). Food is extremely<br />
important to maintain your energy levels during an event and<br />
also helps you to absorb water to avoid dehydration. You should<br />
be aiming to eat (and drink) regularly to maintain your energy<br />
levels. A rough guide is aiming to eat something small every<br />
hour during an event. Having foods that you like is important,<br />
so that you are likely to eat more whilst exercising.<br />
In the day or two before the event, you can prepare by making<br />
sure you eat well to build up your energy (glucogen) stores and<br />
also drink plenty of fluids. In the morning of the event, it is again<br />
important to eat well, preferably foods with a low Glycemic Index<br />
(GI). GI is a figure that denotes how fast the glucose is absorbed<br />
into the bloodstream. Pre-event you should be eating foods with<br />
a low GI, such as oats and complex carbohydrates, since this will<br />
then mean that the energy supplies from the food will be<br />
released slowly as the event proceeds.<br />
During the event, any carbohydrate food is okay, but probably<br />
again with a preference for low GI foods, so that there is a slow<br />
release of energy. If you are using high GI foods, such as jelly<br />
beans, bread and chocolate, then you should be eating these<br />
regularly so that you don’t get highs and lows of energy occurring.<br />
Some suggestions for food during the event are potatoes,<br />
sandwiches, fruit, muesli bars and scroggin. Ideally, the food<br />
should be light weight and also travel well in a <strong>pack</strong>.<br />
After the event, it is important to hydrate properly as soon as<br />
possible. High protein foods are also good to aid in muscle recovery.<br />
For 12 or 24 hour events you may need to carry a warm woollen<br />
or fleece jumper and thermal ‘long johns’ for when it cools off at<br />
night, and a water and wind proof jacket. Gloves and beanie are<br />
also important in cold weather, while gaiters protect legs from<br />
scratches and socks from grass seeds. Lycra clothing is also<br />
popular with some participants, as it helps prevent chafing.<br />
For shorter events (i.e. 6 and 8 hour events) you may not need<br />
extra warm or wet weather clothing, but be mindful that the<br />
weather can change unexpectedly.<br />
Also, take a change of clothes along for after the event - there’s<br />
nothing like pulling on a fresh pair of socks!<br />
Page 10 Which way’s north An introduction to <strong>Rogaining</strong> Victorian <strong>Rogaining</strong> <strong>Association</strong><br />
Victorian <strong>Rogaining</strong> <strong>Association</strong> Which way’s north An introduction to <strong>Rogaining</strong> Page 11
Water<br />
T <strong>Rogaining</strong> Tip<br />
Water<br />
Bring your water bottles<br />
to the event full of water<br />
Water points are marked<br />
on the map with a “W” or<br />
the symbol of a cup, and<br />
are usually numbered<br />
W1, W2, etc<br />
Plan a route that allows<br />
you to replenish your<br />
water supplies<br />
Do not drink from<br />
streams that originate in<br />
farmland, unless you<br />
purify the water first.<br />
Water is an essential item to carry on a rogaine. Dehydration is a<br />
major contributor to fatigue and as a general rule competitors<br />
should consume about one litre per hour during strenuous<br />
exercise. It’s also a good idea to “camel up” by drinking before<br />
you start exercising.<br />
You must never wait until you are thirsty before drinking - by<br />
then it’s too late, and you will already be dehydrated. Depending<br />
on the amount of water on the course and the temperature, you<br />
may need to carry 1-2 litres per person.<br />
The organisers will arrange for water drops on the course at<br />
which you can fill up with water. Fruit may also be provided at<br />
these points. In bush events, creeks may carry water that is<br />
suitable for drinking, however water running through farmland or<br />
originating in farmland is not safe to drink due to bacterial<br />
contamination.<br />
Check with organisers if you are unsure whether creeks on the<br />
course will have safe drinking water.<br />
Pencil<br />
Compass<br />
T <strong>Rogaining</strong> Tip<br />
Your compass should<br />
ideally have<br />
A long base plate<br />
A revolving needle housing<br />
Parallel lines marked on<br />
the revolving housing<br />
Graduations marked in<br />
degrees (not grads or mils)<br />
Luminescent markings<br />
for use at night<br />
A large magnifying window<br />
for viewing map details<br />
A pencil is required for marking intention sheets at checkpoints.<br />
Please do not use pens, as these are difficult to erase after the<br />
event. It is also a good idea to carry a spare pencil.<br />
Make sure you have a good quality liquid filled compass<br />
designed for use in the Southern Hemisphere. Things to look for<br />
when purchasing a compass are shown in the side bar, but<br />
most Silva/Suunto compasses are suitable.<br />
Compasses can be hired from Admin prior to events for a<br />
modest fee. A cash deposit will be required.<br />
First Aid Kit<br />
One first aid kit per team must be carried - this is mandatory.<br />
Minimum requirements in your team first aid kit are:<br />
■ one linear compression bandage<br />
■ one linear conforming bandage<br />
■ one triangular bandage<br />
■ sticking plaster (Elastoplast or similar)<br />
■ the <strong>VRA</strong> first aid sheet (available from Administration).<br />
These basic kits are available for purchase at Administration.<br />
Some other suggested items include pain killers, tweezers,<br />
antiseptic cream, emergency matches, space blanket, and sun<br />
screen. Also, electrolyte replacement powder can be useful for<br />
preventing or stopping muscle cramps. Further suggestions can<br />
be found in the checklist on page 9.<br />
Torch<br />
T <strong>Rogaining</strong> Tip<br />
A small penlight or LED<br />
torch may help save you<br />
on a short event if you<br />
get caught out after dark<br />
For night events, and just for safety on shorter events, you will<br />
need to carry a torch with spare batteries and a spare globe.<br />
Head-torches are very common these days as they allow<br />
hands–free operation while scrub bashing, eating or reading the<br />
map. Don’t feel you need an expensive torch though, as long as<br />
it’s reliable. A penlight torch is adequate at night to read the<br />
map. New LED headlamps are very convenient to use and<br />
generally sufficiently bright for walking through the bush – you<br />
may want to carry a brighter torch though for finding<br />
checkpoints at night.<br />
Whistle<br />
Each competitor is required to carry a whistle. Should you get<br />
into trouble and require assistance THREE sharp blasts on the<br />
whistle is the help signal. Any teams in the area are required to<br />
assist you should they hear this signal. It is also your duty to<br />
provide assistance should you hear someone blow their whistle.<br />
Page 12 Which way’s north An introduction to <strong>Rogaining</strong> Victorian <strong>Rogaining</strong> <strong>Association</strong><br />
Victorian <strong>Rogaining</strong> <strong>Association</strong> Which way’s north An introduction to <strong>Rogaining</strong> Page 13
Miscellaneous<br />
Foot Preparation<br />
Blisters<br />
T <strong>Rogaining</strong> Tip<br />
Wearing two pairs of<br />
socks,or double layer socks,<br />
helps prevent blisters<br />
Some people also carry a<br />
second pair of socks to<br />
change into during the event<br />
Take a specialist blister<br />
plaster such as Moleskin,<br />
Compeed or Second<br />
Skin, to fix blisters if they<br />
do form<br />
Remember to take with you on the course some sun screen,<br />
toilet paper, a watch, and a spare pencil. A map case, or else<br />
contact plastic (available for sale from Admin) will protect your<br />
map. Other useful items include highlighter pens for marking<br />
your map, scissors for map trimming, and a mess kit (plate,<br />
bowl, mug, knife, fork, spoon, tea–towel) to enjoy the culinary<br />
delights of the Hash House. If you intend to camp overnight at<br />
the Hash House you will need a tent and a warm sleeping bag<br />
and sleeping mat. Of course you don’t have to carry these with<br />
you on the event! A table and chairs can make route planning or<br />
eating more comfortable, but are by no means essential.<br />
If you travel 40 km in a rogaine with an average step of 0.8 m,<br />
you will take around 50,000 steps. For the average person with<br />
a day <strong>pack</strong> on, that’s a total impact of about 3,500 tonnes. It is<br />
thus important that you have a good, sturdy pair of runners or<br />
light hiking boots to wear. If you are prone to rolling your<br />
ankles, they can be strapped in the manner shown (Figure 1) to<br />
protect them from turning on uneven ground, but still allowing<br />
freedom of movement. The shoes you wear don’t have to be<br />
expensive, just sturdy and comfortable. There is nothing worse<br />
than getting blisters because your shoes don’t fit properly.<br />
Blisters are better prevented than treated, so if you feel a hot<br />
spot on your heel, cover it immediately with tape such as<br />
Leukosilk. Some people do this before the event start to prevent<br />
the hot spots.<br />
A Vaseline coating on the feet and between the toes also<br />
prevents rubbing and blisters, a trick employed by marathon<br />
runners for years. Good quality socks provide extra comfort and<br />
minimise rubbing. Talcum powder is great after the event to<br />
help the feet recover.<br />
Figure 1.<br />
Suggested<br />
method of taping<br />
feet<br />
PREPARATION FOR THE<br />
ROGAINE<br />
Entering the event<br />
T <strong>Rogaining</strong> Tip<br />
Entering a rogaine<br />
Event information and<br />
entry forms can be found<br />
on the <strong>VRA</strong> website<br />
You must be a member<br />
of a rogaining association<br />
to enter a <strong>VRA</strong> rogaine<br />
You can join the <strong>VRA</strong><br />
when you enter the<br />
rogaine. Just fill in the<br />
appropriate amount in the<br />
“membership” column<br />
Late fees are waived for<br />
team members who are<br />
entering for the first time<br />
Bring your final<br />
instructions to the event<br />
If you have any team<br />
changes then please<br />
inform Admin of this as<br />
soon as possible<br />
The night before<br />
T <strong>Rogaining</strong> Tip<br />
All this information is<br />
summarised in the<br />
checklist on page 7<br />
To enter a rogaine it is necessary to fill out an entry form and<br />
mail it to the event administrator. Entry forms are available from<br />
the <strong>VRA</strong> newsletter, the <strong>VRA</strong> web site (vra.rogaine.asn.au), or<br />
from the Membership Secretary. Note that entries must be sent<br />
by the late date (usually 11 days before the event) to avoid a<br />
late fee. This greatly assists organisers in working out food and<br />
map quantities, so please get your entries in on time!<br />
Once entered, you will receive the rogaine final instructions in<br />
the mail during the week leading up to the event. These<br />
instructions will provide you with a team number, provide<br />
details about how to get to the Hash House (including estimated<br />
travelling times), further details about the course and anything<br />
else particular to that rogaine. You should keep these<br />
instructions as a reference, and bring them to the event. You<br />
will need to inform Admin of your team number upon arrival.<br />
The more you can do the night before, the more time you will<br />
have to plan your route at the event site. Even if you’re planning<br />
for a very leisurely rogaine, it is always nice to have as much<br />
done as possible beforehand.<br />
Have items for the hash house, for after the event, and for on the<br />
course all in separate bags. Plan your food requirements now,<br />
not on the way to the event. If you are going to buy your food on<br />
the morning of the event, make sure you leave yourself enough<br />
time to make the purchases. Make a list the night before. Find<br />
out the weather forecast for the duration of the event and <strong>pack</strong><br />
clothing accordingly. Make sure your walking shoes are clean<br />
and free of any soil, to prevent the spread of plant diseases.<br />
Try to get a good night’s sleep. This is particularly important if<br />
the event is a 24 hour one and you’re planning to be on the<br />
course for a good chunk of that 24 hours.<br />
Page 14 Which way’s north An introduction to <strong>Rogaining</strong> Victorian <strong>Rogaining</strong> <strong>Association</strong><br />
Victorian <strong>Rogaining</strong> <strong>Association</strong> Which way’s north An introduction to <strong>Rogaining</strong> Page 15
The morning of the<br />
event<br />
Travelling to the event<br />
Make sure you have a good hearty breakfast, as it always pays<br />
to have a well-fuelled engine before starting. Also, make sure<br />
you’re hydrated, especially if the forecast is for hot weather. You<br />
may also want to have some electrolyte replacement drink<br />
(Staminade/Powerade etc) to help prevent cramps.<br />
Fill water bottles from home, as many Hash House sites do not<br />
have a source of running water and so all water has to be<br />
brought to the event by the organisers.<br />
If you are travelling by car, allow yourself plenty of time to arrive<br />
at the event site, check in at Administration, plan your route, and<br />
pitch your tent (if necessary). Plan to arrive at the event site 90<br />
minutes to 2 hours before the start time. If going by bus, ensure<br />
you’re at the specified pick-up point with plenty of time to spare.<br />
As you approach the event site, note the terrain and vegetation<br />
to give yourself a feel for what you may be walking through.<br />
Look for significant landmarks such as summits, larger rivers,<br />
and main roads. These observations will help you to become<br />
oriented when you see the map.<br />
UPON ARRIVAL<br />
AT THE EVENT<br />
Registration<br />
T <strong>Rogaining</strong> Tip<br />
Things to bring to admin<br />
Your team’s final<br />
instructions (which has<br />
your team number on it)<br />
Any money owing<br />
The registration number<br />
of the car you arrived in.<br />
(NB: “The grey Subaru<br />
wagon” will not suffice!)<br />
You may need to show<br />
your team’s first aid kit and<br />
whistles, so be prepared<br />
On arriving at the event site, head straight for the Event<br />
Administration tent (Admin) to register your team. Admin opens<br />
about 2 hours prior to the start of the event and maps,<br />
checkpoint description sheets and additional information are<br />
made available at this time. Team members may need to show<br />
their whistles and team first aid kit at Admin. Note that if you<br />
catch the bus, maps will be distributed on the bus at the<br />
designated Admin opening time if the bus hasn’t reached the<br />
event site. All teams travelling on the bus must still register at<br />
Admin when they arrive.<br />
Route Planning<br />
T <strong>Rogaining</strong> Tip<br />
Identify high point<br />
scoring areas by colour<br />
coding your checkpoints<br />
on the map. A suggestion<br />
is to use 3 different<br />
colour highlighters for<br />
high, medium and low<br />
value checkpoints<br />
Highlight the checkpoint<br />
number, not the circle,<br />
because highlighting the<br />
circle may make it harder<br />
to see the important detail.<br />
Once you have your map it is time to plan where you’re going to<br />
go. This can be made easier by colour coding checkpoints with<br />
highlighter pens, using different colours for the different point<br />
values (see side bar). By colour coding checkpoints it’s easier to<br />
see where the high scoring checkpoints are.<br />
Often high scoring checkpoints are located around the edges of<br />
the map and in hard to reach places, such as at the top of steep<br />
hills or in deep gullies with little road access.<br />
Look for obvious routes or loops that join several checkpoints<br />
together. Use linear features such as roads, ridgelines and<br />
watercourses that take you past several checkpoints. Avoid too<br />
much up and down climbing. It may be quicker to take a slightly<br />
longer, flatter route between checkpoints than a short, steep route.<br />
Estimate how far you can travel in the time available, and plan<br />
accordingly. Also identify some ‘escape routes’ that can get you back to<br />
the Hash House quickly if you miscalculate your speed and distance.<br />
Page 16 Which way’s north An introduction to <strong>Rogaining</strong> Victorian <strong>Rogaining</strong> <strong>Association</strong><br />
Victorian <strong>Rogaining</strong> <strong>Association</strong> Which way’s north An introduction to <strong>Rogaining</strong> Page 17
Route Planning<br />
continued<br />
T <strong>Rogaining</strong> Tip<br />
Hash Houses usually<br />
start serving food from<br />
about 17:00 hours until<br />
the end of the event<br />
All Night Cafes may only<br />
serve food during the<br />
night hours – check with<br />
Administration for<br />
opening times<br />
Some 24 hour events have a second Hash House, or All Night<br />
Cafe (ANC), somewhere on the course. All Night Cafes provide a<br />
limited choice of food and a supply of water, and are great<br />
places for an extended rest without having to travel back to the<br />
main Hash House. Make sure you note the times for which the<br />
Hash House and All Night Cafes are ‘open for business’ - there’s<br />
nothing worse than turning up expecting a meal, only to find the<br />
food is not on yet.<br />
T <strong>Rogaining</strong> Tip<br />
Try and identify “escape<br />
routes” back to the Hash<br />
House, to use if you’re<br />
running out of time<br />
If you are more than 3<br />
hours into a 6 hour<br />
event, you should be<br />
heading back to the Hash<br />
House<br />
Most people can walk comfortably at 3-5 km/hr on tracks. It’s<br />
slower in the bush. Time how long it takes you to walk a<br />
kilometre on tracks and in bush of varying thickness.<br />
On 12 and 24 hour rogaines you need to decide if you are going<br />
to return to the Hash House at any time during the event. Most<br />
teams plan to return to the Hash House overnight on 24 hour<br />
events, for both food and sleep. They may then head out on the<br />
course again the next morning. You only need to stay on the<br />
course for as long as you find enjoyable.<br />
At The Start<br />
Prior to the start of each event there is usually a five or ten<br />
minute briefing given by the event organisers. It is important to<br />
listen to this as last minute information may be provided, such as<br />
safety information and roads that will be patrolled if you get into<br />
trouble during the event. When the word is given you can then<br />
collect your score card from the ‘clothes line’ and off you go.<br />
T <strong>Rogaining</strong> Tip<br />
After the first hour of the<br />
event, check how far you<br />
have gone and see if your<br />
proposed route is<br />
reasonable<br />
Be prepared to change<br />
your planned route at any<br />
time<br />
Only stay on the course<br />
for as long as you find<br />
enjoyable.<br />
The top competitors have many theories about if and when to<br />
return to the Hash House. On 12 hour events most competitive<br />
teams will stay out for the entire 12 hours. Those teams that finish<br />
their planned routes early may have a short rest and then collect<br />
some checkpoints close to the Hash House if they have time.<br />
On 24 hour events, the competitive teams may stay out for the<br />
duration of the event. This maximises the opportunity to collect<br />
high value checkpoints around the edge of the map. Other<br />
competitive teams plan a short, fast route for the afternoon that<br />
brings them back to the Hash House on dusk where they can<br />
have a rest and some food before picking up warm clothing and<br />
extra food, and then continuing on all night and into the next<br />
day. Conversely, some teams prefer to return to the Hash House<br />
in the early hours of the morning, when morale is lowest and<br />
travelling time the slowest. It’s amazing what a good rest and<br />
some food do for the soul.<br />
T <strong>Rogaining</strong> Tip<br />
Events last for exactly the<br />
time limit, no matter what<br />
time they start. (i.e. 6<br />
hour events finish exactly<br />
6 hours after they start)<br />
Your team will lose 10<br />
points for each minute (or<br />
part thereof) that it is late<br />
If your team is more than<br />
30 minutes late, you will<br />
be listed as DNF (Did Not<br />
Finish)<br />
WHENEVER YOU RETURN TO THE HASH HOUSE YOU MUST<br />
HAND IN YOUR SCORE CARD, EVEN IF YOU INTEND TO RETURN<br />
TO THE COURSE LATER. THIS IS FOR SAFETY REASONS.<br />
Page 18 Which way’s north An introduction to <strong>Rogaining</strong> Victorian <strong>Rogaining</strong> <strong>Association</strong><br />
Victorian <strong>Rogaining</strong> <strong>Association</strong> Which way’s north An introduction to <strong>Rogaining</strong> Page 19
ON THE COURSE<br />
The score card<br />
Before heading out on the course, there are a few things you need<br />
to know about what you’re looking for and what to do when you<br />
find it – i.e. you need to know about Score Cards and Checkpoints.<br />
The score card is a sheet of plasticised paper with a grid of<br />
numbered squares on it (see Figure). It is used to prove you<br />
have visited a checkpoint. If, for example, you visit checkpoint<br />
45, you use the punch to clip your score card in the square<br />
numbered 45. There is only one score card per team, so don’t<br />
lose it! You collect your team’s score card at the start.<br />
At the checkpoint<br />
If you are lost<br />
T <strong>Rogaining</strong> Tip<br />
If lost<br />
Do not split up<br />
Locate roads nearby and<br />
head for these<br />
Stick to tracks<br />
Use your whistle to<br />
attract attention<br />
When your team reaches a checkpoint you must punch the box on<br />
the score card that corresponds to that checkpoint number. You<br />
also need to fill in the intention sheet hanging from the checkpoint<br />
with your team number, time and proposed next checkpoint. This<br />
helps the organisers if you become lost and are late returning.<br />
If you think you are lost, DON’T PANIC. Try to determine where<br />
you were last sure about your position and back track to that<br />
point. If you can’t back track to a known position, stop and have<br />
a rest and a bite to eat. Think about where you are. Are there<br />
any major roads or other recognisable features near your<br />
general area that you could reach without too much trouble and<br />
use to guide you back to the Hash House<br />
If you are really lost with no idea how to reach a major<br />
road/highway, railway line or similar linear feature, stay put and<br />
consider when a search will be mounted. DO NOT SPLIT UP. If<br />
you are not back at the Hash House within 1 hour of the finish,<br />
a vehicle search by road will begin. If you are on a road, do not<br />
leave the road in the hope of reaching the Hash House crosscountry.<br />
You will be more easily found if you stick to tracks.<br />
The checkpoint<br />
T <strong>Rogaining</strong> Tip<br />
It’s a good idea if one<br />
person punches the<br />
score card and one fills<br />
in the intention sheet<br />
If you visit a checkpoint<br />
but do not punch your<br />
score card, you will not<br />
receive any points for<br />
your visit. “No Punch, No<br />
Points” is <strong>VRA</strong> policy<br />
All team members must<br />
simultaneously get to within<br />
20m of the checkpoint<br />
You should not rest within<br />
100m of a checkpoint<br />
unless it is at a water drop.<br />
This can ‘give away’ the<br />
checkpoint location to other<br />
teams and detract from<br />
their enjoyment of the event<br />
The checkpoint is a white and orange corflute marker hanging in a<br />
tree or on a fence post (see picture). It is not meant to be difficult to<br />
find, just as long as you’ve navigated to the correct location. The<br />
checkpoint has two things attached to it – a punch to mark your score<br />
card, and an intentions sheet to show where you plan to go next.<br />
Some checkpoints – known as metal checkpoints - are simply<br />
white and orange metal plates chained to a feature, with a punch<br />
bolted to them. These checkpoints are used in areas very<br />
accessible to the public, and cannot be tampered with, stolen, or<br />
destroyed as easily as the corflute checkpoints. They usually do<br />
not have intentions sheets attached to them.<br />
If a vehicle search along major roads fails to locate you a more<br />
intensive foot search will be initiated. During a foot search,<br />
intention sheets will be used to determine your movements<br />
throughout the event and isolate a search area. At the same<br />
time, a check of car registrations and tents will be made to<br />
check if you have returned to the Hash House and not returned<br />
your score card to Admin. Phone calls will also be made to<br />
check you haven’t gone home.<br />
Use your whistle to attract attention – THREE blasts at regular<br />
intervals is the recognised distress signal. If you are still<br />
missing after the foot search the Police will be called in to<br />
conduct a more thorough search. (Note that, at the time of<br />
writing, the <strong>VRA</strong> has never had to do this.)<br />
If you are missing following the completion of a 12 hour event,<br />
a thorough search may not be initiated until first light the next<br />
morning depending on the conditions.<br />
Page 20 Which way’s north An introduction to <strong>Rogaining</strong> Victorian <strong>Rogaining</strong> <strong>Association</strong><br />
Victorian <strong>Rogaining</strong> <strong>Association</strong> Which way’s north An introduction to <strong>Rogaining</strong> Page 21
If someone is injured<br />
T <strong>Rogaining</strong> Tip<br />
If injured<br />
THREE blasts on a whistle,<br />
repeated at regular<br />
intervals, is the recognised<br />
distress signal. Use it if<br />
you are injured or lost<br />
If you hear someone<br />
else’s whistle blasts YOU<br />
MUST STOP ROGAINING<br />
and go straight to the<br />
team in distress<br />
If a member of your team is injured and requires assistance<br />
someone can be sent to the Hash House for help. However, if<br />
there are only two people in your team, the injured person<br />
should not be left alone. Use your whistle to attract attention<br />
and seek help from passing teams. Anyone who hears the<br />
distress signal is obliged to provide any assistance required.<br />
You should be familiar with the first aid techniques described on<br />
the <strong>VRA</strong> first aid sheet.<br />
NAVIGATION<br />
Reading Maps<br />
The topographical maps used for rogaines are simply a<br />
graphical representation of the shape and form of the land over<br />
that area. One of the most obvious features of a topographical<br />
map are the continuous lines, called contour lines. Contour lines<br />
are not present in reality but on a map they are used to mark a<br />
line of equal height. The shape of the contour lines allows you<br />
to visualise from the map a picture of what the landscape looks<br />
like in reality. For instance, the closer the contour lines, the<br />
steeper the slope. With practice this becomes an easy task and<br />
a skilled map-reader can recognise the exact shape of the land<br />
at a glance. Examples of the more common contour patterns are<br />
shown in Figure .<br />
If there is a bush fire<br />
The <strong>VRA</strong> will cancel a rogaine if a Total Fire Ban is declared for<br />
the day of the event in the event area. However, it is still<br />
possible that a bush fire may be encountered during a rogaine<br />
(although at the time of writing, this has never happened).<br />
If a rogaine is held in conditions that are fire-prone, competitors<br />
will be issued with a “Competitor Action Sheet”. This sheet will<br />
outline procedures to be adopted in case of bush fire. However,<br />
a few things that are good to know are listed here: -<br />
If fire is sighted or smelt, return to the Hash House via a road or<br />
vehicular track and report the fire to Administration immediately.<br />
Always stay on roads and vehicular tracks so cars can find you.<br />
If the fire is between you and the Hash House then seek<br />
alternative shelter, such as<br />
farmhouses or towns<br />
areas which have sparse tree canopy<br />
areas which have already been burnt<br />
rivers, dams, caves, mines, dugouts<br />
a rut, hollow, or rocky area.<br />
Avoid areas with thick undergrowth or high grass.<br />
Once sheltered, cover your body with a non-synthetic material if<br />
available. Stay out of line-of-sight of the fire. Bury yourself if<br />
necessary. This is to protect you from radiant heat.<br />
Cover your face with a damp cloth and breathe through this.<br />
Hydrate as much as possible.<br />
Linear and other additional features (buildings, dams, etc.) are<br />
sometimes marked on topographical maps using easily<br />
recognisable symbols. For instance, roads and vehicular tracks<br />
are often marked as red lines of varying thickness depending on<br />
the type of road. Walking tracks are often marked as thin dotted<br />
black lines. Be aware that not all tracks are marked and some<br />
that are marked may have become overgrown and difficult to<br />
distinguish. Others may be inaccurately marked.<br />
Watercourses (creeks) are marked as blue lines, although a blue<br />
line doesn’t always mean water, or even a defined channel, will<br />
be present. It just gives an indication of where water would flow.<br />
Buildings and other structures are marked as black squares and<br />
symbols, and dams and waterholes as blue dots or circles.<br />
Some maps may indicate the location of vegetation boundaries.<br />
These boundaries are at best only a guide. <strong>Rogaining</strong> maps will<br />
also indicate areas that are out of bounds to the course. These<br />
areas should not be entered at any time.<br />
A well-made topographical map will have a legend in the margin<br />
that shows in detail what each symbol and line used on a map<br />
represents. They also have additional information such as the<br />
contour interval (vertical distance between contour lines), the<br />
magnetic declination, and the date the map was produced. A<br />
sample rogaining map may be included with this booklet.<br />
Fire can travel at up to 100 km/h, so do not try to out-run a fire.<br />
Fire travels fastest uphill.<br />
Page 22 Which way’s north An introduction to <strong>Rogaining</strong> Victorian <strong>Rogaining</strong> <strong>Association</strong><br />
Victorian <strong>Rogaining</strong> <strong>Association</strong> Which way’s north An introduction to <strong>Rogaining</strong> Page 23
Features of a compass<br />
Once you are sure about recognising features on the map, you<br />
can use a compass to help orient the map so the landscape<br />
features on the map are aligned in the direction of the real<br />
features. The compass is also used to help you travel along a<br />
line, or bearing, between two points.<br />
Figure 3 shows a diagram of a basic magnetic compass. It has a<br />
rectangular base plate of clear Perspex marked with the direction<br />
of travel arrow. Mounted at one end is the circular compass<br />
housing in which is the compass needle. The housing is oil filled<br />
to dampen the movement of the needle. It is transparent, has an<br />
orienting arrow inscribed into it under the needle and can be<br />
rotated within the base plate. North, South, East and West are<br />
marked around its perimeter along with 360° graduations.<br />
T <strong>Rogaining</strong> Tip<br />
If you are confused about<br />
distinguishing gullies<br />
from spurs have a look at<br />
where the creeks run,<br />
these are the gullies and<br />
valleys; the curves in<br />
between are the convex<br />
sides of hills called<br />
‘spurs’. Also, look for the<br />
summits (closed contour<br />
circles), these make it<br />
easy to identify the<br />
descending spurs<br />
Figure 2. Common contour patterns and features found on<br />
rogaining maps. This is a close-up of an actual rogaining map used<br />
in December 2001. The terminology used to identify features is<br />
explained on page 28 (Checkpoint Description Sheet Terminology).<br />
The scale of the map is a very important factor in reading the<br />
map correctly. A scale of 1:25000 (quite common on rogaining<br />
maps) means that 1 unit of distance on the map represents<br />
25,000 of the same units on the ground. For instance, on a<br />
1:25000 map, 4 cm is equivalent to 1 km on the ground (i.e. 4<br />
cm x 25,000 = 100,000 cm = 1000 m = 1 km). On a 1:50000<br />
scale map, 2 cm on the map represents 1 km on the ground.<br />
Most rogaining maps have a series of grid lines running topbottom<br />
and left-right. The distance between these lines is always<br />
1 km, which helps in estimating distances on the map. These<br />
grid lines also provide a reference for taking compass bearings.<br />
A piece of string, a ruler (edge of compass), or the edge of a piece<br />
of paper can be used to measure the distance between two features<br />
on a map and help calculate the actual distance on the ground.<br />
T <strong>Rogaining</strong> Tip<br />
Some maps have<br />
“magnetic north” lines<br />
marked on them, either<br />
instead of, or as well as,<br />
grid lines. These lines are<br />
used when taking compass<br />
bearings, and eliminate the<br />
need to account for<br />
magnetic declination.<br />
Grid north and magnetic<br />
north<br />
Compass<br />
housing<br />
Compass needle<br />
(always points to<br />
magnetic north)<br />
240<br />
210<br />
W<br />
S<br />
300<br />
150<br />
120<br />
330<br />
N<br />
E<br />
30<br />
60<br />
Base plate<br />
"Direction<br />
of travel"<br />
arrow<br />
"Orienting"<br />
arrow<br />
Figure 3.<br />
Features of<br />
a magnetic<br />
compass.<br />
Before using the compass it is important to understand the difference<br />
between Grid North and Magnetic North. Grid North is simply the<br />
direction of the north-south grid lines, where north is up the map.<br />
These grid lines are shown in Figures 2 and 4. Magnetic North is the<br />
direction the red end of a magnetic compass needle points. The grid<br />
lines on the map, however, are generally not aligned with Magnetic<br />
North.<br />
The angular difference between Grid North and Magnetic North<br />
on maps is called the grid magnetic angle. Often it will also be<br />
referred to as the magnetic declination, deviation or variation.<br />
This angle should be marked on all maps, and is typically about<br />
11 degrees to the East of Grid North in Victoria.<br />
Page 24 Which way’s north An introduction to <strong>Rogaining</strong> Victorian <strong>Rogaining</strong> <strong>Association</strong><br />
Victorian <strong>Rogaining</strong> <strong>Association</strong> Which way’s north An introduction to <strong>Rogaining</strong> Page 25
Using the compass<br />
2. Travelling to the checkpoint<br />
To set up the compass in order to travel from one location to<br />
another on the map, carry out the following steps:<br />
Place the compass on the map, aligning the long edge of the<br />
base plate with the route you have chosen. In Figure 4 we are<br />
intending to travel from the dam to checkpoint 55.<br />
Rotate the compass needle housing within the base plate to align its<br />
orienting arrow with the north-south gridlines (as has been done in<br />
Figure 4), and making sure the orienting arrow points to the north<br />
and not the south. In this case the process gives a compass bearing<br />
of 285°. However, this angle is in fact the angle between grid north<br />
and the direction of travel, so it is necessary to compensate for the<br />
difference between Grid North and Magnetic North.<br />
Remove the compass from the map and compensate for the Grid<br />
Magnetic angle by rotating the housing the required number of<br />
degrees in the direction indicated on the map. For example, if<br />
the angle is 11° East of North (as it is in most of Victoria), then<br />
rotate the housing 11° clockwise. This will change the compass<br />
bearing to 274°. The compass has now been set up ready to use.<br />
Now hold the compass level in front of you with the direction of<br />
travel arrow on the base plate pointing away from you. Turn yourself<br />
until the red end of the compass needle is aligned with the orienting<br />
arrow in the housing and the North mark on the rim of the housing.<br />
Walk in the direction indicated by the direction of travel arrow.<br />
1. Travelling from the dam<br />
Following a bearing<br />
Navigation hints<br />
The easiest way to follow a bearing is to pick an easily<br />
identifiable object, such as a tree or rock, in the distance, along<br />
the line indicated by the direction of travel arrow. You can then<br />
walk to this object without looking at the compass. Then repeat<br />
the process identifying a new object along the bearing. This<br />
technique allows you to move off the bearing to negotiate<br />
obstacles but still return to the bearing at the object you had<br />
previously identified as being on the bearing line.<br />
•You can make it easier to take bearings from your map by<br />
drawing in lines corresponding to Magnetic North at intervals<br />
across the map. You then only need to align the lines on the<br />
compass dial with the Magnetic North gridlines drawn in and you<br />
have your bearing. There’s then no need to subtract the magnetic<br />
declination. Some rogaining maps have these lines premarked.<br />
• The bush along spurs and ridgelines is generally more open.<br />
• Bush in gullies is often thick.<br />
• There are often unmarked tracks along spurs and gullies.<br />
• Be wary of relying too heavily on tracks for navigation, as they<br />
are often marked incorrectly. Use minor tracks as a guide only.<br />
4. Orienting arrow is parallel<br />
with north-south grid lines<br />
• Determine the number of steps it takes you to walk 100<br />
metres along tracks, open bush and thick bush. Use this to<br />
pace count and help measure distances between features and<br />
along roads and compass bearings.<br />
North-south<br />
grid lines<br />
• Use obvious features as ‘attack’ points for checkpoints i.e.<br />
Instead of trying to navigate directly to a checkpoint along a<br />
bearing over a long distance, navigate to a nearby feature,<br />
such as a knoll, and then navigate to the checkpoint. This<br />
reduces the chances for error when following bearings for<br />
long distances.<br />
3. Direction of travel arrow points<br />
in the direction we want to go<br />
(from dam to checkpoint)<br />
5. Compass bearing 285°<br />
6. Rotate housing by grid-magnetic angle<br />
(about 11° clockwise in Victoria) to account for<br />
magnetic declination. Bearing will now be 274°<br />
Figure 4. Place the edge of the compass along the line you want to go. Then rotate the housing so the<br />
orienting arrow is parallel with the north-south grid lines and pointing to the north. Finally, subtract the<br />
grid-magnetic angle (about 11° in Victoria) by rotating the housing, to give the final bearing of 274°.<br />
Page 26 Which way’s north An introduction to <strong>Rogaining</strong> Victorian <strong>Rogaining</strong> <strong>Association</strong><br />
• Always be aware of your position and match the terrain to the<br />
map. This will ensure that you pick up any deviations from<br />
your course early.<br />
• Always return your score card to Admin when you return to<br />
the Hash House, even if it is just for a rest. If you do not<br />
return your score card at the end of the event, you will be<br />
presumed missing and a search will be initiated. Do not suffer<br />
the embarrassment and inconvenience of this occurring.<br />
Victorian <strong>Rogaining</strong> <strong>Association</strong> Which way’s north An introduction to <strong>Rogaining</strong> Page 27
Checkpoint description<br />
sheet terminology<br />
Along with the map, you also get a checkpoint description sheet that<br />
describes the location of all the checkpoints. Checkpoint descriptions<br />
begin with ‘THE’ or ‘A’. Checkpoint descriptions beginning with ‘THE’,<br />
e.g. ‘The Spur’, indicate that the spur is a feature that is recognisable<br />
on the map. Checkpoint descriptions beginning with ‘A’, e.g. ‘A Knoll’,<br />
is one that is not marked on the map but is actually there. Often ‘A’<br />
features are implied by the contour lines. Correct checkpoint<br />
description terminology is shown in Figure 2.<br />
Checkpoints may also have a checkpoint description that states<br />
a bearing and distance from the centre of a feature, e.g. ‘The<br />
road junction, 120° 20 m’. This means you must travel to the<br />
centre of the road junction, then set your compass on 120° and<br />
travel in that direction for 20 m to find the checkpoint. Note that<br />
these bearings are magnetic ones, so there is no need to allow<br />
for magnetic declination. You just set the compass to the stated<br />
bearing and go in that direction.<br />
FINAL WORDS …<br />
This document is by no means comprehensive. It is simply<br />
designed to give you some idea of the methods, equipment and<br />
navigational techniques used by many of today’s experienced<br />
rogainers. What you do with it now is up to you. As you progress<br />
in the sport, you will discover your own methods and tricks, and<br />
become a more skillful navigator. If you want more information<br />
on navigating there is an excellent reference book available.<br />
“<strong>Rogaining</strong> – Cross Country Navigation” by Neil Phillips and<br />
Rod Phillips. Third edition published 2000 by Outdoor<br />
Recreation in Australia, Melbourne.<br />
Copies may be bought through the Victorian <strong>Rogaining</strong> <strong>Association</strong><br />
at very reasonable prices and are generally available for sale at<br />
events. Also, make sure that you get a copy of the current event<br />
rules (included in this booklet) and a <strong>VRA</strong> first aid sheet.<br />
If you have any queries or questions about rogaining or<br />
navigation in general, feel free to phone a committee member<br />
(their names and phone numbers are on page 2 of your<br />
newsletter), or speak to them at an event. They are always<br />
happy to help out anyone new to the sport.<br />
If you want to practice your skills any time, the <strong>VRA</strong> has a<br />
permanent course set up in the Mt Disappointment State Forest<br />
north of Melbourne. Checkpoint description sheets and map<br />
information is available from the permanent course manager<br />
who is listed in the <strong>VRA</strong> newsletter. Why not spend a weekend<br />
with your friends at the permanent course, practising your<br />
skills The <strong>VRA</strong> also runs training days, coaching events and<br />
map skills workshops, so keep your eye on the newsletter for<br />
information on these. If you are unable to find a partner for an<br />
event you can contact the Partner Finding Service listed on page<br />
2 of the <strong>VRA</strong> newsletter.<br />
Night navigation<br />
Once you understand the major concepts relevant to daytime<br />
navigation, you can try to put them to use at night. The main<br />
difference at night is that you can only see what is immediately<br />
around you, and possibly the outline of surrounding ridges.<br />
Events are staged as close as possible to full moons to provide<br />
the maximum amount of light at night.<br />
At night, you have to pay as much attention as possible to your<br />
compass, as well as the slope of the ground under your feet and<br />
always keep reference to where you are on the map. If you lose<br />
your position at any stage it is much harder to relocate at night.<br />
Learn to recognise features in the dark, and try to use your<br />
torch as little as possible. This helps protect your night vision.<br />
We hope you enjoy your rogaining experience. However, please<br />
remember that the <strong>VRA</strong> is totally run by volunteers, so consider<br />
volunteering your services to help in some way at an event.<br />
There are plenty of rewarding tasks that need doing, and there is<br />
something for people of all ages and abilities – from organising<br />
an event, to chopping vegetables, to collecting checkpoints after<br />
the event is over. Helping is great fun and you meet lots of new<br />
people and potential partners.<br />
Finally, make sure you have fun out there,<br />
because that’s what it’s all about!<br />
Page 28 Which way’s north An introduction to <strong>Rogaining</strong> Victorian <strong>Rogaining</strong> <strong>Association</strong><br />
Victorian <strong>Rogaining</strong> <strong>Association</strong> Which way’s north An introduction to <strong>Rogaining</strong> Page 29
RULES OF ROGAINING<br />
Definition<br />
<strong>Rogaining</strong> is the sport of long distance cross-country navigation<br />
for teams travelling on foot. The object is to score points by<br />
finding checkpoints located on the course within a specified<br />
time. Checkpoints may be visited in any order.<br />
“The course” means anywhere a team travels during the time of the<br />
rogaine but specifically excludes the access road and areas in the<br />
proximity of an administration area designated for non-competition use by<br />
the organisers, for example for parking or camping. “Event site” includes<br />
the course and any administration, access and non-competition areas.<br />
Entries R1 A team shall consist of two, three, four or five members.<br />
Respect for land<br />
and property<br />
R2<br />
R3<br />
R4<br />
R5<br />
A team that has a member under fourteen years of age<br />
shall also have a member eighteen years of age or over.<br />
Competition placings are awarded in several sections<br />
based on the age and gender composition of teams. Each<br />
team shall be deemed to be entered for all sections of the<br />
competition for which it is eligible.<br />
No member of a team shall have been involved with the<br />
organisation of the rogaine so as to have a prior familiarity<br />
with the rogaine course or the fieldwork of the rogaine map.<br />
Competitors shall respect public and private property.<br />
(a) Competitors shall not cross newly sown ground or<br />
growing crops, except if specifically permitted by the<br />
organisers, or any area deemed out-of-bounds by the<br />
organisers.<br />
(b) Competitors shall keep a reasonable distance from<br />
dwellings and stock with young.<br />
(c) Competitors shall take due care when crossing fences,<br />
crossing at corner posts, solid posts or between wires<br />
wherever possible. Each team shall leave gates in the<br />
same state as they were found.<br />
(d) Competitors shall not discard litter.<br />
(e) Competitors shall not light fires at the event site.<br />
(f) Competitors shall not smoke on the course.<br />
(g) Competitors shall not unduly damage or disturb native<br />
flora or fauna.<br />
(h) Dogs and weapons of any kind, including firearms, are<br />
prohibited at the event site.<br />
Conduct of competitors R6 Competitors shall not enter the course until the official start is<br />
signalled.<br />
R7<br />
R8<br />
R9<br />
The only navigational aids that may be carried on the course<br />
are magnetic compasses, watches and copies of the<br />
competition map. The possession of other navigational aids,<br />
including pedometers, altimeters and GPS receivers on the<br />
course is prohibited. The possession, at the event site, of<br />
maps that provide additional information not shown on the<br />
competition map is prohibited.<br />
The use of computers for course planning is prohibited.<br />
Competitors shall travel only on foot.<br />
R10 Members of a team shall remain within unaided verbal<br />
contact of one another at all times whilst on the course. A<br />
team shall demonstrate compliance with this requirement<br />
to any event official or other team on request.<br />
R11 A team shall surrender its score card to any event official,<br />
and shall advise their team number to any event official or<br />
other team, on request.<br />
R12 A team shall not accept assistance from, nor collaborate<br />
with, other people, nor deliberately follow another team.<br />
R13 No food nor equipment shall be left on the course before the<br />
event for a team’s use, and no food or equipment shall be<br />
discarded on the course unless retrieved by the team during<br />
the event and brought by the team with them to the finish.<br />
R14 Each competitor shall carry a whistle at all times whilst on<br />
the course. In an emergency a competitor shall give a<br />
series of short blasts on their whistle.<br />
Checkpoints R15 All team members shall simultaneously approach to within 20<br />
metres, and within sight, of each checkpoint for which points<br />
are claimed.<br />
R16 In order to gain points for a checkpoint teams must punch the<br />
scorecard provided by the organisers in the correct square with<br />
the punch at the checkpoint marker and fill in any intention sheet<br />
at the checkpoint with the time of arrival, the team number and<br />
the number of the checkpoint that they intend to next visit. If a<br />
team punches an incorrect square, they must notify the<br />
organisers of the details of this immediately upon returning to the<br />
administration to be eligible to be credited with that checkpoint.<br />
Page 30 Which way’s north An introduction to <strong>Rogaining</strong> Victorian <strong>Rogaining</strong> <strong>Association</strong><br />
Victorian <strong>Rogaining</strong> <strong>Association</strong> Which way’s north An introduction to <strong>Rogaining</strong> Page 31
R17 In the event of the scorecard being lost, a team may<br />
record punch marks on any single sheet. The organisers<br />
will accept this so long as the punch marks are<br />
discernible, and the team can identify to the organisers the<br />
checkpoint number for each of the punch marks.<br />
R18 Competitors shall not deliberately rest within one hundred metres<br />
of a checkpoint unless the checkpoint is also a water drop.<br />
Penalties and protests<br />
R23 The penalty for breaching these rules is disqualification<br />
except for rules R16 and R18 for which the penalty is the<br />
loss of points for the checkpoint under consideration. Any<br />
team disqualified under this rule shall be recorded as DSQ.<br />
R24 A team may voluntarily withdraw, by advising the organisers<br />
immediately upon their finish, if they have breached any rule<br />
for any reason and shall be recorded as W/D.<br />
Administration areas<br />
R19 Competitors shall not adversely interfere with a checkpoint,<br />
water drop or any other facility placed upon the course by the<br />
organisers.<br />
R20 Whenever a team visits an administration area, all team<br />
members are required to report together to the organisers<br />
and surrender their team’s scorecard. The team shall only<br />
collect its scorecard immediately prior to leaving that<br />
administration area.<br />
R21 A team shall finish by all of the members reporting together to<br />
the designated finish administration area and surrendering their<br />
scorecard.<br />
R22 If a competitor wishes to withdraw from a team for any<br />
reason the entire team shall return to an administration area<br />
and notify the organisers. The original team shall be deemed<br />
to have finished the event. If a new team is formed it may be<br />
admitted to the competition at the discretion of the organisers<br />
but no points shall be credited for checkpoints already visited.<br />
Scoring<br />
R25 Within forty-five minutes of the nominated finish time, a<br />
team may report in writing to the organisers about any<br />
team thought to have breached these rules, or may protest<br />
in writing to the organisers about any actions of the<br />
organisers that they consider made the competition unfair.<br />
R26 A team that is not satisfied with any decision of the<br />
organisers may appeal in writing to the committee of the<br />
organising association within seven days of the publication of<br />
the official results. This committee shall have the power to<br />
overrule the organisers and to amend the results accordingly.<br />
No further appeal is permitted.<br />
R27 The event shall end at precisely the set number of hours<br />
after the actual starting time, both times as defined by the<br />
organisers’ clock. Teams finishing late will be penalised at<br />
the rate per minute or part thereof specified in advance by<br />
the organisers. Teams finishing more than thirty minutes<br />
late shall be deemed ineligible for a placing and their result<br />
shall be recorded as LATE.<br />
R28 A team’s score shall be the value of the checkpoints visited<br />
and correctly verified in accordance with these rules, less<br />
any penalties. The team with the greatest score, or in the<br />
event of a tie the team that finished earlier, shall be<br />
awarded the higher placing.<br />
R29 In the event of a checkpoint being damaged or deemed<br />
misplaced or missing by the organisers, teams shall be<br />
awarded the checkpoint score:<br />
(a) If the punch is missing or damaged but the team has a<br />
correct record on the intention sheet.<br />
(b) If the punch is missing and there is no intention sheet,<br />
but the team can satisfy the organisers that they<br />
visited the correct site.<br />
(c) If a checkpoint is missing or misplaced but the team can<br />
satisfy the organisers that they visited the correct site.<br />
(d) For a correctly recorded visit to a misplaced checkpoint.<br />
Page 32 Which way’s north An introduction to <strong>Rogaining</strong> Victorian <strong>Rogaining</strong> <strong>Association</strong><br />
Victorian <strong>Rogaining</strong> <strong>Association</strong> Which way’s north An introduction to <strong>Rogaining</strong> Page 33
General<br />
R30 Any team hearing a distress signal must abandon their<br />
course and help in any way needed. No team shall be<br />
penalised for any rule breached in the course of giving<br />
such help.<br />
Notes<br />
Page 34 Which way’s north An introduction to <strong>Rogaining</strong> Victorian <strong>Rogaining</strong> <strong>Association</strong><br />
Victorian <strong>Rogaining</strong> <strong>Association</strong> Which way’s north An introduction to <strong>Rogaining</strong> Page 35