traceable® jumbo refrigerator/freezer thermometer instructions
traceable® jumbo refrigerator/freezer thermometer instructions
traceable® jumbo refrigerator/freezer thermometer instructions
Create successful ePaper yourself
Turn your PDF publications into a flip-book with our unique Google optimized e-Paper software.
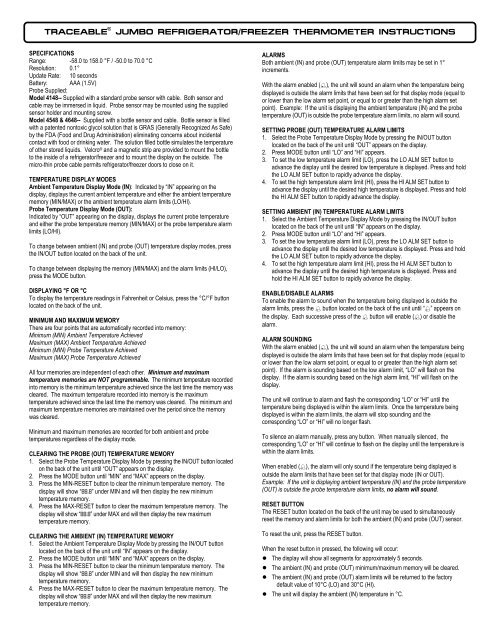
TRACEABLE ® JUMBO REFRIGERATOR/FREEZER THERMOMETER INSTRUCTIONS<br />
SPECIFICATIONS<br />
Range: -58.0 to 158.0 °F / -50.0 to 70.0 °C<br />
Resolution: 0.1°<br />
Update Rate: 10 seconds<br />
Battery: AAA (1.5V)<br />
Probe Supplied:<br />
Model 4148-- Supplied with a standard probe sensor with cable. Both sensor and<br />
cable may be immersed in liquid. Probe sensor may be mounted using the supplied<br />
sensor holder and mounting screw.<br />
Model 4548 & 4648-- Supplied with a bottle sensor and cable. Bottle sensor is filled<br />
with a patented nontoxic glycol solution that is GRAS (Generally Recognized As Safe)<br />
by the FDA (Food and Drug Administration) eliminating concerns about incidental<br />
contact with food or drinking water. The solution filled bottle simulates the temperature<br />
of other stored liquids. Velcro ® and a magnetic strip are provided to mount the bottle<br />
to the inside of a <strong>refrigerator</strong>/<strong>freezer</strong> and to mount the display on the outside. The<br />
micro-thin probe cable permits <strong>refrigerator</strong>/<strong>freezer</strong> doors to close on it.<br />
TEMPERATURE DISPLAY MODES<br />
Ambient Temperature Display Mode (IN): Indicated by “IN” appearing on the<br />
display, displays the current ambient temperature and either the ambient temperature<br />
memory (MIN/MAX) or the ambient temperature alarm limits (LO/HI).<br />
Probe Temperature Display Mode (OUT):<br />
Indicated by “OUT” appearing on the display, displays the current probe temperature<br />
and either the probe temperature memory (MIN/MAX) or the probe temperature alarm<br />
limits (LO/HI).<br />
To change between ambient (IN) and probe (OUT) temperature display modes, press<br />
the IN/OUT button located on the back of the unit.<br />
To change between displaying the memory (MIN/MAX) and the alarm limits (HI/LO),<br />
press the MODE button.<br />
DISPLAYING °F OR °C<br />
To display the temperature readings in Fahrenheit or Celsius, press the °C/°F button<br />
located on the back of the unit.<br />
MINIMUM AND MAXIMUM MEMORY<br />
There are four points that are automatically recorded into memory:<br />
Minimum (MIN) Ambient Temperature Achieved<br />
Maximum (MAX) Ambient Temperature Achieved<br />
Minimum (MIN) Probe Temperature Achieved<br />
Maximum (MAX) Probe Temperature Achieved<br />
All four memories are independent of each other. Minimum and maximum<br />
temperature memories are NOT programmable. The minimum temperature recorded<br />
into memory is the minimum temperature achieved since the last time the memory was<br />
cleared. The maximum temperature recorded into memory is the maximum<br />
temperature achieved since the last time the memory was cleared. The minimum and<br />
maximum temperature memories are maintained over the period since the memory<br />
was cleared.<br />
Minimum and maximum memories are recorded for both ambient and probe<br />
temperatures regardless of the display mode.<br />
CLEARING THE PROBE (OUT) TEMPERATURE MEMORY<br />
1. Select the Probe Temperature Display Mode by pressing the IN/OUT button located<br />
on the back of the unit until “OUT” appears on the display.<br />
2. Press the MODE button until “MIN” and “MAX” appears on the display.<br />
3. Press the MIN-RESET button to clear the minimum temperature memory. The<br />
display will show “88.8” under MIN and will then display the new minimum<br />
temperature memory.<br />
4. Press the MAX-RESET button to clear the maximum temperature memory. The<br />
display will show “88.8” under MAX and will then display the new maximum<br />
temperature memory.<br />
CLEARING THE AMBIENT (IN) TEMPERATURE MEMORY<br />
1. Select the Ambient Temperature Display Mode by pressing the IN/OUT button<br />
located on the back of the unit until “IN” appears on the display.<br />
2. Press the MODE button until “MIN” and “MAX” appears on the display.<br />
3. Press the MIN-RESET button to clear the minimum temperature memory. The<br />
display will show “88.8” under MIN and will then display the new minimum<br />
temperature memory.<br />
4. Press the MAX-RESET button to clear the maximum temperature memory. The<br />
display will show “88.8” under MAX and will then display the new maximum<br />
temperature memory.<br />
ALARMS<br />
Both ambient (IN) and probe (OUT) temperature alarm limits may be set in 1°<br />
increments.<br />
With the alarm enabled (֠), the unit will sound an alarm when the temperature being<br />
displayed is outside the alarm limits that have been set for that display mode (equal to<br />
or lower than the low alarm set point, or equal to or greater than the high alarm set<br />
point). Example: If the unit is displaying the ambient temperature (IN) and the probe<br />
temperature (OUT) is outside the probe temperature alarm limits, no alarm will sound.<br />
SETTING PROBE (OUT) TEMPERATURE ALARM LIMITS<br />
1. Select the Probe Temperature Display Mode by pressing the IN/OUT button<br />
located on the back of the unit until “OUT” appears on the display.<br />
2. Press MODE button until “LO” and “HI” appears.<br />
3. To set the low temperature alarm limit (LO), press the LO ALM SET button to<br />
advance the display until the desired low temperature is displayed. Press and hold<br />
the LO ALM SET button to rapidly advance the display.<br />
4. To set the high temperature alarm limit (HI), press the HI ALM SET button to<br />
advance the display until the desired high temperature is displayed. Press and hold<br />
the HI ALM SET button to rapidly advance the display.<br />
SETTING AMBIENT (IN) TEMPERATURE ALARM LIMITS<br />
1. Select the Ambient Temperature Display Mode by pressing the IN/OUT button<br />
located on the back of the unit until “IN” appears on the display.<br />
2. Press MODE button until “LO” and “HI” appears.<br />
3. To set the low temperature alarm limit (LO), press the LO ALM SET button to<br />
advance the display until the desired low temperature is displayed. Press and hold<br />
the LO ALM SET button to rapidly advance the display.<br />
4. To set the high temperature alarm limit (HI), press the HI ALM SET button to<br />
advance the display until the desired high temperature is displayed. Press and<br />
hold the HI ALM SET button to rapidly advance the display.<br />
ENABLE/DISABLE ALARMS<br />
To enable the alarm to sound when the temperature being displayed is outside the<br />
alarm limits, press the ֠ button located on the back of the unit until “֠” appears on<br />
the display. Each successive press of the ֠ button will enable (֠) or disable the<br />
alarm.<br />
ALARM SOUNDING<br />
With the alarm enabled (֠), the unit will sound an alarm when the temperature being<br />
displayed is outside the alarm limits that have been set for that display mode (equal to<br />
or lower than the low alarm set point, or equal to or greater than the high alarm set<br />
point). If the alarm is sounding based on the low alarm limit, “LO” will flash on the<br />
display. If the alarm is sounding based on the high alarm limit, “HI” will flash on the<br />
display.<br />
The unit will continue to alarm and flash the corresponding “LO” or “HI” until the<br />
temperature being displayed is within the alarm limits. Once the temperature being<br />
displayed is within the alarm limits, the alarm will stop sounding and the<br />
corresponding “LO” or “HI” will no longer flash.<br />
To silence an alarm manually, press any button. When manually silenced, the<br />
corresponding “LO” or “HI” will continue to flash on the display until the temperature is<br />
within the alarm limits.<br />
When enabled (֠), the alarm will only sound if the temperature being displayed is<br />
outside the alarm limits that have been set for that display mode (IN or OUT).<br />
Example: If the unit is displaying ambient temperature (IN) and the probe temperature<br />
(OUT) is outside the probe temperature alarm limits, no alarm will sound.<br />
RESET BUTTON<br />
The RESET button located on the back of the unit may be used to simultaneously<br />
reset the memory and alarm limits for both the ambient (IN) and probe (OUT) sensor.<br />
To reset the unit, press the RESET button.<br />
When the reset button in pressed, the following will occur:<br />
● The display will show all segments for approximately 5 seconds.<br />
● The ambient (IN) and probe (OUT) minimum/maximum memory will be cleared.<br />
● The ambient (IN) and probe (OUT) alarm limits will be returned to the factory<br />
default value of 10°C (LO) and 30°C (HI).<br />
● The unit will display the ambient (IN) temperature in °C.
ON/OFF BUTTON<br />
The ON/OFF button located on the back of the unit may be used to turn the unit off<br />
when the <strong>thermometer</strong> is not being used. The minimum/maximum memory and<br />
alarm limits are not cleared when the unit is turned off. To turn the unit off, press the<br />
ON/OFF button. Each successive press of the ON/OFF button will turn the unit on or<br />
off.<br />
No alarms will sound and no minimum/maximum memory will be recorded when<br />
the unit is off.<br />
BENCH STAND<br />
The unit is supplied with a bench stand that is a part of the back of the unit. To use<br />
the bench stand, locate the small openings on either side of the bottom of the unit.<br />
Place your fingernail into one of the openings and flip the stand out. To close the<br />
stand, simply snap it shut.<br />
WALL MOUNTING THE UNIT<br />
Set a screw into the wall at the desired location. Do not set the screw flush to the wall,<br />
the head of the screw will need to slip into the receptacle on the back of the unit. Once<br />
the screw has been properly set, hang the unit in place by sliding the receptacle on the<br />
back of the unit over the head of the screw.<br />
USING THE ALARM AND MEMORY TO MONITOR A REFRIGERATOR/FREEZER<br />
Following is an example of how to use the alarm and memory to monitor the<br />
temperature inside a <strong>refrigerator</strong> or <strong>freezer</strong>. This example is provided only as a helpful<br />
guide and is not intended to replace existing facility requirements or procedures.<br />
In this example, the <strong>refrigerator</strong> temperature must be monitored and logged for each<br />
24 hour period and certain actions must be taken if temperature falls below 0°C or<br />
rises above 5°C at any time during the 24 hour period.<br />
Unit Setup Example<br />
1. Plug the probe into the unit.<br />
2. Install the battery.<br />
3. Place the probe sensor inside the <strong>refrigerator</strong>.<br />
4. Place the display outside the <strong>refrigerator</strong>.<br />
5. Select the Probe Temperature Display mode. (See the “Temperature Display<br />
Modes” section.)<br />
At this point, if using a bottle probe, allow sufficient time for the bottle probe to reach<br />
equilibrium with the true current temperature inside the <strong>refrigerator</strong>.<br />
6. Set the probe temperature low alarm limit to 0°C. (See the “Setting Probe (OUT)<br />
Temperature Alarm Limits” section.)<br />
7. Set the probe temperature high alarm limit to 5°C. (See the “Setting Probe (OUT)<br />
Temperature Alarm Limits” section.)<br />
8. Enable the alarms. (See the “Enable/Disable Alarms” section.)<br />
9. Clear the minimum and maximum memory. (See the “Clearing the Probe (OUT)<br />
Temperature Memory” section.)<br />
10. Select the probe temperature with Min/Max memory display mode. (See the<br />
“Temperature Display Modes” section.)<br />
The alarm limits have been set and the alarm has been enabled. The display has been<br />
set to show the current temperature inside the <strong>refrigerator</strong> along with the minimum and<br />
maximum temperature that has been achieved inside the <strong>refrigerator</strong>.<br />
If the temperature inside the <strong>refrigerator</strong> goes outside the alarm limits (equal to or<br />
lower than the low alarm set point, or equal to or greater than the high alarm set point),<br />
the alarm will sound.<br />
If no one is available to hear the alarm sounding (overnight), and the temperature<br />
returns to an in-range condition, the memory will provide a record of the single lowest<br />
and highest temperature achieved. When the temperatures are recorded into the<br />
manual log, the memory will allow the user to see that the temperature inside the<br />
<strong>refrigerator</strong> had gone outside of the acceptable range.<br />
Monitoring Procedure Example<br />
Keep a notebook or spreadsheet as a manual log.<br />
1. At the same time every day, record the following into the manual log:<br />
● • Current Date and Time<br />
● • Current Temperature Reading<br />
● • Minimum Temperature Reading (MIN)<br />
● • Maximum Temperature Reading (MAX)<br />
2. Once the above items have been manually recorded, clear both the minimum and<br />
maximum temperature memory. (See the “Clearing the Probe (OUT) Temperature<br />
Memory” section.)<br />
By clearing the memory each day, the minimum and maximum temperature memory will<br />
provide a record of the minimum and maximum temperature that has been achieved<br />
inside the <strong>refrigerator</strong> over the past 24 hour monitoring period. The memory will also<br />
allow the user to see if the temperature inside the <strong>refrigerator</strong> went outside of the<br />
acceptable range when there was no one available to hear the alarm (overnight).<br />
ALL OPERATIONAL DIFFICULTIES<br />
If this unit does not function properly for any reason, replace the battery with a new<br />
high-quality battery (see the “Battery Replacement” section). Low battery power can<br />
occasionally cause any number of “apparent” operational difficulties. Replacing the<br />
battery with a new fresh battery will solve most difficulties.<br />
BATTERY REPLACEMENT<br />
Erratic readings, a faint display, no display, or a battery symbol appearing on the<br />
display are all indications that the battery must be replaced. Open the battery<br />
compartment by depressing the tab located at the top of the battery cover and lifting it<br />
out. The battery cover is hinged at the bottom so that the battery compartment may be<br />
opened without completely removing the battery cover. Remove the exhausted<br />
battery and replace with a AAA alkaline battery. Make certain to insert the new battery<br />
with the proper polarity as indicated in the illustration in the battery compartment.<br />
Close the battery cover.<br />
Replacing the battery has the same affect as pressing the RESET button. (See the<br />
“RESET BUTTON” section.)<br />
Warranty, Service, or Recalibration<br />
For warranty, service, or recalibration, contact:<br />
CONTROL COMPANY<br />
4455 Rex Road<br />
Friendswood, Texas 77546 USA<br />
Ph. 281-482-1714<br />
Fax 281-482-9448<br />
E-mail sales@control3.com<br />
www.control3.com<br />
Control Company is ISO 9001 Quality-Certified by<br />
DNV and ISO 17025 accredited as a Calibration<br />
Laboratory by A2LA.<br />
Control Company Cat. No. 92-4148-00<br />
Traceable ® is a registered trademark of Control Company<br />
© 2008 Control Company


