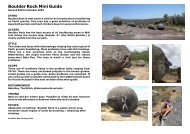
Wellington Dam Quarry - Climbers' Association of Western Australia
Wellington Dam Quarry - Climbers' Association of Western Australia
Wellington Dam Quarry - Climbers' Association of Western Australia

You also want an ePaper? Increase the reach of your titles
YUMPU automatically turns print PDFs into web optimized ePapers that Google loves.
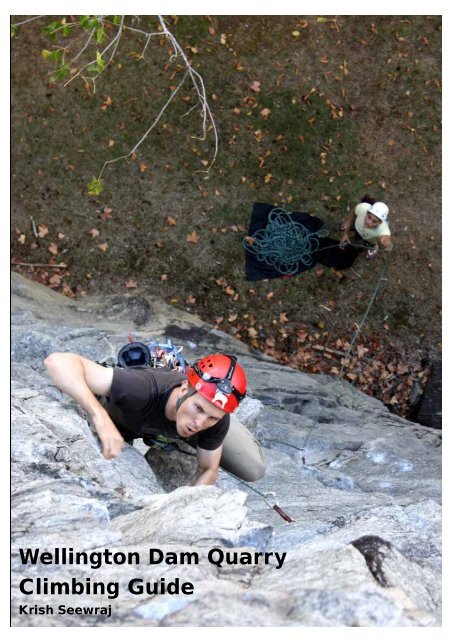
<strong>Wellington</strong> <strong>Dam</strong> <strong>Quarry</strong><br />
Climbing Guide<br />
Krish Seewraj
Warning about Rock Climbing<br />
This climbing guide has been developed to help climbers find out what climbs have been recorded<br />
and that is all. The information given is true and accurate to the best <strong>of</strong> the author’s knowledge.<br />
Remember climbing is an adventure sport and as such you may be seriously injured or killed. The<br />
grades and descriptions may be subject to debate. Therefore, be warned that you must exercise<br />
your own judgment with regard to the route location, description, difficulty and your ability to safely<br />
protect yourself from the risks <strong>of</strong> rock climbing.<br />
You should not depend on any information gleaned from this mini-guide for your personal safety.<br />
Your safety depends on your own experience, equipment and climbing skill. If you have any doubt<br />
as to your ability to safely attempt any route described in this mini-guide, do not attempt it. When<br />
you use this mini-guide, you accept and acknowledge the risk that it may contain errors. The<br />
responsibility for your safety is solely yours.<br />
Chris Wiggins starting up Ear for Fear (21) as Mathew Hodge nears the end <strong>of</strong> Savage Sausage Sniffer (20)<br />
© Sept 2012 Krish Seewraj<br />
All rights reserved. No part <strong>of</strong> this guide<br />
may be reproduced or transmitted in any<br />
form or by any means, electronic or<br />
mechanical, without written permission<br />
from Krish Seewraj, kermit@iinet.net.au<br />
Front cover image: Mathew Hodge finding his way up Raging Torrent (18)<br />
Rear cover image: Ryan Doe enjoying A Walk in Central Park (19)
Introduction<br />
<strong>Wellington</strong> <strong>Dam</strong> <strong>Quarry</strong> is detailed in the 1st and 2nd edition <strong>of</strong> Perth Rock Climbing. Both include<br />
routes established in the late 90s by Amanda Watts, Adam C<strong>of</strong>fee, Glen Henderson, Jeremy Scott,<br />
Boyd McNamara, Matt Tiller and Ross Weiter. This mini-guide has been prepared to make available<br />
the significant works <strong>of</strong> Dan Meester (AKA the <strong>Quarry</strong> Man) and contributions <strong>of</strong> Kym Hartley.<br />
Another reason for this mini-guide is that the <strong>Quarry</strong> gets a bad rap, which may put some people <strong>of</strong>f<br />
from sampling the fine climbs available here. Previous comment has been made to suggest the bolt<br />
placements at the <strong>Quarry</strong> were given little thought resulting in the potential for some nasty falls. In<br />
the opinion <strong>of</strong> the author, and based on comment from local and visiting climbers the bolts have<br />
been well placed. While there are some tenuous clips to be made they are usually in keeping with<br />
the grade and <strong>of</strong>ten have a safe landing. In the few circumstances this is not the case and this is<br />
indicated in the route description and the route title has the following symbol after it �.<br />
It is probably more truthful to say that most people are not used to the different rock and/or style <strong>of</strong><br />
climbing and subsequently find it intimidating. Once you pick a line the bolts are easy enough to<br />
locate but route finding can be tricky. Simply looking up gives little away. So when you first sample<br />
the joys to be had there it is advisable to climb a few grades lower than your comfort zone, at least<br />
until you get used to the place.<br />
Location and Access<br />
The <strong>Quarry</strong> is a 200km drive from Perth and is a day use area for visitors to <strong>Wellington</strong> <strong>Dam</strong>. The<br />
place is equipped with benches, shelters and toilets, the latter being located in the main car park<br />
above the <strong>Quarry</strong>. The Department <strong>of</strong> Environment and Conservation (DEC) also have plans to<br />
install new BBQs and upgrade the general area. A café exists a few minutes walk from the crag but<br />
it is rarely open. With a car park in the <strong>Quarry</strong> itself you can literally stumble out <strong>of</strong> your car and<br />
onto the crag. During summer the faces are shaded till mid/late morning and in winter they are<br />
shaded most <strong>of</strong> the day. While in winter some areas seep a fair bit there is usually a good selection<br />
<strong>of</strong> dry routes to choose from.<br />
To get there turn right <strong>of</strong>f the Collie Highway<br />
onto <strong>Wellington</strong> <strong>Dam</strong> Road (approx 17km<br />
before Collie). Follow <strong>Wellington</strong> <strong>Dam</strong> Road<br />
for 12km and after passing the café descend<br />
a steep incline before turning right into the<br />
<strong>Quarry</strong> car park.<br />
Approx<br />
location<br />
The <strong>Quarry</strong> is situated in the <strong>Wellington</strong><br />
National Park and managed by DEC. A permit<br />
and costs <strong>of</strong> $6/person/day is required for<br />
groups and individuals who use the facilities<br />
for abseiling. For more information contact<br />
the Collie district DEC <strong>of</strong>fice (9735 1988). At<br />
the time <strong>of</strong> publishing this guide recreational<br />
climbers could use the area without needing<br />
to get a permit or informing DEC <strong>of</strong> their<br />
intentions. This may change should the crag<br />
start to become overcrowded and it is best to<br />
check the latest information with the Collie<br />
district DEC <strong>of</strong>fice or the CAWA website or by<br />
emailing cawa@climberswa.asn.au.<br />
Future Development<br />
If anyone would like to share their past or<br />
future experiences in this area, details <strong>of</strong> new<br />
or listed routes as well as any reference<br />
issues, typos or mistakes in this mini-guide<br />
email them to kermit@iinet.net.au.
Rock, Protection & Grading<br />
The <strong>Quarry</strong> <strong>of</strong>fers sheer walls and slabs up to 20m high comprising a compact, and for the most part<br />
solid granite. Being a place set up for the general public most <strong>of</strong> the loose rock was removed when<br />
the quarrying activities ceased but care is still required, especially when climbing near the obvious<br />
blast holes.<br />
Routes tend to be deceptively steep and tricky and become a lot harder even after only a short<br />
shower. All lines are fully equipped with either ring bolts or fixed hangers, except for three routes<br />
which require traditional gear. Most routes are also equipped with lower-<strong>of</strong>fs but there are some for<br />
which you need to top out. These usually have anchors available which are set back from the face.<br />
So six quick draws, gear to set up on the lower-<strong>of</strong>fs and a fifty meter rope will get you up nearly all<br />
the lines.<br />
Naturally, each individual will have their own idea <strong>of</strong> the accuracy <strong>of</strong> the grade, which will be<br />
influenced by personal preference and skill. The climbing here is a little different to other places in<br />
<strong>Western</strong> <strong>Australia</strong> and as such may seem under-graded to some visitors. Despite there being a line<br />
<strong>of</strong> bolts to follow route finding is not straight forward and the steep terrain and fingery holds can<br />
quickly sap your strength. On your first visit here it is recommended to climb several grades below<br />
your comfort zone at least until you get used to the place. As with any crag it is best to read the<br />
description carefully, look at the climb and make your own judgment.<br />
Stars have been given to those climbs considered the best value. However, this was a tough call as<br />
all the lines in the <strong>Quarry</strong> have their own charm. When you warm to this place you are unlikely to<br />
find a climb that doesn’t provide you with a rewarding and satisfying feeling.<br />
The following abbreviations have been used BR (bolt runner), SBB (single bolt belay), DBB (double<br />
bolt belay) & � (potential for a nasty fall so be carefull).
Crag Topo<br />
Routes have been presented in this mini guide from left to right looking at the crag, i.e. a clockwise<br />
direction starting from the left slab. To make things a little easier the crag has been split into five<br />
sections. While images <strong>of</strong> each section have been taken it is difficult to capture all <strong>of</strong> the main wall<br />
clearly due to the larger trees. Some <strong>of</strong> the route locations are therefore a little obscure on the topo,<br />
but locating the routes from the ground should not pose any difficulties.<br />
Left<br />
slab<br />
Light<br />
pole<br />
Left<br />
wall<br />
Grassed<br />
areas<br />
Relatively level<br />
edge set up for<br />
abseiling<br />
<strong>Quarry</strong><br />
car park<br />
Relatively level<br />
edge along top<br />
<strong>of</strong> the <strong>Quarry</strong><br />
Right<br />
Slab<br />
Main<br />
wall<br />
Path connecting<br />
the <strong>Quarry</strong> and<br />
main car park<br />
Stone wall<br />
around top <strong>of</strong><br />
the <strong>Quarry</strong><br />
Large<br />
boulders<br />
Right<br />
wall
Left Slab<br />
HD<br />
Im<br />
Heavenly Delight (12m, 17)<br />
If you have a desperate need to get your trad rack out follow the lowest right trending crack to the<br />
left <strong>of</strong> the slab with a tricky traverse at 8m. After the crack ends go straight up to a tree belay after<br />
which a bush bash descent awaits you. Ross Weiter & Gemma Waldendorp 1997<br />
Impossible (12m, 27)<br />
Trend leftwards up the hollow flake, but be warned one day more large pieces are likely to detach<br />
themselves. Shockingly slick and with an unforgettable crux move for those good enough to get to it<br />
(3BR & SBB). Boyd McNamara 1998<br />
Infeasible (12m, 24)<br />
The right hand line <strong>of</strong> the slick slab taking a direct path passing thin edges and slippery smears<br />
(3BR & SBB). Boyd McNamara 1998<br />
In
Left Wall & left end <strong>of</strong> Main Wall<br />
BnT<br />
Block 'n' Tackle (8m, 15)<br />
A short climb that starts left <strong>of</strong> the light pole providing a good introduction to the deceptiveness <strong>of</strong><br />
the <strong>Quarry</strong> with a crux move that makes you think twice before committing (2BR & DBB). 1997<br />
Pole Voltz (14m, 22)*<br />
Starts to the right <strong>of</strong> the light pole heading up a right facing ramp and corner. Once established<br />
above the corner balance up the steepening wall on extremely thin holds before surmounting the lip<br />
(5BR & DBB - out <strong>of</strong> sight until you are over the lip). Dan Meester 2012<br />
Shock Therapy (14m, 20)<br />
This line shares the first BR <strong>of</strong> PV and heads directly up the steep face providing good but<br />
strenuous climbing, which doesn’t let up till the end (3BR & DBB). Dan Meester 2012<br />
A Walk in Central Park (20m, 19)<br />
The left wall <strong>of</strong> the corner provides good climbing that gets progressively harder. For best value<br />
tackle the crux by heading straight up and avoid the loose rock around the blast hole. Top out and<br />
use the anchors set back from the face (4BR & DBB). Dan Meester & Duncan 2012<br />
The next two lines are on the left end <strong>of</strong> Main Wall:<br />
PV<br />
ST<br />
AWICP<br />
T4 (20m, 24)**<br />
A brilliant route up the wall immediately right <strong>of</strong> the corner. It takes time to find the best holds to use<br />
and there are no real rests so make sure you are up for the challenge. Top out and use the anchors<br />
set back from the face (5BR & DBB). 1997<br />
Attack <strong>of</strong> the March Flies (18m, 22)**<br />
An excellent sustained line that has several differing and exciting crux moves. The final section past<br />
the last two BR <strong>of</strong>fers a right and slightly easier left variant (5BR & DBB). Dan Meester 2012<br />
T4<br />
AOTMF
Main Wall<br />
WTE<br />
LA<br />
XX<br />
T3<br />
Welcome to Edges (14m, 18)<br />
Prior to recent development this was the standard line on the mail wall for warming up on. Being<br />
shorter than most <strong>of</strong> the harder lines, having holds that are uncharacteristically large and friendly for<br />
the place and probably a little easy at the grade it never fully prepares you for your next chosen<br />
climb (4BR & DBB). 1997<br />
Loose <strong>Association</strong> (20m, 20)<br />
A nice line but easy at the grade. As there are no lower-<strong>of</strong>fs and no anchors at the top <strong>of</strong> the crag a<br />
D-shackle has been placed on the last BR or alternatively it is possible to traverse left to use the<br />
lower-<strong>of</strong>fs on WTE (4BR). 1997<br />
T3 (18m, 23)**<br />
A very worthy line that is sure to provide a fully body work out. After a tricky section through the<br />
overhang rest up on the ledge before starting up the next section which doesn’t let up till the very<br />
end (6BR & DBB). 1997<br />
Red Alert (18m, 22) �<br />
This line has some long reaches and loose rock. It seems a bit easy at the grade but the final<br />
moves are extremely committing and hard with a nasty landing awaiting those who don’t make it<br />
(5BR & DBB). 1997<br />
Go, Go Gadget Arms! (18m, 23)* �<br />
Shares the first and fifth BR <strong>of</strong> RA. Some memorable positions and moves up the steep start to this<br />
climb followed by the next thin and balancy section make this climb worth the effort. However, it<br />
does have the same scary finish as RA (5BR & DBB). 1997<br />
Raging Torrent (18m, 18)*<br />
Start immediately right <strong>of</strong> the central gully <strong>of</strong> the main wall, the climb takes a right trending line till<br />
half height from where it goes direct. A more traditional style is needed on this climb which yields<br />
good holds and some fine positions, with a sting in the tail (5BR & DBB). Kym Hartley & Krish<br />
Seewraj 2012<br />
RA<br />
GGGA<br />
RT
Main Wall<br />
YGWI<br />
HITW<br />
SSS<br />
You've Gotta Want It (18m, 23) �<br />
The name says it all! This outrageous climb comes complete with a delicate technical crux low<br />
down followed by two dead point cruxes and one very committing clip (6BR & DBB). Dan Meester<br />
2012<br />
Hole in the Wall (18m, 22)<br />
Fun climbing separated by a couple <strong>of</strong> big rest ledges. The crux is getting past the bulge on small<br />
holds once you find them (5BR & DBB). 1997<br />
Savage Sausage Sniffer (18m, 20)*<br />
Hard at the grade even for the <strong>Quarry</strong> standards. The layback arête in the mid section is as good as<br />
it looks. Once you leave the ledge and head up the arête the pace keeps going until the very end<br />
(4BR & DBB). 1997<br />
Barbie Q (18m, 19)<br />
A very direct line up the wall but the question for almost every BR is do you go left or right, get it<br />
wrong and you may not have enough energy to finish the climb in the style it deserves (5BR &<br />
DBB). 1997<br />
BB<br />
Just Do It (18m, 21)**<br />
A deceptive start and finish joined by fine, and less steep climbing than any other route on the main<br />
wall. When you get towards the end just do it (5BR & DBB). 1997<br />
Slay Away (16m, 22)*<br />
Sustained and technical climbing with a hard crux and after you pass this you’ll be asking yourself if<br />
your arms will hold out till the end. At the top traverse right to share the same DBB <strong>of</strong> EOF (6BR &<br />
DBB). 1997<br />
JDI<br />
SA<br />
EOF
Main Wall<br />
JDI<br />
SA<br />
EOF<br />
FS<br />
Ear <strong>of</strong> Fear (16m, 22)***<br />
Starting directly in front <strong>of</strong> the two large boulders this is the classic <strong>of</strong> the crag that is superb from<br />
start to finish. An airy technical and delicate move is required at the crux, which is then followed by<br />
extremely satisfying bridging up the right facing corner (5BR & DBB). 1997<br />
Flight Simulator (16m, 21)<br />
The first half <strong>of</strong> this climb is full on after which the pace eases considerably. Weave your way up<br />
towards the third BR, for which you’ll need all your energy to hold on and clip to avoid considerable<br />
air time (4BR & DBB). 1997<br />
Gumby Goes Bolting (16m, 20) �<br />
This line has probably seen most discussion about bolt placements as the fourth and fifth BRs are<br />
almost level. To climb this route at the grade head left round the bulge after the third BR noting that<br />
the next BR is some way <strong>of</strong>f. When you get there (with a sigh <strong>of</strong> relief) head straight for the DBB. It<br />
is not known if anyone has successfully climbed the scary variant that heads right from the bulge,<br />
but this was probably the intent <strong>of</strong> the seemingly obsolete BR (5BR & DBB). 1997<br />
Wingspan (16m, 22)<br />
As the name suggests reachy but with adequate rests between the harder sections, this climb goes<br />
right to the top and depending on your stature this climb may have more than one crux. Top out and<br />
use the anchors set back from the face (4BR & DBB). 1997<br />
Ebonie Road (16m, 20)<br />
A fierce line that tests if you are up for the challenge from the start. After the initial steep wall there is<br />
a good rest, take advantage <strong>of</strong> this before you tackle the second half where you need to keep<br />
searching for the right holds to use (4BR & DBB). Dan Meester 2012<br />
Chasing Mason (16m, 23)<br />
A strong line with a desperate looking overhung lower section that provides the first <strong>of</strong> two fine<br />
technical crux sequences (5BR & DBB). Dan Meester 2012<br />
GGB<br />
W<br />
ER<br />
CM
Right Wall<br />
TMC<br />
TVTW<br />
This Murky Corner (14m, 17)<br />
Start up the easy corner but the climb earns its grade with a tricky mid section. While there is a<br />
DBB the climb can be extended by topping out with fine moves. There are no belay anchors set<br />
back from the face but the gate post is <strong>of</strong>ten used (3BR & DBB). 1997<br />
Taj Vs The World (14m, 21)<br />
The first line <strong>of</strong> BRs right <strong>of</strong> TMC looks innocent enough but with almost every move you wonder<br />
should I use this hold or find something better. The question is do they ever get any better and will it<br />
ever ease up. While the angle does eventually ease there is a long run out before you get to the<br />
lower-<strong>of</strong>fs (3BR & DBB). Dan Meester 2012<br />
Full Tiller (14m, 22)*<br />
The start <strong>of</strong> this climb is steep with great moves and sequences until the slab above is reached.<br />
The slab is never too hard but there is a very long run out to the top <strong>of</strong> the crag where anchors are<br />
set back from the face (3BR & DBB). Matt Tiller 1997<br />
Silverback (10m, 21)<br />
This climb starts with reasonable holds but is steep and sustained and has an extremely thin and<br />
fingery crux section (3BR & DBB). Kym Hartley 2012<br />
FT<br />
S
Right Slab<br />
IS<br />
Irish Stew (10m, 14)<br />
Fun slab climbing past a BR above which there is gear in the horizontal break before exiting through<br />
the vegetation. Top out and while there are no belay anchors the guard rail provides a solid anchor<br />
(1BR). Craig Ferguson & Dan Meester 2012<br />
The Crack (10m, 12)<br />
The central crack line <strong>of</strong>fers small but adequate protection. Top out and use the anchors set back<br />
from the face (DBB). 1997<br />
B Young (10m, 16)*<br />
Keep the BRs on your right for some fine slab climbing that leads you into a false sense <strong>of</strong> security<br />
and then attempts to pull your legs away from you when you think you’ve made it. Top out and use<br />
the anchors set back from the face (2BR & DBB). Kym Hartley & Krish Seewraj 2012<br />
Old School (10m, 14)<br />
Shares the same BRs as BY but this time keeping them to your left. Head out right to the arête and<br />
ascend this with increasing difficulty. Top out and use the anchors set back from the face (2BR &<br />
DBB). Kym Hartley & Krish Seewraj 2012<br />
TC<br />
BY<br />
OS
Mathew Hodges powering up the last crux sequence and hoping for good holds on Barbie Q (19)<br />
Chris Howe figuring out the tricky and sustained Taj Vs The World (21)
Chris Howe smearing his way up B Young (16)<br />
Paul Kerston enjoying the fine climbing and unusually friendly holds on Welcome to Edges (18)
Ram Hareli going for the finishing holds <strong>of</strong> This Murky Corner (17)<br />
Ryan Doe taking in some air time after slipping <strong>of</strong>f on the home stretch <strong>of</strong> Just Do It (21)
September 2012