GX240 · GX270 · GX340 · GX390 - Honda Motorcycles
GX240 · GX270 · GX340 · GX390 - Honda Motorcycles
GX240 · GX270 · GX340 · GX390 - Honda Motorcycles

Create successful ePaper yourself
Turn your PDF publications into a flip-book with our unique Google optimized e-Paper software.
10/05/08 08:44:13 32Z8R600_002<br />
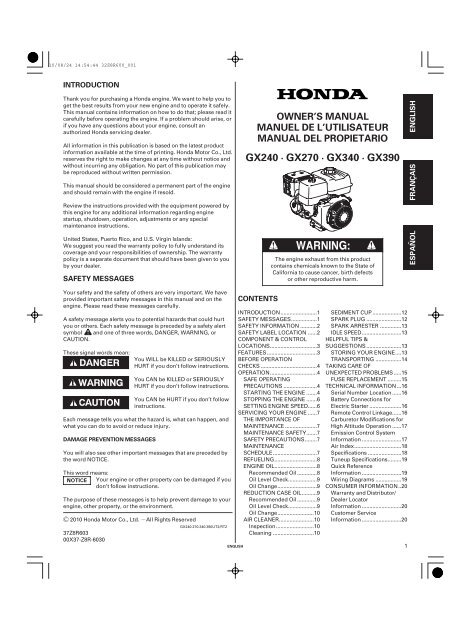
SAFETY INFORMATION SAFETY LABEL LOCATION<br />
2<br />
Understand the operation of all controls and learn how to stop<br />
the engine quickly in case of emergency. Make sure the operator<br />
receives adequate instruction before operating the equipment.<br />
Do not allow children to operate the engine. Keep children and<br />
pets away from the area of operation.<br />
Your engine’s exhaust contains poisonous carbon monoxide.<br />
Do not run the engine without adequate ventilation, and never<br />
run the engine indoors.<br />
The engine and exhaust become very hot during operation.<br />
Keep the engine at least 1 meter (3 feet) away from buildings<br />
and other equipment during operation. Keep flammable<br />
materials away, and do not place anything on the engine while it<br />
is running.<br />
ENGLISH<br />
This label warns you of potential hazards that can cause serious<br />
injury. Read it carefully.<br />
If the label comes off or becomes hard to read, contact your <strong>Honda</strong><br />
servicing dealer for replacement.<br />
MUFFLER CAUTION LABEL<br />
WARNING LABEL<br />
(The label should be located<br />
either on the fuel tank, fan<br />
cover or packaged loosely<br />
with the engine to be applied<br />
by the manufacture.)<br />
WARNING LABEL<br />
For EU Except EU<br />
attached to<br />
product<br />
supplied<br />
with product<br />
supplied<br />
with product<br />
MUFFLER CAUTION LABEL For EU Except EU<br />
not<br />
included<br />
supplied<br />
with product<br />
supplied<br />
with product<br />
supplied<br />
with product<br />
attached to<br />
product<br />
supplied<br />
with product<br />
supplied<br />
with product<br />
attached to<br />
product<br />
supplied<br />
with product<br />
Gasoline is highly flammable and explosive.<br />
Stop the engine and let cool before refueling.<br />
The engine emits toxic poisonous carbon<br />
monoxide gas. Do not run in an enclosed area.<br />
Read Owner’s Manual before operation.<br />
Hot muffler can burn you.<br />
Stay away if engine has been running.
10/05/08 08:44:29 32Z8R600_003<br />
COMPONENT & CONTROL LOCATIONS<br />
FUEL TANK<br />
OIL DRAIN PLUG<br />
CHOKE LEVER<br />
FUEL<br />
VALVE LEVER<br />
ENGINE SWITCH<br />
FUEL FILLER CAP<br />
MUFFLER<br />
CHOKE ROD<br />
(applicable types)<br />
ELECTRIC STARTER TYPES<br />
AIR CLEANER<br />
STARTER GRIP<br />
ENGINE CONTROL TYPES<br />
EXCEPT ELECTRIC<br />
STARTER TYPES<br />
ENGINE SWITCH<br />
ENGINE SWITCH<br />
ELECTRIC STARTER<br />
(applicable types)<br />
OIL FILLER CAP/DIPSTICK<br />
RECOIL STARTER<br />
ENGLISH<br />
FEATURES<br />
OIL ALERT SYSTEM (applicable types)<br />
‘‘Oil Alert is a registered trademark in the United States’’<br />
The Oil Alert system is designed to prevent engine damage<br />
caused by an insufficient amount of oil in the crankcase. Before<br />
the oil level in the crankcase can fall below a safe limit, the Oil<br />
Alert system will automatically stop the engine (the engine switch<br />
will remain in the ON position).<br />
If the engine stops and will not restart, check the engine oil level<br />
(see page 9 ) before troubleshooting in other areas.<br />
CIRCUIT PROTECTOR (applicable types)<br />
The circuit protector protects the<br />
battery charging circuit. A short<br />
circuit, or a battery connected<br />
with reverse polarity, will trip the<br />
circuit protector.<br />
The green indicator inside the<br />
circuit protector will pop out to<br />
show that the circuit protector has<br />
switched off. If this occurs,<br />
determine the cause of the<br />
problem, and correct it before<br />
resetting the circuit protector.<br />
Push the circuit protector button<br />
to reset.<br />
CIRCUIT<br />
PROTECTOR<br />
ON<br />
OFF<br />
3
10/05/08 08:44:54 32Z8R600_004<br />
BEFORE OPERATION CHECKS<br />
IS YOUR ENGINE READY TO GO?<br />
For your safety, to ensure compliance with environmental<br />
regulations, and to maximize the service life of your equipment, it<br />
is very important to take a few moments before you operate the<br />
engine to check its condition. Be sure to take care of any problem<br />
you find, or have your servicing dealer correct it, before you<br />
operate the engine.<br />
Check the General Condition of the Engine<br />
Check the Engine<br />
3. Check the reduction case oil level on applicable types (see page<br />
9 ). Oil is essential to reduction case operation and long life.<br />
4. Check the air filter element (see page 10 ). A dirty air filter<br />
element will restrict air flow to the carburetor, reducing engine<br />
performance.<br />
5. Check the equipment powered by this engine.<br />
4<br />
Improperly maintaining this engine, or failure to<br />
correct a problem before operation, can cause a<br />
malfunction in which you can be seriously hurt or<br />
killed.<br />
Always perform a pre-operation inspection before<br />
each operation, and correct any problem.<br />
Before beginning your pre-operation checks, be sure the engine is<br />
level and the engine switch is in the OFF position.<br />
Always check the following items before you start the engine:<br />
1. Look around and underneath the engine for signs of oil or<br />
gasoline leaks.<br />
2. Remove any excessive dirt or debris, especially around the<br />
muffler and recoil starter.<br />
3. Look for signs of damage.<br />
4. Check that all shields and covers are in place, and all nuts, bolts,<br />
and screws are tightened.<br />
1. Check the fuel level (see page 8 ). Starting with a full tank will<br />
help to eliminate or reduce operating interruptions for refueling.<br />
2. Check the engine oil level (see page 9 ). Running the engine<br />
with a low oil level can cause engine damage.<br />
The Oil Alert system (applicable types) will automatically stop<br />
the engine before the oil level falls below safe limits. However,<br />
to avoid the inconvenience of an unexpected shutdown, always<br />
check the engine oil level before startup.<br />
Review the instructions provided with the equipment powered<br />
by this engine for any precautions and procedures that should<br />
be followed before engine startup.<br />
ENGLISH<br />
OPERATION<br />
SAFE OPERATING PRECAUTIONS<br />
Before operating the engine for the first time, please review the<br />
SAFETY INFORMATION section on page 2 and the BEFORE<br />
OPERATION CHECKS on page 4 .<br />
For your safety, do not operate the engine in an enclosed area<br />
such as a garage. Your engine’s exhaust contains poisonous<br />
carbon monoxide gas that can collect rapidly in an enclosed area<br />
and cause illness or death.<br />
STARTING THE ENGINE<br />
CLOSED<br />
Exhaust contains poisonous carbon monoxide gas<br />
that can build up to dangerous levels in closed areas.<br />
Breathing carbon monoxide can cause<br />
unconsciousness or death.<br />
Never run the engine in a closed, or even partly<br />
closed area where people may be present.<br />
Review the instructions provided with the equipment powered by<br />
this engine for any safety precautions that should be observed<br />
with engine startup, shutdown or operation.<br />
1. Move the fuel valve lever to the ON position.<br />
ON<br />
OFF<br />
CHOKE LEVER<br />
CLOSED<br />
FUEL VALVE LEVER<br />
2. To start a cold engine, move the choke lever or choke rod<br />
(applicable types) to the CLOSED position.<br />
ON<br />
OPEN<br />
CHOKE ROD (applicable types)<br />
OPEN<br />
CLOSED
10/05/08 08:45:16 32Z8R600_005<br />
To restart a warm engine, leave the choke lever or choke rod in<br />
the OPEN position.<br />
Some engine applications use a remote-mounted choke control<br />
rather than the engine-mounted choke lever shown on the<br />
previous page. Refer to the instructions provided by the<br />
equipment manufacturer.<br />
3. Move the throttle lever away from the MIN. position, about 1/3<br />
of the way toward the MAX. position.<br />
THROTTLE LEVER<br />
ENGINE SWITCH<br />
ON<br />
ON<br />
ON<br />
ON<br />
ENGINE SWITCH<br />
MIN.<br />
MAX.<br />
ENGINE SWITCH<br />
MIN.<br />
1/3 POSITION<br />
Some engine applications use a remote-mounted throttle control<br />
rather than the engine-mounted throttle lever shown here. Refer to<br />
the instructions provided by the equipment manufacturer.<br />
4. Turn the engine switch to the ON position.<br />
EXCEPT ELECTRIC<br />
STARTER TYPES<br />
ELECTRIC STARTER TYPES<br />
ENGLISH<br />
5. Operate the starter.<br />
RECOIL STARTER<br />
Pull the starter grip lightly until you feel resistance, then pull<br />
briskly in the direction of the arrow as shown below. Return the<br />
starter grip gently.<br />
STARTER GRIP<br />
OPEN<br />
Direction to pull<br />
Do not allow the starter grip to snap back against the engine.<br />
Return it gently to prevent damage to the starter.<br />
ELECTRIC STARTER (applicable types):<br />
Turn the key to the START position,<br />
and hold it there until the engine starts.<br />
If the engine fails to start within 5<br />
seconds, release the key, and wait at<br />
least 10 seconds before operating the<br />
starter again.<br />
Using the electric starter for more than<br />
5 seconds at a time will overheat the<br />
starter motor and can damage it.<br />
When the engine starts, release the<br />
key, allowing it to return to the ON<br />
position.<br />
CHOKE LEVER<br />
CLOSED<br />
ENGINE SWITCH<br />
(applicable types)<br />
OPEN<br />
CHOKE ROD (applicable types)<br />
OPEN<br />
CLOSED<br />
START<br />
6. If the choke lever or choke rod (applicable types) was moved to<br />
the CLOSED position to start the engine, gradually move it to the<br />
OPEN position as the engine warms up.<br />
5
10/05/08 08:45:35 32Z8R600_006<br />
STOPPING THE ENGINE<br />
To stop the engine in an emergency, simply turn the engine switch<br />
to the OFF position. Under normal conditions, use the following<br />
procedure. Refer to the instructions provided by the equipment<br />
manufacturer.<br />
1. Move the throttle lever to the MIN. position.<br />
6<br />
Some engine applications use a remote-mounted throttle<br />
control rather than the engine-mounted throttle lever shown<br />
here.<br />
EXCEPT ELECTRIC<br />
STARTER TYPES<br />
ENGINE SWITCH<br />
OFF<br />
OFF<br />
ENGINE SWITCH<br />
OFF<br />
OFF<br />
OFF<br />
FUEL VALVE<br />
LEVER<br />
THROTTLE LEVER<br />
2. Turn the engine switch to the OFF position.<br />
ELECTRIC STARTER TYPES<br />
ENGLISH<br />
SETTING ENGINE SPEED<br />
MIN.<br />
MIN. MAX.<br />
OFF<br />
ENGINE SWITCH<br />
3. Turn the fuel valve lever to the OFF position.<br />
OFF<br />
ON<br />
Position the throttle lever for the desired engine speed.<br />
Some engine applications use a remote-mounted throttle control<br />
rather than the engine-mounted throttle lever shown here. Refer to<br />
the instructions provided by the equipment manufacturer.<br />
For engine speed recommendations, refer to the instructions<br />
provided with the equipment powered by this engine.<br />
THROTTLE LEVER<br />
MIN.<br />
MAX.<br />
MIN.
10/05/08 08:46:29 32Z8R600_008<br />
REFUELING<br />
Recommended Fuel<br />
Unleaded gasoline<br />
U.S.<br />
Except U.S.<br />
8<br />
FUEL FILLER CAP<br />
Pump octane rating 86 or higher<br />
Research octane rating 91 or higher<br />
Pump octane rating 86 or higher<br />
This engine is certified to operate on unleaded gasoline with a<br />
pump octane rating of 86 or higher (a research octane rating of 91<br />
or higher).<br />
Refuel in a well ventilated area with the engine stopped. If the<br />
engine has been running, allow it to cool first. Never refuel the<br />
engine inside a building where gasoline fumes may reach flames<br />
or sparks.<br />
You may use unleaded gasoline containing no more than 10%<br />
ethanol (E10) or 5% methanol by volume. In addition, methanol<br />
must contain cosolvents and corrosion inhibitors. Use of fuels<br />
with content of ethanol or methanol greater than shown above<br />
may cause starting and/or performance problems. It may also<br />
damage metal, rubber, and plastic parts of the fuel system. Engine<br />
damage or performance problems that result from using a fuel<br />
with percentages of ethanol or methanol greater than shown<br />
above are not covered under the Warranty.<br />
If your equipment will be used on an infrequent or intermittent<br />
basis, please refer to the fuel section of the STORING YOUR<br />
ENGINE chapter (see page 13 ) for additional information<br />
regarding fuel deterioration.<br />
Never use stale or contaminated gasoline or an oil/gasoline<br />
mixture. Avoid getting dirt or water in the fuel tank.<br />
Gasoline is highly flammable and explosive, and you<br />
can be burned or seriously injured when refueling.<br />
Stop the engine and keep heat, sparks, and flame<br />
away.<br />
Refuel only outdoors.<br />
Wipe up spills immediately.<br />
Fuel can damage paint and some types of plastic. Be careful not to<br />
spill fuel when filling your fuel tank. Damage caused by spilled<br />
fuel is not covered under the Distributor’s Limited Warranty.<br />
For refueling, refer to the manufacturer’s instructions provided<br />
with the equipment. See the following for a <strong>Honda</strong> supplied<br />
standard fuel tank refueling instruction.<br />
1. With the engine stopped and on a level surface, remove the fuel<br />
filler cap and check the fuel level. Refill the tank if the fuel level<br />
is low.<br />
ENGLISH<br />
2. Add fuel to the bottom of the maximum fuel level limit of the<br />
fuel tank. Do not overfill. Wipe up spilled fuel before starting the<br />
engine.<br />
MAXIMUM<br />
FUEL LEVEL<br />
3. Refuel carefully to avoid spilling fuel. Do not fill the fuel tank<br />
completely. It may be necessary to lower the fuel level<br />
depending on operating conditions. After refueling, tighten the<br />
fuel filler cap securely.<br />
Keep gasoline away from appliance pilot lights, barbecues,<br />
electric appliances, power tools, etc.<br />
Spilled fuel is not only a fire hazard, it causes environmental<br />
damage. Wipe up spills immediately.<br />
ENGINE OIL<br />
Oil is a major factor affecting performance and service life.<br />
Use 4-stroke automotive detergent oil.<br />
Recommended Oil<br />
Use 4-stroke motor oil that meets or exceeds the requirements for<br />
API service category SJ or later (or equivalent). Always check the<br />
API service label on the oil container to be sure it includes the<br />
letters SJ or later (or equivalent).<br />
AMBIENT TEMPERATURE<br />
SAE 10W-30 is recommended for general use. Other viscosities<br />
shown in the chart may be used when the average temperature in<br />
your area is within the indicated range.
10/05/08 08:46:55 32Z8R600_009<br />
Oil Level Check<br />
Check the engine oil level with the engine stopped and in a level<br />
position.<br />
1. Remove the oil filler cap/dipstick and wipe it clean.<br />
2. Insert the oil filler cap/dipstick into the oil filler neck as shown,<br />
but do not screw it in, then remove it to check the oil level.<br />
3. If the oil level is near or below the lower limit mark on the<br />
dipstick, fill with the recommended oil (see page 8 ) to the<br />
upper limit mark (bottom edge of the oil fill hole). Do not overfill.<br />
4. Reinstall the oil filler cap/dipstick.<br />
Oil Change<br />
OIL FILLER CAP/DIPSTICK<br />
OIL FILL HOLE<br />
(bottom edge)<br />
UPPER LIMIT<br />
LOWER LIMIT<br />
Running the engine with a low oil level can cause engine damage.<br />
This type of damage is not covered by the Distributor’s Limited<br />
Warranty.<br />
The Oil Alert system (applicable types) will automatically stop the<br />
engine before the oil level falls below the safe limit. However, to<br />
avoid the inconvenience of an unexpected shutdown, always<br />
check the engine oil level before startup.<br />
Drain the used oil when the engine is warm. Warm oil drains<br />
quickly and completely.<br />
1. Place a suitable container below the engine to catch the used oil,<br />
then remove the oil filler cap/dipstick, oil drain plug and washer.<br />
2. Allow the used oil to drain completely, then reinstall the oil drain<br />
plug and a new washer, and tighten the oil drain plug securely.<br />
Please dispose of used motor oil in a manner that is compatible<br />
with the environment. We suggest you take used oil in a sealed<br />
container to your local recycling center or service station for<br />
reclamation. Do not throw it in the trash, pour it on the ground,<br />
or pour it down a drain.<br />
3. With the engine in a level position, fill with the recommended oil<br />
(see page 8 ) to the upper limit mark (bottom edge of the oil fill<br />
hole) on the dipstick.<br />
Running the engine with a low oil level can cause engine<br />
damage. This type of damage is not covered by the Distributor’s<br />
Limited Warranty.<br />
The Oil Alert system (applicable types) will automatically stop<br />
the engine before the oil level falls below the safe limit.<br />
However, to avoid the inconvenience of an unexpected<br />
shutdown, fill to the upper limit, and check the oil level regularly.<br />
ENGLISH<br />
4. Install the oil filler cap/dipstick and tighten securely.<br />
OIL FILLER CAP/<br />
DIPSTICK<br />
WASHER<br />
REDUCTION CASE OIL (applicable types)<br />
Recommended Oil<br />
Oil Level Check<br />
1/2 Reduction Case With Centrifugal Clutch<br />
UPPER LIMIT<br />
OIL DRAIN PLUG<br />
LOWER LIMIT<br />
OIL LEVEL<br />
Use the same oil that is recommended for the engine (see page 8 ).<br />
Check the reduction case oil level with the engine stopped and in a<br />
level position.<br />
1. Remove the oil filler cap/dipstick and wipe it clean.<br />
2. Insert and remove the oil filler cap/dipstick without screwing it<br />
into the filler hole. Check the oil level shown on the oil filler cap/<br />
dipstick.<br />
3. If the oil level is low, add the recommended oil to reach the<br />
upper limit mark on the dipstick.<br />
4. Screw in the oil filler cap/dipstick and tighten securely.<br />
OIL FILLER CAP/DIPSTICK<br />
9
10/08/25 10:37:36 32Z8R600_011<br />
5. Clean the air filter elements if they are to be reused.<br />
Paper air filter element: Tap the filter element several times on a<br />
hard surface to remove dirt, or blow compressed air [not<br />
exceeding 207 kPa (2.1 kgf/cm , 30 psi)] through the filter<br />
element from the inside. Never try to brush off dirt; brushing will<br />
force dirt into the fibers.<br />
Foam air filter element: Clean in warm soapy water, rinse, and<br />
allow to dry thoroughly. Or clean in non-flammable solvent and<br />
allow to dry. Dip the filter element in clean engine oil, then<br />
squeeze out all excess oil. The engine will smoke when started if<br />
too much oil is left in the foam.<br />
6. CYCLONE TYPE ONLY: Remove the three pan-head screws from<br />
the precleaner cap, then remove the cyclone housing and air<br />
guide. Wash the parts with water, dry them thoroughly, and<br />
reassemble them.<br />
Be sure to install the air guide as shown in the illustration.<br />
Install the cyclone housing so the air intake tab fits into the<br />
groove in the precleaner cap.<br />
7. Wipe dirt from the inside of the air cleaner case and cover using<br />
a moist rag. Be careful to prevent dirt from entering the air duct<br />
that leads to the carburetor.<br />
8. Place the foam air filter element over the paper element, and<br />
reinstall the assembled air filter. Be sure the gasket is in place<br />
beneath the air filter. Tighten the air filter wing nut securely.<br />
9. Install the air cleaner cover, and tighten the wing nut securely.<br />
Oil-Bath Type<br />
1. Remove the wing nut, and remove the air cleaner cap and cover.<br />
2. Remove the air filter element from the cover. Wash the cover<br />
and filter element in warm soapy water, rinse, and allow to dry<br />
thoroughly. Or clean in non-flammable solvent and allow to dry.<br />
3. Dip the filter element in clean engine oil, then squeeze out all<br />
excess oil. The engine will smoke if too much oil is left in the<br />
foam.<br />
4. Empty the used oil from the air cleaner case, wash out any<br />
accumulated dirt with non-flammable solvent, and dry the case.<br />
5. Fill the air cleaner case to the OIL LEVEL mark with the same oil<br />
that is recommended for the engine (see page 8 ).<br />
Oil capacities:<br />
<strong>GX240</strong>/<strong>GX270</strong>:<br />
<strong>GX340</strong>/<strong>GX390</strong>:<br />
60 cm (2.0 US oz , 2.1 Imp oz)<br />
80 cm (2.7 US oz , 2.8 Imp oz)<br />
ENGLISH<br />
6. Reassemble the air cleaner, and tighten the wing nut securely.<br />
WING NUT<br />
AIR CLEANER<br />
COVER<br />
FILTER<br />
ELEMENT<br />
GRID<br />
AIR CLEANER<br />
CASE<br />
Low Profile Types<br />
OIL-BATH TYPE<br />
1. Unsnap the air cleaner cover clips,<br />
remove the air cleaner cover, and<br />
remove the air filter element.<br />
2. Wash the element in a solution of<br />
household detergent and warm<br />
water, then rinse thoroughly, or<br />
wash in non-flammable or high<br />
flash point solvent. Allow the<br />
element to dry thoroughly.<br />
3. Soak the air filter element in clean<br />
engine oil and squeeze out the<br />
excess oil. The engine will smoke<br />
during initial startup if too much<br />
oil is left in the element.<br />
4. Reinstall the air filter element and<br />
the cover.<br />
AIR FILTER ELEMENT<br />
CAP<br />
STEEL WOOL<br />
OIL LEVEL<br />
AIR CLEANER COVER<br />
AIR FILTER ELEMENT<br />
11
10/05/08 08:50:18 32Z8R600_017<br />
Carburetor Modifications for High Altitude Operation<br />
At high altitude, the standard carburetor air-fuel mixture will be<br />
too rich. Performance will decrease, and fuel consumption will<br />
increase. A very rich mixture will also foul the spark plug and<br />
cause hard starting. Operation at an altitude that differs from that<br />
at which this engine was certified, for extended periods of time,<br />
may increase emissions.<br />
High altitude performance can be improved by specific<br />
modifications to the carburetor. If you always operate your engine<br />
at altitudes above 1,500 meters (5,000 feet), have your servicing<br />
dealer perform this carburetor modification. This engine, when<br />
operated at high altitude with the carburetor modifications for<br />
high altitude use, will meet each emission standard throughout its<br />
useful life.<br />
Even with carburetor modification, engine horsepower will<br />
decrease about 3.5% for each 300 meter (1,000 foot) increase in<br />
altitude. The effect of altitude on horsepower will be greater than<br />
this if no carburetor modification is made.<br />
When the carburetor has been modified for high altitude operation,<br />
the air-fuel mixture will be too lean for low altitude use. Operation<br />
at altitudes below 1,500 meters (5,000 feet) with a modified<br />
carburetor may cause the engine to overheat and result in serious<br />
engine damage. For use at low altitudes, have your servicing<br />
dealer return the carburetor to original factory specifications.<br />
ENGLISH<br />
Emission Control System Information<br />
Source of Emissions<br />
The combustion process produces carbon monoxide, oxides of<br />
nitrogen, and hydrocarbons. Control of hydrocarbons and oxides<br />
of nitrogen is very important because, under certain conditions,<br />
they react to form photochemical smog when subjected to<br />
sunlight. Carbon monoxide does not react in the same way, but it<br />
is toxic.<br />
<strong>Honda</strong> utilizes appropriate air/fuel ratios and other emissions<br />
control systems to reduce the emissions of carbon monoxide,<br />
oxides of nitrogen, and hydrocarbons.<br />
Additionally, <strong>Honda</strong> fuel systems utilize components and control<br />
technologies to reduce evaporative emissions.<br />
The U.S., California Clean Air Act, and Environment Canada<br />
EPA, California, and Canadian regulations require all<br />
manufacturers to furnish written instructions describing the<br />
operation and maintenance of emission control systems.<br />
The following instructions and procedures must be followed in<br />
order to keep the emissions from your <strong>Honda</strong> engine within the<br />
emission standards.<br />
Tampering and Altering<br />
Tampering with or altering the emission control system may<br />
increase emissions beyond the legal limit. Among those acts that<br />
constitute tampering are:<br />
Removal or alteration of any part of the intake, fuel, or exhaust<br />
systems.<br />
Altering or defeating the governor linkage or speed-adjusting<br />
mechanism to cause the engine to operate outside its design<br />
parameters.<br />
Problems That May Affect Emissions<br />
If you are aware of any of the following symptoms, have your<br />
engine inspected and repaired by your servicing dealer.<br />
Hard starting or stalling after starting.<br />
Rough idle.<br />
Misfiring or backfiring under load.<br />
Afterburning (backfiring).<br />
Black exhaust smoke or high fuel consumption.<br />
Replacement Parts<br />
The emission control systems on your <strong>Honda</strong> engine were<br />
designed, built, and certified to conform with EPA, California<br />
(models certified for sale in California), and Canadian emission<br />
regulations. We recommend the use of <strong>Honda</strong> Genuine parts<br />
whenever you have maintenance done. These original-design<br />
replacement parts are manufactured to the same standards as the<br />
original parts, so you can be confident of their performance. The<br />
use of replacement parts that are not of the original design and<br />
quality may impair the effectiveness of your emission control<br />
system.<br />
A manufacturer of an aftermarket part assumes the responsibility<br />
that the part will not adversely affect emission performance. The<br />
manufacturer or rebuilder of the part must certify that use of the<br />
part will not result in a failure of the engine to comply with<br />
emission regulations.<br />
Maintenance<br />
Follow the maintenance schedule on page 7 . Remember that this<br />
schedule is based on the assumption that your machine will be<br />
used for its designed purpose. Sustained high-load or hightemperature<br />
operation, or use in unusually wet or dusty conditions,<br />
will require more frequent service.<br />
17