
You also want an ePaper? Increase the reach of your titles
YUMPU automatically turns print PDFs into web optimized ePapers that Google loves.
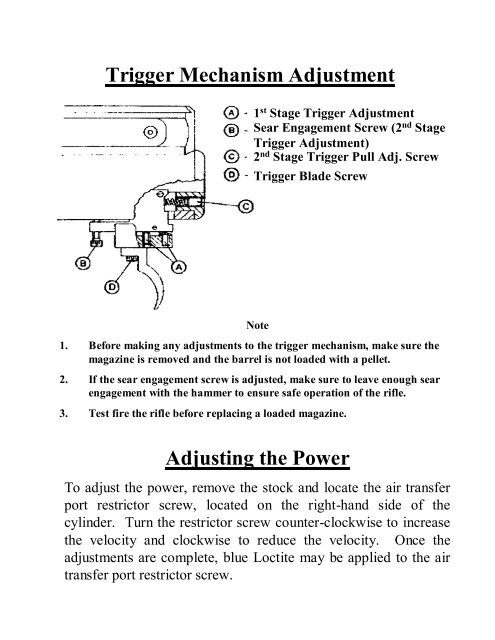
Trigger Mechanism Adjustment<br />
1 st Stage Trigger Adjustment<br />
Sear Engagement Screw (2 nd Stage<br />
Trigger Adjustment)<br />
2 nd Stage Trigger Pull Adj. Screw<br />
Trigger Blade Screw<br />
Note<br />
1. Before making any adjustments to the trigger mechanism, make sure the<br />
magazine is removed and the barrel is not loaded with a pellet.<br />
2. If the sear engagement screw is adjusted, make sure to leave enough sear<br />
engagement with the hammer to ensure safe operation <strong>of</strong> the rifle.<br />
3. Test fire the rifle before replacing a loaded magazine.<br />
Adjusting the Power<br />
To adjust the power, remove the stock and locate the air transfer<br />
port restrictor screw, located on the right-hand side <strong>of</strong> the<br />
cylinder. Turn the restrictor screw counter-clockwise to increase<br />
the velocity and clockwise to reduce the velocity. Once the<br />
adjustments are complete, blue Loctite may be applied to the air<br />
transfer port restrictor screw.