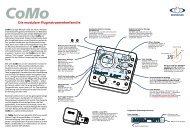
Telario talk - Renschler Instruments
Telario talk - Renschler Instruments
Telario talk - Renschler Instruments

Create successful ePaper yourself
Turn your PDF publications into a flip-book with our unique Google optimized e-Paper software.
picolario <strong>talk</strong><br />
The telemetry system from <strong>Renschler</strong><br />
© 1998/2000 Thomas Seidel www.thommys.com
Table of content :<br />
Preface 3<br />
How to connect the cable to the Picolario 3<br />
Mounting considerations for the vario 4<br />
First operation of the vario 4<br />
The vario function 5<br />
The receiver battery check 5<br />
Automatic altitude mode 5<br />
Request of altitude or voltage, time automatic for altitude 5<br />
Failsafe at PCM-receiver 6<br />
Programming of the Picolario Talk and Parameter setting 6/7<br />
Flight book, minimum / maximum values 8<br />
General tips 8<br />
Usage of the altitude request 8<br />
Usage in electric models 8<br />
Problems with too less receiver channels 8<br />
Professional programming of the requests 8<br />
Technical Data 9<br />
Sales and Information, Manufacturer 9<br />
CE-Declaration 9<br />
Quick start, short reference 10<br />
© 1998/2000 Thomas Seidel www.thommys.com
Dear customer,<br />
Congratulations to your new Picolario <strong>talk</strong>. You have chosen an expandable telemetry<br />
system, which is designed and manufactured in Germany.<br />
It is a joint development between <strong>Renschler</strong> <strong>Instruments</strong> and Thommys Modellbau. Thomas<br />
Seidel experience in RC sailplanes was important to make it a professional system. Due to<br />
Thomas it is also easy to operate and provides the information relevant for flying.<br />
The main idea is to supply a lot of data, without distracting the pilot from flying. Cause it is<br />
not easy in critical situations, to move his eyes from the model, a voice data output was the<br />
optimum solution. With that the pilot is informed through a friendly woman voice.<br />
Due to the wide spread of vario/ telemetry systems the Picolario uses a 16 channel<br />
transmitting module. A cheap 1 channel solution is insufficient due to the limited usage of just<br />
1 pilot. The receiver is a license free standard RF unit (433 MHz in Europe) which could also<br />
be used for other communication purposes: f. e. searching a model in the wood.<br />
Another point we want to mention is the update and upgrade ability of the Picolario Talk.<br />
During turn on the voice tells you the version of the current software.<br />
To get the latest news just, take a look at www.thommys.com .<br />
Please take care to plug the cable correctly.<br />
Please take a look at the picture shown<br />
right .<br />
Lay the Picolario on a table with the pins to<br />
the right side, so the small tube of the<br />
pressure sensor is next to you. The cable is<br />
plugged in on the pins on the other side.<br />
Take the row next to the table and then<br />
minus (-), then plus (+) and then signal<br />
Mounting consideration for the vario :<br />
Stick the vario using the Velcro inside your model. If you have a carbon fuselage, then it is<br />
recommended to have the antenna outside. The antenna should also be straight and not<br />
parallel to other wires or metal pieces, cause this reduces the transmitting range. We have<br />
tested the Picolario with several 35 MHz receiver and we could not see a big impact in the<br />
range. But we recommend in general to make a range check with your model before first<br />
usage. (In every model you are using it). We think that this is generally a good idea after<br />
installation of new electronic components like servos, receivers or varios. If you ran into<br />
problems please contact us. In most cases of problems there has been a general problem<br />
with that specific installation and the vario makes a worse thing even more worse than it has<br />
already been. We could see a range decrease on some receivers, if the RC receiver antenna<br />
was close to servo wires, without even having a Picolario installed.<br />
.<br />
© 1998/2000 Thomas Seidel www.thommys.com
First operation of the vario:<br />
Plug the vario into a free channel of your receiver. This<br />
channel supplies the vario with power and is used to<br />
request information. The voltage the Picolario <strong>talk</strong>s<br />
about, is exactly this voltage. Assign a switch (3<br />
positions ) or a slider to this channel. Ensure that it has<br />
a +- 100% range.<br />
This switch is necessary to control the Picolario. You<br />
need it also to change parameters of the Picolario.<br />
The following table shows the logical assignment of the<br />
switch and it ´s practical impact:<br />
Switch / Slider<br />
100 %<br />
middle position<br />
-100%<br />
During flight During programming<br />
Request of altitude /voltage<br />
time automatic alt mode<br />
Vario signal and altitude and<br />
voltage automatic<br />
No vario signal, TX switched of<br />
only power supply monitor<br />
Select at your transceiver the same channel like selected on the<br />
Picolario. You can also use the scan feature of your transceiver<br />
to find the channel selected at the Picolario.<br />
At a low squelch level it is possible that the transceiver sees the<br />
Picolario at several channels. So it is a good idea to verify the<br />
channel which you have selected on both sides of the<br />
transmission path. After a short initialization you will hear the<br />
vario signal. The first information of the voice is the version of the<br />
current software. (f. e. version 1.3).<br />
© 1998/2000 Thomas Seidel www.thommys.com<br />
Increase value<br />
-<br />
decrease value
Vario function :<br />
The vario indicates climbing through short „peeps“ and the higher the frequency the better<br />
the climbing. Also the interval between the „peeps“ gets shorter with increasing climb rate. A<br />
constant sound indicates falling. No sound is 0 or depending on your „quiet zone“ setting.<br />
You can select in set mode 2 the sink tone level, where the sink tone starts working. If you<br />
set this value to a little bit more than the standard sink rate of your glider, then you will have<br />
in normal flight no sound and only in sinking air a sink tone. But this depends on your taste.<br />
The new voltage monitor of the receiver battery :<br />
The receiver accumulator voltage is measured by the Picolario. Only if it decreases its value<br />
a voltage announcement will occur. This allows the usage of 2 batteries connected through a<br />
switch unit.<br />
Again your are only told the voltage automatically if it has decreased by another 0.1 Volt<br />
step. If you want to know the current voltage then you can request this information at every<br />
time by the 3 position switch.<br />
Automatic altitude mode at middle switch position (50 m automatic) :<br />
The Picolario automatically zeros itself at turn on. So if you switch it on at 1234 meter altitude<br />
it will subtract this value from all future measured values. If you climb 2 meters to 1236<br />
meters then the vario calculates 1236 minus 1234 = 2 meter and this is the altitude it will tell<br />
you. The altitude automatic (only in middle position) will tell you every 50 m automatically<br />
(without a request) the altitude. So if you climb till 120 m you will hear „50m“ and „100m“<br />
automatically. If you sink afterwards from 120 m the next information will be „50m“. The<br />
reason for that is that it is not easy to decide voice output if your altitude varies about 100 m<br />
in 1 m steps ( 99m -> 101m -> 99m)<br />
Request of the altitude or the voltage and time automatic:<br />
Additionally to the automatic announcement of the altitude the precise altitude could be<br />
requested at any time. To do that the switch must be for about 2 seconds in the 100%<br />
position. Then you get a precise announcement of the current altitude: f. e altitude sixty nine<br />
meter. If you leave your switch in the 100% position during the announcement the voltage<br />
information will follow. If you leave your switch in this position for a longer period of time<br />
then after a programmable interval an announcement will occur. f. e. every 10 seconds. This<br />
announcement has no „altitude“ in front of it and simply tells „123 m“. You can program this<br />
time interval in set mode 4 between 10 to 60 seconds in 10 second steps.<br />
Please Note.: The first request of an altitude announcement starts the flight book<br />
recording.<br />
© 1998/2000 Thomas Seidel www.thommys.com
Failsafe detection with PCM receiver ,<br />
which go into a predefined state. You can use the requested altitude information to detect if<br />
your PCM receiver has gone into failsafe mode. You have to program the channel of the<br />
Picolario that it goes to 150% (2 ms) during Failsafe. During flying you have your switch at<br />
middle position or off. If you receive an announcement which have not been requested from<br />
you, you know that your PCM receiver has gone into Failsafe mode. It is always amazing<br />
what our spirit lets us do.<br />
Parameter setting<br />
With revision 1.2 you can set the delay time, the sink tone level, the acoustic scale range and<br />
the time interval for the time automatic. With that you can adapt the Picolario to various<br />
different models or weather conditions.<br />
At very calm conditions at flat lands you can select 4 m/s as acoustic scale. For all other<br />
purposes 8 to 16 m/s is recommended. 2 m/s is only for test purposes. We think this is too<br />
sensitive.<br />
To program a parameter set the switch into the middle position. You enter programming<br />
mode by pressing the red button DURING you switch on of your model. Then the Picolario<br />
enters set mode and will announce this to you. Now you can select one of the 4 set modes<br />
with your switch (up or down). If you have reached the set mode you want to change again<br />
pressing the red button enters the corresponding value setting. Then you can change the<br />
value with the 3 pole switch and store it by pressing a third time the red button on the<br />
Picolario.<br />
The following summarizes the parameters you can change:<br />
1.) delay time. (set mode 1) The vario needs some time from entering the vertical movement<br />
until the first „beep“. That is the delay time. Normally this time is set to one second. The<br />
main reason for that time is that a thermal could be too small to be used. If it beeps with a<br />
delay of 1 second, you can be sure that the thermal is big enough for circling.<br />
2.) sink tone level (set mode 2). This level sets when the sink tone starts. There will be 3<br />
different logical levels. Immediately will give you always a sink tone. (standard setting<br />
with 0.2 m/s.) A little bit more than the sink rate of your glider, will give you a quite zone if<br />
you fly in calm air with no rising or falling. Only if the air is also sinking then the sink tone<br />
will appear. Last a value of about 3 m/s can be programmed by people who like it quiet<br />
during sinking, but want to get informed when a maximum sink level is reached.<br />
3.) acoustic scale range (set mode 3) The Picolarios has 40 different modulated frequencies<br />
for each direction. You can select the range in which the 40 sounds are used. The less<br />
the value the more nervous (and sensitive) the instrument.<br />
4.) automatic time interval for altitude (set mode 4) time interval for the automatic altitude<br />
announcement<br />
We recommend 4 m/s for the acoustic scale range and a delay of 1 seconds.<br />
At strong winds and thermal in the high mountains 8m/s or 16 m/s with a delay of 1 second is<br />
recommended.<br />
If the Picolario sounds to nervous to you, then you should select a higher delay time and a<br />
higher acoustic scale range setting.<br />
© 1998/2000 Thomas Seidel www.thommys.com
Changing the Parameters of the <strong>Telario</strong><br />
model is switched of<br />
end of programming<br />
begin/ end<br />
of programming<br />
push small Vario-button<br />
and switch model on<br />
just switch<br />
the modell off<br />
use switch<br />
or slider<br />
push<br />
button<br />
setmode 1<br />
setmode one<br />
use switch<br />
or slider<br />
setmode two<br />
use switch<br />
or slider<br />
setmode three<br />
use switch<br />
or slider<br />
setmode four<br />
push<br />
button<br />
push<br />
button<br />
push<br />
button<br />
push<br />
button<br />
: use the switch or slider of your transmitter you have designated to the telario<br />
: push the small button on the <strong>Telario</strong><br />
what changes ? actual value range<br />
push<br />
button<br />
delaytime in seconds<br />
sinktonelevel<br />
in m/s<br />
push<br />
button<br />
push<br />
button<br />
range of<br />
acoustic sensibility<br />
push<br />
button<br />
time period between<br />
two altitude anouncements<br />
1,0s<br />
0,2m<br />
: this is what you hear from the small speaker of the low power device<br />
© 1998/2000 Thomas Seidel www.thommys.com<br />
8m<br />
0s<br />
0,5s<br />
3,5s<br />
0,0m<br />
9,9m<br />
16m<br />
2m<br />
60s<br />
0s<br />
use switch<br />
or slider<br />
use switch<br />
or slider<br />
use switch<br />
or slider<br />
use switch<br />
or slider
The flight book :<br />
The Picolario continuously measures the voltage and altitude and also the climb and sink<br />
rate. If you want, you can store the maximum and minimum values after a flight by pressing<br />
the red button. Please note that the recording starts after the first request of an altitude<br />
announcement. You enter flight book mode by pressing the red button. Then the minimum<br />
and maximum values of the last flight will be announced and stored. If you don `t press the<br />
red button after a flight the flight data are lost. There are 10 data sets available and you can<br />
select with your 3 pole switch the flight of interest. Flight number 1 is the most recent one.<br />
Flight number 10 is the oldest. It is a circular buffer. If you want to hear the data from flight<br />
number 2 (2 flights ago) then you bring the 3 pole switch in the middle position after „flight<br />
number 2“ has been announced. If you wait 2 seconds the minimum and maximum values<br />
will automatically be announced. To leave flight book mode switch of your model.<br />
Some words about using a Picolario in the model plane<br />
1.) The altitude measurement is based on an air pressure measurement, which is very<br />
sensitive. If you have your model inside a building pressure changes of up to 0.5 m/s are<br />
possible. You can see that also if you simply open or close a door and the vario starts<br />
beeping. If the weather changes it is also possible that the zero altitude from takeoff<br />
changes by up to 30 meters. At thunderstorms or cold fronts even more.<br />
2.) usage of the altitude information.<br />
The altitude information has several useful applications. If you have to land not directly<br />
close to you, the altitude could be very useful, if you have done some pre<br />
measurements. If you know the altitude difference between your place and the landing<br />
place, the altitude gives you an indication when it is time to think about a landing<br />
approach. If you already have lost 180 from 230 meters maybe some thoughts about<br />
landing direction would be helpful.<br />
Also at light thermals the altitude information is great. If you have in one part of the circle<br />
climbing and in the other sinking then the altitude information will tell you, if it is worth<br />
staying there or not. With the altitude announcement you also can stay at places where<br />
you only make 30 m in 10 minutes. There a normal vario is at it ´s limits.<br />
During competitions it is also very useful to bring all pilots to exactly 200 meters.<br />
3.) usage in electric gliders. The impact of the ventilation openings common at electric<br />
models are in most cases less than feared. Generally you should try to have a pressure<br />
which has minimum variation with speed. Sometimes it is possible that you can hear<br />
motor sounds through the Picolario. This is due to high frequency pulses on the power<br />
supply line.<br />
4.) problems at big models with only few free receiver channels<br />
Very often big models have an insufficient amount of free channels at the receiver. You<br />
can use the vario together with a V wire, which splits the operation with other functions.<br />
The vario is operated in parallel. Ensure that no servo is operated above it `s limits.<br />
There is also sometimes a limitation due to the paralleling.<br />
5.) clever programming for easy operation<br />
it is recommended to have a 3 pole switch controlling the Picolario. With that switch you<br />
control the programming mode and the functions in operation. If you have an additional<br />
easy reachable switch you can program your RC transmitter in a way that you can get<br />
easy announcements.<br />
© 1998/2000 Thomas Seidel www.thommys.com
Technical data:<br />
sensitivity : approx. 5 cm/s<br />
resolution altimeter : 1 m<br />
operating range : -500 m to 9000 m NN<br />
temperature : -20°C to + 50°C<br />
dimensions : 82 x 23 x 13 mm<br />
weight : ca. 24 g<br />
power supply : 4,4 V to 10 V through RC receiver<br />
current consumption 45 mA<br />
TX frequencies : 16 channels in the 433 MHz band<br />
Set modes : delay time, sink tone level, acoustic scale range<br />
Functions: vario signal, announcement of altitude and voltage<br />
Flight book with minimum / maximum storage<br />
In preparation: modules for current, speed and other parameters<br />
PC-connection<br />
If you have constructive feedback let us know.<br />
Sales and Information : manufacturerer :<br />
Thommys Modellbau <strong>Renschler</strong> <strong>Instruments</strong><br />
Rebenweg 27 Kirchtalstr.30<br />
73277 Owen - Teck 70435 Stuttgart<br />
Phone +49 721 553107<br />
Fax +49 721 9553869<br />
www.thommys.com<br />
Picolario@thommys.com<br />
CE –Declaration :<br />
The Picolario is compliant with the EG EMV specification 89/336/EWG,<br />
91/263/EWG and 92/31/EWG. It has been RFI tested regarding EN50 082-1:1992,<br />
EN50 082-2: 1995 and EN50 081-1:1992. The TX module is registered at RegTP<br />
with No. ICT E811 229M.<br />
Important note :<br />
This system is designed for use in Germany. The use in Germany is legal and license free.<br />
If you use the Picolario and/or the LPD in other countries than Germany, you have to make<br />
sure that it is legal in these countries. You will use it on your own risk.<br />
© 1998/2000 Thomas Seidel www.thommys.com
Picolario Talk short reference quick start :<br />
1. Select the same channel at the Picolario and the Transceiver<br />
according to the table on the backside.<br />
2. Mount the Picolario with the Velcro<br />
3. Connect the Picolario to a free channel of your receiver<br />
4. Program to this channel a 3 position switch or slider<br />
Switch / Slider<br />
100 %<br />
middle position<br />
-100%<br />
During flight During programming<br />
Request of altitude /voltage<br />
time automatic alt mode<br />
Vario signal and altitude and<br />
voltage automatic<br />
No vario signal, TX switched of<br />
only power supply monitor<br />
5. Switch it on and do a range check. Then you can start<br />
Setting of the parameters<br />
© 1998/2000 Thomas Seidel www.thommys.com<br />
Increase value<br />
-<br />
decrease value<br />
1. Bring the switch into the middle position and press the red button during turn on<br />
2. Change values according to programming plan in the middle of this manual<br />
Change with the 3 pole switch and select/program with the red switch<br />
set mode 1 = delay time<br />
set mode 2 = sink tone level<br />
set mode 3 = acoustic scale range<br />
set mode 4 = time interval for time automatic model<br />
3. to get out of programming mode, just switch off the power.