Diplomacy Rulebook - Wizards of the Coast
Diplomacy Rulebook - Wizards of the Coast
Diplomacy Rulebook - Wizards of the Coast

Create successful ePaper yourself
Turn your PDF publications into a flip-book with our unique Google optimized e-Paper software.
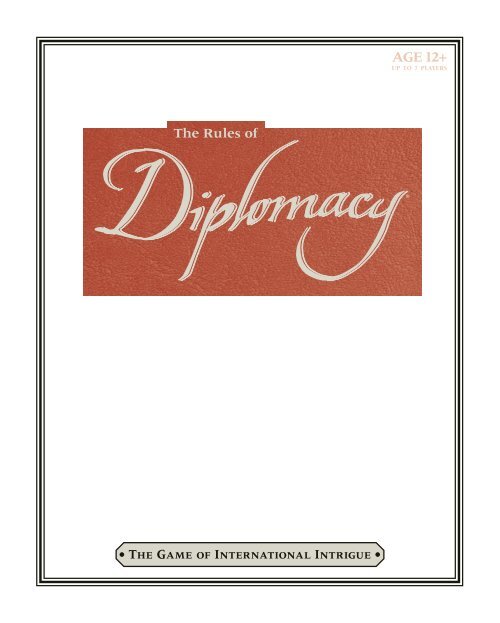
AGE 12+<br />
UP TO 7 PLAYERS<br />
The Rules <strong>of</strong><br />
®<br />
THE GAME OF INTERNATIONAL INTRIGUE
315 PLAYING PIECES<br />
CONTENTS<br />
84 Fleets<br />
84 Armies<br />
147 Control Markers<br />
Game Board<br />
Map Pad<br />
<strong>Rulebook</strong><br />
Need strategy tips<br />
Having trouble finding 7 players<br />
Visit www.avalonhill.com for strategy tips and opportunities<br />
to play <strong>the</strong> game <strong>of</strong> <strong>Diplomacy</strong> ® online.<br />
CREDITS<br />
Game Design: Allan B. Calhamer<br />
Game Development: Mons Johnson<br />
Editing: Cal Moore<br />
Art Direction: Blake Beasley<br />
Cover Illustration: Thomas Gianni<br />
Graphic Designer: Lisa Hanson<br />
Photography: Allison Shinkle<br />
Brand Management: Brian Hart<br />
Production Management: Raini Applin, Godot Gutierre<br />
Thanks to all <strong>of</strong> our project team members and <strong>the</strong> many o<strong>the</strong>rs too<br />
numerous to mention who have contributed to this product.<br />
Questions<br />
U.S., Canada, Asia Pacific,<br />
& Latin America<br />
www.wizards.com/customerservice<br />
<strong>Wizards</strong> <strong>of</strong> <strong>the</strong> <strong>Coast</strong>, Inc.<br />
P.O. Box 707<br />
Renton WA 98057-0707<br />
U.S.A.<br />
Tel: 1-800-324-6496 (within <strong>the</strong> U.S.)<br />
1-206-624-0933 (outside <strong>the</strong> U.S.)<br />
U.K., Eire, & South Africa<br />
Hasbro UK Ltd.<br />
P.O. Box 43<br />
Newport NP19 4YD<br />
UK<br />
Tel: + 800 22 427276<br />
Email: wizards@hasbro.co.uk<br />
Keep <strong>the</strong>se addresses for your records.<br />
All O<strong>the</strong>r European Countries<br />
<strong>Wizards</strong> <strong>of</strong> <strong>the</strong> <strong>Coast</strong> p/a Hasbro<br />
Belgium NV/SA<br />
’t H<strong>of</strong>veld 6D<br />
1702 Groot-Bijgaarden<br />
BELGIUM<br />
Tel: +32.70.233.277<br />
Email: custserv@hasbro.be<br />
Check us out on <strong>the</strong> web: Avalonhill.com<br />
©1999, 2008 <strong>Wizards</strong> <strong>of</strong> <strong>the</strong> <strong>Coast</strong>, Inc., P. O. Box 707, Renton, WA 98057-0707, U.S.A, 1-800-324-6496. The <strong>Wizards</strong> <strong>of</strong> <strong>the</strong> <strong>Coast</strong> logo is a<br />
trademark <strong>of</strong> <strong>Wizards</strong> <strong>of</strong> <strong>the</strong> <strong>Coast</strong>, Inc. in <strong>the</strong> U.S.A. and o<strong>the</strong>r countries. ©1999, 2008 Hasbro, Inc. Avalon Hill, Hasbro, <strong>Diplomacy</strong>, Risk 2210, Risk<br />
Godstorm, Axis & Allies, Axis & Allies: Guadalcanal, Axis & Allies: Battle <strong>of</strong> <strong>the</strong> Bulge, and <strong>the</strong>ir respective logos are trademarks <strong>of</strong> HASBRO and are<br />
used with permission. ® denotes Reg. U.S. Pat. & TM Office. All rights reserved. Color <strong>of</strong> parts may vary from those pictured. 30022193000001 EN
5th Edition 2008<br />
®<br />
TABLE OF CONTENTS<br />
Players And Countries 4<br />
Object Of The Game 4<br />
Game Board 4<br />
Units (Armies And Fleets) 5<br />
Starting Positions 5<br />
How To Play 6<br />
Overview<br />
1. Diplomatic Phase 6<br />
2. Order Writing Phase 6<br />
3. The Order Resolution Phase 18<br />
4. Retreat And Disbanding Phase 18<br />
5. Gaining And Losing Units Phase (After Fall Turn) 18<br />
Time Management 19<br />
Civil Disorder 19<br />
Alternate Way To Play 19<br />
Opening Moves In A Sample Game 20<br />
22 Rules To Help You Resolve Orders 23<br />
Abbreviations 24
At <strong>the</strong> beginning <strong>of</strong><br />
<strong>the</strong> 20th century,<br />
Europe was a<br />
complicated cauldron<br />
<strong>of</strong> political intrigue.<br />
You are about to<br />
travel back to those<br />
times and change <strong>the</strong><br />
course <strong>of</strong> history in<br />
your favor.<br />
PLAYERS AND COUNTRIES<br />
The game <strong>of</strong> <strong>Diplomacy</strong> ® is best played by seven players. Rules for fewer players are<br />
included in <strong>the</strong> Alternate Way to Play section <strong>of</strong> this rulebook on pg. 19. Each player<br />
represents one <strong>of</strong> <strong>the</strong> seven “Great Powers <strong>of</strong> Europe” in <strong>the</strong> years prior to World War I.<br />
These Great Powers include England, Germany, Russia, Turkey, Italy, France, and Austria-<br />
Hungary (hereafter referred to as Austria). At <strong>the</strong> start <strong>of</strong> <strong>the</strong> game, <strong>the</strong> players randomly<br />
decide which Great Power each will represent. This is <strong>the</strong> only element <strong>of</strong> chance in<br />
<strong>the</strong> game.<br />
Note: At various places in <strong>the</strong> rules, <strong>the</strong> term “country” is used generically to represent<br />
“Great Power.”<br />
OBJECT OF THE GAME<br />
As soon as one Great Power controls 18 supply centers, it’s considered to have gained<br />
control <strong>of</strong> Europe. The player representing that Great Power is <strong>the</strong> winner. However,<br />
players can end <strong>the</strong> game by agreement before a winner is determined. In this case, all<br />
players who still have pieces on <strong>the</strong> game board share equally in a draw.<br />
GAME BOARD<br />
Boundaries: Boundaries between major countries are marked with heavy black lines. All<br />
major powers are also divided into provinces and supply-center provinces by thinner black<br />
lines. The oceans and waterways are also divided into separate provinces by thin black<br />
lines. All countries and provinces (land and water) are identified by name.<br />
Types <strong>of</strong> Provinces: There are three types <strong>of</strong> provinces: inland, water, and coastal. Only<br />
Armies move on inland provinces and only Fleets move on water provinces. A coastal<br />
province is land that is adjacent to one or more water provinces. For example, Denmark,<br />
Brest, and Spain are coastal provinces. An Army or a Fleet can occupy a coastal province.<br />
Supply Centers: A total <strong>of</strong> 34 inland and coastal provinces on <strong>the</strong> game board are<br />
designated as supply centers. Each supply center is marked with a star. A Great Power<br />
has as many Armies or Fleets as <strong>the</strong> number <strong>of</strong> supply centers it controlled at <strong>the</strong> end<br />
<strong>of</strong> <strong>the</strong> last Fall turn. Consequently, <strong>the</strong>re will never be more than 34 Armies and Fleets<br />
(also referred to as “units”) on <strong>the</strong> game board at one time. A country gains or loses units<br />
in accordance with <strong>the</strong> number <strong>of</strong> supply centers it controls. See pg. 18 for more on<br />
supply-center control.<br />
4
UNITS (ARMIES AND FLEETS)<br />
Each Army unit is represented by a square playing piece. Each Fleet unit is represented by<br />
a narrow rectangular playing piece. One side <strong>of</strong> each piece has a design that represents <strong>the</strong><br />
appropriate unit, and <strong>the</strong> o<strong>the</strong>r side has <strong>the</strong> color <strong>of</strong> <strong>the</strong> Great Power. Use whichever side<br />
is more helpful. The unit colors <strong>of</strong> each Great Power are displayed on <strong>the</strong> edge <strong>of</strong> <strong>the</strong> game<br />
board and indicated in <strong>the</strong> following table. If an expanding Great Power runs out <strong>of</strong> Army<br />
units or Fleet units, <strong>the</strong> units <strong>of</strong> an eliminated country can be used.<br />
Two key rules regarding units:<br />
• All units have <strong>the</strong> same strength. No one Army is more powerful than<br />
ano<strong>the</strong>r. No single Fleet is stronger than ano<strong>the</strong>r. During <strong>the</strong> game,<br />
various units will support each o<strong>the</strong>r to increase <strong>the</strong>ir strength and<br />
attack weaker adversaries.<br />
• There can be only one unit in a province at a time. There are no<br />
exceptions to this rule.<br />
STARTING POSITIONS<br />
Supply Centers: At <strong>the</strong> start <strong>of</strong> <strong>the</strong> game, each Great Power controls three supply centers,<br />
with <strong>the</strong> exception <strong>of</strong> Russia, which controls four. Place <strong>the</strong> appropriate unit on <strong>the</strong><br />
designated supply center as shown in <strong>the</strong> following table.<br />
The 12 remaining supply centers aren’t occupied at <strong>the</strong> start <strong>of</strong> <strong>the</strong> game.<br />
Note: An “A” indicates an Army, and an “F” indicates a Fleet.<br />
COUNTRY UNIT COLOR UNIT CITY UNIT CITY UNIT CITY<br />
Austria red A Vienna A Budapest F Trieste<br />
England dark blue F London F Edinburgh A Liverpool<br />
France light blue A Paris A Marseilles F Brest<br />
Germany black A Berlin A Munich F Kiel<br />
Italy green A Rome A Venice F Naples<br />
Russia white A Moscow F Sevastopol A Warsaw<br />
F St. Petersburg (SC)<br />
Turkey yellow F Ankara A Constantinople A Smyrna<br />
Flag Markers: The game includes one set <strong>of</strong> markers for each Great Power. Players can use<br />
<strong>the</strong>se markers to identify which supply centers <strong>the</strong>y control on <strong>the</strong> game board. One side<br />
shows <strong>the</strong> flag <strong>of</strong> <strong>the</strong> Great Power, and <strong>the</strong> o<strong>the</strong>r side shows <strong>the</strong> color <strong>of</strong> <strong>the</strong> units <strong>of</strong> that<br />
country. Use whichever side is more helpful.<br />
5
HOW TO PLAY<br />
OVERVIEW<br />
<strong>Diplomacy</strong> is a game <strong>of</strong> negotiations, alliances, promises kept, and<br />
promises broken. In order to survive, a player needs help from<br />
o<strong>the</strong>rs. In order to win <strong>the</strong> game, a player must eventually stand<br />
alone. Knowing whom to trust, when to trust <strong>the</strong>m, what to promise,<br />
and when to promise it is <strong>the</strong> heart <strong>of</strong> <strong>the</strong> game. Remember, you are<br />
a diplomat first, a commander second.<br />
At <strong>the</strong> beginning <strong>of</strong> each turn, players meet toge<strong>the</strong>r in small groups<br />
to discuss <strong>the</strong>ir plans and suggest strategies. Alliances between<br />
players are openly or secretly made, and orders are (hopefully)<br />
coordinated. Immediately following this period <strong>of</strong> “diplomacy,”<br />
each player secretly writes an order for each <strong>of</strong> his or her units on a<br />
slip <strong>of</strong> paper. When all players have written <strong>the</strong>ir orders, <strong>the</strong> orders<br />
are simultaneously revealed, and <strong>the</strong>n <strong>the</strong> orders are all resolved.<br />
Some units are moved, some have to retreat, and some are removed.<br />
Resolving orders is <strong>the</strong> most challenging part <strong>of</strong> <strong>the</strong> rules and<br />
requires complete knowledge <strong>of</strong> <strong>the</strong> rules.<br />
Each turn represents six months <strong>of</strong> time. The first turn is called<br />
a Spring turn and <strong>the</strong> next a Fall turn. After each Fall turn, each<br />
Great Power must reconcile <strong>the</strong> number <strong>of</strong> units it controls with <strong>the</strong><br />
number <strong>of</strong> supply centers it controls. At this time some units are<br />
removed and new ones are built.<br />
Each turn has a series <strong>of</strong> phases. Here are <strong>the</strong> phases in a complete<br />
two-turn year:<br />
Spring four-phase turn<br />
1. Diplomatic phase<br />
2. Order Writing phase<br />
3. Order Resolution phase<br />
4. Retreat and Disbanding phase<br />
Fall five-phase turn<br />
1. Diplomatic phase<br />
2. Order Writing phase<br />
3. Order Resolution phase<br />
4. Retreat and Disbanding phase<br />
5. Gaining and Losing Units phase<br />
After a Fall turn, if one Great Power controls 18 or more supply<br />
centers, <strong>the</strong> game ends and that player is declared <strong>the</strong> winner.<br />
Gamemaster<br />
If an additional person who knows <strong>the</strong> game rules is<br />
available, that person could serve as <strong>the</strong> gamemaster.<br />
The gamemaster could keep time for <strong>the</strong> negotiation<br />
sessions, collect and read orders, resolve issues, and<br />
make rulings when necessary. This role should be<br />
strictly neutral.<br />
1. DIPLOMATIC PHASE<br />
During this phase, players meet to discuss <strong>the</strong>ir plans for upcoming<br />
turns. Alliances are made and strategies are set. These “diplomatic<br />
negotiations” take place before each turn. Negotiations last 30<br />
minutes before <strong>the</strong> first turn and 15 minutes before each turn<br />
<strong>the</strong>reafter. Negotiations may end sooner if all players agree.<br />
Conversations, deals, schemes, and agreements among players will<br />
greatly affect <strong>the</strong> course <strong>of</strong> <strong>the</strong> game. During diplomatic negotiations,<br />
players may say anything <strong>the</strong>y wish. Some players usually go to<br />
ano<strong>the</strong>r room or organize private groups <strong>of</strong> two or three. They may<br />
try to keep <strong>the</strong>ir conversations secret. They may try to overhear<br />
<strong>the</strong> conversations <strong>of</strong> o<strong>the</strong>rs. These conversations usually consist <strong>of</strong><br />
bargaining or joint military planning, but <strong>the</strong>y may include exchanges<br />
<strong>of</strong> information, denouncements, threats, spreading <strong>of</strong> rumors, and<br />
so on. Public announcements may be made and documents may<br />
be written, made public, or kept secret, as <strong>the</strong> players see fit. These<br />
discussions and written agreements, however, do not bind a player<br />
to anything he or she may say. Deciding whom to trust as situations<br />
arise is an important part <strong>of</strong> <strong>the</strong> game.<br />
Note: Using <strong>the</strong> map pad during diplomatic negotiations is an<br />
excellent way to keep track <strong>of</strong> locations, strategies, and alliances.<br />
2. ORDER WRITING PHASE<br />
Each player secretly writes “orders” for each <strong>of</strong> his or her units on a<br />
slip <strong>of</strong> paper. All players <strong>the</strong>n reveal orders at <strong>the</strong> same time. Each<br />
player reads his or her orders while o<strong>the</strong>rs make sure that what <strong>the</strong>y<br />
hear is what is written. A legal order must be followed. An order<br />
written by mistake, if legal, must be followed. An “illegal” order or<br />
an order that is judged to be unsuccessful isn’t followed. A unit that<br />
is given an illegal order (or given no order) must stand in place (<strong>the</strong><br />
unit holds). A poorly written order that has only one meaning must<br />
be followed.<br />
ORDER DATES<br />
All orders must be dated and should alternate between Spring and<br />
Fall beginning with <strong>the</strong> year 1901. For example, <strong>the</strong> first set <strong>of</strong> turn<br />
orders should be dated “Spring 1901.” The second set should be<br />
dated “Fall 1901.” The third set should be dated “Spring 1902,”<br />
and so on.<br />
ORDER FORMAT<br />
Players should make a list <strong>of</strong> <strong>the</strong>ir units and <strong>the</strong> provinces <strong>the</strong>y<br />
occupy for easy reference during diplomatic conferences. In each<br />
set <strong>of</strong> orders, <strong>the</strong> type <strong>of</strong> unit is written first (“A” or “F”) followed by<br />
<strong>the</strong> province that each unit occupies. For example, “A Paris” or “A<br />
Par” is short for an Army in Paris. This is followed by <strong>the</strong> order that<br />
<strong>the</strong> unit is given. For example, “A Par Holds” means that <strong>the</strong> Army<br />
in Paris should hold, or stay in place. The designation <strong>of</strong> “A” or “F”<br />
in orders is to remind players <strong>of</strong> <strong>the</strong>ir pieces. If you leave out <strong>the</strong><br />
unit designation in an order, <strong>the</strong> order doesn’t fail since <strong>the</strong>re can be<br />
only one possible unit in a province.<br />
6
ABBREVIATIONS<br />
Players may refer to <strong>the</strong> abbreviations on <strong>the</strong> back cover <strong>of</strong> this<br />
rulebook for countries or provinces when writing <strong>the</strong>ir orders. A<br />
number <strong>of</strong> provinces begin with <strong>the</strong> same three letters, so many <strong>of</strong><br />
those provinces have special abbreviations. When in doubt, write<br />
it out.<br />
Keep in mind that only one unit can be in a province (inland, water,<br />
or coastal) at <strong>the</strong> same time, so <strong>the</strong>re shouldn’t be any confusion as<br />
to which unit is being ordered.<br />
TYPES OF ORDERS<br />
On each turn, each Great Power can order all, some, or none <strong>of</strong> its<br />
units to do one <strong>of</strong> <strong>the</strong> following:<br />
• Hold<br />
• Move<br />
• Support<br />
• Convoy<br />
Note: Only Fleets can be ordered to convoy.<br />
Hold Order<br />
You can attempt to keep a unit in place by ordering it to “hold.” Not<br />
giving a unit an order is interpreted as ordering it to hold. Following<br />
is an example <strong>of</strong> a hold order:<br />
Army Movement<br />
An Army can be ordered to move into an adjacent inland or<br />
coastal province. Armies can’t be ordered to move into a water<br />
province. Since no two units can occupy <strong>the</strong> same province at<br />
<strong>the</strong> same time, an Army that is ordered to move to an adjacent<br />
province can end up not moving at all (because <strong>of</strong> <strong>the</strong> positions or<br />
orders <strong>of</strong> o<strong>the</strong>r units). See <strong>the</strong> following sections for more examples<br />
<strong>of</strong> movement.<br />
Note: An Army can move across water provinces from one coastal<br />
province to ano<strong>the</strong>r via one or more Fleets. This is called a “convoy”<br />
and is explained in <strong>the</strong> Convoy Order rules on pg. 13.<br />
Army Movement Example: An Army in Paris could move to Brest,<br />
Picardy, Burgundy, or Gascony. See Diagram 1.<br />
Fleet Movement<br />
A Fleet can be ordered to move to an adjacent water province<br />
or coastal province. Fleets can’t be ordered to move to an inland<br />
province. Diagram 2 shows that a Fleet in <strong>the</strong> English Channel can<br />
move to <strong>the</strong> Irish Sea, Wales, London, Belgium, Picardy, Brest, <strong>the</strong><br />
North Sea, or <strong>the</strong> Mid-Atlantic.<br />
DIAGRAM 1<br />
F London Holds (or) F Lon–Holds<br />
Note: In this rulebook, examples <strong>of</strong> hold orders that failed are<br />
underlined to show that <strong>the</strong> unit wasn’t able to hold (or stay) in<br />
a province.<br />
A<br />
Underlined Results<br />
Examples <strong>of</strong> orders are listed throughout this rulebook.<br />
Orders that aren’t executed (because <strong>of</strong> interference<br />
by o<strong>the</strong>r orders) are underlined. This is a standard<br />
for <strong>the</strong> game <strong>of</strong> <strong>Diplomacy</strong> that has been in effect for<br />
years and is used in many strategy guides and o<strong>the</strong>r<br />
literature. While playing <strong>the</strong> game, <strong>the</strong>re isn’t any need<br />
to underline orders.<br />
DIAGRAM 2<br />
Move Order<br />
Throughout <strong>the</strong> game, units will be ordered to move to provinces<br />
that are occupied. This is referred to as “attacking,” and will be<br />
discussed throughout this section.<br />
Writing a Move Order<br />
A move order is written with a dash to separate <strong>the</strong> unit type and<br />
location from <strong>the</strong> order. For example, an order to move from Paris<br />
to Burgundy would look like this:<br />
F<br />
A Paris–Burgundy (or) A Par–Bur<br />
7
DIAGRAM 3<br />
F<br />
When a Fleet is in a coastal province, its warships are considered to<br />
be at any point along <strong>the</strong> coast <strong>of</strong> that province. A Fleet in a coastal<br />
province can be ordered to move to an adjacent coastal province<br />
only if it’s adjacent along <strong>the</strong> coastline (as if <strong>the</strong> Fleet was moving<br />
down <strong>the</strong> coast). For example, in Diagram 3 a Fleet in Rome can<br />
be ordered to move from Rome to Tuscany or to Naples (or to <strong>the</strong><br />
Tyrrhenian Sea). But a Fleet in Rome can’t be ordered to move to<br />
Venice or Apulia because, although those provinces are adjacent<br />
along an inland boundary, <strong>the</strong>y aren’t adjacent along <strong>the</strong> coastline.<br />
Restricted Movement<br />
Any location on <strong>the</strong> game board that isn’t named can’t be occupied.<br />
Switzerland is impassable and can’t be occupied. With <strong>the</strong> exception<br />
<strong>of</strong> England, islands can’t be occupied.<br />
Specific Movement Clarifications<br />
There are a few tricky areas on <strong>the</strong> map. How to move into and out<br />
<strong>of</strong> <strong>the</strong>m is explained below:<br />
Bulgaria, Spain, and St. Petersburg: These are <strong>the</strong> only coastal<br />
provinces that have two separately identified coasts. A Fleet entering<br />
one <strong>of</strong> <strong>the</strong>se provinces enters along one coast and can <strong>the</strong>n move<br />
to a province adjacent to that coast only. The Fleet, never<strong>the</strong>less,<br />
is considered to be occupying <strong>the</strong> entire province. Such a Fleet<br />
should be placed on <strong>the</strong> coastline ra<strong>the</strong>r than completely inland.<br />
For example, a Fleet at Spain’s North <strong>Coast</strong> can’t be ordered to move<br />
to <strong>the</strong> Western Mediterranean or to <strong>the</strong> Gulf <strong>of</strong> Lyon or to Marseilles.<br />
It is, however, considered to be occupying all <strong>of</strong> Spain.<br />
If a Fleet is ordered to one <strong>of</strong> <strong>the</strong>se provinces and it’s possible for <strong>the</strong><br />
Fleet to move to ei<strong>the</strong>r coast, <strong>the</strong> order must specify which coast, or<br />
<strong>the</strong> Fleet doesn’t move. For example, a Fleet in Constantinople can<br />
move to Bulgaria’s East or South <strong>Coast</strong>. The order would be written<br />
“F Con–Bul EC” or “F Con–Bul SC.” Likewise, a Fleet in <strong>the</strong> Mid-<br />
Atlantic Ocean can move to Spain’s North or South <strong>Coast</strong>, but <strong>the</strong><br />
order must specify which coast.<br />
Kiel and Constantinople: Because <strong>of</strong> <strong>the</strong> waterways that run<br />
through <strong>the</strong>se two provinces, <strong>the</strong>y’re considered as having one coast.<br />
Fleets can enter <strong>the</strong>m along one coast and be considered anywhere<br />
along <strong>the</strong> coastline. For example, a Fleet could move from <strong>the</strong> Black<br />
Sea to Constantinople on one turn (“F Bla–Con”) and <strong>the</strong>n on a later<br />
turn move from Constantinople to <strong>the</strong> Aegean Sea (or o<strong>the</strong>r adjacent<br />
provinces). Likewise, a Fleet could move from Holland to Kiel on<br />
one turn and <strong>the</strong>n move from Kiel to Berlin on a later turn (through<br />
<strong>the</strong> Kiel Canal) without having to go around or go to Denmark.<br />
Armies can also pass into and out <strong>of</strong> <strong>the</strong>se provinces, freely bridging<br />
<strong>the</strong>se waterways. This doesn’t mean that units can jump over<br />
<strong>the</strong>se provinces.<br />
Sweden and Denmark: An Army or Fleet can move from Sweden to<br />
Denmark (or vice versa) in one turn. A Fleet moving from <strong>the</strong> Baltic<br />
Sea can’t move directly to <strong>the</strong> Skagerrak province (or vice versa), but<br />
must first move to Sweden or Denmark. The common border with<br />
Denmark doesn’t separate <strong>the</strong> coast <strong>of</strong> Sweden into two coastlines.<br />
Denmark doesn’t border on Berlin.<br />
Stand<strong>of</strong>fs<br />
The following common situations involve forces <strong>of</strong> equal strength<br />
trying to occupy <strong>the</strong> same province at <strong>the</strong> same time. These situations<br />
are called stand<strong>of</strong>fs. These rules apply when one or more countries<br />
are involved. There are a few exceptions to <strong>the</strong>se rules, which are<br />
described on pg. 14.<br />
DIAGRAM 4<br />
• Units <strong>of</strong> equal strength trying to occupy <strong>the</strong> same province<br />
cause all those units to remain in <strong>the</strong>ir original provinces.<br />
If two or more units are ordered to <strong>the</strong> same province, none<br />
<strong>of</strong> <strong>the</strong>m can move. (This is also true <strong>of</strong> equally supported<br />
units, which will be explained in <strong>the</strong> Support Order section.)<br />
In Diagram 4, if <strong>the</strong> German Army in Berlin is ordered to<br />
Silesia and <strong>the</strong> Russian Army in Warsaw is ordered to Silesia,<br />
nei<strong>the</strong>r unit will move and Silesia will remain vacant<br />
A<br />
Germany: A Ber–Sil<br />
Russia: A War–Sil<br />
A<br />
8
DIAGRAM 5<br />
F<br />
A<br />
A<br />
• A stand<strong>of</strong>f doesn’t dislodge a unit already in <strong>the</strong> province<br />
where <strong>the</strong> stand<strong>of</strong>f took place. If two units (or forces <strong>of</strong><br />
equal strength) attack <strong>the</strong> same province, thus standing<br />
each o<strong>the</strong>r <strong>of</strong>f, a unit already in that province isn’t dislodged.<br />
So, in Diagram 4, if <strong>the</strong>re had been a unit holding in<br />
Silesia, <strong>the</strong> results would be <strong>the</strong> same and <strong>the</strong> unit in Silesia<br />
would remain.<br />
• One unit not moving can stop a unit or series <strong>of</strong> units<br />
from moving. If a unit is ordered to hold, or is prevented<br />
from moving, and o<strong>the</strong>r units are ordered into its province,<br />
those o<strong>the</strong>r units can’t move. (It’s like a traffic backup!) In<br />
Diagram 5, <strong>the</strong>re is a Russian Army in Prussia. The Russian<br />
player told Germany that he would move out <strong>of</strong> Prussia (but<br />
he lied and ordered <strong>the</strong> Army to hold instead). The German<br />
player ordered his Army from Berlin to Prussia and his Fleet<br />
from Kiel to Berlin. The result is that nothing moves.<br />
Germany: F Kiel–Ber; A Ber–Pru<br />
Russia: A Pru–Holds<br />
DIAGRAM 6<br />
• Units can’t trade places without <strong>the</strong> use <strong>of</strong> a convoy. If<br />
two units are each ordered to <strong>the</strong> province that <strong>the</strong> o<strong>the</strong>r<br />
occupies, nei<strong>the</strong>r can move. For example, in Diagram 6,<br />
nei<strong>the</strong>r unit would move. (There is a way around this<br />
through <strong>the</strong> use <strong>of</strong> convoys. See Convoy Orders on pg. 13.)<br />
F<br />
A<br />
• Three or more units can rotate provinces during a turn<br />
provided none directly trade places. For example, in<br />
Diagram 7 all orders would succeed as no one unit directly<br />
trades places with ano<strong>the</strong>r.<br />
Support Order<br />
This is <strong>the</strong> most critical and complex section <strong>of</strong> <strong>the</strong> rules. The “support”<br />
and “cutting support” rules must be understood in order to resolve<br />
most orders.<br />
Germany: F Ber–Pru; A Pru–Ber<br />
DIAGRAM 7<br />
F<br />
Nth<br />
F<br />
England: A Hol–Bel; F Bel–Nth<br />
France: F Nth–Hol<br />
A<br />
Overview<br />
Since all units have equal strength, one unit can’t attack and advance<br />
against ano<strong>the</strong>r without help. That “help” is called support. If an<br />
attack is successful, <strong>the</strong> attacking unit moves into <strong>the</strong> province to<br />
which it was ordered. If <strong>the</strong> unit that was attacked had no orders<br />
<strong>of</strong> its own to move elsewhere, it’s defeated and dislodged from<br />
<strong>the</strong> province. The dislodged unit must retreat or be disbanded.<br />
Retreating is explained in detail on pg. 18.<br />
An Army or Fleet can provide support to ano<strong>the</strong>r Army or Fleet.<br />
Support can be <strong>of</strong>fensive (supporting an attacking move order)<br />
or defensive (supporting a hold, support, or convoy order). By<br />
supporting each o<strong>the</strong>r, attacking or defending units gain increased<br />
strength. For example, a unit holding with two supports has <strong>the</strong><br />
strength <strong>of</strong> three: itself plus two supporters. Support can be provided<br />
to a fellow unit or to ano<strong>the</strong>r player’s unit. Support can be given<br />
without consent and can’t be refused! This can cause some unexpected<br />
situations in <strong>the</strong> game that make it more interesting.<br />
A unit moves with its own strength combined with all <strong>of</strong> its valid<br />
supports. It can complete its move unless it’s opposed by a unit<br />
that is supported equally or better. One unit supporting ano<strong>the</strong>r<br />
provides a combined strength <strong>of</strong> two and will defeat an opponent’s<br />
unsupported unit. Likewise, a unit with two supporting units<br />
(strength <strong>of</strong> 3) will defeat an opponent’s unit with only one support<br />
(strength <strong>of</strong> 2).<br />
9
How to Support<br />
A unit gives up its chance to move on a turn in order to support<br />
ano<strong>the</strong>r unit’s order. The province that a unit is providing support<br />
to must be one that <strong>the</strong> supporting unit could have legally moved<br />
to during that turn. Thus, an Army in Brest can’t support a Fleet<br />
in <strong>the</strong> English Channel because an Army can’t move into a water<br />
province. Likewise, a Fleet in Rome can’t support a unit’s move to<br />
Venice because, although adjacent by land, <strong>the</strong> Fleet can’t move to<br />
Venice from Rome.<br />
In Diagram 9, <strong>the</strong> German Army in Silesia is supported by <strong>the</strong> Fleet<br />
in <strong>the</strong> Baltic in pushing <strong>the</strong> Russian Army out <strong>of</strong> Prussia. Note that<br />
<strong>the</strong> German Army and Fleet are both adjacent to <strong>the</strong> target province<br />
(Prussia) but not to each o<strong>the</strong>r. A unit doesn’t have to be adjacent<br />
to <strong>the</strong> unit it’s supporting. However, it must be next to <strong>the</strong> province<br />
into which it’s giving support and must be able to legally move<br />
<strong>the</strong>re itself.<br />
DIAGRAM 8<br />
A Fleet that can move to a province with two separate coasts (a<br />
Fleet in <strong>the</strong> Mid-Atlantic, for example) can support ano<strong>the</strong>r Army<br />
or Fleet into that province (in this case Spain), without regard to<br />
separate coastlines.<br />
Writing a Support Order<br />
1. Write your unit type (A or F).<br />
2. Then write <strong>the</strong> province where your unit is located.<br />
3. Then, write an “S” (for Support).<br />
4. Finally, write <strong>the</strong> type, current location, and<br />
destination <strong>of</strong> <strong>the</strong> unit receiving support (if <strong>the</strong><br />
supported unit is moving).<br />
A<br />
2<br />
A<br />
A<br />
Example: “A Par S A Mar–Bur” orders an Army in Paris to<br />
support an Army in Marseilles moving into Burgundy.<br />
Supporting a Unit<br />
• A unit not ordered to move can be supported by a<br />
support order that only mentions its province. A unit that<br />
is ordered to hold, convoy, support, or not ordered at all can<br />
receive support in holding its position. For example, if <strong>the</strong><br />
order is written “F Den S F Bal,” <strong>the</strong>n <strong>the</strong> Fleet in Denmark<br />
will support <strong>the</strong> Fleet in <strong>the</strong> Baltic Sea as long as <strong>the</strong> Fleet<br />
in <strong>the</strong> Baltic is holding, convoying, or supporting. If <strong>the</strong><br />
Fleet in <strong>the</strong> Baltic attempts to move, <strong>the</strong>n <strong>the</strong> support from<br />
Denmark is invalid.<br />
• A unit ordered to move can only be supported by a<br />
support order that matches <strong>the</strong> move <strong>the</strong> unit is trying to<br />
make. For example, an Army in Bohemia is ordered to<br />
support an Army in Munich in its move to Silesia (A Boh S<br />
A Mun–Sil). However, <strong>the</strong> Army in Munich is ordered<br />
to move to Tyrolia instead (A Mun–Tyr). The support order<br />
fails because <strong>the</strong> move it’s supporting isn’t <strong>the</strong> move that<br />
was ordered. This support order doesn’t become a support<br />
order to hold.<br />
Simple Support<br />
In Diagram 8, <strong>the</strong> French Army in Gascony supports <strong>the</strong> Army<br />
in Marseilles to Burgundy. The German Army in Burgundy will<br />
be dislodged.<br />
France: A Mar–Bur; A Gas S A Mar–Bur<br />
Germany: A Bur–Holds<br />
DIAGRAM 9<br />
Germany: A Sil–Pru; F Bal S A Sil–Pru<br />
Russia: A Pru–Holds<br />
Support in Stand<strong>of</strong>fs<br />
Diagrams 10 and 11 show two common stand<strong>of</strong>f situations. In both<br />
cases, a strength <strong>of</strong> 2 meets a strength <strong>of</strong> 2 and all units stand in<br />
place. In Diagram 10, if <strong>the</strong>re had been a Fleet in <strong>the</strong> Tyrrhenian, it<br />
wouldn’t be dislodged by <strong>the</strong> stand<strong>of</strong>f. (A stand<strong>of</strong>f doesn’t dislodge a<br />
unit already in <strong>the</strong> province where <strong>the</strong> stand<strong>of</strong>f took place.)<br />
2<br />
F<br />
A<br />
A<br />
10
DIAGRAM 10<br />
F<br />
F<br />
• A dislodged unit, even with support, has no effect on<br />
<strong>the</strong> province that dislodged it. If two units are ordered to<br />
<strong>the</strong> same province and one <strong>of</strong> <strong>the</strong>m is dislodged by a unit<br />
coming from that province, <strong>the</strong> o<strong>the</strong>r attacking unit can<br />
move. This situation doesn’t result in a stand<strong>of</strong>f since<br />
<strong>the</strong> dislodged unit has no effect on <strong>the</strong> province that<br />
dislodged it.<br />
2<br />
2<br />
DIAGRAM 12<br />
F<br />
F<br />
A<br />
A<br />
France: F GoL–Tyn; F Wes S F GoL–Tyn<br />
Italy: F Nap–Tyn; F Rom S F Nap–Tyn<br />
A<br />
2<br />
A<br />
2<br />
2<br />
A<br />
DIAGRAM 11<br />
A<br />
F<br />
2<br />
F<br />
Austria: A Boh–Mun; A Tyr S A Boh–Mun<br />
Germany: A Mun–Sil; A Ber S A Mun–Sil<br />
Russia: A War–Sil; A Pru S A War–Sil<br />
F<br />
F 2<br />
DIAGRAM 13<br />
A<br />
Sev<br />
A<br />
France: F GoL–Tyn; F Wes S F GoL–Tyn<br />
Italy: F Tyn–Holds; F Rom S F Tyn–Holds<br />
Dislodgment in Stand<strong>of</strong>fs<br />
• A dislodged unit can still cause a stand<strong>of</strong>f in a province<br />
different from <strong>the</strong> one that dislodged it. When two or<br />
more equally supported units are ordered to <strong>the</strong> same<br />
province, nei<strong>the</strong>r can move—even if one <strong>of</strong> <strong>the</strong>m is dislodged<br />
from a province o<strong>the</strong>r than <strong>the</strong> one that is <strong>the</strong> target <strong>of</strong> <strong>the</strong><br />
stand<strong>of</strong>f during <strong>the</strong> same turn.<br />
In Diagram 12, <strong>the</strong> Austrian attack from Bohemia successfully<br />
dislodges <strong>the</strong> Germany Army in Munich. However, that Army in<br />
Munich still causes a stand<strong>of</strong>f with <strong>the</strong> Russian Army trying to<br />
enter Silesia.<br />
A<br />
2<br />
Turkey: A Bul–Rum<br />
Russia: A Rum–Bul; A Ser S A Rum–Bul; A Sev–Rum<br />
A<br />
In Diagram 13, <strong>the</strong> Russian Army in Rumania dislodges <strong>the</strong> Turkish<br />
Army in Bulgaria. That Turkish Army and <strong>the</strong> Russian Army in<br />
Sevastopol are both ordered to Rumania, which would normally<br />
cause a stand<strong>of</strong>f. However, because Rumania dislodged <strong>the</strong> Army in<br />
Bulgaria, it has no effect on Rumania at all. This allows <strong>the</strong> Sevastapol<br />
Army to enter Rumania. The Army in Bulgaria must retreat.<br />
11
In Diagram 14, even though <strong>the</strong> Turkish unit has support, it fails to<br />
prevent <strong>the</strong> unsupported Russian move into Rumania because a unit<br />
coming from Rumania dislodged <strong>the</strong> Turkish unit.<br />
DIAGRAM 15<br />
DIAGRAM 14<br />
A<br />
A<br />
A<br />
A<br />
2 F<br />
A<br />
A<br />
A<br />
3<br />
A<br />
A<br />
Germany: A Pru–War; A Sil S A Pru–War<br />
Russia: A War–Holds; A Boh–Sil<br />
Turkey: A Bul–Rum; F Bla S A Bul–Rum<br />
Russia: A Rum–Bul; A Gre S A Rum–Bul; A Ser S A Rum–Bul;<br />
A Sev–Rum<br />
In <strong>the</strong> previous two examples, if Russia hadn’t ordered “A Sev–<br />
Rum,” Rumania would have been vacant, but not as <strong>the</strong> result <strong>of</strong><br />
a stand<strong>of</strong>f (<strong>the</strong>re was no stand<strong>of</strong>f). This is discussed fur<strong>the</strong>r in <strong>the</strong><br />
Retreats section on pg. 18.<br />
Cutting Support<br />
Support can be cut. This will cause <strong>the</strong> support order to fail and<br />
support won’t be given.<br />
Note: In this rulebook, examples <strong>of</strong> support orders that failed are<br />
underlined to show that <strong>the</strong> support was cut, not to show that <strong>the</strong><br />
supported unit’s order failed.<br />
DIAGRAM 16<br />
A<br />
A 2<br />
A<br />
• Support is cut if <strong>the</strong> unit giving support is attacked from<br />
any province except <strong>the</strong> one where support is being<br />
given. The support is cut whe<strong>the</strong>r this attack on <strong>the</strong><br />
supporting unit succeeds or not.<br />
Germany: A Pru–War; A Sil S A Pru–War<br />
Russia: A War–Sil<br />
DIAGRAM 17<br />
In Diagram 15, <strong>the</strong> support from <strong>the</strong> Army in Silesia is cut by an<br />
attack from Bohemia. Note that it was enough to attack <strong>the</strong> Army<br />
giving support to cut that support. It wasn’t necessary to dislodge<br />
<strong>the</strong> supporting unit to cut that support.<br />
F<br />
• Support is cut if <strong>the</strong> unit giving support is dislodged. If a<br />
unit ordered to support ano<strong>the</strong>r unit is dislodged by an<br />
attack from any province (including <strong>the</strong> province into which<br />
it’s giving support) <strong>the</strong>n <strong>the</strong> support is cut and <strong>the</strong> unit that<br />
was to receive support doesn’t receive it.<br />
In Diagram 16, <strong>the</strong> German support isn’t cut by <strong>the</strong> attack from<br />
Warsaw because that is <strong>the</strong> province into which support is being<br />
given. To cut support, <strong>the</strong> Army in Warsaw would have to dislodge<br />
<strong>the</strong> Army in Silesia, not merely attack it.<br />
F<br />
A<br />
A<br />
2<br />
A<br />
Germany: F Ber–Pru; A Sil S F Ber–Pru<br />
Russia: A Pru–Sil; A War S A Pru–Sil; F Bal–Pru<br />
12
In Diagram 17, <strong>the</strong> Russian Army coming from Prussia dislodges <strong>the</strong><br />
German Army in Silesia. The support <strong>of</strong> <strong>the</strong> Silesian Army is thus<br />
cut and <strong>the</strong> German Army in Berlin stands <strong>of</strong>f <strong>the</strong> Russian Fleet in<br />
<strong>the</strong> Baltic.<br />
• A unit being dislodged by one province can still cut<br />
support in ano<strong>the</strong>r province. Just as a unit being dislodged<br />
by one province can still cause a stand<strong>of</strong>f in ano<strong>the</strong>r, a unit<br />
still manages to cut support even if it’s dislodged. Just make<br />
sure that <strong>the</strong> dislodgment isn’t coming from <strong>the</strong> province<br />
where <strong>the</strong> unit is giving support. (Remember this rule: A<br />
dislodged unit, even with support, has no effect on <strong>the</strong><br />
province that dislodged it.)<br />
In Diagram 18, even though <strong>the</strong> German Army in Munich is<br />
dislodged by a Russian attack, it’s still able to cut <strong>the</strong> support <strong>of</strong> <strong>the</strong><br />
Russian Army in Silesia. This prevents <strong>the</strong> Russian Army in Prussia<br />
from entering Berlin.<br />
Note: In complicated situations, it helps to first determine what<br />
support, if any, is cut. Once this is determined, it’s easier to<br />
resolve orders.<br />
Writing Convoy Orders<br />
Just as “S” indicates support, <strong>the</strong> letter “C” is used to indicate convoy.<br />
Following is an example <strong>of</strong> a convoy order:<br />
A Ank–Sev; F Bla C A Ank–Sev<br />
A Fleet can’t convoy more than one Army during <strong>the</strong> same turn.<br />
The order to <strong>the</strong> Fleet must contain both <strong>the</strong> location and <strong>the</strong><br />
destination <strong>of</strong> <strong>the</strong> Army being convoyed. Just as with support orders,<br />
<strong>the</strong> convoy order must match <strong>the</strong> move order given by <strong>the</strong> Army<br />
being convoyed. For example, if <strong>the</strong> Army in Rumania is ordered to<br />
Armenia (A Rum–Arm) and <strong>the</strong> convoy order is written to take it to<br />
Ankara (F Bla C A Rum–Ank), <strong>the</strong>n <strong>the</strong> convoy would fail and <strong>the</strong><br />
Army would remain in Rumania.<br />
Note: Fleets in any coastal province (including Constantinople,<br />
Denmark, and Kiel) can’t convoy.<br />
DIAGRAM 19<br />
DIAGRAM 18<br />
A<br />
A<br />
2<br />
A<br />
A<br />
A<br />
A<br />
F<br />
A<br />
Germany: A Ber–Holds; A Mun–Sil<br />
Russia: A Pru–Ber; A Sil S A Pru–Ber; A Boh–Mun;<br />
A Tyr S A Boh–Mun<br />
Convoy Order<br />
Convoying an Army Across One Water Province<br />
A Fleet in a water province (not a coastal province) can convoy an<br />
Army from any coastal province adjacent to that water province to<br />
any o<strong>the</strong>r coastal province adjacent to that water province. To do<br />
this, <strong>the</strong> Army must be ordered to move to <strong>the</strong> intended province<br />
and <strong>the</strong> Fleet must be ordered to convoy it.<br />
Note: A Fleet can’t convoy a Fleet.<br />
England: A Lon–Nwy; F Nth C A Lon–Nwy<br />
In Diagram 19, <strong>the</strong> Fleet in <strong>the</strong> North Sea convoys <strong>the</strong> Army in<br />
London to Norway.<br />
“Support” Can’t be Convoyed<br />
Only Armies can be convoyed. “Support” can’t be transported from<br />
one Army via a convoy to ano<strong>the</strong>r unit. For example, <strong>the</strong> orders<br />
shown below in bold are illegal and clearly fail.<br />
England: A Pic–Bre, A Lon S A Pic–Bre<br />
F Eng C A Lon S A Pic–Bre<br />
France: F Bre–Holds<br />
Convoying an Army Across Several Water Provinces<br />
If Fleets occupy adjacent water provinces, an Army can be convoyed<br />
through all <strong>the</strong>se water provinces on one turn, landing in a coastal<br />
province adjacent to <strong>the</strong> final Fleet in <strong>the</strong> chain.<br />
13
DIAGRAM 20<br />
F<br />
F<br />
A<br />
• A convoy that causes <strong>the</strong> convoyed Army to stand<strong>of</strong>f at<br />
its destination results in that army remaining in its<br />
original province. If a convoyed Army arrives at its<br />
destination province and is unable to stay <strong>the</strong>re because <strong>of</strong><br />
a stand<strong>of</strong>f with ano<strong>the</strong>r unit(s), <strong>the</strong>n that convoyed Army<br />
must remain in its original coastal province. (It could still be<br />
forced out <strong>of</strong> its original province by a successful attack<br />
<strong>the</strong>re.) An Army can be supported into its destination<br />
province to help avoid a stand<strong>of</strong>f.<br />
A<br />
F<br />
F<br />
England: A Lon–Tun; F Eng C A Lon–Tun; F Mid C A Lon–Tun<br />
France: F Wes C English A Lon–Tun<br />
DIAGRAM 21<br />
F<br />
F<br />
2<br />
F<br />
Note: In this rulebook, examples <strong>of</strong> convoy orders that failed are<br />
underlined to show that <strong>the</strong> underlined Fleet was dislodged. O<strong>the</strong>r<br />
Fleets in a convoy chain won’t be underlined.<br />
In Diagram 21, <strong>the</strong> Fleet in <strong>the</strong> Tyrrhenian is dislodged, so <strong>the</strong><br />
French Army doesn’t move from Spain to Naples.<br />
Rare Cases and Tricky Situations<br />
The above rules should resolve most situations that arise in <strong>the</strong><br />
game <strong>of</strong> <strong>Diplomacy</strong>. There are, however, a few exceptions and rare<br />
situations that can occur. They are explained below.<br />
Self Dislodgment<br />
A country can’t dislodge or support <strong>the</strong> dislodgment <strong>of</strong> one <strong>of</strong><br />
its own units, even if that dislodgment is unexpected. This is one<br />
time when support is refused or negated when it would o<strong>the</strong>rwise<br />
be legal. However, such orders can be written for o<strong>the</strong>r reasons,<br />
such as creating a stand<strong>of</strong>f. Following are some examples to<br />
fur<strong>the</strong>r explain this rule.<br />
In Diagram 22, <strong>the</strong> French Army in Paris, supported by its Army in<br />
Marseilles can’t dislodge its own Army in Burgundy.<br />
DIAGRAM 22<br />
France: A Spa–Nap; F GoL C A Spa–Nap; F Tyn C A Spa–Nap<br />
Italy: F Ion–Tyn; F Tun S F Ion–Tyn<br />
A<br />
In Diagram 20, <strong>the</strong> English Army from London goes to Tunis on a<br />
single move with help from <strong>the</strong> French player.<br />
2<br />
A<br />
Disrupting a Convoy<br />
• Dislodgment <strong>of</strong> a fleet in a convoy causes <strong>the</strong> convoy to<br />
fail. If a Fleet ordered to convoy is dislodged during <strong>the</strong> turn,<br />
<strong>the</strong> Army to be convoyed remains in its original province. An<br />
attack on a convoying Fleet, which doesn’t dislodge it, doesn’t<br />
affect <strong>the</strong> convoy.<br />
France: A Par–Bur; A Mar S A Par–Bur; A Bur–Holds<br />
A<br />
14
DIAGRAM 23<br />
A<br />
2<br />
A<br />
A<br />
In Diagram 25, <strong>the</strong> German Army in Munich is in a stand<strong>of</strong>f with <strong>the</strong><br />
Austrian Army in Tyrolia, so nei<strong>the</strong>r unit moves. German Armies in<br />
Ruhr and Silesia tried to create a stand<strong>of</strong>f with each o<strong>the</strong>r in Munich.<br />
However, <strong>the</strong> Austrian Army in Bohemia sneakily gave support to <strong>the</strong><br />
German unit from Silesia into Munich. In most cases, this supported<br />
attack from Silesia into Munich would beat <strong>the</strong> unsupported attack<br />
from Ruhr. But since that would result in Germany dislodging one<br />
<strong>of</strong> its own units, <strong>the</strong> move fails.<br />
The next example demonstrates a situation in which you might<br />
write self-dislodgment orders to create a stand<strong>of</strong>f. This is sometimes<br />
a good defensive move.<br />
France: A Par–Bur; A Bur–Mar<br />
Germany: A Ruh S French A Par–Bur<br />
Italy: A Mar–Bur<br />
A<br />
In Diagram 26, England can’t dislodge its own unit, but its supported<br />
attack on Denmark is necessary to stand<strong>of</strong>f <strong>the</strong> supported Russian<br />
attack on <strong>the</strong> same province.<br />
DIAGRAM 25<br />
DIAGRAM 24<br />
A<br />
2<br />
A<br />
A<br />
2<br />
A<br />
A<br />
A<br />
A<br />
A<br />
A<br />
Germany: A Mun–Tyr; A Ruh–Mun; A Sil–Mun<br />
Austria: A Tyr–Mun; A Boh S German A Sil–Mun<br />
DIAGRAM 26<br />
Germany: A Ruh–Bur; A Mun–Holds<br />
France: A Par S German A Ruh–Bur; A Bur–Holds<br />
In Diagram 23, <strong>the</strong> French Army in Paris, although supported by <strong>the</strong><br />
German Army in Ruhr, can’t dislodge its own Army in Burgundy.<br />
In Diagram 24, <strong>the</strong> German Army in Ruhr, supported by <strong>the</strong> French<br />
Army in Paris, can’t dislodge <strong>the</strong> French Army in Burgundy because<br />
France can’t legally support an attack against one <strong>of</strong> its own units.<br />
However, if Germany had supported its own attack (from Munich),<br />
<strong>the</strong>n <strong>the</strong> French Army in Burgundy would be dislodged.<br />
F<br />
F<br />
2<br />
F<br />
2<br />
F<br />
A<br />
F<br />
England: F Den–Kiel; F Nth–Den; F Hel S F Nth–Den<br />
Russia: A Ber–Kiel; F Ska–Den; F Bal S F Ska–Den<br />
15
Self Stand<strong>of</strong>f<br />
While a country can’t dislodge its own units, it can create stand<strong>of</strong>fs<br />
by ordering two equally-supported attacks on <strong>the</strong> same province.<br />
This is <strong>of</strong>ten done to maintain control <strong>of</strong> three provinces with two<br />
units. However, if one <strong>of</strong> <strong>the</strong> attacks has more support than <strong>the</strong><br />
o<strong>the</strong>r, it will succeed.<br />
In Diagram 27, <strong>the</strong> Austrian player is trying to control Serbia,<br />
Budapest, and Vienna with two units, keeping Budapest vacant.<br />
However, <strong>the</strong> move “A Ser–Bud” succeeds because <strong>of</strong> unexpected<br />
Russian support. It wouldn’t succeed if <strong>the</strong>re was an Austrian Army<br />
already in Budapest, since it would be dislodging its own unit.<br />
The move succeeds whe<strong>the</strong>r <strong>the</strong> support is from a foreign unit (as<br />
illustrated) or from a unit <strong>of</strong> <strong>the</strong> same country.<br />
DIAGRAM 29<br />
F<br />
2<br />
F<br />
F<br />
A<br />
Nth<br />
F<br />
DIAGRAM 27<br />
A<br />
2<br />
A<br />
England: A Lon–Bel; F Eng C A Lon–Bel; F Nth C A Lon–Bel<br />
France: F Bre–Eng; F Iri S F Bre–Eng<br />
Cutting Support on Your Own Units<br />
An attack by a country on one <strong>of</strong> its own units doesn’t cut<br />
support. This rule is in <strong>the</strong> same spirit as <strong>the</strong> Self-Dislodgment rules.<br />
A country can’t dislodge one <strong>of</strong> its own units, nor can it cut its<br />
own support.<br />
A<br />
Exchanging Places via a Convoy<br />
Two units can exchange places if ei<strong>the</strong>r or both are convoyed.<br />
This is <strong>the</strong> exception to <strong>the</strong> earlier rule that stated, “Units can’t trade<br />
places without <strong>the</strong> use <strong>of</strong> a convoy.”<br />
Austria: A Ser–Bud; A Vie–Bud<br />
Russia: A Gal S Austrian A Ser–Bud<br />
DIAGRAM 28<br />
England: A Lon–Bel; F Nth C A Lon–Bel<br />
France: A Bel–Lon; F Eng C A Bel–Lon<br />
F<br />
A<br />
A<br />
Nth<br />
F<br />
In Diagram 28, all moves succeed.<br />
Land and Convoy Routes<br />
In some rare cases, orders are written so that an Army could arrive<br />
at its destination ei<strong>the</strong>r by land or convoy. When this happens, <strong>the</strong><br />
following qualifiers apply:<br />
• If at least one <strong>of</strong> <strong>the</strong> convoying Fleets belongs to <strong>the</strong> player<br />
who controls <strong>the</strong> Army, <strong>the</strong>n <strong>the</strong> convoy is used. The land<br />
route is disregarded.<br />
• If none <strong>of</strong> <strong>the</strong> convoying Fleets belongs to <strong>the</strong> player who<br />
controls <strong>the</strong> Army, <strong>the</strong>n <strong>the</strong> land route is used. However, <strong>the</strong><br />
player controlling <strong>the</strong> Army can use <strong>the</strong> convoy route if he<br />
or she indicated “via convoy” on <strong>the</strong> Army move order<br />
in question.<br />
This prevents foreign powers from kidnapping an Army and<br />
convoying it against its will.<br />
Note: In <strong>the</strong> CD-Rom version <strong>of</strong> <strong>the</strong> game <strong>of</strong> <strong>Diplomacy</strong>, it’s<br />
impossible to specify “via convoy” in an order. In that version, if<br />
ei<strong>the</strong>r <strong>the</strong> overland route or <strong>the</strong> convoy route is valid, <strong>the</strong>n <strong>the</strong><br />
Army will move to its destination. This does allow an Army to be<br />
convoyed against its will.<br />
16
More than One Convoy Route<br />
An Army convoyed using alternate convoy orders reaches its<br />
destination as long as at least one convoy route remains open.<br />
Orders can be written to permit more than one route for convoying<br />
an Army from its origin to its destination. The Army isn’t prevented<br />
from moving unless all routes in <strong>the</strong> order are disrupted.<br />
In Diagram 29, <strong>the</strong> Army in London has two convoy routes. Since<br />
only one was disrupted, <strong>the</strong> English Army lands in Belgium.<br />
A Convoyed Attack Doesn’t Cut Certain Supports<br />
A convoyed Army doesn’t cut <strong>the</strong> support <strong>of</strong> a unit supporting<br />
an attack against one <strong>of</strong> <strong>the</strong> Fleets necessary for <strong>the</strong> Army to<br />
convoy. This is a tricky and rare situation, but without this rule<br />
(using Diagram 30 as an example), a paradox may occur.<br />
In <strong>the</strong> following orders, France could argue that its Army cut <strong>the</strong><br />
support <strong>of</strong> <strong>the</strong> Fleet in Naples, thus protecting <strong>the</strong> convoying Fleet<br />
from dislodgment. (France could state <strong>the</strong> rule, “Support is cut if<br />
<strong>the</strong> unit giving support is attacked from any province but <strong>the</strong> one<br />
where support is being given.”). Italy could argue that dislodgment<br />
<strong>of</strong> <strong>the</strong> Fleet disrupted <strong>the</strong> convoy so that <strong>the</strong> Army couldn’t arrive in<br />
Naples to cut that support. (Italy could state <strong>the</strong> rule, “Dislodgment<br />
<strong>of</strong> a fleet in a convoy causes <strong>the</strong> convoy to fail.”) Since both rules are<br />
contradictory, <strong>the</strong> above new rule takes precedence. Therefore, <strong>the</strong><br />
convoy is blocked and support isn’t cut.<br />
Two More Tricky Situations<br />
Following are two complicated examples that involve <strong>the</strong> Alternate<br />
Convoy rule and <strong>the</strong> Convoyed Attack rule. These situations are rare<br />
and don’t come up in most games. But, here are <strong>the</strong> rules in case<br />
<strong>the</strong>se issues do arise.<br />
An Army with at least one successful convoy route will cut<br />
<strong>the</strong> support given by a unit in <strong>the</strong> destination province that is<br />
trying to support an attack on a Fleet in an alternate route <strong>of</strong><br />
that convoy. As long as <strong>the</strong>re is one successful convoy route, <strong>the</strong><br />
landing Army does cut any support given by a unit in <strong>the</strong> destination<br />
province. (Remember <strong>the</strong> rule: “Support is cut if <strong>the</strong> unit giving<br />
support is attacked from any province but <strong>the</strong> one where support<br />
is being given.”)<br />
DIAGRAM 30<br />
In Diagram 31, France wrote orders that would take its Army to<br />
Naples by ei<strong>the</strong>r <strong>of</strong> two routes. The move from Tunis fails (because<br />
<strong>of</strong> a stand<strong>of</strong>f with <strong>the</strong> Fleet in Naples), but it cuts <strong>the</strong> support <strong>of</strong> that<br />
Fleet because that Fleet isn’t cutting <strong>the</strong> successful convoy that came<br />
via <strong>the</strong> Ionian Sea. Therefore, <strong>the</strong> Fleet in Rome stands <strong>of</strong>f with <strong>the</strong><br />
Fleet in <strong>the</strong> Tyrrhenian Sea.<br />
In Diagram 32, The Fleet in Naples is dislodged by <strong>the</strong> combined<br />
strength <strong>of</strong> <strong>the</strong> Army being convoyed from Tunis and <strong>the</strong> Army in<br />
Apulia. Since <strong>the</strong> Army coming from Tunis can get to Naples via <strong>the</strong><br />
Ionian Sea, <strong>the</strong> Fleet in Naples wasn’t supporting an attack against<br />
<strong>the</strong> Fleet that ultimately convoyed <strong>the</strong> Army, so its support was cut.<br />
DIAGRAM 31<br />
A<br />
F<br />
France: A Tun–Nap; F Tyn C A Tun–Nap; F Ion C A Tun–Nap<br />
Italy: F Rom–Tyn; F Nap S F Rom–Tyn<br />
DIAGRAM 32<br />
F<br />
F<br />
F<br />
F<br />
F<br />
2<br />
A<br />
F<br />
2<br />
F<br />
A<br />
F<br />
A<br />
F<br />
F<br />
France: A Tun–Nap; F Tyn C A Tun–Nap; F Ion C A Tun–Nap;<br />
A Apu S A Tun–Nap<br />
Italy: F Rom–Tyn; F Nap S F Rom–Tyn<br />
Note: If <strong>the</strong> Italian orders had been reversed, <strong>the</strong>n <strong>the</strong> Fleet in <strong>the</strong><br />
Tyrrhenian Sea would be dislodged and <strong>the</strong> Fleet in Naples would<br />
move to <strong>the</strong> Tyrrhenian Sea.<br />
France: A Tun–Nap; F Tyn C A Tun–Nap<br />
Italy: F Ion–Tyn; F Nap S F Ion–Tyn<br />
17
3. THE ORDER RESOLUTION PHASE<br />
After all <strong>the</strong> orders have been revealed and read, <strong>the</strong> players (or an<br />
assigned gamemaster) must resolve all <strong>of</strong> <strong>the</strong> conflicts. Resolution<br />
will result in successful moves, failed moves, stand<strong>of</strong>fs, retreats,<br />
and disbandments. The units on <strong>the</strong> game board are moved and<br />
removed as described in <strong>the</strong> next two phases <strong>of</strong> play.<br />
4. RETREAT AND DISBANDING PHASE<br />
After all <strong>the</strong> orders have been revealed and read, <strong>the</strong> moves made,<br />
and <strong>the</strong> conflicts resolved, any dislodged (defeated) units make<br />
<strong>the</strong>ir retreat. These retreats are written down (just like orders) and<br />
revealed immediately. No diplomacy or discussion takes place prior<br />
to writing retreat orders—all countries are on <strong>the</strong>ir own.<br />
A dislodged unit must retreat to an adjacent province that it could<br />
ordinarily move to if unopposed by o<strong>the</strong>r units. Sometimes a retreat<br />
is made deeper into enemy territory.<br />
A unit can’t retreat to:<br />
• a province that is occupied;<br />
• <strong>the</strong> province from which <strong>the</strong> attacker came; or<br />
• a province that was left vacant by a stand<strong>of</strong>f during<br />
<strong>the</strong> same turn.<br />
If <strong>the</strong>re is no available province to retreat to, <strong>the</strong> dislodged unit is<br />
immediately disbanded and removed from <strong>the</strong> game board.<br />
WRITING RETREATS<br />
If two or more units must retreat, <strong>the</strong> retreat locations are<br />
immediately (and without discussion) written down by <strong>the</strong> players<br />
concerned. The written retreats are <strong>the</strong>n simultaneously revealed.<br />
Retreats can’t be convoyed or supported. Each player should write<br />
down <strong>the</strong> location <strong>of</strong> <strong>the</strong> dislodged unit and <strong>the</strong> location to which<br />
it’s retreating.<br />
DISBANDMENT<br />
If two or more units are ordered to retreat to <strong>the</strong> same province,<br />
<strong>the</strong>y all must be disbanded. If a player fails to order a retreat when<br />
necessary, <strong>the</strong> unit is disbanded. A unit can always voluntarily<br />
disband instead <strong>of</strong> retreating.<br />
Once a country gains control <strong>of</strong> a supply center, it can leave <strong>the</strong><br />
center vacant and still keep control <strong>of</strong> it, as long as that center isn’t<br />
occupied by ano<strong>the</strong>r country at <strong>the</strong> close <strong>of</strong> a Fall turn. A unit that<br />
moves into a supply center during a Spring turn and moves out <strong>of</strong><br />
it during <strong>the</strong> Fall <strong>of</strong> <strong>the</strong> same year doesn’t affect <strong>the</strong> ownership <strong>of</strong><br />
<strong>the</strong> supply center. In short, a country retains control <strong>of</strong> a supply<br />
center as long as, at <strong>the</strong> end <strong>of</strong> each Fall turn (including retreats),<br />
<strong>the</strong> supply center is ei<strong>the</strong>r vacant or is occupied by one <strong>of</strong> its<br />
own units.<br />
ADJUSTING NUMBER OF UNITS<br />
After each Fall turn (including retreats, if any), players adjust <strong>the</strong>ir<br />
units to match <strong>the</strong> number <strong>of</strong> supply centers <strong>the</strong>y control. This may<br />
result in some units being disbanded (if <strong>the</strong> player has lost supply<br />
centers that year) or in some units being built (if <strong>the</strong> player has<br />
gained supply centers that year).<br />
As with retreats, gaining and losing units (collectively known as<br />
“adjustments”) are written and revealed simultaneously without<br />
discussion or diplomacy <strong>of</strong> any kind.<br />
DISBANDING<br />
If a country has fewer supply centers than units, it must disband <strong>the</strong><br />
excess number <strong>of</strong> units (owner’s choice <strong>of</strong> which units).<br />
BUILDING<br />
If a country has more supply centers than units, it can place new<br />
units in each unoccupied supply center <strong>of</strong> its home country that it<br />
still controls. It can’t build units in supply centers outside its home<br />
country.<br />
Example: The French player can build units only in Paris, Brest, and<br />
Marseilles throughout <strong>the</strong> course <strong>of</strong> <strong>the</strong> game. However, if Marseilles<br />
was under Italy’s control and <strong>the</strong> French player had a unit in Brest,<br />
he or she would only be allowed to build in Paris, no matter how<br />
many builds France was entitled to on that turn. If <strong>the</strong> French player<br />
vacated Brest and regained control <strong>of</strong> Marseilles, he or she would be<br />
allowed to build <strong>the</strong>re after ano<strong>the</strong>r Fall turn (provided he or she<br />
was still entitled to build on that turn).<br />
5. GAINING AND LOSING UNITS PHASE<br />
(AFTER FALL TURN)<br />
CONTROLLING SUPPLY CENTERS<br />
After each Fall turn, players check to see how many supply centers<br />
<strong>the</strong>y control. A country controls a supply center when one <strong>of</strong> its<br />
units occupies that supply-center province after a Fall turn has been<br />
played and completed.<br />
18
ADDITIONAL BUILDING RULES<br />
• Only an Army unit can be built on an inland province<br />
supply center.<br />
• When building a unit on a coastal province supply center, a<br />
Fleet or Army must be specified in <strong>the</strong> written build order. If<br />
Russia builds a Fleet in St. Petersburg, <strong>the</strong> Russian player<br />
must also specify “North <strong>Coast</strong>” or “South <strong>Coast</strong>.”<br />
• If your country’s home supply centers are all occupied by<br />
your own (or o<strong>the</strong>r players’) units, <strong>the</strong>n you can’t build during<br />
<strong>the</strong> current Fall turn. Remember to leave some home supply<br />
centers open if you intend to build new units in <strong>the</strong> Fall.<br />
• If your country has lost all <strong>of</strong> its home supply centers, you<br />
can still fight with <strong>the</strong> units (supplied by o<strong>the</strong>r centers)<br />
remaining under your control. In this case, you can’t build<br />
new units until you recapture a home supply center and<br />
control it at <strong>the</strong> close <strong>of</strong> a Fall turn.<br />
• A country can decline to build a unit that it’s entitled to for<br />
whatever reason (usually a diplomatic one).<br />
WRITING BUILDS AND DISBANDMENTS<br />
Players write down which units <strong>the</strong>y will disband (if any) and what<br />
type <strong>of</strong> unit will be built in a home supply center (if any). These<br />
orders are written without diplomacy or discussion and revealed at<br />
<strong>the</strong> same time. Any vague or invalid orders are ignored.<br />
TIME MANAGEMENT<br />
It’s wise to set aside about four hours to play <strong>Diplomacy</strong>. No more<br />
than five minutes should be allowed for writing orders after <strong>the</strong><br />
diplomatic negotiation period has ended. <strong>Diplomacy</strong> and o<strong>the</strong>r<br />
conversation shouldn’t be allowed during <strong>the</strong> writing and reading<br />
<strong>of</strong> orders, between moves and retreats, during and after retreats, or<br />
during adjustments.<br />
Newcomers should be given a half-hour (at least) introduction to<br />
<strong>the</strong> game before <strong>the</strong> o<strong>the</strong>r players assemble. A few moves should<br />
<strong>the</strong>n be played with newcomers so <strong>the</strong>y become familiar with <strong>the</strong><br />
rules before <strong>the</strong> game starts.<br />
CIVIL DISORDER<br />
If you leave <strong>the</strong> game or o<strong>the</strong>rwise fail to submit orders on a given<br />
Spring or Fall turn, it’s assumed that your government has collapsed.<br />
Your units all hold in position, but don’t support each o<strong>the</strong>r. If<br />
<strong>the</strong>y’re dislodged, <strong>the</strong>y’re disbanded. No new units are raised for<br />
<strong>the</strong> country.<br />
If a country in civil disorder has to remove units, <strong>the</strong> units far<strong>the</strong>st<br />
from <strong>the</strong> country are removed first. If units are equally distant, <strong>the</strong>n<br />
remove Fleets before Armies and <strong>the</strong>n in alphabetical order by <strong>the</strong><br />
provinces in which <strong>the</strong>y’re located.<br />
It’s probably best, if enough players are present, to allow someone<br />
else to replace any player who leaves <strong>the</strong> game. Players should decide<br />
what policies <strong>the</strong>y will follow before starting <strong>the</strong> game.<br />
ALTERNATE WAY TO PLAY<br />
The following is an alternative way to play <strong>the</strong> game <strong>of</strong> <strong>Diplomacy</strong><br />
when fewer than seven players are present.<br />
Six Players: Eliminate Italy. Italian units hold in position and defend<br />
<strong>the</strong>mselves, but don’t support each o<strong>the</strong>r. Units belonging to any <strong>of</strong><br />
<strong>the</strong> players can support <strong>the</strong>m in <strong>the</strong>ir holding position. If Italian<br />
units are forced to retreat, <strong>the</strong>y’re disbanded.<br />
Five Players: Eliminate Italy and Germany (as described for<br />
Italy above).<br />
Four Players: One player plays England, and <strong>the</strong> o<strong>the</strong>r three play<br />
<strong>the</strong> following pairs: Austria/France, Germany/Turkey, and Italy/<br />
Russia.<br />
Three Players: One player controls England/Germany/Austria; <strong>the</strong><br />
second, Russia/Italy; and <strong>the</strong> third, France/Turkey.<br />
Two Players: This version can be played as a World War I simulation.<br />
One player controls England/France/Russia while <strong>the</strong> o<strong>the</strong>r plays<br />
Austria/Germany/Turkey. Italy is neutral and Italian territory can’t be<br />
entered. The game begins in 1914. Before <strong>the</strong> Fall 1914 adjustments,<br />
flip a coin. Italy joins <strong>the</strong> winner <strong>of</strong> <strong>the</strong> toss in Spring 1915. The first<br />
player to control 24 supply centers wins. This is also an enjoyable<br />
way for two new players to learn <strong>the</strong> rules.<br />
In games for 2, 3, or 4 players, supply-center ownership is computed<br />
for each individual country, even though <strong>the</strong> same person plays<br />
more than one country. As with <strong>the</strong> regular rules, adjustments must<br />
be made by each country in accordance with its supply-center<br />
holdings.<br />
OPENING MOVES<br />
IN A SAMPLE GAME<br />
This sample game will help demonstrate some <strong>of</strong> <strong>the</strong> typical opening<br />
moves in a game <strong>of</strong> <strong>Diplomacy</strong>. This is intended to be a look at<br />
order writing and resolution. No strategies, diplomacy, alliances, or<br />
negotiations are discussed here. Besides, it would take too much<br />
space to record all <strong>of</strong> <strong>the</strong> discussion that goes on!<br />
As you read <strong>the</strong> orders, you may want set up <strong>the</strong> game board and<br />
move each playing piece so that it projects into <strong>the</strong> province to<br />
which it has been ordered. As soon as <strong>the</strong> final results are clear, <strong>the</strong><br />
piece should be pushed into its new position or back to its old one.<br />
19
Spring 1901<br />
Austria: A Vie–Tri, A Bud–Gal, F Tri–Alb<br />
England: A Lvp–Yor, F Lon–Nth, F Edi–Nrg<br />
France: A Par–Bur, A Mar–Spa, F Bre–Pic<br />
Germany: A Ber–Kie, A Mun–Ruh, F Kie–Den<br />
Italy: A Ven–Pie, A Rom–Ven, F Nap–Ion<br />
Russia: A Mos–Ukr, A War–Gal, F StP–Bot, F Sev–Bla<br />
Turkey: A Con–Bul, A Smy–Con, F Ank–Bla<br />
Commentary: All orders succeed except for <strong>the</strong> two units ordered to <strong>the</strong> Black Sea and <strong>the</strong><br />
two ordered to Galicia.<br />
Key Rule: Units <strong>of</strong> equal strength trying to occupy <strong>the</strong> same province cause all those units to remain<br />
in <strong>the</strong>ir original provinces.<br />
Retreats: None.<br />
Fall 1901<br />
Austria: A Tri Holds, A Bud–Ser, F Alb–Gre<br />
England: A Yor–Nwy, F Nth C A Yor–Nwy, F Nrg–Bar<br />
France: A Bur–Mar, A Spa–Port, F Pic–Bel<br />
Germany: A Kie–Hol, A Ruh–Bel, F Den Holds<br />
Italy: A Ven Holds, A Pie–Mar, F Ion–Tun<br />
Russia: A Ukr S F Sev–Rum, A War–Gal, F Bot–Swe, F Sev–Rum<br />
Turkey: A Bul–Ser, A Con–Bul, F Ank–Bla<br />
Commentary: The units ordered to Belgium, Marseilles, and Serbia don’t move.<br />
Key Rule: Units <strong>of</strong> equal strength trying to occupy <strong>the</strong> same province cause all those units to remain<br />
in <strong>the</strong>ir original provinces.<br />
Commentary: The order “Con–Bul” also doesn’t succeed.<br />
Key Rule: One unit not moving can stop a unit or series <strong>of</strong> o<strong>the</strong>r units from moving.<br />
Retreats: None.<br />
Builds: Looking at <strong>the</strong> supply centers, England, Turkey, Austria, Italy, and France are<br />
each entitled to one build, and Russia and Germany are entitled to two. All players write<br />
down <strong>the</strong>ir builds and reveal <strong>the</strong>ir orders simultaneously. England builds a new Fleet in<br />
Edinburgh “F Edi.” Germany builds “F Kie” and “A Mun.” Russia builds “A StP” and “A<br />
Sev.” Turkey builds “A Smy.” Austria builds “A Vie.” Italy builds “F Nap.” France builds<br />
“F Mar.” France builds one unit for Portugal “A Por,” but none for Spain, which its Army<br />
passed through during <strong>the</strong> Spring turn.<br />
20
Spring 1902<br />
Austria:<br />
A Tri–Bud, A Vie–Bud, A Bud–Ser, F Gre Holds<br />
England: A Nwy–StP, F Nth–Nwy, F Bar S A Nwy–StP, F Edi–Nth<br />
France:<br />
A Bur S F Pic–Bel, A Por–Spa, F Pic–Bel, F Mar Holds<br />
Germany: A Hol–Bel, A Ruh S A Hol–Bel, A Mun–Bur, F Den Holds,<br />
F Kie–Hol<br />
Italy:<br />
Russia:<br />
Turkey:<br />
A Ven Holds, A Pie–Mar, F Tun–Wes, F Nap–Tyn<br />
A Ukr S F Rum, A Gal–Bud, A StP–Nwy, A Sev S F Rum,<br />
F Swe S A StP–Nwy, F Rum Holds<br />
A Bul–Rum, A Con–Bul, A Smy–Arm, F Bla S A Bul–Rum<br />
Commentary: The Russian and English units on <strong>the</strong> Norway/St. Petersburg border fail<br />
to move.<br />
Key Rules: (1) Units <strong>of</strong> equal strength trying to occupy <strong>the</strong> same province cause all those units to<br />
remain in <strong>the</strong>ir original provinces. (2) Units can’t trade places without <strong>the</strong> use <strong>of</strong> a convoy.<br />
Commentary: This causes <strong>the</strong> English Fleets in <strong>the</strong> North Sea and Edinburgh to stay in place.<br />
Key Rule: One unit not moving can stop a unit or series <strong>of</strong> units from moving.<br />
Sweden and Norway are adjacent along a coastline at <strong>the</strong> south, so <strong>the</strong> Fleet in Sweden can<br />
support an attack on Norway.<br />
Commentary: The units ordered to Budapest also fail.<br />
Key Rule: Units <strong>of</strong> equal strength trying to occupy <strong>the</strong> same province cause all those units to remain<br />
in <strong>the</strong>ir original provinces.<br />
The Austrian Fleet in Greece couldn’t support <strong>the</strong> move to Serbia. Because a Fleet can’t<br />
move to an inland province, it can’t provide support <strong>the</strong>re.<br />
The Turkish attack on Rumania, although supported, fails because Russia had more units<br />
supporting <strong>the</strong> Rumanian hold order (two-unit attack vs. a three-unit hold).<br />
Commentary: Many o<strong>the</strong>r orders also fail, including <strong>the</strong> move by Turkey to Bulgaria, <strong>the</strong><br />
Italian move into Marseilles, and <strong>the</strong> German move into Burgundy.<br />
Key Rule: One unit not moving can stop a unit or series <strong>of</strong> units from moving.<br />
Commentary: The German attack on Burgundy from Munich cuts <strong>the</strong> support <strong>the</strong>re. This allows<br />
<strong>the</strong> supported German move into Belgium to succeed (two-unit attack vs. one-unit hold).<br />
Key Rule: Support is cut if <strong>the</strong> unit giving support is attacked from any province except <strong>the</strong> one<br />
where support is being given.<br />
Retreats: None.<br />
21
Fall 1902<br />
Austria:<br />
A Vie–Gal, A Tri–Bud, A Ser S Turkish A Bul–Rum, F Gre Holds<br />
England: A Nwy–StP, F Bar S A Nwy–StP, F Nth–Nwy, F Edi–Nth<br />
France:<br />
A Bur–Bel, F Pic S A Bur–Bel, A Spa S F Mar, F Mar S A Spa<br />
Germany: A Ruh–Bur, A Mun S A Ruh–Bur, A Bel S A Ruh–Bur,<br />
F Den–Swe, F Hol S A Bel<br />
Italy:<br />
Russia:<br />
Turkey:<br />
A Ven–Pie, A Pie–Mar, F Wes–NAf, F Tyn–GoL<br />
A StP–Nwy, F Swe S StP–Nwy, F Rum S A Sev, A Sev S F Rum,<br />
A Gal S F Rum, A Ukr S A Sev<br />
A Bul–Rum, A Con–Bul, A Arm–Sev, F Bla S A Bul–Rum<br />
Commentary: First, look for support that has been cut. Many support<br />
orders written on this turn are cut because <strong>of</strong> <strong>the</strong> following rule.<br />
Key Rule: Support is cut if <strong>the</strong> unit giving support is attacked from any<br />
province but <strong>the</strong> one where support is being given.<br />
The supports that are cut include: <strong>the</strong> Russian Fleet in Sweden (<strong>the</strong><br />
attack from Denmark), <strong>the</strong> French Fleet in Marseilles (<strong>the</strong> attack<br />
from Piedmont), <strong>the</strong> Russian Army in Sevastapol (<strong>the</strong> attack from<br />
Armenia), <strong>the</strong> Russian Army in Galacia (<strong>the</strong> attack from Vienna),<br />
and <strong>the</strong> Russian Fleet in Rumania (<strong>the</strong> attack from Bulgaria).<br />
The German Army in Belgium, supporting a move from Ruhr to<br />
Burgundy, doesn’t have its support cut since <strong>the</strong> attack comes from<br />
Burgundy, <strong>the</strong> province where <strong>the</strong> support is being given.<br />
Commentary: Next, look for stand<strong>of</strong>fs. The Fleet in Marseilles and<br />
<strong>the</strong> Army in Sevastapol successfully stand<strong>of</strong>f <strong>the</strong>ir attackers.<br />
Key Rule: Units <strong>of</strong> equal strength trying to occupy <strong>the</strong> same province<br />
cause all those units to remain in <strong>the</strong>ir original provinces.<br />
In fact, <strong>the</strong> support from Spain and Ukraine is unnecessary here<br />
as <strong>the</strong> individual units would have been enough to hold <strong>of</strong>f<br />
<strong>the</strong> attack.<br />
Commentary: The Army in Vienna can’t get into occupied Galacia<br />
and <strong>the</strong> Army in Venice can’t get into occupied Piedmont. They<br />
remain in place.<br />
Key Rule: One unit not moving can stop a unit or series <strong>of</strong> units<br />
from moving.<br />
Commentary: The French Army trying to get from Burgundy to Belgium<br />
fails because <strong>the</strong> support from Holland makes <strong>the</strong> forces equal.<br />
Key Rule: Units <strong>of</strong> equal strength trying to occupy <strong>the</strong> same province<br />
cause all those units to remain in <strong>the</strong>ir original provinces.<br />
Commentary: The support coming from Munich gives <strong>the</strong> German<br />
Army coming from Ruhr a strength <strong>of</strong> 2 compared to <strong>the</strong> French<br />
Army’s strength <strong>of</strong> 1. The Army in Ruhr moves into Burgundy and<br />
<strong>the</strong> French Army will have to retreat during <strong>the</strong> Retreat phase.<br />
The Russian Fleet in Rumania was originally supported enough to<br />
hold <strong>of</strong>f <strong>the</strong> Turkish attack from Bulgaria. However, both its supports<br />
were cut and it now stands alone. This isn’t enough to hold <strong>of</strong>f <strong>the</strong><br />
attack since Turkey is supporting <strong>the</strong> Bulgarian Army with <strong>the</strong> Fleet<br />
in <strong>the</strong> Black Sea. The Bulgarian Army moves into Rumania and <strong>the</strong><br />
Russian Army <strong>the</strong>re will have to retreat during <strong>the</strong> Retreat phase.<br />
The vacating <strong>of</strong> Bulgaria also allows <strong>the</strong> Army in Constantinople to<br />
enter Bulgaria.<br />
Since <strong>the</strong> Russian support in Sweden was cut, <strong>the</strong> English attack<br />
from Norway into St. Petersburg succeeds. The Russian Army in St.<br />
Petersburg will have to retreat during <strong>the</strong> Retreat phase. Since <strong>the</strong><br />
Army in Norway entered St. Petersburg, <strong>the</strong> o<strong>the</strong>r British Fleets can<br />
complete <strong>the</strong>ir moves.<br />
Retreats: There are three units on <strong>the</strong> board that must retreat during<br />
<strong>the</strong> Retreat phase (one French, two Russian). The Russian unit in<br />
Rumania has no place to retreat (all adjacent territories are occupied)<br />
and is immediately disbanded and removed from <strong>the</strong> board. The<br />
Russian and French players <strong>the</strong>n write down <strong>the</strong> retreat for <strong>the</strong>ir<br />
one unit. Russia: “A StP–Mos.” France: “A Bur–Gas.” The units are<br />
moved to Moscow and Gascony.<br />
Builds and Disbandments: Russia controls four supply centers but<br />
has five units. It must disband one. All o<strong>the</strong>r players but Italy get<br />
a build. All players write down <strong>the</strong>ir builds and disbandments and<br />
reveal <strong>the</strong>m simultaneously. Germany builds “F Kie.” Russia removes<br />
“A Gal.” Turkey builds “F Smy.” Austria builds “A Tri.” France builds<br />
“A Par.” England builds “F Lon.” Italy doesn’t change.<br />
Conclusion: At this point, with all <strong>the</strong> neutral supply centers owned<br />
by one <strong>of</strong> seven countries, and some fledgling alliances and conflicts<br />
between <strong>the</strong> players, we will end our sample game. No effort has<br />
been made here to analyze <strong>the</strong> strategy or tactics <strong>of</strong> <strong>the</strong>se fictitious<br />
players. A detailed look at <strong>the</strong> complexities, strategies, and tactical<br />
moves <strong>of</strong> <strong>the</strong> game <strong>of</strong> <strong>Diplomacy</strong> can be found on our web site:<br />
www.avalonhill.com.<br />
22
22 RULES TO HELP YOU RESOLVE ORDERS<br />
The following is a handy list <strong>of</strong> rules needed to resolve orders and game-play issues. If you’re unable<br />
to resolve an issue using this list, refer to <strong>the</strong> instructions and examples within this rulebook for more<br />
detailed explanations.<br />
1. All units have <strong>the</strong> same strength.<br />
2. There can only be one unit in a province at<br />
a time.<br />
3. Units <strong>of</strong> equal strength trying to occupy <strong>the</strong><br />
same province cause all those units to<br />
remain in <strong>the</strong>ir original provinces.<br />
4. A stand<strong>of</strong>f doesn’t dislodge a unit already in<br />
<strong>the</strong> province where <strong>the</strong> stand<strong>of</strong>f took place.<br />
5. One unit not moving can stop a series <strong>of</strong><br />
o<strong>the</strong>r units from moving.<br />
6. Units can’t trade places without <strong>the</strong> use <strong>of</strong><br />
a convoy.<br />
7. Three or more units can rotate provinces<br />
during a turn provided none directly<br />
trade places.<br />
8. A unit not ordered to move can be<br />
supported by a support order that only<br />
mentions its province.<br />
9. A unit ordered to move can only be<br />
supported by a support order that matches<br />
<strong>the</strong> move <strong>the</strong> unit is trying to make.<br />
10. A dislodged unit can still cause a stand<strong>of</strong>f in<br />
a province different from <strong>the</strong> one that<br />
dislodged it.<br />
11. A dislodged unit, even with support, has no<br />
effect on <strong>the</strong> province that dislodged it.<br />
12. A country can’t dislodge or support <strong>the</strong><br />
dislodgment <strong>of</strong> one <strong>of</strong> its own units, even if<br />
that dislodgment is unexpected.<br />
13. Support is cut if <strong>the</strong> unit giving support is<br />
attacked from any province except <strong>the</strong> one<br />
where support is being given.<br />
14. Support is cut if <strong>the</strong> supporting unit<br />
is dislodged.<br />
15. A unit being dislodged by one province can<br />
still cut support in ano<strong>the</strong>r.<br />
16. An attack by a country on one <strong>of</strong> its own<br />
units doesn’t cut support.<br />
17. A dislodgment <strong>of</strong> a Fleet necessary to a<br />
convoy causes that convoy to fail.<br />
18. A convoy that causes <strong>the</strong> convoyed Army<br />
to stand<strong>of</strong>f at its destination results in that<br />
Army remaining in its original province.<br />
19. Two units can exchange places if ei<strong>the</strong>r or<br />
both are convoyed. (This is <strong>the</strong> exception to<br />
Rule 6.)<br />
20. An Army convoyed using alternate convoy<br />
orders reaches its destination as long as at<br />
least one convoy route remains open.<br />
21. A convoyed Army doesn’t cut <strong>the</strong> support <strong>of</strong><br />
a unit supporting an attack against one <strong>of</strong><br />
<strong>the</strong> Fleets necessary for <strong>the</strong> Army to convoy.<br />
(This supersedes Rule 13.)<br />
22. An Army with at least one successful convoy<br />
route will cut <strong>the</strong> support given by a unit<br />
in <strong>the</strong> destination province that is supporting<br />
an attack on a Fleet in an alternate route in<br />
that convoy. (This supersedes Rule 21.)<br />
23
ABBREVIATIONS<br />
Below is a list <strong>of</strong> commonly accepted abbreviations for <strong>the</strong> provinces on <strong>the</strong> <strong>Diplomacy</strong><br />
map. You may devise your own abbreviations, but remember that abbreviations that are<br />
subject to different interpretations may result in <strong>the</strong> failure <strong>of</strong> an order.<br />
Austria<br />
Bohemia<br />
Budapest<br />
Galicia<br />
Trieste<br />
Tyrolia<br />
Vienna<br />
England<br />
Clyde<br />
Edinburgh<br />
Liverpool<br />
London<br />
Wales<br />
Yorkshire<br />
France<br />
Brest<br />
Burgundy<br />
Gascony<br />
Marseilles<br />
Paris<br />
Picardy<br />
Germany<br />
Berlin<br />
Kiel<br />
Munich<br />
Prussia<br />
Ruhr<br />
Silesia<br />
Italy<br />
Apulia<br />
Naples<br />
Piedmont<br />
Rome<br />
Tuscany<br />
Venice<br />
Russia<br />
Finland<br />
Livonia<br />
Moscow<br />
Sevastopol<br />
St. Petersburg<br />
Ukraine<br />
Warsaw<br />
Boh<br />
Bud<br />
Gal<br />
Tri<br />
Tyr<br />
Vie<br />
Cly<br />
Edi<br />
Lvp<br />
Lon<br />
Wal<br />
Yor<br />
Bre<br />
Bur<br />
Gas<br />
Mar<br />
Par<br />
Pic<br />
Ber<br />
Kie<br />
Mun<br />
Pru<br />
Ruh<br />
Sil<br />
Apu<br />
Nap<br />
Pie<br />
Rom<br />
Tus<br />
Ven<br />
Fin<br />
Lvn<br />
Mos<br />
Sev<br />
StP<br />
Ukr<br />
War<br />
Turkey<br />
Ankara<br />
Armenia<br />
Constantinople<br />
Smyrna<br />
Syria<br />
Neutrals<br />
Albania<br />
Belgium<br />
Bulgaria<br />
Denmark<br />
Greece<br />
Holland<br />
Norway<br />
North Africa<br />
Portugal<br />
Rumania<br />
Serbia<br />
Spain<br />
Sweden<br />
Tunis<br />
Bodies <strong>of</strong> Water<br />
Adriatic Sea<br />
Aegean Sea<br />
Baltic Sea<br />
Barents Sea<br />
Black Sea<br />
Eastern Mediterranean<br />
English Channel<br />
Gulf <strong>of</strong> Bothnia<br />
Gulf <strong>of</strong> Lyon<br />
Helgoland Bight<br />
Ionian Sea<br />
Irish Sea<br />
Mid-Atlantic Ocean<br />
North Atlantic Ocean<br />
North Sea<br />
Norwegian Sea<br />
Skagerrak<br />
Tyrrhenian Sea<br />
Western Mediterranean<br />
Ank<br />
Arm<br />
Con<br />
Smy<br />
Syr<br />
Alb<br />
Bel<br />
Bul<br />
Den<br />
Gre<br />
Hol<br />
Nwy<br />
NAf<br />
Por<br />
Rum<br />
Ser<br />
Spa<br />
Swe<br />
Tun<br />
Adr<br />
Aeg<br />
Bal<br />
Bar<br />
Bla<br />
Eas<br />
Eng<br />
Bot<br />
GoL<br />
Hel<br />
Ion<br />
Iri<br />
Mid<br />
NAt<br />
Nth<br />
Nrg<br />
Ska<br />
Tyn<br />
Wes