Subtitled Public's manual - Rafael Lozano-Hemmer
Subtitled Public's manual - Rafael Lozano-Hemmer
Subtitled Public's manual - Rafael Lozano-Hemmer

You also want an ePaper? Increase the reach of your titles
YUMPU automatically turns print PDFs into web optimized ePapers that Google loves.
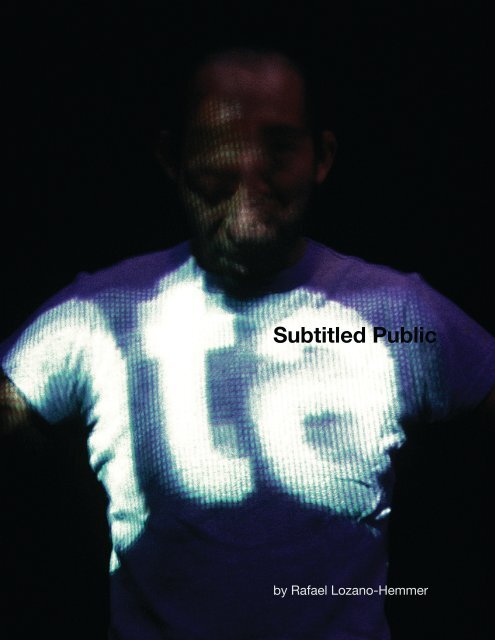
<strong>Subtitled</strong> Public<br />
by <strong>Rafael</strong> <strong>Lozano</strong>-<strong>Hemmer</strong>
<strong>Subtitled</strong> Public 02
page<br />
General information<br />
Description .........................................................................<br />
Production ..........................................................................<br />
Catalogue information ........................................................<br />
Collections ..........................................................................<br />
Credits ................................................................................<br />
Selected reviews ................................................................<br />
Equipment ..........................................................................<br />
Set-up and calibration<br />
Exhibition room ...................................................................<br />
Connections ........................................................................<br />
Lens calibration ..................................................................<br />
Taking calibration images ...................................................<br />
System calibration sequence .............................................<br />
Start and shutdown procedures .........................................<br />
Preservation notes ............................................................................<br />
APPENDIX I - Fire-i Board Digital Camera ........................................<br />
APPENDIX II - Information on Apple Mac Mini .................................<br />
07<br />
08<br />
08<br />
08<br />
08<br />
08<br />
09<br />
13<br />
14<br />
15<br />
18<br />
20<br />
20<br />
23<br />
27<br />
31<br />
<strong>Subtitled</strong> Public 03
<strong>Subtitled</strong> Public 04
<strong>Subtitled</strong> Public 05<br />
GENERAL INFORMATION
<strong>Subtitled</strong> Public 06
Description<br />
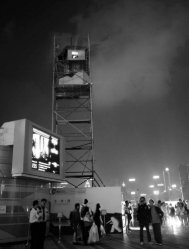
SUBTITLED PUBLIC consists of an empty<br />
exhibition space where visitors are tracked with<br />
a computerized infrared surveillance system. As<br />
people enter the installation, texts are projected<br />
onto their bodies: these “subtitles” consist of<br />
thousands of verbs conjugated in the third person<br />
and they follow each individual everywhere they go.<br />
The verbs appear at chest height, so it is not easy<br />
to read one’s own subtitle. Typically people look at<br />
other people to read the words; this produces an<br />
exchange of glances between visitors that is both<br />
playful and uncomfortable.<br />
The exhibition room does not have any place<br />
where subtitles are not projected. Everyone who is in<br />
the room gets a word and thus is both observer and<br />
observed. The only way to get rid of a subtitle is to<br />
touch someone else: this transfers the word to the<br />
other person.<br />
Every few minutes the piece is briefly interrupted<br />
as the raw video feeds from the tracking<br />
cameras are shown on the floor of the exhibition<br />
space. This is meant as a Brechtian “noticing of the<br />
knots”, a moment where the mechanisms of surveillance<br />
are revealed.<br />
The piece invades the supposed neutrality<br />
of the space that museums and galleries set-up for<br />
contemplation, underlining the violent and asymmetric<br />
character of observation. <strong>Subtitled</strong> Public also<br />
highlights the danger of surveillance systems that<br />
typecast and try to detect different ethnic groups<br />
or suspicious individuals, as in the latest computervision<br />
devices that are being deployed in public<br />
spaces around the world. Finally, the installation is<br />
an ironic commentary on our era of technological<br />
personalization, literally branding all spectators and<br />
converting them into “thematic individuals”.<br />
Sala de Arte Público Siqueiros in Mexico City, 2005.<br />
The surveillance mechanism revealed.<br />
Words are tranfered between people who touch each<br />
other.<br />
<strong>Subtitled</strong> Public 07
Production<br />
<strong>Subtitled</strong> Public was originally developed in 2004 with the support of the Bancomer-<br />
BBVA foundation in Mexico City. The project was premiered at the “Dataspace”<br />
exhibition of Mexican Electronic Art, Conde Duque Center, Madrid, February 2005,<br />
during the ARCO Art Fair. It was later installed at the Sala de Arte Público Siqueiros<br />
(SAPS) in Mexico City, April-May 2005.<br />
Currently the project exists in English and Spanish<br />
languages. Other languages can easily be added by<br />
giving the software a list of all the verbs of that language<br />
conjugated in the third person.<br />
Catalogue information<br />
“<strong>Subtitled</strong> Public” 2005. Variable number of surveillance<br />
pods, each consisting of one data projector, one<br />
nightvision camera, one PC and an infrared illuminator.<br />
Dimensions: variable.<br />
Collections<br />
The piece is sold as a unique work, with one artist<br />
proof. The purchase includes the technology to cover<br />
100 square metres of exhibition space, corresponding<br />
to four surveillance pods. Additional surveillance pods<br />
can be added to cover any sized area, by purchasing or hiring additional PCs, projectors<br />
and cameras. Each pod will add 25 square metres of coverage and will cost<br />
around $8,000 to buy.<br />
Credits<br />
Concept, direction: <strong>Rafael</strong> <strong>Lozano</strong>-<strong>Hemmer</strong>.<br />
Programmers: Conroy Badger.<br />
Production assistance: Jennifer Laughlin, Will Bauer, Ana Parga, Maria Parga,<br />
Natalie Bouchard, Susie Ramsay, Matthew Biederman,<br />
Tara DeSimone and Matthew Marino.<br />
Selected reviews<br />
• Barrios, José Luis, “Interview with <strong>Lozano</strong>-<strong>Hemmer</strong>”, Catalog Galerie Guy Bärtschi,<br />
Geneva 2005<br />
• Benitez Dávila, Mónica, “Un Oráculo Electrónico”, Revista M, Mexico 2005<br />
• Bosco, Roberta “El Ciclón <strong>Rafael</strong>”, Babelia, El País, Madrid 5/2/05<br />
• Leñero, Isabel, “Luciano Matus y <strong>Rafael</strong> <strong>Lozano</strong>-<strong>Hemmer</strong>”, Proceso No. 1485,<br />
México, 2005<br />
• Mac Masters, Merry, “Propuesta para rescatar espacios privados mediante la<br />
perversion de la tecnología”, La Jornada, Mexico 7/5/2005<br />
• Medina, Cuauhtémoc, “Descripciones”, Reforma, Mexico 25/5/05<br />
• Paz Gallardo, Deborah, “Lo sublime tecnológico o como entender el mundo de<br />
hoy”, Arteamérica 9, Cuba 2005<br />
• Serra, Catalina “El Arte Mexicano Exhibe su Madurez”, El País, Madrid 11/2/05<br />
• Springer, José Manuel “Mosaico y replejo, propuestas del arte mexicano en Madrid”,<br />
Replica 21, Mexico 29/3/05<br />
• Springer, José Manuel “Público Subtitulado”, Replica 21, Mexico 20/4/05<br />
<strong>Subtitled</strong> Public 08
Equipment<br />
The piece functions with as many “surveillance pods” as necessary,<br />
but 4 pods are included with the purchase, covering up to 100 square meter<br />
area. Each surveillance pod consists of:<br />
• Compact computer – a Shuttle PC running Windows 2000 or XP, or an Intel<br />
Mac mini running Windows XP SP2 under Boot Camp. The computer should<br />
have one 3 Ghz Pentium processor or a 1.66GHz Core Duo processor, 1GB<br />
RAM, 10GB disk, and 6-pin firewire connection. For example dimensions,<br />
weight and other specs, please visit:<br />
http://sys.us.shuttle.com/G5_8300.aspx<br />
http://www.apple.com/macmini/<br />
• Compact projector – Minimum: a 2500 lumen<br />
projector with wide-angle optics and XGA native<br />
resolution (e.g. a Canon LV-7225). Ideal: a future<br />
projector that has as much native resolution as possible;<br />
the more resolution the less “pixelation” will<br />
be seen in the projected letters. The intensity is not<br />
as important: so long as the throw distances remain<br />
one projector for 25 square metres then 2500-3500<br />
lumens will suffice.<br />
• Surveillance camera – a night vision digital or analog<br />
camera with 0.1 lux sensitivity, fitted with wide<br />
angle lens and IR pass filter. The camera should<br />
capture at least 640x480 pixels 30 times per second in black and white. A<br />
suitable digital camera is the Unibrain fire-I board camera http://www.unibrain.<br />
com/Products/VisionImg/Fire_i_BC.htm if this is used then the camera should<br />
be connected with normal firewire cable to the PC, using firewire repeaters if<br />
necessary. Most analog cameras can also be used with an Imaging Source<br />
DFG/1394-1e video to firewire converter.<br />
In addition to the pods, the installation requires<br />
the placement of an even array of inexpensive<br />
quartz halogen lights pointed straight down. These<br />
lights are covered with Congo Blue filter (Roscolux<br />
382, GAM 930 or Lee 181) and a diffuser such as<br />
Roscolux 116. This allows the room to produce an<br />
even dark blue illumination that is rich in infrared<br />
wavelengths.<br />
The entire installation may be controlled by<br />
a single PC or Mac, same model as above, which<br />
is connected to the others by Ethernet or WIFI as a<br />
local network. This PC or Mac can run VNC so that<br />
the other computers can be controlled remotely.<br />
<strong>Subtitled</strong> Public 09
<strong>Subtitled</strong> Public 10
<strong>Subtitled</strong> Public 11<br />
SET-UP AND CALIBRATION
<strong>Subtitled</strong> Public 12
Exhibition room<br />
The cameras and projectors are set up in pairs on opposing sides of<br />
the exhibition room. Each pair should be hung from the ceiling so that ideally<br />
there is a 45 degree angle to the floor.<br />
ROOM LIGHTING<br />
Notes<br />
• The room needs to be pitch black<br />
• The walls are painted matte black<br />
• The floor would ideally be dark grey<br />
• The light should be arranged to minimize shadows on the floor<br />
• Minimize light coming from the entrance<br />
50W quartz halogen light source with<br />
congo blue filter (Roscolux 382,<br />
GAM 930, LEE 181). This filter lets all<br />
infrared wavelengths through while<br />
giving a very deep blue. Add also a<br />
diffuser such as Roscolux 116. The<br />
fixtures are oriented straight down to<br />
bathe the area evenly.<br />
Depending on the optics for the cameras and projectors differentsized<br />
rooms can be accommodated, but the minimum size is an open room<br />
measuring 9 x 9 m and a height of at least 4 m. The room should be darkened<br />
completely and particular attention should be given to not having light enter<br />
from the entrance(s). This is necessary because the surveillance system works<br />
with background subtraction and thus depends on a constant illumination, i.e.<br />
if there is natural light the system might try to subtitle shadows produced by<br />
clouds that might temporarily block the sun. There can be as many entrances<br />
and exits as desired.<br />
Each pod will cover around 25 square metres of area so the following<br />
diagrams show four pods covering a 100 square metre room. You may<br />
add additional pods but please note that it is very important conceptually that<br />
there be no place in the room where you do not get tracked, i.e. everybody<br />
who is inside the installation should get a subtitle, there should be no “safe<br />
spot” where you can just be an observer.<br />
<strong>Subtitled</strong> Public 13
Connections<br />
HARDWARE AND CABLES<br />
Hardware Amount Length Details<br />
External switch to restart the computer<br />
4<br />
any<br />
A simple contact closure<br />
Ethernet hub<br />
1<br />
100Mbit is fine<br />
Computer PC shuttle or Mac mini<br />
5<br />
Min 1.5GHz, 1GB RAM<br />
Analog camera with wide optics and IR filter<br />
4<br />
Min 0.01 Lux sensitivity<br />
Videoprojector (~ 45 degree angle)<br />
4<br />
Min XGA, 3000 lumen<br />
Analog to digital video converter<br />
4<br />
Imaging source DFG/1394-1e<br />
Camera power supply<br />
4<br />
Ethernet cable<br />
5<br />
up to > 100 m<br />
A closed wifi network is possible<br />
Firewire cable<br />
4<br />
< 10 m<br />
Can use repeaters to extend<br />
VGA or DVI cable<br />
4<br />
depends<br />
Can use repeaters to extend<br />
Analog video cable<br />
4<br />
< 100 m<br />
Electrical power (various cables to outlets)<br />
14<br />
any<br />
Can use 110 to 220 V<br />
<strong>Subtitled</strong> Public 14
Once the computers, projectors, quartz lamps and cameras are hung<br />
as in the diagram, please make the following connections:<br />
1. Each camera to its corresponding PC using a firewire connection.<br />
2. Interconnect the PCs in a local network WIFI or Ethernet running VNC.<br />
3. Connect each projector to its corresponding PC using a VGA or preferably a<br />
DVI connection.<br />
4. Give 110 or 220V power to all the elements.<br />
The projectors should be set to their widest angle and then lowered<br />
until they each cover their respective area. No keystoning should be used as<br />
our software adds its own keystone correction.<br />
CAMERA AND VIDEO PROJECTION CONES<br />
example of camera vision cone<br />
(same camera vision area with the<br />
3 other cmeras)<br />
se apaga<br />
videoprojector projection zone<br />
height of the videoprojection against<br />
the walls arrives right below the head<br />
of an average sized person<br />
Lens calibration<br />
The goal of the lens calibration is to remove the effects of radial distortion<br />
that occurs in any traditional lens assembly. The math for the program is<br />
based on the “pinhole” lens model. This model assumes a perspective mapping<br />
between the world and the camera CCD surface. Straight lines in the real<br />
world must map to straight lines in the camera image. This calibration only<br />
needs to be done once for each lens it is not necessary to do it everytime the<br />
piece is set up.<br />
<strong>Subtitled</strong> Public 15
Please note: if you have already sent us CAD floor plans and elevations<br />
of the exhibition room we can choose the appropriate lenses and precalibrate<br />
them for you; if so, you can skip ahead to section “System calibration<br />
sequence” .<br />
Here’s an example (see picture<br />
left) of radial distortion. Notice the<br />
lines in the chessboard image as<br />
well as the edges of the paper are<br />
curved. In real life, these lines are<br />
really straight.<br />
Below is the same image after<br />
the effects of radial distortion are<br />
removed. Notice the lines are now<br />
straight, just like in the real world.<br />
Also notice the edges of the image<br />
are gone. The image has been effectively<br />
stretched from the edges,<br />
and the extreme edges are lost.<br />
This means that you need to pick a<br />
lens that appears to initially give you<br />
more coverage than you actually<br />
need. To remove the effects of radial<br />
distortion, there’s a program on the<br />
CD called “Calibrate”.<br />
This program can do an internal<br />
(lens) calibration as well as an external (pose) calibration. Here’s a screenshot<br />
of Calibrate’s main screen:<br />
The list of configurations is on the right. You can create a new default<br />
configuration or create a copy of the current configuration. In addition, you can<br />
rename a configuration by typing directly in the configuration list on the right.<br />
Currently there’s no way to delete a configuration from the software. You can<br />
<strong>Subtitled</strong> Public 16
easily do so from windows by selecting the configuration folder from an explorer<br />
window and pressing delete. Note that the program remembers the last<br />
configuration loaded, and if it notices the folder missing it will recreate it for<br />
you and add a default configuration. Switch to another configuration before<br />
deleting any old configurations, or the old one will be recreated by the program<br />
when it launches again.<br />
You’ll want to start with a new configuration, so click “New”. Select<br />
your camera from the drop-down menu on the left. Select the “640x480” resolution<br />
since this is what ”<strong>Subtitled</strong> Public” uses. If you press the “Show View”<br />
button, you’ll be able to see the current camera view.<br />
To perform the calibration, you’ll need to have a calibration pattern<br />
mounted on a firm flat backing, such as a clipboard. You can print the pattern<br />
out right from the program. We have always used the 8x6 pattern.<br />
Once you have your pattern printed out and mounted, press the<br />
“Show View” button to see the camera view. Adjust the camera settings so<br />
you get a clean, well exposed, image. Press the “Cam” button to bring up the<br />
adjustment screen.<br />
This is the adjustment<br />
screen for an ADS pyro<br />
web camera under XP.<br />
Both tabs are shown.<br />
Other cameras may<br />
have more or less controls<br />
or tabs.<br />
Here are some tips on<br />
adjusting the image.<br />
• Since the exhibition<br />
room will have steady,<br />
controlled, artificial<br />
illumination, then all<br />
camera settings should<br />
be set to <strong>manual</strong> (e.g.<br />
exposure, brightness,<br />
white balance check<br />
boxes should not be<br />
checked).<br />
• Go for maximum exposure<br />
without clipping<br />
and maximum contrast.<br />
If the image is too<br />
washed out, turn down<br />
the brightness. Only<br />
then if the image is still<br />
too bright, bring down<br />
the contrast. Try to leave the exposure at maximum if you have control over it.<br />
• <strong>Subtitled</strong> Public does not use colour. If you are using a colour camera, turn<br />
the saturation all the way down. Although the image is automatically converted<br />
to grey scale after the radial distortion, you should take the colour out now.<br />
<strong>Subtitled</strong> Public 17
That way, the image that you see, and are adjusting to is the same image (minus<br />
the radial distortion) that the tracking algorithm will see.<br />
• The sharpness setting is critical for the internal calibration. If the lines are<br />
too sharp, there will be artefacts that will throw off the calibration routines. If<br />
the lines are too blurry, the computer won’t be able to find the corners of the<br />
chessboard image.<br />
For example, the image on the left is a bit blurry, the one in the middle<br />
is just right and the one on the right has artefacts from over-sharpening.<br />
Once you have your camera adjusted close the adjustment screen.<br />
Taking calibration images<br />
You can choose the number of images you want to use for the calibration.<br />
You’ll need at least 3. Using more images will give you a better calibration.<br />
We recommend the default 7 images.<br />
You can take the pictures one at a time or in sequence. Pressing the<br />
“Go” button near the bottom will start the computer taking pictures automatically<br />
in sequence, with a beep after each picture is taken.<br />
You can also take a single picture by selecting the image # to take and<br />
pressing the “Take image #” button. This is handy if the computer failed to find<br />
the chess board corners in some of the images but not all. It’s also nice because<br />
it gives you instant feedback on whether the image was good or not. If<br />
the image passed, the program’s title bar will say “Ok”. If another image needs<br />
to be taken, it will say “Bad”.<br />
Start with the automatic method, and replace the failed images one at a time<br />
with the single shot option. After you’ve taken your images, press the “Show<br />
Images” button, taking you to the internal calibration screen, shown right.<br />
You can select the image to view from the image # edit. Press “Find<br />
corners” to have the computer find the corners for you. This will usually result<br />
in about half the images failing and half passing.<br />
If 4 of the images pass, for example, and 3 fail, simply go back to the<br />
previous screen and take single shots of the failed images. Select the image #<br />
in the edit and press the “Take image #” button until the caption says ok.<br />
Once you have a set of images that the PC is happy with, you can<br />
verify the corners by checking off the “View corners” check box. The corners<br />
should be numbered sequentially and place at the intersections of the chessboard<br />
squares.<br />
<strong>Subtitled</strong> Public 18
To perform the actual internal calibration, press the “Calibrate” button.<br />
The table will fill with values regarding the lens’ distortion. To test the<br />
calibration, check the “Undistort image” check box. Check all the images with<br />
the “Image #” edit to make sure all the lines in the images appear reasonably<br />
straight.<br />
You can now check the camera view to see what kind of coverage<br />
you’re going to have after the lens distortion correction. Go back to the main<br />
screen.<br />
By selecting live feed and undistort from this screen you will see the<br />
live feed of the camera corrected for radial distortion. Hopefully your camera<br />
can still see enough of the tracking area. If not, you can only go back and pick<br />
a wider-angle lens.<br />
Exit this program and you’re ready for the next step. Please note that<br />
this lens calibration is only needed once per lens and camera, if you move the<br />
installation to a different exhibition room you will not need to redo this calibration<br />
if you are using the same lens and camera.<br />
<strong>Subtitled</strong> Public 19
System calibration sequence<br />
Start the PCs and automatically the “<strong>Subtitled</strong> Public” software will<br />
run. Right click on the screen so that you can enter the set-up screen. Press<br />
the calibration button and follow the on-screen instructions so that the system<br />
can know with precision where the camera is in relation to the projector. The<br />
calibration procedure involves matching points shown by the projectors to<br />
points seen by the cameras. You must also enter the relative position of each<br />
pod as indicated by the installation wizard. In the screen you can also enter<br />
the desired language of the installation. Currently you can choose between<br />
English, Spanish or both.<br />
Start and shutdown procedures<br />
To turn the installation ON:<br />
1. Power ON the projectors<br />
2. Power ON the quartz lights<br />
3. Power ON the PCs, -- the software will start-up automatically.<br />
To turn the installation OFF:<br />
1. Shutdown the computers using either the VNC control computer, external<br />
remote switches or the PCs internal shutdown timer.<br />
2. Turn OFF the projectors<br />
3. Turn OFF the quartz lights<br />
<strong>Subtitled</strong> Public 20
<strong>Subtitled</strong> Public 21<br />
PRESERVATION NOTES
<strong>Subtitled</strong> Public 22
The piece runs using software developed by engineer Conroy Badger<br />
from APR Inc. in Edmonton, Canada. He can be contacted at Tel 780-450-<br />
8261 or at conroy.badger@shaw.ca. The software is custom-programmed<br />
in Delphi using Open computer vision libraries from Intel and it runs on<br />
Windows 2000 or XP. The source code is available to the collector so that in<br />
the future the project can be recompiled for a different operating system.<br />
The software will automatically use any and<br />
all available resolution available from the connected<br />
projector and graphics card. Currently the project<br />
is running with XGA resolution 1024x768 pixels but<br />
in the future projectors with much more resolution<br />
could be used to minimize the pixelated quality of<br />
the text when participants are far away. For example,<br />
currently we spread 1024 pixels over 6 m, so in fact<br />
we can only have 170 pixels to write a word when<br />
the person is very far away from the projector. This<br />
“worst case scenario” is acceptable but clearly<br />
more resolution would be better. An HD projector<br />
could do 1920 pixels over 6 m = 320 pixels per<br />
meter, which would make the word easier to read<br />
and more defined. When these future projectors are<br />
used, it will be possible to also extend their range so<br />
that instead of only covering 25 square metres they<br />
can cover much more area provided their brightness<br />
is also increased (by the square of the distance<br />
added). Please note however that the priority is to<br />
add resolution not range, it is preferable to add more<br />
projectors for more range and use the resolution for<br />
better text rendering.<br />
It is possible to use other sources of infrared<br />
light other than the quartz lamps with filters.<br />
For example IR LED panels could be used or other<br />
future technology. These should have diffusers and<br />
be distributed all over the exhibition room to avoid<br />
shadows as much as possible. If other IR sources<br />
are used then the curator will need to decide if s/he<br />
wants to add additional lighting, such as fluorescent<br />
tubes so that the room is not in complete darkness.<br />
i.e. the artist approves for the room environment to<br />
have a different colour than congo blue. If possible<br />
please consult with the artist before making this<br />
decision.<br />
When in the future a superior computer vision<br />
tracking technology is developed this can be<br />
used for the piece. In particular it would be great to<br />
be able to better discriminate when a detected presence<br />
is made of one big person or a couple hugging.<br />
Also, improvements in latency, stability and precision<br />
would be welcome.<br />
<strong>Subtitled</strong> Public 23
From the artist’s perspective, the project as it is now is beautiful and<br />
delivers the required effect. However, the artwork is not the tracking system<br />
and algorithms currently used but the concept of subtitling the public. In this<br />
sense he is open to future ways to accomplish the effect.<br />
In the future it is possible to add more languages to the project, for<br />
example for when the project tours different countries. To do this all you need<br />
to do is prepare verb lists in the desired languages and replace the ones that<br />
come with the project. The verb lists should be saved as txt files, with one<br />
entry per line, with no spaces, and with every verb of<br />
the language conjugated in the third person.<br />
<strong>Subtitled</strong> Public 24
APPENDIX I<br />
Fire-i Board Digital Camera<br />
<strong>Subtitled</strong> Public 25
<strong>Subtitled</strong> Public 26
<strong>Subtitled</strong> Public 27
<strong>Subtitled</strong> Public 28
APPENDIX II<br />
Information on Apple Mac Mini<br />
<strong>Subtitled</strong> Public 29
<strong>Subtitled</strong> Public 30
<strong>Subtitled</strong> Public 31