Subtitled Public's manual - Rafael Lozano-Hemmer
Subtitled Public's manual - Rafael Lozano-Hemmer
Subtitled Public's manual - Rafael Lozano-Hemmer

You also want an ePaper? Increase the reach of your titles
YUMPU automatically turns print PDFs into web optimized ePapers that Google loves.
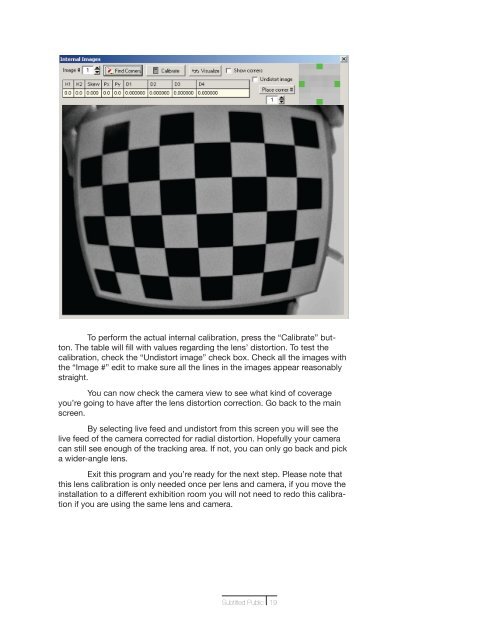
To perform the actual internal calibration, press the “Calibrate” button.<br />
The table will fill with values regarding the lens’ distortion. To test the<br />
calibration, check the “Undistort image” check box. Check all the images with<br />
the “Image #” edit to make sure all the lines in the images appear reasonably<br />
straight.<br />
You can now check the camera view to see what kind of coverage<br />
you’re going to have after the lens distortion correction. Go back to the main<br />
screen.<br />
By selecting live feed and undistort from this screen you will see the<br />
live feed of the camera corrected for radial distortion. Hopefully your camera<br />
can still see enough of the tracking area. If not, you can only go back and pick<br />
a wider-angle lens.<br />
Exit this program and you’re ready for the next step. Please note that<br />
this lens calibration is only needed once per lens and camera, if you move the<br />
installation to a different exhibition room you will not need to redo this calibration<br />
if you are using the same lens and camera.<br />
<strong>Subtitled</strong> Public 19