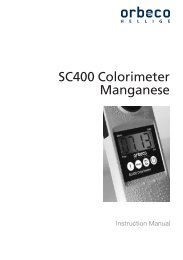
SC400 Colorimeter COD - Orbeco-Hellige
SC400 Colorimeter COD - Orbeco-Hellige
SC400 Colorimeter COD - Orbeco-Hellige

You also want an ePaper? Increase the reach of your titles
YUMPU automatically turns print PDFs into web optimized ePapers that Google loves.
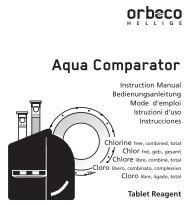
Photometer-System<br />
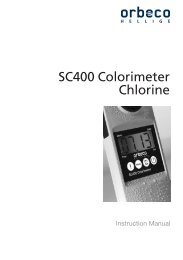
<strong>SC400</strong> <strong>Colorimeter</strong><br />
SiO 2<br />
<strong>COD</strong><br />
DE<br />
GB<br />
FR<br />
IT<br />
ES<br />
Bedienungsanleitung<br />
Seite 3–17<br />
Instruction Manual<br />
Page 19–33<br />
Mode d'emploi<br />
Page 35–49<br />
Instruction Manual<br />
Istruzioni d'uso<br />
Pagina 51–65<br />
Instrucciones<br />
Página 67–81
Requirements<br />
Method: Oxygen Demand, Chemical<br />
Method Description: The sample is heated at 150 o C for two hours in the presence of<br />
a potassium dichromate, which is a strong oxidizing agent. Organic compounds in the<br />
sample are oxidized, reducing the dichromate ion (Cr 2<br />
O 7<br />
2–<br />
) to the green chromic ion (Cr3 +) .<br />
In the Low Range (LR) Test (0-150 mg/L), the amount of remaining Cr 6+ is measured; In the<br />
Mid Range (MR) (0-1,500 mg/L) or (HR) (0-15,000 mg/L), the amount of Cr 3+ produced is<br />
measured. The results are measured as the amount of oxygen (O2) consumed per liter of<br />
water sample. The LR and MR test is displayed in mg/L while the HR test shows g/L.<br />
The <strong>COD</strong> reagent contains both mercury and silver—the mercury controls chloride<br />
interferences and the silver functions as a catalyst to speed the reaction.<br />
Required Instruments:<br />
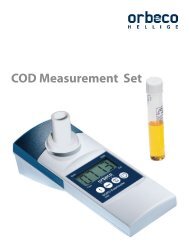
<strong>SC400</strong> <strong>Colorimeter</strong> for <strong>COD</strong> (P/N: <strong>SC400</strong>-00)<br />
TR125 Thermoreactor (P/N: TR12500)<br />
Required Accessories: 16 mm Tube Adapter (P/N: L19802220)<br />
Required Reagents:<br />
Range: Reagent Description: Reagent P/N:<br />
0-150 mg/L Low Range <strong>COD</strong> Tube Test, 25 Tests TT20720<br />
OR Low Range <strong>COD</strong> Tube Test, 150 Tests TT20725<br />
0-1500 mg/L Mid Range <strong>COD</strong> Tube Test, 25 Tests TT20721<br />
OR Mid Range <strong>COD</strong> Tube Test, 150 Tests TT20726<br />
0-15000 mg/L High Range <strong>COD</strong> Tube Test, 25 Tests TT20722<br />
OR High Range <strong>COD</strong> Tube Test, 150 Tests TT20727<br />
Alternate Reagents:<br />
For non-reporting purposes, our complete line of Mercury-Free <strong>COD</strong> reagents is available.<br />
These reagents follow the same procedure and calibrations pre-programmed in the<br />
<strong>SC400</strong>-00. These reagents are not acceptable for USEPA reporting purposes.<br />
Range: Reagent Description: Reagent P/N:<br />
0-150 mg/L Low Range <strong>COD</strong> Tube Test, Mercury-Free, 25 Tests TT20710<br />
0-1500 mg/L Mid Range <strong>COD</strong> Tube Test, Mercury-Free, 25 Tests TT20711<br />
Mid Range <strong>COD</strong> Tube Test, Mercury-Free,150 Tests TT20712<br />
0-15000 mg/L High Range <strong>COD</strong> Tube Test, Mercury-Free, 25 Tests TT20716<br />
2 <strong>SC400</strong>-00, <strong>COD</strong> 03/2009
Contents<br />
• General Notes......................................................4<br />
Method notes .......................................................4<br />
Chemical method notes . . . . . . . . . . . . . . . . . . . . . . . . . . . . . . . . . . . . . . . . . . . . . . . 4<br />
Battery change . . . . . . . . . . . . . . . . . . . . . . . . . . . . . . . . . . . . . . . . . . . . . . . . . . . . . . 4<br />
• Special Functions . . . . . . . . . . . . . . . . . . . . . . . . . . . . . . . . . . . . . . . . . . . . . . . . . . . 5<br />
Backlight ...........................................................5<br />
Recall of stored data ..................................................5<br />
Measuring the absorbance . . . . . . . . . . . . . . . . . . . . . . . . . . . . . . . . . . . . . . . . . . . . . 5<br />
• Methods . . . . . . . . . . . . . . . . . . . . . . . . . . . . . . . . . . . . . . . . . . . . . . . . . . . . . . . . . . 6<br />
Tube Test Reagents . . . . . . . . . . . . . . . . . . . . . . . . . . . . . . . . . . . . . . . . . . . . . . . . . . . 6<br />
Preparing Sample . . . . . . . . . . . . . . . . . . . . . . . . . . . . . . . . . . . . . . . . . . . . . . . . . . . . 6<br />
Measurement . . . . . . . . . . . . . . . . . . . . . . . . . . . . . . . . . . . . . . . . . . . . . . . . . . . . . . . 6<br />
Guidelines for colorimetric measurement. . . . . . . . . . . . . . . . . . . . . . . . . . . . . . . . . . . 7<br />
• Menu Options......................................................8<br />
Menu selections . . . . . . . . . . . . . . . . . . . . . . . . . . . . . . . . . . . . . . . . . . . . . . . . . . . . . 8<br />
Recall of stored data ..................................................8<br />
Setting date and time . . . . . . . . . . . . . . . . . . . . . . . . . . . . . . . . . . . . . . . . . . . . . . . . . 8<br />
• Calibration Mode ...................................................9<br />
User calibration ......................................................9<br />
Recommended calibration values . . . . . . . . . . . . . . . . . . . . . . . . . . . . . . . . . . . . . . . . 9<br />
Factory calibration reset. . . . . . . . . . . . . . . . . . . . . . . . . . . . . . . . . . . . . . . . . . . . . . . 10<br />
• Technical Data.....................................................11<br />
Operating messages . . . . . . . . . . . . . . . . . . . . . . . . . . . . . . . . . . . . . . . . . . . . . . . . . 11<br />
Error codes . . . . . . . . . . . . . . . . . . . . . . . . . . . . . . . . . . . . . . . . . . . . . . . . . . . . . . . . 11<br />
<strong>SC400</strong>-00, <strong>COD</strong> 03/2009<br />
3
General Notes<br />
Method notes<br />
• Prior to measurement ensure that the sample is suitable for analysis (no major interferences,<br />
such as chloride-see below) and does not require any preparation i.e. pH adjustment,<br />
filtration etc.<br />
• Reagents are designed for use in chemical analysis only and should be kept out of the<br />
reach of children.<br />
• Ensure proper disposal of reagent solutions.<br />
• Material Safety Data Sheets: available on our website (www.orbeco.com) or upon<br />
request.<br />
Chemical method notes:<br />
Method:<br />
The organic material present in the sample is oxidizing by a standard amount of a potassium<br />
dichromate oxidized mixture. After oxidation is complete, the excess of this reagent is<br />
measured photometrically.<br />
Application:<br />
Samples can be measured if the chloride content does not exceed 1,000 mg/L (LR/MR) or<br />
10,000 mg/L (HR).<br />
In rare cases, compounds contained in the water cannot be oxidized adequately. This results<br />
in low results compared with the reference method.<br />
Different methods of sampling, preparation of the sample itself and the time elapsed between<br />
taking the sample and analysis can all affect the obtained results.<br />
CAUTION<br />
The accuracy of the instrument is only valid if the instrument is used in an<br />
environment with controlled electromagnetic disturbances according to DIN 61326.<br />
Wireless devices, e.g. wireless phones, must not be used near the instrument.<br />
Battery change<br />
4 <strong>SC400</strong>-00, <strong>COD</strong> 03/2009
Special Functions<br />
Display backlight<br />
!<br />
Press the [!] key to turn the display backlight on or off. The backlight<br />
is turned off automatically during the measurement.<br />
Recall of stored data<br />
!<br />
If the instrument is turned on, press the [!] key for more than<br />
4 seconds to access the recall menu.<br />
Measuring the absorbance<br />
AbS<br />
This instrument ordinarily measures using two wavelengths. In the<br />
AbS mode, it is possible to measure absorbance at a specified<br />
wavelength.<br />
Abs1:<br />
Abs2:<br />
= 430 nm<br />
= 605 nm<br />
<strong>SC400</strong>-00, <strong>COD</strong> 03/2009<br />
5
Method<br />
<strong>COD</strong> Tube Test Reagents<br />
Select the appropriate vial for the desired range:<br />
LR-Range, 25 Tests: 0 – 150 mg/L P/N TT20720<br />
MR-Range, 25 Tests: 0 – 1,500 mg/L P/N TT20721<br />
HR-Range, 25 Tests: 0 – 15,000 mg/L P/N TT20722<br />
Preparing the Sample<br />
1. Open a reaction vial with a white cap and add the specified volume.<br />
(Ensure that appropriate personnel safety equipment is used.)<br />
LR-/MR: 2 ml water sample<br />
HR: 0.2 ml water sample<br />
2. Prepare a blank (Note 1) by using deionized water (TOC-free) instead of the sample<br />
(LR/MR: 2 ml, Hr: 0.2 ml).<br />
3. Replace the cap tightly. Invert the vial gently several times to mix the contents (The<br />
vial will become hot during mixing!) and digest the vials for 120 minutes in the<br />
reactor at a temperature of 302°F (150°C).<br />
4. Remove the vials from the reactor and allow them to cool down to 60°C or less. Mix<br />
the contents by inverting each vial several times while still warm. Then allow the vials to<br />
cool to ambient temperature before measuring.<br />
Measurement<br />
On<br />
Off<br />
Lr<br />
Mode<br />
RANGE<br />
Zero<br />
Test<br />
RANGE<br />
0.0.0<br />
1. Insert the 16 mm adapter into the sample chamber by aligning the<br />
arrow on the adapter with the arrow on the instrument. Be sure that<br />
the adapter seats completely into the sample chamber.<br />
2. Turn on the unit using the [ON/OFF] key.<br />
The display shows the following:<br />
3. Select the required test using the [MODE] key:<br />
LR (low range) MR (mid range) HR (high range) AbS1<br />
(Absorbance 1) AbS2 (Absorbance 2) LR ......... (Scroll)<br />
The display shows the following:<br />
4. Place the blank in the adapter (Note 1–4) making sure that the<br />
marks ı are aligned. Blanks are specially prepared for each<br />
individual test range.<br />
5. Press the [ZERO/TEST] key.<br />
The "Range" symbol flashes for approximately 8 seconds.<br />
The display shows the following: 0.0.0<br />
6. After zeroing, remove the vial from the adapter.<br />
6 <strong>SC400</strong>-00, <strong>COD</strong> 03/2009
Method<br />
Zero<br />
Test<br />
RANGE<br />
RESULT<br />
1. Press the [ZERO/TEST] key.<br />
The "Range" symbol flashes for approx. 3 seconds.<br />
The result appears in the display.<br />
The result is saved automatically.<br />
LR-/MR-range: in mg/L<br />
HR-range: in g/L<br />
(this unit is shown by an alternating display of the<br />
reading and g : L)<br />
Accuracy: ± 3.5 % (full scale)<br />
Zero<br />
Test<br />
Repeating the test:<br />
Press the [ZERO/TEST] key again.<br />
Mode<br />
New zero calibration:<br />
Press the [MODE] key until the desired range symbol appears in the<br />
display again.<br />
Guidelines for colorimetric measurements<br />
1.<br />
2.<br />
3.<br />
4.<br />
5.<br />
6.<br />
7.<br />
8.<br />
Run samples and blanks from the same batch of vials.<br />
The blank is stable when stored in the dark and can be used for further measurements<br />
with vials from the same batch.<br />
Don't place hot vials in the adapter. Allow the vials to cool to room temperature for<br />
minimum 45 minutes. It is recommended to let the vials to cool overnight.<br />
Suspended solids in the vial lead to incorrect measurements. For this reason, it is important<br />
to place the vials carefully in the adapter. The precipitant at the bottom of the sample<br />
should not be suspended.<br />
Clean the outside of the vials with a towel to remove fingerprints and other marks.<br />
Avoid spilling water in the sample chamber. If water should spill into the chamber, absorb<br />
it with a soft cloth or tissue.<br />
Contamination of the optics (LED and photo-sensor) in the sample chamber will result in<br />
incorrect measurements. The windows in of the sample chamber must be checked at<br />
regular intervals and cleaned as necessary. Use a moistened cloth or cotton swab for<br />
cleaning purposes.<br />
Large temperature differences between the colorimeter and ambient conditions can lead<br />
to incorrect measurements, or build-up of condensation around the optics of the vial.<br />
To avoid errors caused by stray light do not use the instrument in bright sunlight.<br />
<strong>SC400</strong>-00, <strong>COD</strong> 03/2009<br />
7
Menu Options<br />
Store<br />
Time<br />
Mode<br />
On<br />
Off<br />
!<br />
Mode<br />
Date<br />
1<br />
2<br />
3 4<br />
Cal<br />
Menu selections<br />
1. Press the [MODE] key and hold.<br />
2. Turn on the unit using the [ON/OFF] key.<br />
Allow the 3 decimal points to be displayed before releasing the<br />
[MODE] key.<br />
The [!] key allows for selection of the following menu points:<br />
1 recall stored data<br />
2 3 setting the date and time<br />
4 user calibration<br />
The selected menu is indicated by an arrow in the display.<br />
Confirm the selection with the [MODE] key.<br />
1 Recall of stored data<br />
Zero<br />
Test<br />
Mode<br />
!<br />
The colorimeter shows the last 16 data sets in the following format<br />
(automatically proceeds every 3 seconds until result is displayed):<br />
Number n xx (xx: 16...1)<br />
Year YYYY (i.e. 2008)<br />
Date mm.dd (monthmonth:dayday)<br />
Time hh:mm (hourhour:minuteminute)<br />
Test Method<br />
Result x,xx<br />
The [ZERO/TEST] key repeats the current data set.<br />
The [MODE] key scrolls through all stored data sets.<br />
Quit the menu by pressing [!] key.<br />
Mode<br />
SET<br />
DATE<br />
YYYY<br />
(2 sec.)<br />
Mode<br />
Zero<br />
Test<br />
!<br />
2<br />
3<br />
Setting date and time (24-hour-format)<br />
After confirming the selection with the [MODE] key the value to be<br />
edited will be shown for 2 sec.<br />
The setting starts with the year (YYYY) followed by the actual value<br />
to be edited. Same applies for month (mm), day (dd), hour (hh) and<br />
minutes (mm). Set the minutes first in steps of 10, press the [!] key to<br />
continue setting the minutes in steps of 1.<br />
Increase the value by pressing the [MODE] key.<br />
Decrease the value by pressing [ZERO/TEST] key.<br />
Proceed to the next value to be edited by pressing [!] key.<br />
After setting the minutes and pressing the [!] key the display will show<br />
“IS SET” and instrument returns to the measurement mode.<br />
Note: If the battery is removed for more than one minute the date<br />
and time menu starts automatically when the photometer is next<br />
turned on.<br />
8 <strong>SC400</strong>-00, <strong>COD</strong> 03/2009
Calibration Mode<br />
4 User calibration<br />
cAL<br />
CAL<br />
CAL<br />
Lr<br />
Zero<br />
Test<br />
RANGE<br />
0.0.0<br />
CAL<br />
Zero<br />
Test<br />
RANGE<br />
RESULT<br />
CAL<br />
Mode<br />
Zero<br />
Test<br />
CAL<br />
RESULT + x<br />
On<br />
Off<br />
: :<br />
Note:<br />
User calibration (Display in calibration mode)<br />
Factory calibration (Display in calibration mode)<br />
After confirming the selection with the [MODE] key the instrument<br />
will show CAL/Lr.<br />
Scroll through ranges using the [MODE] key.<br />
Perform zero calibration (see "Operation").<br />
Press the [ZERO/TEST] key.<br />
The "Range" symbol flashes for approx. 8 seconds.<br />
The display shows the following in alternating mode:<br />
Perform calibration with a standard of known concentration (see<br />
"Operation").<br />
Press the [ZERO/TEST] key.<br />
The "Range" symbol flashes for approx. 3 seconds.<br />
The result is shown in the display, alternating with CAL.<br />
If the reading corresponds with the value of the calibration standard<br />
(within the specified tolerance), exit calibration mode by pressing the<br />
[ON/OFF] key.<br />
Changing the displayed value:<br />
Pressing the [MODE] key once increases the displayed value by<br />
1 digit.<br />
Pressing the [ZERO/TEST] key once decreases the displayed value by<br />
1 digit.<br />
Press the corresponding key until the reading equals the value of the<br />
calibration standard.<br />
By pressing the [ON/OFF] key, the new correction factor is calculated<br />
and stored in the user calibration software.<br />
Confirmation of calibration (3 seconds).<br />
Recommended calibration values<br />
LR: 100 mg/L O 2<br />
MR: 500 mg/L O 2<br />
HR: The instrument calibration in the range MR<br />
is automatically taken also for HR.<br />
<strong>SC400</strong>-00, <strong>COD</strong> 03/2009<br />
9
Calibration Mode<br />
Factory calibration reset<br />
Resetting the user calibration to the original factory calibration will<br />
reset all methods and ranges.<br />
Store<br />
Date<br />
RESULT<br />
Time<br />
Cal<br />
Zero<br />
Mode<br />
Test<br />
On<br />
Off<br />
A user calibrated method is indicated by an arrow while the test result<br />
is displayed.<br />
To reset the calibration press both the [MODE] and [ZERO/TEST] key<br />
and hold.<br />
Turn on the unit using the [ON/OFF] key.<br />
Release the [MODE] and [ZERO/TEST] keys after approx. 1 second.<br />
The following messages will appear in turn on the display:<br />
SEL<br />
CAL<br />
The factory setting is active.<br />
(SEL stands for Select)<br />
or:<br />
SEL<br />
cAL<br />
Calibration has been set by the user.<br />
(If the user calibration is to be retained, turn the unit off using the<br />
[ON/OFF] key).<br />
Mode<br />
SEL<br />
CAL<br />
On<br />
Off<br />
Calibration is reset to the factory setting by pressing the [MODE] key.<br />
The following messages will appear in turn on the display:<br />
Turn off the unit using the [ON/OFF] key.<br />
10 <strong>SC400</strong>-00, <strong>COD</strong> 03/2009
Technical Data – Operating Messages<br />
Light source:<br />
Battery:<br />
Auto-OFF:<br />
Technical Data<br />
Lr-Range: LED, Filter ( = 430 nm)<br />
Mr-/Hr-Range: LED ( = 605 nm)<br />
9 V-block battery (Life approx. 600 tests),<br />
without display light.<br />
Automatically turns off 7 minutes after last keypress<br />
Ambient conditions: 5–40°C (41-104 o F)<br />
30–90% rel. humidity (non-condensing).<br />
CE:<br />
Certificate for Declaration of CE-Conformity<br />
at www.orbeco.com<br />
To ensure the maximum accuracy of test results, always use the reagent systems<br />
supplied by the instrument manufacturer.<br />
Operating messages<br />
Hı<br />
Lo<br />
Measuring range exceeded or excessive turbidity.<br />
Result below the lowest limit of the measuring range.<br />
Replace 9 V battery, no further tests possible.<br />
Error codes<br />
E 01<br />
E 10<br />
E 20/E 21<br />
E 22<br />
Light absorption too great. Reasons: e.g. dirty optics.<br />
Calibration factor "out of range"<br />
Too much light reaching the detector<br />
Battery capacity was too low during measurement. Change battery.<br />
E 70<br />
E 71<br />
E 72<br />
E 73<br />
Lr:<br />
Lr:<br />
Mr:<br />
Mr:<br />
Factory calibration incorrect / erase<br />
User calibration incorrect / erase<br />
Factory calibration incorrect / erase<br />
User calibration incorrect / erase<br />
For assistance with Error Codes or other technical issues, please contact Customer Service.<br />
(Phone: 941.756.6410 or Toll-free U.S. 800.922.5242)<br />
<strong>SC400</strong>-00, <strong>COD</strong> 03/2009<br />
11
Technical changes without notice<br />
FOR TECHNICAL ASSISTANCE, PRICE AND ORDERING<br />
INFORMATION:<br />
In the USA - Call 800-922-5242 or the distributor serving you.<br />
Outside the USA: Call 941-756-6410 or the distributor serving you.<br />
Web: www.orbeco.com<br />
Email: service@orbeco.com<br />
Fax: 941-727-9654<br />
© <strong>Orbeco</strong>-<strong>Hellige</strong>, Inc, 2009. All rights reserved.<br />
Printed in Germany. Updated March 2009, Edition 1