Outdoor Home Playground Safety Handbook - Cultivate Safety
Outdoor Home Playground Safety Handbook - Cultivate Safety
Outdoor Home Playground Safety Handbook - Cultivate Safety

Create successful ePaper yourself
Turn your PDF publications into a flip-book with our unique Google optimized e-Paper software.
Table of Contents<br />
Introduction - <strong>Outdoor</strong> <strong>Home</strong> <strong>Playground</strong> <strong>Safety</strong>............................................1<br />
1. Plan Your Play Area......................................................................................................2<br />
2. Pick the Right Construction Materials ........................................................................2<br />
3. Anchor, Assemble and Maintain Your Equipment ....................................................3<br />
4. Select Protective Surfacing............................................................................................5<br />
5. Prevent Head and Neck Entrapment ...........................................................................7<br />
6. Eliminate Hanging Ropes..............................................................................................7<br />
7. Protect Against Falls......................................................................................................8<br />
8. Use Toddler/Tot Swings Safely.....................................................................................9<br />
<strong>Outdoor</strong> <strong>Home</strong> <strong>Playground</strong> <strong>Safety</strong> Checklist.....................................Back Cover
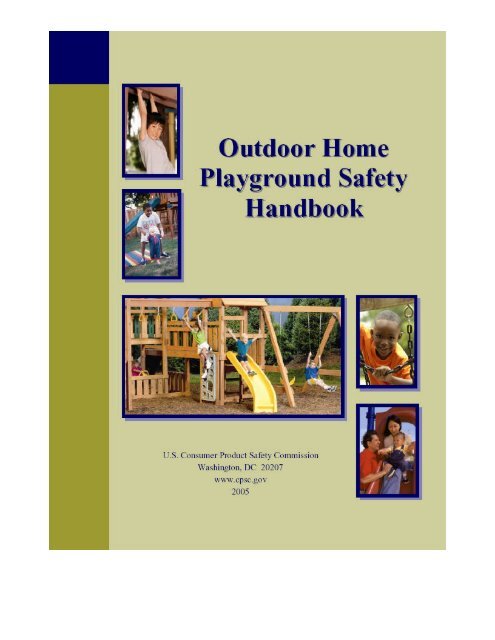
<strong>Outdoor</strong> <strong>Home</strong> <strong>Playground</strong> <strong>Safety</strong><br />
If you have playground equipment in your backyard, you’ll want to make it a fun – and<br />
safe – place for kids to play.<br />
Unfortunately, injuries on home playgrounds can be more than just scraped knees or<br />
minor bruises. Each year, about 50,000 children go to U.S. hospital emergency rooms<br />
because of injuries on home playground equipment. About 80% of the injuries occur<br />
when children fall from play equipment. Children are also injured when they are hit by<br />
swings or other moving equipment or are cut from sharp edges and protruding bolts on<br />
play structures.<br />
In addition, each year several children die on home playgrounds. These deaths often<br />
result when children get entangled in and strangle from ropes, cords, or leashes attached<br />
to play equipment, or when clothing drawstrings and items worn around children’s necks<br />
catch on the equipment. Others die when their heads or necks are trapped in narrow<br />
spaces, they fall from the equipment, or when they are struck by play equipment that<br />
moves or tips over.<br />
The good news is that you can help prevent many of these injuries. This handbook,<br />
developed by the U.S. Consumer Product <strong>Safety</strong> Commission (CPSC), highlights the<br />
most important safety information you need to know about planning, constructing, and<br />
maintaining an outdoor home playground. The most important safety tips for setting up a<br />
home playground as well as a simple reminder to supervise children and teach them how<br />
to play appropriately on the equipment are in the <strong>Outdoor</strong> <strong>Home</strong> <strong>Playground</strong> <strong>Safety</strong><br />
Checklist inside the back cover. The handbook is not a mandatory standard. The<br />
information provided is not intended as the sole method to reduce injuries associated with<br />
playground equipment. The Commission believes, however, that the recommendations in<br />
this handbook will contribute to greater equipment safety.<br />
This handbook is intended as guidance for homes and residential child care facilities.<br />
Schools, parks, multiple family dwellings, public child care facilities, restaurants and<br />
recreational developments, and other public use facilities should reference the <strong>Handbook</strong><br />
for Public <strong>Playground</strong> <strong>Safety</strong>, CPSC publication number 325. The publication is<br />
available on the CPSC website, www.cpsc.gov.<br />
<strong>Playground</strong> Equipment Manufacturers, Builders and Installers<br />
The Standard Consumer <strong>Safety</strong> Performance Specification for <strong>Home</strong><br />
<strong>Playground</strong> Equipment, ASTM F1148 contains technical provisions for the<br />
performance and design of home playground equipment. Protective surfacing<br />
requirements can be found in ASTM F1292, Standard Specification for Impact<br />
Attenuation of Surfacing Materials within the Use Zone of <strong>Playground</strong><br />
Equipment. These standards can be ordered from ASTM International at<br />
www.astm.org or call 610-832-9585.<br />
1
1. Plan Your Play Area<br />
Choosing a Site<br />
When you plan a home playground, a location away from roads and driveways and<br />
readily visible from inside the home and patios or porches, is important. So, keep the<br />
following points in mind:<br />
• Create a site free of obstacles that could cause injuries – such as low overhanging tree<br />
branches, overhead wires, tree stumps and/or roots, large rocks, bricks, and concrete.<br />
• Choose a level location for the equipment. This can reduce the likelihood of the play<br />
set tipping over and loose-fill surfacing materials washing away during heavy rains.<br />
Some sites may need re-grading to improve drainage or to reduce the slope.<br />
• Locate play equipment at least 6 feet from any structure or obstacle, such as a house,<br />
fence, sheds, trees or poles. Swings should be further away from structures to the<br />
front and rear of the swings – a distance equal to twice the height of the top bar from<br />
which the swing is suspended.<br />
• Locate bare metal platforms and slides out of direct sunlight to reduce the likelihood<br />
of serious burns. A slide that faces north will receive the least direct sunlight.<br />
Providing Play Areas<br />
Children can injure themselves when they fall or run between pieces of play equipment.<br />
To help prevent this, you can do the following:<br />
• Provide shock-absorbing protective surfacing material underneath and at least 6 feet<br />
beyond the perimeter of the play structure.<br />
• Provide enough room so that children can use the equipment safely. For example, for<br />
structures with multiple play activities, a slide should not exit in front of a swing.<br />
• Place each piece of play equipment so that it has at least 6 feet of play area around it.<br />
The areas in front of and behind swings need even more play space (see figure on<br />
page 6).<br />
• Separate active and quiet activities from each other. For example, locate sandboxes<br />
away from swings or use a guardrail or barrier to separate the sandbox from the<br />
movement of the swings.<br />
2. Pick the Right Construction Materials<br />
Materials<br />
Whether your play equipment is made of metal, wood, or plastic, keep the following in<br />
mind:<br />
• Metal should be painted, galvanized, or otherwise treated to prevent rust, corrosion<br />
and deterioration – Do not use paint containing lead!<br />
• Wood, intended for outdoor use, should be naturally rot-resistant and insect-resistant<br />
(e.g., cedar or redwood) or treated to prevent such deterioration. Creosote-treated<br />
wood and coatings that contain pesticides should not be used.<br />
2
Pressure-treated Wood:<br />
Since December 31, 2003, wood that is pressure-treated with the<br />
chemical CCA (chromated copper arsenate) is no longer processed for residential<br />
use. The chemical contains arsenic. Alternative chemicals that do not contain<br />
arsenic are now being used to pressure treat wood for playground/residential use.<br />
When using wood treated with any of these alternatives (ACQ/CBA/CA-B, etc.), be<br />
sure the associated hardware (nails, screws, bolts, hangers, etc) is compatible with<br />
the wood treatment chemicals. These chemicals are known to corrode certain<br />
materials faster than others.<br />
Hardware<br />
Hardware is an important component in assembling a play set. Protruding bolts and open<br />
hooks can cause lacerations or clothing entanglement – a possible strangulation hazard.<br />
To avoid these potential hazards:<br />
• Use the bolts and screws provided or recommended by the manufacturer. They<br />
should be corrosion-resistant.<br />
• Fasten all bolts, screws, washers, and nuts tightly. To prevent bolts from loosening,<br />
always use lock washers, self-locking nuts, or other locking means.<br />
• Cover exposed bolt ends with caps supplied by the manufacturer. Bolts should not<br />
protrude more than the diameter of the bolt past the nut. A flush cut is preferred.<br />
• Cover exposed, open ends of tubing with caps or plugs that cannot be removed<br />
without the use of tools.<br />
• Close “S” hooks and all hooks so that the gaps are less than the thickness of a dime.<br />
Open-ended hooks may be used for the uppermost attachment points of swinging<br />
elements. (See figure below for acceptable and unacceptable hook configurations).<br />
Unacceptable hook configurations create a protrusion and could catch clothing.<br />
Suspending bar<br />
Side view<br />
Suspending bar<br />
Side view<br />
Acceptable S-hook orientation<br />
Unacceptable S-hook orientation<br />
3. Anchor, Assemble, and Maintain Your Equipment<br />
Anchoring<br />
Play equipment may need to be restrained with anchors to keep it from tipping over while<br />
in use.<br />
• Follow the manufacturer’s instructions for anchoring.<br />
• Be sure anchors are buried or otherwise covered with protective surfacing. Exposed<br />
anchors, hooks, bolts, etc. can create tripping hazards or lead to other injuries.<br />
3
Assembly<br />
Follow the manufacturer’s instructions for correct assembly.<br />
• Install your play equipment on level ground with adequate surfacing and anchoring.<br />
Use proper hardware, and tighten all connections.<br />
• Use lightweight swings to minimize injuries if a child is struck. Avoid heavy seats of<br />
metal or wood.<br />
• Place disk swings * in separate bays, away from other swinging equipment.<br />
• Locate tire swings capable of 360-degree rotation in a separate bay, away from other<br />
play equipment and structures.<br />
• Space swings at least as far apart as indicated below and shown in the illustration<br />
above.<br />
ü 8 inches minimum for swings with limited sideways motion.<br />
ü 24 inches minimum between swings with unlimited lateral motion (such as<br />
disk swings) and support poles when measured from the side of the swing<br />
perpendicular to the plane formed by the support poles.<br />
ü 12 inches minimum between lawn swings and equipment support poles<br />
measured at 28 inches above the seat.<br />
ü 16 inches minimum between the teeter-totter’s seat center and support poles at<br />
22 inches above the seating surface.<br />
ü 8 inches minimum between the protective surfacing and the underside of a<br />
suspended unit.<br />
* Disk swings should be suspended from woven rope that cannot be separated to create a<br />
strangulation hazard. WARNING: Adults should be aware of the strangulation<br />
hazards associated with ropes and take precautions through supervision and<br />
instruction to ensure children do not become entangled.<br />
4
Maintenance<br />
Keeping a play set in good condition is essential to reduce injuries. Save the<br />
manufacturer’s instructions so you can order parts that break or wear out. The instruction<br />
sheet should provide the name and address of the manufacturer/distributor and the model<br />
number of the playground equipment.<br />
The following maintenance schedule is recommended:<br />
• Check nuts and bolts twice a month and tighten as needed.<br />
• Oil moving metal parts as directed by the manufacturer.<br />
• Check to make sure protective caps and plugs that cover bolt ends and ends of tubing<br />
are in place and tight. Inspect twice a month and replace as needed.<br />
• Check the condition of the equipment, looking for signs of wear and tear such as<br />
broken or missing components, bent pipes or tubing, and splintering wooden surfaces.<br />
Repair as necessary.<br />
• Check swing seats, ropes, chains, and cables monthly for deterioration and replace as<br />
needed.<br />
• Clean, sand, and repaint rusted areas with a non-lead-based paint, as needed.<br />
• Remove plastic swing seats in cold weather, if recommended by the manufacturer.<br />
• Rake surfacing periodically to prevent compaction and maintain appropriate depths.<br />
4. Select Protective Surfacing<br />
One of the most important things you can do to reduce the likelihood of serious head<br />
injuries is to install shock-absorbing protective surfacing under and around your play<br />
equipment. The protective surfacing should be applied to a depth that is suitable for the<br />
equipment height in accordance with ASTM F1292. There are different types of<br />
surfacing to choose from; whichever product you select, follow these guidelines:<br />
NOTE: Do not install home playground equipment over concrete, asphalt, or any<br />
other hard surface. A fall onto a hard surface can result in serious injury to the<br />
equipment user. Grass and dirt are not considered protective surfacing because<br />
wear and environmental factors can reduce their shock absorbing effectiveness.<br />
Carpeting and thin mats are generally not adequate protective surfacing. Ground<br />
level equipment -- such as a sandbox, activity wall, playhouse or other equipment<br />
that has no elevated play surface -- does not need any protective surfacing.<br />
Loose-Fill Materials<br />
• Maintain a minimum depth of 9 inches of loose-fill materials such as wood<br />
mulch/chips, engineered wood fiber (EWF), or shredded/recycled rubber mulch for<br />
equipment up to 8 feet high; and 9 inches of sand or pea gravel for equipment up to 5<br />
feet high. NOTE: An initial fill level of 12 inches will compress to about a 9-inch<br />
depth of surfacing over time. The surfacing will also compact, displace, and settle,<br />
and should be periodically refilled to maintain at least a 9-inch depth.<br />
• Use a minimum of 6 inches of protective surfacing for play equipment less than 4 feet<br />
in height. If maintained properly, this should be adequate. (At depths less than 6<br />
inches, the protective material is too easily displaced or compacted.)<br />
5
• Use containment, such as digging out around the perimeter and/or lining the<br />
perimeter with landscape edging. Don’t forget to account for water drainage.<br />
• Check and maintain the depth of the loose-fill surfacing material. To maintain the<br />
right amount of loose-fill materials, mark the correct level on play equipment support<br />
posts. That way you can easily see when to replenish and/or redistribute the<br />
surfacing.<br />
• Do not install loose fill surfacing over hard surfaces such as concrete or asphalt.<br />
Poured-In-Place Surfaces or Pre-Manufactured Rubber Tiles<br />
You may be interested in using surfacing other than loose-fill materials -- like rubber tiles<br />
or poured-in-place surfaces.<br />
• Installations of these surfaces generally require a professional and are not “do-ityourself”<br />
projects.<br />
• Review surface specifications before purchasing this type of surfacing. Ask the<br />
installer/manufacturer for a report showing that the product has been tested to the<br />
following safety standard: ASTM F1292 Standard Specification for Impact<br />
Attenuation of Surfacing Materials within the Use Zone of <strong>Playground</strong> Equipment.<br />
This report should show the specific height for which the surface is intended to<br />
protect against serious head injury. This height should be equal to or greater than the<br />
fall height - vertical distance between a designated play surface (elevated surface for<br />
standing, sitting, or climbing) and the protective surfacing below - of your play<br />
equipment.<br />
• Check the protective surfacing frequently for wear.<br />
Placement<br />
Proper placement and maintenance of protective surfacing is essential. Be sure to;<br />
• Extend surfacing at least 6 feet from the equipment in all directions.<br />
• For to-fro swings, extend protective surfacing in front of and behind the swing to a<br />
distance equal to twice the height of the top bar from which the swing is suspended.<br />
• For tire swings, extend surfacing in a circle whose radius is equal to the height of the<br />
suspending chain or rope, plus 6 feet in all directions.<br />
6
5. Prevent Head and Neck Entrapment<br />
Play equipment should have no openings between components that could trap a child’s<br />
head or neck.<br />
• Check all openings on the play equipment – such as between ladder rungs, posts, and<br />
railings. Be sure spaces are either smaller than 3½ inches wide (so children can’t put<br />
their body through) or larger than 9 inches (so children can slide their body and head<br />
through). See CPSC Publication Number 325, <strong>Handbook</strong> for Public <strong>Playground</strong><br />
<strong>Safety</strong>; Appendix B, for entrapment test probe specifications and test procedures.<br />
• Inspect slide entrance area and bed for gaps and protrusions that could catch or<br />
entangle clothing and create a potential strangulation hazard.<br />
• Fill V-shaped angles that open upward and are less than 55-degrees with a solid<br />
barrier (gusset) because these angles can trap a child’s head or neck (see figure<br />
below).<br />
• Do not allow children to wear bike helmets on play sets. Helmets can not pass<br />
through some spaces on play equipment, and children have become entrapped and<br />
strangled by the chinstrap.<br />
Gusset<br />
6. Eliminate Hanging Ropes<br />
Hanging cords of any kind on play equipment are a strangulation hazard. Adults should<br />
be aware of the strangulation hazards associated with ropes and take precautions<br />
through supervision and instruction to ensure children do not become entangled.<br />
• Never attach – or allow children to attach – any kind of loop-forming materials<br />
(ropes, twine, jump rope, pet leash, clothesline, belt, etc.) to the play set.<br />
• Secure BOTH ends of climbing ropes according to the manufacturer’s instructions so<br />
the rope cannot become entangled around a child’s neck.<br />
• Remove and replace frayed or loose ropes immediately.<br />
• Do not use ropes that can untwist or separate for swings because they can create an<br />
opening in which a child could become entangled.<br />
7
7. Protect Against Falls<br />
There are a number of ways to protect children from falling off play equipment onto the<br />
ground – the single largest cause of visits to hospital emergency rooms for playground<br />
equipment-related injuries.<br />
Rung Ladders, Stairs and Stepladders<br />
To help protect children from falling off rungs, steps, or other means of platform access:<br />
• Make sure all rungs, steps, and stairs are evenly spaced – including the top one.<br />
• Spacing between climbing elements should not create an entrapment hazard.<br />
Spaces should be less than 3½ inches wide (so children can’t put their body<br />
through) or larger than 9 inches (so children can slide their body and head<br />
through).<br />
Handrails and Rungs<br />
• Round rungs to be gripped by young hands should be<br />
approximately 1 to 1½ inches in diameter. Small or<br />
weaker children do best with the smaller diameter<br />
handgrip.<br />
• Stairs should have continuous handrails on both sides from a point where the top<br />
surface of the step is higher than 30 inches above the protective surfacing.<br />
• Rung ladders and stepladders steeper than 65 degrees should<br />
have hand grips. Hand grips are needed on all stepladders<br />
with closed risers. The hand gripping components should<br />
begin at the first step or rung of the equipment. For rung<br />
ladders, the rung itself may act as the hand-gripping<br />
component.<br />
• Freestanding slides require a handrail on all sides except the<br />
entrance and exit of the slide platform.<br />
Railing Protection<br />
Guardrails or barriers are needed around any platform over 30 inches above the<br />
protective surfacing. Neither should be considered an area for climbing, unless the<br />
guardrail has been specifically designed to double as a climber. Guardrails are intended<br />
to prevent inadvertent falls from the elevated surface while barriers should be designed to<br />
prevent deliberate attempts to pass through the device. Guardrails for low platforms can<br />
have openings larger than 9 inches. Barriers for higher platforms should only have<br />
openings less than 3½ inches in width.<br />
• Platforms above 30 inches up to 48 inches high should have a guardrail at least 25<br />
inches high.<br />
• Platforms above 48 inches up to 72 inches high should have a protective barrier (not a<br />
guardrail) at least 27 inches high.<br />
• Platforms over 72 inches high should have a protective barrier at least 33 inches high.<br />
These high platforms also should have an intermediate standing surface where a child<br />
can stop the ascent and choose another route to descend.<br />
8
• Slide platforms greater that 200 square inches should have a guardrail or barrier on all<br />
sides, except the entry and exit side. The choice of guardrail or barrier is dependent<br />
on the platform height as described above.<br />
• Protective barriers are not areas of intended play. There should be no crossbars or<br />
toeholds that assist children in climbing over the barrier. Openings should be less<br />
than 3½ inches in width.<br />
• Guardrails intended to double as climbers should have no openings that would allow<br />
a head or neck entrapment to occur (between 3½ and 9 inches).<br />
8. Use Toddler/Tot Swings Safely<br />
Close adult supervision is essential.<br />
• Never leave a child in a toddler swing unattended.<br />
• Always securely fasten the child with the swing’s restraint system when provided.<br />
• Make sure the restraints do not allow the child to slide under or through the restraints<br />
(an entrapment hazard) or climb out of the swing (a fall hazard).<br />
Finally…For important tips and reminders about setting up your home playground,<br />
remember to read the <strong>Outdoor</strong> <strong>Home</strong> <strong>Playground</strong> <strong>Safety</strong> Checklist. You’ll find it on the<br />
inside back cover.<br />
9
OUTDOOR HOME PLAYGROUND SAFETY CHECKLIST<br />
Use this to help make your home playground a safe place to play!<br />
Supervision<br />
Surfacing<br />
Types of<br />
Surfacing<br />
Equipment<br />
Maintenance<br />
Opening<br />
Ropes<br />
Anchors<br />
Guardrails or<br />
Barriers<br />
Repair<br />
Upkeep of<br />
Hardware<br />
Be sure to always supervise children on play equipment.<br />
Install a protective surface under and around play equipment to reduce the<br />
likelihood of serious head injuries.<br />
• For most play equipment, install protective surfacing 6 feet in all directions<br />
beyond the equipment.<br />
• For swings, extend protective surfacing in front and back of the swing to a<br />
distance that is twice the height of the bar from which the swing is suspended.<br />
• For tire swings, install protective surfacing outward from the swing equal to the<br />
suspension chain plus 6 feet.<br />
Carpeting and thin mats are not adequate as protective surfacing. Maintain at<br />
least 9 inches of loose-fill material (see page 5) or use an ASTM F1292 rated<br />
material at the depth required for the equipment height.<br />
• Use wood mulch/chips, shredded rubber mulch, or engineered wood fiber for<br />
equipment up to 8 feet high;<br />
• Use sand, pea gravel, or mulch products listed above for play equipment up to 5<br />
feet high; or<br />
• Use surface mats tested to provide impact protection equal to or greater than<br />
the height of the play equipment.<br />
Periodically check nuts, bolts, caps, swing seats, suspension ropes, chains, and<br />
cables and replace as necessary. Maintain loose-fill surfacing and surface mats.<br />
Eliminate openings that can trap a child’s head or neck, such as openings in<br />
guardrails or ladders. Openings should be smaller than 3½ inches to prevent entry<br />
of a small child’s body, or larger than 9 inches to allow a child’s head and body to<br />
slide completely through.<br />
Never attach jump ropes, clotheslines, pet leashes, or cords of any kind to play<br />
equipment. Anchor any climbing ropes at both ends. Remove drawstrings from<br />
children’s clothes. Children can strangle on these.<br />
Bury or cover anchors with adequate surfacing material to prevent tripping. Play<br />
equipment should not tip over.<br />
Make sure that platforms and ramps over 30 inches high have guardrails or<br />
barriers to prevent falls.<br />
Repair sharp points or edges on equipment that can cause injuries.<br />
Replace missing hardware, eliminate protruding bolts, and close “S” hooks that can<br />
cause injuries.
U.S. Consumer Product <strong>Safety</strong> Commission<br />
Washington, DC