User Manual - DigiCam
User Manual - DigiCam
User Manual - DigiCam

You also want an ePaper? Increase the reach of your titles
YUMPU automatically turns print PDFs into web optimized ePapers that Google loves.
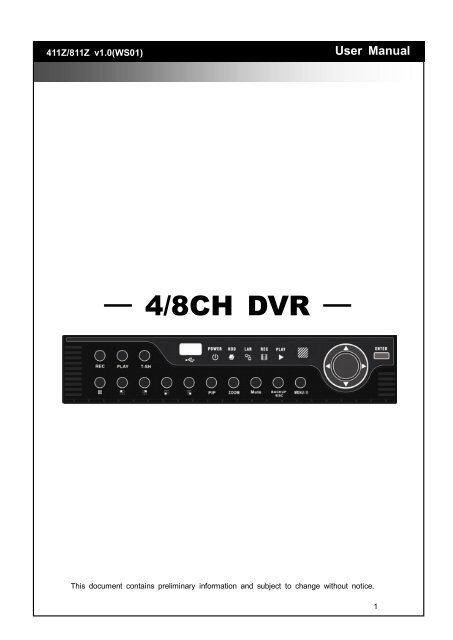
411Z/811Z v1.0(WS01)<br />
─ 4/8CH DVR ─<br />
<strong>User</strong> <strong>Manual</strong><br />
This document contains preliminary information and subject to change without notice.<br />
1
This symbol is intended to<br />
alert the user to the presence<br />
of unprotected “Dangerous<br />
voltage" within the product's<br />
enclosure that may be strong<br />
enough to cause a risk of<br />
electric shock.<br />
This symbol is intended to<br />
alert the user to the presence<br />
of important operating and<br />
maintenance (servicing)<br />
instructions in the literature<br />
accompanying the appliance.<br />
WARNING<br />
TO REDUCE THE RISK OF FIRE OR<br />
ELECTRIC SHOCK, DO NOT EXPOSE<br />
THIS APPLIANCE TO RAIN OR<br />
MOISTURE.<br />
NOTE: This equipment has been tested<br />
and found to comply with the limits for a<br />
class digital device, pursuant to part 15 of<br />
the FCC Rules. These limits are designed<br />
to provide reasonable protection against<br />
harmful interference when the equipment is<br />
operated in a commercial environment.<br />
This equipment generates, uses, and can<br />
radiate radio frequency energy and, if not<br />
installed and used in accordance with the<br />
instruction manual, may cause harmful<br />
interference to radio communications.<br />
Operation of this equipment in a residential<br />
area is likely to cause harmful interference<br />
in which case the user will be required to<br />
correct the interference at his own expense.<br />
Disposal of Old Electrical & Electronic Equipment (Applicable in the European<br />
Union and other European countries with separate collection systems)<br />
This symbol on the product or on its packaging indicates that this product shall not be treated<br />
as household waste. Instead it shall be handed over to the applicable collection point for the<br />
recycling of electrical and electronic equipment. By ensuring this product is disposed of<br />
correctly, you will help prevent potential negative consequences for the environment and<br />
human health, which could otherwise be caused by inappropriate waste handling of this<br />
product. The recycling of materials will help to conserve natural resources. For more detailed<br />
information about recycling of this product, please contact your local city office, your household<br />
waste disposal service or the shop where you purchased the product.<br />
2
Table of Contents<br />
CHAPTER 1 PACKING DETAIL AND INSTALLATION _____________________ 5<br />
1-1 PACKING__________________________________________________ 5<br />
1-2 Hard Disk Installation _______________________________________ 6<br />
CHAPTER 2 PANEL LOCATION _______________________________________ 8<br />
2-1 FRONT PANEL CONTROLS __________________________________ 8<br />
2-2 8CH REAR PANEL CONNECTORS ____________________________ 9<br />
2-3 4CH REAR PANEL CONNECTORS ___________________________ 10<br />
CHAPTER 3 LIVE, PLAYBACK AND PTZ OPERATIONS _________________ 11<br />
3-1 LIVE Mode ________________________________________________ 11<br />
3-2 PLAYBACK Mode _________________________________________ 14<br />
3-3 PTZ Mode ________________________________________________ 16<br />
CHAPTER 4 MAIN MENU SETUP ___________________________________ 17<br />
4-1 RECORD SETUP __________________________________________ 18<br />
4-1.1 Quality & Frame Rate Setup ___________________________ 19<br />
4-2 EVENT SETUP ____________________________________________ 19<br />
4-2.1 MOTION SETUP ______________________________________ 20<br />
4-2.1.1 MOTION AREA SETUP____________________________ 20<br />
4-3 SCHEDULE SETUP ________________________________________ 21<br />
4-3.1 Schedule Record Setup _______________________________ 22<br />
4-3.2 Holiday Setup ________________________________________ 22<br />
4-4 CAMERA SETUP __________________________________________ 23<br />
4-5 ACCOUNT SETUP _________________________________________ 24<br />
4-5.1 Permission Setup _____________________________________ 24<br />
4-5.2 <strong>User</strong> Picture Setup ___________________________________ 25<br />
4-6 NETWORKING SETUP______________________________________ 25<br />
4-6.1 NETWORKING SETUP _________________________________ 26<br />
4-6.1.1 DHCP __________________________________________ 26<br />
4-6.1.2 LAN____________________________________________ 26<br />
4-6.1.3 ADSL __________________________________________ 27<br />
4-6.1.4 3G _____________________________________________ 27<br />
4-6.2 HTTP Setup__________________________________________ 28<br />
4-6.3 DDNS Setup _________________________________________ 29<br />
4-6.4 Mail Setup ___________________________________________ 30<br />
4-7 PTZ & RS485 SETUP ______________________________________ 31<br />
4-8 SYSTEM SETUP ___________________________________________ 32<br />
4-8.1 DISPLAY SETUP ______________________________________ 32<br />
4-8.2 DATE/TIME SETUP ____________________________________ 33<br />
4-8.2.1 CHANGE DATE & TIME ___________________________ 34<br />
4-8.2.2 TIME ZONE AND DAYLIGHT SAVING TIME SETUP ___ 34<br />
4-8.2.3 INTERNET TIME SETUP __________________________ 35<br />
4-8.3 DEVICE SETUP_______________________________________ 35<br />
4-9 UTILITY SETUP ___________________________________________ 37<br />
4-10 DIAGNOSTIC ____________________________________________ 38<br />
CHAPTER 5 BACKUP & SEARCH ___________________________________ 39<br />
5-1 BACKUP SETUP __________________________________________ 39<br />
5-2 SEARCH SETUP __________________________________________ 42<br />
5-2.1 EVENT SEARCH ______________________________________ 42<br />
5-2.1.1 CRITERIA SETUP FOR EVENT SEARCH_____________ 43<br />
5-2.2 TIME SEARCH _______________________________________ 44<br />
2010.10.21 411Z/811Z <strong>User</strong> <strong>Manual</strong> V1.1(WS01) 3
CHAPTER 6 Remote Software Installation and Setup____________________ 45<br />
6-1 AP Software Installation and instruction ______________________ 45<br />
6-2 How to do remote monitoring through IE ____________________ 47<br />
6-3 How to do remote monitoring through JPEG VIEWER(Only Monitor<br />
Function) ____________________________________________________ 48<br />
6-4 AP Software Operation _____________________________________ 50<br />
CHAPTER 7 SPECIFICAITONS ______________________________________ 51<br />
CHAPTER 8 MOBILE APPLICATION INSTALLATION AND USAGE _________ 53<br />
8-1 Mobile Application Installation and Operation for Symbian ______ 53<br />
8-2 Mobile Application Installation and Operation for Windows Mobile 53<br />
8-3 Google Android Phone OS application and operation __________ 53<br />
8-4 Blackberry Operation System Software Installation and Operation 53<br />
8-5 iPhone Software installation and operation ___________________ 53<br />
CHAPTER 9 CMS INSTALLATION AND USAGE GUIDE __________________ 54<br />
9-1 CMS Installation __________________________________________ 54<br />
9-2 CMS LOGIN AND ENVIRONMENT ____________________________ 56<br />
9-3 DVRs, Groups & Events ___________________________________ 58<br />
9-3.1 View DVR/Group List ________________________________ 58<br />
9-3.2 View Event Logs _____________________________________ 59<br />
9-4 Local PC Information and Control ___________________________ 59<br />
9-5 Main Display _____________________________________________ 60<br />
9-5.1 Audio Control ________________________________________ 60<br />
9-5.2 eMAP Display ________________________________________ 61<br />
9-5.3 PTZ Control _________________________________________ 62<br />
9-6 Operation Bar ____________________________________________ 63<br />
9-6.1 <strong>User</strong> administration ___________________________________ 64<br />
9-6.2 DVR Administration ___________________________________ 65<br />
9-6.3 Group Administration _________________________________ 65<br />
9-6.4 eMap Administration __________________________________ 67<br />
9-6.5 Remote Play _________________________________________ 69<br />
9-6.6 HDD Playback________________________________________ 70<br />
9-6.7 File Playback ________________________________________ 71<br />
9-6.8 Event Playback_______________________________________ 72<br />
9-6.9 Snapshot Data _______________________________________ 72<br />
9-6.10 Recording Data _____________________________________ 73<br />
APPENDIXⅠ I-DVR.NET REGISTRATION ______________________________ 74<br />
APPENDIXⅡ ez-dns REGISTRATION _________________________________ 76<br />
APPENDIXⅢ Remote Monitoring IE ActiveX Control Installation Instruction ___ 79<br />
2010.10.21 411Z/811Z <strong>User</strong> <strong>Manual</strong> V1.1(WS01) 4
CHAPTER 1 PACKING DETAIL AND INSTALLATION<br />
1-1 PACKING<br />
1. DVR<br />
2. Quick Start 3. IR Remote Control 4. SATA Cord 1pcs<br />
5. CD 6.Screws x4 7. Power Adaptor<br />
Note: Standard shipping products include neither HDD nor DVD R/W<br />
2010.10.21 411Z/811Z <strong>User</strong> <strong>Manual</strong> V1.1(WS01) 5
1-2 Hard Disk Installation<br />
Step1):Take out the screws as pictures show。<br />
Back panel 3 screws<br />
Left 1 screw<br />
Right 1 screw<br />
Step 2 ) :Open the cover follow the arrow direction。<br />
2010.10.21 411Z/811Z <strong>User</strong> <strong>Manual</strong> V1.1(WS01) 6
Step3):Connect SATA & Power wire to Hard Disk and put it on right position of<br />
the bottom case。<br />
Step4):Fix the Hard Disk with four screws on the bottom case as the picture indicated。<br />
Step5):Put the cover back and fix it with 5 screws as Step 1 indicated.<br />
Note: After installation, please initialize Hard Disk before starting to record. For more detailed<br />
information, please check out <strong>User</strong> <strong>Manual</strong> 4-9 System Tools for reference.<br />
2010.10.21 411Z/811Z <strong>User</strong> <strong>Manual</strong> V1.1(WS01) 7
CHAPTER 2 PANEL LOCATION<br />
2-1 FRONT PANEL CONTROLS<br />
① REC<br />
② PLAY<br />
③ T-SRH<br />
④ USB 2.0 Port<br />
⑤ LED Display<br />
① ② ③ ④ ⑤ ⑥ ⑦ ⑧<br />
⑨ ⑩ ⑪ ⑫ ⑬<br />
(From left to right)<br />
⑥ IR Sensor<br />
⑦ /<br />
Start or stop recording.<br />
Play back in normal speed.<br />
Display the search menu.<br />
Port for USB external devices.<br />
Power: Power is on.<br />
HDD: Hard disk is in use.<br />
LAN: Connected to the internet (in red): Remote user logged in.<br />
REC: Recording.<br />
PLAY: Playing back.<br />
Input sensor for the remote control.<br />
In SETUP mode, press to move cursor down. In PLAYBACK mode, press<br />
to stop playing back.<br />
/ SLOW In SETUP mode, press to move cursor up. In PLAYBACK mode, press to<br />
slow down.<br />
/ In SETUP mode, press to increase value. In PLAYBACK mode press to<br />
play forwards.<br />
/ In SETUP mode, press to reduce value. In PLAYBACK mode, press to<br />
play rewind.<br />
⑧ ENTER/MODE<br />
⑨<br />
⑩<br />
⑪<br />
⑫<br />
⑬<br />
⑭ PIP<br />
⑮ ZOOM<br />
In SETUP mode, press to enter values. In PLAYBACK mode, switch<br />
between full, quad, 9-channel, 16-channel display in order.<br />
In LIVE or PLAYBACK mode, switch to 4-channel display。<br />
In LIVE or PLAYBACK mode, switch to CH1。<br />
In LIVE or PLAYBACK mode, switch to CH2。<br />
In LIVE or PLAYBACK mode, switch to CH3。<br />
In LIVE or PLAYBACK mode, switch to CH4。<br />
In LIVE mode, display with picture in picture format.<br />
In LIVE or PLAYBACK mode, enlarge the display of a channel.<br />
⑯ MUTE Enable / Disable Key Tone.<br />
⑰ BACKUP/ESC<br />
⑱ MENU / II<br />
⑭ ⑮ ⑯ ⑰ ⑱<br />
In LIVE mode, press to display the BACKUP menu. In SETUP mode,<br />
press to return to previous page.<br />
In LIVE mode, press to display menu. In PLAYBACK mode, press to pause<br />
playback.<br />
2010.10.21 411Z/811Z <strong>User</strong> <strong>Manual</strong> V1.1(WS01) 8
2-2 8CH REAR PANEL CONNECTORS<br />
① ④ ⑤ ⑧<br />
② ③ ⑥ ⑦ ⑨<br />
① VGA VGA port<br />
② DC 12V DC 12V power jack<br />
③ MAIN/SPOT monitor MAIN/SPOT monitor BNC Video output<br />
④ VIDEO IN For cameras BNC input ,8 ports<br />
⑤ AUDIO IN RCA input( For CH1)<br />
⑥ AUDIO OUT RCA output ( For CH1)<br />
⑦ RS485 RS-485 for PTZ<br />
⑧ LAN Network port<br />
⑨ USB 2.0 For mouse<br />
2010.10.21 411Z/811Z <strong>User</strong> <strong>Manual</strong> V1.1(WS01) 9
2-3 4CH REAR PANEL CONNECTORS<br />
③ ④<br />
① ② ⑤ ⑥ ⑦ ⑧ ⑨<br />
① DC 12V DC 12V power jack<br />
② VIDEO OUT MAIN/SPOT monitor BNC Video output<br />
③ VIDEO IN For cameras BNC input ,4 ports<br />
④ AUDIO IN RCA input( For CH1)<br />
⑤ AUDIO OUT RCA output ( For CH1)<br />
⑥ VGA VGA port<br />
⑦ USB For mouse<br />
⑧ RS-485 RS-485 for PTZ<br />
⑨ LAN Network port<br />
2010.10.21 411Z/811Z <strong>User</strong> <strong>Manual</strong> V1.1(WS01) 10
CHAPTER 3 LIVE, PLAYBACK AND PTZ OPERATIONS<br />
The IR remote control and mouse operate differently under each mode; this chapter describes<br />
the functions of them under three different modes: LIVE, PLAYBACK and PTZ.<br />
3-1 LIVE Mode<br />
You can monitor all the channels, listen to audio signal and have some related operations under<br />
LIVE mode. This paragraph describes the IR remote control, mouse operation and on screen<br />
graphical icons under LIVE mode.<br />
Table 3-1.1 Functions of remote control under LIVE mode<br />
Button Description<br />
REC Start/Stop recording.<br />
PLAY Start playing back the most recently recorded segment.<br />
ENTER/MODE Switch to full screen, quad display.<br />
MENU/ Enable/ Disable setup Menu.<br />
BK-UP Enable/ Disable backup menu.<br />
ESC Return last menu.<br />
2010.10.21 411Z/811Z <strong>User</strong> <strong>Manual</strong> V1.1(WS01) 11
Table 3-1.2 Graphical icons that will display after right-clicking your mouse under LIVE mode.<br />
Icon Description<br />
Resting the cursor on this icon will bring up the following four menu icons.<br />
Main menu.<br />
Search menu.<br />
Backup menu.<br />
PTZ mode.<br />
Turn on/off recording.<br />
Playback.<br />
Resting the cursor on this icon will bring up the following five display icons.<br />
FREEZE.<br />
ZOOM, double the screen size<br />
AUTO-sequence<br />
LOCK, activate the key lock.<br />
Full screen display.<br />
Quad display.<br />
9 display<br />
2010.10.21 411Z/811Z <strong>User</strong> <strong>Manual</strong> V1.1(WS01) 12
Table 3-1.3 Description of on screen graphical icons in LIVE mode<br />
Icon Description<br />
Recording is on<br />
Schedule Recording is on<br />
Live Audio is on<br />
Live Audio is off<br />
Motion detected on the channel<br />
Video loss detected on the channel<br />
USB device detected<br />
Connected to the LAN cable.<br />
AUTO-seq is on<br />
Freeze is on, screen is frozen<br />
LOCK is on<br />
PTZ control is on<br />
Shows the current hard disk space has been used<br />
(99% mean used 99%, remain 1%)<br />
Lower right of each CH will show the current time<br />
Icon Description<br />
/<br />
/<br />
Image quality (High/Low)<br />
Full screen<br />
Record<br />
Record and snap shot file saving path setup<br />
Enable / Disable Shortcut Toolbar<br />
2010.10.21 411Z/811Z <strong>User</strong> <strong>Manual</strong> V1.1(WS01) 13
3-2 PLAYBACK Mode<br />
Switch to PLAYBACK mode by pressing “PLAY” under the LIVE mode, the graphical icon<br />
will show up on the upper center of the screen and the operation panel ( see below picture) will<br />
show up at right lower corner of the screen. You can drag the panel by mouse to place it on<br />
any location of your screen.<br />
Table 3-2.1 Remote control functions under the PLAYBACK mode<br />
Button Description<br />
ENTER / MODE Switch to full screen, quad<br />
MENU / Turn on/off PAUSE.<br />
PLAY Play back at normal speed.<br />
/ SLOW Play back at slower speed. The speed will be slowed to 1/2, 1/4, 1/8,<br />
by each pressing of the button till the slowest limitation of the normal<br />
speed.<br />
/ Fast rewind. Each press increases the speed to the next level. There<br />
are six speeds: 2x, 4X, 8X, 16x, 32X and 64X.<br />
/ Fast forward. Each press increases the speed to the next level. There<br />
are six speeds: 2x, 4X, 8X, 16x, 32X and 64X.<br />
/ Stop playback.<br />
2010.10.21 411Z/811Z <strong>User</strong> <strong>Manual</strong> V1.1(WS01) 14
Table 3-2.2 The mouse operation under the PLAYBACK mode.<br />
Icon Description<br />
/<br />
「 / 」 Fast rewind<br />
「 / 」Fast forward<br />
Play/pause<br />
「▲ / SLOW」, slow playback<br />
「▼ / ■」stop playback<br />
Playback channel by channel with snap shot display<br />
Full screen display<br />
Quad display<br />
9 screen display<br />
Zoom-in display<br />
If you want to monitor single channel, please choose a channel and click left butt<br />
on of mouse two times.<br />
2010.10.21 411Z/811Z <strong>User</strong> <strong>Manual</strong> V1.1(WS01) 15
3-3 PTZ Mode<br />
Switch to the PTZ mode by pressing “PTZ” button under the LIVE mode. The PTZ icon<br />
will appear on upper left side of screen and the control panel will appear on the down right side<br />
of screen.<br />
Table 3-3.2 Mouse operation under the PTZ mode<br />
Icon Description<br />
Leave PTZ Mode,back to the LIVE mode<br />
Pre-set number N. (0~255)<br />
Go to pre-set number N.<br />
Set current PTZ location at pre-set number N.<br />
「TOUR」, press to activate pre-set tour*<br />
「PIP」, Set current PTZ location as the start of line-scan. *<br />
「FREEZE」, Activate line-scan. *<br />
「ZOOM」, Set current PTZ location as the end of line-scan. *<br />
To move PTZ in 360°<br />
PTZ zoom in; PTZ zoom out<br />
PTZ focus in; PTZ focus out.<br />
PTZ IRIS open, PTZ IRIS close.<br />
Below functions need support from specific PTZ manufacturer.<br />
Please check user manual of your PTZ for more detail.<br />
to<br />
AUX 1~8,「AUTO」Key + Number key「1~8」<br />
「Backup」, Customized function。<br />
* PTZ communication protocols from different brands aren’t compatible 100%<br />
sometimes. Therefore, some of these functions may be unavailable.<br />
2010.10.21 411Z/811Z <strong>User</strong> <strong>Manual</strong> V1.1(WS01) 16
CHAPTER 4 MAIN MENU SETUP<br />
To enter the main menu and set up DVR, log-in account and user password are required.<br />
The default password of the administrator is “123456”. Please check the “Account Setup” for<br />
related setup of other log-in users.<br />
Table 4-0.1 Some definition of virtual keyboard.<br />
Item Description<br />
/<br />
Switch between capital and small letters.<br />
Switch between numbers and letters.<br />
Press to cancel the setup, and re-choose the login<br />
account.<br />
Delete the last character.<br />
Enter to identify the password. It will enter the set<br />
up menu, If the password is verified.<br />
Space key<br />
2010.10.21 411Z/811Z <strong>User</strong> <strong>Manual</strong> V1.1(WS01) 17
Table 4-0.2 The operation of remote control under the setting menu<br />
Item Description<br />
Switch to different options under one item<br />
Switch to different items<br />
MENU Save setup and back to LIVE mode<br />
ESC Back to Upper level of menu without saving<br />
ENTER Enter the menu, or display virtual keyboard<br />
PS. The initialization of new-installed HD is required before recording, please refer to “4-9<br />
UTILITY SETUP” for detail.<br />
4-1 RECORD SETUP<br />
HDD FULL<br />
Item Description<br />
Select STOP to stop recording or OVERWRITE to reuse the<br />
HDD when HDD is full<br />
「Stop」: Stop Recording<br />
OSD position X Setup OSD X axis<br />
OSD position Y Set up OSD y axis<br />
OSD position setup Set up OSD axis<br />
Video Preservation<br />
Quality & Frame Rate<br />
Setup<br />
「Overwrite」: Start to overwrite that begin from the oldest data<br />
of HDD, and continue to record.<br />
Setup the video preservation period. Recorded video will be<br />
deleted automatically after expiry of preservation period.<br />
Setup the quality and frame rate for each channel under normal<br />
recording and event recording type.<br />
2010.10.21 411Z/811Z <strong>User</strong> <strong>Manual</strong> V1.1(WS01) 18
4-1.1 Quality & Frame Rate Setup<br />
Normal setup/<br />
event setup<br />
Resolution<br />
Item Description<br />
Select recording mode<br />
Select recording resolution: NTSC:352x240, 704x240, 704x480<br />
PAL:352X288,704X288,704X576<br />
Record Type You can setup quality and FPS separately for record type.<br />
No. Check/uncheck the box enable/disable selected channel recording<br />
Quality Select quality: Below Basic/ Basic/ Normal/ High/ Highest<br />
FPS Select recording frame rate.<br />
Auto Assign each channel with its maximum accessible fps<br />
4-2 EVENT SETUP<br />
Item Description<br />
Motion Setup Enter to set up motion detection<br />
2010.10.21 411Z/811Z <strong>User</strong> <strong>Manual</strong> V1.1(WS01) 19
4-2.1 MOTION SETUP<br />
Item Description<br />
Alarm Duration(Seconds) When motion detect,the number of seconds continuous alarm<br />
1~4 You can setup independently for each channel.<br />
Enable Check the box to Enable/Disable motion detection for each channel.<br />
Drag the white bar or press ◀ ▶ to set up Sensitivity from valu<br />
Sensitivity<br />
e 1 to 10 for each channel. The lower value you set the highe<br />
r sensitivity it will be<br />
Motion Area Setup Enter to setup motion detection area<br />
4-2.1.1 MOTION AREA SETUP<br />
The motion detection has been divided into 16x12 grids. The default detection area is<br />
full screen as it marked in transparent for local DVR and purple for remote access.<br />
Areas deselected for motion detection are marked in red for both local and remote site.<br />
2010.10.21 411Z/811Z <strong>User</strong> <strong>Manual</strong> V1.1(WS01) 20
Item Description<br />
Mask Mouse Selection Switch between “select” and “deselect” for cursor-dragging function<br />
All Area Detection Select entire screen as detection area.<br />
Mask All Area Deselect entire detection area.<br />
Continue Continue setup<br />
Exit & Save Save setup and leave<br />
Exit & Discard Cancel setup and leave<br />
4-3 SCHEDULE SETUP<br />
Except from starting recording manually, you can also setup the recording time by weeks<br />
and schedule including normal, motion detect, and recording type.<br />
Item Description<br />
Page Each page provides 10 schedules for setup. 5 pages in total.<br />
Holiday Setup Enter to setup holiday, up to 50 days, other than weekends,.<br />
View Event/ Motion/<br />
Sensor Setup<br />
View Normal/ Motion<br />
2010.10.21 411Z/811Z <strong>User</strong> <strong>Manual</strong> V1.1(WS01) 21
4-3.1 Schedule Record Setup<br />
Click on the time on the left side. The setup menu will be displayed. You can have<br />
detail setup by dates, Time and event.<br />
4-3.2 Holiday Setup<br />
Since holidays are different by different country and region, you can setup the holiday of<br />
your location accordingly.<br />
2010.10.21 411Z/811Z <strong>User</strong> <strong>Manual</strong> V1.1(WS01) 22
4-4 CAMERA SETUP<br />
Item Description<br />
1~4 You can setup independently for each channel.<br />
Mask Check the box to Enable/Disable mask function for LIVE mode<br />
Sharpness<br />
Brightness<br />
Contrast<br />
Chroma(U)/(V)<br />
Hue<br />
Drag the bar or press ◀ ▶ to adjust Sharpness of your camera from<br />
value 0 to 15. The default value is 1.<br />
Drag the bar or press ◀ ▶ to adjust Brightness of your camera from<br />
value 1 to 255. The default value is 128.<br />
Drag the bar or press ◀ ▶ to adjust Contrast of your camera from<br />
value 1 to 255. The default value is 100.<br />
Drag the bar or press ◀ ▶ to adjust Chroma of your camera from<br />
value 1 to 255. The default value is 128.<br />
Drag the bar or press ◀ ▶ to adjust Hue of your camera from value 1<br />
to 255. The default value is 128. ( This function doesn’t support at<br />
PAL system)<br />
Name Set up name of each channel<br />
Volume<br />
Audio volume for CH1 under LIVE mode and recording mode can be<br />
adjusted.( 4CH model only 1 CH can be adjusted )<br />
2010.10.21 411Z/811Z <strong>User</strong> <strong>Manual</strong> V1.1(WS01) 23
4-5 ACCOUNT SETUP<br />
The Account Setup menu is used to provide role-based permission independently setting for<br />
each user (maximum of 4 users) to access DVR over network. The default admin account and<br />
password is “admin” and “123456”<br />
(The default password remains the same after firmware upgrade)<br />
Item Description<br />
No. Check to activate the user’s account.<br />
<strong>User</strong>name Set up username<br />
Password Set up password for each user. Password is 8-digits required and can<br />
be mixed by letters and numbers with case-sensitive. Letters can be<br />
mixed with capitals or lowercases.<br />
Permissions Set up Permissions for each user<br />
Change Admin<br />
Password<br />
Change administrator’s password<br />
Picture Change user’s picture<br />
4-5.1 Permission Setup<br />
The Account Setup is set to provide individual user (maximum of 4 users) role-based<br />
permissions, including access to Setup menu, Network operation, PTZ function, Playback,<br />
Utility, Backup, Password expiry date and Mask on specific channels while playing back.<br />
2010.10.21 411Z/811Z <strong>User</strong> <strong>Manual</strong> V1.1(WS01) 24
4-5.2 <strong>User</strong> Picture Setup<br />
<strong>User</strong> can select picture wished to be changed to from hard drive.<br />
4-6 NETWORKING SETUP<br />
Item Description<br />
Connect type Setup mode for network connection: (ADSL、DHCP、LAN、3G).<br />
HTTP Setup Enter to set up HTTP<br />
DDNS Setup Enter to set up DDNS<br />
Mail Setup Enter to set up mail<br />
3G Setup Enter to set up 3G network<br />
2010.10.21 411Z/811Z <strong>User</strong> <strong>Manual</strong> V1.1(WS01) 25
4-6.1 NETWORKING SETUP<br />
There are three ways to connect to the network as followed.<br />
4-6.1.1 DHCP<br />
When DHCP is selected, IP address will be assigned by DHCP server automatically.<br />
4-6.1.2 LAN<br />
Select LAN for network connection, the following information is required.<br />
Item Description<br />
IP Address Enter IP address provided by ISP<br />
Subnet Mask Enter IP address of Subnet Mask provided by ISP<br />
Gateway Enter IP address of Gate way provided by ISP<br />
DNS Enter DNS address provided by ISP.<br />
(Note: The correct DNS address must be entered for DDNS function).<br />
2010.10.21 411Z/811Z <strong>User</strong> <strong>Manual</strong> V1.1(WS01) 26
4-6.1.3 ADSL<br />
Select ADSL for network connection, the following information is required.<br />
Item Description<br />
<strong>User</strong> Name Enter user name provided by ISP<br />
Password Enter password provided by ISP<br />
4-6.1.4 3G<br />
Select 3G for network connection, the following information is required.<br />
Item Description<br />
Dial-up Number Dial-up Number,Determined as the ISP<br />
PIN Enter SIM card password<br />
APN Enter ”internet”<br />
Advance Setting The advanced settings (Taiwan ISP outside)<br />
2010.10.21 411Z/811Z <strong>User</strong> <strong>Manual</strong> V1.1(WS01) 27
Item Description<br />
Enable Enable advance setting<br />
<strong>User</strong> Name Enter ISP username<br />
Password Enter ISP password<br />
IP Address Enter the ISP provides a fixed IP address。<br />
4-6.2 HTTP Setup<br />
Enable HTTP<br />
Server<br />
(if the client uses the Internet only need to enter a fixed IP)<br />
PS:This feature currently only supports the Huawei 3G card<br />
Item Description<br />
Check to enable HTTP server. <strong>User</strong>s can remotely access into the<br />
DVR over the network if the HTTP function is activated.<br />
Port Enter a valid port value from 1 up to 65000. The default value is 80.<br />
Auto Assign each channel with its maxima accessible fps<br />
No. Chanel number<br />
Quality Set up record quality. There are below basic, basic, normal, high,<br />
highest<br />
FPS Set up record FPS<br />
2010.10.21 411Z/811Z <strong>User</strong> <strong>Manual</strong> V1.1(WS01) 28
4-6.3 DDNS Setup<br />
Item Description<br />
Enable DDNS Enable/disable DDNS function.<br />
DDNS Server Enter the registered SMTP Server:<br />
ez-dns*、I-DVR.NET* 、DYNDNS.ORG、NO-IP.ORG、3322.ORG<br />
Host Name Enter the completed registered SMTP Server.<br />
(Including username + Server)<br />
If the user name is h.264 and you choose i-dvr as your server,<br />
you should enter: h.264.i-dvr.net<br />
<strong>User</strong> Name Enter user name.<br />
Password Enter password.<br />
*For more detailed I-DVR.NET operation instruction, please refer to appendixⅠ、Ⅱ<br />
2010.10.21 411Z/811Z <strong>User</strong> <strong>Manual</strong> V1.1(WS01) 29
4-6.4 Mail Setup<br />
When event occurs (VLOSS, MOTION), email will be sent to the receiver account automatically.<br />
Item Description<br />
Enable E-mail Notification Check the box to enable/disable E-mal Notification function.<br />
SMTP Server<br />
Enter to set up SMTP Server name.<br />
(Varies according to the user)<br />
<strong>User</strong> Name Enter to set up <strong>User</strong> Name.<br />
Password Enter to set up Password.<br />
Sender E-mail Enter to set up e-mail address of receivers.<br />
Trigger Event<br />
Enter to select events to send out E-mail notifications when below<br />
circumstances happen: Motion, Sensor and Vloss (Video Loss).<br />
Receiver E-mail Enter to set up e-mail addresses for up to 10 receivers individually.<br />
2010.10.21 411Z/811Z <strong>User</strong> <strong>Manual</strong> V1.1(WS01) 30
4-7 PTZ & RS485 SETUP<br />
The DVR allows users to control PTZ functions of your camera. To enable PTZ function, the 485<br />
cable should be connected to the RS-485 port of DVR.<br />
Item Description<br />
Enable PTZ Click the box to Enable/Disable PTZ function for each channel.<br />
Protocol Set up the protocol of PTZ cam. The supported protocol are<br />
PELCO-P, PELCO-D, KND, LI-LIN, SAMSUNG, LG, AVTECH.<br />
PTZ ID Click or press ◀ ▶ to set up PTZ ID. The valid ID value is from 1<br />
to 64.<br />
Baud Rate Select Baud Rate for PTZ from 2400, 4800, 9600,19200<br />
RS-485 ID Select RS-485 ID from 1 to 64<br />
RS-485 Baud Rate Select RS-485 Baud Rate from 2400. 4800, 9600,19200<br />
Keyboard Select Keyboard.<br />
Note:4CH DVR will display 4 channels.<br />
2010.10.21 411Z/811Z <strong>User</strong> <strong>Manual</strong> V1.1(WS01) 31
4-8 SYSTEM SETUP<br />
Item Description<br />
DVR Name The name of DVR will be shown when users login from remote access.<br />
DVR Location The location of DVR will be shown when users login from remote access<br />
Language Click or press ▼ to select OSD language.<br />
Remote ID Default ID is 0. DVR is controlled by standard remote control,<br />
Display Setup Enter to set up Display<br />
Date/Time Setup Enter to set up Date/Time<br />
Device Setup<br />
Spot Setup<br />
4-8.1 DISPLAY SETUP<br />
Enter to set up Buzzer & Relay<br />
Enter to set up Spot<br />
2010.10.21 411Z/811Z <strong>User</strong> <strong>Manual</strong> V1.1(WS01) 32
Item Description<br />
Auto-Seq Interval Set up duration time in seconds for the interval between channels<br />
under Auto-Seq mode.<br />
Show OSD Turn On / Off OSD display<br />
Show DVR Status Turn On / Off DVR illustration and record status display<br />
Show Date/Time Turn On / Off date and time display<br />
Show Channel Name Turn On / Off channel name display<br />
CRT Deflicker(only for CRT monitor)<br />
Border Color Set up the color of border in LIVE , PLAYBACK mode.(Red,<br />
4-8.2 DATE/TIME SETUP<br />
Green, Blue)<br />
Item Description<br />
Hour Format 12HOURS/ 24HOURS<br />
Date Format MM-DD-YY/DD-MM-YY/YY-MM-DD<br />
Date/Time Position Choose the position of Time and Date display<br />
Change Date & Time Setup time and date of DVR<br />
Time Zone Setup Set up GMT and Daylight Saving Time.<br />
Internet Time Setup Setup automatic synchronization with internet server<br />
2010.10.21 411Z/811Z <strong>User</strong> <strong>Manual</strong> V1.1(WS01) 33
4-8.2.1 CHANGE DATE & TIME<br />
Setup date and time of DVR manually according to user’s local time.<br />
4-8.2.2 TIME ZONE AND DAYLIGHT SAVING TIME SETUP<br />
Set up time zone and activate Daylight Saving Time function according to user’s DVR location.<br />
Item Description<br />
Select Time Zone Enter to modify GMT from GMT- 13 to GMT+ 13<br />
Daylight Saving Time Turn on/ off Daylight Saving Time<br />
2010.10.21 411Z/811Z <strong>User</strong> <strong>Manual</strong> V1.1(WS01) 34
4-8.2.3 INTERNET TIME SETUP<br />
Synchronize your DVR time with internet time server.<br />
Automatic<br />
Synchronization<br />
Update Now<br />
Item Description<br />
4-8.3 DEVICE SETUP<br />
Mouse Speed<br />
Check to enable DVR automatic synchronization function.<br />
Effective by this option selected, DVR will automatically<br />
synchronize the time upon rebooting or by every 24 hours after<br />
booting.<br />
Effectively, Date and Time show on DVR will immediately<br />
correspond with those in internet server.<br />
Item Description<br />
Buzzer Setup Into the buzzer setup.<br />
Move the mouse cursor speed, the more the faster to the<br />
right. (Only Local machine)<br />
2010.10.21 411Z/811Z <strong>User</strong> <strong>Manual</strong> V1.1(WS01) 35
Item Description<br />
Key Tone Enable/Disable keystrokes.<br />
Buzzer<br />
Enable/Disable buzzer operation when the alarm is triggered for<br />
HDD Error, Motion and Vloss (Video Loss).<br />
2010.10.21 411Z/811Z <strong>User</strong> <strong>Manual</strong> V1.1(WS01) 36
4-9 UTILITY SETUP<br />
HDD Initialization<br />
Item Description<br />
Select to enter hard disk initialization menu. Please stop<br />
recording before entering this menu. Enter the menu,<br />
system will show all the data (model ,volume ) of HDD that<br />
installed in DVR. Check the HDD you’d like to initialize<br />
then press “Start”. HDD initialization is successful when<br />
the status shows “Succeed”<br />
USB Initialization Clean up all data on USB. Enter USB initialization and<br />
press YES to clean up all data on your USB. The<br />
initialization is done when it’s showed “Succeed”.<br />
System Recovery<br />
Restore system default values<br />
Reset System Events Reset all the recording events in DVR.<br />
Copy Setup to USB<br />
Copy configuration to a USB device. There will be a file<br />
named 「sdvr_conf.dat」 on your USB.<br />
Download Setup from USB Download configuration from a USB device into DVR.<br />
Upgrade<br />
Upgrade DVR through USB.<br />
Please stop recording and backup setup configuration<br />
before upgrading.<br />
System will reboot automatically when the upgrade is<br />
completed.<br />
Notice! DO NOT TURN OFF POWER OR UNPLUG USB DEVICE DURING THE UPGRADE<br />
as it may cause incomplete firmware upgrade and damage to the DVR.<br />
2010.10.21 411Z/811Z <strong>User</strong> <strong>Manual</strong> V1.1(WS01) 37
4-10 DIAGNOSTIC<br />
Item Description<br />
Version The current firmware version of DVR<br />
IP The connected IP address of DVR. If disconnected<br />
from network, the screen will display” NETWORK<br />
DISCONNECT”.<br />
MAC MAC Address of DVR<br />
HDD Status No. HDD number<br />
Volume HDD Capacity<br />
Used Rate Percentage of space used on HDD.<br />
Status<br />
Shows HDD status.<br />
USING means the HDD is being used for recording<br />
now<br />
GOOD/BAD means the HDD has a known/unknown<br />
format for the DVR. (Note: Please initialize your<br />
newly-installed HDD before using it.)<br />
Format Time The latest format time of HDD<br />
2010.10.21 411Z/811Z <strong>User</strong> <strong>Manual</strong> V1.1(WS01) 38
CHAPTER 5 BACKUP & SEARCH<br />
5-1 BACKUP SETUP<br />
<strong>User</strong> can backup any segment of recorded data in a specified time frame. To do so, either a CD<br />
R/W or storage device, like USB, must be connected to the DVR. The format of backup file is<br />
IRF file that can be played by both “Ifileplay” and “CMS”<br />
*:Use the USB flash backup, the system will automatically copy "Ifileplay" to the USB<br />
Item Description<br />
From The start time of backup file<br />
To The end time of backup file<br />
Device Select USB or PC as the backup device<br />
Free Space The available space in your backup device. (not available for PC backup)<br />
Refresh Recalculate the available space of backup device. (not available for PC backup)<br />
Required Space Show the size of the backup file<br />
Calculate Calculate the size of backup file<br />
Start<br />
Start backup operation.<br />
Be sure to calculate the size of backup file BEFORE operating backup.<br />
Note! Do not unplug the USB device or turn off the DVR during the backup process to<br />
avoid unrecoverable error.<br />
2010.10.21 411Z/811Z <strong>User</strong> <strong>Manual</strong> V1.1(WS01) 39
iFileplay Use Method<br />
Step 1: install 「iFileplay」software to your PC. You can get「iFileplay」file from the CD with DVR<br />
Packing.<br />
PS: When you using USB to backup file, iFileplay.exe will copy to USB with the backup<br />
file automatically.<br />
Step 2:Setup「ifileplaypack.exe」。<br />
Step 3:Click「open」, choose and star a DVR backup file。<br />
2010.10.21 411Z/811Z <strong>User</strong> <strong>Manual</strong> V1.1(WS01) 40
Step 4:Ifileplay software will play the backup file automatically.<br />
Step 5:If there is no display on the screen, The backup file is not our DVR recording format.<br />
Please check it.<br />
2010.10.21 411Z/811Z <strong>User</strong> <strong>Manual</strong> V1.1(WS01) 41
5-2 SEARCH SETUP<br />
Item Description<br />
Event Search Event search menu<br />
Time Search Enter time search menu<br />
5-2.1 EVENT SEARCH<br />
The DVR automatically records events with type, time and channel information included. If there<br />
is recording data for an event, a yellow signal will be shown on the left side of time<br />
information. Rest your cursor under the line and press “enter”, or left click your mouse to<br />
playback the recording data.<br />
P.S. Event Records will still be generated even when hard disk is not installed or the<br />
record function is not activated. However, the record can’t be viewed after selecting it.<br />
2010.10.21 411Z/811Z <strong>User</strong> <strong>Manual</strong> V1.1(WS01) 42
Item Description<br />
Criteria Setup conditions of event search<br />
Page Switch between pages of events<br />
Date/Time Date/time when event occurred.<br />
Event Type<br />
Info<br />
Event type, defined as following<br />
MOTION Motion Detected<br />
Video Loss Video Loss<br />
Remote Login user log-in over the network<br />
Remote Logout user log-out over the network<br />
Power On DVR Power on<br />
HDD Full HDD Space FULL<br />
HDD Error Detect HDD error<br />
Reboot DVR Reboot<br />
The channel where event occurs or login user<br />
5-2.1.1 CRITERIA SETUP FOR EVENT SEARCH<br />
The amount of events can be numerous. Therefore, you can facilitate event sorting by setting<br />
up “criteria”. Setup “start time” and “end time” for event search, then the search result will be<br />
limited to this specific period of time. Only checked events and channels will be sorted in event<br />
search.<br />
2010.10.21 411Z/811Z <strong>User</strong> <strong>Manual</strong> V1.1(WS01) 43
5-2.2 TIME SEARCH<br />
TIME SEARCH can search for the specific time of recording data to playback. Press “Enter” or<br />
left click on the desired date to playback. Note that dates with recording data are marked with a<br />
red square “ □ “System will start playing back according to the date you selected. Calendar<br />
will be shown by using mouse to click on “year” and “month”.<br />
Click “date” to display recording time of that specific date with time bar. You can change time<br />
(hour/minute/second) or click on a specific time of time bar by mouse then press “ok”. DVR will<br />
playback the selected recording data.<br />
2010.10.21 411Z/811Z <strong>User</strong> <strong>Manual</strong> V1.1(WS01) 44
CHAPTER 6 Remote Software Installation and Setup<br />
6-1 AP Software Installation and instruction<br />
AP software:「DVR Remote Desktop」can allow you to remotely access and control the DVR<br />
from PC.<br />
p.s. Operation system currently supports Windows XP SP2 and above and Window<br />
s Vista, Windows 7<br />
Step One:Enter the IP address of DVR in IE browser<br />
Step Two: Windows as below will show up. Please enter the user name and password. Default<br />
user name and password is admin/123456. Other related setup about user account<br />
and password, please check “4-5 Account Setup. “<br />
Step Three: Click on the link to start downloading the AP software.<br />
2010.10.21 411Z/811Z <strong>User</strong> <strong>Manual</strong> V1.1(WS01) 45
Step Four: Run or Save our AP software.<br />
Step Five: If you choose to run the software, Start window will be shown up. Please enter<br />
information of login DVR: IP, Port, <strong>User</strong>name and Password, or choose “Play<br />
Recorded File” to open backup files in your PC.<br />
Step Six: You’ve logged into the DVR<br />
2010.10.21 411Z/811Z <strong>User</strong> <strong>Manual</strong> V1.1(WS01) 46
6-2 How to do remote monitoring through IE<br />
Step One:Enter the IP address of DVR in IE browser. The address appeared in this image is<br />
only for demonstration. Actual address is depending on the setup of on-site DVR.<br />
Step Two: Windows as below will show up. Please enter the user name and password. Default<br />
user name and password is admin/123456. Other related setup about user account<br />
and password, please check “4-5 Account Setup. “ The user name and password<br />
appeared in this image is only for demonstration. Actual user name and password<br />
depend on the setup of on-site DVR.<br />
Step Three: Click on “Internet Explorer 6, 7, and 8”to start downloading the AP software. ( The<br />
first option is for IE view, please refer to next chapter for more information)<br />
p.s. There will be IE connection security issue when clicking this link for the first time.<br />
Please refer to index II for Remote Monitoring IE ActiveX Control Installation Instruction.<br />
2010.10.21 411Z/811Z <strong>User</strong> <strong>Manual</strong> V1.1(WS01) 47
Step Four: DVR images appear.<br />
6-3 How to do remote monitoring through JPEG VIEWER(Only Monitor Fun<br />
ction)<br />
Step One:Enter the IP address of DVR in IE browser. The address appeared in this image is<br />
only for demonstration. Actual address is depending on the setup of on-site DVR.<br />
Step Two: Windows as below will show up. Please enter the user name and password. Default<br />
user name and password is admin/123456. Other related setup about user account<br />
and password, please check “4-5 Account Setup. “ The user name and password<br />
appeared in this image is only for demonstration. Actual user name and password<br />
depend on the setup of on-site DVR.<br />
2010.10.21 411Z/811Z <strong>User</strong> <strong>Manual</strong> V1.1(WS01) 48
Step Three: Click on “Jpeg Viewer”<br />
Step Four: DVR images appear.<br />
PS : Only for viewer, without any operation function.<br />
2010.10.21 411Z/811Z <strong>User</strong> <strong>Manual</strong> V1.1(WS01) 49
6-4 AP Software Operation<br />
Open the file “DVRemoteDesktop.exe”; enter the information of DVR “IP address”, “Port”<br />
“<strong>User</strong>name” and “Password” and click “OK”. You should be able to login DVR successfully and<br />
start to use the software. The default username and password is 「admin/ 123456」<br />
“DVRemoteDesktop.exe” AP software provides some extra functions for remote users.<br />
Please check Table 6-4.1 for minimum system requirements for “DVRemoteDesktop.exe”<br />
operation.<br />
Table 6-4.1 System Requirements for AP software<br />
CPU Intel Pentium 4 above<br />
OS Microsoft Windows 7、Windows Vista、Windows XP SP2 above<br />
RAM 512M above<br />
VGA Card Needed to support DirectX9.0 (Above) Note 1<br />
Others DirectX 9.0 above<br />
Note 1:<br />
Known VGA card that support DirectX9.0 currently:<br />
NVIDIA: Geforce FXseries, Geforce 6series, Geforce 7series, Geforce 8series, Geforce<br />
9series, Geforce 200series, etc.<br />
Or<br />
visit:http://en.wikipedia.org/wiki/Comparison_of_Nvidia_graphics_processing_units<br />
ATI: Radeon R300series, Radeon R400series, Radeon R500series, Radeon R600series,<br />
Radeon R700series, Radeon HD 3xxx IGPseries, Mobility Radeonseries (9500<br />
above), Mobility Radeon Xseries, Mobility Radeon HDseries, or FireGL Vseries etc.<br />
Or visit: http://en.wikipedia.org/wiki/Comparison_of_ATI_graphics_processing_units<br />
SiS: SiS 67Xseries, or SiS 77Xseries etc.<br />
Or visit: http://www.sis.com/support/support_compare.htm<br />
Intel: 91Xseries, 94Xseries, 96Xseries, G3Xseries, or G4Xseries, etc.<br />
Or visit: http://en.wikipedia.org/wiki/Intel_GMA<br />
2010.10.21 411Z/811Z <strong>User</strong> <strong>Manual</strong> V1.1(WS01) 50
CHAPTER 7 SPECIFICAITONS<br />
1. VIDEO<br />
Input Level 1.0 Vp-p±10% Composite, 75W Balanced<br />
Display Speed<br />
Display Resolution<br />
NTSC 120fps<br />
PAL 100fps<br />
NTSC 720(H) X 480(V)<br />
PAL 704(H) X 576(V)<br />
Monitor Output 2Vp-p Composite, 75W Balanced<br />
2. RECORDING<br />
Compression Method H.264<br />
Recording Speed Refer to table 7-1<br />
Recording Resolution<br />
Quality<br />
NTSC 704 X 480, 704 X 240, 352 X 240<br />
PAL 704 X 576, 704 X 288, 352 X 288<br />
Independent for<br />
each channel<br />
Below Basic/ Basic/ Normal/ High/ Highest<br />
Schedule Setup by “minute” as unit<br />
Mode <strong>Manual</strong> / Event (Motion) / Schedule<br />
Method<br />
3. SATA DEVICE<br />
Capacity<br />
Internal Storage 1 HDD<br />
External Storage Not support<br />
By resolution, fps and quality<br />
Setup fps and quality separately for normal and<br />
event recording<br />
Type SATA / SATAⅡ compatible<br />
4. ALARM<br />
Motion Detection Available per each camera/ Multi-detection level<br />
5. CONNECTIONS<br />
Video Input BNC 8 ports (8CH), 4 ports (4CH)<br />
Video Output<br />
Audio Input RCA 1 port<br />
Audio Output RCA 1 port<br />
BNC 1 port (To switch the main screen output<br />
or SPOT output),<br />
VGA 1 port (Max Resolution:1280X1024)<br />
USB 2.0 USB memory stick, USB Touch Monitor<br />
USB 1.1 USB Mouse<br />
Remote Remote control<br />
External I/O 1 RS-485,<br />
Ethernet 1 RJ45 connector, 10/100 Mbps<br />
6. ELECTRICAL<br />
Power Source DC 12V / 3A<br />
7. ENVIRONMENTAL<br />
Operation Temperature 5℃ ~ + 40℃<br />
Humidity Less than 90%<br />
8. PHYSICAL<br />
2010.10.21 411Z/811Z <strong>User</strong> <strong>Manual</strong> V1.1(WS01) 51
Dimension 225(W) x 215(D) x 46(H) mm<br />
Weight 0.95kg ( without HDD)<br />
9. BACKUP<br />
BACKUP<br />
10. SEARCHING & PLAYBACK<br />
USB Stick Video Data, Audio<br />
Network Video Data, Audio<br />
Searching Type Event/ Time<br />
Playback speed 120 FPS<br />
11. MULTI-REMOTE SURVEILLANCE<br />
Monitoring Environment Web / Client Software(CMS)<br />
Max. client Supporting multi-client (5 clients accessible)<br />
12. OTHERS<br />
OS Embedded Linux<br />
Multi Task Pentaplex Live、Record、Playback、Network、Backup<br />
Control Device<br />
Front Keys / Remote Control /<br />
Virtual Keyboard / Mouse / AP Software<br />
PC Viewer Direct monitoring of DVR’s HDD on PC<br />
Numbers of event list 10000<br />
Table 7-1<br />
Recording<br />
Speed<br />
(Independent<br />
setting for each<br />
channel)<br />
NTSC<br />
PAL<br />
352 x 240 100 FPS(4CH), 200FPS(8CH)<br />
704 x 240 100 FPS(4CH), 200FPS(8CH)<br />
704 x 480 100 FPS(4CH), 200FPS(8CH)<br />
352 x 288 100 FPS(4CH), 200FPS(8CH)<br />
704 x 288 100 FPS(4CH), 200FPS(8CH)<br />
704 x 576 100 FPS(4CH), 200FPS(8CH)<br />
Compression Method H.264<br />
2010.10.21 411Z/811Z <strong>User</strong> <strong>Manual</strong> V1.1(WS01) 52
CHAPTER 8 MOBILE APPLICATION INSTALLATION AND USAGE<br />
You can remotely monitor all channels of DVR through your mobile device.<br />
The required mobile application is from DVR manufacturer and it supports mobile OS for<br />
1. Windows mobile 5.0 above.<br />
2. Symbian.<br />
3. Google Android<br />
4. Blackberry<br />
5. Apple Iphone<br />
8-1 Mobile Application Installation and Operation for Symbian<br />
Please refer to shipping the Mobile->Symbian directory CD<br />
8-2 Mobile Application Installation and Operation for Windows Mobile<br />
Please refer to shipping the Mobile->WindowsMobile directory CD<br />
8-3 Google Android Phone OS application and operation<br />
Please refer to shipping the Mobile->Gphone directory CD<br />
8-4 Blackberry Operation System Software Installation and Operation<br />
Please refer to shipping the Mobile->Blackberry directory CD<br />
8-5 iPhone Software installation and operation<br />
Please refer to shipping the Mobile->Iphone directory CD<br />
2010.10.21 411Z/811Z <strong>User</strong> <strong>Manual</strong> V1.1(WS01) 53
CHAPTER 9 CMS INSTALLATION AND USAGE GUIDE<br />
9-1 CMS Installation<br />
System Requirement:<br />
*Intel Pentium 4 processor or equivalent.<br />
*Microsoft Windows Vista、Windows XP、Windows 2003 Server.<br />
*Besides OS and other required APs, there will be 512MB remaining memory needed or above.<br />
*512MB memory above.(500M requested for group DVR connection and 180M for single DVR)<br />
*20MB HD space. Recording and image capturing require extra space for storage.<br />
*VGA Card needs to support DirectX9 and function well while running it. Please refer to<br />
p48 Note 1.<br />
Installation:<br />
1. Connect to the manufacturer’s website and download the CMS software.<br />
2. Decompress and execute “setup.exe”.<br />
3. If “Visual C++ Runtime Libraries” has not been installed before in the operating PC, the<br />
following sign will suggest an installation automatically.<br />
4. Select “Next”, and then select “Browse” to change installation path if needed. To check<br />
available space on hard disk, please select “Disk Cost” then please select “Next” to the<br />
next step.<br />
5.”Confirm Installation” window shows. Select ‘Next’ then the installation starts.<br />
2010.10.21 411Z/811Z <strong>User</strong> <strong>Manual</strong> V1.1(WS01) 54
6. Select ‘Close’ to finish installation when the “Installation Complete” window shows.<br />
2010.10.21 411Z/811Z <strong>User</strong> <strong>Manual</strong> V1.1(WS01) 55
Instruction for Log-in Failure to CMS after Upgrade<br />
Log in to CMS with the default account and password after CMS upgrade. If an error<br />
message occurs as shown in the image, please follow the instruction to solve the error.<br />
Step 1: Please enter file manager to enter folder, “Windows” and then folder “Systme32”<br />
(ex:C:\Windows\System32)<br />
Step 2: Locate file, “iCMS.dat” and delete it.<br />
Step 3: Restart CMS. Log-in successfully.<br />
9-2 CMS LOGIN AND<br />
2010.10.21 411Z/811Z <strong>User</strong> <strong>Manual</strong> V1.1(WS01) 56
ENVIRONMENT<br />
To enter CMS, the administrator’s user name and password are required. The defaults are<br />
‘admin’ and ‘123456’.<br />
After successful login, the following image shows on your screen:<br />
①<br />
② :<br />
① DVRs, Groups &<br />
Events<br />
② PC information<br />
and control<br />
Information about DVRs, groups and events.<br />
See “9-3 Information List” for more detail.<br />
Information about local PC’s hard disk, volume, recording...etc.<br />
See “9-4 PC Information and Control” for more detail.<br />
③ Main Display Live image display area. See “9-5 Main Display” for detail.<br />
④ Display Modes Several choices of display modes supported by CMS.<br />
⑤ Operation Bar<br />
③<br />
④ ⑤<br />
A set of 10 operations are provided by CMS. See “ 9-6 Operation<br />
Bar” for detail.<br />
2010.10.21 411Z/811Z <strong>User</strong> <strong>Manual</strong> V1.1(WS01) 57
9-3 DVRs, Groups & Events<br />
Icon Description<br />
View list of logged in DVR/ Group.<br />
View Logs: list all the event information of DVR<br />
9-3.1 View DVR/Group List<br />
Single left click on ‘DVR’ or ‘Group’ will<br />
expand/collapse the entire DVRs and<br />
groups list.<br />
On the DVR list, double left click on a<br />
connected DVR will show its image in<br />
main display. See “9-6.2 DVR<br />
Administration” for further information.<br />
On the Group list, double left click on a<br />
group will show live image from the<br />
channels of the group in the main<br />
display. See “9-6.3 for Group<br />
Administration” for further information.<br />
Left-clicking on a connected DVR will expand/collapse status of its all channels as below:<br />
Icon Description<br />
Video Loss<br />
Motion Detected<br />
Sensor Triggered<br />
2010.10.21 411Z/811Z <strong>User</strong> <strong>Manual</strong> V1.1(WS01) 58
9-3.2 View Event Logs<br />
Under this page, all the events of a DVR can be expanded/collapsed in the order of Re<br />
mote in/Remote out, Video Loss, Motion, Sensor, Others (Power Reset, Key Lock, Key<br />
Unlock, HD Full).<br />
9-4 Local PC Information and Control<br />
Located at the left lower corner of the screen, please see the chart below:<br />
Icon Function Description<br />
HDD info<br />
Recording<br />
Directory<br />
Recording<br />
Cycle<br />
Shows the ratio of available space / HDD capacity of C:\ drive<br />
(where CMS is installed).<br />
Setting Recording Directory.<br />
(Default is C:\Program files\iCMS)<br />
Set the capacity size of the Recording space.<br />
(minimum is 10MB)<br />
Volume PC volume or playback volume control bar.<br />
Recording<br />
Snapshot<br />
Record live image to local PC storage. To view locally stored<br />
data, use “Record” under the operation bar. Also see<br />
“9-6.6 recording data” for detail.<br />
Take snapshot to save in local PC storage. To view all the<br />
snapshots you’ve taken, please go to ” Snapshot” under the<br />
operation bar. See “9-6.5 Snapshot data” for detail.<br />
2010.10.21 411Z/811Z <strong>User</strong> <strong>Manual</strong> V1.1(WS01) 59
9-5 Main Display<br />
The main display area is where the live image of DVR is shown. You can drag to change the<br />
location of screen for each channel and turn on/off audio signal with mouse-click.<br />
9-5.1 Audio Control<br />
In live mode, you can turn on/off the audio signal of Ch1~Ch4:<br />
「 」Audio signal is On<br />
「 」Audio signal is Off<br />
Turn on/off by clicking on the graphical icon, please note there can allow only one chan<br />
nel’s audio signal to be on at one time.<br />
2010.10.21 411Z/811Z <strong>User</strong> <strong>Manual</strong> V1.1(WS01) 60
9-5.2 eMAP Display<br />
In Live mode, pressing will bring the e-MAP drag-down menu. If the channel has<br />
been set up to use e-MAP, the menu will show all the e-MAP titles that have been<br />
entitled to this channel; otherwise, “No eMaps” will be shown. Please check “9-6.4<br />
eMAP administration” for setup information.<br />
2010.10.21 411Z/811Z <strong>User</strong> <strong>Manual</strong> V1.1(WS01) 61
9-5.3 PTZ Control<br />
In the main display, right click on the channel will bring up PTZ control panel as below.<br />
Icon Description<br />
8 direction key Rotate the PTZ<br />
ZOOM+:Zoom in<br />
ZOOM : Zoom out<br />
Setup the PTZ spot as pre-set N.<br />
FOCUS+ : Focus in<br />
FOCUS-:Focus out<br />
Move to pre-set N.<br />
Set PTZ Preset Setup 16 pre-set N.<br />
Goto PTZ Preset Move to specific pre-set N.<br />
Activate auto pre-set tour*<br />
PTZ Sensitivity Setup PTZ sensitivity*<br />
Setup the “start” and “end” of liner scan.*<br />
Activate the liner scan cruise.*<br />
B Adjust the Brightness (Down is +)<br />
C Adjust the Contrast (Down is +)<br />
S Adjust the Sharpness (Down is +)<br />
*PTZ communication protocols from different brands aren’t compatible 100% sometimes.<br />
Therefore, some of these functions may be unavailable.<br />
2010.10.21 411Z/811Z <strong>User</strong> <strong>Manual</strong> V1.1(WS01) 62
9-6 Operation Bar<br />
10 Operations to be listed as below:<br />
Table 9-6.1 description of 10 operations:<br />
Icon Description<br />
<strong>User</strong> Administration. Please see “9-6.1 <strong>User</strong> administration”<br />
DVR Administration. Please see “9-6.2 DVR Administration”<br />
Group Administration. Please see “9-6.3 Group Administration”<br />
eMap Administration. Please see “9-6.4 eMap Administration”.<br />
Remote Playback. Please see “9-6.5 Remote Play”.<br />
HDD Playback. Please see “9-6.6 HDD Play”<br />
File Playback. Please see “9-6.7 File Play”<br />
Event Playback. Please see “9-6.8 Event Play”<br />
Snapshot Data. Please see “9-6.9 Snapshot”<br />
Recording Data. Please see “9-6.10 Recording”<br />
2010.10.21 411Z/811Z <strong>User</strong> <strong>Manual</strong> V1.1(WS01) 63
9-6.1 <strong>User</strong> administration<br />
Before the CMS can be used on a PC, user accounts should be added with proper authority.<br />
Each user should also be assigned a password and optionally a description. If a user does not<br />
have certain authority assigned, he/she will not be able to operate the corresponding function<br />
on the Operation Bar. The default is none of the authority is assigned. The administrator should<br />
assign proper authority to each user. These user accounts can be deleted or edited later on.<br />
Select “OK” to save the setup.<br />
Icon Description<br />
Add a user account. The default authority is with none permission.<br />
Delete a user account.<br />
Language Switch display language<br />
If the turn on this feature, when the program reduced, it will be based in the sys<br />
tem tray icon.<br />
systray<br />
(This feature is switched on / off, the need to re-open the CMS until after the pr<br />
ogram in force)<br />
VGA turbo Increase the VGA efficiency<br />
2010.10.21 411Z/811Z <strong>User</strong> <strong>Manual</strong> V1.1(WS01) 64
9-6.2 DVR Administration<br />
DVR connections can be added to or deleted from the CMS and their information can be edited.<br />
DVR’s channel names can be entered here or downloaded from the DVR by pressing ‘From<br />
DVR’. Select “OK” to save the information.<br />
9-6.3 Group Administration<br />
A ‘Group’ means a set of video channels from one or many DVRs, which means, user can<br />
organize channels from different DVRs to be set in a group. This function allows you to monitor<br />
and manager channels from multiple DVRs easily and flexible.<br />
Steps:<br />
1. Add a new group and set its name and description.<br />
2. Click ‘Select’ which will bring up a new window.<br />
2.<br />
1.<br />
Name: DVR Name(Unrepeatable)<br />
Model: DVR Model<br />
Generic: For General Models<br />
Generic MainStream: For DualStream Model<br />
DUAL SDVR: For MPEG4 2U Models<br />
Address: DVR IP Address<br />
Port: DVR Network Port<br />
Channel: DVR Camera Number<br />
ID: DVR Login Account<br />
Password: DVR Login Password<br />
Description: Other Description<br />
Camera Description: Carera Description<br />
From DVR: Load Camera name from DVR<br />
2010.10.21 411Z/811Z <strong>User</strong> <strong>Manual</strong> V1.1(WS01) 65
3. Check the specific channels that you’d like them to be included in the group. To include all<br />
channels of a DVR, just check the DVR.(1 Group up to select 64 camera)<br />
4. Click “OK” to return to the previous window.<br />
5. Select a display mode.<br />
6. Drag a channel from the lower left panel into the main display to a preferred location. Or,<br />
change the channel location in the main display by mouse dragging.<br />
7. You can ‘Select’ again to add other channels, but the un-saved channel locations will be<br />
lost.<br />
8. Click “OK” to save the setup.<br />
2010.10.21 411Z/811Z <strong>User</strong> <strong>Manual</strong> V1.1(WS01) 66
9-6.4 eMap Administration<br />
If geographical locations are relevant, or if it is desired to use a picture as the background,<br />
eMap can be used for the purpose. With eMap, the background picture can be picked by the<br />
user and channels from multiple DVRs can be placed and dragged around on the picture.<br />
Steps to follow:<br />
1. Click and a path for the picture will be prompted.<br />
2. Select a picture, click OK and the picture will show in the right panel.<br />
3. Drag channels in the left lower corner onto the picture to any position.<br />
4. To delete a channel already on the picture, right click the channel and click ‘Remove’.<br />
2010.10.21 411Z/811Z <strong>User</strong> <strong>Manual</strong> V1.1(WS01) 67
5. Click OK to save.<br />
2010.10.21 411Z/811Z <strong>User</strong> <strong>Manual</strong> V1.1(WS01) 68
9-6.5 Remote Play<br />
Video images recorded on a DVR can be displayed on a remote CMS. With Remote Play<br />
function, select a DVR and a display mode on top of the screen. After the recorded segments<br />
are listed below, double click on one to show its image on the right.<br />
Icon Description<br />
Start playing.<br />
Pause.<br />
Fast forward.<br />
Fast rewind.<br />
Select the clip you want to watch the number of minutes and<br />
seconds,Press the right button is set to start playing<br />
2010.10.21 411Z/811Z <strong>User</strong> <strong>Manual</strong> V1.1(WS01) 69
9-6.6 HDD Playback<br />
You can directly play the recording data in the HDD that’s uninstalled from DVR by CMS. See<br />
the picture below, the left part of screen is recording data in list that’s separated by hour and the<br />
right part is main display. You can change the display modes and play files fast forward or<br />
rewind.<br />
Icon Description<br />
Start playing.<br />
Pause.<br />
Fast forward.<br />
Fast rewind.<br />
2010.10.21 411Z/811Z <strong>User</strong> <strong>Manual</strong> V1.1(WS01) 70
9-6.7 File Playback<br />
You can play the recorded .irf files by “File Play” in CMS. It allows you to change the<br />
display mode, forward or rewind the file and drag the time bar.<br />
Icon Description<br />
Start playing.<br />
Pause.<br />
Stop playback.<br />
Fast forward.<br />
Fast rewind.<br />
2010.10.21 411Z/811Z <strong>User</strong> <strong>Manual</strong> V1.1(WS01) 71
9-6.8 Event Playback<br />
Event recordings on the DVR can be played back in CMS.<br />
Steps to follow:<br />
1. Select a DVR and a display mode.<br />
2. Select a date.<br />
3. Double click an event and play back the images on the right.<br />
Use buttons at the bottom to control the playback.<br />
9-6.9 Snapshot Data<br />
It can display all the snapshots you’ve taken in line in “Snapshot Data”. You can review, delete<br />
or save as other files here.<br />
*Capture images of the date and time will follow the PC-time display<br />
2010.10.21 411Z/811Z <strong>User</strong> <strong>Manual</strong> V1.1(WS01) 72
9-6.10 Recording Data<br />
It can play all the recording files you’ve recorded in line in “Recording Data”. You can play or<br />
delete them here.<br />
Steps to follow:<br />
1. Choose the recording time at upper left corner, it will be played on the main display.<br />
2. You can choose the display mode.<br />
3. Time bar will be shown at right lower corner, please drag the time bar to specify<br />
the recording time you’d like to play.<br />
Icon Description<br />
Start playing.<br />
Pause.<br />
Stop playback.<br />
Fast forward.<br />
Fast rewind.<br />
2010.10.21 411Z/811Z <strong>User</strong> <strong>Manual</strong> V1.1(WS01) 73
APPENDIXⅠ I-DVR.NET REGISTRATION<br />
DDNS Registration on I-DVR.NET<br />
In the package of each DVR, you will find a sticker shows account information including<br />
username and password that allows users to login I-DVR.NET for registration.<br />
To register DDNS on I-DVR.NET, please follow the steps as shown.<br />
Step 1. Please open IE browser and then enter “ http://i-DVR.NET/logon.asp ” in IE browser bar.<br />
Next, “Control Panel Logo” dialog will appear. Enter the username and password<br />
provided by the sticker and then press, “Logon.”<br />
Step 2. After login successfully, enter name at “host” in “Add New Record” dialog. For example,<br />
“icatchddns” is the host name, and then the address will be “icatchddns.idvr.net.” Select<br />
“Standard” type and enter an IP address of the DVR. Input known IP address if any, or<br />
press the “Add New” button if none.<br />
Please enter any name by your choice at Column, “host.domain”<br />
For example, “hostname”<br />
Therefore, IE address will be “hostname.i-dvr.net”<br />
Step 3. The “Host Manager” dialog will show “insert succeed” when user setup successfully.<br />
The “host.domain” column will show up the setup just entered.<br />
Next, enter the DVR the same time setting the DDNS client machine information<br />
If DDNS set up at DVR side successfully, the website will update the IP information in<br />
one minute. The IP column will be renewed to the corresponding IP address by<br />
pressing “F5: refresh” button.<br />
“host.domain” is named by your choice.<br />
“icatchddns.idvr.net” is what the main<br />
server generates<br />
System will automatically show the current computer IP.<br />
If the DVR IP is known, you can type it in the column.<br />
If not, you can press “insert” button.<br />
If DVR IP has any changes, there are updates<br />
Here at the same time. Press, “F5: Refresh”<br />
And then IP column will update automatically<br />
to it’s real IP Address.<br />
2010.10.21 411Z/811Z <strong>User</strong> <strong>Manual</strong> V1.1(WS01) 74
Step 4. Enter DVR →Main Menu → Network Setup → DDNS. Activate DDNS functions and<br />
input related information.<br />
Step 5.Back to the i-dvr.net, on this page by pressing "F5: Refresh", IP will be automatically<br />
updated into the DVR of the real IP location.<br />
DDNS work properly when this option selected.<br />
This part of the information required and the<br />
same within the i-dvr.net<br />
2010.10.21 411Z/811Z <strong>User</strong> <strong>Manual</strong> V1.1(WS01) 75
APPENDIXⅡ ez-dns REGISTRATION<br />
DDNS Registration on ez-dns.com<br />
In addition to I-DVR.NET the Company, the other has a ez-dns.com server may be used..<br />
To register DDNS on ez-dns.com, please follow the steps as shown.<br />
Step 1. Please open IE browser and then enter “ http://ez-dns.com ” in IE browser bar.<br />
First time, please click on the top of the screen of "Sing up" (red box )<br />
Step 2. To input a user name and password, after clicking “singup”.<br />
Later, log in to use ez-dns.com that this group account password<br />
2010.10.21 411Z/811Z <strong>User</strong> <strong>Manual</strong> V1.1(WS01) 76
Step 3. The “host.domain” column will show up the setup just entered.<br />
Next, enter the DVR the same time setting the DDNS client machine information<br />
If DDNS set up at DVR side successfully, the website will update the IP information in<br />
10 minute. The IP column will be renewed to the corresponding IP address by pressing<br />
“F5: refresh” button.<br />
“host.domain” is named by your choice.<br />
“demodvr.ez-dns.com” is what the main<br />
server generates<br />
The system will automatically display the<br />
current user's computer IP,<br />
If the DVR's IP location is known can be input<br />
field and click update,<br />
If DVR IP has any changes, there are updates<br />
Here at the same time. Press, “F5: Refresh”<br />
And then IP column will update automatically<br />
to it’s real IP Address.<br />
Step 4. Enter DVR →Main Menu → Network Setup → DDNS. Activate DDNS functions and<br />
input related information.<br />
2010.10.21 411Z/811Z <strong>User</strong> <strong>Manual</strong> V1.1(WS01) 77
Step 5.Back to the ez-dns.com, on this page by pressing "F5: Refresh", IP will be automatically<br />
updated into the DVR of the real IP location.<br />
DDNS work properly when this option selected.<br />
This part of the information required and the<br />
same within the ez-dns.com<br />
2010.10.21 411Z/811Z <strong>User</strong> <strong>Manual</strong> V1.1(WS01) 78
APPENDIXⅢ Remote Monitoring IE ActiveX Control<br />
Installation Instruction<br />
When using IE for remote monitoring for the first time, IE ActiveX Control is needed to be<br />
downloaded.<br />
1. When remote monitoring on IE for the first time, an alert message occurs “Install ActiveX<br />
control” on the tool bar.<br />
2. Click at this alert message and select “Install ActiveX Control”<br />
3. “Do you want to install this software” alert pops up. Select “Install”<br />
2010.10.21 411Z/811Z <strong>User</strong> <strong>Manual</strong> V1.1(WS01) 79
4. After installation, IE remote monitoring image appears.<br />
5. If message, “Your security Settings do not allow web sites to use ActiveX controls installed<br />
on your computer.” pops on when logging in, please follow the next instruction.<br />
6. First select “Tools” on the tool bar and then select “Internet Options”<br />
2010.10.21 411Z/811Z <strong>User</strong> <strong>Manual</strong> V1.1(WS01) 80
7. Select Security →Trusted Sites → Sites<br />
8. Enter DVR address (This address is only for demonstration. Please use the address<br />
depends on the setup of on-site DVR.) into the blanks shown in picture, and then press<br />
“add.”<br />
2010.10.21 411Z/811Z <strong>User</strong> <strong>Manual</strong> V1.1(WS01) 81
9. Newly added website will appear at the trusted web sites list. Press close.<br />
10. Go back to IE window, press refresh button or F5.<br />
2010.10.21 411Z/811Z <strong>User</strong> <strong>Manual</strong> V1.1(WS01) 82