Manual - EDAN USA
Manual - EDAN USA
Manual - EDAN USA

You also want an ePaper? Increase the reach of your titles
YUMPU automatically turns print PDFs into web optimized ePapers that Google loves.
About this <strong>Manual</strong><br />
P/N: 01.54.106666-20<br />
Release Date: June 2012<br />
© Copyright <strong>EDAN</strong> INSTRUMENTS, INC. 2008-2012. All rights reserved.<br />
Statement<br />
This manual will help you understand the operation and maintenance of the product better. It is<br />
reminded that the product shall be used strictly complying with this manual. User’s operation<br />
failing to comply with this manual may result in malfunction or accident for which <strong>EDAN</strong><br />
INSTRUMENTS, INC. (hereinafter called <strong>EDAN</strong>) can not be held liable.<br />
<strong>EDAN</strong> owns the copyrights of this manual. Without prior written consent of <strong>EDAN</strong>, any<br />
materials contained in this manual shall not be photocopied, reproduced or translated into other<br />
languages.<br />
Materials protected by the copyright law, including but not limited to confidential information<br />
such as technical information and patent information are contained in this manual, the user shall<br />
not disclose such information to any irrelevant third party.<br />
The user shall understand that nothing in this manual grants him, expressly or implicitly, any<br />
right or license to use any of the intellectual properties of <strong>EDAN</strong>.<br />
<strong>EDAN</strong> holds the rights to modify, update, and ultimately explain this manual.<br />
Responsibility of the Manufacturer<br />
<strong>EDAN</strong> only considers itself responsible for any effect on safety, reliability and performance of<br />
the equipment if:<br />
Assembly operations, extensions, re-adjustments, modifications or repairs are carried out by<br />
persons authorized by <strong>EDAN</strong>, and<br />
The electrical installation of the relevant room complies with national standards, and<br />
The instrument is used in accordance with the instructions for use.<br />
Upon request, <strong>EDAN</strong> may provide, with compensation, necessary circuit diagrams, and other<br />
information to help qualified technician to maintain and repair some parts, which <strong>EDAN</strong> may<br />
define as user serviceable.<br />
I
Terms Used in this <strong>Manual</strong><br />
This guide is designed to give key concepts on safety precautions.<br />
WARNING<br />
A WARNING label advises against certain actions or situations that could result in personal<br />
injury or death.<br />
CAUTION<br />
A CAUTION label advises against actions or situations that could damage equipment, produce<br />
inaccurate data, or invalidate a procedure.<br />
NOTE<br />
A NOTE provides useful information regarding a function or a procedure.<br />
II
Table of Contents<br />
Chapter 1 Safety Guidance ...........................................................................................................1<br />
1.1 Intended Use........................................................................................................................1<br />
1.2 Warnings and Cautions........................................................................................................1<br />
1.2.1 General Warnings......................................................................................................1<br />
1.2.2 Li-ion Battery Care Warnings ...................................................................................4<br />
1.2.3 General Cautions.......................................................................................................5<br />
1.2.4 Operation for Wireless System..................................................................................5<br />
1.2.5 Preparation and Operation Warnings (for Exercise ECG) ........................................6<br />
1.2.6 Contraindications (for Exercise ECG) ......................................................................7<br />
1.3 List of Symbols ...................................................................................................................8<br />
Chapter 2 Introduction................................................................................................................10<br />
2.1 SE-1010 PC ECG System .................................................................................................10<br />
2.2 DP12 ECG Sampling Box of Wired System.....................................................................13<br />
2.3 DX12 ECG Sampling Boxes of Wireless System.............................................................16<br />
2.4 Features .............................................................................................................................19<br />
Chapter 3 Assembling SE-1010 PC ECG System......................................................................21<br />
3.1 Assembling Wired System ................................................................................................21<br />
3.2 Assembling Wireless System ............................................................................................23<br />
Chapter 4 Installing SE-1010 PC ECG Software ......................................................................25<br />
4.1 System Running Environment ..........................................................................................25<br />
4.1.1 Requirements on the Hardware of the PC...............................................................25<br />
4.1.2 Requirements on the Software of the PC ................................................................25<br />
4.2 About Installation Window ...............................................................................................26<br />
Chapter 5 Preparations Before Operation.................................................................................27<br />
5.1 Preparing the Patient .........................................................................................................27<br />
5.1.1 Instructing the Patient .............................................................................................27<br />
5.1.2 Preparing the Skin...................................................................................................27<br />
5.2 Connecting the Electrodes of Wired System.....................................................................28<br />
5.3 Connecting the Electrodes of Wireless System.................................................................29<br />
5.4 Attaching Electrodes (for Resting ECG)...........................................................................29<br />
5.4.1 Wilson Lead System................................................................................................30<br />
5.4.2 Frank Lead System..................................................................................................30<br />
5.4.3 Attaching Electrodes to the Patient .........................................................................31<br />
5.5 Attaching Electrodes to the Patient (for Exercise ECG) ...................................................33<br />
III
5.6 Inspection Before Test.......................................................................................................35<br />
5.7 Setting DX12 Transmitter (for Wireless System) .............................................................36<br />
5.7.1 Keyboard Locking/Unlocking.................................................................................38<br />
5.7.2 Menu Settings .........................................................................................................39<br />
Chapter 6 Operation Instructions for Resting ECG.................................................................40<br />
6.1 Viewing Lead Placement Information...............................................................................41<br />
6.2 Selecting a Patient Record to Start a New Test.................................................................42<br />
6.3 Entering New Patient Information ....................................................................................44<br />
6.3.1 Entering New Patient Information <strong>Manual</strong>ly..........................................................44<br />
6.3.2 Entering Patient Information by Using a Bar Code Reader....................................47<br />
6.4 Selecting Sampling Type...................................................................................................48<br />
6.5 Sampling Resting ECG .....................................................................................................48<br />
6.5.1 Specifying Display Mode........................................................................................49<br />
6.5.2 Specifying Lowpass Filter.......................................................................................50<br />
6.5.3 Specifying Gain.......................................................................................................50<br />
6.5.4 Specifying Speed.....................................................................................................50<br />
6.5.5 Recording ECG Data...............................................................................................51<br />
6.5.6 Freezing and Previewing ECG................................................................................51<br />
6.5.7 Stopping Sampling Data .........................................................................................52<br />
6.5.8 Printing ECG Waves ...............................................................................................53<br />
6.6 Analyzing ECG Data.........................................................................................................53<br />
6.6.1 Analyzing Normal ECG ..........................................................................................53<br />
6.6.1.1 Viewing the Waveform..................................................................................54<br />
6.6.1.2 About the Average Template Window...........................................................56<br />
6.6.1.3 About the Detail Information Window..........................................................58<br />
6.6.1.4 About the Rhythm Wave Window.................................................................59<br />
6.6.1.5 Previewing Normal ECG ..............................................................................59<br />
6.6.2 Analyzing QT Dispersion........................................................................................61<br />
6.6.2.1 Editing Waveform on the QT Dispersion Screen..........................................62<br />
6.6.2.2 About QT Value.............................................................................................62<br />
6.6.2.3 Previewing QT Dispersion............................................................................63<br />
6.6.3 Analyzing Frequency ECG .....................................................................................64<br />
6.6.3.1 About Two-lead Comparison Window..........................................................64<br />
6.6.3.2 About 12-lead Power Spectrum Window......................................................66<br />
6.6.3.3 Previewing Frequency ECG..........................................................................66<br />
6.6.4 Analyzing High Frequency ECG ............................................................................68<br />
IV
6.6.5 Analyzing HRV .......................................................................................................70<br />
6.6.5.1 Editing the HRV Data on the Analysis Screen..............................................71<br />
6.6.5.2 Editing the HRV Waveform in the Waveform Window ................................72<br />
6.6.5.3 Previewing HRV ...........................................................................................73<br />
6.6.6 Analyzing HRT........................................................................................................74<br />
6.6.7 Analyzing Vector ECG............................................................................................76<br />
6.6.7.1 Displaying Vector ECG with All Plane and All Loop...................................76<br />
6.6.7.2 Displaying Vector ECG with Frontal Plane and QRS Loop .........................79<br />
6.6.7.3 Displaying 3D Vector ECG...........................................................................79<br />
6.6.7.4 Previewing Vector ECG ................................................................................80<br />
6.6.8 Analyzing Time Vector ECG...................................................................................81<br />
6.6.9 Analyzing Signal Averaged ECG ............................................................................83<br />
6.6.9.1 About the Time Domain Window .................................................................83<br />
6.6.9.2 About the Frequency Domain Window.........................................................84<br />
6.6.9.3 Previewing Signal Averaged ECG ................................................................85<br />
6.6.10 Printing ECG Reports ...........................................................................................86<br />
6.6.11 Saving ECG Reports .............................................................................................86<br />
6.7 Sampling STAT ECG ........................................................................................................87<br />
Chapter 7 Operation Instructions for Exercise ECG ...............................................................88<br />
7.1 Viewing Lead Placement Information...............................................................................88<br />
7.2 Selecting a Patient Record to Start a New Test.................................................................89<br />
7.2.1 Setting Target HR....................................................................................................90<br />
7.2.2 Setting Normal BP ..................................................................................................90<br />
7.2.3 Setting a Protocol ....................................................................................................90<br />
7.2.4 Setting Post J...........................................................................................................90<br />
7.2.5 Setting BP Sampling Mode.....................................................................................91<br />
7.2.6 Setting BP Triggering Mode ...................................................................................91<br />
7.2.7 Setting Auto Printing...............................................................................................91<br />
7.3 Entering New Patient Information ....................................................................................91<br />
7.4 Pre-sampling ECG ............................................................................................................92<br />
7.5 Pretest Phase......................................................................................................................93<br />
7.5.1 Viewing the Heart Rate and the Blood Pressure .....................................................94<br />
7.5.2 Viewing Other Information .....................................................................................95<br />
7.5.3 Editing the Waveform .............................................................................................95<br />
7.5.4 Printing the Pretest Report ......................................................................................97<br />
7.6 Exercise Phase...................................................................................................................97<br />
V
7.7 Recovery Phase .................................................................................................................98<br />
7.8 Exiting the Exercise Test...................................................................................................98<br />
7.9 About Analysis Screen ......................................................................................................99<br />
7.9.1 About Summary Screen...........................................................................................99<br />
7.9.2 About ST Analysis Screen.....................................................................................101<br />
7.9.3 About All View Review Screen.............................................................................103<br />
7.9.4 About Trend Screen...............................................................................................105<br />
7.9.5 About ECG Strip Screen .......................................................................................106<br />
7.9.6 Previewing ECG Reports ......................................................................................106<br />
7.9.7 Printing ECG Reports ...........................................................................................107<br />
7.9.8 Saving ECG Reports .............................................................................................107<br />
7.9.9 Exiting the Analysis Screen ..................................................................................107<br />
Chapter 8 Processing Patient Records .....................................................................................108<br />
8.1 Searching Patient Records...............................................................................................108<br />
8.2 Modifying Patient Records ............................................................................................. 110<br />
8.3 Deleting Records............................................................................................................. 111<br />
8.3.1 Deleting Patient Records....................................................................................... 111<br />
8.3.2 Deleting Examination Records of a Patient .......................................................... 111<br />
8.4 Selecting a Patient Record .............................................................................................. 111<br />
8.5 Merging Examination Records ....................................................................................... 112<br />
8.6 Comparing Two Examination Records ........................................................................... 112<br />
8.7 Importing ECG Data into the Data Manager Screen ...................................................... 114<br />
8.8 Exporting ECG Data from the Data Manager Screen..................................................... 116<br />
8.9 Viewing an Examination Record..................................................................................... 117<br />
Chapter 9 Configuring the System ........................................................................................... 118<br />
9.1 Basic Information Setup.................................................................................................. 118<br />
9.1.1 Setting Basic Information ..................................................................................... 119<br />
9.1.2 Setting ID Mode....................................................................................................120<br />
9.1.3 Setting Language...................................................................................................120<br />
9.1.4 Specifying the Storage Path of the ECG Data ......................................................120<br />
9.2 Sample Setup...................................................................................................................121<br />
9.2.1 Setting Filter..........................................................................................................121<br />
9.2.2 Setting Sampling Time..........................................................................................122<br />
9.2.3 Others ....................................................................................................................122<br />
9.2.4 Selecting Auto Printing When Detecting Arrhythmia...........................................123<br />
9.2.5 Setting Background Grid ......................................................................................123<br />
VI
9.2.6 Setting Anti-aliasing..............................................................................................123<br />
9.2.7 Selecting QRS Voice .............................................................................................123<br />
9.2.8 Selecting Sequence Mode When Sampling ..........................................................123<br />
9.3 Device Setup ...................................................................................................................124<br />
9.3.1 Setting Sampling Device.......................................................................................124<br />
9.3.2 Setting Device Type/Mode....................................................................................125<br />
9.3.3 Setting COM Port of Sample/Treadmill/BP Monitor............................................125<br />
9.3.4 Setting a Protocol ..................................................................................................125<br />
9.3.4.1 Creating a New Protocol .............................................................................126<br />
9.3.4.2 Modifying a Protocol ..................................................................................127<br />
9.3.4.3 Deleting a Protocol......................................................................................128<br />
9.3.4.4 Restoring the default protocol.....................................................................128<br />
9.3.5 Advanced Setup.....................................................................................................128<br />
9.3.5.1 Setting Access Network ..............................................................................128<br />
9.3.5.2 Setting Barcode ...........................................................................................129<br />
9.4 Print Setup.......................................................................................................................131<br />
9.4.1 Choosing Patient Information to be Printed..........................................................131<br />
9.4.2 Choosing Diagnosis Information to be Printed.....................................................132<br />
9.4.3 Setting Rhythm Lead.............................................................................................133<br />
9.4.4 Defining Printing Format ......................................................................................133<br />
9.5 Output File Setup ............................................................................................................134<br />
9.5.1 File Naming...........................................................................................................134<br />
9.5.2 Setting PDF/JPG ...................................................................................................135<br />
9.5.3 Setting SCP ...........................................................................................................135<br />
9.5.4 Setting FDA-XML ................................................................................................135<br />
9.5.5 Setting DICOM .....................................................................................................136<br />
9.5.6 Specifying the Output Path ...................................................................................136<br />
9.6 Data Maintenance Setup .................................................................................................136<br />
9.6.1 Database Rebuild ..................................................................................................137<br />
9.6.2 Database Backup...................................................................................................137<br />
9.7 GDT Setup ......................................................................................................................139<br />
9.8 Other Setup......................................................................................................................140<br />
9.8.1 Setting Unit and Color ..........................................................................................141<br />
9.8.2 Setting System Password ......................................................................................141<br />
9.8.3 Setting Wave Width and Grid Width.....................................................................141<br />
9.9 Modifying the Glossary...................................................................................................142<br />
VII
Chapter 10 Hint Information....................................................................................................144<br />
Chapter 11 Cleaning, Care and Maintenance .........................................................................146<br />
11.1 Cleaning and Maintaining the Treadmill.......................................................................146<br />
11.2 Cleaning and Maintaining the Patient Cable and Reusable Electrodes ........................146<br />
11.3 Disinfection ...................................................................................................................147<br />
Chapter 12 Accessories ..............................................................................................................148<br />
Chapter 13 Warranty & Service...............................................................................................150<br />
13.1 Warranty........................................................................................................................150<br />
13.2 Contact information ......................................................................................................150<br />
Chapter 14 Recommended Optional Accessories....................................................................151<br />
Appendix 1 Technical Specifications ........................................................................................153<br />
A1.1 Safety Specifications....................................................................................................153<br />
A1.2 Environment Specifications .........................................................................................153<br />
A1.3 Physical Specifications.................................................................................................154<br />
A1.4 Power Supply Specifications........................................................................................154<br />
A1.5 Performance Specifications..........................................................................................154<br />
Appendix 2 EMC Information..................................................................................................157<br />
Appendix 3 Abbreviation...........................................................................................................162<br />
VIII
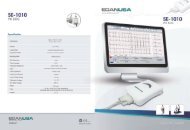
SE-1010 PC ECG User <strong>Manual</strong><br />
Safety Guidance<br />
Chapter 1 Safety Guidance<br />
This chapter provides important safety information related to the use of SE-1010 PC ECG.<br />
1.1 Intended Use<br />
SE-1010 PC ECG is a PC-based diagnostic tool intended to acquire, process and store ECG<br />
signals from adult and pediatric patients undergoing stress exercise test or resting test. SE-1010<br />
PC ECG is intended to be used only in hospitals and healthcare facilities by doctors and trained<br />
healthcare professionals. The cardiogram recorded by SE-1010 PC ECG can help users to analyze<br />
and diagnose heart disease. However the ECG with measurements and interpretive statements is<br />
offered to clinicians on an advisory basis only.<br />
WARNING<br />
1. This system is not designed for intracardiac use or direct cardiac application.<br />
2. This system is not intended for home use.<br />
3. This system is not intended for treatment or monitoring.<br />
4. This system is intended for use on adult and pediatric patients only.<br />
5. The results given by the system should be examined based on the overall clinical<br />
condition of the patient, and they can not substitute for regular checking.<br />
1.2 Warnings and Cautions<br />
To use the system safely and effectively, firstly be familiar with the operation method of<br />
Windows and read the user manual in detail to be familiar with the proper operation method for<br />
the purpose of avoiding the possibility of system failure. The following warnings and cautions<br />
must be paid more attention to during the operation of the system.<br />
1.2.1 General Warnings<br />
WARNING<br />
1. The system is intended to be used by qualified physicians or personnel professionally<br />
trained. They should be familiar with the contents of this user manual before<br />
operation.<br />
2. Only qualified service engineers can install this equipment, and only service<br />
engineers authorized by the manufacturer can open the shell.<br />
- 1 -
SE-1010 PC ECG User <strong>Manual</strong><br />
Safety Guidance<br />
WARNING<br />
3. EXPLOSION HAZARD - Do not use the system in the presence of flammable<br />
anesthetic mixtures with oxygen or other flammable agents.<br />
4. SHOCK HAZARD - The power receptacle must be a hospital grade grounded outlet.<br />
Never try to adapt the three-prong plug to fit a two-slot outlet.<br />
5. Only the patient cable and other accessories supplied by the manufacturer can be<br />
used. Or else, the performance and electric shock protection can not be guaranteed.<br />
The system has been safety tested with the recommended accessories, peripherals,<br />
and leads, and no hazard is found when the system is operated with cardiac<br />
pacemakers or other stimulators.<br />
6. Make sure that all electrodes are connected to the patient correctly before operation.<br />
7. Ensure that the conductive parts of electrodes and associated connectors, including<br />
neutral electrodes, do not come in contact with earth or any other conducting objects.<br />
8. If reusable electrodes with electrode gel are used during defibrillation, the system<br />
recovery will take more than 10 seconds. The manufacturer recommends the use of<br />
disposable electrodes at all times.<br />
9. Electrodes of dissimilar metals should not be used; otherwise it may cause a high<br />
polarization voltage.<br />
10. The disposable electrodes can only be used for one time.<br />
11. Do not touch the patient, bed, table or the equipment while using the ECG together<br />
with a defibrillator.<br />
12. Do not touch accessible parts of non-medical electrical equipment and the patient<br />
simultaneously.<br />
13. The use of equipment that applies high frequency voltages to the patient (including<br />
electrosurgical equipment and some respiration transducers) is not supported and<br />
may produce undesired results. Disconnect the patient data cable from the<br />
electrocardiograph, or detach the leads from the patient prior to performing any<br />
procedure that uses high frequency surgical equipment.<br />
14. Fix attention on the examination to avoid missing important ECG waves.<br />
15. SHOCK HAZARD - Don’t connect non-medical electrical equipment, which has been<br />
supplied as a part of the system, directly to the wall outlet when the non-medical<br />
equipment is intended to be supplied by a multiple portable socket-outlet with an<br />
isolation transformer.<br />
- 2 -
SE-1010 PC ECG User <strong>Manual</strong><br />
Safety Guidance<br />
WARNING<br />
16. SHOCK HAZARD - Don’t connect electrical equipment, which has not been supplied<br />
as a part of the system, to the multiple portable socket-outlet supplying the system.<br />
17. Do not connect any equipment or accessories that are not approved by the<br />
manufacturer or that are not IEC/EN 60601-1-1 approved to the system. The<br />
operation or use of non-approved equipment or accessories with the system is not<br />
tested or supported, and system operation and safety are not guaranteed.<br />
18. Any non-medical equipment (such as the external printer) is not allowed to be used<br />
within the patient vicinity (1.5m/6ft.).<br />
19. Do not exceed the maximum permitted load when using the multiple portable<br />
socket-outlet(s) to supply the system.<br />
20. Multiple portable socket-outlets shall not be placed on the floor.<br />
21. Do not use the additional multiple portable socket-outlet or extension cord in the<br />
medical electrical system, unless it’s specified as part of the system by manufacturer.<br />
And the multiple portable socket-outlets provided with the system shall only be used<br />
for supplying power to equipment which is intended to form part of the system.<br />
22. Accessory equipment connected to the analog and digital interfaces must be certified<br />
according to the respective IEC/EN standards (e.g. IEC/EN 60950 for data processing<br />
equipment and IEC/EN 60601-1 for medical equipment). Furthermore all<br />
configurations shall comply with the valid version of the standard IEC/EN 60601-1-1.<br />
Therefore anybody, who connects additional equipment to the signal input or output<br />
connector to configure a medical system, must make sure that it complies with the<br />
requirements of the valid version of the system standard IEC/EN 60601-1-1. If in<br />
doubt, consult our technical service department or your local distributor.<br />
23. Connecting any accessory (such as external printer) or other device (such as the<br />
computer) to this electrocardiograph makes a medical system. In that case, additional<br />
safety measures should be taken during installation of the system, and the system<br />
shall provide:<br />
a) Within the patient environment, a level of safety comparable to that provided by<br />
medical electrical equipment complying with IEC/EN 60601-1, and<br />
b) Outside the patient environment, the level of safety appropriate for non-medical<br />
electrical equipment complying with other IEC or ISO safety standards.<br />
24. All the accessories connected to system must be installed outside the patient vicinity,<br />
if they do not meet the requirement of IEC/EN 60601-1.<br />
- 3 -
SE-1010 PC ECG User <strong>Manual</strong><br />
Safety Guidance<br />
WARNING<br />
25. You should purchase computer, printer, treadmill, ergometer, BP monitor and bar code<br />
reader from the manufacturer. Otherwise, the manufacturer will not be held<br />
responsible for the maintenance of the PC hardware, operating system and other<br />
accessories.<br />
26. If multiple instruments are connected to a patient, the sum of the leakage currents<br />
may exceed the limits given in the IEC/EN 60601-1 and may pose a safety hazard.<br />
Consult your service personnel.<br />
27. Connecting to other devices may decrease the antistatic gradation of the system<br />
during operation.<br />
1.2.2 Li-ion Battery Care Warnings<br />
WARNING<br />
1. Improper operation may cause the internal li-ion battery (hereinafter called battery) to<br />
be hot, ignited or exploded, and it may lead to the decrease of the battery capacity. It<br />
is necessary to read the user manual carefully and pay more attention to warning<br />
messages.<br />
2. Batteries of the same model and specification as manufacture configuration should be<br />
used.<br />
3. DANGER OF EXPLOSION -- Do not reverse the anode and the cathode when<br />
installing the battery.<br />
4. Do not heat or splash the battery or throw it into fire or water.<br />
5. Do not destroy the battery; do not pierce battery with a sharp object such as a needle;<br />
do not hit with a hammer, step on or throw or drop to cause strong shock; do not<br />
disassemble or modify the battery.<br />
6. When leakage or foul smell is found, stop using the battery immediately. If your skin or<br />
cloth comes into contact with the leakage liquid, cleanse it with clean water at once. If<br />
the leakage liquid splashes into your eyes, do not wipe them. Irrigate them with clean<br />
water first and go to see a doctor immediately.<br />
7. Properly dispose of or recycle the depleted battery according to local regulations.<br />
8. Remove the battery from the transmitter if the system won’t be used for a long time.<br />
- 4 -
SE-1010 PC ECG User <strong>Manual</strong><br />
Safety Guidance<br />
1.2.3 General Cautions<br />
CAUTION<br />
1. Avoid liquid splash and excessive temperature. The temperature must be kept<br />
between 5 ºC and 40 ºC during operation, and it should be kept between -20 ºC and<br />
55 ºC during transportation and storage.<br />
2. Do not use the equipment in a dusty environment with bad ventilation or in the<br />
presence of corrosive.<br />
3. Make sure that there is no intense electromagnetic interference source around the<br />
equipment, such as radio transmitters or mobile phones etc. Attention: large medical<br />
electrical equipment such as electrosurgical equipment, radiological equipment and<br />
magnetic resonance imaging equipment etc. is likely to bring electromagnetic<br />
interference.<br />
4. Ruptured fuse must only be replaced with that of the same type and rating as the<br />
original.<br />
5. The device and accessories are to be disposed of according to local regulations after<br />
their useful lives. Alternatively, they can be returned to the dealer or the manufacturer<br />
for recycling or proper disposal. Batteries are hazardous waste. Do NOT dispose of<br />
them together with house-hold garbage. At the end of their lives hand the batteries<br />
over to the applicable collection points for the recycling of waste batteries. For more<br />
detailed information about recycling of this product or battery, please contact your<br />
local Civic Office, or the shop where you purchased the product.<br />
6. Federal (U.S.) law restricts this device to sale by or on the order of a physician.<br />
1.2.4 Operation for Wireless System<br />
WARNING<br />
1. Make sure that there is no intense electromagnetic interference source around the<br />
wireless system.<br />
2. Do not open the battery cover of the transmitter during operation.<br />
- 5 -
SE-1010 PC ECG User <strong>Manual</strong><br />
Safety Guidance<br />
1.2.5 Preparation and Operation Warnings (for Exercise ECG)<br />
WARNING<br />
1. Test the safety stop (mushroom type) and safety stop (cord type) of the treadmill<br />
before using the system.<br />
2. During the exercise test, ensure that there are at least 2 experienced physicians<br />
present. One of them observes the patient and deals with the emergency.<br />
3. Make sure that there is necessary valid first-aid equipment such as defibrillators,<br />
blood-pressure meters etc, and necessary valid medication in the exercise test room.<br />
4. Turn off the system power and disconnect the power cord from the wall outlet after<br />
using the system.<br />
5. Make sure that the power is turned off and the power cord is disconnected from the<br />
AC socket before defibrillation.<br />
6. Keep the four feet of the machine on the ground and make sure that it’s stably<br />
working.<br />
7. The treadmill must be powered by the specific power outlet.<br />
8. Examine the treadmill/ergometer carefully before using it.<br />
9. The patient undergoing the exercise test should wear suitable clothes and shoes.<br />
10. Keep hands, hair, jewelry, and loose clothing away from moving parts.<br />
11. Don’t let the patient stand on the running belt when starting the treadmill. The patient<br />
should stand on the foot rails and hold the handrails during start-up. Wait until the<br />
running belt is moving before placing feet on the belt.<br />
12. To avoid the static electricity, the patient should not wear loose clothing or clothing<br />
(such as nylon) that easily produces static electricity.<br />
13. Stop exercising immediately when the patient feels uncomfortable or something<br />
abnormal in the operation.<br />
14. Press down the safety stop (mushroom type) or pull out the safety stop (cord type) to<br />
stop the treadmill immediately when an emergency happens.<br />
- 6 -
SE-1010 PC ECG User <strong>Manual</strong><br />
Safety Guidance<br />
1.2.6 Contraindications (for Exercise ECG)<br />
Absolute Contraindications:<br />
1. Acute MI (within 2 days)<br />
2. High-risk unstable angina<br />
3. Hemodynamic compromise caused by uncontrolled cardiac arrhythmia<br />
4. Symptomatic severe aortic stenosis<br />
5. Heart failure with clinic episode uncontrolled<br />
6. Acute pulmonary embolus or pulmonary infarction<br />
7. Acute myocarditis or pericarditis<br />
8. The patient opposes the test.<br />
Relative Contraindications:<br />
1. Left main coronary stenosis<br />
2. Moderate stenotic valvular heart disease<br />
3. Serum Electrolyte abnormalities<br />
4. Severe hypertension (systolic blood pressure >200 mmHg or diastolic blood<br />
pressure >110 mmHg)<br />
5. Tachyarrhythmias or bradyarrhythmias<br />
6. Hypertrophic cardiomyopathy<br />
7. Patients can not cooperate because of mental impairment or physical disability<br />
8. High-degree AV block<br />
- 7 -
SE-1010 PC ECG User <strong>Manual</strong><br />
Safety Guidance<br />
1.3 List of Symbols<br />
Equipment or part of CF type with defibrillator proof<br />
Caution<br />
Consult Instructions for Use<br />
Recycle<br />
Part Number<br />
Serial Number<br />
Date of Manufacture<br />
Manufacturer<br />
Authorized Representative in the European Community<br />
The symbol indicates that the device complies with the<br />
European Council Directive 93/42/EEC concerning medical<br />
devices.<br />
It indicates that the device should be sent to the special agencies<br />
according to local regulations for separate collection after its<br />
useful life.<br />
Rx only (U.S.)<br />
Federal (US) law restricts this device to sale by or on the order<br />
of a physician<br />
- 8 -
SE-1010 PC ECG User <strong>Manual</strong><br />
Safety Guidance<br />
Class Ⅱ<br />
Transmission Status Indicator of Bluetooth<br />
Burglar Lock<br />
Power Supply Indicator of DX12 Receiver<br />
- 9 -
SE-1010 PC ECG User <strong>Manual</strong><br />
Introduction<br />
Chapter 2 Introduction<br />
SE-1010 PC ECG has similar functions with an ordinary electrocardiograph. ECG data can be<br />
sampled, analyzed and stored in a PC, and it can be saved in PDF, Word, BMP or JPG format.<br />
ECG waves can be frozen and reviewed. Auto measurement and diagnosis are available, and the<br />
diagnosis template can be edited. SE-1010 PC ECG can also be invocated by Smart ECG Net<br />
version 1.3 or above.<br />
When a patient with coronary heart disease runs, the added heart load will cause myocardium<br />
hypotension, and then the ECG will change abnormally. Therefore, with the function of exercise<br />
ECG, SE-1010 PC ECG can also be used to diagnose concealed coronary heart disease and<br />
atypical angina pectoris, prescribe the workload for patients with myocardial infarction before<br />
they leave hospital, and assess the effect of the treatment. With SE-1010 PC ECG, doctors’<br />
workload can be reduced greatly.<br />
NOTE:<br />
1. The exercise ECG function is optional. It is available only if you purchased this<br />
function.<br />
2. The pictures and windows in this manual are for reference only.<br />
2.1 SE-1010 PC ECG System<br />
SE-1010 PC ECG system includes the following equipment:<br />
‣ PC ECG software<br />
‣ ECG Sampling Box (wired or wireless system)<br />
‣ Patient Cable<br />
‣ Electrodes<br />
‣ Sentinel<br />
‣ USB Cable<br />
- 10 -
SE-1010 PC ECG User <strong>Manual</strong><br />
Introduction<br />
Wired System of SE-1010 PC ECG System<br />
1 Resting ECG of Wired System<br />
Patient<br />
PC (<strong>Manual</strong>ly<br />
Configured)<br />
Resting<br />
ECG Cable<br />
Patient Cable<br />
DP12 ECG<br />
Sampling Box<br />
USB Cable<br />
Printer (<strong>Manual</strong>ly<br />
Configured)<br />
2 Exercise ECG of Wired System<br />
Treadmill or Ergometer<br />
(<strong>Manual</strong>ly Configured)<br />
Serial<br />
Cable<br />
Patient<br />
Patient Cable<br />
PC (<strong>Manual</strong>ly<br />
Configured)<br />
Exercise<br />
ECG Cable<br />
DP12 ECG<br />
Sampling Box<br />
Exercise<br />
BP Monitor<br />
(<strong>Manual</strong>ly<br />
Configured)<br />
ECG Cable<br />
USB Cable<br />
Printer (<strong>Manual</strong>ly<br />
Configured)<br />
- 11 -
SE-1010 PC ECG User <strong>Manual</strong><br />
Introduction<br />
Wireless System of SE-1010 PC ECG System<br />
1 Resting ECG of Wireless System<br />
Patient<br />
Patient Cable<br />
Resting<br />
PC (<strong>Manual</strong>ly<br />
Configured)<br />
ECG Cable<br />
DX12<br />
Receiver<br />
DX12<br />
Transmitter<br />
USB Cable<br />
Printer (<strong>Manual</strong>ly<br />
Configured)<br />
2 Exercises ECG of Wireless System<br />
Treadmill or Ergometer<br />
(<strong>Manual</strong>ly Configured)<br />
Serial<br />
Patient<br />
Cable<br />
Patient Cable<br />
PC (<strong>Manual</strong>ly<br />
Configured)<br />
Exercise<br />
ECG Cable<br />
DX12<br />
Receiver<br />
DX12<br />
Transmitter<br />
USB Cable<br />
Printer (<strong>Manual</strong>ly<br />
Configured)<br />
Exercise<br />
ECG Cable<br />
BP Monitor<br />
(<strong>Manual</strong>ly<br />
Configured<br />
WARNING<br />
The system should be installed by a qualified service engineer. Do not power on the<br />
system until all cables are properly connected and verified.<br />
- 12 -
SE-1010 PC ECG User <strong>Manual</strong><br />
Introduction<br />
2.2 DP12 ECG Sampling Box of Wired System<br />
DP12 ECG Sampling Box Appearance<br />
Front Panel<br />
Lamp<br />
USB Socket<br />
Name<br />
Lamp<br />
USB Socket<br />
Explanation<br />
When the ECG sampling box is powered by the PC, the lamp<br />
will be lit.<br />
Connecting to the USB socket of the PC with a USB cable<br />
- 13 -
SE-1010 PC ECG User <strong>Manual</strong><br />
Introduction<br />
USB Socket<br />
Definitions of corresponding pins:<br />
Pin Signal Pin Signal<br />
1 GND 6 GND<br />
2 VCC 7 GND<br />
3 QRS 8 GND<br />
4 GND 9 D-<br />
5 GND 10 D+<br />
WARNING<br />
1. When the computer connected to the USB cable is powered on, do not connect the<br />
USB cable to the DP12 ECG sampling box; when the system is powered on, do not<br />
disconnect the USB cable from the ECG sampling box.<br />
2. It is not necessary or recommended to regularly disconnect the USB cable from the<br />
DP12 ECG sampling box. Disconnect the USB cable from the PC if necessary.<br />
Back Panel<br />
Patient Cable Socket<br />
: Applied part of type CF with defibrillator proof<br />
: Caution<br />
- 14 -
SE-1010 PC ECG User <strong>Manual</strong><br />
Introduction<br />
Patient Cable Socket<br />
Definitions of corresponding pins:<br />
Pin Signal Pin Signal Pin Signal<br />
1 C2 / V2 6 SH 11 F / LL<br />
2 C3 / V3 7 NC 12 C1 / V1<br />
or NC<br />
3 C4 / V4 8 NC 13 C1 / V1<br />
4 C5 / V5 9 R / RA 14 RF (N) /RL<br />
or NC<br />
5 C6 / V6 10 L / LA 15 RF (N) / RL<br />
NOTE: The left side of “/” is European standard, and the right side is American standard.<br />
Top Panel and Bottom Panel<br />
Screw<br />
Decorative<br />
Chip<br />
Label<br />
- 15 -
SE-1010 PC ECG User <strong>Manual</strong><br />
Introduction<br />
WARNING<br />
1. Accessory equipment connected to the analog and digital interfaces must be certified<br />
according to the respective IEC/EN standards (e.g. IEC/EN 60950 for data<br />
processing equipment and IEC/EN 60601-1 for medical equipment). Furthermore all<br />
configuration shall comply with the valid version of the standard IEC/EN 60601-1-1.<br />
Therefore anybody, who connects additional equipment to the signal input or output<br />
connector to configure a medical system, must make sure that it complies with the<br />
requirements of the valid version of the system standard IEC/EN 60601-1-1. If in<br />
doubt, consult our technical service department or your local distributor.<br />
2. If multiple instruments are connected to a patient, the sum of the leakage currents<br />
may exceed the limits given in the IEC/EN 60601-1 and may pose a safety hazard.<br />
Consult your service personnel.<br />
2.3 DX12 ECG Sampling Boxes of Wireless System<br />
DX12 Transmitter Appearance<br />
- 16 -
SE-1010 PC ECG User <strong>Manual</strong><br />
Introduction<br />
Front Panel<br />
Patient Cable Socket<br />
Patient Cable Socket<br />
:Applied part of type CF with defibrillator proof<br />
:Caution<br />
Definitions of corresponding pins:<br />
Pin Signal Pin Signal Pin Signal Pin Signal<br />
1 NC 6 C5/V5 11 NC 16 L/LA<br />
2 F/LL 7 NC 12 C2/V2 17 NC<br />
3 NC 8 C4/V4 13 NC 18 R/RA<br />
4 C6/V6 9 NC 14 C1/V1 19 NC<br />
5 NC 10 C3/V3 15 NC 20 N/RL<br />
NOTE: The left side of “/” is European standard, and the right side is American standard.<br />
- 17 -
SE-1010 PC ECG User <strong>Manual</strong><br />
Introduction<br />
DX12 Receiver Appearance<br />
USB Socket<br />
USB Socket<br />
- 18 -
SE-1010 PC ECG User <strong>Manual</strong><br />
Introduction<br />
Definitions of corresponding pins:<br />
Pin Signal Pin Signal<br />
1 GND 5 GND<br />
2 VCC 6 GND<br />
3 QRS 7 GND<br />
4 GND 8 D-<br />
5 GND 10 D+<br />
Lock<br />
2.4 Features<br />
♦ Powerful functions, friendly windows and easy operation<br />
♦ 3/6/12-channel ECG waves are displayed and printed simultaneously<br />
♦ ECG waves can be frozen and reviewed<br />
♦ Supporting auto measurement and diagnosis<br />
♦ Measurement point adjustment and re-analysis, manual measurement with an electronic<br />
ruler of high precision<br />
♦ Perfect data management and processing functions<br />
- 19 -
SE-1010 PC ECG User <strong>Manual</strong><br />
Introduction<br />
♦ Reports can be printed in PDF, Word, JPG or BMP format<br />
♦ Supporting multi-language<br />
♦ Updated to be a network electrocardiograph, transmitting ECG data over LAN or WAN<br />
or INTERNET<br />
♦ Automatic baseline adjustment for optimal printing<br />
♦ High performance filters guarantee stable ECG waveforms<br />
♦ Real-time analysis, real-time displaying and printing 12-lead simultaneous ECG<br />
waveforms<br />
♦ Nine analysis functions including Normal ECG, Frequency ECG, High Frequency ECG,<br />
QT Dispersion, Vector ECG, Time Vector ECG, HRT analysis, HRV analysis and Signal<br />
Averaged ECG (Only for resting ECG)<br />
The following features are only for the exercise test function of SE-1010 PC ECG<br />
♦ Automatically controlling and adjusting the speed and the elevation of the treadmill<br />
♦ Supporting many kinds of treadmills and ergometers<br />
♦ Providing classical exercise protocols; new exercise protocols can be added to the<br />
system<br />
♦ ST segment analysis and measurement of 12-lead waveforms while sampling ECG; ST<br />
position is adjustable while sampling ECG<br />
♦ Providing summaries, ST analysis, wave reviews and trends<br />
♦ Providing specific statistic data of each lead in each stage<br />
♦ Providing average waves of each lead in each stage for you to observe the changes of ST<br />
segments among different stages<br />
- 20 -
SE-1010 PC ECG User <strong>Manual</strong><br />
Assembling SE-1010 PC ECG System<br />
Chapter 3 Assembling SE-1010 PC ECG System<br />
3.1 Assembling Wired System<br />
1<br />
2<br />
Patient Cable for Resting ECG<br />
Patient Cable for Exercise ECG<br />
3<br />
6<br />
4<br />
7<br />
5<br />
DP12 ECG Sampling Box<br />
Exercise ECG Cable<br />
9<br />
Resting ECG Cable<br />
8<br />
Assembly Drawing<br />
- 21 -
SE-1010 PC ECG User <strong>Manual</strong><br />
Assembling SE-1010 PC ECG System<br />
For Resting ECG of wired system,<br />
1. Insert plug 1 of the patient cable into socket 3 of DP12 ECG sampling box.<br />
2. Insert plug 8 of the cable into socket 4 of DP12 ECG sampling box.<br />
3. Insert plug 9 of the cable into the USB socket of the PC.<br />
4. Connect a printer to the PC.<br />
5. Insert the Sentinel into the USB socket of the PC.<br />
6. Make sure that the above parts are properly connected, and then connect the PC, and the<br />
printer to the power supply.<br />
For Exercise ECG of wired system,<br />
1. Insert plug 2 of the patient cable into socket 3 of DP12 ECG sampling box.<br />
2. Insert plug 7 of the cable into socket 4 of DP12 ECG sampling box.<br />
3. Insert plug 5 of the cable into the USB socket of the PC.<br />
4. Connect plug 6 of the cable to the BP monitor.<br />
5. Connect a treadmill or an ergometer to the PC.<br />
6. Connect a printer to the PC.<br />
7. Insert the Sentinel into the USB socket of the PC.<br />
8. Make sure that the above parts are properly connected, and then connect the PC,<br />
treadmill/ergometer and printer to the power supply.<br />
WARNING<br />
1. Use a special grounded socket to get accurate voltage and current.<br />
2. When using a laptop with a two-prong plug, please connect a grounded printer to<br />
avoid power interference.<br />
3. Only stress BP monitors can be used.<br />
- 22 -
SE-1010 PC ECG User <strong>Manual</strong><br />
Assembling SE-1010 PC ECG System<br />
3.2 Assembling Wireless System<br />
2<br />
1<br />
Patient Cable<br />
DX12 Transmitter<br />
3<br />
5<br />
4<br />
DX12 Belt<br />
Resting ECG Cable<br />
10<br />
7<br />
6<br />
DX12 Receiver<br />
8<br />
Exercise ECG Cable<br />
9<br />
- 23 -
SE-1010 PC ECG User <strong>Manual</strong><br />
Assembling SE-1010 PC ECG System<br />
12<br />
11<br />
Burglar Lock<br />
Assembly Drawing<br />
For Resting ECG of wireless system,<br />
1. Insert plug 1 of the patient cable into socket 2 of DX12 transmitter.<br />
2. Insert plug 4 of the cable into socket 6 of DX12 receiver.<br />
3. Insert plug 5 of the cable into the USB socket of the PC.<br />
4. Connect a printer to the PC.<br />
5. Insert the Sentinel into the USB socket of the PC.<br />
6. Make sure that the above parts are properly connected, and then connect the PC, and the<br />
printer to the power supply.<br />
For Exercise ECG of wireless system,<br />
1. Insert plug 1 of the patient cable into socket 2 of DX12 transmitter.<br />
2. Insert DX12 transmitter into pocket 3 of DX12 belt, and then wear the belt around the<br />
waist.<br />
3. Insert plug 8 of the cable into socket 6 of the DX12 receiver.<br />
4. Insert plug 9 of the cable into the USB socket of the PC.<br />
5. Connect plug 10 of the cable to the BP monitor.<br />
6. Connect a treadmill or an ergometer to the PC.<br />
7. Connect a printer to the PC.<br />
8. Insert the Sentinel into the USB socket of the PC.<br />
9. Make sure that the above parts are properly connected, and then connect the PC,<br />
treadmill/ergometer and printer to the power supply.<br />
WARNING<br />
1. Use a special grounded socket to get accurate voltage and current.<br />
2. When using a laptop with a two-prong plug, please connect a grounded printer to<br />
avoid power interference.<br />
3. Only stress BP monitors can be used.<br />
- 24 -
SE-1010 PC ECG User <strong>Manual</strong><br />
Installing SE-1010 PC ECG Software<br />
Chapter 4 Installing SE-1010 PC ECG Software<br />
4.1 System Running Environment<br />
4.1.1 Requirements on the Hardware of the PC<br />
CPU:<br />
System Memory (RAM):<br />
Main Board<br />
Hard Disk:<br />
Printer:<br />
Display:<br />
Others:<br />
Pentium P4, Celeron D 310 or above<br />
512MB or above<br />
Recommend the main board of Intel chipset<br />
40G or above<br />
ink jet printer of more than 600dpi or laser printer<br />
Recommend HP2035, HP2010、CANON iP1980<br />
17” TFT (Resolution: 1024×768, 1280*1024, 1366*768) or<br />
19” TFT (1440×900 resolution), 16 bit actual color, regular<br />
icon and font setup<br />
CD-ROM (24 × or above)<br />
4.1.2 Requirements on the Software of the PC<br />
♦ Windows XP PROFESSIONAL SP2/SP3, Windows Vista (32/64 bit) or Windows 7<br />
(32/64 bit)<br />
♦ MSDE2000 (Microsoft SQL Server 2000 Desktop Engine) or Microsoft SQL Server<br />
2005 Express<br />
CAUTION<br />
1. Ensure that there is no other database software in the PC in which our software will be<br />
installed.<br />
2. Ensure that there is a graphic driver installed in the PC. Otherwise, the displayed<br />
ECG waves may be abnormal.<br />
- 25 -
SE-1010 PC ECG User <strong>Manual</strong><br />
Installing SE-1010 PC ECG Software<br />
4.2 About Installation Window<br />
Insert the installation CD into CD-ROM, and double-click on Setup.exe<br />
to open the following installation window.<br />
Figure 4-1 Installation Window<br />
Click on the Install button to install PC ECG. Click on the Next button continually during<br />
installation.<br />
After installing PC ECG, click on the Install button in the installation window. Then the<br />
Environment Detection window pops up. Check the installing status of all the components. If<br />
the Environment Detection window shows that a certain component needs to be installed, please<br />
install it manually.<br />
NOTE: During the installation of SQL Server 2005 Express in Windows 7/Vista, only if<br />
Add user to the SQL Server Administrator role is selected, can the database<br />
be available.<br />
Click on the Help button to see the installation guide.<br />
For details on installing PC ECG software, please refer to SE-1010 PC ECG Installation Guide.<br />
- 26 -
SE-1010 PC ECG User <strong>Manual</strong><br />
Preparations Before Operation<br />
Chapter 5 Preparations Before Operation<br />
5.1 Preparing the Patient<br />
5.1.1 Instructing the Patient<br />
Before attaching the electrodes, greet the patient and explain the procedure. Explaining the<br />
procedure decreases the patient’s anxiety. Reassure the patient that the procedure is painless.<br />
Privacy is important for relaxation. When possible, prepare the patient in a quiet room or area<br />
where others can’t see the patient. Make sure that the patient is comfortable. The more relaxed<br />
the patient is, the less the ECG will be affected by noise.<br />
5.1.2 Preparing the Skin<br />
Thorough skin preparation is very important. The skin is a poor conductor of electricity and<br />
frequently creates artifacts that distort the ECG signals. By performing methodical skin<br />
preparation, you can greatly reduce the possibility of noise caused by muscle tremor and baseline<br />
drift, ensuring high-quality ECG waves. There is natural resistance on the skin surface due to dry,<br />
dead epidermal cells, oils and dirt.<br />
To prepare the skin<br />
1. Shave hair from electrode sites, if necessary. Excessive hair prevents a good connection.<br />
2. Wash the area thoroughly with soap and water.<br />
3. Dry the skin to increase capillary blood flow and to remove the dead, dry skin cells and oils.<br />
4. Use the disposable frosting film in the standard accessory list to get good ECG waveform.<br />
NOTE: Rub the skin with a gauze pad to increase capillary blood flow if you don’t operate<br />
the steps above.<br />
- 27 -
SE-1010 PC ECG User <strong>Manual</strong><br />
Preparations Before Operation<br />
5.2 Connecting the Electrodes of Wired System<br />
WARNING<br />
The performance and electric shock protection can be guaranteed only if the original<br />
patient cable and electrodes of the manufacturer are used.<br />
The patient cable includes main cable and lead wires which can be connected to electrodes<br />
according to the colors and identifiers.<br />
Connecting to<br />
ECG Sampling Box<br />
Lead Wires<br />
Main Cable<br />
Connecting<br />
Electrodes<br />
to<br />
Patient Cable for Resting ECG<br />
Lead Wires<br />
Main Cable<br />
Connecting to Electrodes<br />
Screw<br />
Connecting to the<br />
ECG Sampling Box<br />
Patient Cable for Exercise ECG<br />
1. Connect the patient cable to DP12 ECG sampling box of wired system. For details, please<br />
refer to Section 3.1, “Assembling Wired System”.<br />
2. Align all lead wires of the patient cable to avoid twisting, and connect the lead wires to the<br />
corresponding electrodes according to the colors and identifiers. Firmly attach them.<br />
- 28 -
SE-1010 PC ECG User <strong>Manual</strong><br />
Preparations Before Operation<br />
5.3 Connecting the Electrodes of Wireless System<br />
The patient cable includes main cable and lead wires which can be connected to electrodes<br />
according to the colors and identifiers.<br />
Connecting to the<br />
ECG Sampling Box<br />
Connecting to Electrodes<br />
Main Cable<br />
Lead Wires<br />
Patient Cable of Wireless System<br />
1. Connect the patient cable to DX12 transmitter of wireless system. For details, see Section 3.2,<br />
“Assembling Wireless System”.<br />
2. Align all lead wires of the patient cable to avoid twisting, and connect the lead wires to the<br />
corresponding electrodes according to the colors and identifiers. Firmly attach them.<br />
5.4 Attaching Electrodes (for Resting ECG)<br />
The identifiers and color codes of electrodes used comply with IEC/EN requirements. In order to<br />
avoid incorrect connections, the electrode identifiers and color codes are specified in Table 5-1.<br />
Moreover the equivalent codes according to American requirements are given in Table 5-1 too.<br />
Table 5-1 Electrodes and Their Identifiers and Color Codes<br />
European<br />
American<br />
WILSON FRANK Identifier Color Code Identifier Color Code<br />
Right arm Right arm R Red RA White<br />
Left arm Left arm L Yellow LA Black<br />
Right leg Right leg N or RF Black RL Green<br />
Left leg Left leg F Green LL Red<br />
Chest 1 I C1 White/Red V1 Brown/Red<br />
Chest 2 E C2 White/Yellow V2 Brown/Yellow<br />
Chest 3 C C3 White/Green V3 Brown/Green<br />
Chest 4 A C4 White/Brown V4 Brown/Blue<br />
Chest 5 M C5 White/Black V5 Brown/Orange<br />
Chest 6 H C6 White/Violet V6 Brown/Violet<br />
- 29 -
SE-1010 PC ECG User <strong>Manual</strong><br />
Preparations Before Operation<br />
5.4.1 Wilson Lead System<br />
C1: Fourth intercostal space at the right border of the sternum<br />
C2: Fourth intercostal space at the left border of the sternum<br />
C3: Fifth rib between C2 and C4<br />
C4: Fifth intercostal space on the left midclavicular line<br />
C5: Left anterior axillary line at the horizontal level of C4<br />
C6: Left midaxillary line at the horizontal level of C4<br />
5.4.2 Frank Lead System<br />
- 30 -
SE-1010 PC ECG User <strong>Manual</strong><br />
Preparations Before Operation<br />
FRANK lead system is usually adopted when PC ECG is used to produce VCG. The conventional<br />
letter designations for the electrodes and their respective positions are:<br />
E/C2: at the front midline<br />
M/C5: at the back midline<br />
I/C1: at the right mid-axillary line<br />
A/C4: at the left mid-axillary line<br />
C/C3: at 45º angle between the front midline and the left mid-axillary line<br />
F: on the left leg<br />
N: on the right leg<br />
H: on the back of the neck<br />
The first five electrodes (E, M, I, A and C) are all located at the same transverse level --<br />
approximately at the interspace between the fourth rib and the fifth rib.<br />
5.4.3 Attaching Electrodes to the Patient<br />
For Limb Electrodes:<br />
Connecting to a Lead Wire<br />
Clamp<br />
Reed<br />
1. Clean the electrode area which is in a short distance above the ankle or the wrist with<br />
alcohol.<br />
2. Daub the electrode area on the limb with gel evenly.<br />
3. Place a small amount of gel on the metal part of the limb electrode clamp.<br />
4. Connect the electrode to the limb, and make sure that the metal part is placed on the<br />
electrode area above the ankle or the wrist.<br />
5. Attach all limb electrodes in the same way.<br />
For Chest Electrodes:<br />
Suction Bulb<br />
Cup<br />
Connecting to a Lead Wire<br />
- 31 -
SE-1010 PC ECG User <strong>Manual</strong><br />
Preparations Before Operation<br />
1. Clean the electrode area on the chest surface with alcohol.<br />
2. Daub the round area of 25mm in diameter on each electrode area with gel evenly.<br />
3. Place a small amount of gel on the brim of the chest electrode’s metal cup.<br />
4. Place the electrode on the chest electrode area and squeeze the suction bulb. Unclench it and<br />
the electrode is adsorbed on the chest.<br />
5. Attach all chest electrodes in the same way.<br />
Chest Electrode (Only for C5 in Frank Lead System):<br />
Snap/Banana Socket Adapter:<br />
Disposable Electrode:<br />
Disposable Electrode Connection:<br />
1. Connect the snap/banana socket adapter to the lead wire.<br />
2. Connect the snap/banana socket adapter to the disposable electrode.<br />
3. Clean the electrode area at the back midline with 75% alcohol.<br />
4. Attach the disposable electrode to the electrode area at the back midline.<br />
The quality of ECG waveform will be affected by the contact resistance between the patient and<br />
the electrode. In order to get a high-quality ECG, the skin-electrode resistance must be minimized<br />
while connecting electrodes.<br />
WARNING<br />
1. Make sure that all electrodes are connected to the patient correctly before operation.<br />
2. Make sure that the conductive parts of electrodes and associated connectors,<br />
including neutral electrodes, do not come in contact with earth or any other<br />
conducting objects.<br />
3. The disposable electrodes can only be used for one time.<br />
- 32 -
SE-1010 PC ECG User <strong>Manual</strong><br />
Preparations Before Operation<br />
5.5 Attaching Electrodes to the Patient (for Exercise ECG)<br />
The identifiers and color codes of electrodes used comply with IEC/EN requirements. In order to<br />
avoid incorrect connections, the electrode identifiers and color codes are specified in Table 5-2.<br />
Moreover the equivalent codes according to American requirements are given in Table 5-2 too.<br />
Table 5-2 Electrodes and their identifiers and color codes<br />
European<br />
American<br />
Electrodes Color code Electrodes Color code<br />
R Red RA White<br />
L Yellow LA Black<br />
N or RF Black RL Green<br />
F Green LL Red<br />
C1 White/Red V1 Brown/Red<br />
C2 White/Yellow V2 Brown/Yellow<br />
C3 White/Green V3 Brown/Green<br />
C4 White/Brown V4 Brown/Blue<br />
C5 White/Black V5 Brown/Orange<br />
C6 White/Violet V6 Brown/Violet<br />
- 33 -
SE-1010 PC ECG User <strong>Manual</strong><br />
Preparations Before Operation<br />
The Precordial Electrodes’ Positions on Body Surface:<br />
C1: Fourth intercostal space at the right border of the sternum<br />
C2: Fourth intercostal space at the left border of the sternum<br />
C3: Fifth rib between C2 and C4<br />
C4: Fifth intercostal space on the left midclavicular line<br />
C5: Left anterior axillary line at the horizontal level of C4<br />
C6: Left midaxillary line at the horizontal level of C4<br />
The Extremity Electrodes’ Positions on Body Surface:<br />
R/L: below the right/left clavicle<br />
N/F: below the right/left rib<br />
The quality of ECG waveform will be affected by the contact resistance between the patient<br />
and the electrode. In order to get a high-quality ECG, the skin-electrode resistance must be<br />
minimized while connecting electrodes.<br />
Electrodes Connection:<br />
1. Align all lead wires of the patient cable to avoid twisting, and connect the disposable<br />
electrodes to the lead wires.<br />
2. Clean the electrode areas on the body surface with 75% alcohol.<br />
3. Attach the disposable electrodes to the electrode sites.<br />
NOTE: The quality and the placement of the electrode will directly influence the quality<br />
of exercise ECG. The wrong placement and use of electrodes will cause<br />
incorrect analysis results.<br />
WARNING<br />
1. Make sure that all electrodes are connected to the patient correctly before operation.<br />
2. Make sure that the conductive parts of electrodes and associated connectors,<br />
including neutral electrodes, do not come in contact with earth or any other<br />
conducting objects.<br />
3. The disposable electrodes can only be used for one time.<br />
- 34 -
SE-1010 PC ECG User <strong>Manual</strong><br />
Preparations Before Operation<br />
5.6 Inspection Before Test<br />
In order to avoid safety hazards and get good ECG records, the following inspection procedure is<br />
recommended before operation.<br />
1. Environment:<br />
♦ Make sure that there is no electromagnetic interference source around the equipment,<br />
especially large medical electrical equipment such as electrosurgical equipment,<br />
radiological equipment, magnetic resonance imaging equipment etc. Switch off these<br />
devices when necessary.<br />
♦ Keep the examination room warm to avoid muscle action voltages in ECG signals<br />
caused by cold.<br />
2. Power Supply:<br />
♦<br />
Check whether the power cord is connected well. The grounded outlet should be used.<br />
3. Patient Cable:<br />
♦<br />
Check whether the patient cable is connected to the ECG sampling box firmly, and keep<br />
it far away from the power cord.<br />
4. Electrodes:<br />
♦<br />
♦<br />
Check whether all electrodes are connected to lead wires of the patient cable correctly.<br />
Ensure that the electrodes do not contact.<br />
5. Patient:<br />
♦<br />
♦<br />
The patient should not come into contact with conducting objects such as earth, metal<br />
parts etc.<br />
Ensure the patient is warm and relaxed, and breathes calmly.<br />
WARNING<br />
1. The system is intended to be used by qualified physicians or personnel professionally<br />
trained. They should be familiar with the contents of this user manual before<br />
operation.<br />
2. Before connecting the device to the power line, make sure that the voltage and<br />
frequency ratings of your power line match those indicated on the device label. For<br />
details, see Appendix 1, “Technical Specifications”.<br />
3. Before use, the system, patient cable, electrodes etc. should be checked.<br />
Replacement should be taken if there is any evident defectiveness or aging symptom<br />
which may impair the safety or the performance.<br />
- 35 -
SE-1010 PC ECG User <strong>Manual</strong><br />
Preparations Before Operation<br />
5.7 Setting DX12 Transmitter (for Wireless System)<br />
Switch on DX12 receiver and install batteries on DX12 transmitter. Press to start up<br />
DX12 transmitter, and then the company information and the main screen will be displayed.<br />
Figure 5-1 Main Screen<br />
When the main screen is displayed, press to switch the leads.<br />
If the Bluetooth connection icon is not displayed on the main screen, you have to match the<br />
device manually. Operation instructions are as follows:<br />
- 36 -
SE-1010 PC ECG User <strong>Manual</strong><br />
Preparations Before Operation<br />
1. Press to enter the menu screen.<br />
Figure 5-2 Menu Screen<br />
2. Press to display Match Device item in black, and then press to open the screen<br />
with a prompt “Inquiring…”.<br />
- 37 -
SE-1010 PC ECG User <strong>Manual</strong><br />
Preparations Before Operation<br />
3. When the receiver is found, the address of DX12 receiver will be displayed on the screen in<br />
10 seconds. Press to start up the Bluetooth connection. The Bluetooth connection<br />
will be displayed on the main screen of DX12 transmitter and the Bluetooth status indicator<br />
illuminates in kelly when DX12 transmitter and DX12 receiver are matched successfully.<br />
The Bluetooth status indicator blinks when a data transmission builds between DX12<br />
transmitter and DX12 receiver. The system will return to the previous menu if no DX12<br />
receiver is found.<br />
NOTE: Select the receiver address displayed in the PC ECG software when receiving<br />
more than one addresses. For details, please refer to Section 9.3 “Device Setup”.<br />
5.7.1 Keyboard Locking/Unlocking<br />
If no operation is taken, the keyboard will be locked automatically in 8 seconds. If the previous<br />
screen is the menu screen, it will return to the main screen after the keyboard is locked<br />
automatically.<br />
When the keyboard is locked, a prompt unlock will be displayed on the left bottom of the main<br />
screen and an icon will be displayed on the top right.<br />
When the keyboard is locked, press , and then press in 1.2 seconds to unlock the<br />
keyboard.<br />
When the keyboard is unlocked, press , and then press in 1.2 seconds to lock the<br />
keyboard manually.<br />
- 38 -
SE-1010 PC ECG User <strong>Manual</strong><br />
Preparations Before Operation<br />
5.7.2 Menu Settings<br />
Press on the main screen to enter the menu screen (Figure 5-2). Press on the menu<br />
screen to display an item in black, and then press<br />
to enter the setting screen of this item.<br />
Table 5-3 Menu<br />
Menu Option Description<br />
Back Light<br />
Auto Sleep<br />
Language<br />
Lead Electrode<br />
Match Device<br />
Device Information<br />
On<br />
Off<br />
On<br />
Off<br />
English<br />
Chinese<br />
IEC<br />
AHA<br />
Inquiring……<br />
Address of DX12<br />
receiver<br />
No device found.<br />
Try again later.<br />
Software version:1.0<br />
ID:0016a400035D<br />
<strong>EDAN</strong><br />
2010.04.20<br />
Select On to turn on the backlight of LCD<br />
screen.<br />
Select Off to turn off the backlight of LCD<br />
screen.<br />
Select On to display Sleeping on the screen<br />
and make DX12 transmitter be in low power<br />
consumption mode after lead off for 5 minutes.<br />
Select Off to turn off auto sleep function.<br />
You can select English or Chinese.<br />
You can select IEC or AHA.<br />
Inquiring……will be displayed (for 10<br />
seconds) to search DX12 receiver. The address<br />
of DX12 receiver will be displayed (for 8<br />
seconds) if a matching DX12 receiver is found.<br />
No device found. Try again later will be<br />
displayed (for 1 second) if no matching DX12<br />
receiver is found.<br />
You can see the related information, such as<br />
software version, ID, address of DX12 receiver,<br />
manufacture and release time about the device.<br />
NOTE: The device information is for<br />
reference only.<br />
- 39 -
SE-1010 PC ECG User <strong>Manual</strong><br />
Operation Instructions for Resting ECG<br />
Chapter 6 Operation Instructions for Resting ECG<br />
Double-click on the shortcut icon on the desktop to display the main screen. is<br />
the desktop icon for SE-1010 PC ECG.<br />
NOTE: Do not use other software when using PC ECG software.<br />
Figure 6-1 Toolbar of Main Screen<br />
The toolbar contains six buttons. From left to right, they are New Patient, STAT ECG, Data<br />
Manager, System Setting, Lead Placement and Exit.<br />
Below the toolbar, the software name, version number and copyright information can be seen.<br />
Click on Help (H) to see the help information.<br />
Click on the Exit button on the main screen to exit the system.<br />
If you use PC ECG software for the first time, the following window will be displayed.<br />
Figure 6-2 Initial Window<br />
- 40 -
SE-1010 PC ECG User <strong>Manual</strong><br />
Operation Instructions for Resting ECG<br />
You can set the unit, print, frequency of AC and the saving path of source data based on your<br />
needs. Click on the OK button after setup, the system will enter the main screen automatically.<br />
NOTE: You should install the software to the saving path of source data after the<br />
uninstallation and reinstallation; otherwise, the software needs a new<br />
configuration.<br />
6.1 Viewing Lead Placement Information<br />
1. Click on the Lead Placement button on the main screen to display the Lead Placement<br />
window.<br />
2. Click on Wilson lead system, Frank lead system or Exercise ECG lead system to view the<br />
lead placement information in the corresponding system.<br />
- 41 -
SE-1010 PC ECG User <strong>Manual</strong><br />
Operation Instructions for Resting ECG<br />
6.2 Selecting a Patient Record to Start a New Test<br />
Click on the Data Manager button on the main screen (Figure 6-1) to open the Data Manager<br />
screen (Figure 6-3).<br />
Figure 6-3 Data Manager Screen<br />
1. Select a search item in the pull-down list on the Data Manager screen.<br />
Then all the patient records which meet the search condition are listed in the patient<br />
information list.<br />
2. Or, select a search item in the pull-down list , enter the<br />
corresponding information in the right textbox, and then click on the Search button. All the<br />
patient records which meet the conditions will be displayed in the patient information list.<br />
- 42 -
SE-1010 PC ECG User <strong>Manual</strong><br />
Operation Instructions for Resting ECG<br />
3. Or, click on Advanced Search to display the Search Condition window. Enter the search<br />
conditions, and click on the Search button, and all the patient records which meet the<br />
conditions will be displayed in the patient information list.<br />
4. Click on the patient record in the patient information list and click on the Select button to<br />
open the Patient Information window. Or, double-click on the patient record in the patient<br />
information list to open the Patient Information window.<br />
Figure 6-4 Patient Information Window<br />
- 43 -
SE-1010 PC ECG User <strong>Manual</strong><br />
Operation Instructions for Resting ECG<br />
6.3 Entering New Patient Information<br />
6.3.1 Entering New Patient Information <strong>Manual</strong>ly<br />
If the patient is a new one, you can click on the New Patient button<br />
screen (Figure 6-1) to display the Patient Information window.<br />
on the main<br />
Then you need to input the patient’s related information.<br />
1. Enter basic information, such as patient ID, name, sex and age.<br />
User-defined 1 and User-defined 2: You can input other related information such as patients’<br />
medical records.<br />
User-defined 1 and User-defined 2 can be set in the Basic Information window (Figure 9-1).<br />
Before setting them, the two items in the Patient Information window are unavailable. For<br />
details, please refer to Section 9.1.1, “Setting Basic Information”.<br />
NOTE: In the Patient information window, patient ID is a must. You can use the<br />
number generated by the system or input a number manually. Patient ID can<br />
be a random character string excluding ‘/’, ‘\’, ‘:’, ‘*’, ‘’, ‘’ and ‘|’.<br />
2. Enter additional information, such as BP, height, weight, medication and race.<br />
NOTE: You can select the additional information items in the Print Setting window,<br />
and these additional information items will be displayed in the Patient<br />
Information window after setting printer.<br />
For details, please refer to Section 9.4.1, “Choosing Patient Information to be Printed”.<br />
- 44 -
SE-1010 PC ECG User <strong>Manual</strong><br />
Operation Instructions for Resting ECG<br />
3. Enter information of doctor and department<br />
1) Enter information of physician, technician or Req. physician<br />
Click on the pull-down list<br />
, and then click on the Edit button to<br />
display the Edit window.<br />
Enter the doctor name in the textbox, and then click on the Add button. The doctor name<br />
will be displayed in List. Meanwhile, you can also directly enter the doctor name in<br />
textbox of Physician item, and then click on the OK button in the Patient Information<br />
window.<br />
Click on one name in List, and then you can delete or modify the name:<br />
♦ Click on the Delete button, and then click the OK button to delete the name from<br />
the list.<br />
♦ Click on the Modify button, enter a new name in textbox to modify the name, and<br />
then click on the OK button.<br />
Click on the OK button to confirm and exit the Edit window, and then click on the<br />
pull-down list<br />
, you can select the doctor name you enter.<br />
NOTE: Take the same steps above for entering information of technician or<br />
Req.physician.<br />
- 45 -
SE-1010 PC ECG User <strong>Manual</strong><br />
Operation Instructions for Resting ECG<br />
2) Enter information of department<br />
Click on the pull-down list<br />
, and then click on the Edit button to<br />
display the Edit Department window.<br />
Enter the department name in the textbox, and then click on the Add button. The doctor<br />
name will be displayed in List. Meanwhile, you can also enter the department name in the<br />
textbox of Dept. item, and then click on the OK button in the Patient Information<br />
window.<br />
Click on one department name in List, and then you can delete or modify the name:<br />
♦ Click on the Delete button, and then click the OK button to delete the department<br />
name from the list.<br />
♦ Click on the Modify button, enter a new name in the textbox to modify the<br />
department name, and then click on the OK button.<br />
Click on the OK button to confirm and exit the Edit window, and then click on the<br />
pull-down list<br />
, you can select the doctor name you enter.<br />
NOTE: You can select Physician, Technician or Req.physician in the Print<br />
Setting window. Before setting them, these items in the Patient<br />
Information window are unavailable. For details, please refer to Section<br />
9.4.1, “Choosing Patient Information to be Printed”.<br />
- 46 -
SE-1010 PC ECG User <strong>Manual</strong><br />
Operation Instructions for Resting ECG<br />
4. Confirm pacemaker information<br />
If you select Pacemaker in the Print Setting window, Pacemaker appears in the Patient<br />
Information window. Select Pacemaker to detect very small pacemaker pulses. However,<br />
when pacemaker pulse enhancer is on, the system is very sensitive, and should not be close to<br />
equipment emitting high frequency radiation. High frequency radiation can interfere with<br />
pacemaker pulse detection and normal ECG acquisition.<br />
NOTE: Pacemaker is recommended to be deselected unless it is known that the<br />
majority of the electrocardiograph usage will be on patients with<br />
pacemakers.<br />
5. Select risk indicators and symptoms (for Exercise ECG), such as cigarette, diabetes,<br />
congenital heart disease, hypertension, hyperlipemia and family medical history.<br />
NOTE: You can select risk indicators and symptoms only in Exercise ECG mode.<br />
6.3.2 Entering Patient Information by Using a Bar Code Reader<br />
Operation procedures are as follows:<br />
1. Configure the bar code<br />
For more detailed information about configuring the bar code, please refer to Section 9.3.5.2,<br />
“Setting Barcode”.<br />
NOTE: If the two-dimensional bar code reader is used, you should install Symbol<br />
COM Port Emulation Drive manually. For details, please refer to SE-1010 PC<br />
ECG Installation Guide.<br />
2. Connect the bar code reader to the PC.<br />
3. Log into the PC ECG software.<br />
4. When the main screen or the Patient Information window is displayed, scan the patient’s<br />
bar code with the bar code reader, and then the patient information will appear in the<br />
corresponding boxes of the Patient Information window.<br />
NOTE:<br />
1. Only bar code readers recommended by the manufacturer can be used.<br />
2. Only the basic information of the patient can be scanned by the bar code reader.<br />
- 47 -
SE-1010 PC ECG User <strong>Manual</strong><br />
Operation Instructions for Resting ECG<br />
6.4 Selecting Sampling Type<br />
You can select a sampling type in the Patient information window.<br />
6.5 Sampling Resting ECG<br />
After inputting the patient information, click on the OK button in the Patient information<br />
window to open the ECG sampling screen.<br />
Before sampling, if you do not connect the PC to the ECG sampling box, the following hint will<br />
pop up.<br />
If the system is invocated by Smart ECG Net, but the system integration is not activated, the<br />
following hint will pop up.<br />
- 48 -
SE-1010 PC ECG User <strong>Manual</strong><br />
Operation Instructions for Resting ECG<br />
The system begins to pre-sample ECG.<br />
Figure 6-5 Pre-Sampling Screen<br />
6.5.1 Specifying Display Mode<br />
There are eight display modes including 12*1, 6*2, 3*4, 6*1, 3*1, 3*4+1, 3*4+3 and 6*2+1.<br />
When the display mode is set to 12*1, 12-channel ECG waves are displayed on one screen<br />
simultaneously.<br />
When the display mode is set to 6*2, 12-channel ECG waves are displayed in 2 groups of 6 on<br />
one screen.<br />
When the display mode is set to 3*4, 12-channel ECG waves are displayed in 4 groups of 3 on<br />
one screen.<br />
When the display mode is set to 6*1, 6-channel ECG waves are displayed on one screen.<br />
- 49 -
SE-1010 PC ECG User <strong>Manual</strong><br />
Operation Instructions for Resting ECG<br />
When the display mode is set to 3*1, 3-channel ECG waves are displayed on one screen<br />
simultaneously.<br />
When the display mode is set to 3*4+1, 12-channel ECG waves are displayed in 4 groups of 3<br />
and one rhythm lead on one screen.<br />
When the display mode is set to 3*4+3, 12-channel ECG waves are displayed in 4 groups of 3<br />
and three rhythm leads on one screen.<br />
When the display mode is set to 6*2+1, 12-channel ECG waves are displayed in 2 groups of 6<br />
and one rhythm lead on one screen.<br />
6.5.2 Specifying Lowpass Filter<br />
Lowpass Filter restricts the bandwidth of input signals. The cutoff frequency can be set to 25Hz,<br />
35Hz, 45Hz, 75Hz, 100Hz, or 150Hz. The input signals whose frequency is higher than the set<br />
cutoff frequency will be attenuated.<br />
6.5.3 Specifying Gain<br />
You can set the indicated length of 1mV ECG on the paper.<br />
You can set the gain to 2.5mm/mV, 5mm/mV, 10mm/mV or 20mm/mV.<br />
6.5.4 Specifying Speed<br />
You can set the paper speed to 5mm/s, 10mm/s, 12.5mm/s, 25mm/s or 50mm/s.<br />
- 50 -
SE-1010 PC ECG User <strong>Manual</strong><br />
Operation Instructions for Resting ECG<br />
6.5.5 Recording ECG Data<br />
When the pre-sample ECG waves are steady, you can click on the Start button to save the<br />
sampled ECG data to the designated directory. For details, please refer Section 9.1.4, “Specifying<br />
the Storage Path of the ECG Data”.<br />
Figure 6-6 ECG Sampling Screen<br />
NOTE: After you click on the Start button, the system will save the sampled ECG data. If<br />
you don’t click on the Start button, the system won’t save the sampled ECG data.<br />
6.5.6 Freezing and Previewing ECG<br />
Click on the Freeze button on the ECG sampling screen (Figure 6-6), the system will display the<br />
Wave review window. The system can review a 3-minute (at least) waveform (counted from<br />
before clicking on the Freeze button for 3 minutes). You can review the waveform by dragging<br />
the scrollbar and you can print the current waveform by clicking on the Print button.<br />
NOTE:Printing ECG reports in the Wave review window are only available for Resting<br />
ECG and Exercise ECG.<br />
- 51 -
SE-1010 PC ECG User <strong>Manual</strong><br />
Operation Instructions for Resting ECG<br />
Figure 6-7 Wave Review Window<br />
Click on Exit to return to the ECG sampling screen.<br />
NOTE: The display modes in the Wave review window are the modes you select on the<br />
ECG sampling screen. 3*1 and 6*1 display modes are displayed in 3*4 and 6*2<br />
modes.<br />
6.5.7 Stopping Sampling Data<br />
After clicking on the Start button, there are two ways to stop sampling data.<br />
1. The system will stop sampling ECG data and display the ECG analysis screen automatically<br />
after the ECG sampling time is over. For details, please refer to Section 9.2.2, “Setting<br />
Sampling Time”.<br />
2. Before the ECG sampling time is over, you can click on the Stop button to stop sampling<br />
data and the ECG analysis screen will pop up automatically.<br />
- 52 -
SE-1010 PC ECG User <strong>Manual</strong><br />
Operation Instructions for Resting ECG<br />
6.5.8 Printing ECG Waves<br />
Click on the Print button on the ECG sampling screen to print the ECG waves on the ECG<br />
sampling screen.<br />
NOTE:<br />
1. You can set the printer type on the Printer and Faxes screen. For details, please<br />
refer to Section 6.6.10, “Printing ECG Reports”.<br />
2. The report can be printed in white- black or color. The report color is defined by<br />
setting the printer type and can be observed on the preview screen. For details,<br />
please refer to Section 9.4.4, “Print Setup”.<br />
6.6 Analyzing ECG Data<br />
You can open the ECG analysis screen in one of the following three ways:<br />
1. Click on the Start button, and then the system will stop sampling ECG and display the ECG<br />
analysis screen automatically after the ECG sampling time is over.<br />
2. Or, click on the Stop button to stop sampling after clicking on the Start button, and the<br />
system will display the ECG analysis screen automatically.<br />
3. Or, double-click on an examination record in the examination record list on the Data<br />
Manager screen (Figure 6-3) to open the ECG analysis screen.<br />
When Resting ECG is selected as the sampling type, the ECG analysis screens include Normal<br />
ECG, QT Dispersion (QTD), Frequency ECG (FCG) and High Frequency ECG (HF ECG).<br />
When HRV ECG is selected as the sampling type, the ECG analysis screens include Heart Rate<br />
Variability (HRV) and Heart Rate Turbulence (HRT).<br />
When VCG/TVCG/SAECG is selected as the sampling type, the ECG analysis screens include<br />
Vector ECG (VCG), Time Vector ECG (TVCG) and Signal Averaged ECG (SAECG).<br />
6.6.1 Analyzing Normal ECG<br />
Click on the Normal Analysis button to open the normal ECG analysis screen. There are four<br />
tabs: Waveform, Average Template, Detail information and Rhythm Wave.<br />
- 53 -
SE-1010 PC ECG User <strong>Manual</strong><br />
Operation Instructions for Resting ECG<br />
6.6.1.1 Viewing the Waveform<br />
Click on the Waveform tab on the normal ECG analysis screen to open the Waveform window<br />
(Figure 6-8).<br />
Figure 6-8 Normal ECG - Waveform Window<br />
You can choose a speed, a gain and a display mode for the displayed waves.<br />
Click on the Measure button in the Waveform window (Figure 6-8). Click on one point on the<br />
wave, and then drag the mouse to another point. The distance, amplitude difference and heart rate<br />
between the two points will be displayed.<br />
NOTE:<br />
1. You can measure the distance between any two points more than once after running<br />
the ruler. The last measure track and data will be displayed after the measurement.<br />
2. Only ECG waves can be measured.<br />
Click on Re-Sample, and then the system can re-sample ECG data.<br />
Click on Re-Diagnosis, and then the system can re-diagnose the 10s ECG data on the screen<br />
automatically.<br />
- 54 -
SE-1010 PC ECG User <strong>Manual</strong><br />
Operation Instructions for Resting ECG<br />
The common parameters are displayed in the circle in Figure 6-8. These parameters are as<br />
follows.<br />
Designation<br />
Heart Rate<br />
P Duration<br />
PR Dur.<br />
QRS Dur.<br />
QT/QTc<br />
P/QRS/T<br />
RV5/SV1<br />
RV5+SV1<br />
RV6/SV2<br />
Description<br />
Heart Rate<br />
P-wave duration of the current lead<br />
P-R interval of the current lead<br />
QRS complex duration of the current lead<br />
Q-T interval of the current lead/Normalized QT interval<br />
Dominant direction of the average integrated ECG vectors<br />
The amplitude of R wave of V5 lead/the amplitude of S<br />
wave of V1 lead<br />
The amplitude of R wave of V5 lead plus the amplitude of<br />
S wave of V1 lead<br />
The amplitude of R wave of V6 lead/the amplitude of S<br />
wave of V2 lead<br />
Double-click on a parameter, and then you can modify it. Then click on the Save button to save<br />
the modifications.<br />
To Edit Diagnosis Result in the Waveform Window<br />
- 55 -
SE-1010 PC ECG User <strong>Manual</strong><br />
Operation Instructions for Resting ECG<br />
1. Enter your own opinions in the Diagnosis textbox, and then click on the Save button.<br />
2. Or, double-click on the necessary results required to be added in the Glossary textbox, the<br />
selected results will be displayed in the Diagnosis textbox, and then click on the Save button.<br />
If the Integration function is activated, the data can be uploaded to Smart ECG Net system after<br />
you click on the Save button.<br />
6.6.1.2 About the Average Template Window<br />
Click on the Average Template tab on the normal ECG analysis screen to open the Average<br />
Template window (Figure 6-9). You can analyze average templates in this window.<br />
Figure 6-9 Normal ECG - Average Template Window<br />
- 56 -
SE-1010 PC ECG User <strong>Manual</strong><br />
Operation Instructions for Resting ECG<br />
To Edit Waveform on the Analysis Screen<br />
You can press a lead button in<br />
to<br />
display magnified average templates of this lead. When you press more than one lead button,<br />
magnified average templates of these leads will be overlapped with the same central axis.<br />
When you press ALL, magnified average templates of all leads will be overlapped with the same<br />
central axis.<br />
You can set the speed and the gain of average templates.<br />
You can drag marker lines of P1, P2, Q, S and T on average templates.<br />
P1 is the start point of P wave, P2 is the end point of P wave, Q marks the position of Q point, S<br />
marks the position of S point, and T is the end point of T wave. You can move these lines by<br />
dragging on the mouse and the mouse will turn to a hand pointer when it is put on these marks.<br />
You can also use the arrows key on the keyboard to move these marks, and the corresponding<br />
parameter values will change.<br />
To Edit Diagnosis Result in the Average Template Window<br />
For details, please refer to Section 6.6.1.1, “Viewing the Waveform”.<br />
- 57 -
SE-1010 PC ECG User <strong>Manual</strong><br />
Operation Instructions for Resting ECG<br />
6.6.1.3 About the Detail Information Window<br />
Click on the Detail information tab on the normal ECG analysis screen to open the Detail<br />
information window. This window displays lead parameter values as Figure 6-10 shows.<br />
Figure 6-10 Normal ECG - Detail Information Window<br />
Click on the Export Excel button to export an Excel file.<br />
To Edit Diagnosis Result in the Detail Information Window<br />
For details, please refer to Section 6.6.1.1, “Viewing the Waveform”.<br />
- 58 -
SE-1010 PC ECG User <strong>Manual</strong><br />
Operation Instructions for Resting ECG<br />
6.6.1.4 About the Rhythm Wave Window<br />
Click on the Rhythm Wave tab on the normal ECG analysis screen to open the Rhythm wave<br />
window. This window displays rhythm wave as Figure 6-11 shows.<br />
Figure 6-11 Normal ECG - Rhythm Wave Window<br />
You can set the gain, the speed and the lead of the displayed ECG waves.<br />
You can click on Previous Page or Next Page to display the waves of the previous or next page.<br />
Click on one point on the wave, and then drag the mouse to another point. Then click on Print to<br />
print the selected wave field.<br />
6.6.1.5 Previewing Normal ECG<br />
Click on the Preview button to display the normal ECG preview screen.<br />
is<br />
the toolbar on the normal ECG preview screen.<br />
1. Click on Previous Page/Next Page to switch to the previous/next preview page.<br />
2. Click on Zoom In/ Zoom Out to magnify/minify the preview page.<br />
3. Click on Print to print the report.<br />
- 59 -
SE-1010 PC ECG User <strong>Manual</strong><br />
Operation Instructions for Resting ECG<br />
4. Click on Close to close the normal ECG preview screen and return to the previous screen.<br />
Figure 6-12 ECG Wave<br />
NOTE: The report title is in one line by default, you can also change the line to two lines.<br />
Find the text named PCECG.ini in the installation path, modify LineofTitle=0 to<br />
LineofTitle=1, and then save the text to change the line to two lines.<br />
Effect pictures of report title are as shown below:<br />
Report Title in One Line<br />
- 60 -
SE-1010 PC ECG User <strong>Manual</strong><br />
Operation Instructions for Resting ECG<br />
6.6.2 Analyzing QT Dispersion<br />
Report Title in Two Lines<br />
Click on the QTD button to open the QT Dispersion screen.<br />
QT Dispersion: The difference between the largest QT interval and the shortest QT interval based<br />
on the synchronous 12-lead surface ECG. The QT interval is a measurement of the time<br />
difference between the start of the Q wave and the end of the T wave.<br />
Figure 6-13 QT Dispersion screen<br />
- 61 -
SE-1010 PC ECG User <strong>Manual</strong><br />
Operation Instructions for Resting ECG<br />
6.6.2.1 Editing Waveform on the QT Dispersion Screen<br />
There are red and blue triangle icons on top of the displayed ECG waves. You can click on the<br />
triangle icon to change the color.<br />
represents the current chosen R wave<br />
represents the position of R wave<br />
You can set the speed and the gain of the displayed ECG waves. The lead<br />
number and the lead type of the displayed ECG waves can also be chosen.<br />
6.6.2.2 About QT Value<br />
as the left figure shows.<br />
QT values of 12 leads and QT dispersion (QTd) are displayed<br />
- 62 -
SE-1010 PC ECG User <strong>Manual</strong><br />
Operation Instructions for Resting ECG<br />
6.6.2.3 Previewing QT Dispersion<br />
Click on the Preview button on the QT Dispersion screen to open the QT Dispersion preview<br />
screen.<br />
is the toolbar on the<br />
QT Dispersion preview screen.<br />
1. Click on Print(P) to print the report.<br />
2. Click on Next Page/Prev Page to switch to the previous/next preview page.<br />
3. Click on Two Page to preview two pages on one screen simultaneously.<br />
4. Click on Zoom In/ Zoom Out to magnify/minify the preview page.<br />
5. Click on Close to close the preview screen and return to the previous screen.<br />
Figure 6-14 QT Dispersion Preview Screen<br />
- 63 -
SE-1010 PC ECG User <strong>Manual</strong><br />
Operation Instructions for Resting ECG<br />
6.6.3 Analyzing Frequency ECG<br />
Click on the FCG button to open the Frequency ECG screen.<br />
Frequency ECG displays characteristic waves of ECG signal spectrum.<br />
There are two tabs on the Frequency ECG screen: Two leads compare and 12-lead power<br />
spectrum.<br />
6.6.3.1 About Two-lead Comparison Window<br />
The two-lead comparison window displays the power spectrum, phase shift, amplitude shift,<br />
coherence, impulse response and correlation functions of ECG waves, as Figure 6-15 shows.<br />
Figure 6-15 Frequency ECG - Two-lead Comparison Window<br />
- 64 -
SE-1010 PC ECG User <strong>Manual</strong><br />
Operation Instructions for Resting ECG<br />
Every parameter of Frequency ECG is shown in the following table.<br />
Designation<br />
Definition<br />
1/2<br />
If the first peak value is lower than 90% of the second peak<br />
value, it is positive (‘+’). Otherwise it is minus (‘-’).<br />
Power<br />
Spectrum<br />
1-N<br />
5/10<br />
TU<br />
The first peak is too low or disappears. (The frequency value<br />
of the first peak’s position * 60 = heart rate. For example, if<br />
the frequency value of the first peak’s position is 1.2, the<br />
heart rate is 72.)<br />
If the peak value of any peak behind the fifth peak is higher<br />
than the first peak value, it is positive. Otherwise it is minus.<br />
If the distances between peak values are not equal, it is<br />
positive. Otherwise it is minus.<br />
Phase Shift<br />
D<br />
If the phase shift in the range of 6~18Hz exceeds 90 degrees,<br />
it is positive. Otherwise it is minus.<br />
Coherence<br />
Impulse<br />
Response<br />
Correlation<br />
Function<br />
(VXY)<br />
Cp<br />
RW<br />
PV<br />
M<br />
RV<br />
RD<br />
NW<br />
If the coherence value of the fundamental (the position of the<br />
first peak in power spectrum) is less than 0.8, it is positive.<br />
Otherwise it is minus.<br />
If there are four twists and turns with peak-to-valley interval<br />
>0.5r or five twists and turns with peak-to-valley interval<br />
>0.1 in the range of 10~20Hz, it is positive. Otherwise it is<br />
minus.<br />
If the main peak in the middle upends, the downward peak<br />
value is higher than the upward peak value, it is positive.<br />
Otherwise it is minus.<br />
If there is a peak around the main peak higher than 60% of<br />
the main peak, it is positive. Otherwise it is minus.<br />
If the main peak in the middle upends, it is positive.<br />
Otherwise it is minus.<br />
If the main peak in the middle deviates from the origin and<br />
the baseline, it is positive. Otherwise it is minus.<br />
The main peak is like the letter ‘N’.<br />
- 65 -
SE-1010 PC ECG User <strong>Manual</strong><br />
Operation Instructions for Resting ECG<br />
6.6.3.2 About 12-lead Power Spectrum Window<br />
The 12-lead power spectrum window displays the power spectrum of 12-lead ECG waves.<br />
Figure 6-16 Frequency ECG - 12-lead Power Spectrum Window<br />
6.6.3.3 Previewing Frequency ECG<br />
Click on the Preview button to open the Frequency ECG preview screen.<br />
is the toolbar on the<br />
Frequency ECG preview screen.<br />
1. Click on Print(P) to print the report.<br />
2. Click on Next Page/Prev Page to switch to the previous/next preview page.<br />
3. Click on Two Page to preview two pages on one screen simultaneously.<br />
4. Click on Zoom In/ Zoom Out to magnify/minify the preview page.<br />
5. Click on Close to close the preview screen and return to the previous screen.<br />
- 66 -
SE-1010 PC ECG User <strong>Manual</strong><br />
Operation Instructions for Resting ECG<br />
Figure 6-17 Two-lead Comparison Report<br />
Figure 6-18 12-lead Power Spectrum Report<br />
- 67 -
SE-1010 PC ECG User <strong>Manual</strong><br />
Operation Instructions for Resting ECG<br />
6.6.4 Analyzing High Frequency ECG<br />
In a conventional electrocardiogram, only these ECG signals, of which the amplitude is in the<br />
millivolt range and the frequency is less than 100 Hz, are visible. Those ECG signals, of which<br />
the amplitude is in the microvolt range and the frequency is between 150Hz and 250Hz, are<br />
invisible. If these invisible high frequency components are abnormal, it is the indication of<br />
myocardial ischemia or myocardial infarction.<br />
HF ECG is to detect high frequency components of QRS such as notches, slurs and beadings.<br />
Click on the HF ECG button to open the HF ECG analysis screen.<br />
Figure 6-19 HF ECG Analysis Screen<br />
- 68 -
SE-1010 PC ECG User <strong>Manual</strong><br />
Operation Instructions for Resting ECG<br />
The ECG wave between the two green lines is the present one.<br />
Click on<br />
to select another QRS wave. Select the present lead in the pull-down list<br />
.<br />
You can choose the lead group, the gain and the speed of the waves displayed in the<br />
bottom part of the HF ECG analysis screen.<br />
is the statistic data<br />
of beadings, notches and slurs. You can change a value by double-clicking on the value.<br />
Click on the Preview button to open the HF ECG preview screen.<br />
is the toolbar on the<br />
HF ECG preview screen.<br />
1. Click on Print(P) to print the report.<br />
2. Click on Next Page/Prev Page to switch to the previous/next preview page.<br />
3. Click on Two Page to preview two pages on one screen simultaneously.<br />
4. Click on Zoom In/ Zoom Out to magnify/minify the preview page.<br />
5. Click on Close to close the preview screen and return to the previous screen.<br />
- 69 -
SE-1010 PC ECG User <strong>Manual</strong><br />
Operation Instructions for Resting ECG<br />
Figure 6-20 HF ECG Report<br />
6.6.5 Analyzing HRV<br />
Click on HRV to display the HRV ECG analysis screen. The HRV ECG analysis screen includes<br />
two tabs: Auto diagnosis result and Waveform.<br />
NOTE:<br />
1. The HRV sampling time can be set in the Sample Setting window.<br />
2. The HRV analysis lead can be selected in the Sample Setting window.<br />
- 70 -
SE-1010 PC ECG User <strong>Manual</strong><br />
Operation Instructions for Resting ECG<br />
6.6.5.1 Editing the HRV Data on the Analysis Screen<br />
Figure 6-21 Analysis Screen of HRV<br />
Designation<br />
Sampling time<br />
Total Beat<br />
Heart Rate<br />
Average RR interval<br />
Max RR interval<br />
Min RR interval<br />
Max/Min<br />
SDNN<br />
RMSSD<br />
NN50<br />
(the total beat number)<br />
PNN50<br />
(unit: per centum)<br />
Definition<br />
Set sampling time<br />
Total beat number during the measuring course<br />
Heart rate<br />
Average RR interval<br />
Maximum RR interval<br />
Minimum RR interval<br />
Ratio of Maximum RR interval to Minimum RR interval<br />
Standard Deviation of Normal to Normal Intervals<br />
Root Mean Square Successive Difference<br />
The number of duration difference that is more than 50ms<br />
between the adjacent NN durations.<br />
NN50 divide the total NN number<br />
- 71 -
SE-1010 PC ECG User <strong>Manual</strong><br />
Operation Instructions for Resting ECG<br />
LF<br />
HF<br />
LF/HF<br />
LF (norm)<br />
HF (norm)<br />
Low Frequency<br />
High Frequency<br />
Ratio of low frequency to high frequency<br />
Standard LF power<br />
Standard HF power<br />
H- Doctor Diagnosis Field<br />
1. Enter your own opinions in the Auto diagnosis textbox, and then click on the Save button.<br />
2. Or, double-click on the necessary results required to be added in the Glossary textbox, the<br />
selected results will be displayed in the Auto Diagnosis textbox, and then click on the Save<br />
button.<br />
6.6.5.2 Editing the HRV Waveform in the Waveform Window<br />
Figure 6-22 Waveform Window of HRV<br />
- 72 -
SE-1010 PC ECG User <strong>Manual</strong><br />
Operation Instructions for Resting ECG<br />
HRV waveform is displayed in the Waveform window (Figure 6-22).<br />
1. You can drag the mouse in the window to choose the wave field to be printed. Then click on<br />
the Print button to print the selected wave field.<br />
2. Click on Previous Page or Next Page to display the waves of the previous or next page.<br />
6.6.5.3 Previewing HRV<br />
Click on the Preview button to open the HRV preview screen.<br />
is the toolbar on the<br />
HRV preview screen.<br />
1. Click on Print(P) to print the report.<br />
2. Click on Next Page/Prev Page to switch to the previous/next preview page.<br />
3. Click on Two Page to preview two pages on one screen simultaneously.<br />
4. Click on Zoom In/ Zoom Out to magnify/minify the preview page.<br />
5. Click on Close to close the preview screen and return to the previous screen.<br />
- 73 -
SE-1010 PC ECG User <strong>Manual</strong><br />
Operation Instructions for Resting ECG<br />
6.6.6 Analyzing HRT<br />
Figure 6-23 HRV Preview Screen<br />
Click on HRT to display the HRT ECG analysis screen.<br />
- 74 -
SE-1010 PC ECG User <strong>Manual</strong><br />
Operation Instructions for Resting ECG<br />
You can select Average Histogram or Single Histogram in Mode View field.<br />
Click on Next PVC or Previous PVC to see the Next or Previous PVC wave and the relevant<br />
histogram.<br />
Click on the Preview button to open the HRT preview screen.<br />
is the toolbar on the<br />
HRT preview screen.<br />
1. Click on Print(P) to print the report.<br />
2. Click on Next Page/Prev Page to switch to the previous/next preview page.<br />
3. Click on Two Page to preview two pages on one screen simultaneously.<br />
4. Click on Zoom In/ Zoom Out to magnify/minify the preview page.<br />
5. Click on Close to close the preview screen and return to the previous screen.<br />
- 75 -
SE-1010 PC ECG User <strong>Manual</strong><br />
Operation Instructions for Resting ECG<br />
6.6.7 Analyzing Vector ECG<br />
Click on the VCG button on the ECG analysis screen to display the VCG analysis screen. Vector<br />
ECG displays 3D image of ECG activity.<br />
You can choose the plane<br />
and the vector loop<br />
on the VCG analysis screen. Plane choices include Frontal (F),<br />
Horizontal (H), Sagittal(S) and ALL. Loop choices include P loop, QRS loop, T loop and<br />
ALL.<br />
6.6.7.1 Displaying Vector ECG with All Plane and All Loop<br />
Set the plane to ALL and the loop to ALL.<br />
A B E F<br />
G<br />
D<br />
C<br />
Figure 6-24 Vector ECG - Plane of ALL and Loop of ALL<br />
- 76 -
SE-1010 PC ECG User <strong>Manual</strong><br />
Operation Instructions for Resting ECG<br />
Figure 6-24 displays Vector ECG with the plane of ALL and the loop of ALL.<br />
A- Vector ECG of Frontal (F)<br />
B- Vector ECG of Horizontal (H)<br />
C- Vector ECG of Sagittal (S)<br />
D- Average templates of X, Y and Z leads. Double-click on this figure to display the magnified<br />
average template. You can drag these lines marked P1, P2, Q, S, T1 and T2 on the wave. With the<br />
change of the line position, the corresponding parameter values change.<br />
E- Click on the Parameter button to display the following Vector ECG parameter list.<br />
Designation<br />
Max Vector<br />
Amplitude<br />
Angle<br />
Direction<br />
CW<br />
CCW<br />
Definition<br />
The position of the maximal amplitude of QRS/P/T loop<br />
(mV)<br />
The amplitude of the Max vector of QRS/P/T loop (mV)<br />
The angle of the Max vector of QRS/P/T loop (degree)<br />
Rotation direction of QRS/P/T loop<br />
Clockwise<br />
Counter-clockwise<br />
- 77 -
SE-1010 PC ECG User <strong>Manual</strong><br />
Operation Instructions for Resting ECG<br />
8 ‘8’ font ring<br />
0.01 (amplitude) The amplitude at 0.01s from QRS loop<br />
0.01 (angle) The angle at 0.01s from QRS loop<br />
0.02 (amplitude) The amplitude at 0.02s from QRS loop<br />
0.02 (angle) The angle at 0.02s from QRS loop<br />
0.03 (amplitude) The amplitude at 0.03s from QRS loop<br />
0.03 (angle) The angle at 0.03s from QRS loop<br />
0.04 (amplitude) The amplitude at 0.04s from QRS loop<br />
0.04 (angle) The angle at 0.04s from QRS loop<br />
Start Vector<br />
End Vector<br />
ST Vector<br />
Length/Width<br />
T-R angle<br />
Start point of QRS loop<br />
End point of QRS loop<br />
The position of ST vector in vector loop<br />
The ratio of length to width in T loop<br />
The degree between the Max vector of T loop and the<br />
Max vector of QRS loop (degree)<br />
F- Click on 3D to display the 3D VCG graph.<br />
G- Diagnosis Field<br />
1. Enter your own opinions in the Auto Diagnosis textbox, and then click on the Save button.<br />
2. Or, double-click on the necessary results required to be added in the Glossary textbox, and<br />
the selected results will be displayed in the Auto Diagnosis textbox, and then click on the<br />
Save button.<br />
- 78 -
SE-1010 PC ECG User <strong>Manual</strong><br />
Operation Instructions for Resting ECG<br />
6.6.7.2 Displaying Vector ECG with Frontal Plane and QRS Loop<br />
Figure 6-25 Vector ECG - Frontal & QRS loop<br />
The percent values of 0.00%, 94.16%, 1.35% and 4.49% in the square represent the area<br />
percentages of QRS loop in every quadrant. 20 mm/mV indicates the magnified multiple (gain).<br />
The red curve is QRS loop.<br />
You can click on the Zoom in button or the Zoom out button to change the gain of the displayed<br />
graphics. You can click on the Play button to watch the forming process of the QRS loop.<br />
6.6.7.3 Displaying 3D Vector ECG<br />
Click on 3D to display the 3D VCG graph.<br />
3D (Three Dimensional Vector Loops)<br />
This function allows you to observe the Vector ECG in three dimensions.<br />
Select Rotation, and then you can rotate the whole picture to view all directions of the vector<br />
loops by clicking the mouse.<br />
Select Axis to display the axes.<br />
Select Plane to display the planes.<br />
- 79 -
SE-1010 PC ECG User <strong>Manual</strong><br />
Operation Instructions for Resting ECG<br />
Click on Zoom In/ Zoom Out to magnify/minify the picture.<br />
Click on Reset to restore the magnified/minified picture to original size.<br />
Click on Preview to preview the 3D graph.<br />
Click on Print to print the 3D graph.<br />
Click on Save to save the graph on the current screen.<br />
Click on Return to return to the ECG analysis screen.<br />
6.6.7.4 Previewing Vector ECG<br />
Click on the Preview button to open the VCG preview screen.<br />
is the toolbar on the<br />
VCG preview screen.<br />
1. Click on Print(P) to print the report.<br />
2. Click on Next Page/Prev Page to switch to the previous/next preview page.<br />
3. Click on Two Page to preview two pages on one screen simultaneously.<br />
4. Click on Zoom In/ Zoom Out to magnify/minify the preview page.<br />
5. Click on Close to close the preview screen and return to the previous screen.<br />
- 80 -
SE-1010 PC ECG User <strong>Manual</strong><br />
Operation Instructions for Resting ECG<br />
Figure 6-26 VCG Preview Screen (Plane is ALL & loop is ALL)<br />
6.6.8 Analyzing Time Vector ECG<br />
Click on the TVCG button on the ECG analysis screen to display the TVCG analysis screen.<br />
Time Vector ECG is Vector ECG including time factor.<br />
As Figure 6-27 shows, you can observe waves of X lead, Y lead, Z lead, X-Y lead, X-Z lead and<br />
Z-Y lead.<br />
You can choose the speed and the gain of the displayed waves.<br />
- 81 -
SE-1010 PC ECG User <strong>Manual</strong><br />
Operation Instructions for Resting ECG<br />
Figure 6-27 Time Vector ECG Screen<br />
Click on the Preview button to display the TVCG preview screen.<br />
is the toolbar on the<br />
TVCG preview screen.<br />
1. Click on the Zoom In button on the toolbar to magnify the preview page.<br />
2. Click on the Zoom Out button on the toolbar to minify the preview page.<br />
3. Click on the Close button to close the TVCG preview screen and return to the previous<br />
screen.<br />
Figure 6-28 Time Vector ECG Preview Screen<br />
- 82 -
SE-1010 PC ECG User <strong>Manual</strong><br />
Operation Instructions for Resting ECG<br />
6.6.9 Analyzing Signal Averaged ECG<br />
SAECG is also called Ventricular Late Potential (VLP). Click on SAECG to open the SAECG<br />
analysis screen. The SAECG analysis screen includes two tabs: Time domain and Frequency<br />
domain.<br />
6.6.9.1 About the Time Domain Window<br />
Click on the Time domain tab to open the Time domain window.<br />
Figure 6-29 Time Domain Window<br />
Every parameter of SAECG is shown in the following table.<br />
Designation<br />
Standard QRS<br />
Total QRS<br />
Below 40µV<br />
Last 40µV<br />
Description<br />
QRS intervals measured on three-quadrature leads before<br />
filtering<br />
The total QRS time for filtering and superimposing QRS<br />
waveform.<br />
The time of amplitude that is below 40µV for filtering and<br />
superimposing QRS waveform.<br />
The root mean square of amplitude in the last 40ms for<br />
filtering and superimposing QRS waveform.<br />
- 83 -
SE-1010 PC ECG User <strong>Manual</strong><br />
Operation Instructions for Resting ECG<br />
Select a filter in the Filter pull-down list .<br />
The top of the Time domain window is the window of standard superimposed QRS waveform.<br />
The left green line is the starting point of standard unfiltered QRS waveform, and the right green<br />
line is the end point. You can respectively drag the two green lines to change QRS duration.<br />
The bottom of the Time domain window is the window of standard superimposed QRS<br />
waveform after filtering. The left green line is the starting point of standard filtered QRS<br />
waveform, and the right green line is the end point. You can respectively drag the two green lines<br />
to change QRS duration, and then the corresponding parameters in the right part will also change.<br />
6.6.9.2 About the Frequency Domain Window<br />
Click on the Frequency domain tab to open the Frequency domain window.<br />
Figure 6-30 Frequency Domain Window<br />
You can drag the green vertical lines on the ECG wave, and the corresponding parameters in the<br />
right part and the 3D graph in the bottom part will change.<br />
- 84 -
SE-1010 PC ECG User <strong>Manual</strong><br />
Operation Instructions for Resting ECG<br />
6.6.9.3 Previewing Signal Averaged ECG<br />
Click on the Preview button to display the SAECG preview screen.<br />
is the toolbar on the<br />
SAECG preview screen.<br />
1. Click on Print(P) to print the report.<br />
2. Click on Next Page/Prev Page to switch to the previous/next preview page.<br />
3. Click on Two Page to preview two pages on one screen simultaneously.<br />
4. Click on Zoom In/ Zoom Out to magnify/minify the preview page.<br />
5. Click on Close to close the preview screen and return to the previous screen.<br />
Figure 6-31 Signal Averaged ECG Report<br />
- 85 -
SE-1010 PC ECG User <strong>Manual</strong><br />
Operation Instructions for Resting ECG<br />
6.6.10 Printing ECG Reports<br />
1. Choose Start > Printers and Faxes, and then right-click on the icon of the printer used, and<br />
select Set as Default Printer. Then close the Printers and Faxes window.<br />
2. Click on the Print button on the analysis screen to print an ECG report.<br />
3. Or, click on the Print button on the preview screen to print an ECG report.<br />
6.6.11 Saving ECG Reports<br />
You can click on the Report Save button<br />
to save ECG reports.<br />
The report format includes PDF, WORD, JPG and BMP. Click on the Browse button to choose<br />
the save path and click on OK to save the sampled data to the designated directory. During the<br />
saving course, the system will give the hint information.<br />
- 86 -
SE-1010 PC ECG User <strong>Manual</strong><br />
Operation Instructions for Resting ECG<br />
If you select Send, the sampled data will be sent by OUTLOOK EXPRESS (Windows XP) or<br />
Window Live Mail (Windows 7/Vista) when it is saved to the designated directory. During the<br />
saving and sending course, the system will give the hint information.<br />
NOTE: In Windows 7/Vista, only if Window Live Mail is installed, can the report be sent by<br />
email.<br />
6.7 Sampling STAT ECG<br />
Click on the STAT ECG button on the main screen (Figure 6-1) to sample normal ECG directly<br />
without entering new patient information or selecting an existing patient record from the database<br />
before sampling. The system will automatically distribute a new patient ID.<br />
- 87 -
SE-1010 PC ECG User <strong>Manual</strong><br />
Operation Instructions for Exercise ECG<br />
Chapter 7 Operation Instructions for Exercise ECG<br />
The exercise ECG function is optional. It is available only if you purchased this function.<br />
7.1 Viewing Lead Placement Information<br />
1. Click on the Lead Placement button on the main screen to display the Lead Placement<br />
window.<br />
2. Click on Exercise ECG lead system to view the lead placement information.<br />
- 88 -
SE-1010 PC ECG User <strong>Manual</strong><br />
Operation Instructions for Exercise ECG<br />
7.2 Selecting a Patient Record to Start a New Test<br />
1. You can select a patient record from the database to start a new test. The operation steps are<br />
the same as those of resting ECG. For details, refer to Section 6.2, “Selecting a Patient<br />
Record to Start a New Test”.<br />
2. Select Exercise ECG in the Patient Information window.<br />
3. Click on OK in the Patient Information window to open the Exercise ECG Setting<br />
window. After setting the parameters, click on the OK button to open the pre-sampling<br />
screen.<br />
- 89 -
SE-1010 PC ECG User <strong>Manual</strong><br />
Operation Instructions for Exercise ECG<br />
7.2.1 Setting Target HR<br />
The system applies the following formulas to calculate the target heart rate.<br />
220 and 85 are default values, and you can modify them in different situations in the Exercise<br />
ECG Setting window.<br />
7.2.2 Setting Normal BP<br />
Set the normal BP range in the Exercise ECG Setting window. When the patient’s BP exceeds<br />
the normal BP range, the system will consider it as abnormal status.<br />
7.2.3 Setting a Protocol<br />
Select a protocol from the pull-down list .<br />
7.2.4 Setting Post J<br />
Select a Post J value from the Post J pull-down list in the Exercise ECG Setting window.<br />
Post J is the length after J point of the ST segment. You can set Post J to 0ms, 20ms, 40ms, 60ms<br />
or 80ms.<br />
NOTE: J Point is the connection point between the end of QRS complex and the start of<br />
ST segment. It is the standard point to fix the position of ST segment in this<br />
system. Please select the proper option based on the patient’s actual ECG<br />
waves.<br />
- 90 -
SE-1010 PC ECG User <strong>Manual</strong><br />
Operation Instructions for Exercise ECG<br />
7.2.5 Setting BP Sampling Mode<br />
Select a BP sampling mode from the BP sampling mode list.<br />
7.2.6 Setting BP Triggering Mode<br />
You can set the BP triggering mode to Square wave or QRS in the<br />
Exercise ECG Setting window.<br />
7.2.7 Setting Auto Printing<br />
Select Auto print to print ECG reports automatically.<br />
7.3 Entering New Patient Information<br />
If the patient is a new one,<br />
1. Click on the New Patient button on the main screen (Figure 6-1) to display<br />
the Patient Information window, and then enter the patient information. The operation steps<br />
are the same as those of resting ECG. For details, refer to Section 6.3, “Entering New Patient<br />
Information”.<br />
NOTE:<br />
1) Patient ID and age must be entered.<br />
2) Please enter the correct patient age which has direct relationship with the<br />
calculation of the target heart rate.<br />
- 91 -
SE-1010 PC ECG User <strong>Manual</strong><br />
Operation Instructions for Exercise ECG<br />
2. Select Exercise ECG in the Patient information window.<br />
3. Click on OK in the Patient information window to open the Exercise ECG Setting<br />
window. After setting the parameters, click on the OK button to open the pre-sampling<br />
screen. For details, please refer to Section 7.2, “Selecting a Patient Record to Start a New<br />
Test”.<br />
7.4 Pre-sampling ECG<br />
Figure 7-1 Pre-Sampling Screen<br />
Click on Pretest/Exercise/Recovery to enter the relevant phase.<br />
- 92 -
SE-1010 PC ECG User <strong>Manual</strong><br />
Operation Instructions for Exercise ECG<br />
1. Select a display mode from the display mode pull-down list .<br />
2. Select a gain from the gain pull-down list .<br />
3. Select a speed from the speed pull-down list .<br />
4. Select a lowpass filter from the lowpass filter pull-down list .<br />
7.5 Pretest Phase<br />
Click on Print to print the wave of 10 seconds before you click on Print.<br />
Click on Keep, the system will keep staying in the current phase, and the current speed and slope<br />
will also be kept until you click on Keep again.<br />
Click on Next, the system will enter next phase/stage.<br />
NOTE:<br />
1. If the test time exceeds 40 minutes, the system will enter the monitoring status. Data<br />
will not be saved, analyzed or printed any more.<br />
2. The length of the pretest phase is not fixed, but it should be no less than 15 seconds.<br />
3. The pretest phase report will be printed at the fourteenth second.<br />
When the tracings are satisfying and you have specified the desired settings, you can start the<br />
pretest.<br />
- 93 -
SE-1010 PC ECG User <strong>Manual</strong><br />
Operation Instructions for Exercise ECG<br />
7.5.1 Viewing the Heart Rate and the Blood Pressure<br />
1. View the heart rate in the heart rate field . The middle number is the current<br />
heart rate, and the right number is the target heart rate.<br />
The symbol<br />
shows the percentage of the current heart rate to the target<br />
heart rate, and the blue part indicates the current heart rate.<br />
NOTE: If the current heart rate exceeds the target heart rate, the hint The current HR<br />
has exceeded the target HR! will appear on the sampling screen and the<br />
background color of the heart rate field will change from white to yellow.<br />
2. View the blood pressure in the BP field . The left number is the systolic<br />
pressure, and the right number is the diastolic pressure. The displayed blood pressure will be<br />
updated every set time period. Clicking on the BP button can update the displayed blood<br />
pressure manually.<br />
Double-click on the BP field on the ECG sampling screen to open the following dialog box,<br />
and then enter the blood pressure manually. If you set the BP sampling mode to <strong>Manual</strong>ly<br />
Enter BP in the Exercise ECG Setting window, clicking on the BP button can also open the<br />
following dialog box.<br />
- 94 -
SE-1010 PC ECG User <strong>Manual</strong><br />
Operation Instructions for Exercise ECG<br />
NOTE: If the systolic pressure or the diastolic pressure exceeds the normal BP<br />
range, the hint The systolic/diastolic BP has exceeded the normal range!<br />
will appear on the sampling screen and the background color of the BP field<br />
will change from white to yellow.<br />
7.5.2 Viewing Other Information<br />
1. If a treadmill is used, view other information such as the stage time, exercise time, total time,<br />
PVC/min, speed/slope, and Max ST/Min ST.<br />
2. If an ergometer is used, view other information such as the stage time, exercise time, total<br />
time, power/RPM, and Max ST/Min ST.<br />
NOTE: Total time is counted from the beginning of the pretest phase to the end of the<br />
exercise test.<br />
7.5.3 Editing the Waveform<br />
1. Click on the Freeze button to freeze waves on the current screen, and the Wave review<br />
window pops up.<br />
- 95 -
SE-1010 PC ECG User <strong>Manual</strong><br />
Operation Instructions for Exercise ECG<br />
Click on the Print button to print the current waveform.<br />
Click on Exit to return to the ECG sampling screen.<br />
2. Click on the Comment button to display the Comment dialog box. Enter the comment in the<br />
Comment dialog box. Click on the OK button, and the comment will be displayed on the<br />
ECG waves on the analysis screen.<br />
3. Click on the Template button, and the average waves of 12 leads and the calibration lines<br />
will be displayed. The average waves will be updated every 10 seconds. Right-click on the<br />
average wave field to display the lead group menu, and then you can select other leads.<br />
Select Compare to compare the current ST segments with the average beats of the sampled<br />
data in the first stage of the pretest phase. Double-click on the average wave of a lead, the<br />
amplified average wave of the lead and the calibration lines will be displayed. You can drag<br />
the calibration lines on the wave. The average wave will be updated every 10 seconds.<br />
- 96 -
SE-1010 PC ECG User <strong>Manual</strong><br />
Operation Instructions for Exercise ECG<br />
4. Click on the ST Trend button to display the ST trend. Right-click on the ST trend field to<br />
display the lead group menu, and then you can select other leads.<br />
7.5.4 Printing the Pretest Report<br />
1. The pretest report will be printed automatically 14 seconds after the beginning of the pretest<br />
phase.<br />
2. Or, you can click on the Print button to print the pretest report.<br />
7.6 Exercise Phase<br />
1. Instruct the patient to use the treadmill/ergometer. Then click on the Exercise button to enter<br />
the exercise phase. Or, the system will enter the exercise phase automatically after reaching<br />
the set pretest time.<br />
2. View the heart rate and BP of the patient. For details, please refer to Section 7.5.1, “Viewing<br />
the Heart Rate and the Blood Pressure”.<br />
NOTE: When the current heart rate exceeds the target heart rate, click on the<br />
Recovery button to enter the recovery phase and observe the waveforms.<br />
3. View other information. For details, please refer to Section 7.5.2, “Viewing Other<br />
Information”.<br />
4. Edit the waveform. For details, please refer to Section 7.5.3, “Editing the Waveform”.<br />
5. Click on the Print button to print the exercise report.<br />
6. The system will enter the next stage of the exercise phase automatically after the set time of<br />
this stage is over. Or, click on the Exercise or Next button to enter the next stage of the<br />
exercise phase manually.<br />
- 97 -
SE-1010 PC ECG User <strong>Manual</strong><br />
Operation Instructions for Exercise ECG<br />
7. Click on the Keep button and the system enters the Keep state. The hint Keep will be<br />
displayed in the speed/power field. The Next button becomes unavailable. In this state, the<br />
system will not follow the previous settings to change the speed and grade of the treadmill,<br />
but keep the current speed and grade until this button is pressed again.<br />
7.7 Recovery Phase<br />
1. When the current heart rate exceeds the target heart rate, click on the Recovery button to<br />
enter the recovery phase. Or, the system will enter the recovery phase automatically after the<br />
set exercise test time is over.<br />
2. View the heart rate and BP of the patient. For details, please refer to Section 7.5.1, “Viewing<br />
the Heart Rate and the Blood Pressure”.<br />
3. View other information. For details, please refer to Section 7.5.2, “Viewing Other<br />
Information”.<br />
4. Edit the waveform. For details, please refer to Section 7.5.3, “Editing the Waveform”.<br />
5. Click on the Print button to print the recovery report.<br />
6. The system will enter the next stage of the recovery phase automatically after the set time of<br />
this stage is over. Or, click on the Recovery button or click on the Next button to enter the<br />
next stage of the recovery phase manually.<br />
7.8 Exiting the Exercise Test<br />
During the exercise test, click on the STOP button to display the following dialog box. Enter the<br />
reasons for termination in the dialog box or select a reason from the pull-down list. Then click on<br />
the OK button to open the analysis screen. The reason for termination will be displayed in the<br />
summary report.<br />
- 98 -
SE-1010 PC ECG User <strong>Manual</strong><br />
Operation Instructions for Exercise ECG<br />
7.9 About Analysis Screen<br />
7.9.1 About Summary Screen<br />
1. Click on Summary to open the Summary screen.<br />
Figure 7-2 Summary Screen<br />
Click on the Measure button, click on one point on the wave, and then drag the mouse to<br />
another point. The distance, amplitude difference and heart rate between the two points will<br />
be displayed.<br />
2. If a treadmill is used, view the stage, stage time, speed, slope, workload (METs), BP, HR,<br />
PVC, Max ST and Min ST in every stage of the exercise test in the list.<br />
If an ergometer is used, view the stage, stage time, power, BP, HR, PVC, Max ST and Min ST<br />
in every stage of the exercise test in the list.<br />
3. Double-click on a stage, the scroll bar of the wave field will be scrolled to the ECG waves of<br />
the stage.<br />
4. Right-click on a wave, and then click on the pop-up Add Comment menu. Then you can<br />
enter the comment in the Comment dialog box. Click on the OK button, and the comment<br />
will be displayed on the wave. Right-click on the comment, and then you can click on the<br />
Delete Comment button to delete the comment.<br />
- 99 -
SE-1010 PC ECG User <strong>Manual</strong><br />
Operation Instructions for Exercise ECG<br />
5. Enter diagnosis results in the Diagnosis textbox, and then click on Save.<br />
6. Or, double-click on the necessary results required to be added in the Glossary textbox, the<br />
selected results will be displayed in the Diagnosis textbox, and then click on the Save button.<br />
7. Click on the Preview button to display the Print Set window.<br />
Select Summary Report or Current Wave. Click on the OK button to open the preview screen.<br />
Figure 7-3 Summary Report<br />
- 100 -
SE-1010 PC ECG User <strong>Manual</strong><br />
Operation Instructions for Exercise ECG<br />
Figure 7-4 Current Wave Report<br />
NOTE: The diagnosis result is displayed in the diagnosis field of the summary report.<br />
7.9.2 About ST Analysis Screen<br />
1. Click on the ST analysis button to display the ST analysis screen.<br />
Figure 7-5 ST Analysis Screen<br />
- 101 -
SE-1010 PC ECG User <strong>Manual</strong><br />
Operation Instructions for Exercise ECG<br />
2. Click on Pretest to display 12-lead ST analysis waves of the pretest phase.<br />
3. Click on Exercise to display 12-lead ST analysis waves of the exercise phase.<br />
4. Click on Recovery to display 12-lead ST analysis waves of the recovery phase.<br />
5. Click on Previous Page/Next Page to display 12-lead ST analysis waves of every 10<br />
seconds.<br />
6. Click on Max ST Ascend to display the Max ST ascending waves.<br />
7. Click on Max ST Descend to display the Max ST descending waves.<br />
8. You can double-click on the wave to select the PostJ value on the ST analysis screen.<br />
Double-click on the wave of a lead, the amplified wave of the lead and the calibration lines<br />
will be displayed. Drag the calibration lines on the wave, and then the ST value will change.<br />
Click on the OK button, and then the Save button becomes available. Click on Save to save<br />
the modifications.<br />
- 102 -
SE-1010 PC ECG User <strong>Manual</strong><br />
Operation Instructions for Exercise ECG<br />
7.9.3 About All View Review Screen<br />
1. Click on the ALL View button to display the ALL View screen.<br />
Figure 7-6 All View Screen<br />
The ALL View screen displays the ECG wave of one lead throughout the whole test, and<br />
arrhythmia will be marked in red signs.<br />
2. Select a lead from the lead pull-down list to view the ECG wave of the lead.<br />
3. Select a gain from the gain pull-down list .<br />
- 103 -
SE-1010 PC ECG User <strong>Manual</strong><br />
Operation Instructions for Exercise ECG<br />
4. Click on one point on the wave and drag the mouse to another point, and then the selected<br />
range will be marked with two red lines.<br />
Then click on the Zoom in button to display the amplified ECG segment.<br />
Drag the bottom scroll bar to view the whole amplified ECG waves.<br />
5. The ALL View screen displays ECG waves of 450 seconds (50 seconds in one line and at<br />
least 9 lines in one page). ECG waves exceeding 450 seconds can be reviewed by clicking on<br />
the Previous Page/Next Page button.<br />
- 104 -
SE-1010 PC ECG User <strong>Manual</strong><br />
Operation Instructions for Exercise ECG<br />
7.9.4 About Trend Screen<br />
Click on the Trend button to display the STj Trend screen.<br />
Figure 7-7 STj Trend Screen<br />
You can observe 12-lead trend of the exercise test on the STj Trend screen.<br />
The horizontal coordinate indicates test time, but the unit of the vertical coordinate is different on<br />
different trend screens.<br />
Click on Zoom In or Zoom Out button to adjust the value on the vertical coordinate.<br />
- 105 -
SE-1010 PC ECG User <strong>Manual</strong><br />
Operation Instructions for Exercise ECG<br />
7.9.5 About ECG Strip Screen<br />
Click on the ECG Strip button to display the ECG Strip screen.<br />
Figure 7-8 ECG Strip Screen<br />
1. Click on Pretest to display 12-lead strip waves of the pretest phase.<br />
2. Click on Exercise to display12-lead strip waves of the exercise phase.<br />
3. Click on Recovery to display12-lead strip waves of the recovery phase.<br />
4. Click on Previous Page/Next Page to display strip waves of every 30 seconds.<br />
7.9.6 Previewing ECG Reports<br />
Click on the Preview button to preview an ECG report.<br />
- 106 -
SE-1010 PC ECG User <strong>Manual</strong><br />
Operation Instructions for Exercise ECG<br />
7.9.7 Printing ECG Reports<br />
You can print an ECG report by clicking on the Print button. For details, please refer to Section<br />
6.6.10, “Printing ECG reports”.<br />
7.9.8 Saving ECG Reports<br />
You can save an ECG report by clicking on the Report Save button. For details, please refer to<br />
Section 6.6.11, “Saving ECG reports”.<br />
7.9.9 Exiting the Analysis Screen<br />
Click on the Exit button on the analysis screen to return to the previous screen.<br />
- 107 -
SE-1010 PC ECG User <strong>Manual</strong><br />
Processing Patient Records<br />
Chapter 8 Processing Patient Records<br />
Click on the Data Manager button on the main screen (Figure 6-1) to open the Data Manager<br />
screen (Figure 8-1).<br />
Figure 8-1 Data Manager Screen<br />
Click on a patient record in the patient information list, and then all the examination records of<br />
the patient will be displayed in the examination record list.<br />
NOTE: Click on an option in the patient information list, such as ID, name, etc, and then<br />
all the patient records will be arranged in sequence.<br />
8.1 Searching Patient Records<br />
1. Select a search item in the pull-down list on the Data Manager screen.<br />
Then all the patient records which meet the search condition are listed in the patient<br />
information list.<br />
- 108 -
SE-1010 PC ECG User <strong>Manual</strong><br />
Processing Patient Records<br />
2. Or, select a search item in the pull-down list , enter the<br />
corresponding information in the right textbox, and then click on the Search button. All the<br />
patient records which meet the conditions will be displayed in the patient information list.<br />
3. Or, click on Advanced Search to display the Search Condition window, and then enter the<br />
search conditions. Click on the Search button, and all the patient records which meet the<br />
conditions will be displayed in the patient information list.<br />
NOTE: User-defined 1 and User-defined 2 are unavailable before they are set in the<br />
Basic Information window (Figure 9-1).<br />
- 109 -
SE-1010 PC ECG User <strong>Manual</strong><br />
Processing Patient Records<br />
4. Or, you can click on Physician or Examination , and then choose<br />
the doctor name or examination types, all the patient records which meet the conditions will<br />
be displayed in the patient information list.<br />
5. Select The patients with no examination, and then the patient records which are registered<br />
but not examined, will appear in the patient information list.<br />
8.2 Modifying Patient Records<br />
Click on a patient record in the patient information list on the Data Manager screen, and then<br />
click on the Modify button to display the Patient Information window. Then you can modify the<br />
information of the patient in the Patient Information window. If the patient has more than one<br />
record, the modification is only for the selected record. Click on the OK button to save these<br />
modifications.<br />
- 110 -
SE-1010 PC ECG User <strong>Manual</strong><br />
Processing Patient Records<br />
8.3 Deleting Records<br />
NOTE: The deletion of records is permanent, and you can’t restore the records deleted.<br />
Please use this operation cautiously.<br />
8.3.1 Deleting Patient Records<br />
Click on a patient record in the patient information list on the Data Manager screen, and then<br />
click on the Delete button to delete the patient record from the patient information list. At the<br />
same time, all the examination records of the patient will be deleted.<br />
To select multiple patient records simultaneously, you can click on the first patient record to be<br />
deleted in the patient information list and press the Shift button on the keyboard, and then click<br />
on the last patient record to be deleted in the patient information list. You can also press the Ctrl<br />
button on the keyboard and then select the patient records one by one. After selecting all the<br />
patient records to be deleted, click on the Delete button to delete all the patient records selected<br />
from the patient information list.<br />
8.3.2 Deleting Examination Records of a Patient<br />
The operation methods of deleting examination records are similar to those of deleting patient<br />
records. The deletion of an examination record cannot delete the corresponding patient<br />
information.<br />
8.4 Selecting a Patient Record<br />
Click on a patient record in the patient information list on the Data Manager screen and click on<br />
the Select button to display the Patient Information window. Then click on the OK button, the<br />
system will sample ECG data of the patient.<br />
- 111 -
SE-1010 PC ECG User <strong>Manual</strong><br />
Processing Patient Records<br />
8.5 Merging Examination Records<br />
Click on one or more examination records in the examination record list on the Data Manager<br />
screen, and then click on the Merge/Assign button to display the Patient Information window.<br />
Input a patient ID and click on the OK button to assign the examination record selected to this<br />
patient.<br />
8.6 Comparing Two Examination Records<br />
Press the Ctrl button on the keyboard and select two examination records of resting ECG, and<br />
then click on the Compare button to display the Compare window.<br />
NOTE: Please select two records to compare only in Resting ECG.<br />
You can select the lead, speed and gain to be compared from the lead pull-down list. Then the<br />
waves of the selected lead, speed and gain of the two examination records will be displayed in the<br />
window. You can drag the scroll bar on the bottom to view all the waves of the selected lead.<br />
When Add is selected, the waves of the two examination records will be displayed in the window.<br />
The black wave is the original wave and the blue wave is the compared wave. You can drag the<br />
scroll bar on the bottom to view all the waves of the two examination records.<br />
- 112 -
SE-1010 PC ECG User <strong>Manual</strong><br />
Processing Patient Records<br />
When Template is selected, the templates of the two examination records will be displayed in the<br />
window.<br />
You can press Print button to print the current window.<br />
Click on the Ruler button on the Compare window. Click on one point on the wave, and then<br />
drag the mouse to another point. The distance, amplitude difference and heart rate between the<br />
two points will be displayed.<br />
- 113 -
SE-1010 PC ECG User <strong>Manual</strong><br />
Processing Patient Records<br />
8.7 Importing ECG Data into the Data Manager Screen<br />
Click on the Import button on the Data Manager screen (Figure 8-1) to open the following<br />
window.<br />
Select the data to be imported and click on the Select button to import the data into the Data<br />
Manager screen.<br />
To import multiple examination records simultaneously, you can click on the first examination<br />
record to be imported and press the Shift button on the keyboard, and then click on the last<br />
examination record to be imported. You can also press the Ctrl button on the keyboard and then<br />
select the examination records one by one. After selecting all the examination records to be<br />
imported, click on the Select button to import all the examination records into the Data Manager<br />
screen. If all the data are successfully imported into the screen, the following hint will pop up.<br />
- 114 -
SE-1010 PC ECG User <strong>Manual</strong><br />
Processing Patient Records<br />
If the data to be imported exists on the Data Manager screen, the following hint will pop up.<br />
If you press the Yes button, the imported record will replace the file with the same name.<br />
If you press the No button, the system will hint you a failure operation occurs.<br />
NOTE: Only ECG data in DAT format can be imported.<br />
- 115 -
SE-1010 PC ECG User <strong>Manual</strong><br />
Processing Patient Records<br />
8.8 Exporting ECG Data from the Data Manager Screen<br />
Select examination records and click on the Export button on the Data Manager screen (Figure<br />
8-1) to open the following window. Assign the file name, saving path and export file format (SCP,<br />
FDA-XML, DICOM, dat, pdf), and then click on the OK button to export the data into the<br />
selected path. At the same time, the patient information of these records will be exported.<br />
When the export is successful, the hint information will be displayed.<br />
If you select SCP and Compress, the compressed SCP file will be exported.<br />
NOTE: Only if the export file format is set to SCP, can the Compress check box be<br />
displayed.<br />
If you select pdf, the pdf file will be exported only for Resting ECG and Exercise ECG. You need<br />
to enter the analysis screen to export pdf files for HRV ECG, VCG, TVCG and SAECG.<br />
- 116 -
SE-1010 PC ECG User <strong>Manual</strong><br />
Processing Patient Records<br />
8.9 Viewing an Examination Record<br />
Click on a patient record in the patient information list, and then all the records of the patient will<br />
be displayed in the examination record list.<br />
Select All records and all the examination records will be displayed in the examination record<br />
list.<br />
Double-click on an examination record in the examination record list on the Data Manager<br />
screen (Figure 8-1). If it is a Resting ECG record, the Resting ECG analysis screen will pop up. If<br />
it is an HRV record, the HRV analysis screen will pop up. If it is a VCG/TVCG/SAECG record,<br />
the VCG/TVCG/SAECG analysis screen will pop up. If it is an Exercise ECG record, the<br />
Exercise ECG analysis screen will pop up. Then you can do the corresponding operation to the<br />
examination record. For details, please refer to Section 6.6, “Analyzing ECG Data” and Section<br />
7.9, “About Analysis Screen”.<br />
- 117 -
SE-1010 PC ECG User <strong>Manual</strong><br />
Configuring the System<br />
Chapter 9 Configuring the System<br />
Click on the System Setting button on the main screen (Figure 6-1) to open the System Setting<br />
window.<br />
There are eight tabs in the System Setting window: Basic Information, Sample Setting, Device,<br />
Print Setting, Output File, Data Maintenance, GDT and Others.<br />
After you modify some information in the System Setting window,<br />
1. Click on the OK button to save these modifications and exit.<br />
2. Or, click on the Cancel button to cancel these modifications and exit.<br />
9.1 Basic Information Setup<br />
Click on the Basic Information tab in the System Setting window to display the Basic<br />
Information window.<br />
Figure 9-1 Basic Information Setup Window<br />
- 118 -
SE-1010 PC ECG User <strong>Manual</strong><br />
Configuring the System<br />
9.1.1 Setting Basic Information<br />
Enter information in the Hospital Name, User-Defined 1 or User-Defined 2 textbox in the Basic<br />
Information window (Figure 9-1).<br />
When you fill in the User-Defined 1/2 textbox, the corresponding items in the Patient<br />
Information window will change into what is filled.<br />
For example, when you enter Allergies in the User-Defined 1 textbox, and enter Other in the<br />
User-Defined 2 textbox in the Basic Information window (Figure 9-1), the corresponding items<br />
in the Patient Information window will be Allergies and Other respectively.<br />
(a)<br />
(b)<br />
- 119 -
SE-1010 PC ECG User <strong>Manual</strong><br />
Configuring the System<br />
NOTE: Click on the New Patient button on the main screen to open the Patient<br />
Information window as the above figure shows.<br />
Select Memory in Basic Information window, the content of User-Defined 1 in the Patient<br />
Information window will be saved. For example, when you enter None in the Allergies textbox<br />
of picture (a), and enter None in the Other textbox of picture (b), click OK and open the Patient<br />
Information window again, you will find that None is in Allergies textbox and the Other<br />
textbox is empty. If Memory is not selected, the Allergies textbox and the Other textbox are all<br />
empty.<br />
9.1.2 Setting ID Mode<br />
Set ID Create Type to Automatically, <strong>Manual</strong>ly or Accumulatively.<br />
When ID Create Type is set to Automatically, the patient ID can be automatically generated<br />
according to the examination date.<br />
When ID Create Type is set to <strong>Manual</strong>ly, you should enter the patient ID manually in the<br />
Patient Information window.<br />
When ID Create Type is set to Accumulatively, the patient ID can be increased by one<br />
automatically. You need to set the format and the starting number for ID.<br />
9.1.3 Setting Language<br />
You can set the language to Chinese or English.<br />
NOTE: To validate the language setup, after setting, you should restart the system.<br />
9.1.4 Specifying the Storage Path of the ECG Data<br />
Click on the Browse button in the Basic Information window (Figure 9-1) to assign the storage<br />
path.<br />
- 120 -
SE-1010 PC ECG User <strong>Manual</strong><br />
Configuring the System<br />
9.2 Sample Setup<br />
Figure 9-2 Sample Setup Window<br />
9.2.1 Setting Filter<br />
Set filters in the Sample Setting window (Figure 9-2).<br />
- 121 -
SE-1010 PC ECG User <strong>Manual</strong><br />
Configuring the System<br />
DFT Filter<br />
DFT filter greatly reduces the baseline fluctuations without affecting ECG signals. There are two<br />
options: Weak and Strong.<br />
NOTE: If DFT filter is set to Strong, the ECG data displayed on the screen is 0.85<br />
seconds later than the real-time ECG data; if DFT filter is set to Weak, the ECG<br />
data displayed on the screen is 1.8 seconds later than the real-time ECG data.<br />
EMG Filter<br />
EMG filter suppresses the disturbance caused by strong muscle tremor. The cutoff frequency can<br />
be set to 25Hz, 35Hz, or 45Hz.<br />
Lowpass Filter<br />
Lowpass filter restricts the bandwidth of input signals. The cutoff frequency can be set to 75Hz,<br />
100Hz or 150Hz. All the input signals whose frequency is higher than the setting cutoff<br />
frequency will be attenuated.<br />
AC Filter<br />
AC filter suppresses AC interference without attenuating or distorting ECG signals. There are two<br />
options: 50Hz and 60Hz.<br />
9.2.2 Setting Sampling Time<br />
You can enter the normal ECG sampling time manually. The range is 10~600s.<br />
You can enter the HRV sampling time manually. The range is 1~15min.<br />
You can enter the sequence mode time manually. The range is 10~900s.<br />
9.2.3 Others<br />
♦ Lead Sequence<br />
You can set Lead sequence to Standard or Cabrera, and the lead groups are displayed or<br />
printed in the corresponding sequence listed in the following table.<br />
Lead Sequence Lead group 1 Lead group 2 Lead group 3 Lead group 4<br />
Standard І, II, ІІІ aVR, aVL, aVF V1, V2, V3 V4, V5, V6<br />
Cabrera aVL, І, -aVR II, aVF, ІІІ V1, V2, V3 V4, V5, V6<br />
- 122 -
SE-1010 PC ECG User <strong>Manual</strong><br />
Configuring the System<br />
♦ HR Calculation<br />
You can set the HR calculation to one of the 12 standard leads: І, ІІ, ІІІ, aVR, aVL, aVF, V1, V2,<br />
V3, V4, V5, or V6.<br />
♦ HR Analysis Lead<br />
You can set the HR Analysis Lead to one of the 12 standard leads: І, ІІ, ІІІ, aVR, aVL, aVF, V1,<br />
V2, V3, V4, V5, or V6.<br />
9.2.4 Selecting Auto Printing When Detecting Arrhythmia<br />
When Auto printing when arrhythmia is selected, if Arrhythmia ECG data, including<br />
Ventricular Tachycardia, 5>PVCS>=3, Paired PVCS, Bigeminy, Trigeminy, R ON T, single PVC<br />
and Missed Beat, is detected during the sampling course, printing will be triggered automatically.<br />
9.2.5 Setting Background Grid<br />
Select Background Grid, the grid on the background of the ECG sampling screen will be<br />
displayed.<br />
Deselect Background Grid, the grid on the background of the ECG sampling screen will not be<br />
displayed.<br />
9.2.6 Setting Anti-aliasing<br />
Select Anti-aliasing, the system will automatically make the waveform smooth.<br />
Deselect Anti-aliasing, the system will not make the waveform smooth.<br />
9.2.7 Selecting QRS Voice<br />
If you select QRS Voice, there will be a beep when an R wave is detected.<br />
9.2.8 Selecting Sequence Mode When Sampling<br />
When Sequence Mode When Sampling is selected, groups of waves will be displayed in<br />
succession.<br />
- 123 -
SE-1010 PC ECG User <strong>Manual</strong><br />
Configuring the System<br />
9.3 Device Setup<br />
Figure 9-3 Device Setup Window<br />
9.3.1 Setting Sampling Device<br />
Select a sample device from the Sampling Device pull-down list<br />
in the Device window (Figure 9-3).<br />
- 124 -
SE-1010 PC ECG User <strong>Manual</strong><br />
Configuring the System<br />
When DX12 wireless sampling box is selected, you can click on the Address button to view the<br />
receiver address. You can match the transmitter and receiver based on the address<br />
from the Sampling Device pull-down list.<br />
9.3.2 Setting Device Type/Mode<br />
Select a device type/mode from the Device Type/Device pull-down list<br />
.<br />
9.3.3 Setting COM Port of Sample/Treadmill/BP Monitor<br />
Select the COM port for sampling/treadmill/BP monitor from the corresponding pull-down lists<br />
. To guarantee the system’s proper operation, one of the<br />
preconditions is to ensure that the connection between the peripheral equipment and the PC<br />
accords with the setup in the software. For example, if you set the treadmill port to COM2, you<br />
should connect the treadmill to COM2 of the PC; if you set the BP monitor port to COM3, you<br />
should connect the BP monitor to COM3 of the PC.<br />
9.3.4 Setting a Protocol<br />
Select a protocol from the Protocol pull-down list<br />
also add a new protocol or modify a protocol.<br />
. You can<br />
- 125 -
SE-1010 PC ECG User <strong>Manual</strong><br />
Configuring the System<br />
9.3.4.1 Creating a New Protocol<br />
Click on the New button in the Device window (Figure 9-3) to enter the Edit the protocol<br />
window.<br />
1. Enter the protocol name in the Protocol Name textbox.<br />
2. Right-click on the grid to display the menu , click on Add Stage, and enter<br />
information in the grid.<br />
3. Set the auto printing time of 12-lead ECG reports in the 12-lead ECG Report (First) and<br />
12-lead ECG Report (Repeat) columns.<br />
4. Set the auto BP sampling time in the BP (First) or BP (Repeat) columns.<br />
5. After entering all the information, click on the OK button.<br />
- 126 -
SE-1010 PC ECG User <strong>Manual</strong><br />
Configuring the System<br />
9.3.4.2 Modifying a Protocol<br />
1. Select a protocol from the Protocol pull-down list, and then click on the Modify button to<br />
display the Edit Protocol window.<br />
2. Double-click on an option of the phase row to be modified in the protocol list, and the<br />
pull-down list<br />
the corresponding grid.<br />
will be displayed. Select a phase and it will be displayed in<br />
3. Double-click on the grid to be modified, input new information, and click on any other grid<br />
to save the information.<br />
4. Right-click on the grid to display the menu , click on Add Stage, and enter<br />
information in the grid.<br />
5. Set the auto printing time of 12-lead ECG reports in the 12-lead ECG Report (First) and<br />
12-lead ECG Report (Repeat) columns.<br />
6. Set the auto BP sampling time in the BP (First) or BP (Repeat) columns.<br />
7. Click on the OK button to confirm, or click on the Cancel button to cancel modifications.<br />
- 127 -
SE-1010 PC ECG User <strong>Manual</strong><br />
Configuring the System<br />
9.3.4.3 Deleting a Protocol<br />
Select a protocol from the Protocol pull-down list, and then click on the Delete button to delete<br />
the protocol.<br />
NOTE: You can’t delete default protocols Bruce and IsoPower.<br />
9.3.4.4 Restoring the default protocol<br />
Click on the Restore the default button to resume the default protocol.<br />
9.3.5 Advanced Setup<br />
Click on Advanced Setting, input the correct password in the pop-up textbox, and then click on<br />
the OK button.<br />
9.3.5.1 Setting Access Network<br />
Click on the Access Network Setting tab to display the following window.<br />
- 128 -
SE-1010 PC ECG User <strong>Manual</strong><br />
Configuring the System<br />
Only if Enable System Integration is selected, can Device ID and Output Path be set.<br />
Device ID and Output Path should be set to the same values as those of Smart ECG Net.<br />
Otherwise, data of this system can not be uploaded to Smart ECG Net system normally.<br />
If the System Integration is activated, the system will save two copies of data, one is saved to the<br />
data path of the system, and the other is saved to the output path, the default of which is system<br />
disk: \SENData\.<br />
9.3.5.2 Setting Barcode<br />
Click on the Barcode Setting tab to display the following window.<br />
NOTE: You can make related settings only for two-dimensional bar code readers in the<br />
Barcode Setting window.<br />
Enter the start and end addresses, the male and female codes and the device port, and then click<br />
on the OK button confirm.<br />
If the bar code reader cannot be automatically detected, you can make related settings as the<br />
following procedures show:<br />
1. Connect the bar code reader to the PC<br />
2. Click on start, right-click on My Computer, and then select Manage in the pop-up menu to<br />
display the Computer Management screen.<br />
- 129 -
SE-1010 PC ECG User <strong>Manual</strong><br />
Configuring the System<br />
3. Click on Device Manager on the Computer Management screen, and then click on<br />
Human Interface Devices to view port information.<br />
4. In the Barcode Setting window, set Device to the port you view on the Computer<br />
Management screen, and then click on the OK button to confirm.<br />
5. Restart the PC ECG software.<br />
- 130 -
SE-1010 PC ECG User <strong>Manual</strong><br />
Configuring the System<br />
9.4 Print Setup<br />
Figure 9-4 Print Setting Window<br />
9.4.1 Choosing Patient Information to be Printed<br />
The default items of the patient information are Department, Room No and Physician. You can<br />
also select the additional information, such as FirstName/LastName, Date of Birth, height, weight,<br />
BP, race, medication, Pacemaker, Technician and Ref-Physician. The patient information items<br />
you selected will be displayed in the Patient Information window and the report printed out.<br />
- 131 -
SE-1010 PC ECG User <strong>Manual</strong><br />
Configuring the System<br />
If you select First Name/Last Name, the Patient Name textbox in the Patient Information<br />
window will change into the First Name and Last Name textboxes.<br />
If you select D.O.B, the D.O.B textbox appears in the Patient Information window, and the Age<br />
textbox becomes unavailable.<br />
9.4.2 Choosing Diagnosis Information to be Printed<br />
The diagnosis information is displayed on the preview screen and in the report printed out.<br />
Position Mark should be selected together with Average template, because the position mark is<br />
only used to mark the position of ECG waves in the average template. Select Auto Diagnosis to<br />
display diagnosis results on the preview screen and in the report printed out. Select Auto<br />
Measure to display values of parameters. Select RV5+SV1&RV6/SV2 to display values of<br />
RV5+SV1&RV6/SV2. Select Minnesota code to display Minnesota code.<br />
- 132 -
SE-1010 PC ECG User <strong>Manual</strong><br />
Configuring the System<br />
9.4.3 Setting Rhythm Lead<br />
The rhythm lead can be one of 12 standard leads: І, ІІ, ІІІ, aVR, aVL, aVF, V1, V2, V3, V4, V5,<br />
or V6.<br />
When the printing mode is set to 3×4+1 or 6×2+1, the rhythm lead selected in the Rhythm1 list<br />
box will be printed out.<br />
When the printing mode is set to 3×4+3, 3 rhythm leads selected in the Rhythm1, Rhythm2 and<br />
Rhythm3 list boxes will be printed out.<br />
9.4.4 Defining Printing Format<br />
1. The paper form can be set to landscape or portrait.<br />
2. Set Sequence to sequential or synchronous.<br />
When Sequence is set to sequential, the lead group is printed one by one in a certain<br />
sequence. The start time of a lead group is just the end time of the previous lead group.<br />
When Sequence is set to synchronous, all leads are printed simultaneously. The start time of<br />
each group is the same.<br />
3. Set the paper size to A4 or Letter.<br />
4. Set the Report Hint to Report confirmed by: or Unconfirmed Report.<br />
5. Set the Baseline Adjustment to OFF, Horizontal or Auto.<br />
6. Select Auto gain change, and the gain will be changed automatically and Auto baseline will<br />
be changed to Horizontal automatically.<br />
7. Select Color and the background grid of report will be printed in color.<br />
Deselect Color, and the background grid of report won’t be printed in color.<br />
NOTE: If the printing color is set to color, but a black-and-white printer is used, the<br />
report printed will be illegible.<br />
8. Select Background grid, and the background grid will be printed in the report.<br />
Deselect Background grid, and the background grid won’t be printed in the report.<br />
- 133 -
SE-1010 PC ECG User <strong>Manual</strong><br />
Configuring the System<br />
9.5 Output File Setup<br />
Figure 9-5 Output File Setup Window<br />
9.5.1 File Naming<br />
The default file name is Exam Time-ID, and a “-” exists between every two fields. You can also<br />
modify the file name manually, such as Name-ID-Exam Time. Each field includes ID, name,<br />
exam time, age and sex items, you can randomly use these items to combine a file name, but you<br />
should select at least one item as a file name.<br />
NOTE: When you select FirstName/LastName in the Print Setting window, name will<br />
be divided into two parts.<br />
When the file name is empty, the system will give hint information.<br />
- 134 -
SE-1010 PC ECG User <strong>Manual</strong><br />
Configuring the System<br />
9.5.2 Setting PDF/JPG<br />
Select Output PDF when making diagnosis, the system will automatically output files in PDF<br />
format when making diagnoses.<br />
Select Output JPG when making diagnosis, the system will automatically output files in JPG<br />
format when making diagnoses.<br />
9.5.3 Setting SCP<br />
Select Data Compression, the system will automatically output files in SCP format of data<br />
compression.<br />
Deselect Data Compression, the system will output files in SCP format without data<br />
compression.<br />
Select Output when sampling finishes, the system will automatically output files in SCP format<br />
when sampling finishes.<br />
Deselect Output when sampling finishes, the system will not output files in SCP format when<br />
sampling finishes.<br />
Select Output when making diagnosis, the system will automatically output files in SCP format<br />
when making diagnoses.<br />
Deselect Output when making diagnosis, the system will not output files in SCP format when<br />
making diagnoses.<br />
9.5.4 Setting FDA-XML<br />
Select Output when sampling finishes, the system will automatically output files in FDA-XML<br />
format when sampling finishes.<br />
Deselect Output when sampling finishes, the system will not output files in FDA-XML format<br />
when sampling finishes.<br />
Select Output when making diagnosis, the system will automatically output files in FDA-XML<br />
format when making diagnoses.<br />
Deselect Output when making diagnosis, the system will not output files in FDA-XML format<br />
when making diagnoses.<br />
- 135 -
SE-1010 PC ECG User <strong>Manual</strong><br />
Configuring the System<br />
9.5.5 Setting DICOM<br />
Select Output when sampling finishes, the system will automatically output files in DICOM<br />
format when sampling finishes.<br />
Deselect Output when sampling finishes, the system will not output files in DICOM format<br />
when sampling finishes.<br />
Select Output when making diagnosis, the system will automatically output files in DICOM<br />
format when making diagnoses.<br />
Deselect Output when making diagnosis, the system will not output files in DICOM format<br />
when making diagnoses.<br />
9.5.6 Specifying the Output Path<br />
Click on the … button in the Output File window (Figure 9-5) to assign the output path.<br />
9.6 Data Maintenance Setup<br />
Figure 9-6 Data Maintenance Window<br />
- 136 -
SE-1010 PC ECG User <strong>Manual</strong><br />
Configuring the System<br />
9.6.1 Database Rebuild<br />
You can rebuild the database to avoid losing data because of damaged data files. Click on the<br />
Rebuild Database button in the Data Maintenance window, and then you can select the path to<br />
rebuild database. You cannot enter the path manually.<br />
After rebuilding the path successfully, hint information will be displayed.<br />
9.6.2 Database Backup<br />
You can also make a backup for the data files to avoid your data files being damaged or missing.<br />
Click on the Begin backup button in the Data Maintenance window, and then you can select the<br />
path of data backup. You should select the path of a disk with enough space. Otherwise, the<br />
system will prompt you to change the path.<br />
If the Select Time in the Backup Setting window is selected, the system will back up the data<br />
files from the start time to the finish time. If the Select Time is not selected, the system will back<br />
up all the data files.<br />
- 137 -
SE-1010 PC ECG User <strong>Manual</strong><br />
Configuring the System<br />
Click on the OK button in the Backup Setting window, the system will begin backup. You can<br />
check the backup status according to the progress bar or you can stop backup at any times.<br />
The system will back up the data files for the latest time if you do not change the path.<br />
- 138 -
SE-1010 PC ECG User <strong>Manual</strong><br />
Configuring the System<br />
You can also set the reminded backup period to remind you back up the data files at any time.<br />
The default system reminded period is None, you can also select 7 days, 14 days, 30 days or you<br />
can define it manually.<br />
9.7 GDT Setup<br />
Figure 9-7 GDT Setup Window<br />
- 139 -
SE-1010 PC ECG User <strong>Manual</strong><br />
Configuring the System<br />
Select GDT to enable GDT features.<br />
Click on the Browse button, and then appoint the path to exchange files with EDP.<br />
Fill in the Input file name textbox to set command file name assigned by EDP to the PC ECG<br />
system.<br />
Fill in the Output file name textbox to set data file name that is used by the PC ECG system to<br />
transmit the result data to EDP.<br />
Enter ECG ID to set GDT ID assigned to the system which will be entered in field 8315 or 8316<br />
in the GDT protocol.<br />
Enter EDP ID to set GDT ID of the EDP system which will be entered in field 8315 or 8316 in<br />
the GDT protocol.<br />
Select Output GDT file when sampling stops, the system will automatically output GDT files<br />
when sampling stops.<br />
Select Output GDT file when making diagnoses, the system will automatically output GDT<br />
files when making diagnoses.<br />
9.8 Other Setup<br />
Figure 9-8 Other Setup Window<br />
- 140 -
SE-1010 PC ECG User <strong>Manual</strong><br />
Configuring the System<br />
9.8.1 Setting Unit and Color<br />
Set the height unit to cm, inch or mm.<br />
Set the weight unit to Kg, g or Pound.<br />
Set the BP unit to kPa or mmHg.<br />
Set the speed unit to Km/h or mph.<br />
Set the grade unit to % or degree.<br />
Set the time mode to 24Hour or 12Hour.<br />
Set the date mode to MM-DD-YYYY, DD-MM-YYYY OR YYYY-MM-DD.<br />
Set the color of the background, waves, grid (5mm), grid (1mm), mark and text. If you want to<br />
change a color, double-click on the color block to display the Color window, and then you can<br />
select your favorite color.<br />
Click on the Default button to restore the default colors.<br />
9.8.2 Setting System Password<br />
You can set a system password to avoid the system setting being modified. Click on the Set<br />
Password button in the Others window, enter the same password for twice, and then the system<br />
password is set successfully.<br />
After a successful password setting, you should have a correct password to enter the System<br />
Setting window. Otherwise, the system will give hint information to prevent your access.<br />
9.8.3 Setting Wave Width and Grid Width<br />
You can adjust Wave Width, Grid Width (5mm) and Grid Width (1mm) of report by using the<br />
up or down arrow. The adjustable range is: 1~5.<br />
NOTE: The width may vary with the type of printer.<br />
- 141 -
SE-1010 PC ECG User <strong>Manual</strong><br />
Configuring the System<br />
9.9 Modifying the Glossary<br />
Click on Edit Diagnosis Template from the Tool (F) pull-down list on the main screen (Figure<br />
6-1), and then the Edit Diagnosis Template window appears.<br />
1. Adding an item<br />
Enter a diagnosis item, such as aa in the textbox, and then click on the Add button. The added<br />
item will be displayed in the Edit Diagnosis Template window.<br />
- 142 -
SE-1010 PC ECG User <strong>Manual</strong><br />
Configuring the System<br />
2. Adding a subitem<br />
Click on the item you wanted to add a subitem, enter a diagnosis subitem, such as bb in the<br />
textbox, and then click on the Add button. The added subitem will be displayed under aa.<br />
3. Deleting an item<br />
Click on the item you wanted to delete from the Edit Diagnosis Template window, and then<br />
click on the Delete button to delete this item.<br />
4. Save the settings<br />
Click on the Save button to save these modifications.<br />
- 143 -
SE-1010 PC ECG User <strong>Manual</strong><br />
Hint Information<br />
Chapter 10 Hint Information<br />
Hint information and the corresponding causes provided by the system are listed as follows.<br />
Table 10-1 Hint Information and Causes<br />
Hint Information<br />
Lead off: X<br />
It is pre-sampling now, please click on<br />
‘Start’ to begin recording.<br />
Resting ECG is sampling now!<br />
Can't detect the Sentinel, enter DEMO or<br />
not<br />
The Sentinel is not compatible, enter<br />
DEMO or not<br />
Hint: Please make sure the USB line has<br />
been connected. If possible, please<br />
re-connect it!<br />
Communication error! Please check the<br />
USB cable!<br />
It is connecting now, please wait…<br />
Can't find the corresponding Bluetooth<br />
sampling device, please make sure the<br />
device is on.<br />
Battery of sampling device is weak,<br />
please change the battery after the test.<br />
Battery is weak, the sampling device is<br />
closing.<br />
Causes<br />
Electrodes fall off the patient or the patient<br />
cable falls off the ECG sampling box.<br />
During the pre-sampling course<br />
During the sampling course of Resting ECG<br />
The sentinel is not inserted.<br />
The sentinel is incorrect.<br />
The USB cable is disconnected or the<br />
communication between the ECG sampling box<br />
and the serial port is interrupted.<br />
1. Reconnect the ECG sampling box to the<br />
PC.<br />
2. Click on the Device tab in the System<br />
Setting window of the PC ECG system,<br />
and check whether the sampling device is<br />
set correctly.<br />
The USB cable falls off the PC during the<br />
sampling process.<br />
DX12 transmitter is connecting to DX12<br />
receiver.<br />
Fail to connect with DX12 receiver.<br />
Battery of DX12 transmitter is low.<br />
Battery of DX12 transmitter is low.<br />
- 144 -
SE-1010 PC ECG User <strong>Manual</strong><br />
Hint Information<br />
Sampling Device is in sleep mode, please<br />
press “Power” to wake it up.<br />
Overload<br />
Sorry, Can not Connect to the Database!<br />
Fail to create database!<br />
Fail to open the treadmill (ergometer)<br />
port! Please make sure the treadmill<br />
(ergometer) has been connected to the<br />
computer and the port setting is right<br />
Fail to open the BP monitor port! Please<br />
make sure the BP monitor has been<br />
connected to the computer and the Port<br />
set is right!<br />
The current HR has exceeded the target<br />
HR!<br />
The diastolic BP has exceeded the normal<br />
range!<br />
The systolic BP has exceeded the normal<br />
range!<br />
DX12 transmitter is in sleep mode.<br />
The direct current offset voltage on an electrode<br />
is too high.<br />
MSDE 2000 or SQL Server 2005 Express is not<br />
started up.<br />
The system fails to create database.<br />
Fail to open the COM port which controls the<br />
treadmill/ergometer. Reconnect the<br />
treadmill/ergometer to the PC, and set the COM<br />
port correctly.<br />
Fail to open the COM port which controls the<br />
blood pressure. Reconnect the BP monitor to the<br />
PC, and set the COM port correctly.<br />
Current heart rate value exceeds the target heart<br />
rate value.<br />
Diastolic blood pressure exceeds the normal BP<br />
range.<br />
Systolic blood pressure exceeds the normal BP<br />
range.<br />
According to IEC/EN 60601-1-8, the characteristics of the visual alarm signals (hint information)<br />
are listed in Table 10-2.<br />
Table 10-2 Characteristics of Visual Alarm Signals (Hint Information)<br />
Alarm Category Indicator Color Flashing Frequency Duty Cycle<br />
LOW Yellow Constant (on) 100%<br />
- 145 -
SE-1010 PC ECG User <strong>Manual</strong><br />
Cleaning, Care and Maintenance<br />
Chapter 11 Cleaning, Care and Maintenance<br />
CAUTION<br />
Turn off the system power and drag the power cable out from the socket before cleaning<br />
or disinfection.<br />
11.1 Cleaning and Maintaining the Treadmill<br />
Daily Cleaning and Maintenance<br />
1. Wipe the treadmill with a clean soft cloth to remove dust, moisture and sweat stain.<br />
2. Wipe the handrail of the treadmill with a clean soft cloth damped in non-caustic neutral<br />
detergent.<br />
3. Do not pour or spray detergent onto the treadmill directly.<br />
Weekly Cleaning and Maintenance<br />
1. Clean dust around the treadmill with a dust-collector.<br />
2. Check whether the emergency stop switch is valid.<br />
3. Check the tightness degree of the running belt.<br />
Semiyearly Cleaning and Maintenance<br />
1. Lubricate the screws.<br />
2. Valuate the state of the treadmill.<br />
11.2 Cleaning and Maintaining the Patient Cable and Reusable<br />
Electrodes<br />
WARNING<br />
Failure on the part of the responsible individual hospital or institution employing this<br />
equipment to implement a satisfactory maintenance schedule may cause undue<br />
equipment failures and possible health hazards.<br />
♦<br />
♦<br />
Clean the patient cable with a clean soft cloth. Do not use the detergent containing<br />
alcohol to clean the patient cable.<br />
Integrity of the patient cable, including the main cable and lead wires, should be<br />
checked regularly. Make sure that it is conductible.<br />
- 146 -
SE-1010 PC ECG User <strong>Manual</strong><br />
Cleaning, Care and Maintenance<br />
♦<br />
♦<br />
♦<br />
♦<br />
Do not drag or twist the patient cable with excessive stress while using it. Hold the<br />
connector plugs instead of the cable when connecting or disconnecting the patient<br />
cable.<br />
Align the patient cable to avoid twisting, knotting or crooking at a closed angle while<br />
using it.<br />
Store the lead wires in a big wheel.<br />
Once damage or aging of the patient cable is found, replace it with a new one<br />
immediately.<br />
Remove the remainder gel from the electrodes with a clean soft cloth first. Take suction<br />
bulbs and metal cups of chest electrodes apart, and take clamps and metal parts of limb<br />
electrodes apart. Clean them in warm water and make sure that there is no remainder gel.<br />
Dry the electrodes with a clean dry cloth or air dry naturally.<br />
CAUTION<br />
1. The device and accessories are to be disposed of according to local regulations after<br />
their useful lives. Alternatively, they can be returned to the dealer or the manufacturer<br />
for recycling or proper disposal.<br />
2. The disposable electrodes can only be used for one time.<br />
11.3 Disinfection<br />
To avoid permanent damage to the equipment, disinfection can be performed only when it is<br />
considered as necessary according to your hospital’s regulations.<br />
Before disinfection, clean the equipment first. Then wipe the surfaces of the unit and the patient<br />
cable with hospital standard disinfectant.<br />
CAUTION<br />
Do not use chloric disinfectant such as chloride, sodium hypochlorite etc.<br />
- 147 -
SE-1010 PC ECG User <strong>Manual</strong><br />
Accessories<br />
Chapter 12 Accessories<br />
WARNING<br />
Only the patient cable and other accessories supplied by the manufacturer can be used.<br />
Or else, the performance and electric shock protection can not be guaranteed.<br />
Table 12-1 Standard Accessory List for Wired System<br />
Accessory<br />
Part Number<br />
DP12 ECG Sampling Box 02.01.210039<br />
Sentinel / USB 01.18.047225<br />
Resting ECG External USB Cable 01.13.036134<br />
DP12 Patient Cable / European Standard 01.57.106902<br />
DP12 Patient Cable / American Standard 01.57.107048<br />
Limb Electrode 01.57.040162<br />
Chest Electrode 01.57.040163<br />
Portable Bag 11.56.078136<br />
Table 12-2 Standard Accessory List for Wireless System<br />
Accessory<br />
Part Number<br />
PC ECG&Stress ECG (DX12) Transmitter 02.06.260163<br />
PC ECG&Stress ECG (DX12) Receiver 02.06.260164<br />
Exercise ECG External USB Cable 01.13.036135<br />
Sentinel 01.18.047229<br />
SE-1010 PC ECG software 02.01.210065<br />
Burglar Lock 11.18.078205<br />
DX12 Patient Cable / European Standard 01.57.471030-10<br />
DX12 Patient Cable / American Standard 01.57.471055-10<br />
Excell Alkaline AA LR6 1.5V 01.21.064086<br />
Disposable electrodes 11.57.471046<br />
DX12 Belt 01.57.471054-10<br />
Portable Bag 11.56.078136<br />
- 148 -
SE-1010 PC ECG User <strong>Manual</strong><br />
Accessories<br />
Table 12-3 Optional Accessory List<br />
Accessory<br />
Part Number<br />
Sentinel / USB 01.18.047229<br />
Patient Cable for Exercise ECG<br />
(only for Wired ECG System)<br />
01.57.109850<br />
Resting ECG External USB Cable 01.13.036134<br />
Disposable Frosting Film for Skin Preparation 01.57.107418<br />
MSB1212 Disposable Electrode 01.57.040171<br />
Exercise ECG External USB Cable 01.13.036135<br />
Computer<br />
Lenovo, Qitian M6900<br />
Snap/Banana Socket Adapter<br />
(only for Wired ECG System)<br />
11.18.052208<br />
01.13.107449<br />
Bar Code Reader Z-3152SR(U) 01.18.052267<br />
Bar Code Reader LAB 1000 11.23.068003<br />
- 149 -
SE-1010 PC ECG User <strong>Manual</strong><br />
Warranty & Service<br />
Chapter 13 Warranty & Service<br />
13.1 Warranty<br />
<strong>EDAN</strong> warrants that <strong>EDAN</strong>’s products meet the labeled specifications of the products and will be<br />
free from defects in materials and workmanship that occur within warranty period.<br />
The warranty is void in cases of:<br />
a) damage caused by mishandling during shipping.<br />
b) subsequent damage caused by improper use or maintenance.<br />
c) damage caused by alteration or repair by anyone not authorized by <strong>EDAN</strong>.<br />
d) damage caused by accidents.<br />
e) replacement or removal of serial number label and manufacture label.<br />
If a product covered by this warranty is determined to be defective because of defective materials,<br />
components, or workmanship, and the warranty claim is made within the warranty period, <strong>EDAN</strong><br />
will, at its discretion, repair or replace the defective part(s) free of charge. <strong>EDAN</strong> will not provide<br />
a substitute product for use when the defective product is being repaired.<br />
13.2 Contact information<br />
If you have any question about maintenance, technical specifications or malfunctions of devices,<br />
contact your local distributor.<br />
Alternatively, you can send an email to <strong>EDAN</strong> service department at: support@edan.com.cn.<br />
- 150 -
SE-1010 PC ECG User <strong>Manual</strong><br />
Recommended Optional Accessories<br />
Chapter 14 Recommended Optional Accessories<br />
Treadmill:<br />
Model: TM-400<br />
Manufacturer: <strong>EDAN</strong> INSTRUMENTS, INC. China<br />
CE marking<br />
Model: Valiant<br />
Manufacturer: Lode B.V. The Nettherlands<br />
CE marking<br />
Model: h/p/cosmos (all medical models) with coscom interface<br />
Manufacturer: Full Vision Inc. <strong>USA</strong><br />
CE marking<br />
Model: mercury med 4.0, mercury 4.0<br />
Manufacturer: h/p/cosmos sports & medical gmbh Germany<br />
CE marking<br />
Ergometer:<br />
Model: sana bike 120F, sana bike 150F, sana 250F<br />
Manufacturer: ergosana gmbh Germany<br />
CE marking<br />
Model: ergoselect 100P/100K, ergoselect 200P/200K<br />
Manufacturer: ergoline gmbh Germany<br />
CE marking<br />
Model: Corival<br />
Manufacturer: Lode B.V. The Nettherlands<br />
CE marking<br />
- 151 -
SE-1010 PC ECG User <strong>Manual</strong><br />
Recommended Optional Accessories<br />
STRESS BP:<br />
Model: Tango+<br />
Manufacturer: SunTech Medical Inc. <strong>USA</strong><br />
CE Certificate and FDA 510(k) clearance<br />
Isolating Transformer:<br />
Model: ES710<br />
Manufacturer: BenDer Inc. Deutschland<br />
Electrical Outlet:<br />
Power Consumption: no less than 4500VA<br />
Special use for medical equipment<br />
Printer:<br />
Model: HP2010, HP2035<br />
Manufacturer: HP Company, <strong>USA</strong><br />
Model: CANON iP1980<br />
Manufacturer: CANON Company, Japan<br />
WARNING<br />
1. The electrical outlet and the isolating transformer shall only be used for supplying<br />
power to the part of the system.<br />
2. It will harm the wall outlet to connect the non-medical electrical equipment of the PC<br />
ECG system directly to the wall outlet, because the non-medical electrical equipment<br />
of the system is intended to be powered by using the electrical outlet and the isolating<br />
transformer.<br />
3. An additional multiple portable socket-outlet or extension cord shall not be connected<br />
to the system.<br />
4. The electrical outlet and the isolating transformer shall not be placed on the floor.<br />
- 152 -
SE-1010 PC ECG User <strong>Manual</strong><br />
Technical Specifications<br />
Appendix 1 Technical Specifications<br />
A1.1 Safety Specifications<br />
Comply with:<br />
Anti-electric-shock type:<br />
Anti-electric-shock<br />
degree:<br />
Degree of protection<br />
against harmful ingress of<br />
water:<br />
Disinfection/sterilization<br />
method:<br />
Degree of safety of<br />
application in the presence<br />
of flammable gas:<br />
Working mode:<br />
EMC:<br />
IEC/EN 60601-1+A1+A2, IEC/EN 60601-1-2+A1,<br />
IEC/EN60601-2-25, ANSI/AAMI EC11, IEC/EN60601-2-51<br />
Class ІI<br />
Type CF with defibrillation-proof<br />
Ordinary equipment (Sealed equipment without liquid proof)<br />
Refer to the user manual for details<br />
Equipment not suitable for use in the presence of flammable<br />
gas<br />
Continuous operation<br />
Group 1, Class A<br />
Patient Leakage<br />
NC
SE-1010 PC ECG User <strong>Manual</strong><br />
Technical Specifications<br />
A1.3 Physical Specifications<br />
Dimensions<br />
DP12 ECG sampling box: 148 mm (L) ×100 mm (W) × 40 mm (H)<br />
(5.8in×3.9in×1.6in)<br />
DX12 transmitter: 63mm(L)×107mm(W) ×23mm(H) (2.5in×4.2in×0.9in)<br />
DX12 receiver: 155mm(L)×100mm(W)×30mm(H) (6.1in×3.9in×1.2in)<br />
DP12 ECG sampling box: Approx. 210g<br />
Weight<br />
DX12 transmitter: Approx. 113g (not including battery)<br />
DX12 receiver: Approx. 173g<br />
A1.4 Power Supply Specifications<br />
Power Supply:<br />
PC<br />
DP12 ECG<br />
Sampling Box<br />
DX12 transmitter<br />
DX12 receiver<br />
Operating Voltage: 110V-240V~<br />
Operating Frequency: 50 Hz/60 Hz<br />
DC 5V<br />
Input Power: 1 VA(MAX), 0.5 VA(MIN)<br />
Input Power: 2x1.5V Excell Alkaline AA IEC LR6;<br />
Operation life of battery≥12 hours<br />
DC 5V<br />
Input Power: 350mW<br />
A1.5 Performance Specifications<br />
Display<br />
Display Content<br />
Recording<br />
Recording Paper:<br />
Paper Width:<br />
System name, Patient ID, Patient name<br />
Hear rate, Display mode, Printing mode<br />
Speed, Gain, Lowpass Filter<br />
Hint information<br />
ECG waves<br />
A4, Letter<br />
210*295mm (A4),216*279mm (Letter)<br />
- 154 -
SE-1010 PC ECG User <strong>Manual</strong><br />
Paper Speed:<br />
Record message:<br />
Technical Specifications<br />
5 mm/s, 10 mm/s, 12.5 mm/s, 25 mm/s, 50 mm/s(±3%)<br />
Date, Time, Printing Speed, Filter, Symbol, Heart Rate,<br />
Patient ID, Sex, Age, Lead Mark, Lead Wave, Average<br />
Template Wave or Rhythm Lead Wave, Measurement Result<br />
and Interpretation Information Result (option) etc.<br />
Channel:<br />
3 / 6 / 12 channels, auto baseline adjustment<br />
HR Recognition<br />
Technique:<br />
Peak-peak detection<br />
HR Range:<br />
30 BPM ~300 BPM<br />
Accuracy:<br />
±1 BPM<br />
Memory<br />
Memory:<br />
Storage amount depends on PC machine<br />
ECG Sampling Box Performance<br />
Leads Mode:<br />
12 standard leads/ Cabrera leads<br />
Acquisition Mode:<br />
simultaneously 12 leads<br />
DP12 ECG sampling box: 1,000 /sec/channel<br />
Sample Frequency:<br />
DX12 transmitter: 10,000 /sec/channel (sampling)<br />
500 /sec/channel (analysis)<br />
A/D Resolution:<br />
DP12 ECG sampling box: 24 bits<br />
DX12 transmitter: 18 bits<br />
Time Constant:<br />
≥3.2 s<br />
Frequency Response:<br />
0.05 Hz ~ 150 Hz (-3 dB)<br />
Gain:<br />
2.5 mm/mV, 5 mm/mV, 10 mm/mV, 20 mm/mV<br />
Input Impedance:<br />
DP12 ECG sampling box≥50 MΩ (10Hz)<br />
DX12 transmitter≥20 MΩ (10Hz)<br />
Input Circuit Current:<br />
≤0.05 μA<br />
Input Voltage Range<br />
SE-1010 PC ECG User <strong>Manual</strong><br />
Technical Specifications<br />
Work Frequency<br />
Filter<br />
CMRR<br />
DFT Filter: weak/strong<br />
LOWPASS Filter: 25 Hz / 35 Hz / 45 Hz / 75 Hz / 100 Hz /<br />
150 Hz<br />
DP12 ECG sampling box≥110 dB<br />
DX12 transmitter≥100 dB<br />
Pacemaker Detection<br />
Amplitude<br />
Width<br />
Sampling Frequency<br />
DP12 ECG sampling box: ±2 to ±700 mV<br />
DX12 transmitter: ±2 to ±500 mV<br />
0.1 to 2.0 ms<br />
10,000 /sec/channel<br />
NOTE: Test the accuracy of input signal reproduction according to the methods<br />
described in clause 4.2.7.2 in ANSI/AAMI EC11:1991/(R) 2001/(R) 2007, and<br />
the result complies with clause 3.2.7.2 in ANSI/AAMI EC11:1991/(R) 2001/(R)<br />
2007.<br />
- 156 -
SE-1010 PC ECG User <strong>Manual</strong><br />
EMC Information<br />
Appendix 2 EMC Information<br />
Guidance and manufacture’s declaration - electromagnetic emissionsfor<br />
all EQUIPMENT and SYSTEMS<br />
Guidance and manufacture’s declaration - electromagnetic emission<br />
SE-1010 PC ECG is intended for use in the electromagnetic environment specified below. The<br />
customer or the user of SE-1010 PC ECG should assure that it is used in such an environment.<br />
Emission test Compliance Electromagnetic environment - guidance<br />
RF emissions<br />
CISPR 11<br />
RF emission<br />
CISPR 11<br />
Harmonic emissions<br />
IEC 61000-3-2<br />
Voltage fluctuations/<br />
flicker emissions<br />
IEC 61000-3-3<br />
Group 1<br />
Class A<br />
Not applicable<br />
Not applicable<br />
SE-1010 PC ECG uses RF energy only for its<br />
internal function. Therefore, its RF emissions<br />
are very low and are not likely to cause any<br />
interference in nearby electronic equipment.<br />
SE-1010 PC ECG is suitable for use in all<br />
establishments, other than domestic and those<br />
directly connected to the public low-voltage<br />
power supply network that supplies buildings<br />
used for domestic purposes.<br />
- 157 -
SE-1010 PC ECG User <strong>Manual</strong><br />
EMC Information<br />
Guidance and manufacture’s declaration - electromagnetic immunity -<br />
for all EQUIPMENT and SYSTEMS<br />
Guidance and manufacture’s declaration - electromagnetic immunity<br />
SE-1010 PC ECG is intended for use in the electromagnetic environment specified below. The<br />
customer or the user of SE-1010 PC ECG should assure that it is used in such an environment.<br />
Immunity test IEC 60601 test level Compliance level<br />
Electromagnetic<br />
environment - guidance<br />
Electrostatic<br />
±6 kV contact<br />
±6 kV contact<br />
Floors should be wood,<br />
discharge (ESD)<br />
IEC 61000-4-2<br />
±8 kV air<br />
±8 kV air<br />
concrete or ceramic tile. If<br />
floor are covered with<br />
synthetic material, the<br />
relative humidity should be<br />
at least 30%.<br />
Electrical fast<br />
transient/burst<br />
IEC 61000-4-4<br />
Surge<br />
IEC 61000-4-5<br />
±2 kV for power<br />
supply lines<br />
±1 kV line to line<br />
±2 kV line to groud<br />
Not applicable Mains power quality<br />
should be that of a typical<br />
commercial or hospital<br />
environment.<br />
Not applicable Mains power quality<br />
should be that of a typical<br />
commercial or hospital<br />
environment.<br />
Power frequency<br />
(50Hz/60Hz)<br />
magnetic field<br />
IEC 61000-4-8<br />
3A/m 3A/m Power frequency magnetic<br />
fields should be at levels<br />
characteristic of a typical<br />
location in a typical<br />
commercial or hospital<br />
environment.<br />
Voltage dips, short<br />
interruptions and<br />
voltage variations<br />
on power supply<br />
input lines<br />
IEC 61000-4-11<br />
95% dip in U T )<br />
for 0.5 cycle<br />
40% U T<br />
(60% dip in U T )<br />
for 5 cycles<br />
Not applicable Mains power quality<br />
should be that of a typical<br />
commercial or hospital<br />
environment. If the user of<br />
SE-1010 PC ECG requires<br />
continued operation during<br />
power mains interruptions,<br />
it is recommended that<br />
- 158 -
SE-1010 PC ECG User <strong>Manual</strong><br />
70% U T<br />
(30% dip in U T )<br />
for 25 cycles<br />
EMC Information<br />
SE-1010 PC ECG be<br />
powered from an<br />
uninterruptible power<br />
supply or a battery.<br />
95% dip in U T )<br />
for 5 sec<br />
NOTE<br />
U T is the a.c. mains voltage prior to application of the test level.<br />
Guidance and manufacture’s declaration - electromagnetic immunity -<br />
for EQUIPMENT and SYSTEMS that are not LIFE-SUPPORTING<br />
Guidance and manufacture’s declaration - electromagnetic immunity<br />
SE-1010 PC ECG is intended for use in the electromagnetic environment specified below. The<br />
customer or the user of SE-1010 PC ECG should assure that it is used in such an environment.<br />
Immunity<br />
test<br />
IEC 60601 test level<br />
Compliance<br />
level<br />
Electromagnetic environment -<br />
guidance<br />
Portable and mobile RF<br />
communications equipment should be<br />
used no closer to any part of SE-1010<br />
PC ECG, including cables, than the<br />
recommended separation distance<br />
calculated from the equation applicable<br />
to the frequency of the transmitter.<br />
Recommended separation distance<br />
Conducted RF<br />
IEC61000-4-6<br />
3 V rms<br />
150 kHz to 80 MHz<br />
3V rms<br />
d = 1. 2<br />
P<br />
d = 1. 2 P 80 MHz to 800 MHz<br />
Radiated RF<br />
3 V/m<br />
3 V/m<br />
d = 2. 3 P 800 MHz to 2.5 GHz<br />
IEC61000-4-3<br />
80 MHz to 2.5 GHz<br />
Where P is the maximum output power<br />
rating of the transmitter in watts (W)<br />
according to the transmitter<br />
manufacturer and d is the<br />
recommended separation distance in<br />
metres (m).<br />
- 159 -
SE-1010 PC ECG User <strong>Manual</strong><br />
EMC Information<br />
Field strengths from fixed RF<br />
transmitters, as determined by an<br />
electromagnetic site survey, a should be<br />
less than the compliance level in each<br />
frequency range. b<br />
Interference may occur in the vicinity<br />
of equipment marked with the<br />
following symbol:<br />
NOTE 1 At 80 MHz and 800 MHz, the higher frequency range applies.<br />
NOTE 2 These guidelines may not apply in all situations. Electromagnetic propagation is<br />
affected by absorption and reflection from structures, objects and people.<br />
a<br />
b<br />
Field strengths from fixed transmitters, such as base stations for radio (cellular/cordless)<br />
telephones and land mobile radios, amateur radio, AM and FM radio broadcast and TV<br />
broadcast cannot be predicted theoretically with accuracy. To assess the electromagnetic<br />
environment due to fixed RF transmitters, an electromagnetic site survey should be<br />
considered. If the measured field strength in the location in which SE-1010 PC ECG is<br />
used exceeds the applicable RF compliance level above, SE-1010 PC ECG should be<br />
observed to verify normal operation. If abnormal performance is observed, additional<br />
measures may be necessary, such as reorienting or relocating SE-1010 PC ECG.<br />
Over the frequency range 150 kHz to 80 MHz, field strengths should be less than 3 V/m.<br />
- 160 -
SE-1010 PC ECG User <strong>Manual</strong><br />
EMC Information<br />
Recommended separation distances between portable and mobile<br />
RF communications equipment and the EQUIPMENT or SYSTEM –<br />
for EQUIPMENT or SYSTEM that are not LIFE-SUPPORTING<br />
Recommended separation distances between<br />
portable and mobile RF communications equipment and SE-1010 PC ECG<br />
SE-1010 PC ECG is intended for use in an electromagnetic environment in which radiated RF<br />
disturbances are controlled. The customer or the user of SE-1010 PC ECG can help prevent<br />
electromagnetic interference by maintaining a minimum distance between portable and mobile<br />
RF communications equipment (transmitters) and SE-1010 PC ECG as recommended below,<br />
according to the maximum output power of the communications equipment.<br />
Separation distance according to frequency of transmitter<br />
Rated<br />
(m)<br />
maximum<br />
output power of<br />
150 kHz to 80 MHz<br />
80 MHz to 800 MHz<br />
800 MHz to 2.5 GHz<br />
transmitter<br />
d = 1. 2<br />
P<br />
d = 1. 2<br />
P<br />
d = 2. 3<br />
P<br />
(W)<br />
0.01 0.12 0.12 0.23<br />
0.1 0.38 0.38 0.73<br />
1 1.2 1.2 2.3<br />
10 3.8 3.8 7.3<br />
100 12 12 23<br />
For transmitters rated at a maximum output power not listed above, the recommended<br />
separation distance d in metres (m) can be estimated using the equation applicable to the<br />
frequency of the transmitter, where P is the maximum output power rating of the transmitter in<br />
watts (W) according to the transmitter manufacturer.<br />
NOTE 1 At 80 MHz and 800 MHz, the separation distance for the higher frequency range<br />
applies.<br />
NOTE 2 These guidelines may not apply in all situations. Electromagnetic propagation is<br />
affected by absorption and reflection from structures, objects and people.<br />
- 161 -
SE-1010 PC ECG User <strong>Manual</strong><br />
Abbreviation<br />
Appendix 3 Abbreviation<br />
Abbreviation<br />
ECG<br />
VCG<br />
TVCG<br />
QTD<br />
FCG<br />
HRV<br />
HFECG<br />
HRT<br />
SAECG<br />
TO<br />
TS<br />
VLP<br />
HR<br />
P Dur<br />
PR Dur<br />
QRS Dur<br />
QT/QTc<br />
P/QRS/T<br />
Maximum/Minimum<br />
SDNN<br />
RMSSD<br />
LF<br />
HF<br />
LF (norm)<br />
Statement<br />
Electrocardiograph/Electrocardiogram<br />
Vector ECG<br />
Time Vector ECG<br />
QT Dispersion<br />
Frequency ECG<br />
Heart Rate Variability<br />
High Frequency ECG<br />
Heart Rate Turbulence<br />
Signal Averaged ECG<br />
Turbulence Onset<br />
Turbulence Slope<br />
Ventricular Late Potential<br />
Heart Rate<br />
P-wave Duration<br />
P-R Interval<br />
QRS Complexes Duration<br />
Q-T Interval of the Current Lead / Normalized QT Interval<br />
Dominant Direction of the Average Integrated ECG<br />
Vectors<br />
Ratio of Maximum RR Interval to Minimum RR Interval<br />
Standard Deviation of Normal to Normal Intervals<br />
Root Mean Square Successive Difference<br />
Low Frequency<br />
High Frequency<br />
Standard LF Power<br />
- 162 -
SE-1010 PC ECG User <strong>Manual</strong><br />
Abbreviation<br />
HF (norm)<br />
aVF<br />
aVL<br />
aVR<br />
LA<br />
R<br />
RA<br />
RL<br />
ID<br />
AC<br />
USB<br />
Standard HF Power<br />
Left Foot Augmented Lead<br />
Left Arm Augmented Lead<br />
Right Arm Augmented Lead<br />
Left Arm<br />
Right<br />
Right Arm<br />
Right Leg<br />
Identification<br />
Alternating Current<br />
Universal Serial Bus<br />
- 163 -