USER MANUAL DVD/MPEG4/CD/MP3/ PLAYER /DVB-T ... - Lenco
USER MANUAL DVD/MPEG4/CD/MP3/ PLAYER /DVB-T ... - Lenco
USER MANUAL DVD/MPEG4/CD/MP3/ PLAYER /DVB-T ... - Lenco
Create successful ePaper yourself
Turn your PDF publications into a flip-book with our unique Google optimized e-Paper software.
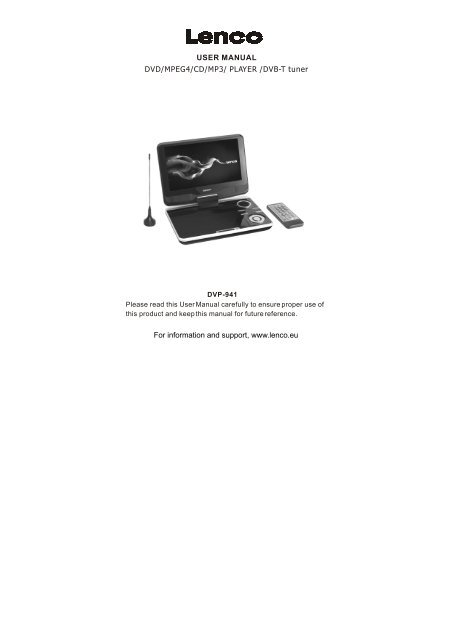
<strong>USER</strong> <strong>MANUAL</strong><br />
<strong>DVD</strong>/<strong>MPEG4</strong>/<strong>CD</strong>/<strong>MP3</strong>/ <strong>PLAYER</strong> /<strong>DVB</strong>-T tuner<br />
DVP-941<br />
Please read this User Manual carefully to ensure proper use of<br />
this product and keep this manual for future reference.<br />
For information and support, www.lenco.eu
<strong>DVD</strong> Use Manual Content<br />
INTRODUCTION<br />
Safety Precautions................................................................................................1<br />
Panel Illustration...................................................................................................2<br />
Connecting to a TV set.........................................................................................3<br />
Remote Control....................................................................................................4<br />
Remote Control Operation...................................................................................4<br />
<strong>DVD</strong> PART<br />
The Setup Menu System ......................................................................................5<br />
<strong>MPEG4</strong>/<strong>MP3</strong> PLAYBACK......................................................................................7<br />
KODAK Picture <strong>CD</strong> playback.................................................................................8<br />
<strong>DVB</strong> PART<br />
The Setup Menu System.......................................................................................9<br />
OTHERS<br />
Troubleshooting................................................................................................12<br />
Specifications ...................................................................................................13<br />
1. The apparatus shall not be exposed to dripping or Splashing and<br />
that no objects filled with liquids, such as Vases, shall be placed<br />
the apparatus.<br />
2. The mains plug is used as the disconnect device, the disconnect<br />
device shall remain readily operable.<br />
3. To be completely disconnect the power input, the mains plug of<br />
apparatus shall be disconnected from the mains.<br />
4. The mains plug of apparatus should not be obstructed or should<br />
be easily accessed during intended use.<br />
Remarks<br />
It is impossible to save the settings and time schedule.<br />
Warning:<br />
Do not use the mode <strong>DVB</strong>-T in a moving vehicle etc.. The <strong>DVB</strong>-T function<br />
only works when the vehicle is stationary.<br />
Prolonged exposure to high volume from audio players can cause temporary<br />
or permanent hearing loss<br />
The USB drive must be connected directly to the unit.<br />
To prevent data loss by interference and transfer, do not use USB extension<br />
cords.
Safety Instructions<br />
Safety is Important<br />
CAUTION<br />
RISK OF ELECTRIC SHOCK<br />
DO NOT OPEN<br />
To ensure your safety and the safety of others, please ensure you read the Safety<br />
Instructions before you operate this product.<br />
Keep this information in a safe place for future reference.Please read all the safety information before<br />
using the product.Safety Considerations.<br />
Position the cables so that they cannot be walked on or pinched by items placed on or against them.<br />
Do not use the portable <strong>DVD</strong> Player in humid or damp conditions.<br />
Do not allow the portable <strong>DVD</strong> Player to get wet.<br />
Do not expose the portable <strong>DVD</strong> Player to dripping or splashing.<br />
Do not place water filled objects such as vases on top of the portable <strong>DVD</strong> Player.<br />
Do not place naked flame sources, such as candles, on the top of the portable <strong>DVD</strong> Player.<br />
Caution: Danger of explosion if battery is incorrectly replaced.Replace only with the<br />
same or equivalent type.<br />
Warning: The battery (battery or batteries or battery pack) shall not be exposed to excessive heat<br />
such as sunshine,fire or the like.<br />
Warning: To reduce the risk of fire or electric shock, do not expose this<br />
apparatus to rain or moisture.The appapatus shall not be exposed to dripping or splashing and<br />
that no objects filled with liquids,such as vases,shall not be placed on apparatus.<br />
Warning: Only use attachments/accessories specified provided by the manufacturer,the<br />
Portable <strong>DVD</strong> Player is supplied by AC adapter,the AC adapter is used as disconnect device,the<br />
disconnect device shall remain readily operable.<br />
Cleaning<br />
ALWAYS unplug the portable <strong>DVD</strong> Player<br />
Ventilation<br />
The slots and openings on the portable <strong>DVD</strong><br />
before you clean it.<br />
Player are for ventilation.<br />
Do not use liquid or aerosol cleaners. Clean<br />
Do not cover or block them as it may cause<br />
the portable <strong>DVD</strong> Player with a soft,<br />
damp (not wet) cloth.<br />
Servicing<br />
There are no user serviceable parts in this<br />
portable <strong>DVD</strong> Player.<br />
When servicing, refer to qualified service<br />
personnel.<br />
Consult your dealer if you are ever in doubt<br />
about the installation, operation or safety of<br />
this unit.<br />
overheating.<br />
NEVER let children push anything into the<br />
holes or slots on the case.<br />
Battery Disposal<br />
Please ensure batteries are disposed of<br />
safely.<br />
Never dispose of batteries in a fire or with<br />
other household waste.<br />
Check with your local authority for disposal<br />
regulations.<br />
This symbol indicates that this product incorporates double insulation between<br />
hazardous mains voltage and user accessible parts. When servicing use only identical<br />
replacement parts. WARNING: To reduce the risk of fire or electric shock, do not expose this<br />
apparatus to rain or cords.<br />
Correct Disposal of this product. This making indicates that this product should not be disposed<br />
with other household wastes throughout the EU. To prevent possible harm to the environment or<br />
human health from uncontrolled waste disposal, recycle it responsibly to<br />
promote the sustainable reuse of material resources. To return your used device, please use<br />
the return and collection systems or contact the retailer where the product was purchased.<br />
They can take this product for environmental safe recycling.<br />
Special notice<br />
A few highlights or dark spots may occur on the L<strong>CD</strong> screen. It is a very common phenomenon<br />
of the activematrix display technology, and does not mean any defects or faults. Never try to<br />
repair this machine by yourself. In case of any faults. Please turn off the unit at once, and notify<br />
our Company or the corresponding dealer. The display is made up of many precision electronic<br />
components. Any disassembly or modification may lead to further damage.<br />
When the apparatus was in electrostatic circumstance, it may be malfunction<br />
and need to reset by user.<br />
Warning The USB memory stick should be plug in the unit directly. USB extension cable should<br />
not be used to avoid failing of data transferring and interference caused.<br />
1
Connecting to a TV Set<br />
Connections<br />
3
Remote Control<br />
Introduction<br />
Remote Control<br />
POWER<br />
POWER<br />
MUTE<br />
MUTE<br />
ZOOM<br />
Note:<br />
1. In this manual, will be used to represent different NAVIGATION ARROWS on<br />
the remote respectively.<br />
2. In order to operate any of the remote functions, you must first press the Power button on the<br />
<strong>DVD</strong> player.<br />
3. Some of the keys is multiple key. They can be used in <strong>DVD</strong> mode or in <strong>DVB</strong> mode.<br />
4. In <strong>DVB</strong>T, EXIT Button on unit and RC perform the channel swap function.<br />
2<br />
CR2025<br />
1<br />
HOW TO REPLACE THE BATTERY<br />
STEP 1: PUSH THE BUTTON TOWARD LEFT;<br />
STEP 2: PULL THE BATTERY LOADER OUT.<br />
BATTERIES<br />
INCORRECT USE OF BATTERIES MAY CAUSE THEM TO LEAK, CORRODE OR EXPLODE.<br />
Be sure to place the batteries in the correct direction.<br />
It is dangerous to charge/heat/open or short-circuit the batteries.<br />
Do not leave dead or expired batteries or mix old/new batteries.<br />
When not using the remote control for a long duration of time, remove the batteries. When<br />
operating range becomes reduced, replace all batteries with new, fresh ones.<br />
If leakage from the battery occurs, wipe the battery liquid from the battery compartment, then<br />
replace.<br />
4
About Built-in Rechargeable Battery<br />
Precautions related to battery recharge<br />
1. Once the battery is fully discharged, immediately recharge it (regardless of whether you plan to<br />
use the battery or not) in order to maximize the battery life. When the power is low, the battery icon<br />
will be shown on the upper right corner of the TFT for warning.<br />
2. To charge the battery, please connect this player to AC mains via the AC adapter and the charge<br />
indicator will turn on in red, and the indicator will turn into green when the battery is fully charged.<br />
This will take about 2-2.5 hours if the player is in off mode or 4.5-6 hours if the player is in working<br />
mode.<br />
Using and maintaining your rechargeable batteries<br />
1. Please make sure you always use only the AC adapter included with the player to recharge<br />
your batteries.<br />
2. Recharge efficiency will degrade when the environmental temperature drops below 50 o F<br />
(10 o C) or exceed 95 o F (35 o C).<br />
3. The lasting time of the fully charged battery when a headphone is connected to the player is<br />
approximately 1.5 hours<br />
The setup menu system---<strong>DVD</strong> PART<br />
Advanced Features<br />
General Steps of setup menu<br />
In the <strong>DVD</strong> mode, Press the button, Then press button, the <strong>DVD</strong> main setup<br />
menu appears.<br />
1. <strong>DVD</strong> MENU<br />
A. <strong>DVD</strong> Setup-Language Setup<br />
Press the Up and Down button move on the <strong>DVD</strong> setup and to enter.<br />
The <strong>DVD</strong> Setup-lanuage Setup option appear the screen.<br />
1) MENU<br />
Highlight the MENU option, and press the Arrow buttons to choose<br />
the menu language you prefer. Press to confirm. If the<br />
disc you are playing has that Language availabel. It will display the<br />
Menu in the languae.<br />
Notes:<br />
If your preferred language is not availabel, the disc s default<br />
language will be played.<br />
2) AUDIO<br />
Highlight the AUDIO option, and press the Arrow buttons to choose the audio language<br />
you prefer. Press to confirm. If the disc you are playing has that language<br />
available, it will output the language.<br />
3) SUBTITLE<br />
Highlight the SUBTITLE option, and press the Arrow buttons to choose the subtitle<br />
language you prefer. Press to confirm. If the disc you are playing has that<br />
language available, it will display subtitles in that language.<br />
B. <strong>DVD</strong> Setup-Audio Setup<br />
Press arrow button to highlight the Audio Setup<br />
option on the screen.<br />
5
1) DOWNMIX<br />
There are two modes, one is Lo/Ro, one is Lt/Rt.<br />
C. <strong>DVD</strong> Setup-Custom Setup<br />
Press the arrow button to highlight the Custom Setup option on the screen.<br />
1) PARENTAL CTRL<br />
Parental Ctrl:1,2:G,3:G,4:PG13,5,6:R,7:NC17,8 the eight levels. The first level discs are<br />
open to people of ever age and eight level only suitable for the adult. If you want to change<br />
the parental ctrl setting, enter the user s age control item and then enter four digital<br />
password. The default password is 6666 (if you are using this player for the first time, just<br />
input this code).If the input code has been confirmed, the level setting up menu will appear.<br />
Move the cursor to choose the expected level and press button to confirm<br />
and memory it. Move the cursor to the "ENTER" and press button to confirm and<br />
withdraw to the user setup menu or press button to directly withdraw from<br />
the operation.<br />
2) ANGLE MARK<br />
There are On and Off the two choices for this item. If in<br />
the ON mode, when play a disc which the content is<br />
multi-angle shot, you may press the button on<br />
the remote control to enjoy the Scene in different angles.<br />
D. <strong>DVD</strong> Setup-Exit<br />
Press the arrow button to highlight the<br />
option on the screen In the <strong>DVD</strong> Setup-Exit ,Choose the Exit option to return the<br />
<strong>DVD</strong> main Setup.<br />
2.System Setting<br />
Press the button, the <strong>DVD</strong> main setup menu appears the screen, then press the<br />
button to highlight the system setting option.<br />
A. System Setting Menu-language Setup<br />
Press the and button moveon the System setting and to enter button. the<br />
System setting Menu-lanuage Setup option appear the screen.In the System setting Menulanguage<br />
Setup, you can setup the OSD option.<br />
1) OSD LANGUAGE<br />
Highlight the OSD LANGUAGE option, and press the<br />
Arrow buttons<br />
to choose the OSD language you prefer. Press<br />
to confirm, and it will display OSD in that<br />
language.<br />
2)EXTERNAL SUBTITLE<br />
Highlight the EXTERNAL SUBTITLE option, and<br />
press the Arrow buttons to choose the supported<br />
subtitle language when playing <strong>MPEG4</strong> format discs.<br />
B. System setting Menu-Display Setup<br />
Press the arrow button to highlight the Setup<br />
option on the screen In the System Setting Menu-<br />
Display Setup.<br />
1) TV Standard<br />
According to the Color System of the TV, you can choose the TV<br />
Standard.<br />
2) AV Output<br />
Default is Panel change to TV in AV out mode.<br />
6
The setup menu system---<strong>DVD</strong> PART<br />
Advanced Features<br />
3) Display TYPE<br />
According to the Display type, you can choose 4:3PS, 4:3LB or16:9.<br />
4)BRIGHTNESS<br />
According to the Brightness, you can choose Normal, Bright or Soft .<br />
5)CONTRAST<br />
Use the Up and Down arrow buttons to scroll and adjust the contrast.<br />
C. System setting Menu-Preference<br />
Press the Down arrow button to highlight the Preference option<br />
on the screen.<br />
1) UI Style<br />
According to UI Style, you can choose Style1, Style2, Style3, Style4.<br />
2). Change PIN<br />
The default password is 6666.<br />
3). Default Type<br />
In the Default Type options, you can choose the <strong>DVD</strong> MODE, <strong>DVB</strong>MODE, USB MODE,<br />
CARD READER MODE Last operation Type MODE.<br />
NOTE: In the Default Type, If you choose the <strong>DVB</strong> MODE. That next power on the <strong>PLAYER</strong><br />
will direct enter <strong>DVB</strong> MODE, no again display the SOURCE list.<br />
4) Default The Default setup options are RESTORE factory setup, Let your <strong>PLAYER</strong> work<br />
on the default state.<br />
7
<strong>MP3</strong> Playback<br />
When a Mp3 disc is loaded, the screen will display as follows:<br />
Press to select the file when the cursor appears in the file<br />
window. Press select to play the current file select by the cursor.<br />
Press to switch between the directory window and the file<br />
window.<br />
Note:<br />
The player will not function correctly under the following<br />
condition:<br />
1. The disc is badly scratched, damaged or dirty.<br />
2. The disc is not finalized.<br />
3. The recording format is not supported by the player.<br />
Current<br />
directory<br />
name<br />
Current <strong>MP3</strong>/JPEG file<br />
name. If a JPEG file is<br />
playing, the name should<br />
have a JPEG extension.<br />
Kodak picture <strong>CD</strong> Playback<br />
The Introduction of KODAK Picture <strong>CD</strong><br />
A Kodak picture <strong>CD</strong> has the size and shape of a regular <strong>CD</strong>. You can order a KODAK Picture<br />
<strong>CD</strong> simply by checking the box on the photo finishing envelope when you drop off<br />
a roll of film(35mm or Advanced Photo System(APS) color print film) at the time<br />
of processing in Kodak Express store displaying Kodak Picture Cd sign. When your<br />
order is returned, you receive your prints, negatives, and your full roll of pictures<br />
safely stored on your KODAK Picture <strong>CD</strong>. Each KODAK Picture <strong>CD</strong> brings you the<br />
tools to enhance, share and manage your pictures on your computer. You also can<br />
record the JPEG picture into <strong>CD</strong>-R or <strong>CD</strong>-RW with the <strong>CD</strong>-Rewriter yourself.<br />
Note:<br />
1. The Max. Size of JPEG Picture can be supported: 3840X3840 pels<br />
2. JPEG stands for Joint Picture Experts Group. It is the first<br />
nternational Standard on Still Picture Compressing: ISO 10918-1, constituted<br />
by the Committee on Still Picture compressing Standard of ISO. The pictures on<br />
KODAK Picture <strong>CD</strong> are stored in this format(JPEG). This player can decode the<br />
JPEG picture in KODAK Picture <strong>CD</strong> and playback the pictures in different modes.<br />
Now, you can playback KODAK Picture <strong>CD</strong> on this player and view your wonderful<br />
pictures on your TV in the comfort of your living room. When a Kodak Picture <strong>CD</strong> is<br />
inserted on a player an automatic slide show is launched. Each picture in the<br />
Kodak Picture <strong>CD</strong> will be displayed consecutively in a slide- show fashion and will be<br />
scaled to fit in the whole TV screen.<br />
8
The setup menu system---<strong>DVB</strong> PART<br />
Advanced Features<br />
1. First Time Installation<br />
After all the connections have been madeproperly, switch on your TV.<br />
Make sure the receiver is connected to the home antenna and press<br />
to switch the receiver on. If you are using the receiver for<br />
the first time, a First Time Installation menu will be displayed to guide<br />
you through the initial setup. Use the remote controller to finish the<br />
setup.<br />
A. At the First time installation menu, select YES and press<br />
button on the remote controller to proceed.<br />
B. Enter your regional settings, include your Country, Language, Time<br />
Zone . Then select to proceed.<br />
C. Select Yes to start the automatic channel search.<br />
D. Wait to complete the scanning.In case you want to stop the scanning,<br />
press the button. The channels already found will still be stored.<br />
E. When finished, all active channels found will be stored automatically.<br />
The last found channel will be played.<br />
2. <strong>DVB</strong> Mode of Main Menu<br />
Press the button, the <strong>DVB</strong> main setup menu appears<br />
the screen, then press the button to highlight the <strong>DVB</strong><br />
Menu option.<br />
A. <strong>DVB</strong> MENU-Program list<br />
Press the and button<br />
move on the <strong>DVB</strong> Menu and to enter<br />
button to enter the <strong>DVB</strong> Menu-Program<br />
list option, appear the screen.<br />
1) TV Program<br />
Press the button to highlight the TV Program, Then press the<br />
button to enter the TV program options, appear the screen.<br />
All active channels are listed in the Program List, allowing you to make<br />
your own Favorite channel group, move, delete channels.<br />
Creating Favorite Channel Groups<br />
This feature allows you to group your favorite channels. To create your<br />
favorite groups:<br />
a. Select the channel which you would like to add to the group and go to the Favor column.<br />
b. When the Favor column of the desired channel ishighlighted, one red heart symbol will appear<br />
after press the button.Pressing the button again will un-select the channel<br />
of the favorite group.<br />
c. Once your favorite group is created, you can press the keys to quickly access<br />
your favorite channels.<br />
Moving a Channel<br />
a. Select the channel which you like to move and go to the Move column.<br />
b. Press button and a symbol will be displayed.<br />
c. Use the key to move the channel to a desired position.<br />
d. Press button again will be exit the moving channel mode.<br />
9
T he setup menu system---<strong>DVB</strong> PART<br />
Advanced Features<br />
Deleting a Channel<br />
a. Select the channel which you like to delete and go to the Del column.<br />
b. Press button and an X symbol will be displayed. Repeat this step in the<br />
channel to be deleted.<br />
c. Press or button and the marked channel will be deleted. d.<br />
Press button again will exit the deleting channel mode.<br />
2) Music Program<br />
Press the button to highlight the Music Program, Then press the button to<br />
enter the Music program options, appear the screen.<br />
NOTE: This Music program options operation same the TV Program.<br />
3) Sort<br />
Press the button to highlight the Sort options, yon can choose the channels Sort<br />
style. As: By Name, By Service ID, By Channel number, By<br />
LCN.<br />
B. <strong>DVB</strong> Menu-Program Search<br />
Press the Up and Down button moveon the <strong>DVB</strong> Menu-Program<br />
Search option appear the screen. In the <strong>DVB</strong> Menu-Program<br />
Search, you can setup the Automatic Search, Manual Search<br />
options.<br />
1) Automatic Search.<br />
Choose the Automatic Search options, This operation same the<br />
First Time<br />
Installation. Refer to First time Installation.<br />
2) Manual Search.<br />
If any channel is missing after auto search, or you want to add<br />
newly launched channels, you can use Manual Search to scan<br />
the desired channels. To manually search the target channel, you<br />
must know its parameters, e.g., the channel number. After the<br />
channel is found, it is appended to the current channel list<br />
a. Enter the Manual Search menu via Main Menu ><br />
Program<br />
Search > Manual Search.<br />
b. Specify the appropriate channel number in the Channel No field<br />
by press and button. Enter your selection, the frequency and bandwidth<br />
values are changed accordingly.<br />
c. Select button to start manual search<br />
d. If no signal is found, a message indicating no signal will appear. Otherwise scanned<br />
channel will be saved and appended to the current channel list.<br />
C. <strong>DVB</strong> Menu - Parental Control<br />
This feature allows you to prevent children or unauthorized people from watching channels.<br />
1) Enter Main Menu > Parental Control. First, you will need to enter PIN as prompted to<br />
use the parental control menu. (The default PIN is 6666.)<br />
2) After correct PIN input, the following options are provided: Channel Lock: Allows you to<br />
activate or de-activate the overall parental control. When set to YES,<br />
all the channels with locking settings will be locked.<br />
Parental Setting: In the channel list, select the channel you<br />
want to lock and then press . A padlock symbol<br />
will be displayed. To remove the lock, press again.<br />
10
The setup menu system---<strong>DVB</strong> PART<br />
Advanced Features<br />
D. <strong>DVB</strong> Menu-System Setting<br />
1) Country<br />
In the Country options, you can choose a kinds of the<br />
Countries. As: England Germany, Italy, France, Spain etc.<br />
2) Language<br />
Press the button to highlight the Language options, then Press the <br />
button to into the Language setup.<br />
1 st /2nd Audio : This option allows you to select your first and second choice for the audio<br />
language. If neither of your selected language is available on the program transmitted,<br />
the main language of the program will be used.<br />
Subtitle : Allows you to select the subtitle language. If your selected language is not<br />
available on the program transmitted, the main language of the program will be used.<br />
Exit: you can choose the Exit options to return the System setting.<br />
3) GMT usage:<br />
Allows you to enable/disable Greenwich Mean Time (GMT) usage. If you know the GMT<br />
time zone of your location, set GMT usage to ON and select an appropriate time zone. If<br />
you prefer to set the time manually, select OFF in GMT usage item and then manually<br />
select the date and time.<br />
4) Time Zone<br />
Select an appropriate time zone to display the local time correctly. Both EPG and system<br />
schedule need a correct time zone setting.<br />
5) System Schedule<br />
Press the button to highlight the System Schedule options, then Press the<br />
button to into the System schedule setup.This feature allows the receiver to<br />
automatically switch on and tune to a pre-specified channel for a pre-set length of time. Up<br />
to10 tasks can be scheduled.<br />
A. In the Schedule pane, use the key to select<br />
a task and use key to switch between<br />
Inactive and Active.<br />
b. Press to enter the detail page.c. Enter the<br />
following settings as required. Use the key to<br />
move between setting items, the key to<br />
switch between available selections and numeric keys to<br />
enter numeric value. Mode: You can repeat the task by setting<br />
The frequency as Once, Daily or Weekly. Or you can select Stop to disable the task. Start<br />
and End Time: Enter the start and end time that automatically turns on and off the receiver.<br />
Channel Type: Select TV or radio channel as required. Channel No: Select the channel to<br />
be played at scheduled time.<br />
d. When the setting is done, press or to save the changes.<br />
11
Troubleshooting<br />
If you have any questions, please consult the troubleshooting guide below.<br />
Other<br />
NO PICTURE OR SOUND<br />
Ensure the power button is on.<br />
Ensure the power outlet is operational.<br />
Ensure the power cord is not damaged.<br />
Ensure the power plug is connected firmly to the outlet.<br />
PICTURE BUT NO SOUND<br />
Ensure the audio jacks are securely connected.<br />
Ensure the audio connector is not damaged.<br />
Ensure the volume is turned up in VOL/CH setup.<br />
Ensure you have set the player's AUDIO settings<br />
correctly.<br />
Ensure you have ENTERed the correct AV input for<br />
your TV.<br />
Ensure the audio is not set to mute.<br />
SOUND BUT NO PICTURE<br />
Ensure the video jacks are securely connected.<br />
Ensure you have ENTE Red the correct AV input for your<br />
TV.<br />
Ensure the video connector is not damaged.<br />
Ensure you have set the player's VIDEO settings correctly.<br />
UNIT NOT WORKING<br />
Turn off the power, and then turn it on again.<br />
"BAD DISC" DISPLAYED<br />
Ensure the disc is not warped, damaged or<br />
deformed.<br />
Ensure the disc is not badly stained or damaged.<br />
Ensure the disc format is compatible with the player.<br />
Please check whether you have tried to play a<br />
software <strong>CD</strong>. If so, please restart the player.<br />
REMOTE NOT WORKING<br />
Ensure the remote batteries are working.<br />
Point the remote control directly at the player's IR<br />
sensor.<br />
Remove any obstacles between the remote and the IR<br />
sensor.<br />
"NO DISC" DISPLAYED<br />
Ensure you have put the disc on the tray.<br />
Ensure the disc is not upside down.<br />
Ensure the disc is not distorted, stained or scratched.<br />
POOR PICTURE OR SOUND<br />
Ensure you have set the player's AUDIO settings<br />
correctly.<br />
Ensure the disc is not scratched or stained.<br />
Ensure the AV connector or the output terminal is not<br />
damaged.<br />
Before you request for repair<br />
Phenomena below does not necessarily mean failure with TV set.<br />
Please check following before you request for repair.<br />
Phenomena<br />
No picture, no sound<br />
No image<br />
No sound<br />
Diamonds in picture<br />
No signal<br />
Dark picture<br />
Diamonds in picture<br />
orinferior sound during<br />
driving.<br />
Possible causes<br />
Improper connection with AC adapter or Car adapter. Use of<br />
unauthorized power supply. Power Switch is on OFF position.<br />
Whether antenna adjusted correctly;<br />
Whether the correct Channel or Countryselected.<br />
May need to reset or search.<br />
Whether the sound is turned to the end.<br />
Whether earphone plugged in.<br />
Whether press speaker button Whether press mute button<br />
Whether antenna adjusted correctly; Maybe too<br />
weak signal at the receiving place.<br />
Whether the correct Country selected; Maybe signal too weak.<br />
Adjust Brightness, Contrast correctly<br />
The signal too weak at that place<br />
12
Specifications<br />
Other<br />
Play mode<br />
Disc mode<br />
NTSC / PAL<br />
<strong>DVD</strong>,V<strong>CD</strong>, <strong>CD</strong>, <strong>MP3</strong>, <strong>CD</strong>-R, <strong>CD</strong>-RW, JPEG, <strong>DVD</strong>+ -R/W, <strong>MPEG4</strong>,<br />
Video characteristic<br />
Video S/N ratio<br />
Resolution AV OUT<br />
65dB.<br />
500 lines.<br />
Audio characteristic<br />
Frequency response<br />
Audio S/N ratio<br />
Dynamic range<br />
Distortion<br />
D/A Converter<br />
fs 96KHz: 20Hz-20KHz:+/-1dBI<br />
90dB<br />
80dB<br />
< 0.01%<br />
96KHz/24bit<br />
Output characteristic<br />
Display Device<br />
Receiving Channel<br />
Color TFT-L<strong>CD</strong><br />
DTV: VHF 177.5MHz~226.5MHz<br />
UHF 474 MHz~858 Mhz<br />
Screen<br />
Video<br />
Audio<br />
Size<br />
output<br />
output<br />
9 inches<br />
1Vp-p(75 Ω)<br />
2CH<br />
Power Voltage<br />
Power consumption<br />
Size<br />
DC IN 12V<br />
12W<br />
238x170x41mm<br />
Weight<br />
1.0kg<br />
Specifications are subject to change without notice.<br />
13
I <strong>Lenco</strong><br />
II DVP-941<br />
9<br />
13<br />
22,86<br />
9<br />
14


