
Create successful ePaper yourself
Turn your PDF publications into a flip-book with our unique Google optimized e-Paper software.
Owner’s <strong>Manual</strong><br />
Web www.evehicle.com.au for colour version of the<br />
instructions (EVO Mk2) or Email : info@evehicle.com.au<br />
Thank you for purchasing this product please call or email Electric Vehicles for any<br />
problems with the installation.<br />
EVS Knoxfield Unit 4/1488 Ferntree Gully Road, Knoxfeild Vic 3180<br />
Ph (03) 9763 6271 eMail: knox@evehicle.com.au<br />
EVS St Kilda 10 Punt Road, St Kilda Vic. 3182<br />
Ph (03) 95332901 eMail: punt@evehicle.com.au
Web www.evehicle.com.au for colour version of the instructions<br />
(EVO Mk2) info@evehicle.com.au<br />
Required tools 19mm Ring & Open end spanner<br />
3.5mm hex key (5mm hex key for brake), Cutters, 20 Cable ties Adjustable spanner.<br />
The bike should be of good quality, without disc brakes, a clearance of space 98mm is<br />
required between the front steel forks to fit this kit. See diagram attached page 23<br />
The rack must be very good quality, notice that support struts are vertical and top<br />
support brace is also vertical. This provides excellent strength & durability to support<br />
the battery pack. We recommend the Beto Brand Baby Seat Carrier. Lock tight on<br />
mounting screws is recommended.
Vertical support brace is best for this kit, contact Electric Vehicles for supply<br />
Unpack the parts, being especially careful of the wiring. All connections are already<br />
fitted, only the battery needs to be plugged in at the end of the installation. Notice<br />
thumb throttle, keys inside, wheel and charger. The battery comes in a separate box.
The front wheel must be fitted with a thorn proof / slim filled tube. Again special care<br />
must be taken when fitting, to protect the wiring of the front wheel.<br />
Tube and tyre fitted. Leave the throttle placed inside the rear pack, to avoid damage<br />
while fitting the front wheel, ensure that the wire in on the left hand side for forward<br />
motion.
Loosen the two wheel nuts, washers on outside of the forks against the nuts, move the<br />
wire protection cover carefully, then slide back into position.<br />
Notice the wire cover slides on the left hand side nut, off to enable tightening the nuts,<br />
using 19mm spanner. Motor axle nut tension should be not less than 67Nm
Warning!<br />
(Bike is upside down) Ensure flat sides on the axle, are slotted deep into the fork to<br />
match the slots on the fork. Any other fitting may cause damage to the fork and kit<br />
and void your warranty, if you are unsure contact our office for advice.<br />
(Bike is upside down)<br />
The axle should slot fully into the fork, the washers sitting flat in the recess of the<br />
front fork. Notice the neat wiring and cover back in place.
Photo above notice fine clearance with this type of front suspension fork, if clearance<br />
is too tight then another suspension fork must be used.<br />
Ensure the plastic cap is back in place, ready to route wiring using the cable ties.
Fit pack to rack using all 6 Velcro straps to hold pack in place. Trim Velcro straps if<br />
required, remove lights, reflectors etc that can be refitted to rear of rack.<br />
Remove the hand grip, and cut and trim to allow space for the throttle then slide the<br />
throttle on, ensuring that all gear changes can be used, this sometimes requires some<br />
rotating of the brake and throttle to the best ergonomic fit.
Route the throttle wires using brake cables as support (using zip ties along the way)<br />
refit and trim hand grip length. Notice trimmed hand grip above.<br />
Notice the routing of the motor wire along the back of the front fork, allow enough<br />
slack for right to left steering. Note: If transporting the bike on a rack do not crush<br />
the wiring, crushed wires will not be covered by the warranty.
Gently pull excess wire inside the pack, and neatly loop under the foam, keep<br />
connectors & wire to front of the pack ensuring that the battery is not placed on top of<br />
connectors and wiring.<br />
Ensure the foam is in place to protect wires and connectors. If foam becomes<br />
damaged or lost cut a new one, Yes it’s important!
Place battery pack inside pack and connect the power leads, tuck the leads down the<br />
side of pack out of the way. Make sure that noting is crushed under battery.<br />
Zip the pack up leaving the charger socket for easy access. Always use the extra<br />
heavy duty Velcro strap when riding the bike as in this photo.
When charging is complete, tuck the charger plug back in pack , just at the edge of the<br />
zipper so you do not have to unzip or un strap the pack.<br />
Before connecting the charger, ensure charger is switched off, this resets the charger.<br />
Red and yellow indicate charging, red and green is “charged”<br />
Turn key on and press red button on throttle on, lights should be on, be careful that all<br />
little hands are away from front moving wheel if testing.<br />
A two position key switch is used (Off On On) this allows for two Lithium packs to<br />
be used allowing for a total of 720 Watt hours of power or around 110ks range. Our<br />
rear pack was designed for one lead acid or two Lithium (Li-ma) packs.<br />
EVO Kit Warranty<br />
1. Motor and Controller – 12 months<br />
2. Batteries – 6 Months<br />
3. Throttle - 12 Months<br />
4. Warranty Card must be completed and returned to EVS<br />
Thank you for purchasing this product please call or email Electric Vehicles for any<br />
problems with the installation.<br />
EVS Knoxfield Unit 4/1488 Ferntree Gully Road, Knoxfeild Vic 3180<br />
Ph (03) 9763 6271 eMail: knox@evehicle.com.au<br />
EVS St Kilda 10 Punt Road, St Kilda Vic. 3182<br />
Ph (03) 95332901 eMail: punt@evehicle.com.au<br />
Web: www.evehicle.com.au
This is the controller wiring with throttle and motor connected.<br />
Not used in this version for future use includes:<br />
White male Red Black Green wire<br />
Small black female Yellow Black Red wire<br />
Female Green Yellow wire<br />
Thank you for purchasing this product please call or email Electric Vehicles for any<br />
problems with the installation. Ph 03 9533 2901<br />
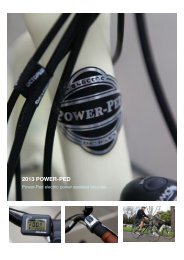
Powerped EVO Conversion Kit<br />
Our latest line up of products includes the awesome new Power Ped EVO<br />
Conversion Kit. Using the very latest brushless geared motor tech we have<br />
developed the most exciting conversion kit available on the market. Speeds of up to<br />
30km/h can be maintained without pedaling. Speeds of up to 35 Km/h can be<br />
maintained with Pedaling.<br />
The Kit has a range of up to 40~60km per charge. Batteries last for 300+ charges.<br />
The EVO Kit is simple to fit and has the best performance of any kit we have tested.<br />
The kit is compatible with most 26” and 700c wheels. Even 24” for the Gomier<br />
Trikes. We supply the motor fitted to a wheel in 24”, 26” or 700c.<br />
Critical fitting requirements<br />
The wheel and motor mounts on standard axel width forks. (98-100 mm). Distance<br />
between fork arms needs to be a minimum of 84mm for a vertical 83mm from axel<br />
centre. Total diameter of motor is 165mm. Recommend the Beto baby Spec seat rack.<br />
The EVO Kit allows you to easily convert most of your best selling bikes into highly<br />
effective and reliable electric bikes. Consumers can now choose their own bike and<br />
size it the benefits of electric power. Price $1195
26 Inch mountain bike Very good all round touring<br />
700c Hybrid bike best road cruising
5 reasons to fit the to fit The Power Ped EVO KIT<br />
We HIGHLY recommend<br />
you use the strongest rack<br />
possible with this<br />
conversion kit. The Beto<br />
baby Seat rack is<br />
recommended. $59.95<br />
<br />
<br />
<br />
<br />
<br />
<br />
Allows you retain you existing bike and accessories<br />
High Fuel Prices = Save on vehicle used and running costs.<br />
Easy and simple installation for most standard<br />
bikes.<br />
Almost zero ongoing maintenance required.<br />
Complete spare parts and service support from<br />
EVS<br />
Custom fit to a wide range of bikes and sizes.<br />
www.evehicle.com.au<br />
Quite simply the most advanced electric<br />
bike kit available!<br />
The Power Ped EVO kit kit is an innovative way to create your own electric bike.<br />
Converting your own personal bike has some distinct advantages such as custom<br />
fitting frame and component specifications to your size and usage requirements.<br />
Being front wheel drive and using your own pedal power at the rear wheel it<br />
effectively makes this bike ALL Wheel Drive. This creates a terrific riding experience<br />
on all surfaces.<br />
Installation is as simple as removing your front wheel and installing the new pre<br />
spoked wheel. (Note: Does not include tyre and tube). Install a carry rack. Zip tie the<br />
wiring loom. Plug into controller and battery. Mount throttle next to current hand grip<br />
and go.<br />
The Power Ped Evo kit uses the very latest brushless geared motor technology to<br />
develop high torque outputs while using available power as efficiently as possible.<br />
Brushless motors are significantly more reliable and efficient than brushed motors.<br />
The Kit is available in 24"(trikes), 26" (MTB) and 700c (Hybrid) wheel sizes. It is 98-<br />
100 mm wide on the axel which makes it compatible with most standard suspension<br />
forks.Note: You cannot have a disc brake with the set up however.<br />
The self install kit takes around 40 minutes to install for most people.<br />
We also can fit these kits to most popular TRICYCLES as well. eg Gomier 24"<br />
tricycle.<br />
You will need to supply your own rack as bikes vary in compatibility for racks. Call<br />
us for assistance if needed.<br />
Critical Requirements to fit kit. The wheel and motor mounts on standard axel width<br />
forks. (100 mm). Distance between fork arms from Centre of axel needs to be a
minimum of 84mm for a distance of 83mm from axel centre. Total diameter of motor<br />
is 165mm. Please measure your bike first.<br />
Now available. Power Ped Lithium 36v battery upgrades. 1/3 the weight of SLA, 3<br />
Times the life cycle, better current and voltage, 50% smaller. Amazing stuff. Please<br />
call for more details. Limited availability.<br />
The Standard Kits consist of the following:<br />
1x Brushless geared hi torque motor spoked up into either a 26” Alloy wheel<br />
or a 700c alloy wheel (Used on most hybrid Bikes). Not including tyre and<br />
tube.<br />
1x 36v 3 amp Power Ped 4 Stage Switch Mode Charger. 4-6 hour recharge<br />
1x Matching Controller 36v<br />
1 x Wiring loom<br />
3 x 12v 10aH Batteries<br />
1 x Bag for rear rack.<br />
1 x Thumb throttle with battery meter supplied<br />
1x Full installation instructions supplied.<br />
<br />
10 x High quality zip ties<br />
Definitely the best kit on the market today.<br />
Note: All prices are ex Melbourne freight to be added.<br />
Gomier Trike Conversions<br />
<br />
<br />
<br />
<br />
Same specs as our EVO Conversion kit<br />
Fits 24” 5 speed Gomier Trikes<br />
Easy to install.<br />
Excellent performance and long range per charge. Up to 40 km.<br />
300 plus charges per battery pack.
Takes up a small space in carry basket so additional batteries can<br />
be carried.<br />
Trike and Kit: $1795. ex Melbourne.<br />
Web www.evehicle.com.au for colour version of the<br />
instructions (Trike Mk2)<br />
Required tools 19mm Ring & Open end spanner<br />
3.5mm hex key (5mm hex key for brake), Cutters, 20 Cable ties Adjustable spanner<br />
The bike should be of good quality, without disc brakes, a clearance of space of<br />
98mm is required between the front forks to fit this kit. Be careful with all wiring.<br />
The front wheel is recommended to be fitted with a thorn proof tube, again care must<br />
be taken when fitting, to maintain the wiring of the front wheel.
Unpack the parts ensuring always to be careful of the wiring. All connections are<br />
already fitted, only the battery needs to be plugged in at the end of the installation.<br />
Notice thumb throttle, inside, wheel and charger. The battery comes in a separate box<br />
The front wheel is recommended to be fitted with a thorn proof tube, again care must<br />
be taken when fitting, to protect the wiring of the front wheel.<br />
Notice the neat routing of the wiring.
Fit pack to rack using Velcro straps to hold pack in place. Take notice of access to the<br />
charge plug.
Remove the hand grip and cut and trim to allow for the throttle, slide the throttle on,<br />
ensuring that all gear changes can be used, this sometimes requires some rotating of<br />
the brake and throttle to the best ergonomic fit. On some trikes the gears changer may<br />
be swapped to the other side of the handle bars.<br />
Place the battery inside the pack and connect the power leads, tuck the leads down the<br />
side of pack out of the way. Zip the pack up leaving the charger socket for easy<br />
access.<br />
When charging is complete tuck the charger plug back in pack , just at the edge of the<br />
zipper so you do not have to unzip or un strap the pack.<br />
Before connecting the charger, ensure charger is switched off this resets the charger.<br />
Turn key on and press red button on throttle on, lights should be on, be careful that all<br />
little hands are away from front moving wheel if testing.
A two position key switch is used (Off On On) this allows for two Lithium packs to<br />
be used allowing for a total of 960 Watt hours of power or around 110ks range. Our<br />
rear pack was designed for one lead acid or two Lithium packs.<br />
Turn key on and press red button on lights should be on.<br />
Thank you for purchasing this product please call or email Electric Vehicles for<br />
any problems with the installation. Ph 03 9533 2901
Power-Ped Lithium Battery Pack<br />
NOW AVAILIBLE. The Powerped lithium 36v Battery Pack at 3.5kg's is THE most<br />
advanced E-Bike battery pack available. It can be used with our exciting EVO kit.<br />
Upgrade your bike now with a 10kg weight saving of a standard lead acid pack.<br />
Twice the battery life and much better voltage delivery per charge. This is a<br />
revolutionary pack. POA<br />
Dimensions L=220 W=150 H=75, weight = 3.5kg's
Recommend steel forks. Motor axle nut tension 67Nm
Warranty Card<br />
Name:______________________________<br />
Address:____________________________<br />
Suburb/Town_______________State:_____<br />
Postcode:______Ph:___________________<br />
E-Mail:_____________________________<br />
Model Purchased:_____________________<br />
Vin or Serial Number: _________________<br />
Date purchased: __________<br />
Dealer Purchased from:_________________<br />
Questionaire<br />
How did you find out about EVS Products<br />
Radio__Web/Internet__Magazine__Editorial__Trade<br />
Show__Friend__Signted on street__<br />
What is your age category<br />
15-20__21-30__31-40__41-50__51-60__61-70__71-80+__<br />
Have you purchased and electric powered vehicle before<br />
If so what brand and model______________________________<br />
What do you intend using your EVS product for<br />
Shopping__Exercise__Travelling__Commuting to work__<br />
What are you hobbies<br />
Socialising__Sport__Shopping__Travelling__Caravaning__Offroad/4WD__<br />
What do find most appealing about your EVS product<br />
Looks__Performance__Point of difference__New<br />
Technology__Environmentally Friendly_ Quiet__<br />
Would you like to receive more info on EVS products Yes___ No__<br />
Send to<br />
Electric Vehicles P/L<br />
Unit 4/1488 Ferntree Gully Rd<br />
Knoxfield, vic 3180<br />
Ph: 03 9763 6271<br />
Fax: 03 9763 8541<br />
Email: scott@evehicle.com.au<br />
Web: www.evehicle.com.au<br />
Dealer Stamp