Vapor Sorption Analyzer - AquaLab
Vapor Sorption Analyzer - AquaLab
Vapor Sorption Analyzer - AquaLab

Create successful ePaper yourself
Turn your PDF publications into a flip-book with our unique Google optimized e-Paper software.
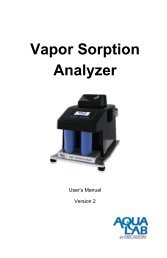
<strong>Vapor</strong> <strong>Sorption</strong><br />
<strong>Analyzer</strong><br />
User‘s Manual<br />
Version 2
Table of Contents<br />
1. Introduction .................................................................... 1<br />
About this Manual ............................................................... 1<br />
Warranty ............................................................................. 1<br />
Customer Support ............................................................... 2<br />
Seller’s Liability ................................................................... 3<br />
2. About the VSA ............................................................... 4<br />
Moisture <strong>Sorption</strong> Isotherms ............................................... 4<br />
Measurement Method ......................................................... 5<br />
Specifications ...................................................................... 7<br />
3. Theory ............................................................................ 8<br />
Moisture <strong>Sorption</strong> Isotherm Methods ................................... 9<br />
4. Getting Started ............................................................. 22<br />
Instrument Setup ............................................................... 23<br />
5. User Interface and Menus ............................................ 28<br />
Isotherm Tab ..................................................................... 28<br />
Measurement Tab ............................................................. 29<br />
Configuration Tab ............................................................. 29<br />
Data Tab ........................................................................... 43<br />
6. Cleaning and Maintenance .......................................... 46<br />
Desiccant cartridge desiccant replacement. ...................... 46<br />
Cleaning the Testing Chamber .......................................... 48
7. Verification of Calibration .............................................. 54<br />
Water Activity Verification ..................................................54<br />
Verification Standards ........................................................55<br />
When to Verify for Linear Offset .........................................56<br />
8. Running a Test ............................................................. 65<br />
Becoming Familiar with Stages ..........................................65<br />
Running a Moisture <strong>Sorption</strong> Isotherm Test .......................65<br />
For DDI method ............................................................................ 69<br />
For DVS method ........................................................................... 72<br />
Using DDI to investigate Glass Transition ..........................75<br />
Creating a Working Isotherm Using the VSA .....................75<br />
Editing a Running Isotherm Test ........................................76<br />
Running a Water Activity Test ............................................78<br />
9. VSA Downloader Software ........................................... 79<br />
Connect .............................................................................79<br />
Configure and Start a New Test .........................................79<br />
Download and Export ........................................................80<br />
10. Troubleshooting .......................................................... 81<br />
Diagnostic Screen ..............................................................97<br />
Appendix A ..................................................................... 101<br />
Index ............................................................................... 102
<strong>AquaLab</strong> <strong>Vapor</strong> <strong>Sorption</strong> <strong>Analyzer</strong><br />
1. Introduction<br />
1. Introduction<br />
The <strong>AquaLab</strong> <strong>Vapor</strong> <strong>Sorption</strong> <strong>Analyzer</strong> (VSA) is an automatic<br />
isotherm generator from the world leaders in water activity<br />
measurement. The VSA is the only automatic isotherm generator<br />
that can generate isotherms using both the Dynamic <strong>Vapor</strong><br />
<strong>Sorption</strong> (DVS) method, which generates equilibrium isotherms,<br />
and the Dynamic Dewpoint Isotherm (DDI) method, which<br />
generates dynamic isotherms. By combing both methods in one<br />
instrument, the VSA makes it possible to investigate both<br />
dynamic matrix changes due to water sorption and the kinetics of<br />
those changes. This manual is for VSA operation and to be<br />
informative regarding the capabilities of your VSA.<br />
About this Manual<br />
Included in this manual are instructions for setting up your VSA<br />
which includes setting up an isotherm test, running a test, collecting<br />
data, and analyzing data. Please read the manual before<br />
operating the VSA to ensure your instrument performs to its full<br />
potential.<br />
Warranty<br />
The VSA has a one year warranty on parts and labor. Your<br />
warranty is automatically validated upon receipt of the<br />
instrument. Decagon will contact you within the first 90 days of<br />
your purchase to see how the VSA is working for you.<br />
1
<strong>AquaLab</strong> <strong>Vapor</strong> <strong>Sorption</strong> <strong>Analyzer</strong><br />
1. Introduction<br />
Customer Support<br />
If you ever need assistance with your VSA, or if you just have<br />
questions or feedback, there are several ways to contact us.<br />
Customer service representatives are available to speak with<br />
you Monday thru Friday, between 7am and 5pm Pacific time.<br />
NOTE: If you purchased your VSA through a distributor, please<br />
contact them for assistance.<br />
E-mail:<br />
support@aqualab.com or sales@aqualab.com<br />
Phone:<br />
1-509-332-5601<br />
Fax:<br />
1-509-332-5158<br />
If contacting us by email or fax, please include as part of your<br />
message your instrument‘s serial number, your name, address,<br />
phone, and fax number.<br />
Note to Our VSA Users<br />
This manual is written to aid the end user in understanding the<br />
basic concepts of moisture sorption isotherms, enabling them to<br />
use our instruments with confidence. Every effort has been made<br />
to ensure the content of this manual is correct and scientifically<br />
sound.<br />
2
<strong>AquaLab</strong> <strong>Vapor</strong> <strong>Sorption</strong> <strong>Analyzer</strong><br />
1. Introduction<br />
Seller’s Liability<br />
Seller warrants new equipment of its own manufacture against<br />
defective workmanship and materials for a period of one year<br />
from date of receipt of equipment. The results of ordinary wear<br />
and tear, neglect, misuse, accident and excessive deterioration<br />
due to corrosion from any cause are not to be considered a<br />
defect. The seller‘s liability for defective parts shall in no event<br />
exceed the furnishing of replacement parts F.O.B. from the<br />
factory where originally manufactured. Material and equipment<br />
covered hereby which is not manufactured by Seller shall be<br />
covered only by the warranty of its manufacturer. Seller shall not<br />
be liable to Buyer for loss, damage or injuries to persons<br />
(including death), or to property or things of whatsoever kind<br />
(including, but not without limitation, loss of anticipated profits),<br />
occasioned by or arising out of the installation, operation, use,<br />
misuse, nonuse, repair, or replacement of said material and<br />
equipment, or out of the use of any method or process for which<br />
the same may be employed. The use of this equipment<br />
constitutes Buyer‘s acceptance of the terms set forth in this<br />
warranty. There are no understandings, representations, or<br />
warranties of any kind, express, implied, statutory or otherwise<br />
(including, but without limitation, the implied warranties of merchantability<br />
and fitness for a particular purpose), not expressly<br />
set forth herein.<br />
3
<strong>AquaLab</strong> <strong>Vapor</strong> <strong>Sorption</strong> <strong>Analyzer</strong><br />
2. About the VSA<br />
2. About the VSA<br />
The VSA Isotherm Generator is an automatic moisture sorption<br />
isotherm generator that can generate both dynamic and<br />
equilibrium moisture sorption isotherms.<br />
Moisture <strong>Sorption</strong> Isotherms<br />
The relationship between water activity (a w ) and moisture<br />
content at a given temperature is called the moisture sorption<br />
isotherm. This relationship is complex and unique for each<br />
product due to different interactions (colligative, capillary, and<br />
surface effects) between the water and the solid components at<br />
different moisture contents. An increase in a w is almost always<br />
accompanied by an increase in water content, but in a non-linear<br />
fashion. Moisture sorption isotherms are sigmoidal in shape for<br />
most foods, although foods that contain large amounts of sugar<br />
or small soluble molecules have a J-type isotherm curve shape.<br />
Isotherms provide information about product quality and safety.<br />
A few uses for isotherms include:<br />
1. Monolayer moisture content determination.<br />
2. Determine critical water activity or moisture content.<br />
3. Limits for crispness, hardness, and flow properties.<br />
4. Optimize moisture contents at a safe water activity that<br />
maximizes moisture and avoids over drying.<br />
5. Determine shelf-life and storage stability of a product.<br />
6. Predict packaging requirements based on sorption<br />
properties of a product.<br />
7. Determine kinetics of sorption and water vapor diffusion<br />
coefficients<br />
4
5<br />
<strong>AquaLab</strong> <strong>Vapor</strong> <strong>Sorption</strong> <strong>Analyzer</strong><br />
2. About the VSA<br />
8. Determine the equilibrium water activity of a mixture of dry<br />
ingredients.<br />
9. Determine the degree of crystallinity of powders.<br />
10. Determine the level of amorphous material in a product.<br />
11. Determine critical water activities for phase transitions.<br />
12. Determine the relationship between water activity and glass<br />
transition temperature.<br />
13. Determine the relationship between water activity and<br />
crystallization.<br />
14. Determine hysteresis levels for a product.<br />
15. Determine the moisture sensitivity of a product.<br />
16. Determine the equilibrium moisture content at a given water<br />
activity.<br />
17. Allow rapid moisture content determination from water<br />
activity analysis through an isotherm curve.<br />
Measurement Method<br />
The VSA is the only automatic isotherm generator that can<br />
create isotherms using both dynamic and static methods. To<br />
produce dynamic isotherms, the VSA uses the Dynamic<br />
Dewpoint Isotherm (DDI) method. To produce static or<br />
equilibrium isotherms, the VSA uses a controlled humidity and<br />
balance system commonly referred to as Dynamic <strong>Vapor</strong><br />
<strong>Sorption</strong> (DVS).<br />
The DDI method for dynamic isotherms is a water activity and<br />
gravimetric analysis method that controls neither water content<br />
nor water activity, but dries or wets the sample and measures<br />
water activity and water content during the wetting or drying<br />
process. Water content is determined by weighing the sample<br />
using a high precision magnetic force balance. Water activity is
<strong>AquaLab</strong> <strong>Vapor</strong> <strong>Sorption</strong> <strong>Analyzer</strong><br />
2. About the VSA<br />
determined using Decagon‘s patented chilled-mirror dewpoint<br />
sensor. Drying of the sample is imposed by flowing dry air from a<br />
desiccant tube across the sample. Wetting of the sample is<br />
imposed by saturating the air with water before it enters the<br />
chamber and flows across the sample. The water reservoir is<br />
mounted to the temperature controlled lower block to ensure<br />
humidity saturation and minimize temperature fluctuation.<br />
The DVS method for static or equilibrium isotherms consists of<br />
tracking sample weight change as the sample is exposed to<br />
different controlled humidities. The sample is held at each<br />
humidity for a preset time interval or until a steady state weight<br />
change is achieved, the goal being to achieve equilibrium<br />
between the sample water activity and the controlled humidity.<br />
Typically, several humidity levels are chosen and preset during<br />
the setup process. The instrument then tracks equilibrium<br />
progress at each humidity level and automatically steps to the<br />
next humidity when equilibrium requirements are achieved.<br />
Weight change vs. time data is recorded allowing for determining<br />
kinetics of sorption for each humidity level. Using less stringent<br />
equilibrium settings for weight change or setting a reduced time<br />
interval at each step will speed up the isotherm test, but may<br />
give non-equilibrium results. In addition, setting smaller steps in<br />
humidity will increase the data resolution of the isotherm, but at<br />
the expense of much longer test times.<br />
The VSA is a stand-alone instrument with an integrated pump<br />
system that eliminates the need for an external gas cylinder,<br />
however an external gas source can be used if desired. The<br />
instrument consists of a case which houses the power supply, air<br />
pump, balance, temperature controlled sample chamber, sensor<br />
block, sensor and temperature control electronics, water<br />
6
<strong>AquaLab</strong> <strong>Vapor</strong> <strong>Sorption</strong> <strong>Analyzer</strong><br />
2. About the VSA<br />
reservoir, and desiccant supply. Setup is as simple as plugging<br />
the instrument in, installing the desiccant tubes, and filling the<br />
water reservoir. Test parameters can be set using an onboard<br />
interface or using a connected computer and VSA software<br />
package.<br />
Specifications<br />
Water Activity (Relative Humidity) Range: 0.03 to 0.95 a w (3%<br />
to 95% RH) for 15 to 50°C , 0.03 to 0.90 a w for 50 to 60°C<br />
Water Activity (Relative Humidity) Accuracy: ±0.005 a w (0.5<br />
%RH) (for volatiles setting, ±0.02 a w )<br />
Water Activity (Relative Humidity) Repeatability: ±0.003 a w<br />
(0.3% RH) (for volatiles setting, ±0.02 a w )<br />
Sample Weight Range: 500-5000 mg<br />
Temperature Control Range: 15 to 60°C at STP. Instrument<br />
Control (sample temperature may vary)<br />
Temperature Operating Range: 0 to 60°C<br />
Humidity Operating Range: 10-90% non-condensing<br />
Universal Power: 110 V to 220 V AC. 50/60Hz<br />
Size (Footprint): 38.1 x 26.7 x 30.5cm (15 x 10.5 x 12in. (L x W<br />
x H))<br />
Weight: 33 pounds<br />
Weight Resolution: ± 0.1mg<br />
7
<strong>AquaLab</strong> <strong>Vapor</strong> <strong>Sorption</strong> <strong>Analyzer</strong><br />
3. Theory<br />
3. Theory<br />
Water profoundly influences product attributes such as quality<br />
and safety. To completely understand water relations in a<br />
product requires an understanding of the amount of water<br />
(moisture content) that can be held at a given energy state<br />
(water activity). Moisture sorption isotherms describe the<br />
relationship between water activity and moisture content at a<br />
constant temperature. The nature of this relationship depends on<br />
the interaction between water and other ingredients. The amount<br />
of water vapor that can be absorbed by a product depends on its<br />
chemical composition, physical-chemical state, and physical<br />
structure. Consequently, the isotherm shape is unique to each<br />
product type due to differences in capillary, surface, and<br />
colligative effects (Figure 1). Products that lie in the low water<br />
activity portion of the isotherm are often referred to as dry, those<br />
in the range of 0.60 a w to 0.90 a w are intermediate moisture<br />
products, and those having water activities higher than 0.90 are<br />
high water activity products.<br />
For ease of interpretation, isotherms are often identified by<br />
Brunauer classifications (Brunauer, 1945). Most food and<br />
pharmaceutical products fall under type I, II, or III. Type I<br />
isotherms are typical of very hygroscopic materials. Type II<br />
(sigmoidal) isotherms are typical for intermediate moisture<br />
products. Type III (J-shaped) isotherms are typical for crystalline<br />
and coated materials. These general classifications proved<br />
useful when conducting isotherms on every product was not<br />
feasible due to time and labor constraints. However, with<br />
automation and improved speed, isotherms can easily be<br />
conducted on any product and the uniqueness of each isotherm<br />
8
Moisture Content (% d.b.)<br />
<strong>AquaLab</strong> <strong>Vapor</strong> <strong>Sorption</strong> <strong>Analyzer</strong><br />
3. Theory<br />
often proves more valuable than placing them in a common<br />
classification.<br />
Icing Creme Filling Cake Wood Pulp Granola Bar Milk Powder<br />
50<br />
45<br />
40<br />
35<br />
30<br />
25<br />
20<br />
15<br />
10<br />
5<br />
0<br />
0 0.1 0.2 0.3 0.4 0.5 0.6 0.7 0.8 0.9 1<br />
Water Activity<br />
Figure 1. Moisture adsorption isotherms for icing (♦) , crème filling (■),<br />
cake (▲), wood pulp (♦), granola bar (*), and milk powder (●) showing<br />
that the isotherm shape is unique to the product.<br />
Moisture <strong>Sorption</strong> Isotherm Methods<br />
Constructing an isotherm consists of collecting water activity and<br />
moisture content data at various points along the water activity<br />
range. The range of water activities used will depend on the<br />
situation, but normally run from 0.10 a w up to 0.90 a w . This can<br />
be accomplished by controlling water activity levels using<br />
saturated salt slurries or mechanical humidifiers and determining<br />
equilibrium moisture content at each water activity level.<br />
Equilibrium is assumed when the weight of the sample stops<br />
changing. This process is often accomplished using sealed<br />
chambers such as desiccators and the equilibration process can<br />
9
<strong>AquaLab</strong> <strong>Vapor</strong> <strong>Sorption</strong> <strong>Analyzer</strong><br />
3. Theory<br />
take weeks. Additional challenges with this manual method<br />
include difficulty tracking the weight of the samples, removing the<br />
samples for weighing exposes them to ambient humidity, and at<br />
high humidities, there is the possibility of mold growth. Decagon‘s<br />
VSA Isotherm Generator uses the DVS method described<br />
above to speed up and automate the construction of equilibrium<br />
isotherms, eliminating the challenges of manual determination. In<br />
additional to equilibrium moisture contents at a given water<br />
activity, equilibrium isotherms provide information about kinetics<br />
of sorption and water vapor diffusion properties.<br />
Moisture sorption isotherms can also be determined using<br />
dynamic methods such as the DDI method used by the VSA.<br />
The DDI method directly measures water activity while<br />
gravimetrically tracking weight, so there is no dependence on<br />
equilibration to known water activity levels to determine water<br />
activity. Adsorption occurs as saturated wet air is passed over<br />
the sample. Desorption is accomplished as desiccated air is<br />
passed over the sample. After a short period of time, airflow is<br />
stopped and a snapshot of the sorption process is taken by<br />
directly measuring the water activity and weight. The advantages<br />
of this method are increased analysis speed since the sample<br />
does not have to wait for equilibration to a known water activity<br />
and an unmatched level of resolution. This makes it possible for<br />
dynamic isotherms to produce high resolution isotherms in a<br />
matter of days instead of the weeks it would take to make a<br />
comparable isotherm using equilibrium techniques. The high<br />
resolution of dynamic isotherms makes them valuable for<br />
observing sudden changes in sorption properties associated with<br />
matrix changes such as glass transition.<br />
10
<strong>AquaLab</strong> <strong>Vapor</strong> <strong>Sorption</strong> <strong>Analyzer</strong><br />
3. Theory<br />
The dynamic nature of the DDI method means that moisture<br />
contents may or may not be at equilibrium and it is possible for<br />
there to be differences between dynamic and equilibrium<br />
isotherms. For samples with fast vapor diffusion, penetration by<br />
water vapor into the whole sample is rapid and isotherms using<br />
the DDI method for these types of products will be comparable<br />
equilibrium methods. However, for samples with slow diffusion<br />
rates, moisture movement through the sample is slow and<br />
complete diffusion of moisture into and out of the sample may be<br />
slow enough to give the appearance of vapor equilibrium in the<br />
headspace during water activity analysis. In reality, the moisture<br />
has not had time to be completely absorbed by the sample.<br />
Isotherms for these types of samples developed using the DDI<br />
method may have lower moisture contents during adsorption and<br />
higher moisture contents during desorption than equilibrium<br />
isotherms, resulting in higher levels of apparent hysteresis.<br />
Combining DVS and DDI in one instrument<br />
A unique and important feature of the <strong>AquaLab</strong> VSA is that it can<br />
generate both dynamic and equilibrium isotherms. As explained<br />
above, both DVS and DDI methods have advantages and<br />
disadvantages. While the data they generate will agree in some<br />
cases, it is the uniqueness of the results from each method that<br />
gives them value. There is information that can only be obtained<br />
from dynamic isotherms such as critical water activities for glass<br />
transition. Similarly, there is information that can only be<br />
obtained by equilibrium isotherms such as kinetics of sorption.<br />
Therefore, to provide the most information about the moisture<br />
characteristics of a material, both types of isotherms are needed.<br />
The VSA can provide both DVS and DDI isotherms and even run<br />
them both on one sample.<br />
11
<strong>AquaLab</strong> <strong>Vapor</strong> <strong>Sorption</strong> <strong>Analyzer</strong><br />
3. Theory<br />
Hysteresis<br />
Figure 2 shows two isotherms, one obtained by wetting a sample<br />
from complete dryness and the other obtained by drying a<br />
sample from saturation. The arrows show the direction of the<br />
process. The water content at each water activity is higher during<br />
desorption (drying from high water content) than adsorption<br />
(wetting from low water content). This phenomenon is called<br />
hysteresis. The curves in Figure 2 represent limits or bounding<br />
isotherms since they begin at water activities near zero and one.<br />
If a drying process reduces the water activity of a sample only<br />
part way to dryness, and the sample is then re-wet, it follows a<br />
path between the wetting and drying boundary curves, as shown<br />
in Figure 3. These curves are called scanning curves, and there<br />
can be an infinite number of them depending on where drying<br />
stops and starts.<br />
Figure 2. Full isotherm showing hysteresis.<br />
12
Moisture Content (%d.b.)<br />
<strong>AquaLab</strong> <strong>Vapor</strong> <strong>Sorption</strong> <strong>Analyzer</strong><br />
3. Theory<br />
14.00<br />
12.00<br />
10.00<br />
8.00<br />
6.00<br />
4.00<br />
2.00<br />
0.00<br />
0 0.2 0.4 0.6 0.8 1<br />
Water Activity<br />
Figure 3. Scanning adsorption curves resulting from drying to<br />
different water activities.<br />
These observations help clarify the point that an isotherm is not<br />
a single valued function. The water content for any given water<br />
activity value depends on the wetting and drying history of the<br />
sample.<br />
It is possible to obtain isotherm data which appear to show<br />
hysteresis by failing to allow a sample to equilibrate at each step,<br />
or by inducing changes in the water binding properties of the<br />
matrix by wetting or drying. We prefer to treat these cases<br />
separately, and reserve the term hysteresis for situations where<br />
equilibrium is reached, but water contents of wetted and dried<br />
samples still differ because of their history.<br />
Several plausible models exist for hysteresis. Theories are<br />
based on; capillary condensation of porous solids, phase<br />
13
<strong>AquaLab</strong> <strong>Vapor</strong> <strong>Sorption</strong> <strong>Analyzer</strong><br />
3. Theory<br />
changes of non-porous solids, structural changes within a solid<br />
matrix, and supersaturation of some solutes during desorption.<br />
Depending on the composition of the sample, these theories<br />
explain why the water content of a desorption process is greater<br />
than that for a wetting process.<br />
1. Capillary condensation of porous solids theory is illustrated<br />
by the ‗ink bottle‘ model, in which pores and capillaries fill<br />
and empty differently. Such a pore fills when the water<br />
activity corresponding to the energy state of the larger<br />
radius is exceeded, but will empty only when the water<br />
activity drops below the energy state of the narrow neck<br />
radius.<br />
2. A phase change of non-porous solids is illustrated by the<br />
fact that desorption from rubbery state can reach equilibrium<br />
faster due to increased molecular mobility, while adsorption<br />
into a glassy material can be slow due to restrictions in<br />
molecular mobility.<br />
3. Structural changes within a solid matrix occur when the<br />
material swells and polar sites once obscured are now<br />
exposed to ‗bind‘ with water. For example, hydrated protein<br />
contains many sites for water ‗binding‘ before desorption<br />
while dehydrated protein have limited polar sites for water<br />
‗binding‘ prior to adsorption.<br />
4. Some solutes may supersaturate below their crystallization<br />
water activity (non-equilibrium condition) and thus, hold<br />
more water as a w is lowered. Foods with high sugar content<br />
frequently exhibit this phenomenon.<br />
14
<strong>AquaLab</strong> <strong>Vapor</strong> <strong>Sorption</strong> <strong>Analyzer</strong><br />
3. Theory<br />
Non-Equilibrium<br />
If diffusion of water into (adsorption) or out of (desorption) a<br />
material is slow and sufficient time is not allowed for complete<br />
diffusion, there will be a large amount of apparent hysteresis that<br />
could be reduced by allowing sample equilibration.<br />
Matrix Changes<br />
Figure 4 shows three different isotherm curves of spray-dried<br />
milk powder with different maximum water activities and different<br />
sorption histories. The boundary isotherm with a 0.80 a w<br />
maximum experienced a phase change at 0.43 a w, indicated by a<br />
sharp inflection point in the curve. The desorption curve for this<br />
isotherm appears to show hysteresis, especially below a water<br />
activity of 0.60. However, an isotherm, run on a sample wetted to<br />
a maximum water activity below the phase change, exhibits very<br />
little hysteresis. The lack of hysteresis in this isotherm indicates<br />
that the matrix changes that occur at 0.43 a w are completely<br />
responsible for the apparent hysteresis.<br />
Water in a sample is bound to particle surfaces by various<br />
bonding mechanisms. When the configuration of particle<br />
surfaces changes due to a phase change, binding sites change<br />
and the amount of water which can be bound at a given energy<br />
of water also changes. An isotherm curve of the phase changed<br />
sample does not show further phase transitions since simply<br />
drying the sample does not return it to an amorphous state.<br />
These matrix changes represent a true physical change in the<br />
material. They are not reversible by drying, no matter how many<br />
drying cycles occur. Differences between the adsorption and<br />
15
Moisture Content (% d.b.)<br />
<strong>AquaLab</strong> <strong>Vapor</strong> <strong>Sorption</strong> <strong>Analyzer</strong><br />
3. Theory<br />
desorption curves in the initial isotherm is not true hysteresis<br />
since the sample matrix has experienced a physical change.<br />
Differences between sorption curves in the subsequent<br />
isotherms represent true hysteresis.<br />
25<br />
20<br />
15<br />
10<br />
5<br />
0<br />
0 0.2 0.4 0.6 0.8 1<br />
Water Activity<br />
Figure 4. Moisture sorption isotherms for spray-dried milk<br />
powder showing a change in hysteresis due to a phase change<br />
at 0.43 a w . When the isotherm is ended prior to the phase<br />
change at 0.43 a w (■), there is little hysteresis. When the<br />
isotherm is ended above the phase change (), there is<br />
apparent, but not actual hysteresis due to the phase change.<br />
Subsequent isotherms run on the sample after experiencing a<br />
phase transition (▲) do not show an inflection point, are<br />
repeatable, and exhibit only small levels of hysteresis.<br />
Working Isotherms<br />
Full boundary isotherms give information about the physical<br />
characteristics of a product, show hysteresis, and are important<br />
in establishing critical control points, but in many cases a<br />
working isotherm will prove very useful. A working isotherm<br />
16
Moisture Content (% d.b.)<br />
<strong>AquaLab</strong> <strong>Vapor</strong> <strong>Sorption</strong> <strong>Analyzer</strong><br />
3. Theory<br />
shows how a product adsorbs and desorbs water from its current<br />
or typical condition. To create a working isotherm, the product is<br />
processed as usual, and then a scanning curve is created by<br />
wetting one sample from that point and drying a different sample<br />
from that same point. Figure 5 shows a working isotherm for<br />
wood pulp superimposed over its full boundary isotherm.<br />
The scanning curve the product will initially follow depends on<br />
whether the product was previously wetted or dried to its current<br />
state. If a product was wetted to a certain water activity and then<br />
is dried back down, there will be an initial transition period as the<br />
product moves from the adsorption curve to the desorption<br />
curve. The same is true for a product that was previously dried<br />
and then wetted up. There will be an initial transition period as<br />
the product moves from the desorption curve to the adsorption<br />
curve. This transition region can be observed at any point on the<br />
isotherm if the direction of the sorption is changed and the<br />
product exhibits hysteresis as can be observed in Figure 5.<br />
9<br />
8<br />
7<br />
6<br />
5<br />
4<br />
3<br />
2<br />
1<br />
0<br />
0 0.2 0.4 0.6 0.8 1<br />
Water Activity<br />
17
<strong>AquaLab</strong> <strong>Vapor</strong> <strong>Sorption</strong> <strong>Analyzer</strong><br />
3. Theory<br />
Figure 5. A working isotherm () superimposed over a full<br />
isotherm (■) for wood pulp. There is a transition from the native<br />
starting point (0.60 a w ) on the working isotherm in both<br />
adsorption and desorption until the curves meet the bounding<br />
adsorption and desorption curves of the full isotherm at which<br />
point the working isotherm follows the full isotherm.<br />
NOTE: Please refer to Chapter 8 for information about running a<br />
working Isotherm using the VSA.<br />
Isotherm Models<br />
Several different isotherm models have been proposed and<br />
compared in the literature. These models are necessary to<br />
predict the moisture content at a given water activity and are<br />
used to evaluate thermodynamic functions of water in foods.<br />
They are also necessary when using isotherm methods with low<br />
data resolution to interpolate between isotherm data points.<br />
While there are 270 proposed isotherm models, the most<br />
commonly used models are the GAB and BET. Since the BET<br />
model is only applicable up to 0.50 a w , the GAB model is widely<br />
accepted as the most useful for characterizing isotherms across<br />
the entire water activity range. Its coefficients also have<br />
theoretical physical meaning such as providing monolayer<br />
moisture content. A new empirical model called the Double Log<br />
Polynomial (DLP) or Chi plot (Condon, 2006) has proven to be<br />
even better than the GAB at characterizing complex isotherms.<br />
The model equations are shown below.<br />
BET<br />
aw<br />
moc<br />
m <br />
( 1<br />
a )[1 a ( c 1)]<br />
w<br />
w<br />
(2)<br />
18
<strong>AquaLab</strong> <strong>Vapor</strong> <strong>Sorption</strong> <strong>Analyzer</strong><br />
3. Theory<br />
Where m is the moisture in g/100 solids or g/g solids at water<br />
activity a w and m o is the monolayer value in the same units. The<br />
Qs<br />
<br />
constant c is calculated by: c exp Where Q s is the<br />
RT <br />
surface interaction energy in J/mole, R is the gas constant (8.314<br />
J/mol K) and T (K) is the temperature.<br />
GAB<br />
mokbc aw<br />
m <br />
( 1<br />
kbc)(1<br />
kbaw<br />
kbc aw)<br />
(3)<br />
Where m is the moisture in g/100 solids or g/g solids, k b is a<br />
constant in the range of 0.70 to 1 and c is a constant in the range<br />
of 1 to 2000. In addition, m o is the monolayer moisture content in<br />
the same units as m and a w is the water activity at moisture m.<br />
DLP m = b 3 3 + b 2 2 + b 1 + b 0 (4)<br />
Where m is the moisture in g/100 solids or g/g solids, = ln[-<br />
ln(a w )] and b 0 – b 3 are empirical constants.<br />
Uses for Moisture <strong>Sorption</strong> Isotherms<br />
Moisture sorption isotherms provide valuable information. For<br />
anyone who dries or wets their product, the sorption isotherm<br />
serves as a drying and wetting curve and provides information<br />
about the moisture content of a product when dried or wetted to<br />
a specific water activity. It can be used to assist in process<br />
control by determining drying rates and optimal endpoints. If a<br />
product exhibits hysteresis, the isotherm will show what impact<br />
that will have on the moisture content after drying to a given<br />
water activity.<br />
19
<strong>AquaLab</strong> <strong>Vapor</strong> <strong>Sorption</strong> <strong>Analyzer</strong><br />
3. Theory<br />
An additional function of the isotherm is moisture content<br />
prediction. Although water activity is a much better predictor of<br />
safety and quality than moisture content, there are times when it<br />
is necessary to know both water activity and moisture content as<br />
well as the relationship between the two parameters for a given<br />
product. Water content measurements can be inaccurate, timeconsuming<br />
and require a precision balance. As an alternative to<br />
moisture content measurement methods, the sorption isotherm<br />
can be used to determine moisture content based on water<br />
activity, usually with better accuracy than actually running a<br />
moisture content analysis and in much less time.<br />
Isotherms can be used to determine the effect of temperature on<br />
a product‘s water activity and moisture content. Isotherms<br />
conducted at several different temperatures will show the<br />
temperature at which a product, in a sealed package (at constant<br />
moisture content), will be at unstable water activity levels.<br />
Isotherms can be very valuable for formulation and product<br />
development. By comparing the isotherms of different<br />
formulations, it is possible to determine if a product can be<br />
adjusted to allow higher moisture content at a given water<br />
activity or a lower water activity at a given moisture content. The<br />
result can be a moister product that is still shelf stable. For those<br />
producing multi-component products, it is possible using the<br />
isotherms of the two components to determine what the final<br />
water activity will be of the mixture without actually making the<br />
product. For dried products, the isotherm will predict the moisture<br />
content of the product when it is dried to a shelf stable water<br />
activity level.<br />
20
<strong>AquaLab</strong> <strong>Vapor</strong> <strong>Sorption</strong> <strong>Analyzer</strong><br />
3. Theory<br />
Finally, sorption isotherms are valuable for shelf life prediction. A<br />
product‘s isotherm can be used to determine package<br />
requirements depending on the products sensitivity to moisture.<br />
It can also be used to determine the monolayer moisture content,<br />
which represents a products most stable state. The shape of the<br />
isotherm can provide information about the level of amorphous to<br />
crystalline material in a product. Changes in the slope of the<br />
isotherm indicate phase transitions and can provide information<br />
about critical water activities for maintaining texture properties<br />
and preventing caking and clumping. The water activity value<br />
where the glass transition temperature equals storage temperature<br />
or the crystallization temperature equals storage<br />
temperature can also be determined.<br />
21
<strong>Vapor</strong> <strong>Sorption</strong> <strong>Analyzer</strong><br />
4. Getting Started<br />
4. Getting Started<br />
Components of VSA<br />
The VSA requires a computer and software to generate and<br />
analyze isotherm data. Once a test has begun, the computer can<br />
be disconnected and re-connected without losing any data. Your<br />
VSA is shipped with the following items:<br />
<br />
<br />
<br />
<br />
<br />
<br />
<br />
<br />
<br />
<br />
<br />
The VSA Isotherm Generator Main Unit<br />
The VSA Software Installation Disc<br />
Operators Manual<br />
Calibration Certificate / MSDS Certificates<br />
Power Cord<br />
USB Interface Cable<br />
2 Stainless Steel Sample Cups<br />
2 Refillable Desiccant Tubes<br />
1 Decagon Cleaning Kit<br />
1 Water Bottle<br />
3 Vials each of the following verification solution:<br />
0.920 a w 2.33 molal NaCl<br />
0.760 a w 6.0 molal NaCl<br />
0.500 a w 8.57 molal LiCl<br />
0.250 a w 13.41 molal LiCl<br />
<br />
1 2g NIST traceable weight.<br />
NOTE: Please keep the box your instrument arrives in. If it ever<br />
needs to be returned, it must be shipped in the original<br />
packaging.<br />
22
Instrument Setup<br />
<strong>AquaLab</strong> <strong>Vapor</strong> <strong>Sorption</strong> <strong>Analyzer</strong><br />
4. Getting Started<br />
1. Place <strong>AquaLab</strong> VSA on a flat, stable surface. Use the<br />
bubble level (Figure 6) and the adjustable feet to level the<br />
instrument. The small rubber feet on the back of the lower<br />
plate are to prevent tip-over and do not need to be touching<br />
the table.<br />
2. Use <strong>AquaLab</strong> VSA where environmental temperature and<br />
humidity remain stable.<br />
3. Plug in <strong>AquaLab</strong> VSA and turn on the power (switch in<br />
back). For best results, let the instrument warm-up for 2<br />
hours before use.<br />
Lower plate<br />
Bubble level<br />
Figure 6: Adjustment and bubble level.<br />
Adjustment feet: two<br />
on front and one on<br />
the middle back.<br />
23
<strong>Vapor</strong> <strong>Sorption</strong> <strong>Analyzer</strong><br />
4. Getting Started<br />
4. Install the 2 desiccant tubes in the front of the instrument.<br />
Desiccant tubes are installed as shown in Figure 7:<br />
Desiccant installation. Before insertion make sure that<br />
the desiccant tube lid is firmly sealed onto the desiccant<br />
tube, remove black vinyl covers from air fittings. Lift the<br />
desiccant tube into the area above the desiccant receiver<br />
and then insert the fittings into the mating holes while<br />
rocking the tube slightly. Be sure to place the black fitting<br />
into the corresponding black hole. Once in place, the<br />
desiccant tube is sealed for flow purposes even if it may<br />
feel loose.<br />
Desiccant<br />
cartridge<br />
Black fitting<br />
Black hole<br />
Figure 7. Desiccant installation<br />
Desiccant<br />
receiver<br />
24
<strong>AquaLab</strong> <strong>Vapor</strong> <strong>Sorption</strong> <strong>Analyzer</strong><br />
4. Getting Started<br />
5. Install the air cylinder and weighing pan. With the lid open,<br />
inset the air cylinder and weighing pan into the testing block<br />
as shown in Figure 8. These parts remain in the instrument<br />
continually and are only removed for maintenance. A<br />
sample cup is not inserted unless a test is going to be run.<br />
The air cylinder is placed into the bore of the base block. It<br />
should slide into the block easily and settle at the bottom of<br />
the bore. The weight pan connects to the scale and holds<br />
the sample cup. For best results, verify cleanliness of all<br />
parts and avoid dropping the parts as damaged parts may<br />
not slide properly and affect performance.<br />
Sample Cup Lid<br />
Only used for sample<br />
storage and must be<br />
removed during tests.<br />
Sample cup<br />
Stainless steel cups are<br />
recommended. Plastic<br />
cups absorb moisture over<br />
time.<br />
Weighing Pan<br />
Air Cylinder<br />
Base Block Bore<br />
Figure 8. Sample cup and lower block assembly<br />
25
<strong>Vapor</strong> <strong>Sorption</strong> <strong>Analyzer</strong><br />
4. Getting Started<br />
6. Verify shipping did not damage the scale performance and<br />
test scale stability:<br />
a) Turn on the VSA and wait for it to warm up.<br />
NOTE: The scale takes about 2 hours after being<br />
turned on to come to full equilibrium.<br />
b) Go to the Configuration menu and navigate to the<br />
diagnostics screen and press .<br />
c) Scroll down and choose diagnostics by pressing<br />
.<br />
d) Scroll down to the screen that shows the weight.<br />
Readings should vary no more than 0.1 mg.<br />
e) Lightly tap the table with one finger. If the<br />
readings vary more than 0.2 mg after tapping, the<br />
table holding the VSA is probably too unstable for<br />
accurate weight readings during a test and will<br />
need to be made more rigid or another location<br />
found for this equipment. Contact your <strong>AquaLab</strong><br />
distributor if the scale readings are unstable after<br />
placing the unit on a stable structure.<br />
7. Fill the water tank. Remove the black plug on the clear<br />
plastic tank fill extension located on the back right of the<br />
VSA. (see Figure 9: Tank fill extension). Fill the tank with<br />
steam distilled water until full to top. Reinstall the black plug<br />
once finished.<br />
26
<strong>AquaLab</strong> <strong>Vapor</strong> <strong>Sorption</strong> <strong>Analyzer</strong><br />
4. Getting Started<br />
Water fill plug<br />
Upper horizontal<br />
drilled hole<br />
Water tank fill extension<br />
Water tank drain plug<br />
Fan filter<br />
Figure 9: Tank fill extension<br />
8. Figure 9 also shows the location of the fan filter that will<br />
need to be removed from time to time when dust builds up<br />
on it. The housing around the filter is a snap on housing<br />
that is easily removed.<br />
9. To remove the water from the water tank, the water tank<br />
drain plug is used.<br />
27
<strong>AquaLab</strong> <strong>Vapor</strong> <strong>Sorption</strong> <strong>Analyzer</strong><br />
5. User Interface and Menus<br />
5. User Interface and Menus<br />
The <strong>AquaLab</strong> VSA is a stand-alone instrument that uses arrows<br />
and 3 buttons to navigate menus and begin tests. At the top of<br />
the display screen there are 4 tabs: Isotherm, Measurement,<br />
Configuration, and Data. These tabs indicate the 4 menus you<br />
can access. To change between the tabs press the right most<br />
button below the document icon. The enter icon is the read or<br />
enter button.<br />
Isotherm Tab<br />
The Isotherm tab, as seen below, is the main screen which<br />
displays each time you turn on your VSA. If this screen doesn‘t<br />
appear, refer to the chapter on troubleshooting. From this<br />
screen, a new test can be initiated by pressing the wizard icon<br />
(third button from right). If a test is already running, this screen<br />
will display the latest test values including water activity, weight<br />
(% weight change or % moisture content) and temperature.<br />
Pressing the 2 nd button activates the chart view.<br />
28
Measurement Tab<br />
<strong>AquaLab</strong> <strong>Vapor</strong> <strong>Sorption</strong> <strong>Analyzer</strong><br />
5. User Interface and Menus<br />
The Measurement tab allows you to take water activity readings<br />
of the sample in the sample chamber when not running a test.<br />
Pushing the right or left arrow keys will change the display to a<br />
temperature equilibration screen shown below. This screen<br />
shows the temperature difference between the sample<br />
temperature and the lid temperature.<br />
Configuration Tab<br />
When at the configuration screen, pressing the up and down<br />
arrow keys moves the cursor through the various configuration<br />
options. Press the left and right arrows to page through the<br />
29
<strong>AquaLab</strong> <strong>Vapor</strong> <strong>Sorption</strong> <strong>Analyzer</strong><br />
5. User Interface and Menus<br />
options. The enter button will allow you to change the highlighted<br />
setting.<br />
30
<strong>AquaLab</strong> <strong>Vapor</strong> <strong>Sorption</strong> <strong>Analyzer</strong><br />
5. User Interface and Menus<br />
Calibration:<br />
Pressing the Enter button when Calibration is highlighted opens<br />
the calibration menu where either a water activity or weight<br />
adjustment can be made.<br />
For more details on weight and water activity calibration<br />
procedures refer to the chapter on Verification of Calibration.<br />
You may also reset the calibration to the factory defaults by<br />
highlighting the Defaults option in the calibration menu and<br />
pressing Enter. This will reset all options to the way they were<br />
when the instrument arrived at your location.<br />
Volatiles:<br />
The instrument will give accurate readings on most samples<br />
when the default volatiles setting is ―Off‖. However, samples<br />
31
<strong>AquaLab</strong> <strong>Vapor</strong> <strong>Sorption</strong> <strong>Analyzer</strong><br />
5. User Interface and Menus<br />
with certain volatiles in high enough concentrations may give<br />
inaccurate water activity values. This is because the volatiles<br />
condense on the mirror during the reading process, but do not<br />
evaporate from the mirror as water does. As a result, the reading<br />
on samples with volatiles will not be accurate. The concentration<br />
of volatiles that will cause interference is variable and matrix<br />
dependent. The most effective method to determine if volatiles<br />
are a problem is to compare dew point readings to capacitance<br />
readings. If the dew point readings are more than 0.02 higher<br />
than the capacitance readings, volatiles are likely a problem and<br />
it is recommended that the volatiles setting be switched to ―On‖.<br />
When the volatiles setting is turned on, the instrument only uses<br />
the capacitive relative humidity sensor for water activities<br />
measurements and isotherm tests. All other operations and<br />
features will be the same, including measurement times and<br />
adjusting for linear offset. Press enter to toggle the volatiles<br />
setting on and off.<br />
Weight Reference:<br />
Weight reference is the reference used when calculating the<br />
percent change in weight of the sample. This can be based on<br />
the initial weight of the test, the starting weight of the stage or the<br />
minimum weight during the test. This reference is used anytime<br />
a percent weight is calculated.<br />
Basis:<br />
The VSA generates water activity values and corresponding<br />
sample weights during moisture desorption and resorption. To<br />
complete the isotherm, the sample weights must be translated<br />
into moisture contents. Moisture content can be calculated in<br />
different ways and reported with a variety of different units. The<br />
32
<strong>AquaLab</strong> <strong>Vapor</strong> <strong>Sorption</strong> <strong>Analyzer</strong><br />
5. User Interface and Menus<br />
basis parameter allows the reporting of moisture content in two<br />
different ways:<br />
Percent moisture on a wet basis (%wb, g/100g total)<br />
%Moisture <br />
initial weight - dry weight<br />
initial weight<br />
x 100<br />
<br />
grams of water<br />
100 grams<br />
total<br />
Percent Moisture on a dry basis (%db, g/100g solids)<br />
%Moisture <br />
initial weight - dry weight<br />
dry weight<br />
x 100<br />
<br />
grams of water<br />
100 grams solid<br />
For food applications, moisture contents are reported on a wet<br />
basis. A simple equation will convert between the wet and dry<br />
basis.<br />
% moisture wet<br />
% moisturedry <br />
100<br />
100 -% moisture wet<br />
% moisture dry<br />
% moisture wet <br />
100<br />
100 % moisture dry<br />
Date:<br />
The VSA has an internal calendar and clock. The time and date<br />
are recorded with each water activity reading. Pressing Enter<br />
when the Date option is highlighted allows you to set the date in<br />
the instrument. Press the left and right arrows to change<br />
between the month, day and year. Press the up or down arrows<br />
to change any of the individual values.<br />
33
<strong>AquaLab</strong> <strong>Vapor</strong> <strong>Sorption</strong> <strong>Analyzer</strong><br />
5. User Interface and Menus<br />
Time:<br />
Pressing Enter when the Time option is highlighted allows you to<br />
set the current local time. Press the up or down arrows to<br />
change any of the individual values. Press the left or right<br />
buttons to change between hour and minutes. The hour setting<br />
automatically changes between AM and PM.<br />
a w Settings:<br />
Settings related to water activity measurements can be updated<br />
here. These include default system temperature, temperature<br />
equilibration tolerance and beeps.<br />
34
<strong>AquaLab</strong> <strong>Vapor</strong> <strong>Sorption</strong> <strong>Analyzer</strong><br />
5. User Interface and Menus<br />
Temperature:<br />
This setting is the temperature that the instrument<br />
maintains during water activity measurements. It also is<br />
the temperature that the instrument will return to after a<br />
test is complete. The default temperature is 25°C. Press<br />
the enter button to change the temperature setting. The<br />
VSA may be set between 15 and 50°C by 0.1°C intervals.<br />
Using the up and down arrows, set the VSA to your<br />
desired temperature and press the save button.<br />
Temp Eq:<br />
Temperature Equilibration Tolerance or ―Temp Eq‖ sets<br />
the maximum difference allowed between the lid and the<br />
sample. This lid to sample temperature difference must<br />
be less than the Temp Eq in order to start a water activity<br />
measurement. If a sample is out of this range, the VSA<br />
will wait for the sample to equilibrate prior to beginning<br />
the water activity measurement.<br />
Beeps:<br />
Indicates the number of audible beeps after a water<br />
activity measurement is completed. This value can be<br />
set to off (0), 4, or infinity (∞).<br />
35
<strong>AquaLab</strong> <strong>Vapor</strong> <strong>Sorption</strong> <strong>Analyzer</strong><br />
5. User Interface and Menus<br />
Regional Formatting:<br />
Allows you to configure how the VSA will display information.<br />
You may choose the temperature scale (Celsius vs Fahrenheit),<br />
the date display (mm/dd/yy vs. dd/mm/yy), the hour format (12 vs<br />
24 hour) and the language. Press enter to switch the setting.<br />
Admin Settings:<br />
Allows you to create an administrator password as well as<br />
create, edit and delete additional users. The admin option allows<br />
the administrator to grant or block access to some or all of the<br />
configuration options in all Series 4 models. For example: If the<br />
administrator wanted to make sure that all samples were read at<br />
25°C the administrator would set their temperature to 25°C and<br />
then would lock all other users out of that configuration screen.<br />
This is accomplished by entering the Access function and<br />
selecting the desired option to toggle it on and off. Additionally<br />
you can lock and unlock all of them at once. (For example, if you<br />
do not want John Doe changing the instrument‘s measurement<br />
temperature, the administrator can lock that function for John.)<br />
The areas that can be locked are calibration, temperature,<br />
temperature equilibration, sensor selection, mode, date/time,<br />
region, password, auto-save, number of beeps, contrast, and<br />
delete functions.<br />
36
<strong>AquaLab</strong> <strong>Vapor</strong> <strong>Sorption</strong> <strong>Analyzer</strong><br />
5. User Interface and Menus<br />
User Setup:<br />
Users can be added, edited or deleted from this screen. To<br />
add a user, press the Enter button when the ―New‖ is<br />
highlighted. To edit or delete a user, choose the target user<br />
and press enter. When creating a new user, an alphabet<br />
screen will appear where a name can be entered using lower<br />
case, upper case and accents.<br />
NOTE: User setup is not required for instrument operation. It is<br />
available for users wanting to be compliant with 21 CFR Part 11<br />
or who want to maintain the settings they have selected.<br />
37
<strong>AquaLab</strong> <strong>Vapor</strong> <strong>Sorption</strong> <strong>Analyzer</strong><br />
5. User Interface and Menus<br />
Auto Restart:<br />
Auto restart enabled the instrument to automatically resume the<br />
currently running test if there is a power failure of any kind.<br />
Press enter to toggle auto restart between on and off.<br />
Lighting:<br />
Turns the lighting in the desiccant tube area on or off.<br />
External Gas:<br />
Enables or disables the use of external gas. When External Gas<br />
is ―On‖, the external gas is used as the air source for desiccation<br />
and wetting of the sample. When External Gas is ―Off‖ the<br />
internal pump uses ambient air as the air source.<br />
NOTE: WHEN THE EXTERNAL GAS IS USED IT IS<br />
EXHAUSTED INTO THE ATMOSPHERE. BE SURE TO<br />
PROVIDE ADEQUATE VENTILATION AND SAFETY<br />
MEASURES WHILE USING AN EXTERNAL GAS SUPPLY<br />
WITH THE INSTRUMENT. COMBUSTABLE OR HAZARDOUS<br />
GASES ARE NOT RECOMMENDED.<br />
If the external gas is off and you want to turn it on, pressing enter<br />
causes the following screen to appear:<br />
38
<strong>AquaLab</strong> <strong>Vapor</strong> <strong>Sorption</strong> <strong>Analyzer</strong><br />
5. User Interface and Menus<br />
To start using external gas, remove the external gas plug from<br />
the back of the VSA and insert the desired gas source. Adjust<br />
the external gas pressure until it is between 5 and 35 kPa (0.7 to<br />
5 psi). The check mark will be hidden until the gas is within the<br />
acceptable pressure range. Press Check to enable external gas<br />
or escape to cancel.<br />
Note: When selecting a gas source, choose a gas supply with a<br />
filter system that eliminates oil and other particulates to help<br />
prolong the life of your VSA.<br />
If the external gas is on and you want to turn it off, pressing enter<br />
causes the following screen to appear:<br />
To stop using external gas, turn off the external gas source and<br />
remove the external gas tubing and adapters from the back of<br />
the instrument. Reinstall the external gas plug and then press<br />
the check to disable external gas or escape to cancel.<br />
Contrast:<br />
Allows you to set the contrast of the screen to your liking.<br />
Viewing the screen from a sitting versus a standing position may<br />
require contrast adjustment for the best visibility in that position.<br />
39
<strong>AquaLab</strong> <strong>Vapor</strong> <strong>Sorption</strong> <strong>Analyzer</strong><br />
5. User Interface and Menus<br />
Diagnostics:<br />
The diagnostics screen provides you with detailed information<br />
about all the sensors in the instrument. Refer to the<br />
Troubleshooting section for details on what kind of values you<br />
should expect for each sensor. Press up or down to page<br />
between the different diagnostics screens. On startup, the pump<br />
is turned on and flows dry air into the chamber so that the<br />
desiccating capacity of the tubes can be monitored.<br />
40
<strong>AquaLab</strong> <strong>Vapor</strong> <strong>Sorption</strong> <strong>Analyzer</strong><br />
5. User Interface and Menus<br />
The weight icon on the bottom allows you to zero the balance so<br />
that you can take weight readings via the diagnostic screen.<br />
The weight calibration value is the current calibration applied to<br />
balance readings. A value of one means no weight calibration is<br />
applied. The dew point and capacitance RH sensor offset values<br />
are the current linear offsets applied to water activity readings for<br />
the respective sensor type. A value of zero means that no water<br />
activity calibration is applied.<br />
The number button on the bottom screen allows you to switch<br />
between the two desiccant tubes. If you press the number<br />
button with the arrow to the left, it switches to the left desiccant<br />
tube (#1). If you press the number button with the arrow to the<br />
41
<strong>AquaLab</strong> <strong>Vapor</strong> <strong>Sorption</strong> <strong>Analyzer</strong><br />
5. User Interface and Menus<br />
right, it switched to the right desiccant tube (#2). Any time the<br />
desiccant tube button is pressed the pump is turned on and dry<br />
air is blown into the chamber so that desiccating capacity of the<br />
tubes can be monitored.<br />
About:<br />
This screen provides important information including the serial<br />
number and code version of your instrument.<br />
42
<strong>AquaLab</strong> <strong>Vapor</strong> <strong>Sorption</strong> <strong>Analyzer</strong><br />
5. User Interface and Menus<br />
Data Tab<br />
This tab allows you to view detailed information about the test<br />
stored in memory. You can view data as a list, view detailed<br />
data point information, and graph all or individual stages. You<br />
can also delete the data in memory.<br />
View:<br />
This selection brings you to a screen where you can decided<br />
how you want to view your data. You can choose to view your<br />
whole test at once by selecting ―All‖ or you can view an individual<br />
stage. Once the desired portion of the test is selected, you can<br />
then choose to graph the data by pressing the graph icon or<br />
by pressing the enter icon to view summary information of<br />
43
<strong>AquaLab</strong> <strong>Vapor</strong> <strong>Sorption</strong> <strong>Analyzer</strong><br />
5. User Interface and Menus<br />
each data record. See Chapter 11: Computer Interface for<br />
information about downloading test data to a computer.<br />
Graph Screen:<br />
This selection shows the graph of the selected data from the<br />
previous screen. You can change the y-axis units by pressing<br />
the left or right arrows or change the x-axis units by pressing the<br />
up or down arrows. The title of the graph indicates the test name<br />
and the stage number (if applicable). The isotherm type is show<br />
on the right hand side.<br />
Example of a graph with water activity as the x-axis.<br />
Example of a graph with elapsed time as the x-axis.<br />
NOTE: For DVS isotherms, if water activity is the x-axis, only<br />
equilibrated data points appear on the chart. To view all the data<br />
points, the x-axis must be in terms of the time elapsed.<br />
44
<strong>AquaLab</strong> <strong>Vapor</strong> <strong>Sorption</strong> <strong>Analyzer</strong><br />
5. User Interface and Menus<br />
Summary Screen:<br />
This selection will allow you to view your stored measurements.<br />
The up/down arrows will move you through the stored data with<br />
the most recent measurements at the top of the table. You may<br />
also press the left and right arrows to page quickly through the<br />
data. When you are viewing the summary screen, you may press<br />
the enter button on a highlighted reading to get detailed<br />
information on the reading as shown below.<br />
The information shown is the water activity of the sample, the<br />
temperature, the test time, the user who ran the test (if setup),<br />
the date of the reading, the sensor used, the time the reading<br />
was taken, and the sequence number of the stored reading.<br />
Delete:<br />
Selecting this option will delete all of the information currently<br />
stored in the instrument.<br />
NOTE: You will NOT be able to recover deleted data so make<br />
sure you’ve backed up your data to the computer using the VSA<br />
downloader software package prior to deleting the data from the<br />
instrument.<br />
45
<strong>AquaLab</strong> <strong>Vapor</strong> <strong>Sorption</strong> <strong>Analyzer</strong><br />
6. Cleaning and Maintenance<br />
6. Cleaning and Maintenance<br />
Desiccant cartridge desiccant replacement.<br />
Removal of the desiccant material<br />
1. Orient the desiccant cartridge or tube (Figure 10) so the<br />
lid or cap is up.<br />
2. Remove the main lid.<br />
3. Remove the foam located below the lid as shown in<br />
Figure 11.<br />
4. Hold the small tubing at the top by curling the tubing over<br />
the top edge of the cartridge. This will prevent desiccant<br />
from getting into it when emptying the cartridge.<br />
5. Pour out the desiccant material.<br />
Figure 10: Desiccant<br />
Cartridge<br />
46<br />
Figure 11: Desiccant<br />
Cartridge Foam
<strong>AquaLab</strong> <strong>Vapor</strong> <strong>Sorption</strong> <strong>Analyzer</strong><br />
6. Cleaning and Maintenance<br />
Loading the desiccant into the desiccant cartridge.<br />
1. Orient the desiccant tube so the opening is upward.<br />
2. Hold the tubing to the side of the cartridge and looped<br />
over the edge of the cartridge.<br />
3. Fill the cartridge to the top of the cartridge.<br />
4. Shake or vibrate the desiccant cartridge to settle the<br />
material.<br />
5. The top of the desiccant should be about 0.1 inches from<br />
the top.<br />
6. Place in the foam at the top.<br />
7. Place the small tubing across the filter and through the<br />
slit in the foam.<br />
8. Wet with water the<br />
cartridge (bottle) lip or the<br />
edge of the washer<br />
adjacent to the bottle lip<br />
located in the lid as<br />
shown in Figure 12.<br />
9. Secure the lid to the<br />
desiccant cartridge<br />
10. Verify the lid seal is Figure 12: Desiccant Lid<br />
correct by using the<br />
squeeze bottle (included with your VSA). Refer to Figure<br />
13: Checking Desiccant Cartridge for leaks.<br />
a. Have a pan or cup with about 1 inch deep water in<br />
the bottom<br />
47
<strong>AquaLab</strong> <strong>Vapor</strong> <strong>Sorption</strong> <strong>Analyzer</strong><br />
6. Cleaning and Maintenance<br />
b. Hold one finger over the output<br />
fitting<br />
c. Pressurize the desiccant tube<br />
using the pressure bottle as<br />
shown in Figure 13. (Note: The<br />
bottle just needs to be<br />
squeezed with air in it. DO<br />
NOT put water into the squeeze<br />
bottle!)<br />
d. Place the desiccant tube with<br />
the lid into the water. If the lid is<br />
not sealed, the water could flow<br />
into the desiccant cartridge.<br />
Hold the tube in the water only<br />
as long as needed to verify the<br />
test.<br />
e. Look for bubbles escaping<br />
from the lid. If there are many<br />
bubbles, the lid is not sealed. The washer will<br />
need to be reset. This requires that the lid be<br />
removed and the washer reset. The washer will<br />
need to be lubricated with water and lid reinstalled.<br />
11. When the desiccant cartridge is placed into the desiccant<br />
receiver, the o-rings on the fittings will need to be wetted<br />
for ease of installation and to reduce wear.<br />
Cleaning the Testing Chamber<br />
Keeping your VSA clean is vital to maintaining the accuracy of<br />
your instrument. Dust and sampling debris can contaminate the<br />
sampling chamber and must therefore be regularly cleaned out.<br />
48<br />
Figure 13: Checking<br />
Desiccant Cartridge<br />
for leaks.
49<br />
<strong>AquaLab</strong> <strong>Vapor</strong> <strong>Sorption</strong> <strong>Analyzer</strong><br />
6. Cleaning and Maintenance<br />
Purpose<br />
The purpose for the cleaning procedure is to remove grease, dirt<br />
and other soluble substances which can absorb/release water<br />
during verification, calibration, and/or sample testing. For a<br />
smooth and even dew formation, the mirror must be perfectly<br />
clean. If there are any contaminants (e.g. fingerprints) on the<br />
mirror, the dew will form unevenly and thus affect the accuracy of<br />
the reading.<br />
When to Clean:<br />
The instrument should be cleaned if visual inspection indicates<br />
the chamber is dirty or as instructed in the verification flowchart.<br />
Materials Needed<br />
• A thin plastic rod or other non-metal<br />
implement<br />
• Distilled Water<br />
• Isopropyl Alcohol (IPA) or Decagon Cleaning<br />
Solution<br />
• Kimwipes®<br />
You may also purchase the VSA Cleaning Kit which comes with<br />
all the above materials except the Isopropyl Alcohol and Distilled<br />
Water.<br />
Before you begin:<br />
Cleaning your VSA is a multi-step procedure which involves<br />
washing, rinsing, and drying for each specific area as outlined<br />
below<br />
Follow the cleaning procedures being careful not to get cleaning<br />
solution or alcohol on the capacitance sensor filter. Repeated<br />
exposure of cleaning materials or contaminants to the filter may<br />
cause inaccurate readings. If the filter appears to be
<strong>AquaLab</strong> <strong>Vapor</strong> <strong>Sorption</strong> <strong>Analyzer</strong><br />
6. Cleaning and Maintenance<br />
contaminated, it may need to be replaced. (To replace the<br />
capacitance sensor filter, use tweezers or a small knife blade to<br />
pry up the edge of the filter, being careful not to disturb the<br />
sensor beneath. Discard the soiled filter. With clean hands press<br />
a new filter into place.)<br />
Wash your hands with soap and water and/or use clean lab<br />
gloves before starting the cleaning procedure. This will prevent<br />
oils from contaminating the cleaning materials, the sample<br />
chamber and/or the sensors.<br />
Accessing the Sample Chamber<br />
Turn the power off on your <strong>AquaLab</strong> VSA. If latched, move the<br />
lever over to the open position. Lift the chamber cover to expose<br />
the VSA sample chamber and sensors. The sample chamber<br />
50
<strong>AquaLab</strong> <strong>Vapor</strong> <strong>Sorption</strong> <strong>Analyzer</strong><br />
6. Cleaning and Maintenance<br />
consists of all surfaces within the red o-ring when the lid is<br />
closed.<br />
Cleaning Procedure:<br />
1. Cleaning the Sample Chamber<br />
Note: Be extremely careful not to damage the fan<br />
blades when cleaning the chamber.<br />
a. Remove any debris that may have collected within or<br />
around the sample chamber.<br />
b. Wrap a NEW Kimwipe around the end of the thin<br />
plastic rod (spatula) and moisten it with isopropyl alcohol<br />
or Decagon Cleaning Solution. Note: Do NOT dip a used<br />
Kimwipe into your container of IPA or cleaning solution<br />
(the IPA or cleaning solution will become contaminated).<br />
c. WASH—Clean upper chamber, o-ring, and all surfaces<br />
of the block within the o-ring. You may need to replace<br />
the Kimwipe if it becomes too dirty during this process.<br />
d. Clean lower block with a fresh Kimwipe. Be sure to<br />
clean the entire block surface.<br />
e. RINSE—Repeat steps b-d using new Kimwipes with<br />
distilled water.<br />
f. DRY—Repeat steps b-d using new, dry Kimwipes to<br />
help remove any moisture remaining from the cleaning.<br />
g. Visually inspect the sample chamber for cleanliness.<br />
Re-clean if necessary. Note: Do not reuse Kimwipes.<br />
2. Clean the Mirror<br />
a. Wrap a new Kimwipe around the end of the thin plastic<br />
rod (spatula) and moisten it with isopropyl alcohol or<br />
Decagon Cleaning Solution.<br />
51
<strong>AquaLab</strong> <strong>Vapor</strong> <strong>Sorption</strong> <strong>Analyzer</strong><br />
6. Cleaning and Maintenance<br />
b. WASH—Swipe the moistened Kimwipe across the<br />
mirror once. (A single swipe is usually sufficient to<br />
remove contaminants.)<br />
c. RINSE—Repeat steps a-b using new Kimwipes<br />
moistened with distilled water instead of cleaning<br />
solution.<br />
d. DRY—Repeat steps a-b using new, dry Kimwipes to<br />
help remove any moisture remaining from the cleaning.<br />
e. Visually inspect the mirror for cleanliness. Re-clean if<br />
necessary.<br />
3. Clean the Thermopile and Optical Sensor<br />
a. Wrap a new Kimwipe around the end of the thin plastic<br />
rod (spatula) and moisten it with isopropyl alcohol or<br />
Decagon Cleaning Solution.<br />
b. WASH—Swipe the moistened Kimwipe across<br />
thermopile and optical sensor. (A single swipe across the<br />
sensor is usually sufficient to remove contaminants).<br />
c. RINSE—Repeat steps a-b using new Kimwipes<br />
moistened with distilled water instead of cleaning<br />
solution.<br />
d. DRY—Repeat steps a-b but use a new, dry Kimwipe to<br />
help remove any moisture remaining from the cleaning.<br />
e. Visually inspect the thermopile and optical sensor for<br />
cleanliness. Re-clean if necessary.<br />
52
<strong>AquaLab</strong> <strong>Vapor</strong> <strong>Sorption</strong> <strong>Analyzer</strong><br />
6. Cleaning and Maintenance<br />
4. Additional Drying Time<br />
a. Visually inspect the sample chamber and sensors for<br />
contaminants, including moisture. If necessary, repeat<br />
the cleaning process using new Kimwipes.<br />
b. Let stand for about 5 minutes to ensure the sample<br />
chamber is dry.<br />
53
<strong>AquaLab</strong> <strong>Vapor</strong> <strong>Sorption</strong> <strong>Analyzer</strong><br />
7. Verification of Calibration<br />
7. Verification of Calibration<br />
After you have cleaned the chamber and other parts of your<br />
VSA, it is important to check the instrument‘s performance in<br />
order to correct for any linear offset that may have occurred<br />
during the cleaning process.<br />
Before you check the instrument we recommend that you run a<br />
sample of the activated charcoal pellets provided in your VSA<br />
cleaning kit. This cleans the air inside the chamber, helping it<br />
come back to a stable sampling environment. It is important to<br />
verify VSA‘s water activity calibration against known standards to<br />
guarantee optimal performance and accuracy. <strong>AquaLab</strong><br />
recommends verification before running a new isotherm test.<br />
Water Activity Verification<br />
<strong>AquaLab</strong> VSA uses both a capacitance relative humidity sensor<br />
and a chilled-mirror dew point technique to determine water<br />
activity. If volatiles is set to ―yes‖ as described in Chapter 5,<br />
water activity verification will be performed on the capacitance<br />
sensor only, but if volatiles is set to ―no‖, the dewpoint sensor will<br />
be verified. While the instrument does not require a routine full<br />
calibration, it is important to verify for linear offset periodically.<br />
The components used by the instrument to measure water<br />
activity are subject to contamination which may affect the VSA‘s<br />
performance. When this occurs, it changes the accuracy of the<br />
instrument. This is what is called a ―linear offset.‖<br />
54
<strong>AquaLab</strong> <strong>Vapor</strong> <strong>Sorption</strong> <strong>Analyzer</strong><br />
7. Verification of Calibration<br />
Therefore, frequent verification assures the VSA is performing<br />
correctly. Linear offset is checked by using two different<br />
verification standards.<br />
Verification Standards<br />
Verification standards are specially prepared unsaturated salt<br />
solutions having a specific molality and water activity value which<br />
are accurately measurable. The verification standards that were<br />
sent with your initial shipment are very accurate and readily<br />
available from Decagon. Using verification standards to verify<br />
accuracy can greatly reduce preparation errors. For these<br />
reasons, we recommend using standards available through<br />
Decagon for the most accurate verification of your VSA‘s<br />
performance.<br />
Performance Verification Standards come in six water activity<br />
levels: 1.000, 0.984, 0.920, 0.760, 0.500, and 0.250 a w . The<br />
standards are produced under a strict quality assurance regime.<br />
Please contact Decagon Devices to order additional standards or<br />
order via the web at www.aqualab.com/reorder.<br />
Verification Standard<br />
at 25°C<br />
13.41m LiCl<br />
8.57m LiCl<br />
6.00m NaCl<br />
2.33m NaCl<br />
0.50m KCl<br />
Distilled Water<br />
Water Activity<br />
0.250 ±0.003<br />
0.500 ±0.003<br />
0.760 ±0.003<br />
0.920 ±0.003<br />
0.984 ±0.003<br />
1.000 ±0.003<br />
NOTE: If you need to obtain a Material Safety Data Sheet<br />
(MSDS) for any of these standards, a printable version is<br />
available on our website at www.aqualab.com/msds.<br />
55
<strong>AquaLab</strong> <strong>Vapor</strong> <strong>Sorption</strong> <strong>Analyzer</strong><br />
7. Verification of Calibration<br />
Although distilled water is available as a verification standard.<br />
Decagon does not recommend its use with the <strong>AquaLab</strong> VSA.<br />
To use a verification standard, remove the twist top and pour the<br />
contents into one of the stainless steel sample cups. Information<br />
about the standard‘s value and molality can be found printed on<br />
the outside of the plastic vial.<br />
When to Verify for Linear Offset<br />
Linear offset should be checked against two known verification<br />
standards before running a new isotherm test. Linear offset<br />
should never be verified solely against a single standard, since it<br />
does not give an accurate representation of the linear offset. For<br />
best results, the water activity verification for the VSA should be<br />
conducted using the 0.76 a w and 0.25 a w standards. Checking<br />
the water activity of a standard solution will alert you to the<br />
possibility of unit contamination or shifts in the linear offset from<br />
other causes.<br />
NOTE: The verification process is the same whether the volatiles<br />
is set to yes or no, except that the accuracy for the capacitance<br />
sensor is ± 0.020 a w .<br />
Verification<br />
To verify for linear offset of your VSA do the following:<br />
(Refer to Figure 14 at the end of this section)<br />
1. From the Isotherm Tab, navigate to the Measurement<br />
Tab by pressing .<br />
2. Choose a 0.25 a w standard.<br />
3. Remove weighing pan.<br />
4. Empty a vial of solution into a stainless steel sample cup<br />
and place it in the VSA‘s testing chamber. Make sure that<br />
56
<strong>AquaLab</strong> <strong>Vapor</strong> <strong>Sorption</strong> <strong>Analyzer</strong><br />
7. Verification of Calibration<br />
your standard is as close to the instrument temperature<br />
as possible. Note: Make sure the rim and outside of the<br />
sample cup are clean.<br />
5. Carefully close the lid and move the lever to the READ<br />
position.<br />
6. Take two readings. The water activity readings should be<br />
within ± 0.005 a w of the given value for the verification<br />
standard. See Appendix A for the correct water activity<br />
value of Decagon‘s standards at temperatures other than<br />
25°C.<br />
7. If your VSA is reading within ±0.005 a w of the verification<br />
standard, choose a 0.76 a w standard.<br />
8. Prepare a sample cup of the second verification standard<br />
and make two readings. The second water activity<br />
reading for the second verification standard should be<br />
within ±0.005 a w .<br />
9. If either of the verification standards is not correct, it is<br />
probably due to contamination of the sensor chamber.<br />
For cleaning instructions, see Chapter 6. After cleaning,<br />
repeat verification from step two.<br />
10. If you are consistently getting readings outside the water<br />
activity of your first verification standard by more than<br />
±0.005 a w , a linear offset has probably occurred. In this<br />
case, adjust the reading to match the verification<br />
standard‘s correct value as outlined in the next section.<br />
57
<strong>AquaLab</strong> <strong>Vapor</strong> <strong>Sorption</strong> <strong>Analyzer</strong><br />
7. Verification of Calibration<br />
Figure 14. This flowchart is a graphical representation of the<br />
directions given above for checking for linear offset.<br />
Adjust for Linear Offset for Water Activity<br />
1. Once you are certain a linear offset has occurred, toggle to<br />
the Configuration tab by pressing the Menu icon button.<br />
Calibration is the first option highlighted in the configuration<br />
tab. Press the icon button to bring up the following screen.<br />
58
<strong>AquaLab</strong> <strong>Vapor</strong> <strong>Sorption</strong> <strong>Analyzer</strong><br />
7. Verification of Calibration<br />
2. To offset for water activity, highlight water activity and press<br />
and the following screen will appear.<br />
3. Highlight start and press . Follow the wizard on screen<br />
commands.<br />
4. Empty the whole vial of solution into a sample cup. We<br />
recommend using the 6.0 NaCl (0.76 a w ). Do not adjust for<br />
the offset using distilled water. Ensure the rim and outside of<br />
the cup are clean. Place the sample cup in the VSA‘s sample<br />
chamber.<br />
NOTE: The same verification standard may be used to verify<br />
and adjust the linear offset.<br />
59
<strong>AquaLab</strong> <strong>Vapor</strong> <strong>Sorption</strong> <strong>Analyzer</strong><br />
7. Verification of Calibration<br />
5. Carefully close the lid and move the lever to the READ<br />
position. Press the icon button to begin testing.<br />
NOTE: If you decide at this point not to continue with the<br />
linear off set program, just return the lever to the OPEN<br />
position or press the cancel button and you will be returned<br />
to the previous screen.<br />
6. After your VSA has finished measuring the verification<br />
standard, it will display the test value.<br />
7. Press the up and down arrows to adjust the water activity<br />
reading to its proper value for the particular verification<br />
standard you are measuring. When the correct value is<br />
displayed, press to store this new value. To cancel and<br />
return to the main menu, press and no changes will be<br />
made.<br />
8. Re-measure the verification standard again on the<br />
Measurement Tab. It should read the proper value (within<br />
±0.005 a w ) at a given temperature for your particular<br />
standard (see Appendix A for temperatures other than 25°C).<br />
9. Measure the water activity of a second verification standard<br />
according to the verification procedure described above. If<br />
both verification readings are within ±0.005 a w then the<br />
instrument is ready to begin testing.<br />
If you still have incorrect verification standard readings<br />
after cleaning the chamber and adjusting for linear off set,<br />
contact <strong>AquaLab</strong> by email at support@aqualab.com or by<br />
phone at 509-332-5601 for further instructions. If you<br />
purchased your <strong>AquaLab</strong> instrument from one of our<br />
international distributors, please contact them for local<br />
service and support.<br />
60
<strong>AquaLab</strong> <strong>Vapor</strong> <strong>Sorption</strong> <strong>Analyzer</strong><br />
7. Verification of Calibration<br />
Verifying Weight Measurement<br />
The VSA uses a magnetic force balance to gravimetrically track<br />
the weight of the sample during the isotherm test. The<br />
performance of this balance is verified against a NIST traceable<br />
2 gram standard weight. This 2 gram weight is included with the<br />
VSA and should be handled with tweezers and not bare skin.<br />
1. To verify the balance, toggle to the Configuration tab by<br />
pressing the Menu icon button. Scroll down to Diagnostics<br />
and press the icon button to bring up the following screen.<br />
2. Scroll down until you see weight on the screen.<br />
3. Close the lid and seal by pressing the lever to read.<br />
4. Press the balance icon at the bottom to zero the balance.<br />
61
<strong>AquaLab</strong> <strong>Vapor</strong> <strong>Sorption</strong> <strong>Analyzer</strong><br />
7. Verification of Calibration<br />
5. Open the lid and carefully place the 2 gram standard on the<br />
balance using glove and tweezers.<br />
6. Close the lid and verify that the weight readings are within +/-<br />
0.1 mg of 2000mg. If the weight reading is not correct, a<br />
balance adjustment may be needed.<br />
Adjusting for Weight Measurement Offset<br />
1. To adjust the balance, toggle to the Configuration tab by<br />
pressing the Menu icon button. Calibration is the first option<br />
highlighted in the configuration tab. Press the icon button<br />
to bring up the following screen.<br />
2. To adjust the balance, highlight weight and press and the<br />
following screen will appear.<br />
62
<strong>AquaLab</strong> <strong>Vapor</strong> <strong>Sorption</strong> <strong>Analyzer</strong><br />
7. Verification of Calibration<br />
3. Highlight start and press . Follow the wizard on screen<br />
commands.<br />
4. When asked to place the 2 gram weight on the balance,<br />
handle carefully with tweezers and gloves to prevent<br />
changing the weight of the standard.<br />
5. Carefully close the lid and move the lever to the READ<br />
position. Press the icon button to begin testing.<br />
NOTE: If you decide at this point not to continue with the<br />
linear off set program, just return the lever to the OPEN<br />
position or press the cancel button and you will be returned to<br />
the previous screen.<br />
6. After your VSA has finished measuring the weight<br />
verification, it will display the test value.<br />
7. Press the up and down arrows to adjust the weight reading to<br />
its proper value for the 2 gram (2000 mg) standard. When<br />
the correct value is displayed, press to store this new<br />
value. To cancel and return to the main menu, press and<br />
no changes will be made.<br />
If you continue to have problems with weight readings,<br />
contact <strong>AquaLab</strong> by email at support@aqualab.com or by<br />
phone at 509-332-5601 for further instructions. If you<br />
purchased your <strong>AquaLab</strong> instrument from one of our<br />
international distributors, please contact them for local<br />
service and support.<br />
How to Restore Factory Defaults<br />
To restore original calibration settings, do the following:<br />
1. Toggle to the Configuration tab by pressing the Menu<br />
icon button. Select Calibration and press the button.<br />
63
<strong>AquaLab</strong> <strong>Vapor</strong> <strong>Sorption</strong> <strong>Analyzer</strong><br />
7. Verification of Calibration<br />
2. Select water activity or weight, depending on which<br />
defaults you want to restore and press .<br />
3. Scroll down to Defaults and press the icon button to<br />
access the Restore Factory Defaults routine. To cancel<br />
and return to the main menu, press the Cancel icon<br />
button. After pushing the Enter icon button, the following<br />
screen will appear:<br />
4. To restore the factory calibration values, press . To<br />
cancel and return to the main menu, press the cancel<br />
button. After pressing , the following screen will appear:<br />
Similar screens will appear if the weight factory defaults are<br />
being restored, but the screen will say weight instead of water<br />
activity. To return to the main menu screen, press .<br />
64
<strong>AquaLab</strong> <strong>Vapor</strong> <strong>Sorption</strong> <strong>Analyzer</strong><br />
8. Running a Test<br />
8. Running a Test<br />
Becoming Familiar with Stages<br />
The <strong>AquaLab</strong> VSA uses test stages to maximize the utility of<br />
running an isotherm test. In the vocabulary of setting up and<br />
running moisture sorption isotherms with the VSA, an isotherm<br />
test is considered a collection of stages all performed on 1<br />
sample. Each stage should be considered a unique portion of a<br />
test with its own settings while keeping in mind that all stages will<br />
be conducted on 1 sample and will be combined into 1 data set<br />
at the end of the isotherm test. This means that an isotherm test<br />
could consist of 1 stage or could consist of up to 20 stages. An<br />
example of an isotherm test with multiple stages might be<br />
running a sample through full adsorption and desorption using<br />
the static DVS method for Stage 1, then setting up Stage 2 to run<br />
the same test, but using the DDI method on the same sample.<br />
Another example would be to run a sample through full<br />
adsorption and desorption at 15C for Stage 1, then, in Stage 2,<br />
switch the temperature to 25C and run the same test on the<br />
same sample. This stage interface makes it easy to compare<br />
dynamic and static isotherms and utilize the advantages offered<br />
by both methods all on a single sample. It also makes it easy to<br />
edit currently running tests as seen below.<br />
Running a Moisture <strong>Sorption</strong> Isotherm Test<br />
Before starting a test it is important to verify that the VSA is<br />
performing correctly before starting a test using Decagon‘s<br />
Verification Standards. Please refer to Chapter 7 for instructions<br />
on how to verify your VSA and adjust the calibrations if<br />
necessary. Tests can also be setup using a wizard interface in<br />
65
<strong>AquaLab</strong> <strong>Vapor</strong> <strong>Sorption</strong> <strong>Analyzer</strong><br />
8. Running a Test<br />
the VSA Downloader software (see Chapter 9 for more<br />
information).<br />
1. Before starting a test, set the Volatiles: Yes/No option in the<br />
configuration menu. If your sample has volatiles, select<br />
―Yes‖ otherwise select ―No‖.<br />
2. On the main screen, select the test wizard<br />
3. A warning screen will appear letting the user know that any<br />
data points currently on the instrument from previous tests<br />
will be deleted when a new test is started. Press to<br />
continue.<br />
4. A new message reminding the user to make sure the water<br />
chamber is full and there is still active (blue) desiccant in the<br />
desiccant tubes. For instructions on filling the water<br />
chamber and replacing the desiccant, refer to Chapter 4<br />
instrument setup. Press to continue or to go back.<br />
66
<strong>AquaLab</strong> <strong>Vapor</strong> <strong>Sorption</strong> <strong>Analyzer</strong><br />
8. Running a Test<br />
5. The Edit Test screen will now appear. To provide a name for<br />
the test, press with Name highlighted and then use the<br />
arrow keys to create the name. When finished, press .<br />
(The name of a previous test will appear by default.)<br />
6. Enter initial moisture content if known (optional) by pressing<br />
with Initial MC highlighted and use the up and down<br />
arrow to enter the correct moisture. The %wb refers to the<br />
moisture reporting basis, which can be either wet basis<br />
(%wb) or dry basis (%db). The moisture content basis is set<br />
as a global preference in the configuration menu (see<br />
section 5) . Press to continue or to go back.<br />
67
<strong>AquaLab</strong> <strong>Vapor</strong> <strong>Sorption</strong> <strong>Analyzer</strong><br />
8. Running a Test<br />
7. Setup each stage of the isotherm test. A stage is used to<br />
adjust the isotherm settings for an individual sample (up to<br />
20 stages). Each stage is setup with the isotherm method<br />
(DDI or DVS) and the settings for that portion of the<br />
isotherm. Once a stage is created, it can be modified or<br />
deleted anytime before the test is started.<br />
8. i.e. For milk powder, Stage 1 could use the DDI method to<br />
ramp quickly from 0.1 to 0.4 a w and Stage 2 could use the<br />
DVS method to step from 0.4 to 0.8 a w slowly in 0.05 a w<br />
increments.<br />
9. To setup a new stage, select ―new‖ and press . If more<br />
than one stage is in memory, you will have the option of<br />
inserting the stage after any existing stage in the test. A<br />
screen with several parameters will appear. If a previous<br />
68
<strong>AquaLab</strong> <strong>Vapor</strong> <strong>Sorption</strong> <strong>Analyzer</strong><br />
8. Running a Test<br />
test has been run, the stages for that test will be listed by<br />
default. These stages can be used as is or updated with<br />
new settings. If you need to delete or edit a stage, go to the<br />
specific stage and press and then select Edit or Delete.<br />
10. Select the isotherm method as either Dynamic Dewpoint<br />
Isotherm (DDI) or Dynamic <strong>Vapor</strong> <strong>Sorption</strong> (DVS). DDI will<br />
create a dynamic isotherm and DVS will create a static or<br />
equilibrium isotherm. The other choices will adjust based on<br />
which method, was selected.<br />
For DDI method<br />
1. To choose the starting a w , press with ―Start‖ highlighted<br />
and then cycle to the desired value using the up and down<br />
arrows. Any value between 0.03 and 0.95 a w can be<br />
chosen including ―current‖. Choosing ―current‖ means that<br />
the stage will start at the initial a w of the sample. Press<br />
when finished.<br />
2. To choose the final a w , press with ―Final‖ highlighted and<br />
then cycle to the desired value using the up and down<br />
arrows. Any value between 0.03 and 0.95 a w can be<br />
chosen including current (see ―current‖ definition above).<br />
69
<strong>AquaLab</strong> <strong>Vapor</strong> <strong>Sorption</strong> <strong>Analyzer</strong><br />
8. Running a Test<br />
Selecting a final a w that is lower than the starting a w will<br />
result in desorption, while selecting a final a w higher than the<br />
starting a w will result in adsorption. Press when finished.<br />
3. To choose the temperature of the stage, press with<br />
―Temperature‖ highlighted and then cycle to the desired<br />
temperature using the up and down arrow keys (hold down<br />
arrows for accelerated scrolling). Any temperature between<br />
15-60°C can be chosen. Each stage can run at a unique<br />
temperature.<br />
4. To choose the desired a w resolution, press with<br />
―Resolution‖ highlighted and then cycle to the desired value<br />
using the up and down arrows. Any value between 0.003<br />
and 1.0 a w can be chosen. The resolution for DDI<br />
determines the target a w resolution. Setting a higher step<br />
value will make the test faster, but will decrease the a w<br />
resolution. A DDI step of 0.01 a w is recommended.<br />
5. To choose the air flow rate, press with ―Flow‖ highlighted,<br />
and then cycle to the desired value using the up and down<br />
arrows. Any value between 10-600 ml/min can be selected.<br />
Higher flow rates will speed up the test, but may result in<br />
lower data resolution and non-equilibrium conditions. The<br />
default value of 100 ml/min is suitable for most products.<br />
70
<strong>AquaLab</strong> <strong>Vapor</strong> <strong>Sorption</strong> <strong>Analyzer</strong><br />
8. Running a Test<br />
6. To choose to include a timeout setting, press with<br />
―Timeout‖ highlighted, and then cycle to the desired value<br />
using the up and down arrows. Any value between 5.0 min<br />
to 30 days can be selected. The timeout determines the<br />
maximum time allotted to move from the starting a w to the<br />
final a w (DDI only) and is optional. The default value is off,<br />
which means there is no timeout value.<br />
7. To choose to have the isotherm loop, press with ―Loop‖<br />
highlighted to toggle between on and off. Turning loop on<br />
causes the isotherm to automatically return to the start a w<br />
(with the same settings) once the final a w has been<br />
achieved. This would create both an adsorption and<br />
desorption curve (or vice versa depending on the starting<br />
direction).<br />
8. When finished adjusting the settings for the stage, press<br />
to save and return to the edit stage screen. Press to<br />
return to edit stage screen without saving changes.<br />
71
<strong>AquaLab</strong> <strong>Vapor</strong> <strong>Sorption</strong> <strong>Analyzer</strong><br />
8. Running a Test<br />
For DVS method<br />
1. To choose the starting a w , press with ―Start‖ highlighted,<br />
and then cycle to the desired value using the up and down<br />
arrows. Any value between 0.03 and 0.95 a w can be<br />
chosen including ―current‖. Choosing ―current‖ means that<br />
the stage will start at the initial a w of the sample. Press<br />
when finished.<br />
2. To choose the final a w , press with ―Final‖ highlighted, and<br />
then cycle to the desired value using the up and down<br />
arrows. Any value between 0.03 and 0.95 a w can be<br />
chosen including current (see ―current‖ definition above).<br />
Selecting a final a w that is lower than the starting a w will<br />
result in desorption, while selecting a final a w higher than the<br />
starting a w will result in adsorption. Press when finished.<br />
3. To choose the temperature of the stage, press with<br />
―Temperature‖ highlighted, and then cycle to the desired<br />
temperature using the up and down arrow keys. Any<br />
temperature between 15-60°C can be chosen. Each stage<br />
can run at a unique temperature.<br />
4. To choose the desired a w step, press with ―Step‖<br />
highlighted and then cycle to the desired value using the up<br />
and down arrows. Any value between 0.003 and 1.0 a w<br />
can be chosen. The step setting for DVS determines the a w<br />
values for equilibration and consequently the resolution. A<br />
step setting of 0.10 a w will result in humidity being controlled<br />
to 0.1, 0.2, 0.3 … up to the final a w , remaining at each level<br />
until either equilibrium is achieved based on the trigger<br />
value or the timeout value is reached. Setting a higher<br />
value will make the test faster, but will decrease the a w<br />
resolution.<br />
72
<strong>AquaLab</strong> <strong>Vapor</strong> <strong>Sorption</strong> <strong>Analyzer</strong><br />
8. Running a Test<br />
To choose the trigger %dm/dt value that will indicate<br />
equilibration, press enter with ―Trigger‖ highlighted and a<br />
new window will open. Cycle to the desired trigger value<br />
using the up and down arrows. The trigger can be shut<br />
off or be any value between 0.001-1%/hr. The trigger<br />
value represents an acceptable change in mass per<br />
change in time to indicate equilibrium for a given step.<br />
Next, choose the number of readings or events meeting<br />
the trigger value that are required to achieve<br />
equilibration. For example, choosing 3 means that in<br />
order for a step to have reached equilibrium, 3 %dm/dt<br />
readings in row must be less than the set trigger value.<br />
Any value between 1 to 10 can be chosen. Setting a<br />
higher trigger value and a lower number of events will<br />
make the test faster, but may not result in complete<br />
equilibrium. A recommended starting point would be 2<br />
events at 0.01%/hr. If the trigger is turned off, the sample<br />
will be held at each step for the time indicated by the<br />
timeout setting. After adjusting all settings, press to<br />
save the settings and return to the stage setup screen.<br />
73
<strong>AquaLab</strong> <strong>Vapor</strong> <strong>Sorption</strong> <strong>Analyzer</strong><br />
8. Running a Test<br />
5. To choose to include a timeout setting, press with<br />
―Timeout‖ highlighted and then cycle to the desired value<br />
using the up and down arrows. Any value between 5.0 min<br />
to 30 days can be selected. The timeout determines the<br />
maximum time allotted for each a w step, NOT the time from<br />
starting a w to final a w . The default value is off, which means<br />
there is no timeout value and only the trigger value will<br />
determine the end of step. If both a trigger value and<br />
timeout value are set, whichever is reached first will<br />
determine the end of the step.<br />
6. To choose to have the isotherm loop, press with ―Loop‖<br />
highlighted to toggle between on and off. Turning loop on<br />
causes the isotherm to automatically return to the start a w<br />
(with the same settings) once the final a w has been<br />
achieved. This would create both an adsorption and<br />
desorption curve (or vice versa depending on the starting<br />
direction).<br />
7. When finished adjusting the settings for the stage, press<br />
to save and return to the edit stage screen. Press to<br />
return to edit stage screen without saving changes.<br />
8. After setting up all stages on the edit stage screen, press<br />
the button.<br />
74
75<br />
<strong>AquaLab</strong> <strong>Vapor</strong> <strong>Sorption</strong> <strong>Analyzer</strong><br />
8. Running a Test<br />
9. Follow the message on the screen to place an empty<br />
stainless steel cup in the chamber and seal it. Press to<br />
tare the cup.<br />
10. Follow the message on the screen to place the sample in<br />
the cup and press to weight the sample.<br />
11. Press to begin the test.<br />
Using DDI to investigate Glass Transition<br />
To investigate glass transition events using dynamic isotherms, a<br />
DDI test with the settings of initial water activity of 0.03-0.1 a w ,<br />
final water activity >0.80 a w , flow rate of 30-40 ml/min, resolution<br />
of 0.01 a w and no timeout should be used.<br />
Creating a Working Isotherm Using the VSA<br />
Working isotherms, as described in the Theory section in<br />
Chapter 3, can be generated using the VSA, but it requires<br />
several steps.<br />
1. Generate two isotherm tests using the VSA, one for<br />
adsorption and one for desorption and both starting at the<br />
―current‖ water activity value. A working isotherm is an<br />
analysis of the sorption characteristics of a sample<br />
starting from its native state. To generate this data<br />
requires the analysis of two sub-samples in the same<br />
condition as the original sample.<br />
2. Adsorption Curve: One sub-sample is analyzed for<br />
adsorption from its current state. The test is setup with<br />
one stage with desired settings for method (DDI or DVS),<br />
temperature, step value, flow rate etc., but the starting<br />
water activity must be Current, and the final water<br />
activity must be a value higher than the current water
<strong>AquaLab</strong> <strong>Vapor</strong> <strong>Sorption</strong> <strong>Analyzer</strong><br />
8. Running a Test<br />
activity of the sample. Upon completion of the isotherm,<br />
the data is downloaded and the test saved using a name<br />
that will identify the sample name and the sorption<br />
direction.<br />
3. Desorption Curve: A second sub-sample is analyzed for<br />
desorption from its current state. The test is again setup<br />
with one stage with desired settings for method (DDI or<br />
DVS), temperature, step value, flow rate etc., but the<br />
starting water activity must be Current, and the final<br />
water activity must be a value lower than the current<br />
water activity of the sample. Upon completion of the<br />
isotherm, the data is downloaded and the test saved<br />
using a name that will identify the sample name and the<br />
sorption direction.<br />
Editing a Running Isotherm Test<br />
A test that is already running can be edited and additional stages<br />
can be added to a running test (inserted after the current running<br />
stage) at any time using the edit test function. This can be done<br />
using either the instrument interface or the software. To edit the<br />
test using the device interface:<br />
1. Press the icon as you did when starting a test. The<br />
following screen will appear.<br />
76
<strong>AquaLab</strong> <strong>Vapor</strong> <strong>Sorption</strong> <strong>Analyzer</strong><br />
8. Running a Test<br />
2. Press the icon to edit the selected test. The following<br />
screen will appear<br />
3. The current running stage (spinner icon) and completed<br />
stages (lock icons) cannot be edited. To add additional<br />
stages, select new and press . Then setup each stage<br />
as outlined above. To edit an existing stage that is not<br />
currently running and is not compete, select it and press<br />
. Adjust the settings as instructed above.<br />
4. To alter a currently running stage, insert a new stage<br />
after the currently running stage. Make sure to set the<br />
starting a w to ―Current‖ if you want the new stage to<br />
resume where the previous stage left off. Then select<br />
―End current stage‖ and click . The current stage will<br />
end and the newly created stage will start.<br />
To edit a test using the software, see the VSA Downloader<br />
Software in chapter 9.<br />
77
<strong>AquaLab</strong> <strong>Vapor</strong> <strong>Sorption</strong> <strong>Analyzer</strong><br />
8. Running a Test<br />
Running a Water Activity Test<br />
(Can’t be done when isotherm test is running)<br />
The <strong>AquaLab</strong> VSA can also be used as a water activity meter.<br />
For best results and temperature control, we recommend you<br />
use a clean stainless steel cup for water activity testing and that<br />
you remove the weighing pan and place the cup directly on air<br />
cylinder when testing for water activity. If volatiles is set to yes as<br />
described in Chapter 5, water activity readings will be<br />
determined using the capacitance sensor, otherwise, the<br />
dewpoint sensor is used. To measure water activity<br />
1. Press until you are at the Measurement screen (2nd<br />
tab). Move latch left and/or press to start a reading.<br />
The pinwheel will spin indicating a measurement is<br />
running.<br />
2. The a w reading for the sample and the temperature will<br />
display when finished.<br />
3. To change between dew point and capacitive readings,<br />
you will need to toggle the Volatiles Yes/No option in the<br />
Configuration menu (Volatiles = Yes → Capacitive<br />
Sensor, Volatiles = No → Dew Point Sensor).<br />
78
<strong>AquaLab</strong> <strong>Vapor</strong> <strong>Sorption</strong> <strong>Analyzer</strong><br />
9. VSA Downloader Software<br />
9. VSA Downloader Software<br />
While the <strong>AquaLab</strong> VSA can operate as a stand-alone<br />
instrument, a computer must be attached to download test<br />
results. The VSA Downloader software makes it easy to<br />
download moisture sorption isotherm measurements from your<br />
VSA, view the data in table or chart form, export for use in other<br />
programs, and easily setup a new test with multiple stages. After<br />
installing the VSA Downloader on a computer, follow these steps<br />
to utilize software.<br />
Connect<br />
1. Connect your USB cable between the COM port on the<br />
<strong>Vapor</strong> <strong>Sorption</strong> <strong>Analyzer</strong> (VSA) and the USB port on your<br />
computer.<br />
2. Open the VSA Downloader software.<br />
3. Select the proper COM port in the toolbar.<br />
4. Click the Connect button in the toolbar.<br />
Configure and Start a New Test<br />
1. Once your VSA is connected, click the Wizard button in<br />
the toolbar.<br />
2. Follow the Wizard‘s instructions and fill in the parameters<br />
of your test and each stage desired.<br />
3. After completing the Wizard, follow the instructions<br />
displayed on the VSA to start your test.<br />
79
<strong>AquaLab</strong> <strong>Vapor</strong> <strong>Sorption</strong> <strong>Analyzer</strong><br />
9. VSA Downloader Software<br />
Modify a Currently Running Test<br />
Note: You can only modify stages that have not yet begun. If you<br />
wish to modify the current running stage, simply create a new<br />
stage and adjust your stage behavior from the current reading of<br />
the VSA.<br />
1. Connect to VSA running test<br />
2. Click the Wizard button in the toolbar<br />
3. Modify stages in the currently running test<br />
4. Click Next<br />
5. Click Finish and Allow the Wizard to finish communicating<br />
with the device<br />
Download and Export<br />
1. Once your VSA is connected and a test has been run,<br />
select Download in the toolbar<br />
2. From the File menu or using the icon in the toolbar, select<br />
―Export…‖ to create an Excel compatible table<br />
3. To view your data in table format, click the Table button<br />
in the toolbar<br />
4. To view your data in chart format, click the Chart button<br />
in the toolbar<br />
While the VSA Downloader does not have a hardcopy manual,<br />
extensive help files exist to guide you through the various<br />
features and processes of VSA Downloader. To find these help<br />
files in the VSA Downloader, click on the Help menu item and<br />
then select the VSA Downloader Help submenu item to display<br />
the help files.<br />
80
<strong>AquaLab</strong> <strong>Vapor</strong> <strong>Sorption</strong> <strong>Analyzer</strong><br />
10. Troubleshooting<br />
10. Troubleshooting<br />
The <strong>AquaLab</strong> VSA is a high performance, low maintenance<br />
instrument, designed to have few problems if used with care.<br />
Unfortunately even the best operators using the best instruments<br />
encounter technical difficulties. Below is a quick reference guide<br />
that will direct you to detailed solutions of some problems that<br />
may occur. If these remedies still don‘t resolve your problem,<br />
then please contact Decagon for help (see Customer Support in<br />
Chapter 1). Here is a list of some problems that may occur.<br />
NOTE: If you purchased your <strong>AquaLab</strong> VSA instrument from one<br />
of our international distributors, please contact them for local<br />
service and support.<br />
If this problem occurs:<br />
Troubleshooting Quick Guide<br />
VSA won't turn on ....................................................... Problem #1<br />
Readings are slow or inconsistent ............................. Problem #2<br />
a w reading on solution too high/low to adjust ............. Problem #3<br />
Screen displays "Sample too hot" ............................... Problem #4<br />
Screen displays "a w < 0.0" .......................................... Problem #5<br />
Dew point sensor failure ............................................. Problem #6<br />
The verification is not correct ...................................... Problem #7<br />
Screen displays "Crystal failure" ................................. Problem #8<br />
81
<strong>AquaLab</strong> <strong>Vapor</strong> <strong>Sorption</strong> <strong>Analyzer</strong><br />
10. Troubleshooting<br />
Troubleshooting Quick Guide Continued<br />
Screen displays "Contaminated Mirror" ...................... Problem #9<br />
Screen displays "Firmware is corrupted"................... Problem #10<br />
Screen displays "Missing bootstrap loader" .............. Problem #11<br />
Screen displays ―Annual calibration due‖. ................. Problem #12<br />
Screen displays ―No equilibration points available!‖ .. Problem #13<br />
Screen displays ―Desiccant tank is low.‖ ................... Problem #14<br />
Displays Low or High System Pressure Warning. ..... Problem #15<br />
Power was reset. ...................................................... Problem #16<br />
Screen indicates a Scale failure ................................ Problem #17<br />
(overload or underload)<br />
Screen displays ―Actuator failure.‖ ............................ Problem #18<br />
Critical error starting a test ........................................ Problem #19<br />
Can‘t communicate with the VSA .............................. Problem #20<br />
Weight is decreasing during adsorption .................... Problem #21<br />
Weight is increasing during desorption ..................... Problem #22<br />
Isotherm test has stopped prematurely ..................... Problem #23<br />
Isotherm test taking unusually long time<br />
to complete ....................................................... Problem #24<br />
82
<strong>AquaLab</strong> <strong>Vapor</strong> <strong>Sorption</strong> <strong>Analyzer</strong><br />
10. Troubleshooting<br />
Troubleshooting Quick Guide Continued<br />
Scale Readings are not stable or balance<br />
cannot be started ..................................................... Problem #25<br />
Scale calibration is failing ......................................... Problem #26<br />
Desiccant cartridges are hard to install ..................... Problem #27<br />
Poor temperature control on the system ................... Problem #28<br />
Diagnostic Screen .................................................... Problem #29<br />
1. PROBLEM:<br />
VSA won‘t turn on.<br />
SOLUTIONS:<br />
1) Check to make sure your power cord is securely attached<br />
to the back of the instrument and it is plugged into the<br />
power outlet.<br />
2) A power surge may have caused a fuse to blow. To<br />
change the fuses, follow these instructions:<br />
a. Unplug the power cord<br />
b. Locate the panel where the power cord plugs in.<br />
The fuse box is on the right side of that panel.<br />
Press in on the release tab and pull the fuseholder<br />
out. Pull the broken fuse(s) out and<br />
replace with a 1.25 Amp 250V fuse.<br />
Caution: Do not use any other kind of fuse or you will<br />
risk damage to your instrument as well as void your<br />
warranty.<br />
83
<strong>AquaLab</strong> <strong>Vapor</strong> <strong>Sorption</strong> <strong>Analyzer</strong><br />
10. Troubleshooting<br />
c. Replace the fuse-holder and push it into the fusewell<br />
until the release tab snaps in place.<br />
d. Re-connect the power cord and turn your<br />
instrument on. If the fuse blows again, a failed<br />
component may be causing the problem. Contact<br />
Decagon to make arrangements for repairs.<br />
2. PROBLEM:<br />
Reading are slow or inconsistent.<br />
SOLUTIONS:<br />
1) The sample chamber may be dirty. Refer to Chapter 6 for<br />
directions on cleaning the sample chamber.<br />
2) The temperature difference between the sample and the<br />
block chamber may be too great. The sample will need<br />
to equilibrate to instrument temperature before an<br />
accurate reading can be made. (Refer to Chapter 8,<br />
Samples Not at Room Temperature.)<br />
3) Some products absorb or desorb moisture very slowly,<br />
causing measurements to take longer than usual, and<br />
nothing can be done to speed up the process. Refer to<br />
Chapter 8 for further explanation.<br />
4) Your sample may contain volatiles. Volatiles are known<br />
to cause unstable readings, because they condense on<br />
the surface of the chilled mirror and alter the readings.<br />
Please refer to the volatiles section in Chapter 8 for hints<br />
on reducing difficulties with measuring samples with<br />
propylene glycol or ethanol. If you have further questions<br />
regarding the measurement of volatiles contact Decagon.<br />
5) A fan blade in the block chamber may be broken or bent.<br />
If even salt standards take a long time to read, and the<br />
sample chamber is clean, you may have a broken<br />
84
<strong>AquaLab</strong> <strong>Vapor</strong> <strong>Sorption</strong> <strong>Analyzer</strong><br />
10. Troubleshooting<br />
chamber fan blade. This is especially likely if you have<br />
just cleaned the chamber. If you suspect this may have<br />
happened, contact Decagon for details on replacement.<br />
3. PROBLEM:<br />
Water activity readings on verification standards are too high/low<br />
and a linear offset adjustment cannot be made any higher/lower.<br />
SOLUTIONS:<br />
1) The thermopile in your chamber, which measures sample<br />
temperature, may have become contaminated. Refer to<br />
Chapter 6 for directions on cleaning.<br />
2) The chamber mirror may be dirty. Refer to Chapter 6 for<br />
directions on cleaning.<br />
4. PROBLEM:<br />
Message on screen displays the following:<br />
SOLUTION:<br />
Your sample‘s temperature is too high for the instrument to<br />
equilibrate with it in a reasonable amount of time. The instrument<br />
and sample need to be in temperature equilibrium before<br />
accurate measurements can be made. Therefore, very cold<br />
85
<strong>AquaLab</strong> <strong>Vapor</strong> <strong>Sorption</strong> <strong>Analyzer</strong><br />
10. Troubleshooting<br />
samples will take a very long time to measure for the same<br />
reason. To avoid this problem, make sure to only measure<br />
samples that are at the same temperature as the instrument.<br />
5. PROBLEM:<br />
Message on screen displays the following:<br />
SOLUTIONS:<br />
1) The sample is too dry for the instrument to read<br />
accurately. If your sample has a water activity that is less<br />
than below the detection limits of the instrument, this<br />
message will come up. Essentially, it means that there is<br />
not enough sample moisture to condense on the mirror<br />
and provide a reading.<br />
2) The mirror may be dirty. Try cleaning the mirror and<br />
chamber and measuring the sample again.<br />
86
<strong>AquaLab</strong> <strong>Vapor</strong> <strong>Sorption</strong> <strong>Analyzer</strong><br />
10. Troubleshooting<br />
6. PROBLEM:Message on screen displaying dew point sensor<br />
failure.<br />
SOLUTION:<br />
The Cooler is damaged and will need to be serviced by<br />
Decagon. See Chapter 12 for detailed instructions.<br />
7. PROBLEM<br />
Verification is not correct.<br />
SOLUTIONS:<br />
1) The sample chamber and mirror need to be cleaned. See<br />
Chapter 6 for detailed cleaning instructions. If verification is<br />
still not correct, then a linear offset has occurred.<br />
2) Verify and Adjust for Linear Offset. After you have cleaned<br />
the sample chamber and mirror (Chapter 7) you will need to<br />
use a Verification Standard to verify and adjust for Linear<br />
Offset as described in Chapter 7.<br />
87
<strong>AquaLab</strong> <strong>Vapor</strong> <strong>Sorption</strong> <strong>Analyzer</strong><br />
10. Troubleshooting<br />
8. PROBLEM:<br />
Message on screen displays the following:<br />
SOLUTION:<br />
The crystal that runs the firmware is having trouble starting.<br />
Occasionally, cycling the power will solve the problem. If this<br />
message continues to appear, the instrument will need to be<br />
serviced by Decagon. See Chapter 13 for detailed instructions.<br />
9. PROBLEM:<br />
Message on the screen displays the following:<br />
88
<strong>AquaLab</strong> <strong>Vapor</strong> <strong>Sorption</strong> <strong>Analyzer</strong><br />
10. Troubleshooting<br />
SOLUTION:<br />
The mirror used for dew point measurements requires cleaning.<br />
Follow the instructions outlined in Chapter 6: Cleaning and<br />
Maintenance before trying to run your sample again. If this<br />
message continues to appear, contact your Decagon for further<br />
options.<br />
10. PROBLEM:<br />
Message on the screen displays the following:<br />
SOLUTION:<br />
The firmware on the instrument is corrupted and needs to be<br />
reloaded. To download new firmware to the VSA, the instrument<br />
must be serviced by Decagon.<br />
11. PROBLEM:<br />
Message on the screen displays the following:<br />
89
<strong>AquaLab</strong> <strong>Vapor</strong> <strong>Sorption</strong> <strong>Analyzer</strong><br />
10. Troubleshooting<br />
SOLUTION:<br />
The instrument cannot download new firmware updates. To<br />
download new firmware to the VSA, or to stop this message from<br />
displaying, the instrument must be serviced by Decagon.<br />
12. PROBLEM:<br />
Message on the screen displays the following:<br />
SOLUTION:<br />
This message indicates that it‘s been at least a year since the<br />
instrument has been calibrated and serviced by Decagon or your<br />
local distributor. It is recommended that you return your<br />
instrument so that we can help you ensure you are getting the<br />
most accurate readings possible from your VSA. Click remind<br />
me later to be reminded in a couple of weeks, click Don‘t display<br />
again if you don‘t want to be reminded in the near future.<br />
90
13. PROBLEM:<br />
Message on the screen displays the following:<br />
<strong>AquaLab</strong> <strong>Vapor</strong> <strong>Sorption</strong> <strong>Analyzer</strong><br />
10. Troubleshooting<br />
SOLUTION:<br />
When graphing a test, this message indicates that there are no<br />
data points in which the weight has stabilized. The time it takes<br />
for an equilibration point to appear depends on the sample<br />
phase changes and stage trigger/ timeout specifications. To<br />
view detailed data other than equilibration points, press the up or<br />
down arrow.<br />
14. PROBLEM:<br />
Message on the screen indicates that a desiccant tube is low.<br />
SOLUTION:<br />
During a test, if the VSA determines that a desiccant tube is<br />
exhausted its drying capacity, the VSA will automatically switch<br />
to the other desiccant tube. When this event occurs, a message<br />
appears indicating that the exhausted desiccant tube needs to<br />
be replaced. See Chapter 4 for information on replacing the<br />
desiccant tube.<br />
91
<strong>AquaLab</strong> <strong>Vapor</strong> <strong>Sorption</strong> <strong>Analyzer</strong><br />
10. Troubleshooting<br />
15. PROBLEM:<br />
Screen displays a Low or High System Pressure Warning.<br />
SOLUTION:<br />
Anytime the VSA instrument requires air flow, it monitors the<br />
system pressure and sends a warning if the system pressure is<br />
outside the expected range for the current scenario. This may<br />
be caused by one of the following issues:<br />
1) External gas is flowing when the external gas setting is off.<br />
2) External gas is not flowing when external gas setting is on.<br />
3) External gas pressure is outside the recommended range for<br />
running a test.<br />
4) External gas input plug is not properly installed or missing<br />
when external gas is off.<br />
5) Both Desiccant tubes are not properly installed or missing.<br />
6) Water chamber plug is not properly installed or missing.<br />
7) Pump system is failing<br />
If you continue to receive a message after the above items have<br />
been checked, contact Decagon for further options.<br />
16. PROBLEM:<br />
Message on the screen displays the following:<br />
92
<strong>AquaLab</strong> <strong>Vapor</strong> <strong>Sorption</strong> <strong>Analyzer</strong><br />
10. Troubleshooting<br />
SOLUTION:<br />
Anytime during a test if the VSA instrument is reset due to a<br />
power outage or due to unforeseen circumstances, this message<br />
will appear on the screen. If Auto Restart is turned on, the test<br />
will automatically resume after a device reset. If Auto Restart is<br />
turned off, then the test will stop running when a device reset<br />
occurs. To prevent device resets, it‘s strongly recommended<br />
that you connect your VSA to a UPS.<br />
17. PROBLEM:<br />
Screen indicates a Scale failure, overload or underload.<br />
SOLUTION:<br />
If the VSA is unable to communicate with the scale, the scale<br />
failure message will appear. If the scale is reading overload or<br />
underload, the balance is either misaligned or broken. If any of<br />
these instances occur the VSA will need to be serviced by<br />
Decagon.<br />
18. PROBLEM:<br />
Screen displays ―Actuator failure.‖<br />
SOLUTION:<br />
An actuator failure is caused when the air cylinder is unable to<br />
actuate. This may be caused by a dirty chamber, a faulty or<br />
damaged air cylinder, a misaligned scale shaft or a pump<br />
assembly problem. Clean the chamber including the air cylinder,<br />
the weighing pan, and the space beneath the air cylinder. If you<br />
continue to have problems, contact Decagon.<br />
93
<strong>AquaLab</strong> <strong>Vapor</strong> <strong>Sorption</strong> <strong>Analyzer</strong><br />
10. Troubleshooting<br />
19. PROBLEM:<br />
Message on the screen displays the following:<br />
SOLUTION:<br />
Verify that the following has been done before starting a test:<br />
<br />
<br />
The sample weight is at least 50 milligrams.<br />
The test must have a name.<br />
The test must contain at least one stage.<br />
If you continue to receive this error, contact Decagon.<br />
20. PROBLEM:<br />
Can‘t communicate with the VSA.<br />
SOLUTIONS:<br />
1) USB cable is not plugged in.<br />
2) Wrong com port chosen.<br />
3) Restart VSA.<br />
4) Restart communication software.<br />
94
21. PROBLEM:<br />
Weight is decreasing during absorption.<br />
<strong>AquaLab</strong> <strong>Vapor</strong> <strong>Sorption</strong> <strong>Analyzer</strong><br />
10. Troubleshooting<br />
SOLUTIONS:<br />
1) Water tank has run dry.<br />
2) Plug on fill tank is loose.<br />
3) Pump is not working.<br />
4) Material is undergoing a phase change.<br />
5) Scale needs to be checked for calibration.<br />
22. PROBLEM:<br />
Weight is increasing during desorption.<br />
SOLUTIONS:<br />
1) Desiccant cartridge has been used up.<br />
2) Pump is not working.<br />
3) Desiccant tube/tubes leaking.<br />
4) Scale needs to be checked for calibration.<br />
23. PROBLEM:<br />
Isotherm test has stopped prematurely.<br />
SOLUTIONS:<br />
1) Download the test with the VSA downloader.<br />
2) Navigate to the Table view.<br />
3) Scroll down to the last data record in the list.<br />
4) Look in the special condition column to see what<br />
caused the test to stop prematurely.<br />
5) Refer to the troubleshooting section that references the<br />
special condition indicated.<br />
95
<strong>AquaLab</strong> <strong>Vapor</strong> <strong>Sorption</strong> <strong>Analyzer</strong><br />
10. Troubleshooting<br />
24. PROBLEM:<br />
Isotherm test is taking an unusually long time to complete, even<br />
at high flow rates.<br />
SOLUTIONS:<br />
1) Sample has very slow sorption properties.<br />
2) Water has run out – fill.<br />
3) Desiccant is used up – replace.<br />
4) Increase the flow rate.<br />
25. PROBLEM:<br />
Scale readings are not stable or the sample cups cannot be<br />
tared.<br />
SOLUTIONS:<br />
1) Unstable bench or support for the VSA.<br />
2) Internal parts need to be cleaned. Lift out air cylinder and<br />
clean.<br />
3) Interior parts have shifted and are contacting so weight<br />
cylinder will not slide.<br />
26. PROBLEM:<br />
Scale calibration is failing.<br />
SOLUTIONS:<br />
1) Air cylinder and internal parts need to be cleaned.<br />
2) Air cylinder is not actuating. May be sticking due to<br />
contamination in chamber.<br />
96
<strong>AquaLab</strong> <strong>Vapor</strong> <strong>Sorption</strong> <strong>Analyzer</strong><br />
10. Troubleshooting<br />
27. PROBLEM:<br />
Desiccant cartridges hard to install.<br />
SOLUTIONS:<br />
Dampen the o-rings on the desiccant cartridge using water<br />
before installing<br />
28. PROBLEM:<br />
Poor temperature control on the system.<br />
SOLUTIONS:<br />
1) Clean the filters on the enclosure fans.<br />
2) Check that external fan on the back of the unit is<br />
operational.<br />
Diagnostic Screen<br />
If, after cleaning your instrument and reading the other<br />
troubleshooting hints, you have reason to believe that one of the<br />
components of your VSA may be causing measurement error,<br />
you may access a screen that will display values for component<br />
performance. This is done by navigating to the Configuration tab<br />
and then by scrolling down to the diagnostics option. Press enter<br />
and you will be given a list of components and their values.<br />
97
<strong>AquaLab</strong> <strong>Vapor</strong> <strong>Sorption</strong> <strong>Analyzer</strong><br />
10. Troubleshooting<br />
This screen shows typical values for the temperature sensors on<br />
the instrument. Press up and down to scroll between the different<br />
pages. Lid, base and sample temperatures may fluctuate but<br />
should not change more than 0.03 degrees. Typical ranges for<br />
the lid, base and sample temperatures are between 24.5 and<br />
25.5 degrees.<br />
If the mirror temperature is at lid temperature, the cooler has<br />
failed and must be replaced. If the mirror is below the lid<br />
temperature or appears to be random, the thermocouple wire is<br />
broken and must be repaired.<br />
RH: This screen shows the capacitive sensor‘s RH percentage<br />
which should always be between 0 and 100%.<br />
Weight: The weight measurement is updated in real-time and<br />
can be zeroed for measurements by pressing the weight icon<br />
(2 nd button from the left). If the weight is reading overload or<br />
underload, the balance is broken and needs to be replaced. A<br />
negative value indicates that the balance needs to be re-zeroed<br />
if you want to take weight measurements.<br />
Optical: A typical optical range is between 500 mV -- 2900 mV.<br />
98
<strong>AquaLab</strong> <strong>Vapor</strong> <strong>Sorption</strong> <strong>Analyzer</strong><br />
10. Troubleshooting<br />
Latch: To determine if the latch is functioning properly, open<br />
and close the latch while monitoring the latch status on the<br />
screen. If the screen doesn‘t update the latch status when you<br />
open and close the latch, the latch magnet may need to be reseated<br />
(with the correct polarity) or the Hall Effect sensor needs<br />
to be realigned with the magnet.<br />
Pump: The pump pressure is only valid when the pump is<br />
active. When the pump is off, the pressure should be 0 kPa.<br />
This pressure reading also applies to an auxiliary air supply.<br />
When the air supply is active the pressure in the system<br />
shouldn‘t exceed 45 kPa. If the pump pressure continually reads<br />
zero (even when you press the switch desiccant button) then the<br />
pump system may need to be serviced.<br />
Desiccant: The Desiccant humidity value indicates the<br />
effectiveness of the desiccant tubes. Initially when the<br />
diagnostic screen is turned on, the pump supplies flow through<br />
the active desiccant tube to help verify that it‘s able to desiccate<br />
properly. After 30 seconds of pumping, the desiccant humidity<br />
reading should be 5% or less. If the desiccant humidity is unable<br />
to reach 5% humidity, refer to Chapter 7 for instructions on<br />
replacing the desiccant tubes.<br />
99
<strong>AquaLab</strong> <strong>Vapor</strong> <strong>Sorption</strong> <strong>Analyzer</strong><br />
10. Troubleshooting<br />
Weight Cal: The weight calibration saved a scalar into memory<br />
that‘s applied to all subsequent weight readings. A scalar of 1<br />
means that the weight hasn‘t been changed from it‘s default<br />
factory calibration. If the scalar strays too far from 1, you may<br />
need to reverify the balance and also recertify the weight<br />
standard.<br />
Dew Offset: The chilled mirror dew point calibration offset is<br />
zero if it‘s running off of the default factory calibration. This value<br />
indicates how large an offset was needed to be applied to the<br />
water activity readings inorder to read correctly.<br />
Cap Offset: The capacitive RH calibration offset is zero if it‘s<br />
running off of the default factory calibration. This value indicates<br />
how large an offset was needed to be applied to the water<br />
activity readings inorder to read correctly.<br />
100
<strong>AquaLab</strong> <strong>Vapor</strong> <strong>Sorption</strong> <strong>Analyzer</strong><br />
Appendix A<br />
Appendix A<br />
Temperature Correction of<br />
Decagon’s Verification Standards<br />
Temp.<br />
(°C)<br />
H2O<br />
0.5m<br />
KCL<br />
2.33 m<br />
NaCl<br />
6.0m<br />
NaCl<br />
8.57m<br />
LiCl<br />
13.4m<br />
LiCl<br />
15.0 1.000 0.984 0.923 0.761 0.492 0.238<br />
20.0 1.000 0.984 0.922 0.760 0.496 0.245<br />
25.0 1.000 0.984 0.920 0.760 0.500 0.250<br />
30.0 1.000 0.984 0.920 0.760 0.504 0.255<br />
35.0 1.000 0.984 0.920 0.760 0.508 0.261<br />
40.0 1.000 0.984 0.921 0.760 0.512 0.266<br />
50.0 1.000 0.984 0.920 0.759 0.517 0.275<br />
60.0 1.000 0.984 0.894 0.740 0.505 0.279<br />
The Aqualab <strong>Vapor</strong> <strong>Sorption</strong> <strong>Analyzer</strong> will measure these<br />
standards to ±0.005 a w .<br />
101
<strong>AquaLab</strong> <strong>Vapor</strong> <strong>Sorption</strong> <strong>Analyzer</strong><br />
Index<br />
Index<br />
A<br />
<strong>AquaLab</strong> VSA Information, 4<br />
B<br />
Balance<br />
magnetic force, 61<br />
Calibration, 31<br />
verification, 54<br />
Cleaning<br />
C<br />
block and sensors, 50<br />
testing chamber, 48<br />
Components, 22<br />
Configuration tab, 29<br />
Customer Support, 2<br />
Data tab, 43<br />
Desiccant<br />
D<br />
cartridge replacement, 46<br />
Desorption, 10<br />
Diagnostics, 40<br />
Dynamic Dewpoint Isotherm (DDI), 5<br />
Dynamic <strong>Vapor</strong> <strong>Sorption</strong> (DVS), 5<br />
E<br />
Equilibrium isotherms, 6<br />
External gas, 6, 38<br />
Flow rate, 70, 96<br />
F<br />
G<br />
Glass transition, 5, 11, 21<br />
H<br />
Humidity operating range, 7<br />
Hysteresis, 12<br />
Isotherm<br />
models, 18<br />
moisture sorption, 9<br />
types, 8<br />
Isotherm tab, 28<br />
Linear offset, 58<br />
I<br />
L<br />
102
<strong>AquaLab</strong> <strong>Vapor</strong> <strong>Sorption</strong> <strong>Analyzer</strong><br />
Index<br />
Matrix changes, 15<br />
M<br />
Measurement tab, 29<br />
Moisture Content<br />
basis, 32<br />
Moisture <strong>Sorption</strong> Isotherm<br />
moisture sorption, 4<br />
test, 65<br />
Power outage, 93<br />
P<br />
Product development, 20<br />
Seller’s Liability, 3<br />
Setup<br />
S<br />
instrument, 23<br />
Shelf life prediction, 21<br />
Specifications, 7<br />
Stages, 65<br />
Standards, 55<br />
Static isotherms, 65<br />
Tabs, 28<br />
Tare, 75<br />
Temperature<br />
T<br />
control range, 7<br />
operating range, 7<br />
Test wizard, 66<br />
Theory, 8<br />
Trigger, 73<br />
Troubleshooting, 81<br />
User Interface, 28<br />
U<br />
V<br />
<strong>Vapor</strong> equilibrium, 11<br />
Verification, 54<br />
Volatiles, 31<br />
VSA Downloader, 79<br />
Warranty, 1<br />
Water activity<br />
accuracy, 7<br />
range, 7<br />
repeatability, 7<br />
Water Activity<br />
testing, 78<br />
W<br />
Water tank, 26<br />
Weight reference, 32<br />
Working isotherms, 75<br />
103