Dr Z 1x10 ext. cab to combo cab conversion - Dr Z Amplifiers
Dr Z 1x10 ext. cab to combo cab conversion - Dr Z Amplifiers
Dr Z 1x10 ext. cab to combo cab conversion - Dr Z Amplifiers

You also want an ePaper? Increase the reach of your titles
YUMPU automatically turns print PDFs into web optimized ePapers that Google loves.
<strong>Dr</strong> Z <strong>1x10</strong> <strong>ext</strong>. <strong>cab</strong> <strong>to</strong> <strong>combo</strong> <strong>cab</strong> <strong>conversion</strong><br />
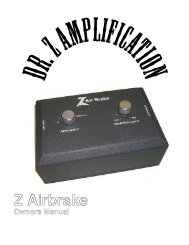
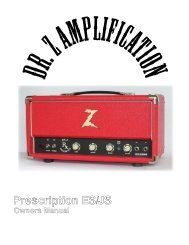
1. Undo speaker jack and remove from jack plate.<br />
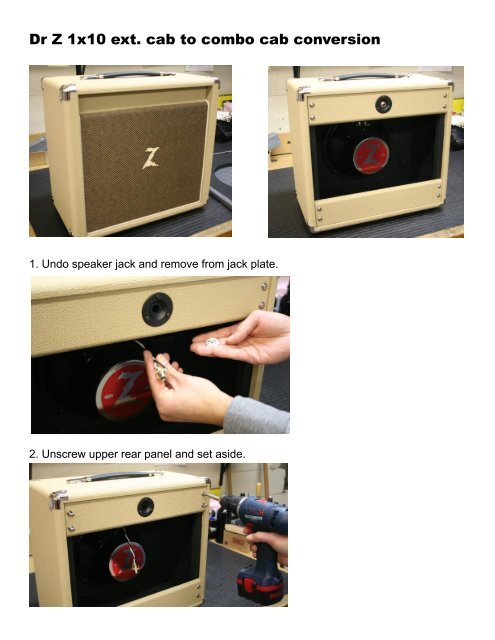
2. Unscrew upper rear panel and set aside.
4. Remove the 2 upper side blocks on either sire of the <strong>cab</strong>inet.<br />
5. Remove front upper panel (6 screws)<br />
This should be what you have at this point:
6. Use an Exac<strong>to</strong> knife <strong>to</strong> cut out the 4 chassis mounting holes on <strong>to</strong>p of the <strong>cab</strong>.<br />
These holes are already drilled.<br />
7. Lay <strong>cab</strong>inet flat and position upper back panel even with the side mounting rails.<br />
<strong>Dr</strong>ill out 4 pilot holes using 1/8” drill bit. Set panel aside.<br />
8. Mount chassis using the 4 screws from your old head or <strong>combo</strong>.
9. Attach upper back panel and 1/4” jack. You may choose <strong>to</strong> use a short speaker<br />
<strong>cab</strong>le <strong>to</strong> connect the jack and chassis. You may also install a new speaker lead with a<br />
1/4” plug <strong>to</strong> go directly from the speaker <strong>to</strong> the chassis.