

The FlightGear Manual - Mapserver - FlightGear
The FlightGear Manual - Mapserver - FlightGear
The FlightGear Manual - Mapserver - FlightGear

Create successful ePaper yourself
Turn your PDF publications into a flip-book with our unique Google optimized e-Paper software.
<strong>The</strong> <strong>FlightGear</strong> <strong>Manual</strong><br />
Michael Basler, Martin Spott,<br />
Stuart Buchanan, Jon Berndt,<br />
Bernhard Buckel, Cameron Moore,<br />
Curt Olson, Dave Perry,<br />
Michael Selig, Darrell Walisser,<br />
and others<br />
<strong>The</strong> <strong>FlightGear</strong> <strong>Manual</strong><br />
November 5, 2012<br />
For <strong>FlightGear</strong> version 2.8.0
Contents<br />
1 Preface 5<br />
1.1 Condensed Reading . . . . . . . . . . . . . . . . . . . . . . . . . 6<br />
1.2 Instructions For the Truly Impatient . . . . . . . . . . . . . . . . 6<br />
1.3 Further Reading . . . . . . . . . . . . . . . . . . . . . . . . . . . 7<br />
I Installation 9<br />
2 Want to have a free flight? Take <strong>FlightGear</strong>! 11<br />
2.1 Yet Another Flight Simulator? . . . . . . . . . . . . . . . . . . . 11<br />
2.2 System Requirements . . . . . . . . . . . . . . . . . . . . . . . . 14<br />
2.3 Choosing A Version . . . . . . . . . . . . . . . . . . . . . . . . . 15<br />
2.4 Flight Dynamics Models . . . . . . . . . . . . . . . . . . . . . . 16<br />
2.5 About This Guide . . . . . . . . . . . . . . . . . . . . . . . . . . 16<br />
3 Preflight: Installing <strong>FlightGear</strong> 19<br />
3.1 Installing scenery . . . . . . . . . . . . . . . . . . . . . . . . . . 19<br />
3.1.1 MS Windows Vista/7 . . . . . . . . . . . . . . . . . . . . 20<br />
3.1.2 Mac OS X . . . . . . . . . . . . . . . . . . . . . . . . . 20<br />
3.1.3 FG_SCENERY . . . . . . . . . . . . . . . . . . . . . . . 21<br />
3.1.4 Fetch Scenery as you fly . . . . . . . . . . . . . . . . . . 21<br />
3.1.5 Creating your own Scenery . . . . . . . . . . . . . . . . . 22<br />
3.2 Installing aircraft . . . . . . . . . . . . . . . . . . . . . . . . . . 22<br />
3.3 Installing documentation . . . . . . . . . . . . . . . . . . . . . . 23<br />
II Flying with <strong>FlightGear</strong> 25<br />
4 Takeoff: How to start the program 27<br />
4.1 Environment Variables . . . . . . . . . . . . . . . . . . . . . . . 27<br />
4.1.1 FG_ROOT . . . . . . . . . . . . . . . . . . . . . . . . . 27<br />
4.1.2 FG_SCENERY . . . . . . . . . . . . . . . . . . . . . . . 27<br />
4.1.3 Environment Variables on Windows and Mac OS X . . . . 27<br />
4.2 Launching the simulator under Unix/Linux . . . . . . . . . . . . 28<br />
3
4 CONTENTS<br />
4.3 Launching the simulator under Windows . . . . . . . . . . . . . . 29<br />
4.3.1 Launching from the command line . . . . . . . . . . . . . 30<br />
4.4 Launching the simulator under Mac OS X . . . . . . . . . . . . . 30<br />
4.4.1 Selecting an aircraft and an airport . . . . . . . . . . . . . 31<br />
4.4.2 Enabling on-the-fly scenery downloading . . . . . . . . . 31<br />
4.4.3 Enabling Navigation Map (Atlas) . . . . . . . . . . . . . 31<br />
4.4.4 Launching <strong>FlightGear</strong> - the simulator . . . . . . . . . . . 32<br />
4.4.5 Advanced Features . . . . . . . . . . . . . . . . . . . . . 32<br />
4.4.6 Launching from the command line . . . . . . . . . . . . . 36<br />
4.5 Command line parameters . . . . . . . . . . . . . . . . . . . . . 37<br />
4.5.1 General Options . . . . . . . . . . . . . . . . . . . . . . 37<br />
4.5.2 Features . . . . . . . . . . . . . . . . . . . . . . . . . . . 38<br />
4.5.3 Sound . . . . . . . . . . . . . . . . . . . . . . . . . . . . 39<br />
4.5.4 Aircraft . . . . . . . . . . . . . . . . . . . . . . . . . . . 39<br />
4.5.5 Flight model . . . . . . . . . . . . . . . . . . . . . . . . 40<br />
4.5.6 Initial Position and Orientation . . . . . . . . . . . . . . . 40<br />
4.5.7 Environment Options . . . . . . . . . . . . . . . . . . . . 42<br />
4.5.8 Rendering Options . . . . . . . . . . . . . . . . . . . . . 42<br />
4.5.9 HUD Options . . . . . . . . . . . . . . . . . . . . . . . . 45<br />
4.5.10 Aircraft System Options . . . . . . . . . . . . . . . . . . 45<br />
4.5.11 Time Options . . . . . . . . . . . . . . . . . . . . . . . . 45<br />
4.5.12 Network Options . . . . . . . . . . . . . . . . . . . . . . 46<br />
4.5.13 Route/Waypoint Options . . . . . . . . . . . . . . . . . . 46<br />
4.5.14 IO Options . . . . . . . . . . . . . . . . . . . . . . . . . 47<br />
4.5.15 Debugging options . . . . . . . . . . . . . . . . . . . . . 48<br />
4.6 Joystick support . . . . . . . . . . . . . . . . . . . . . . . . . . . 49<br />
4.6.1 Built-in joystick support . . . . . . . . . . . . . . . . . . 49<br />
4.6.2 Joystick support via .fgfsrc entries . . . . . . . . . . . . . 56<br />
5 In-flight: All about instruments, keystrokes and menus 59<br />
5.1 Starting the engine . . . . . . . . . . . . . . . . . . . . . . . . . 59<br />
5.1.1 Piston Aircraft . . . . . . . . . . . . . . . . . . . . . . . 59<br />
5.1.2 Turboprop Aircraft . . . . . . . . . . . . . . . . . . . . . 60<br />
5.1.3 Jet Aircraft . . . . . . . . . . . . . . . . . . . . . . . . . 60<br />
5.2 Keyboard controls . . . . . . . . . . . . . . . . . . . . . . . . . . 60<br />
5.2.1 Aircraft controls . . . . . . . . . . . . . . . . . . . . . . 60<br />
5.2.2 Simulator controls . . . . . . . . . . . . . . . . . . . . . 62<br />
5.2.3 Autopilot controls . . . . . . . . . . . . . . . . . . . . . 63<br />
5.3 Mouse-controlled actions . . . . . . . . . . . . . . . . . . . . . . 63<br />
5.3.1 Normal mode . . . . . . . . . . . . . . . . . . . . . . . . 64<br />
5.3.2 Control mode . . . . . . . . . . . . . . . . . . . . . . . . 64<br />
5.3.3 View mode . . . . . . . . . . . . . . . . . . . . . . . . . 64<br />
5.4 Menu entries . . . . . . . . . . . . . . . . . . . . . . . . . . . . 65<br />
5.5 <strong>The</strong> Instrument Panel . . . . . . . . . . . . . . . . . . . . . . . . 69
CONTENTS 5<br />
5.6 <strong>The</strong> Head Up Display . . . . . . . . . . . . . . . . . . . . . . . . 69<br />
6 Features 71<br />
6.1 Multiplayer . . . . . . . . . . . . . . . . . . . . . . . . . . . . . 71<br />
6.1.1 Quick Start . . . . . . . . . . . . . . . . . . . . . . . . . 71<br />
6.1.2 Other Methods . . . . . . . . . . . . . . . . . . . . . . . 71<br />
6.1.3 Troubleshooting . . . . . . . . . . . . . . . . . . . . . . 72<br />
6.2 Aircraft Carrier . . . . . . . . . . . . . . . . . . . . . . . . . . . 73<br />
6.2.1 Starting on the Carrier . . . . . . . . . . . . . . . . . . . 74<br />
6.2.2 Launching from the Catapult . . . . . . . . . . . . . . . . 74<br />
6.2.3 Finding the Carrier - TACAN . . . . . . . . . . . . . . . 74<br />
6.2.4 Landing on the Carrier . . . . . . . . . . . . . . . . . . . 75<br />
6.3 Atlas . . . . . . . . . . . . . . . . . . . . . . . . . . . . . . . . . 75<br />
6.4 Multiple Displays . . . . . . . . . . . . . . . . . . . . . . . . . . 76<br />
6.5 Multiple Computer . . . . . . . . . . . . . . . . . . . . . . . . . 76<br />
6.5.1 Setup . . . . . . . . . . . . . . . . . . . . . . . . . . . . 76<br />
6.5.2 Basic Configuration . . . . . . . . . . . . . . . . . . . . 76<br />
6.5.3 Advanced Configuration . . . . . . . . . . . . . . . . . . 77<br />
6.6 Recording and Playback . . . . . . . . . . . . . . . . . . . . . . 77<br />
6.7 Text to Speech with Festival . . . . . . . . . . . . . . . . . . . . 78<br />
6.7.1 Installing the Festival system . . . . . . . . . . . . . . . . 78<br />
6.7.2 Running <strong>FlightGear</strong> with Voice Support . . . . . . . . . . 78<br />
6.7.3 Troubleshooting . . . . . . . . . . . . . . . . . . . . . . 79<br />
6.7.4 Installing more voices . . . . . . . . . . . . . . . . . . . 79<br />
6.8 Air-Air Refuelling . . . . . . . . . . . . . . . . . . . . . . . . . 80<br />
6.8.1 Setup . . . . . . . . . . . . . . . . . . . . . . . . . . . . 81<br />
6.8.2 Multiplayer Refueling . . . . . . . . . . . . . . . . . . . 82<br />
III Tutorials 83<br />
7 Tutorials 85<br />
7.1 In-flight Tutorials . . . . . . . . . . . . . . . . . . . . . . . . . . 85<br />
7.1.1 Cessna 172P tutorials . . . . . . . . . . . . . . . . . . . . 86<br />
7.2 <strong>FlightGear</strong> Tutorials . . . . . . . . . . . . . . . . . . . . . . . . . 86<br />
7.3 Other Tutorials . . . . . . . . . . . . . . . . . . . . . . . . . . . 86<br />
8 A Basic Flight Simulator Tutorial 89<br />
8.1 Foreword . . . . . . . . . . . . . . . . . . . . . . . . . . . . . . 89<br />
8.2 Starting Up . . . . . . . . . . . . . . . . . . . . . . . . . . . . . 90<br />
8.2.1 MS Windows . . . . . . . . . . . . . . . . . . . . . . . . 90<br />
8.2.2 Linux and other unices . . . . . . . . . . . . . . . . . . . 91<br />
8.2.3 In the dark? . . . . . . . . . . . . . . . . . . . . . . . . . 92<br />
8.3 <strong>The</strong> First Challenge - Flying Straight . . . . . . . . . . . . . . . . 92
6 CONTENTS<br />
8.4 Basic Turns . . . . . . . . . . . . . . . . . . . . . . . . . . . . . 99<br />
8.5 Taxiing on the ground . . . . . . . . . . . . . . . . . . . . . . . . 100<br />
8.5.1 Airspeed . . . . . . . . . . . . . . . . . . . . . . . . . . 101<br />
8.6 Advanced Turns . . . . . . . . . . . . . . . . . . . . . . . . . . . 103<br />
8.7 A Bit of Wieheisterology . . . . . . . . . . . . . . . . . . . . . . 105<br />
8.7.1 Engine control . . . . . . . . . . . . . . . . . . . . . . . 105<br />
8.7.2 Wings and speed . . . . . . . . . . . . . . . . . . . . . . 108<br />
8.7.3 <strong>The</strong> flaps . . . . . . . . . . . . . . . . . . . . . . . . . . 110<br />
8.7.4 <strong>The</strong> stall . . . . . . . . . . . . . . . . . . . . . . . . . . . 111<br />
8.7.5 <strong>The</strong> trim . . . . . . . . . . . . . . . . . . . . . . . . . . . 112<br />
8.7.6 What direction am I flying? . . . . . . . . . . . . . . . . 113<br />
8.7.7 A look around the panel . . . . . . . . . . . . . . . . . . 114<br />
8.8 Let’s Fly . . . . . . . . . . . . . . . . . . . . . . . . . . . . . . . 117<br />
8.8.1 A realistic take off . . . . . . . . . . . . . . . . . . . . . 117<br />
8.8.2 Landing . . . . . . . . . . . . . . . . . . . . . . . . . . . 118<br />
8.8.3 Engine Shutdown . . . . . . . . . . . . . . . . . . . . . . 120<br />
8.8.4 Aborted Landing . . . . . . . . . . . . . . . . . . . . . . 121<br />
8.9 Dealing with the Wind . . . . . . . . . . . . . . . . . . . . . . . 121<br />
8.9.1 Crosswind Take Off . . . . . . . . . . . . . . . . . . . . 123<br />
8.9.2 Crosswind Landing . . . . . . . . . . . . . . . . . . . . . 124<br />
8.9.3 Taxiing in the Wind . . . . . . . . . . . . . . . . . . . . . 124<br />
8.10 <strong>The</strong> autopilot . . . . . . . . . . . . . . . . . . . . . . . . . . . . 125<br />
8.11 What Next? . . . . . . . . . . . . . . . . . . . . . . . . . . . . . 126<br />
8.12 Thanks . . . . . . . . . . . . . . . . . . . . . . . . . . . . . . . . 127<br />
8.13 Flying Other Aircraft . . . . . . . . . . . . . . . . . . . . . . . . 127<br />
8.13.1 How to land the Cherokee Warrior II . . . . . . . . . . . . 128<br />
8.13.2 How to take off and land the Piper J3 Cub . . . . . . . . . 129<br />
8.13.3 How to take off and land a jet . . . . . . . . . . . . . . . 130<br />
8.13.4 How to take off and land the P-51D Mustang . . . . . . . 134<br />
8.13.5 How to take off and land the B-52 Stratofortress . . . . . 135<br />
9 A Cross Country Flight Tutorial 137<br />
9.1 Introduction . . . . . . . . . . . . . . . . . . . . . . . . . . . . . 137<br />
9.1.1 Disclaimer and Thanks . . . . . . . . . . . . . . . . . . . 137<br />
9.2 Flight Planning . . . . . . . . . . . . . . . . . . . . . . . . . . . 138<br />
9.3 Getting Up . . . . . . . . . . . . . . . . . . . . . . . . . . . . . 140<br />
9.3.1 Pre-Flight . . . . . . . . . . . . . . . . . . . . . . . . . . 140<br />
9.3.2 ATIS . . . . . . . . . . . . . . . . . . . . . . . . . . . . 140<br />
9.3.3 Radios . . . . . . . . . . . . . . . . . . . . . . . . . . . 141<br />
9.3.4 Altimeter and Compass . . . . . . . . . . . . . . . . . . . 143<br />
9.3.5 Take-Off . . . . . . . . . . . . . . . . . . . . . . . . . . 144<br />
9.4 Cruising . . . . . . . . . . . . . . . . . . . . . . . . . . . . . . . 144<br />
9.4.1 <strong>The</strong> Autopilot . . . . . . . . . . . . . . . . . . . . . . . . 144<br />
9.4.2 Navigation . . . . . . . . . . . . . . . . . . . . . . . . . 145
CONTENTS 7<br />
9.4.3 Mixture . . . . . . . . . . . . . . . . . . . . . . . . . . . 146<br />
9.5 Getting Down . . . . . . . . . . . . . . . . . . . . . . . . . . . . 147<br />
9.5.1 Air Traffic Control . . . . . . . . . . . . . . . . . . . . . 147<br />
9.5.2 <strong>The</strong> Traffic Pattern . . . . . . . . . . . . . . . . . . . . . 148<br />
9.5.3 Approach . . . . . . . . . . . . . . . . . . . . . . . . . . 150<br />
9.5.4 VASI . . . . . . . . . . . . . . . . . . . . . . . . . . . . 151<br />
9.5.5 Go Around . . . . . . . . . . . . . . . . . . . . . . . . . 152<br />
9.5.6 Clearing the Runway . . . . . . . . . . . . . . . . . . . . 152<br />
10 An IFR Cross Country Flight Tutorial 153<br />
10.1 Introduction . . . . . . . . . . . . . . . . . . . . . . . . . . . . . 153<br />
10.1.1 Disclaimer . . . . . . . . . . . . . . . . . . . . . . . . . 154<br />
10.2 Before Takeoff . . . . . . . . . . . . . . . . . . . . . . . . . . . 154<br />
10.2.1 Flight Planning . . . . . . . . . . . . . . . . . . . . . . . 154<br />
10.2.2 VHF Omnidirectional Range . . . . . . . . . . . . . . . . 155<br />
10.2.3 Takeoff . . . . . . . . . . . . . . . . . . . . . . . . . . . 159<br />
10.3 In the Air . . . . . . . . . . . . . . . . . . . . . . . . . . . . . . 159<br />
10.3.1 George I . . . . . . . . . . . . . . . . . . . . . . . . . . 160<br />
10.3.2 MISON Impossible . . . . . . . . . . . . . . . . . . . . . 160<br />
10.3.3 George II . . . . . . . . . . . . . . . . . . . . . . . . . . 161<br />
10.3.4 Staying the Course . . . . . . . . . . . . . . . . . . . . . 163<br />
10.3.5 Yet More Cross-Checks . . . . . . . . . . . . . . . . . . 164<br />
10.4 Getting Down . . . . . . . . . . . . . . . . . . . . . . . . . . . . 165<br />
10.4.1 Instrument Approach Procedures . . . . . . . . . . . . . . 165<br />
10.4.2 Nondirectional Beacons . . . . . . . . . . . . . . . . . . 166<br />
10.4.3 Procedure Turn . . . . . . . . . . . . . . . . . . . . . . . 169<br />
10.4.4 Chasing the Needle . . . . . . . . . . . . . . . . . . . . . 171<br />
10.4.5 FOOTO Time . . . . . . . . . . . . . . . . . . . . . . . . 172<br />
10.4.6 George III . . . . . . . . . . . . . . . . . . . . . . . . . . 172<br />
10.4.7 ILS Landings . . . . . . . . . . . . . . . . . . . . . . . . 173<br />
10.4.8 Intercepting the Localizer . . . . . . . . . . . . . . . . . 174<br />
10.4.9 Intercepting the Glide Slope . . . . . . . . . . . . . . . . 174<br />
10.4.10 Touchdown, Almost . . . . . . . . . . . . . . . . . . . . 175<br />
10.4.11 A Confession . . . . . . . . . . . . . . . . . . . . . . . . 176<br />
10.4.12 Touchdown, Not . . . . . . . . . . . . . . . . . . . . . . 176<br />
10.4.13 Touchdown . . . . . . . . . . . . . . . . . . . . . . . . . 177<br />
10.5 Epilogue . . . . . . . . . . . . . . . . . . . . . . . . . . . . . . . 178<br />
11 A Helicopter Tutorial 181<br />
11.1 Preface . . . . . . . . . . . . . . . . . . . . . . . . . . . . . . . 181<br />
11.2 Getting started . . . . . . . . . . . . . . . . . . . . . . . . . . . . 182<br />
11.3 Lift-Off . . . . . . . . . . . . . . . . . . . . . . . . . . . . . . . 183<br />
11.4 In the air . . . . . . . . . . . . . . . . . . . . . . . . . . . . . . . 183<br />
11.5 Back to Earth I . . . . . . . . . . . . . . . . . . . . . . . . . . . 184
8 CONTENTS<br />
11.6 Back to Earth II . . . . . . . . . . . . . . . . . . . . . . . . . . . 184<br />
IV Appendices 187<br />
V Annexes 189<br />
A Missed approach: If anything refuses to work 191<br />
A.1 <strong>FlightGear</strong> Problem Reports . . . . . . . . . . . . . . . . . . . . 191<br />
A.2 General problems . . . . . . . . . . . . . . . . . . . . . . . . . . 192<br />
A.3 Potential problems under Linux . . . . . . . . . . . . . . . . . . . 193<br />
A.4 Potential problems under Windows . . . . . . . . . . . . . . . . . 193<br />
B Landing: Some further thoughts before leaving the plane 197<br />
B.1 A Sketch on the History of <strong>FlightGear</strong> . . . . . . . . . . . . . . . 197<br />
B.1.1 Scenery . . . . . . . . . . . . . . . . . . . . . . . . . . . 198<br />
B.1.2 Aircraft . . . . . . . . . . . . . . . . . . . . . . . . . . . 199<br />
B.1.3 Environment . . . . . . . . . . . . . . . . . . . . . . . . 200<br />
B.1.4 User Interface . . . . . . . . . . . . . . . . . . . . . . . . 200<br />
B.2 Those, who did the work . . . . . . . . . . . . . . . . . . . . . . 202<br />
B.3 What remains to be done . . . . . . . . . . . . . . . . . . . . . . 210
Chapter 1<br />
Preface<br />
<strong>FlightGear</strong> is a free Flight Simulator developed cooperatively over the Internet<br />
by a group of flight simulation and programming enthusiasts. "<strong>The</strong> <strong>FlightGear</strong><br />
<strong>Manual</strong>" is meant to give beginners a guide in getting <strong>FlightGear</strong> up and running,<br />
and themselves into the air. It is not intended to provide complete documentation<br />
of all the features and add-ons of <strong>FlightGear</strong> but, instead, aims to give a new user<br />
the best start to exploring what <strong>FlightGear</strong> has to offer.<br />
This version of the document was written for <strong>FlightGear</strong> version 2.8.0. Users<br />
of earlier versions of <strong>FlightGear</strong> will still find this document useful, but some of<br />
the features described may not be present.<br />
This guide is split into three parts and is structured as follows.<br />
Part I: Installation<br />
Chapter 2, Want to have a free flight? Take <strong>FlightGear</strong>, introduces <strong>FlightGear</strong>,<br />
provides background on the philosophy behind it and describes the system requirements.<br />
In Chapter 3, Preflight: Installing <strong>FlightGear</strong>, you will find instructions for installing<br />
the binaries and additional scenery and aircraft.<br />
Part II: Flying with <strong>FlightGear</strong><br />
<strong>The</strong> following Chapter 4, Takeoff: How to start the program, describes how to<br />
actually start the installed program. It includes an overview on the numerous command<br />
line options as well as configuration files.<br />
Chapter 5, In-flight: All about instruments, keystrokes and menus, describes how<br />
to operate the program, i.e. how to actually fly with <strong>FlightGear</strong>. This includes a<br />
(hopefully) complete list of pre-defined keyboard commands, an overview on the<br />
menu entries, detailed descriptions on the instrument panel and HUD (head up<br />
display), as well as hints on using the mouse functions.<br />
Chapter 6, Features describes some of the special features that <strong>FlightGear</strong> offers<br />
to the advanced user.<br />
9
10 CHAPTER 1. PREFACE<br />
Part III: Tutorials<br />
Chapter 7, Tutorials, provides information on the many tutorials available for new<br />
pilots.<br />
Chapter 8, A Basic Flight Simulator Tutorial, provides a tutorial on the basics of<br />
flying, illustrated with many examples on how things actually look in <strong>FlightGear</strong>.<br />
Chapter 9, A Cross Country Flight Tutorial, describes a simple cross-country flight<br />
in the San Fransisco area that can be run with the default installation.<br />
Chapter 10, An IFR Cross Country Flight Tutorial, describes a similar crosscountry<br />
flight making use of the instruments to successfully fly in the clouds under<br />
Instrument Flight Rules (IFR).<br />
Appendices<br />
In Appendix A, Missed approach: If anything refuses to work, we try to help you<br />
work through some common problems faced when using <strong>FlightGear</strong>.<br />
In the final Appendix B, Landing: Some further thoughts before leaving the plane,<br />
we would like to give credit to those who deserve it, sketch an overview on the<br />
development of <strong>FlightGear</strong> and point out what remains to be done.<br />
1.1 Condensed Reading<br />
For those who don’t want to read this document from cover to cover, we suggest<br />
reading the following sections in order to provide an easy way to get into the air:<br />
Installation : 3<br />
Starting the simulator : 4<br />
Using the simulator : 5<br />
1.2 Instructions For the Truly Impatient<br />
We know most people hate reading manuals. If you are sure the graphics driver<br />
for your card supports OpenGL (check documentation; for instance in general<br />
NVIDIA graphics cards do) and you are using Windows, Mac OS-X or Linux,<br />
you can probably skip at least Part I of this manual and use pre-compiled binaries.<br />
<strong>The</strong>se as well as instructions on how to set them up, can be found at<br />
http://www.flightgear.org/Downloads/.<br />
If you are running Linux, you may find that <strong>FlightGear</strong> is bundled with your<br />
distribution.<br />
Once you have downloaded and installed the binaries, see Chapter 4 for details<br />
on starting the simulator.
1.3. FURTHER READING 11<br />
1.3 Further Reading<br />
While this introductory guide is meant to be self contained, we strongly suggest<br />
having a look into further documentation, especially in case of trouble:<br />
• A handy leaflet on operation for printout can be found in base package under<br />
/<strong>FlightGear</strong>/Docs, and is also available from<br />
http://www.flightgear.org/Docs/FGShortRef.pdf.<br />
• Additional user documentation on particular features and function is available<br />
within the base package under the directory /<strong>FlightGear</strong>/Docs.<br />
• <strong>The</strong>re is an official <strong>FlightGear</strong> wiki available at http://wiki.flightgear.org.
12 CHAPTER 1. PREFACE
Part I<br />
Installation<br />
13
Chapter 2<br />
Want to have a free flight? Take<br />
<strong>FlightGear</strong>!<br />
2.1 Yet Another Flight Simulator?<br />
Did you ever want to fly a plane yourself, but lacked the money or ability to do so?<br />
Are you a real pilot looking to improve your skills without having to take off? Do<br />
you want to try some dangerous maneuvers without risking your life? Or do you<br />
just want to have fun with a more serious game without any violence? If any of<br />
these questions apply to you, PC flight simulators are just for you.<br />
You may already have some experience using Microsoft’s c○ Flight Simulator<br />
or any other of the commercially available PC flight simulators. As the price tag of<br />
those is usually within the $50 range, buying one of them should not be a serious<br />
problem given that running any serious PC flight simulator requires PC hardware<br />
within the $1500 range, despite dropping prices.<br />
With so many commercially available flight simulators, why would we spend<br />
thousands of hours of programming and design work to build a free flight simulator?<br />
Well, there are many reasons, but here are the major ones:<br />
• All of the commercial simulators have a serious drawback: they are made<br />
by a small group of developers defining their properties according to what<br />
is important to them and providing limited interfaces to end users. Anyone<br />
who has ever tried to contact a commercial developer would agree that getting<br />
your voice heard in that environment is a major challenge. In contrast,<br />
<strong>FlightGear</strong> is designed by the people and for the people with everything out<br />
in the open.<br />
• Commercial simulators are usually a compromise of features and usability.<br />
Most commercial developers want to be able to serve a broad segment of<br />
the population, including serious pilots, beginners, and even casual gamers.<br />
In reality the result is always a compromise due to deadlines and funding.<br />
As <strong>FlightGear</strong> is free and open, there is no need for such a compromise.<br />
15
16 2. WANT TO HAVE A FREE FLIGHT?<br />
We have no publisher breathing down our necks, and we’re all volunteers<br />
that make our own deadlines. We are also at liberty to support markets that<br />
no commercial developer would consider viable, like the scientific research<br />
community.<br />
• Due to their closed-source nature, commercial simulators keep developers<br />
with excellent ideas and skills from contributing to the products. With Flight-<br />
Gear, developers of all skill levels and ideas have the potential to make a<br />
huge impact on the project. Contributing to a project as large and complex<br />
as <strong>FlightGear</strong> is very rewarding and provides the developers with a great<br />
deal of pride in knowing that we are shaping the future of a great simulator.<br />
• Beyond everything else, it’s just plain fun! I suppose you could compare us<br />
to real pilots that build kit-planes or scratch-builts. Sure, we can go out a<br />
buy a pre-built aircraft, but there’s just something special about building one<br />
yourself.<br />
<strong>The</strong> points mentioned above form the basis of why we created <strong>FlightGear</strong>.<br />
With those motivations in mind, we have set out to create a high-quality flight<br />
simulator that aims to be a civilian, multi-platform, open, user-supported, and userextensible<br />
platform. Let us take a closer look at each of these characteristics:<br />
• Civilian: <strong>The</strong> project is primarily aimed at civilian flight simulation. It<br />
should be appropriate for simulating general aviation as well as civilian aircraft.<br />
Our long-term goal is to have <strong>FlightGear</strong> FAA-approved as a flight<br />
training device. To the disappointment of some users, it is currently not a<br />
combat simulator; however, these features are not explicitly excluded. We<br />
just have not had a developer that was seriously interested in systems necessary<br />
for combat simulation.<br />
• Multi-platform: <strong>The</strong> developers are attempting to keep the code as platformindependent<br />
as possible. This is based on their observation that people interested<br />
in flight simulations run quite a variety of computer hardware and<br />
operating systems. <strong>The</strong> present code supports the following Operating Systems:<br />
– Linux (any distribution and platform),<br />
– Windows NT/2000/XP/Seven (Intel/AMD platform),<br />
– Windows 95/98/ME,<br />
– BSD UNIX,<br />
– Sun-OS,<br />
– Mac OS X<br />
At present, there is no other known flight simulator – commercial or free –<br />
supporting such a broad range of platforms.
2.1 YET ANOTHER FLIGHT SIMULATOR? 17<br />
• Open: <strong>The</strong> project is not restricted to a static or elite cadre of developers.<br />
Anyone who feels they are able to contribute is most welcome. <strong>The</strong> code (including<br />
documentation) is copyrighted under the terms of the GNU General<br />
Public License (GPL).<br />
<strong>The</strong> GPL is often misunderstood. In simple terms it states that you can copy<br />
and freely distribute the program(s) so licensed. You can modify them if you<br />
like and even charge as much money as want to for the distribution of the<br />
modified or original program. However, when distributing the software you<br />
must make it available to the recipients in source code as well and it must<br />
retain the original copyrights. In short:<br />
”You can do anything with the software except make it non-free”.<br />
<strong>The</strong> full text of the GPL can be obtained from the <strong>FlightGear</strong> source code or<br />
from http://www.gnu.org/copyleft/gpl.html.<br />
• User-supported and user-extensible: Unlike most commercial simulators,<br />
<strong>FlightGear</strong>’s scenery and aircraft formats, internal variables, APIs, and everything<br />
else are user accessible and documented from the beginning. Even<br />
without any explicit development documentation (which naturally has to be<br />
written at some point), one can always go to the source code to see how<br />
something works. It is the goal of the developers to build a basic engine<br />
to which scenery designers, panel engineers, maybe adventure or ATC routine<br />
writers, sound artists, and others can build upon. It is our hope that the<br />
project, including the developers and end users, will benefit from the creativity<br />
and ideas of the hundreds of talented “simmers” around the world.<br />
Without doubt, the success of the Linux project, initiated by Linus Torvalds, inspired<br />
several of the developers. Not only has Linux shown that distributed development<br />
of highly sophisticated software projects over the Internet is possible,<br />
it has also proven that such an effort can surpass the level of quality of competing<br />
commercial products.
18 2. WANT TO HAVE A FREE FLIGHT?<br />
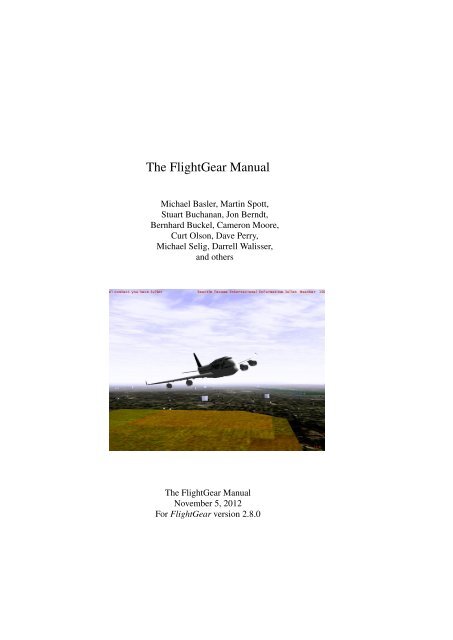
Fig. 1: <strong>FlightGear</strong> under UNIX: Bad approach to San Francisco International -<br />
by one of the authors of this manual. . .<br />
2.2 System Requirements<br />
In comparison to other recent flight simulators, the system requirements for Flight-<br />
Gear are not extravagant. A medium speed AMD Athlon64 or Intel P4, even a<br />
decent AMD Athlon/K7 or an Intel PIII should be sufficient to handle <strong>FlightGear</strong><br />
pretty well, given you have a proper 3D graphics card.<br />
One important prerequisite for running <strong>FlightGear</strong> is a graphics card whose<br />
driver supports OpenGL. If you don’t know what OpenGL is, the overview given<br />
at the OpenGL website<br />
http://www.opengl.org<br />
says it best: “Since its introduction in 1992, OpenGL has become the industry’s<br />
most widely used and supported 2-D and 3D graphics application programming<br />
interface (API)...”.<br />
<strong>FlightGear</strong> does not run (and will never run) on a graphics board which only<br />
supports Direct3D/DirectX. Contrary to OpenGL, Direct3D is a proprietary interface,<br />
being restricted to the Windows operating system.<br />
You may be able to run <strong>FlightGear</strong> on a computer that features a 3D video card<br />
not supporting hardware accelerated OpenGL – and even on systems without 3D<br />
graphics hardware at all. However, the absence of hardware accelerated OpenGL
2.3. CHOOSING A VERSION 19<br />
support can bring even the fastest machine to its knees. <strong>The</strong> typical signal for<br />
missing hardware acceleration are frame rates below 1 frame per second.<br />
Any modern 3D graphics featuring OpenGL support will do. For Windows<br />
video card drivers that support OpenGL, visit the home page of your video card<br />
manufacturer. You should note that sometimes OpenGL drivers are provided by<br />
the manufacturers of the graphics chip instead of by the makers of the board. If<br />
you are going to buy a graphics card for running <strong>FlightGear</strong>, an NVIDIA GeForce<br />
card is recommended, as these tend to have better OpenGL support than AMD/ATI<br />
Radeon. 256MB of dedicated graphics memory will be more than adequate - many<br />
people run <strong>FlightGear</strong> happily on less.<br />
To install the executable and basic scenery, you will need around 500 MB of<br />
free disk space. In case you want/have to compile the program yourself you will<br />
need about another 500 MB for the source code and for temporary files created during<br />
compilation. This does not include the development environment, which will<br />
vary in size depending on the operating system and environment being used. Windows<br />
users can expect to need approximately 300 MB of additional disk space for<br />
the development environment. Linux and other UNIX machines should have most<br />
of the development tools already installed, so there is likely to be little additional<br />
space needed on those platforms.<br />
For the sound effects, any capable sound card should suffice. Due to its flexible<br />
design, <strong>FlightGear</strong> supports a wide range of joysticks and yokes as well as rudder<br />
pedals under Linux and Windows. <strong>FlightGear</strong> can also provide interfaces to fullmotion<br />
flight chairs.<br />
<strong>FlightGear</strong> is being developed primarily under Linux, a free UNIX clone (together<br />
with lots of GNU utilities) developed cooperatively over the Internet in<br />
much the same spirit as <strong>FlightGear</strong> itself. <strong>FlightGear</strong> also runs and is partly developed<br />
under several flavors of Windows. Building <strong>FlightGear</strong> is also possible<br />
on a Mac OS X and several different UNIX/X11 workstations. Given you have<br />
a proper compiler installed, <strong>FlightGear</strong> can be built under all of these platforms.<br />
<strong>The</strong> primary compiler for all platforms is the free GNU C++ compiler (the Cygnus<br />
Cygwin compiler under Win32).<br />
If you want to run <strong>FlightGear</strong>under Mac OS X, you need to have Mac OS X<br />
10.4 or higher. Minimum hardware requirement is either a Power PC G4 1.0GHz<br />
or an Intel Mac, but We suggest you have MacBook Pro, Intel iMac, Mac Pro, or<br />
Power Mac (Power PC G5) for comfortable flight.<br />
2.3 Choosing A Version<br />
It is recommended that you run the latest official release, which are typically produced<br />
annually, and which are used to create the the pre-compiled binaries. It is<br />
available from<br />
http://www.flightgear.org/Downloads/ If you really want to get the very latest<br />
and greatest (and, at times, buggiest) code, you can clone the sources at
20 2. WANT TO HAVE A FREE FLIGHT?<br />
http://www.gitorious.org/fg.<br />
to get the recent code. A detailed description of how to set this up for Flight-<br />
Gear can be found at<br />
http://wiki.flightgear.org/GIT.<br />
2.4 Flight Dynamics Models<br />
Historically, <strong>FlightGear</strong> was based on a flight model it inherited (together with the<br />
Navion airplane) from LaRCsim. As this had several limitations (most importantly,<br />
many characteristics were hard wired in contrast to using configuration files), there<br />
were several attempts to develop or include alternative flightmodels. As a result,<br />
<strong>FlightGear</strong> supports several different flight models, to be chosen from at runtime.<br />
• Possibly the most important one is the JSB flight model developed by Jon<br />
Berndt. <strong>The</strong> JSB flight model is part of a stand-alone project called JSBSim:<br />
http://jsbsim.sourceforge.net/.<br />
• Andrew Ross created another flight model called YASim for Yet Another Simulator.<br />
YASim takes a fundamentally different approach to many other FDMs<br />
by being based on geometry information rather than aerodynamic coefficients.<br />
YASim has a particularly advanced helicopter FDM.<br />
• Christian Mayer developed a flight model of a hot air balloon. Curt Olson<br />
subsequently integrated a special “UFO” slew mode, which helps you to<br />
quickly fly from point A to point B.<br />
• Finally, there is the UIUC flight model, developed by a team at the University<br />
of Illinois at Urbana-Champaign. This work was initially geared toward<br />
modeling aircraft in icing conditions, but now encompasses “nonlinear”<br />
aerodynamics, which result in more realism in extreme attitudes, such<br />
as stall and high angle of attack flight. Two good examples that illustrate<br />
this capability are the Airwave Xtreme 150 hang glider and the 1903 Wright<br />
Flyer. More details of the UIUC flight model can be found at<br />
http://www.ae.illinois.edu/m-selig/apasim/Aircraft-uiuc.html<br />
It is even possible to drive <strong>FlightGear</strong>’s scene display using an external FDM running<br />
on a different computer or via named pipe on the local machine – although<br />
this might not be a setup recommended to people just getting in touch with Flight-<br />
Gear.<br />
2.5 About This Guide<br />
<strong>The</strong>re is little, if any, material in this Guide that is presented here exclusively.<br />
You could even say with Montaigne that we “merely gathered here a big bunch
2.5. ABOUT THIS GUIDE 21<br />
of other men’s flowers, having furnished nothing of my own but the strip to hold<br />
them together”. Most (but fortunately not all) of the information herein can also be<br />
obtained from the <strong>FlightGear</strong> web site located at<br />
http://www.flightgear.org/<br />
<strong>The</strong> <strong>FlightGear</strong> <strong>Manual</strong> is intended to be a first step towards a complete Flight-<br />
Gear documentation. <strong>The</strong> target audience is the end-user who is not interested<br />
in the internal workings of OpenGL or in building his or her own scenery. It is<br />
our hope that someday there will be an accompanying <strong>FlightGear</strong> Programmer’s<br />
Guide a <strong>FlightGear</strong> Scenery Design Guide, describing the Scenery tools now packaged<br />
as TerraGear; and a <strong>FlightGear</strong> Flight School package.<br />
We kindly ask you to help us refine this document by submitting corrections,<br />
improvements, suggestions and translations. All users are invited to<br />
contribute descriptions of alternative setups (graphics cards, operating systems<br />
etc.). We will be more than happy to include those in future versions of<br />
<strong>The</strong> <strong>FlightGear</strong> <strong>Manual</strong> (of course not without giving credit to the authors).
22 2. WANT TO HAVE A FREE FLIGHT?
Chapter 3<br />
Preflight: Installing <strong>FlightGear</strong><br />
To run <strong>FlightGear</strong> you need to install the binaries. Once you’ve done this you may<br />
install additional scenery and aircraft if you wish.<br />
Pre-compiled binaries for the latest release are available for<br />
• Windows - any flavor,<br />
• Mac OS X,<br />
• Linux.<br />
To download them go to<br />
http://www.flightgear.org/Downloads/binary.shtml<br />
and follow the instructions provided on the page.<br />
3.1 Installing scenery<br />
Detailed <strong>FlightGear</strong> scenery is available for the entire world, allowing you to fly<br />
everywhere from the Himalaya mountains to rural Kansas. <strong>The</strong> <strong>FlightGear</strong> base<br />
package contains scenery for a small area around San Francisco, so to fly elsewhere<br />
you will need to download additional scenery.<br />
Each piece of scenery is packaged into a compressed archive, or tarball, in a 10<br />
degree by 10 degree chunk. Each tarball is named after the 10x10 degree chunk it<br />
represents, for example w130n50.tgz.<br />
You can download scenery from a clickable map here:<br />
http://www.flightgear.org/Downloads/scenery.html<br />
Alternatively, you can support the <strong>FlightGear</strong> project by purchasing a complete<br />
set of scenery for the entire world from here:<br />
http://www.flightgear.org/dvd/<br />
Once you have downloaded the tarball onto your computer, you need to find<br />
the Scenery directory of your <strong>FlightGear</strong> installation.<br />
23
24 CHAPTER 3. PREFLIGHT: INSTALLING FLIGHTGEAR<br />
• For Windows, this directory is likely to be<br />
c:\Program Files\<strong>FlightGear</strong>\data\Scenery.<br />
• For Unices, it is usually<br />
/usr/local/share/<strong>FlightGear</strong>/data/Scenery.<br />
• For Mac OS X, it is usually either<br />
/Applications/<strong>FlightGear</strong>.app/Contents/Resources/data/Scenery.<br />
To install the scenery, uncompress the tarball into the Scenery directory.<br />
Most operating system provide tools to uncompress tarballs. If you cannot uncompress<br />
the tarball, install an extractor program such as 7-zip (http://www.7-zip.org/).<br />
Note that you should not decompress the numbered scenery files inside the<br />
tarball like 958402.gz - this will be done by <strong>FlightGear</strong> on the fly.<br />
Once you have uncompressed the tarball, the Terrain and Objects directories<br />
will contain additional sub-directories with your new scenery inside.<br />
To use the new scenery, simply select a starting airport within the new scenery.<br />
If you are using the <strong>FlightGear</strong> Launcher, you will need to press the Refresh button<br />
before you select your airport.<br />
3.1.1 MS Windows Vista/7<br />
If you are using Windows Vista or Windows 7, you may find that Windows installs<br />
downloaded scenery (and aircraft) to your Virtual Store:<br />
c:\Users\(Your Name)\AppData\Local\VirtualStore\Program Files\<strong>FlightGear</strong>\Scenery<br />
If it does this, you need to copy the Terrain and Objects directories manually<br />
to your real <strong>FlightGear</strong> Scenery directory as described above.<br />
3.1.2 Mac OS X<br />
You may install the downloaded scenery data and aircraft using the GUI launcher.<br />
Pressing Install Add-On data on the Advanced Features » Others tab opens up<br />
the file browser window. Selecting one or more scenery data files will install the<br />
scenery data into /Applications/<strong>FlightGear</strong>.app/Contents/Resources/data/Scenery.<br />
Acceptable formats for the scenery data are one of zip, tar.gz, tgz, tar, and extracted<br />
folder. If the installation via the GUI launcher failure for some reason, you still<br />
have an alternative way to install the data. Opening the data folder by pressing<br />
“Open data folder” on the Others tab will pop up an Finder window for the data<br />
folder. Dragging an aircraft folder to data/Aircraft folder (or a scenery folder to<br />
data/Scenery folder) under the data folder will get the job done.
3.1. INSTALLING SCENERY 25<br />
3.1.3 FG_SCENERY<br />
If you would prefer to keep your downloaded scenery separate from the core installation,<br />
you can do so by setting your FG_SCENERY environment variable.<br />
This is where <strong>FlightGear</strong> looks for Scenery files. It consists of a list of directories<br />
that will be searched in order. <strong>The</strong> directories are separated by “:” on Unix<br />
(including Mac OS X) and “;” on Windows.<br />
For example, on Linux a FG_SCENERY environment variable set to<br />
/home/jsmith/WorldScenery:/usr/local/share/Flightgear/data/Scenery<br />
searches for scenery in /home/jsmith/WorldScenery first, followed by<br />
/usr/local/share/Flightgear/data/Scenery.<br />
On Windows, a FG_SCENERY environment variable set to<br />
c:\Program Files\<strong>FlightGear</strong>\data\Scenery;c:\data\WorldScenery<br />
searches for scenery in c:\Program Files\<strong>FlightGear</strong>\data\Scenery<br />
first, followed by c:\data\WorldScenery<br />
Setting up environment variables on different platforms is beyond the scope of<br />
this document.<br />
3.1.4 Fetch Scenery as you fly<br />
<strong>FlightGear</strong> is able to fetch the Scenery as you fly, if you have a permanent Internet<br />
connection at your disposal. Create an empty ‘working’ directory for TerraSync,<br />
writable to the user and point <strong>FlightGear</strong> at this directory using the FG_SCENERY<br />
variable (as explained above). Do not let TerraSync download Scenery into your<br />
pre-installed Scenery directory.<br />
Within <strong>FlightGear</strong> itself, select the Scenery Download option under the Environment<br />
menu. <strong>The</strong>n simply select the directory you created above and enable<br />
automatic scenery download.<br />
<strong>The</strong>re is a chicken/egg problem when you first start up in a brand new area.<br />
<strong>FlightGear</strong> is expecting the Scenery to be there now but it may not have been<br />
fetched yet. <strong>The</strong>refore, once TerraSync has loaded the new tile (which you can see<br />
from the Status section of the Scenery Download dialog), select the <strong>Manual</strong> Refresh<br />
button to reload the scenery. If this still causes problems, restart <strong>FlightGear</strong>.<br />
One major benefit of TerraSync is that it always fetches the latest and greatest<br />
Scenery from the <strong>FlightGear</strong> World (Custom) Scenery Project and therefore allows<br />
you to pick up incremental updates independant of the comprehensive World<br />
Scenery releases, which are generally synchronized with <strong>FlightGear</strong> releases.<br />
Running TerraSync as a separate tool<br />
It is also possible to run TerraSync as an external tool.<br />
On Mac OS X or Windows, just checking “Download scenery on the fly” on the<br />
GUI launcher launches TerraSync as a separate process automatically for down-
26 CHAPTER 3. PREFLIGHT: INSTALLING FLIGHTGEAR<br />
loading the Scenery around your aircraft, so you don’t have to specify the atlas<br />
option or FG_SCENERY at all.<br />
Alternatively you can run the terrasync program directly. It talks to <strong>FlightGear</strong><br />
using the ‘Atlas’ protocol, so call <strong>FlightGear</strong> with the:<br />
--atlas=socket,out,1,localhost,5505,udp<br />
command line parameter and tell TerraSync about the port number you’re using<br />
as well as the respective directory:<br />
terrasync -p 5505 -S -d /usr/local/share/TerraSync<br />
Note that TerraSync (when called with the "-S" command line switch, as recommended)<br />
is going to download Scenery via the Subversion protocol over HTTP.<br />
Thus, if your Internet access is set up to use a HTTP proxy, plase make yourself<br />
aware how to configure the "libsvn" Subversion client for use of a proxy. If you<br />
are using Mac OS X 10.5, <strong>The</strong> GUI launcher automatically specifies -S if svn is<br />
available.<br />
3.1.5 Creating your own Scenery<br />
If you are interested in generating your own Scenery, have a look at TerraGear -<br />
the tools that generate the Scenery for <strong>FlightGear</strong>:<br />
http://wiki.flightgear.org/TerraGear<br />
<strong>The</strong> most actively maintained source tree of the TerraGear toolchain is colocated<br />
at the <strong>FlightGear</strong> landuse data <strong>Mapserver</strong>:<br />
http://mapserver.flightgear.org/git/gitweb.pl.<br />
3.2 Installing aircraft<br />
<strong>The</strong> base <strong>FlightGear</strong> package contains only a small subset of the aircraft that are<br />
available for <strong>FlightGear</strong>. Developers have created a wide range of aircraft, from<br />
WWII fighters like the Spitfire, to passenger planes like the Boeing 747.<br />
You can download aircraft from<br />
http://www.flightgear.org/download/aircraft/<br />
Simply download the file and uncompress it into the data/Aircraft subdirectory<br />
of your installation. <strong>The</strong> aircraft are downloaded as .zip files. Once you<br />
have uncompressed them, there will be a new sub-directory in your data/Aircraft<br />
directory containing the aircraft. Next time you run <strong>FlightGear</strong>, the new aircraft<br />
will be available.<br />
On Mac OS X, you may use the GUI launcher to install the downloaded aircraft<br />
files as described in section 3.1.2.
3.3. INSTALLING DOCUMENTATION 27<br />
3.3 Installing documentation<br />
Most of the packages named above include the complete <strong>FlightGear</strong> documentation<br />
including a PDF version of <strong>The</strong> <strong>FlightGear</strong> <strong>Manual</strong> intended for pretty printing<br />
using Adobe’s Acrobat Reader, available from<br />
http://www.adobe.com/products/acrobat/<br />
Moreover, if properly installed, the HTML version can be accessed via Flight-<br />
Gear’s help menu entry.<br />
Besides, the source code contains a directory docs-mini containing numerous<br />
ideas on and solutions to special problems. This is also a good place for further<br />
reading.
28 CHAPTER 3. PREFLIGHT: INSTALLING FLIGHTGEAR
Part II<br />
Flying with <strong>FlightGear</strong><br />
29
Chapter 4<br />
Takeoff: How to start the<br />
program<br />
4.1 Environment Variables<br />
<strong>The</strong>re are two environment variables that must be defined to run <strong>FlightGear</strong>. <strong>The</strong>se<br />
tell <strong>FlightGear</strong> where to find its data and scenery.<br />
You can set them in a number of ways depending on your platform and requirements.<br />
4.1.1 FG_ROOT<br />
This is where <strong>FlightGear</strong> will find data files such as aircraft, navigational beacon<br />
locations, airport frequencies. This is the data subdirectory of where you installed<br />
<strong>FlightGear</strong>. e.g. /usr/local/share/<strong>FlightGear</strong>/data or c:\Program<br />
Files\<strong>FlightGear</strong>\data.<br />
4.1.2 FG_SCENERY<br />
This is where <strong>FlightGear</strong> will look for scenery files. It consists of a list of directories<br />
that will be searched in order. <strong>The</strong> directories are separated by “:” on Unix<br />
and “;” on Windows. e.g.<br />
/home/joebloggs/WorldScenery:/usr/local/share/<strong>FlightGear</strong>/data/Scenery<br />
or<br />
c:\Program Files\<strong>FlightGear</strong>\data\Scenery;c:\Program Files\<strong>FlightGear</strong>\data\WorldScenery.<br />
4.1.3 Environment Variables on Windows and Mac OS X<br />
<strong>The</strong> graphical wizard on Windows and the GUI launcher on Mac OS X internally<br />
define these environment variables so you don’t have to define these yourself. However,<br />
in case you launch <strong>FlightGear</strong> from command-line, you need to explicitly<br />
define these variables.<br />
31
32 4. TAKEOFF<br />
4.2 Launching the simulator under Unix/Linux<br />
Fig. 3: Ready for takeoff: Waiting at the default startup position at San Francisco<br />
Intl., KSFO.<br />
Before you can run <strong>FlightGear</strong>, you need to set a couple of environment variables:<br />
• You must add /usr/local/share/<strong>FlightGear</strong>/lib to your LD_LIBRARY_PATH<br />
• FG_ROOT must be set to the data directory of your <strong>FlightGear</strong> installation.<br />
e.g. /usr/local/share/<strong>FlightGear</strong>/data.<br />
• FG_SCENERY should be a list of scenery directories, separated by ”:”. This<br />
works like PATH when searching for scenery. e.g. $FG_ROOT/Scenery:$FG_ROOT/WorldS<br />
To add these in the Bourne shell (and compatibles):<br />
LD_LIBRARY_PATH=/usr/local/share/<strong>FlightGear</strong>/lib:$LD_LIBRARY_PATH<br />
export LD_LIBRARY_PATH<br />
FG_HOME=/usr/local/share/<strong>FlightGear</strong><br />
export FG_HOME<br />
FG_ROOT=/usr/local/share/<strong>FlightGear</strong>/data<br />
export FG_ROOT<br />
FG_SCENERY=$FG_ROOT/Scenery:$FG_ROOT/WorldScenery<br />
export FG_SCENERY
4.3. LAUNCHING THE SIMULATOR UNDER WINDOWS 33<br />
or in C shell (and compatibles):<br />
setenv LD_LIBRARY_PATH=\<br />
/usr/local/share/<strong>FlightGear</strong>/lib:$LD_LIBRARY_PATH<br />
setenv FG_HOME=/usr/local/share/<strong>FlightGear</strong><br />
setenv FG_ROOT=/usr/local/share/<strong>FlightGear</strong>/data<br />
setenv FG_SCENERY=\<br />
$FG_HOME/Scenery:$FG_ROOT/Scenery:$FG_ROOT/WorldScenery<br />
Once you have these environment variables set up, simply start <strong>FlightGear</strong><br />
by running fgfs --option1 --option2... Command-line options are<br />
described in Chapter 4.5.<br />
4.3 Launching the simulator under Windows<br />
<strong>The</strong> pre-built windows binaries come complete with a graphical wizard to start<br />
<strong>FlightGear</strong>. Simply double-click on the <strong>FlightGear</strong> Launcher Start Menu<br />
item, or the icon on the Desktop. <strong>The</strong> launcher allows you to select your aircraft,<br />
the start airport and runway, time of day, current weather, and lots of other settings.<br />
Fig. 4: <strong>The</strong> <strong>FlightGear</strong> Launcher<br />
<strong>The</strong> first time your run it, you will be asked to set your FG_ROOT variable (normally<br />
c:\Program Files\<strong>FlightGear</strong>\data) and FG_SCENERY. This should<br />
be a list of the directories where you have installed scenery, typically c:\Program<br />
Files\<strong>FlightGear</strong>\data\Scenery.
34 4. TAKEOFF<br />
If you set invalid values or change your scenery directories later, you can<br />
change the settings by pressing the ”Prev” button from the first page of the launcher.<br />
4.3.1 Launching from the command line<br />
Alternatively, you can run <strong>FlightGear</strong> from the command line. To do this, you need<br />
to set up the FG_ROOT and FG_SCENERY environment variables manually.<br />
Open a command shell, change to the directory where your binary resides (typically<br />
something like c:\Program Files\<strong>FlightGear</strong>\bin\Win32), set<br />
the environment variables by typing<br />
SET FG_HOME="c:\Program Files\<strong>FlightGear</strong>"<br />
SET FG_ROOT="c:\Program Files\<strong>FlightGear</strong>\data"<br />
SET FG_SCENERY="c:\Program Files\<strong>FlightGear</strong>\data\Scenery"<br />
and invoke <strong>FlightGear</strong> (within the same Command shell, as environment settings<br />
are only valid locally within the same shell) via<br />
fgfs --option1 --option2... Command-line options are described<br />
in Chapter 4.5. Of course, you can create a batch file with a Windows text editor<br />
(like notepad) using the lines above. For maximum performance it is recommended<br />
that you to minimize (iconize) the text output window while running <strong>FlightGear</strong>.<br />
4.4 Launching the simulator under Mac OS X<br />
<strong>The</strong> prebuilt binary package for Mac OS X comes with the GUI launcher. Simply<br />
double-click the <strong>FlightGear</strong> icon on /Applications folder shows up the GUI<br />
launcher window as shown in Fig. 5. <strong>The</strong> launcher allows you to :<br />
• Select an aircraft and an airport<br />
• Enable/Disable automatic scenery download (using TerraSync)<br />
• Enable/Disable the Navigation Map (Atlas)<br />
• Launch <strong>FlightGear</strong><br />
<strong>The</strong> following sections describe the use of these features.
4.4. LAUNCHING THE SIMULATOR UNDER MAC OS X 35<br />
Fig. 5: <strong>The</strong> GUI Launcher for Mac OS X<br />
4.4.1 Selecting an aircraft and an airport<br />
At the launcher window, you can select an aircraft and an airport by clicking gear<br />
buttons at the right end of the airport/aircraft name. <strong>The</strong> thumbnail image of a<br />
selected aircraft will show up at the image panel on the window. <strong>The</strong> airport that<br />
you select here will be the starting point of your flight. <strong>FlightGear</strong> uses ICAO<br />
4-letter airport code, which is composed with one or two prefix letters followed by<br />
a two or three letter airport code. For example, the ICAO code for San Francisco<br />
International Airport is KSFO. “K” in this case is the prefix for <strong>The</strong> United States,<br />
and SFO is the airport code for San Francisco International Airport. You can use<br />
Advanced features » Position or Aircraft tab to find an airport or an aircraft.<br />
4.4.2 Enabling on-the-fly scenery downloading<br />
By checking Download scenery on the fly at the launcher window, the scenery data<br />
will be downloaded while you’re flying using TerraSync. <strong>The</strong> scenery downloader<br />
will install the scenery data into<br />
/Applications/<strong>FlightGear</strong>.app/Contents/Resouces/data/Scenery-Terrasync.<br />
4.4.3 Enabling Navigation Map (Atlas)<br />
<strong>The</strong> Mac version of <strong>FlightGear</strong> includes Atlas, the navigation map that helps your<br />
flight plan, for your convenience. Checking this option will automatically launch<br />
Atlas when you start the flight. You don’t have to specify any Atlas options. <strong>The</strong><br />
GUI launcher will specify these for you.
36 4. TAKEOFF<br />
4.4.4 Launching <strong>FlightGear</strong> - the simulator<br />
Clicking Start Flight button at the launcher window opens up another window - the<br />
<strong>FlightGear</strong> main window. <strong>FlightGear</strong> immediately starts loading tons of data required<br />
for simulation. It may take a while on slower machines to load everything.<br />
4.4.5 Advanced Features<br />
<strong>FlightGear</strong> has many features and options that you can specify at launch time.<br />
Some of these are not changeable from the menu in the <strong>FlightGear</strong> main window.<br />
To enable / disable these features, click the triangle-shaped button at the left-bottom<br />
of the launcher window. This displays the advanced features tabs. All settings are<br />
saved so you don’t have to respecify them.<br />
General, Features, and Rendering tabs<br />
<strong>The</strong>se tabs let you specify some of <strong>FlightGear</strong> options:<br />
• Save preferences on exit: lets <strong>FlightGear</strong> save preferences that you changed<br />
from the menu in the <strong>FlightGear</strong> (fgfs) main window will be saved to<br />
$HOME/.fgfs/autosave.xml.<br />
• Control: specifies the control device you will use in <strong>FlightGear</strong>. auto, joystick,<br />
mouse, and keyboard are available. You can leave it as auto unless you<br />
really want to change it manually.<br />
• Unit: specifies the unit used in <strong>FlightGear</strong>. feet and meters are available.<br />
• Time of day: specifies the time of day. Available options are real, dawn,<br />
morning, noon, afternoon, dusk, evening, and midnight.<br />
• Season: specifies the season of <strong>FlightGear</strong> world. You can choose either<br />
summer or winter.<br />
• Sound: disabling this will cut all the sound in <strong>FlightGear</strong>.<br />
• Instrumental panel: specifies if 2D panel is drawn from the beginning. You<br />
can also enable/disable the 2D panel from <strong>FlightGear</strong> menu.<br />
• Random objects: specifies whether <strong>FlightGear</strong> draws random objects or<br />
not.<br />
• AI models: specifies whether <strong>FlightGear</strong> handles AI aircraft and ships.<br />
• Clock never advances: specifies whether the clock advances in <strong>FlightGear</strong><br />
or not.<br />
• No fuel consumption: makes aircraft consume no fuel while it’s flying.
4.4. LAUNCHING THE SIMULATOR UNDER MAC OS X 37<br />
• Start in a frozen state: starts <strong>FlightGear</strong> with frozen state. it does not seem<br />
working at this moment.<br />
• Display HUD: displays HUD at the beginning, I guess. You can turn HUD<br />
on/off by pressing ’h’ while you are flying.<br />
• 3D HUD: enables 3D HUD if an selected aircraft supports it.<br />
• Real weather fetch: enables fetching real weather condition using METAR.<br />
• Horizon effect: enables horizon effect.<br />
• Clouds: enables drawing clouds.<br />
• 3D clouds: enables drawing 3D clouds. You need to enable 3D clouds by<br />
checking 3D cloud from the View » Rendering option on the <strong>FlightGear</strong><br />
simulator window.<br />
• Turbulence: specifies the strength of turbulence. 0.0 is calm and 1.0 is<br />
severe. You need to specify value from 0.0 through 1.0<br />
• Visibility: specifies the visibility in meter. You can specify 5000 or less if<br />
<strong>FlightGear</strong> runs slow on your machine.<br />
• Fullscreen mode: enabling this will launch <strong>FlightGear</strong> as full-screen mode.<br />
• Window size: specifies the size of <strong>FlightGear</strong> window. It will be ignored<br />
when full-screen mode is enabled.<br />
• Sky blending: enables or disables <strong>FlightGear</strong> to blend the sky depending on<br />
time and surrounding environment. DO NOT disable this option, or Flight-<br />
Gear crashes.<br />
• Textures: enables or disables textures on runways, buildings, and scenery<br />
objects. Disabling this will give you some more fps, effective especially on<br />
G4 Macs.<br />
• Wireframe: lets <strong>FlightGear</strong> draw wire-frames so you can see how the world<br />
of <strong>FlightGear</strong> is drawn. This should be enabled only for debug / development<br />
purpose.<br />
• Fog: specifies how fog is drawn. disable, fastest, nicest are available.<br />
Favorite tab<br />
Favorite list provides a means of preserving a named set of current options like a<br />
book mark of a web browser. To save the current set of options, press “+” button<br />
on the top window or at the bottom of the Favorite tab. Once favorites are added,<br />
You can switch from one configuration to another by double-clicking a row in the<br />
table view in the Favorite tab. Pressing “-” button (or delete key) on a favorite in<br />
the table view deletes the selected favorite.
38 4. TAKEOFF<br />
Position<br />
You can find airports or aircraft carriers by searching with a keyword into the filter<br />
text area. Available keywords are:<br />
• For airports:<br />
– a part of airport name (e.g. international, ranch, or civil),<br />
– country name (such as Japan, USA, or France) if available,<br />
– location name (such as city or county or U.S. state abbrev. if available),<br />
– IATA code (such as SFO, LAX, HND) if available,<br />
– ICAO code (such as KSFO, KLAX, RJTT) - works on all airports.<br />
• For aircraft carriers:<br />
– carrier name (Nimitz or Eisenhower),<br />
– “carrier”.<br />
Airports and carriers that match the keyword are shown at the table view below<br />
the filter text area. <strong>The</strong> airport name at the upper pane is synchronized with the<br />
currently selected airport or carrier. You can also open this tab by clicking the<br />
gear button at the right end of airport name on the top pane. When you choose an<br />
airport, available runways show up at the “runway” pop-up button. You can choose<br />
a runway or leave it as “default.”<br />
Aircraft tab<br />
You can find aircraft by searching with a keyword into the filter text area. Available<br />
keywords are:<br />
• a part of aircraft name (e.g. c172, zero, shinden)<br />
• configuration file name without -set.xml (e.g. a6m2, p51d)<br />
• fdm (Flight Dynamics Model) name (e.g. yasim, jsb)<br />
• status (e.g. alpha, beta, production, development)<br />
A list of aircraft that match the keyword shows up at the table view below the filter<br />
text area. <strong>The</strong> aircraft name at the upper pane is synchronized with the currently<br />
selected aircraft. You can also open this tab by clicking the gear button at the right<br />
end of aircraft name on the top pane.<br />
If you want to find more aircraft data from the internet, click “Get Aircraft”<br />
button at the bottom of the Aircraft tab. It opens a web browser to lead you to the<br />
Aircraft Links page on <strong>FlightGear</strong> Mac OS X web site. You can visit some links
4.4. LAUNCHING THE SIMULATOR UNDER MAC OS X 39<br />
there and download an aircraft you want. Once an aircraft is downloaded, open<br />
“Others” tab to install it.<br />
If you encounter some weird behavior in searching aircraft, removing a cache<br />
file for aircraft database might solve your problem. Open<br />
/Applications/Utilities/Terminal.app and type the following commands<br />
to remove the cache file:<br />
cd /Applications/<strong>FlightGear</strong>.app/Contents/Resources<br />
rm AircraftCache.rb<br />
Note that you must not launch <strong>FlightGear</strong> from mounted disk image of a prebuilt<br />
binary package since the folder in the mounted disk image is read-only, which<br />
prevents you from installing any add-on data. Vou need to install <strong>FlightGear</strong> by<br />
copying the <strong>FlightGear</strong> icon from the mounted disk image to /Applications<br />
folder.<br />
Network tab<br />
This tab contains two network features of <strong>FlightGear</strong>. One is multi-player mode<br />
and another is FGCOM (a voice ATC). To enable multi-player mode, specify the<br />
followings:<br />
• Enable Multiplay: enables or disables multi-player mode. Enabling this<br />
will open a new browser window to show the map on a multi player server.<br />
• Callsign: specifies the name shown in the map. Username must contain only<br />
alphabet letters, numbers, underscores, and dots. <strong>FlightGear</strong> will exit when<br />
you specify a call sign with invalid characters. A user name with 8 or more<br />
characters will be truncated into the first 7 characters.<br />
• Server: specifies the server to connect. mpserver02.flightgear.org<br />
is available at the time of writing this.<br />
• Your Mac: specifies your Mac’s IP address. Usually the launcher detects<br />
the address automatically. If something is wrong with network connection,<br />
clear this text field.<br />
• Port: must be 5000<br />
FGCOM enables you to make a real voice communication using radio setting.<br />
You can talk at a selected radio frequency (COM1) while pressing space bar. You<br />
can listen to some other player’s talking in the frequency if some others are using<br />
the same frequency and you are in range. <strong>The</strong> options available for FGCOM are<br />
listed below:<br />
• Enable FGCOM in Multi Player mode: specifies if you use FGCOM when<br />
Multiplay is enabled.
40 4. TAKEOFF<br />
• FGCOM Server: specifies a VOIP server.<br />
For further instructions on FGCOM, and Multiplay, please see Chapter 6.<br />
Others tab<br />
You can specify any options other than aircraft, airport, and the options shown in<br />
the launcher. Entering space-separated options as shown in Figure 11 will pass<br />
additional options to <strong>FlightGear</strong>. You can see all available options by pressing<br />
“View Options.” Some options might cause <strong>FlightGear</strong> crash. If you encounter<br />
such crashes with a specific option, please let us know.<br />
To install additional aircraft and scenery data, press "Install Add-on Data." You<br />
can specify multiple files and/or folders to install to the <strong>FlightGear</strong> data folder.<br />
Acceptable file types are:<br />
• zip<br />
• tar<br />
• tar.gz<br />
• tar.bz2<br />
• folder<br />
• 7zip (only if 7zip is installed)<br />
You will see the message window when all the data is successfully installed,<br />
otherwise error message will show up. You can select both aircraft and scenery<br />
data at the same time. If you select an archived file that does not contain aircraft<br />
files, it will be extracted into the data folder, but will be ignored. When you finish<br />
installing new aircraft, you can select the aircraft on the “Aircraft” tab.<br />
4.4.6 Launching from the command line<br />
You can also launch the simulator from the command line on Mac OS X. To do<br />
so, open Terminal.app (located at /Applications/Utilities) and type the<br />
following commands:<br />
cd /Applications/<strong>FlightGear</strong>.app/Contents/Resources<br />
./fgfs --option1 --option2 ....<br />
See chapter 4.5 for detail information on command line options. Unlike the<br />
other platforms, you don’t have to manually specify the environment variables such<br />
as FG_ROOT and FG_SCENERY as long as you use a prebuilt binary package.
4.5. COMMAND LINE PARAMETERS 41<br />
4.5 Command line parameters<br />
Following is a complete list and short description of the numerous command line<br />
options available for <strong>FlightGear</strong>. Most of these options are exposed through the<br />
<strong>FlightGear</strong> launcher delivered with the Windows binaries.<br />
If you have options you re-use continually, you can create a preferences file<br />
containing a set of command-line options that will be set automatically. You can<br />
create the file with any text editor (notepad, emacs, vi, if you like).<br />
• On Unix systems (including Mac OS X), put the command line options in a<br />
file called .fgfsrc in your home directory.<br />
• On Windows, put the command line options in a file called system.fgfsrc<br />
in the FG_ROOT directory (e.g. c:\Program Files\<strong>FlightGear</strong>\data).<br />
4.5.1 General Options<br />
• --help<br />
Display the most relevant command line options.<br />
• --help --verbose<br />
Display all command line options.<br />
• --version<br />
Display the current <strong>FlightGear</strong> version.<br />
• --fg-root=path<br />
Tells <strong>FlightGear</strong> where to look for its root data files if you didn’t compile it<br />
with the default settings.<br />
• --fg-scenery=path<br />
Allows specification of a path to the base scenery path , in case scenery<br />
is not at the default position under $FG ROOT/Scenery; this might be<br />
especially useful in case you have scenery on a CD-ROM.<br />
• --fg-aircraft=path<br />
Allows specification of a paths to aircraft. Defaults to $FG ROOT/Aircraft.<br />
• --language=code<br />
Select the language for this session. e.g. pl, nl, it, fr, en, de.<br />
• --restore-defaults<br />
Reset all user settings to their defaults
42 4. TAKEOFF<br />
• --enable-save-on-exit, --disable-save-on-exit<br />
Enable or disable saving of user-preferences on exit from the simulator.<br />
• --enable-freeze, --disable-freeze<br />
Control whether <strong>FlightGear</strong> starts paused or not. Defaults to not paused.<br />
• --control=mode<br />
Specify your primary control mode (joystick, keyboard, mouse) Defaults<br />
to joystick.<br />
• --enable-auto-coordination, --disable-auto-coordination<br />
Switches auto-co-ordination between aileron and rudder on/off. Auto-coordination<br />
is recommended for users without rudder pedals or a ‘twist’ joystick. Defaults<br />
to off.<br />
• --browser-app=path<br />
Specify location of your web browser. E.g: --browser-app=<br />
“C:\Program Files\Internet Explorer\iexplore.exe” (Note<br />
the “ ” because of the spaces!).<br />
• --config=path<br />
Load additional properties from the given path. E.g:<br />
--config=./Aircraft/X15-set.xml<br />
• --units-feet<br />
Use feet as the unit of measurement.<br />
• --units-meters<br />
Use meters as the unit of measurement.<br />
4.5.2 Features<br />
• --enable-ai-models, --disable-ai-models<br />
Enable or disable other aircraft/AI-models in the simulator.<br />
• --ai-scenario=name<br />
Enable a specific AI scenario (e.g. --ai-scenario=vinson-demo).<br />
May be used multiple times.
4.5. COMMAND LINE PARAMETERS 43<br />
4.5.3 Sound<br />
• --enable-sound, --disable-sound<br />
Enable or disable sound.<br />
• --show-sound-devices<br />
Show the available sound devices.<br />
• --sound-device=device<br />
Specify the sound device to use for audio.<br />
• --enable-intro-music, --disable-intro-music<br />
Enable or disable playing an audio sample when <strong>FlightGear</strong> starts up.<br />
4.5.4 Aircraft<br />
• --aircraft=aircraft<br />
Load the specified aircraft, for example: --aircraft=c172p. For available<br />
choices check the directory $FG ROOT/Aircraft, and look for files<br />
ending in “-set.xml”. When specifying the aircraft, drop the “-set.xml”<br />
from the filename. Alternatively, use the --show-aircraft option described<br />
below to list the available aircraft. For information on downloading<br />
additional aircraft, see Section 3.2.<br />
• --show-aircraft<br />
Print a sorted list of the currently available aircraft types.<br />
• --min-status=status<br />
Display only those aircraft with a specified minimum declared status, one<br />
of alpha, beta, early-production, production. For use with<br />
--show-aircraft.<br />
• --aircraft-dir=PATH<br />
Aircraft directory relative to the executable location. Defaults to $FG ROOT/Aircraft.<br />
• --vehicle=name of aircraft definition file<br />
Synonym for --aircraft.<br />
• --livery=Name<br />
Set the aircraft livery.
44 4. TAKEOFF<br />
4.5.5 Flight model<br />
• --fdm=abcd<br />
Select the core flight model. Options are jsb, larcsim, yasim, magic,<br />
balloon, external, pipe, ada, null. This option can normally be<br />
ignored, as the --aircraft option will set the FDM correctly.<br />
• --aero=aircraft<br />
Specifies the aircraft aeronautical model to load. This option can normally<br />
be ignored, as the --aircraft option will set the aircraft model correctly.<br />
• --model-hz=n<br />
Run the Flight Dynamics Model with this rate (iterations per second).<br />
• --speed=n<br />
Run the Flight Dynamics Model this much faster than real time.<br />
• --trim, --notrim<br />
Trim (or not) when initializing JSBSim. Defaults to trim.<br />
• --on-ground, --in-air<br />
Start up at ground level (default), or in the air. If specifying --in-air you<br />
must also set an initial altitude using --altitude, and may also want to<br />
set an initial velocity with --vc. Note that some aircraft (notably the X15)<br />
must be started in mid-air.<br />
• --enable-fuel-freeze, --disable-fuel-freeze<br />
Control whether fuel state is constant (e.g. frozen) or consumed normally<br />
(default).<br />
4.5.6 Initial Position and Orientation<br />
• --airport=ABCD<br />
Start at a specific airport. <strong>The</strong> airport is specified by its ICAO code, e.g.<br />
--airport=KJFK for JFK airport in New York. For US airport without<br />
an ICAO code, try prefixing the 3 character code with ‘K’.<br />
• --parking-id=ABCD<br />
Start at a specific parking spot on the airport.<br />
• --runway=NNN<br />
Start at the threshold of a specific runway (e.g. 28L). If no runway or parking<br />
ID is specified, a runway facing into the wind will be chosen for takeoff.
4.5. COMMAND LINE PARAMETERS 45<br />
• --vor=ABCD, --ndb=ABCD, --fix=ABCD<br />
Set the starting position relative to a VOR, NDB or FIX. Useful for practising<br />
approaches.<br />
• --carrier=NAME<br />
Start on an aircraft carrier. See 6.2 for details of carrier operations.<br />
• --parkpos=NAME<br />
Start at a particular parking position on the carrier. Must be used with<br />
--carrier. Defaults to a catapult launch position.<br />
• --offset-distance=nm, --offset-azimuth=deg<br />
Start at a particular distance and heading from a position set using --airport,<br />
--vor, --ndb, --fix, --carrier.<br />
• --lon=degrees, --lat=degrees<br />
Start at a particular longitude and latitude, in decimal degrees (south, west<br />
negative).<br />
• --altitude=feet<br />
Start at specific altitude. Implies --in-air. Altitude is specified in feet<br />
unless you also select --units-meters, in which case altitude is in meters.<br />
You may also want to set an initial velocity with --vc to avoid stalling<br />
immediately.<br />
• --heading=degrees, --roll=degrees, --pitch=degrees<br />
Set the initial orientation of the aircraft. All values default to 0 - heading<br />
North, in straight and level flight.<br />
• --uBody=X, --vBody=Y, --wBody=Z<br />
Set the initial speed along the X, Y and Z axes. Speed is in feet per second<br />
unless you also select --units-meters, in which case altitude is in<br />
meters per second.<br />
• --vNorth=N, --vEast=E, --vDown=D<br />
Set the initial speed along the South-North, West-East and vertical axes.<br />
Speed is in feet per second unless you also select --units-meters, in<br />
which case altitude is in meters per second.<br />
• --vc=knots, --mach=num<br />
Set the initial airspeed in knots or as a Mach number. Useful if setting<br />
--altitude, unless you want to stall immediately!
46 4. TAKEOFF<br />
• --glideslope=degrees, --roc=fpm<br />
Set the initial glide slope angle in degrees or as a climb rate in feet per<br />
minute. May be positive or negative.<br />
4.5.7 Environment Options<br />
• --ceiling=FT ASL[:THICKNESS FT]<br />
Sets an overcase ceiling at a particular height, and with an optional thickness<br />
(defaults to 2000ft).<br />
• --enable-real-weather-fetch, --disable-real-weather-fetch<br />
Control whether real-time weather information is downloaded and used.<br />
• --metar=METAR STRING<br />
Use a specific METAR string, e.g. --metar="XXXX 012345Z 00000KT<br />
99SM CLR 19/M01 A2992". <strong>The</strong> METAR may be specified in most<br />
common formats (US, European). Incompatible with --enable-real-weather-fetch.<br />
• --random-wind<br />
Sets random wind direction and strength.<br />
• --turbulence=n<br />
Sets turbulence from completely calm (0.0) to severe (1.0).<br />
• --wind=DIR@SPEED<br />
Specify the surface wind. Direction is in degrees, and speed in knots. Values<br />
may be specified as a range by using a colon separator; e.g. --wind=180:220@10:15.<br />
• --season=param<br />
Sets the simulated season. Valid parameters are summer (default), winter.<br />
• --visibility=meters, --visibility-miles=miles<br />
4.5.8 Rendering Options<br />
• --aspect-ratio-multiplier=N<br />
Set a multiplier for the display aspect ratio.<br />
• --bpp=depth<br />
Specify the bits per pixel.<br />
• --enable-clouds, --disable-clouds<br />
Enable (default) or disable cloud layers.
4.5. COMMAND LINE PARAMETERS 47<br />
• --enable-clouds3d, --disable-clouds3d<br />
Enable (default), disable 3D clouds. Very pretty, but depend on your graphics<br />
card supporting GLSL Shaders, which some older, or less powerful graphics<br />
cards do not.<br />
• --enable-distance-attenuation, --disable-distance-attenuation<br />
Enable or disable more realistic runway and approach light attenuation.<br />
• --enable-enhanced-lighting, --disable-enhanced-lighting<br />
Enable or disable more realistic runway and approach lights.<br />
• --enable-fullscreen, --disable-fullscreen<br />
Enable, disable (default) full screen mode.<br />
• --enable-game-mode, --disable-game-mode<br />
Enable or disable full screen display for 3DFX graphics cards.<br />
• --enable-horizon-effect, --disable-horizon-effect<br />
Enable (default), disable celestial body growth illusion near the horizon.<br />
• --enable-mouse-pointer, --disable-mouse-pointer<br />
Enable, disable (default) extra mouse pointer. Useful in full screen mode for<br />
old Voodoo based cards.<br />
• --enable-panel, --disable-panel<br />
Enable (default) the instrument panel.<br />
• --enable-random-buildings, --disable-random-building<br />
Enable, disable (default) random buildings. Note that random buildings take<br />
up a lot of memory.<br />
• --enable-random-objects, --disable-random-objects<br />
Enable (default), disable random scenery objects.<br />
• --enable-random-vegetation, --disable-random-vegetation<br />
Enable (default), disable random vegetation such as trees. Requires a graphics<br />
card that supports GLSL Shaders, which some older, or less powerful<br />
graphics cards do not.<br />
• --enable-rembrandt, --disable-rembrandt<br />
Enable, disable (default) an experimental feature that includes enhanced<br />
lighting and realtime shadows.
48 4. TAKEOFF<br />
• --enable-skyblend, --disable-skyblend<br />
Enable (default), disable fogging/haze.<br />
• --enable-specular-highlight, --disable-specular-highlight<br />
Enable (default), disable specular highlights.<br />
• --enable-splash-screen, --disable-splash-screen<br />
Enable or disable (default) the rotating 3DFX logo when the accelerator<br />
board gets initialized (3DFX only).<br />
• --enable-textures, --disable-textures<br />
Enable (default), disable use of textures.<br />
• --enable-wireframe, --disable-wireframe<br />
Enable, disable (default) display of wireframes. If you want to know what<br />
the world of <strong>FlightGear</strong> looks like internally, try this!<br />
• --fog-disable, --fog-fastest, --fog-nicest<br />
Set the fog level. To cut down the rendering efforts, distant regions vanish in<br />
fog by default. If you disable fog you’ll see farther, but your frame rates will<br />
drop. Using --fog-fastest will display a less realistic fog, by increase<br />
frame rate. Default is --fog-nicest.<br />
• --fov=degrees<br />
Sets the field of view in degrees. Default is 55.0.<br />
• --materials-file=file<br />
Specify the materials file used to render the scenery. Default: Materials/regions/materia<br />
• --geometry=WWWxHHH<br />
Defines the window/screen resolution. E.g. --geometry=1024x768..<br />
• --shading-smooth, --shading-flat<br />
Use smooth shading (default), or flat shading which is faster but less pretty.<br />
• --texture-filtering=N<br />
Configure anisotropic texture filtering. Values are 1 (default), 2, 4, 8 or 16.<br />
• --view-offset=xxx<br />
Allows setting the default forward view direction as an offset from straight<br />
ahead. Possible values are LEFT, RIGHT, CENTER, or a specific number<br />
of degrees. Useful for multi-window display.
4.5. COMMAND LINE PARAMETERS 49<br />
4.5.9 HUD Options<br />
• --enable-anti-alias-hud, --disable-anti-alias-hud<br />
Control whether the HUD (Head Up Display) is shown anti-aliased.<br />
• --enable-hud, --disable-hud<br />
Control whether the HUD is displayed. Defaults to disabled.<br />
• --enable-hud-3d, --disable-hud-3d<br />
Control whether the 3D HUD is displayed.<br />
• --hud-culled, --hud-tris<br />
Display the percentage of triangles culled, or the number of triangles rendered<br />
in the HUD. Mainly of interest to graphics developers.<br />
4.5.10 Aircraft System Options<br />
• --adf=[radial:]frequency<br />
Set the ADF frequency and radial.<br />
• --com1=frequency, --com2=frequency<br />
Set the COM1/COM2 radio frequency.<br />
• --dme=nav1|nav2|frequency<br />
Set the DME to NAV1, NAV2, or a specific frequency and radial.<br />
• --failure=system<br />
Fail a specific aircraft system. Valid systems are pitot, static, vacuum,<br />
electrical. Specify multiple times to fail multiple systems.<br />
• --nav1=[radial:]frequency, --nav2=[radial:]frequency<br />
Set the NAV1/NAV2 radio frequency and radial.<br />
4.5.11 Time Options<br />
• --enable-clock-freeze, --disable-clock-freeze<br />
Control whether time advances normally or is frozen.<br />
• --start-date-gmt=yyyy:mm:dd:hh:mm:ss, --start-date-lat=yyyy:mm:dd:hh:mm:ss,<br />
--start-date-sys=yyyy:mm:dd:hh:mm:ss<br />
Specify the exact startup time/date. <strong>The</strong> three functions differ in that they<br />
take either Greenwich Mean Time, the local time of your virtual flight, or<br />
your computer system’s local time as the reference point.<br />
Incompatible with --time-match-local, --time-match-real.
50 4. TAKEOFF<br />
• --time-match-local, --time-match-real<br />
--time-match-real, is default: Simulator time is read from the system clock,<br />
and is used as is. When your virtual flight is in the same timezone as where<br />
your computer is located, this may be desirable, because the clocks are synchronized.<br />
However, when you fly in a different part of the world, it may<br />
not be the case, because there is a number of hours difference, between the<br />
position of your computer and the position of your virtual flight.<br />
<strong>The</strong> option --time-match-local takes care of this by computing the timezone<br />
difference between your real world time zone and the position of your virtual<br />
flight, and local clocks are synchronized.<br />
Incompatible with --start-date-gmt, --start-date-lat, --start-date-sys.<br />
• --time-offset=[+-]hh:mm:ss<br />
Specify a time offset relative to one of the time options above.<br />
• --timeofday=param<br />
Set the time of day. Valid parameters are real, dawn, morning, noon,<br />
afternoon, dusk, evening, midnight.<br />
4.5.12 Network Options<br />
• --multiplay=dir,Hz,host,port, --callsign=ABCD<br />
Set multiplay options and aircraft call-sign. See Section 6.1.<br />
• --httpd=port, --telnet=port<br />
Enable http server or telnet server on the specified port to provide access to<br />
the property tree.<br />
• --jpg-httpd=port<br />
Enable screen shot http server on the specified port.<br />
• --proxy=[user:password@]host:port<br />
Specify a proxy server to use.<br />
4.5.13 Route/Waypoint Options<br />
• --wp=ID[@alt]<br />
Allows specifying a waypoint for the GC autopilot; it is possible to specify<br />
multiple waypoints (i.e. a route) via multiple instances of this command.<br />
• --flight-plan=[file]<br />
This is more comfortable if you have several waypoints. You can specify a<br />
file to read them from.
4.5. COMMAND LINE PARAMETERS 51<br />
NB: <strong>The</strong>se options are rather geared to the advanced user who knows what he<br />
is doing.<br />
4.5.14 IO Options<br />
More detailed descriptions of the various IO parameters can be found in the README.IO<br />
file within the Docs directory of your <strong>FlightGear</strong> installation.<br />
• --atlas=params<br />
Open connection using the Atlas protocol (used by Atlas and TerraSync).<br />
• --atcsim=params<br />
Open connection using the ATC Sim protocol (atc610x).<br />
• --AV400=params<br />
Open connection to drive a Garmin 196/296 series GPS<br />
• --AV400Sim=params<br />
Open connection to drive a Garmin 400 series GPS<br />
• --generic=params<br />
Open connection using the Generic (XML-defined) protocol.<br />
• --garmin=params<br />
Open connection using the Garmin GPS protocol.<br />
• --joyclient=params<br />
Open connection to an Agwagon joystick.<br />
• --jsclient=params<br />
Open connection to a remote joystick.<br />
• --native-ctrls=params<br />
Open connection using the FG native Controls protocol.<br />
• --native-fdm=params<br />
Open connection using the FG Native FDM protocol.<br />
• --native-gui=params<br />
Open connection using the FG Native GUI protocol.<br />
• --native=params<br />
Open connection using the FG Native protocol.
52 4. TAKEOFF<br />
• --nmea=params<br />
Open connection using the NMEA protocol.<br />
• --opengc=params<br />
Open connection using the OpenGC protocol.<br />
• --props=params<br />
Open connection using the interactive property manager.<br />
• --pve=params<br />
Open connection using the PVE protocol.<br />
• --ray=params<br />
Open connection using the RayWoodworth motion chair protocol.<br />
• --rul=params<br />
Open connection using the RUL protocol.<br />
4.5.15 Debugging options<br />
• --enable-fpe<br />
Enable abort on a Floating Point Exception.<br />
• --fgviewer<br />
Instead of loading the entire simulator, load a lightweight OSG viewer. Useful<br />
for checking aircraft models.<br />
• --log-level=LEVEL<br />
Set the logging level. Valid values are bulk, debug, info, warn, alert.<br />
• --prop:[type:]name=value<br />
Set property name to value<br />
Example: --prop:/engines/engine[0]/running=true starts the<br />
simulator with running engines.<br />
Another example:<br />
--aircraft=c172p<br />
--prop:/consumables/fuels/tank[0]/level-gal=10<br />
--prop:/consumables/fuels/tank[1]/level-gal=10<br />
fills the Cessna for a short flight. You may optionally specific the property<br />
type (double, string, boolean).
4.6. JOYSTICK SUPPORT 53<br />
• --trace-read=params<br />
Trace the reads for a property; multiple instances are allowed.<br />
• --trace-write=params<br />
Trace the writes for a property; multiple instances are allowed.<br />
4.6 Joystick support<br />
Could you imagine a pilot in his or her Cessna controlling the machine with a keyboard<br />
alone? For getting the proper feeling of flight you will need a joystick/yoke<br />
plus rudder pedals, right? However, the combination of numerous types of joysticks,<br />
flightsticks, yokes, pedals etc. on the market with the several target operating<br />
systems, makes joystick support a non-trivial task in <strong>FlightGear</strong>.<br />
<strong>FlightGear</strong> has integrated joystick support, which automatically detects any<br />
joystick, yoke, or pedals attached. Just try it! If this does work for you, lean<br />
back and be happy! You can see what <strong>FlightGear</strong> has detected your joystick as by<br />
selecting Help -> Joystick Information from the menu.<br />
Unfortunately, given the several combinations of operating systems supported<br />
by <strong>FlightGear</strong> (possibly in foreign languages) and joysticks available, chances are<br />
your joystick does not work out of the box. Basically, there are two alternative<br />
approaches to get it going, with the first one being preferred.<br />
4.6.1 Built-in joystick support<br />
General remarks<br />
In order for joystick auto-detection to work, a joystick bindings xml file must exist<br />
for each joystick. This file describes what axes and buttons are to be used to control<br />
which functions in <strong>FlightGear</strong>. <strong>The</strong> associations between functions and axes or<br />
buttons are called “bindings”. This bindings file can have any name as long as a<br />
corresponding entry exists in the joysticks description file<br />
/<strong>FlightGear</strong>/joysticks.xml<br />
which tells <strong>FlightGear</strong> where to look for all the bindings files. We will look at<br />
examples later.<br />
<strong>FlightGear</strong> includes several such bindings files for several joystick manufacturers<br />
in folders named for each manufacturer. For example, if you have a CH<br />
Products joystick, look in the folder<br />
/<strong>FlightGear</strong>/Input/Joysticks/CH<br />
for a file that might work for your joystick. If such a file exists and your joystick<br />
is working with other applications, then it should work with <strong>FlightGear</strong> the first<br />
time you run it. If such a file does not exist, then we will discuss in a later section<br />
how to create such a file by cutting and pasting bindings from the examples that<br />
are included with <strong>FlightGear</strong>.
54 4. TAKEOFF<br />
Verifying your joystick is working<br />
Does your computer see your joystick? One way to answer this question under<br />
Linux is to reboot your system and immediately enter on the command line<br />
dmesg | grep Joystick<br />
which pipes the boot message to grep which then prints every line in the boot message<br />
that contains the string “Joystick”. When you do this with a Saitek joystick<br />
attached, you will see a line similar to this one:<br />
input0: USB HID v1.00 Joystick [SAITEK CYBORG 3D USB] on<br />
usb2:3.0<br />
This line tells us that a joystick has identified itself as SAITEK CYBORG 3D USB<br />
to the operating system. It does not tell us that the joystick driver sees your joystick.<br />
If you are working under Windows, the method above does not work, but you can<br />
still go on with the next paragraph.<br />
Confirming that the driver recognizes your joystick<br />
<strong>FlightGear</strong> ships with a utility called js demo. It will report the number of joysticks<br />
attached to a system, their respective “names”, and their capabilities. Under Linux,<br />
you can run js demo from the folder /<strong>FlightGear</strong>/bin as follows:<br />
$ cd /usr/local/<strong>FlightGear</strong>/bin<br />
$ ./js demo<br />
Under Windows, open a command shell (Start|All Programs|Accessories), go to<br />
the <strong>FlightGear</strong> binary folder and start the program as follows (given <strong>FlightGear</strong> is<br />
installed under c:\Flightgear)<br />
cd \<strong>FlightGear</strong>\bin<br />
js demo.exe<br />
Under Mac OS X, open Terminal.app (/Applications/Utilities/) and<br />
run js demo as follows:<br />
$ cd /Applications/<strong>FlightGear</strong>.app/Contents/Resources<br />
$ ./js demo<br />
On our system, the first few lines of output are (stop the program with Ctrl-C<br />
if it is quickly scrolling past your window!) as follows:<br />
Joystick test program.<br />
Joystick 0: “CH PRODUCTS CH FLIGHT SIM YOKE USB ”<br />
Joystick 1: “CH PRODUCTS CH PRO PEDALS USB ”<br />
Joystick 2 not detected<br />
Joystick 3 not detected<br />
Joystick 4 not detected<br />
Joystick 5 not detected
4.6. JOYSTICK SUPPORT 55<br />
Joystick 6 not detected<br />
Joystick 7 not detected<br />
+-------------JS.0---------------+-------------JS.1---------------+<br />
| Btns Ax:0 Ax:1 Ax:2 Ax:3 Ax:4 Ax:5 Ax:6 | Btns Ax:0 Ax:1 Ax:2 |<br />
+-------------------------------+-------------------------------+<br />
| 0000 +0.0 +0.0 +1.0 -1.0 -1.0 +0.0 +0.0 . | 0000 -1.0 -1.0 -1.0 . . . . . |<br />
First note that js demo reports which number is assigned to each joystick recognized<br />
by the driver. Also, note that the “name” each joystick reports is also included<br />
between quotes. We will need the names for each bindings file when we<br />
begin writing the binding xml files for each joystick.<br />
Identifying the numbering of axes and buttons<br />
Axis and button numbers can be identified using js demo as follows. By observing<br />
the output of js demo while working your joystick axes and buttons you can determine<br />
what axis and button numbers are assigned to each joystick axis and button.<br />
It should be noted that numbering generally starts with zero.<br />
<strong>The</strong> buttons are handled internally as a binary number in which bit 0 (the least<br />
significant bit) represents button 0, bit 1 represents button 1, etc., but this number<br />
is displayed on the screen in hexadecimal notation, so:<br />
0001 ⇒ button 0 pressed<br />
0002 ⇒ button 1 pressed<br />
0004 ⇒ button 2 pressed<br />
0008 ⇒ button 3 pressed<br />
0010 ⇒ button 4 pressed<br />
0020 ⇒ button 5 pressed<br />
0040 ⇒ button 6 pressed<br />
... etc. up to ...<br />
8000 ⇒ button 15 pressed<br />
... and ...<br />
0014 ⇒ buttons 2 and 4 pressed simultaneously<br />
... etc.<br />
For Linux users, there is another option for identifying the “name” and the<br />
numbers assigned to each axis and button. Most Linux distributions include a very<br />
handy program, “jstest”. With a CH Product Yoke plugged into the system, the<br />
following output lines are displayed by jstest:<br />
jstest /dev/js3<br />
Joystick (CH PRODUCTS CH FLIGHT SIM YOKE USB ) has 7 axes and 12 buttons. Driver version is 2.1.0<br />
Testing...(interrupt to exit)<br />
Axes: 0: 0 1: 0 2: 0 3: 0 4: 0 5: 0 6: 0 Buttons: 0:off 1:off 2:off 3:on 4:off 5:off 6:off 7:off<br />
8:off 9:off 10:off 11:off
56 4. TAKEOFF<br />
Note the “name” between parentheses. This is the name the system associates with<br />
your joystick.<br />
When you move any control, the numbers change after the axis number corresponding<br />
to that moving control and when you depress any button, the “off” after<br />
the button number corresponding to the button pressed changes to “on”. In this<br />
way, you can quickly write down the axes numbers and button numbers for each<br />
function without messing with binary.<br />
Writing or editing joystick binding xml files<br />
At this point, you have confirmed that the operating system and the joystick driver<br />
both recognize your joystick(s). You also know of several ways to identify the<br />
joystick “name” your joystick reports to the driver and operating system. You will<br />
need a written list of what control functions you wish to have assigned to which<br />
axis and button and the corresponding numbers.<br />
Make the following table from what you learned from js demo or jstest above<br />
(pencil and paper is fine). Here we assume there are 5 axes including 2 axes associated<br />
with the hat.<br />
Axis Button<br />
elevator = 0 view cycle = 0<br />
rudder = 1 all brakes = 1<br />
aileron = 2 up trim = 2<br />
throttle = 3 down trim = 3<br />
leftright hat = 4 extend flaps = 4<br />
foreaft hat = 5 retract flaps = 5<br />
decrease RPM = 6<br />
increase RPM = 7<br />
We will assume that our hypothetical joystick supplies the “name” QUICK<br />
STICK 3D USB to the system and driver. With all the examples included with<br />
<strong>FlightGear</strong>, the easiest way to get a so far unsupported joystick to be auto detected,<br />
is to edit an existing binding xml file. Look at the xml files in the sub-folders<br />
of /<strong>FlightGear</strong>/Input/Joysticks/. After evaluating several of the xml<br />
binding files supplied with <strong>FlightGear</strong>, we decide to edit the file<br />
/<strong>FlightGear</strong>/Input/Joysticks/Saitek/Cyborg-Gold-3d-USB.xml.<br />
This file has all the axes functions above assigned to axes and all the button functions<br />
above assigned to buttons. This makes our editing almost trivial.<br />
Before we begin to edit, we need to choose a name for our bindings xml file,<br />
create the folder for the QS joysticks, and copy the original xml file into this directory<br />
with this name.<br />
$ cd /usr/local/<strong>FlightGear</strong>/Input/Joysticks<br />
$ mkdir QS<br />
$ cd QS
4.6. JOYSTICK SUPPORT 57<br />
$ cp /usr/local/<strong>FlightGear</strong>/Input/Joysticks/Saitek/<br />
Cyborg-Gold-3d-USB.xml QuickStick.xml<br />
Here, we obviously have supposed a Linux/UNIX system with <strong>FlightGear</strong> being<br />
installed under /usr/local/<strong>FlightGear</strong>. For a similar procedure under<br />
Windows with <strong>FlightGear</strong> being installed under c:<strong>FlightGear</strong>, open a command<br />
shell and type<br />
c:<br />
cd /<strong>FlightGear</strong>/Input/Joysticks<br />
mkdir QS<br />
cd QS<br />
copy /<strong>FlightGear</strong>/Input/Joysticks/Saitek/<br />
Cyborg-Gold-3d-USB.xml QuickStick.xml<br />
Next, open QuickStick.xml with your favorite editor. Before we forget to<br />
change the joystick name, search for the line containing . You should find<br />
the line<br />
SAITEK CYBORG 3D USB<br />
and change it to<br />
QUICK STICK 3D USB.<br />
This line illustrates a key feature of xml statements. <strong>The</strong>y begin with a and<br />
end with a .<br />
You can now compare your table to the comment table at the top of your file<br />
copy. Note that the comments tell us that the Saitek elevator was assigned to axis<br />
1. Search for the string<br />
<br />
and change this to<br />
.<br />
Next, note that the Saitek rudder was assigned to axis 2. Search for the string<br />
<br />
and change this to<br />
.<br />
Continue comparing your table with the comment table for the Saitek and changing<br />
the axis numbers and button numbers accordingly. Since QUICKSTICK USB and<br />
the Saitek have the same number of axes but different number of buttons, you must<br />
delete the buttons left over. Just remember to double-check that you have a closing<br />
tag for each opening tag or you will get an error using the file.<br />
Finally, be good to yourself (and others when you submit your new binding<br />
file to a <strong>FlightGear</strong> developers or users archive!) by taking the time to change the
58 4. TAKEOFF<br />
comment table in the edited file to match your changed axis and button assignments.<br />
<strong>The</strong> new comments should match the table you made from the js demo<br />
output. Save your edits.<br />
Several users have reported that the numbers of axes and buttons assigned to<br />
functions may be different with the same joystick under Windows and Linux. <strong>The</strong><br />
above procedure should allow one to easily change a binding xml file created for a<br />
different operating system for use by their operating system.<br />
Telling <strong>FlightGear</strong> about your new bindings xml file<br />
Before <strong>FlightGear</strong> can use your new xml file, you need to edit the file<br />
/<strong>FlightGear</strong>/joysticks.xml,<br />
adding a line that will include your new file if the “name” you entered between<br />
the name tags matches the name supplied to the driver by your joystick. Add the<br />
following line to joysticks.xml.<br />
<br />
You can tell how <strong>FlightGear</strong> has interpreted your joystick setup by selecting<br />
Help -> Joystick Information from the Menu.<br />
Some hints for Windows users<br />
Basically, the procedures described above should work for Windows as well. If<br />
your joystick/yoke/pedals work out of the box or if you get it to work using the<br />
methods above, fine. Unfortunately, however, it’s likely you may encounter a few<br />
problems.<br />
<strong>The</strong> first one concerns users of non-US Windows versions. As stated above,<br />
you can get the name of the joystick from the program js demo. If you have a non-<br />
US version of Windows and the joystick .xml files named above do not contain that<br />
special name, just add it on top of the appropriate file in the style of<br />
Microsoft-PC-Joysticktreiber <br />
No new entry in the base joysticks.xml file is required.<br />
Unfortunately, there is one more loophole with Windows joystick support. In<br />
the case that you have two USB devices attached (for instance, a yoke plus pedals),<br />
it’s possible that the same driver name will be reported twice. In this case, you<br />
can at least get the yoke working by assigning it number 0 (out of 0 and 1). For<br />
this purpose, rotate the yoke (aileron control) and observe the output of js demo. If<br />
figures in the first group of colons (for device 0) change, assignment is correct. If<br />
figures in the second group of colons (for device 1) change, you have to make the<br />
yoke the preferred device first. For doing so, enter the Windows “Control panel”,<br />
open “Game controllers” and select the “Advanced” button. Here you can select<br />
the yoke as the “Preferred” device. Afterward you can check that assignment by<br />
running js demo again. <strong>The</strong> yoke should now control the first group of figures.
4.6. JOYSTICK SUPPORT 59<br />
Unfortunately, we did not find a way to get the pedals to work, too, that way.<br />
Thus, in cases like this one (and others) you may want to try an alternative method<br />
of assigning joystick controls.<br />
Some hints for Mac OS X users<br />
Thanks to Mac OS X, most of HID compatible joysticks are recognized and usable<br />
on Mac OS X. Some of joysticks are already defined properly in <strong>FlightGear</strong>. However,<br />
sometimes your joystick does not work as you expect due to some reasons<br />
such as missing joystick ID, and misconfigured buttons or axis. In such cases, you<br />
need to modify a joystick configuration file.<br />
<strong>The</strong> basic procedures in configuring joysticks under Mac OS X are the same as<br />
those of Linux as described above. <strong>The</strong> main differences are the path to the joystick<br />
configuration files and the means of finding a joystick name. <strong>The</strong> joystick configuration<br />
files are at Contents/Resources/data/Input/Joysticks under<br />
the <strong>FlightGear</strong>.app folder. You can open the data folder by choosing “Advanced<br />
Features » Others » Open data folder” on the GUI launcher. You can also open<br />
it by right-clicking the <strong>FlightGear</strong> icon at Applications folder and choose “Show<br />
Package Contents” to access the folders inside the application. To find a joystick<br />
name, follow the steps below:<br />
1. Open System Profiler by choosing Apple Menu | About this Mac | More Info...<br />
2. Select USB from the Hardware list in the left pane.<br />
3. Find the name of your joystick (e.g. Logitech Extreme 3D) from the USB<br />
Device Tree.<br />
4. Add a name tag with the recognized joystick name to a proper configuration<br />
XML file (e.g. Logitech Extreme 3D)<br />
5. Check if your device name is shown properly by choosing Help | Joystick<br />
information from the menu on the <strong>FlightGear</strong> simulator window.<br />
In case your joystick doesn’t work as expected even it is recognized properly,<br />
you need to modify the button and/or axis settings. Some Mac users reported that<br />
twisting a joystick controls the throttle instead of the rudder. This is a typical<br />
joystick misconfiguration on Mac OS X. To fix this issue, you need to edit two axis<br />
tags in a joystick configuration file.<br />
In many cases, the rudder is assigned to axis 2 and the throttle to axis 3 in driver<br />
level. Editing or adding a mac tag inside an axis tag for the rudder (and throttle)<br />
will fix this problem. <strong>The</strong> example below is a part of a joystick configuration file<br />
that assigns axis 3 for rudder control.<br />
<br />
Rudder
60 4. TAKEOFF<br />
<br />
2<br />
3 <br />
3<br />
<br />
.....<br />
4.6.2 Joystick support via .fgfsrc entries<br />
Fortunately, there is now a utility available which makes things easier for the average,<br />
non-XML savvy user.<br />
To configure your joystick using this approach do the following:<br />
1. Open a command shell. Under Windows this is known as a Command<br />
prompt and can be found under Start -> All programs -> Accessories<br />
2. Change to the directory /<strong>FlightGear</strong>/bin (e.g. cd c:\<strong>FlightGear</strong>\bin).<br />
3. Run the fgjs tool.<br />
<strong>The</strong> program will tell you which joysticks, if any, were detected. Now follow<br />
the commands given on screen, i.e. move the axis and press the buttons as required.<br />
Be careful, a minor touch already “counts” as a movement. Check the reports on<br />
screen. If you feel something went wrong, just re-start the program.<br />
After you are done with all the axes and switches, the directory above will<br />
hold a file called fgfsrc.js. <strong>The</strong> contents on this file can be copied into your<br />
personal preferences file (.fgfsrc/system.fgfsrc). See 4.5 for details of<br />
how to create this file.<br />
Note that output of fgjs is UNIX formatted. As a result, Windows Editor may<br />
not display it properly. It may be helpful to use an editor capable of handling UNIX<br />
files as well. My favorite freeware file editor for that purpose, although somewhat<br />
dated, is PFE, which can be obtained from http://www.lancs.ac.uk/staff/steveb/cpaap/pfe/.<br />
<strong>The</strong> axis/button assignment of fgjs should at least get the axis assignments<br />
right, but the output may need some tweaking. For example, some axes may be<br />
moving the opposite way they should, or the dead zones may be too small. For<br />
instance, the elevator axes on my USB CH Yoke was reversed so I had to change<br />
--prop:/input/joysticks/js[1]/axis[1]/binding/factor=-1.0<br />
into<br />
--prop:/input/joysticks/js[1]/axis[1]/binding/factor=1.0<br />
To help with tuning, here is a short introduction into the assignments of joystick<br />
properties. Basically, all axes settings are specified via lines having the following<br />
structure:
4.6. JOYSTICK SUPPORT 61<br />
--prop:/input/joysticks/js[n]/axis[m]/binding/command=property-scale<br />
--prop:/input/joysticks/js[n]/axis[m]/binding/property=/controls/steering option<br />
--prop:/input/joysticks/js[n]/axis[m]/binding/dead-band=db<br />
--prop:/input/joysticks/js[n]/axis[m]/binding/offset=os<br />
--prop:/input/joysticks/js[n]/axis[m]/binding/factor=fa<br />
where<br />
n = number of device (usually starting with 0)<br />
m = number of axis (usually starting with 0)<br />
steering option = elevator, aileron, rudder, throttle, mixture, pitch<br />
dead-band = range within which signals are discarded.<br />
Useful to avoid jittering for minor yoke movements<br />
offset = Applies an offset after any factor.<br />
Useful to handle devices where the neutral position does not map to 0.<br />
factor = controls sensitivity of that axis; defaults to +1,<br />
with a value of -1 reversing the behavior<br />
You should be able to at least get your joystick working along these lines.<br />
Concerning all the finer points, such as getting the joystick buttons working, John<br />
Check has written a very useful README included in the base package under<br />
$FG_ROOT/Docs/README.Joystick.html. In case of any trouble with<br />
your input device, it is highly recommended to read this document.
62 4. TAKEOFF
Chapter 5<br />
In-flight: All about instruments,<br />
keystrokes and menus<br />
<strong>The</strong> following is a description of the main systems for controlling the program and<br />
piloting the plane. It is assumed that the reader is already familiar with flying,<br />
possibly from experience on other simulators. If you are completely new to flying,<br />
the tutorials in section 7 are a better resource for learning to fly using <strong>FlightGear</strong>.<br />
A short leaflet showing the standard keys and designed to be printed can be<br />
found at<br />
http://www.flightgear.org/Docs/FGShortRef.pdf.<br />
A reference to most of the keyboard controls can be found under the Help menu<br />
in the simulator.<br />
5.1 Starting the engine<br />
Depending on the type of aircraft, you may have to start the engine(s) before you<br />
can go flying. <strong>The</strong> instructions below are generic. Check the aircraft help or aircraft<br />
tutorials for more specific instructions.<br />
Once you’ve started the engine, you should check whether the parking brakes<br />
are engaged. If so, press the ‘B’ key to release them.<br />
5.1.1 Piston Aircraft<br />
For piston-engined aircraft, the magnetos are controlled by the ‘{’ and ‘}’ keys.<br />
On most aircraft, the starter is engaged using the ‘s’ key. On multi-engined aircraft<br />
you can select which engines to control. Use ‘˜’ to select all the engines at once.<br />
Most magnetos have 4 positions - OFF, LEFT, RIGHT and BOTH. So, to start the<br />
selected engine, press the ‘}’ key three times, then hold down ‘s’.<br />
Note that the starting procedure for powerful WWII-era fighter aircraft is often<br />
more complex. See the aircraft help for details.<br />
63
64 5. FLIGHT<br />
5.1.2 Turboprop Aircraft<br />
Starting a turbo-prop engine generally requires simply moving the condition lever<br />
from Off to Idle, using ’m’.<br />
5.1.3 Jet Aircraft<br />
Starting a jet aircraft is significantly more complex, and the controls vary between<br />
different aircraft.<br />
1. Set cutoff ON<br />
2. Engage the starter<br />
3. Once the engines spools up to approximately 5% N1, set cutoff OFF<br />
4. Disengage the starter once the engine has reached operational speed.<br />
5.2 Keyboard controls<br />
While joysticks, yokes and rudder pedals are supported, you can fly <strong>FlightGear</strong><br />
using the keyboard alone or in conjunction with a mouse, described below. However<br />
you control the aircraft, you will need to use the keyboard for at least some<br />
controls.<br />
<strong>The</strong>se key bindings are not hard-coded, but user-adjustable. You can check<br />
and change these setting via the file keyboard.xml which can be found in the<br />
main <strong>FlightGear</strong> directory. This is a human-readable plain ASCII file. Although<br />
it’s perhaps not the best idea for beginners to modify this file, more advanced users<br />
will find it useful to change key bindings according to their wishes, e.g. to match<br />
other simulators.<br />
5.2.1 Aircraft controls<br />
In order to have full control of the plane during flight using the keyboard you should<br />
ensure that NumLock is on, and the <strong>FlightGear</strong> window is in focus. <strong>The</strong> following<br />
keys control the primary aircraft surfaces.<br />
Key Action<br />
9 / 3 Throttle<br />
4 / 6 Aileron<br />
8 / 2 Elevator<br />
0 / Enter Rudder<br />
5 Center aileron/elevator/rudder<br />
7 / 1 Elevator trim<br />
Table 1: Primary aircraft controls<br />
<strong>The</strong> following keys control the engines.
5.2. KEYBOARD CONTROLS 65<br />
Key Action<br />
! Select 1st engine<br />
@ Select 2nd engine<br />
# Select 3rd engine<br />
$ Select 4th engine<br />
∼ Select all engines<br />
{ Decrease magneto on selected engine<br />
} Increase magneto on selected engine<br />
s Fire starter on selected engine(s)<br />
M / m Lean/Enrich selected engine mixture<br />
N / n Decrease/Increase selected propeller RPM<br />
Table 2: Engine control keys<br />
<strong>The</strong> following keys control secondary aircraft systems.<br />
Key Action<br />
b Apply all brakes<br />
, / . Apply left/right brake<br />
(useful for differential braking)<br />
l Toggle tail-wheel lock<br />
B Toggle parking brake<br />
g/G Raise/lower landing gear<br />
Space Push To Talk (PTT)<br />
- / _ MP text chat menu/entry<br />
[ / ] Retract/extend flaps<br />
j / k Retract/extend spoilers<br />
Ctrl-B Toggle speed brakes<br />
Table 3: Secondary aircraft controls<br />
Autopilot controls are as follows.<br />
Key Action<br />
Backspace Toggle autopilot<br />
Ctrl-A Toggle altitude lock<br />
Ctrl-G Toggle glide slope lock (NAV 1)<br />
Ctrl-H Toggle heading hold<br />
Ctrl-N Toggle NAV 1 lock<br />
Ctrl-S Toggle autothrottle<br />
Ctrl-T Toggle terrain follow (AGL) lock<br />
Ctrl-U Add 1000 ft. to your altitude (emergency)<br />
F6 Toggle autopilot heading mode<br />
F11 Autopilot altitude dialog<br />
8 / 2 Altitude adjust<br />
4 / 6 Heading adjust<br />
9 / 3 Autothrottle adjust<br />
Table 4: Autopilot controls
66 5. FLIGHT<br />
5.2.2 Simulator controls<br />
To change the view direction, you must de-activate NumLock. <strong>The</strong> available controls<br />
are as follows:<br />
Numpad Key View direction<br />
Shift-8 Forward<br />
Shift-7 Left/forward<br />
Shift-4 Left<br />
Shift-1 Left/back<br />
Shift-2 Back<br />
Shift-3 Right/back<br />
Shift-6 Right<br />
Shift-9 Right/forward<br />
Table 5: View directions<br />
Additionally, the following keys allow you to control the display:<br />
Key Action<br />
P Toggle instrument panel on/off<br />
c Toggle3D/2D cockpit (if both are available)<br />
S Cycle panel style full/mini<br />
Ctrl-C Toggle panel/cockpit hotspot visibility<br />
h Toggle HUD<br />
H Change HUD brightness<br />
i / I Minimize/maximize HUD<br />
x / X Zoom in/out<br />
v / V Cycle view modes forth and back<br />
Ctrl-V Reset view modes to pilot view<br />
z / Z Increase/Decrease visibility (fog)<br />
F10 Toggle menu on/off<br />
Table 6: Display options<br />
Finally, the following general simulator controls are available.<br />
Key Action<br />
b Apply all brakes<br />
, / . Apply left/right brake<br />
(useful for differential braking)<br />
l Toggle tail-wheel lock<br />
B Toggle parking brake<br />
g/G Raise/lower landing gear<br />
Space Push To Talk (PTT)<br />
- / _ MP text chat menu/entry<br />
[ / ] Retract/extend flaps<br />
j / k Retract/extend spoilers<br />
Ctrl-B Toggle speed brakes
5.3. MOUSE-CONTROLLED ACTIONS 67<br />
Table 7: General simulator controls.<br />
5.2.3 Autopilot controls<br />
<strong>FlightGear</strong> supports two types of autopilot - a generic autopilot that works with all<br />
aircraft (even those that would not normally have an autopilot), and aircraft-specific<br />
autopilots that are controlled from within the cockpit.<br />
<strong>The</strong> generic autopilot is controlled via the following keys:<br />
Key Action<br />
Backspace Toggle autopilot<br />
Ctrl-A Toggle altitude lock<br />
Ctrl-G Toggle glide slope lock (NAV 1)<br />
Ctrl-H Toggle heading hold<br />
Ctrl-N Toggle NAV 1 lock<br />
Ctrl-S Toggle autothrottle<br />
Ctrl-T Toggle terrain follow (AGL) lock<br />
Ctrl-U Add 1000 ft. to your altitude (emergency)<br />
F6 Toggle autopilot heading mode<br />
F11 Autopilot altitude dialog<br />
8 / 2 Altitude adjust<br />
4 / 6 Heading adjust<br />
9 / 3 Autothrottle adjust<br />
Tab. 6: Autopilot controls.<br />
Ctrl + T is especially interesting as it makes your aircraft behave like a cruise<br />
missile, and follow the terrain. Ctrl + U might be handy in case you feel you’re<br />
just about to crash.<br />
When the autopilot is enabled, some of the numeric keypad keys function differently<br />
and adjust the autopilot rather than the controls themselves:<br />
Key Action<br />
p Pause simulator<br />
a / A Simulation speed up/slow down<br />
t / T Clock speed up/slow down<br />
Ctrl-R Instant replay<br />
F3 Save screen shot<br />
ESC Exit program<br />
Tab. 7: Additional Autopilot controls.<br />
Note that some keyboards use “.” instead of “,”.<br />
5.3 Mouse-controlled actions<br />
As well as selecting menu items and clicking on controls in the cockpit, your mouse<br />
can be used for a variety of other valuable functions in <strong>FlightGear</strong>.
68 5. FLIGHT<br />
<strong>The</strong>re are three mouse modes: Normal (the default), Control and View. You<br />
can change between them by using the right mouse button.<br />
5.3.1 Normal mode<br />
In normal mode, you can control the menus and the panel controls. This mode is<br />
indicated by a normal arrow cursor.<br />
To change a switch or toggle, simply click on it with the left or middle mouse<br />
button.<br />
To change a knob on a radio or linear control such as the throttle, click on the<br />
left hand side to decrease the value, and the right hand side to increase the value.<br />
Click with the left mouse button to make a small adjustment, or the right button<br />
to make a large one. Some controls, such as radios, also support using the mouse<br />
wheel.<br />
Pressing Ctrl-C highlights the clickable hotspots and objects.<br />
5.3.2 Control mode<br />
In control mode you can control the aircraft flight controls by moving the mouse.<br />
This mode is indicated by a cross-hair mouse cursor.<br />
In this mode, moving the mouse left or right controls the ailerons and rolls the<br />
aircraft. Moving the mouse forwards and or backwards controls the elevator and<br />
changes the pitch of the aircraft.<br />
Holding the left mouse button down changes the behaviour so that moving the<br />
mouse left/right controls the rudder. Holding the middle mouse button down and<br />
moving the mouse forwards/backwards controls the throttle.<br />
Finally, the scroll-wheel may be used to set the elevator trim.<br />
This mode is particularly useful if you do not have a joystick, as it provides<br />
much better control of the aircraft than using the keyboard. If you intend to use<br />
the mouse to control the aircraft regularly, it is recommended that you enabled<br />
auto-coordination, so the ailerons are linked to the rudder. This can be done using<br />
--enable-auto-coordination when lauching the simulator, or selecting<br />
auto-coordination from the launcher.<br />
5.3.3 View mode<br />
In view mode you can look around using the mouse. This mode is indicated by a<br />
double-headed arrow cursor.<br />
Simply moving the mouse pans and tilts your view in the current position. This<br />
is particularly useful for looking around the cockpit, or out a side window. <strong>The</strong><br />
scroll-wheel can be used to zoom in or out. Clicking the left mouse button resets<br />
the view back to its initial position, usually straight ahead.<br />
Holding down the middle mouse button and moving the mouse allows you to<br />
move the viewpoint itself left/right and up/down. Moving the mouse while both the
5.4. MENU ENTRIES 69<br />
middle button and Ctrl are held down allows you to move the viewpoint forwards<br />
and backwards.<br />
5.4 Menu entries<br />
<strong>The</strong> menu bar provides access to a variety of options for the simulator and the<br />
aircraft. Many aircraft have their own menu items, for changing their registration<br />
to automatically starting their engines. <strong>The</strong>se can be found at the end of the menu<br />
bar.<br />
To display or hide the menu bar, press F10. You can also display the menu<br />
automatically by moving your mouse to the top of the screen.<br />
<strong>The</strong> menu bar provides the following menus and options.<br />
• File<br />
• View<br />
– Reset (Shift-Esc) resets the flight to the selected starting position. Comes<br />
in handy if you get lost or something goes wrong.<br />
– Screenshot (F3) saves a screen shot as<br />
fgfs-screen-XXX.jpg.<br />
– Screenshot Directory allows you to set the directory for<br />
screenshots to be saved to.<br />
– Sound Configuration configures the volume for various sound channels,<br />
and whether they are heard outside the aircraft.<br />
– Quit (Esc) exits the program.<br />
– Display Options configures various display options, including whether<br />
the 2D panel, frame rate and chat messages are displayed.<br />
– Rendering Options configures various graphical features. This allows<br />
you to trade eye-candy such as shadows, 3D clouds and specular reflections<br />
for frame-rate. To help you achieve a good balance, enable the<br />
“Show Frame Rate” option in the Display Options menu, which will<br />
show the current frame-rate in frames-per-second in the bottom right<br />
of the screen. Most people find a frame-rate of around 20fps adequate<br />
for flying. <strong>The</strong> frame-rate is affected by the graphical features you<br />
have enabled, the current visibility (set by Z/z), the number of objects<br />
in view and their level of detail (LOD).<br />
– View Options configures which views are enabled.<br />
– Cockpit View Options configures the view within the cockpit, the pilot’s<br />
head movement, black-out due to high G, and redout due to negative<br />
G.
70 5. FLIGHT<br />
– Adjust LOD Ranges sets the range at which different levels of detail<br />
are displayed. This affects the textures and objects displayed in the<br />
simulator.<br />
– Adjust View Position displays the current view offset. You can adjust<br />
this by dragging the dials. Alternatively you can make small adjustments<br />
to your view-point using the mouse (see above).<br />
– Adjust HUD Properties configures the Head Up Display (HUD) settings,<br />
such as transparency and whether anti-aliasing is used to display<br />
it.<br />
– Toggle Glide Slope Tunnel displays a virtual tunnel to guide you down<br />
to the runway on a normal approach path. Useful if you are having<br />
difficulties setting up your approach for landing.<br />
– Instant Replay (Ctrl-R) controls the instant replay feature - a good<br />
tool for checking your landings!<br />
– Stereoscopic View Options configures stereoscopic display, using Red/Green<br />
glasses or other display methods.<br />
• Location<br />
– Position Aircraft On Ground positions the aircraft on the runway of<br />
any installed airport. You need to know the ICAO code for the airport<br />
you wish to start from (e.g. KSFO for San Fransisco International).<br />
– Position Aircraft In Air positions the aircraft at an arbitary point in<br />
the air. You must select a known ground point, e.g. an airport, VOR,<br />
long/lat coordinates, and a position relative to that point, e.g distance,<br />
direction, altitude. You can also set your initial speed and heading.<br />
This is useful for practising approaches.<br />
– Select Airport from List positions the aircraft at an airport. You can<br />
search amongst all the airports that you have installed. Clicking Apply<br />
will place you at that airport on a runway appropriate for the current<br />
wind.<br />
– Random Attitude Sets the aircraft with a random heading, speed and<br />
attitude. Useful for practising recovery from unusual attitudes.<br />
– Tower position configures the airport tower used for the Tower View<br />
and Tower View Look From views.<br />
• Autopilot This menu is only available for aircraft that have the default autopilot<br />
configured. Some aircraft may have their own autopilot which is<br />
configured through the panel, in which case this menu is disabled.<br />
– Autopilot Settings configures the aircraft autopilot. You can set the<br />
autopilot up in a variety of different ways - from simply keeping the<br />
wings level, to following an ILS.
5.4. MENU ENTRIES 71<br />
– Route Manager sets the route (waypoint) list for the autopilot. Waypoints<br />
can be airports or fixes. <strong>The</strong> heading, distance and time to the<br />
current waypoint may be displayed in the HUD.<br />
– Previous Waypoint selects the previous waypoint from the route list.<br />
– Next Waypoint selects the next waypoint from the route list.<br />
• Environment<br />
– Weather allows you to set the current weather, select a weather scenario,<br />
or use the weather reported by the closest weather reporting<br />
station (usually an airport) via METAR. You may either use Basic<br />
weather, which sets conditions explicitly, or Advanced weather which<br />
simulates larger weather systems, at the expense of local accuracy.<br />
– Time Settings allows you to set the current time in the simulator, speed<br />
up the simulation, and change the rate at which time passes in the simulator.<br />
Also displays UTC and local time.<br />
– Wildfire Settings configures whether aircraft crashes create realistic<br />
wildfires, which may spread and be extinguished using an appropriately<br />
equipped water bomber aircraft.<br />
– Scenery Download configures automatic download of scenery over the<br />
Internet using the TerraSync feature.<br />
• Equipment<br />
– Map displays a moving map, showing airports, navigational beacons<br />
etc.<br />
– Stopwatch displays a simple stopwatch. Useful for instrument approaches.<br />
– Fuel and Payload allows you to set the fuel levels and current payload<br />
within the aircraft. Only available on some aircraft.<br />
– Radio Settings (F12) sets the frequencies and radials being used by<br />
the radios and navigational equipment.<br />
– GPS Settings configures waypoints and views course information for<br />
the GPS.<br />
– Instrument Settings allows you to set the altimeter pressure and Heading<br />
Indicator offset.<br />
– Random Failures configures random failure of various aircraft systems<br />
and instruments, by setting a mean time between failure (MTBF)<br />
or mean cycles between failure (MCBF).<br />
– System Failures configures random failure of aircraft systems, such as<br />
the vacuum system.
72 5. FLIGHT<br />
• AI<br />
– Instrument Failures configures random failure of specific aircraft instruments.<br />
– Traffic and Scenario settings configures the active AI scenarios. Note<br />
that this will only take effect after the simulator is re-started.<br />
– Wingman Controls allows you to control AI wingmen (depending on<br />
aircraft).<br />
– Tanker Controls allows you to dynamically create an air-to-air refueling<br />
tanker, if your aircraft supports it. See Section 6.8 for further<br />
details.<br />
– Carrier Controls allows you to control an AI aircraft carrier.<br />
– Jetway Settings allows you to control jetways on some airports.<br />
• Multiplayer<br />
– Multipler Settings allows you to configure Multiplayer by setting a<br />
callsign and server.<br />
– Chat Dialog allows you to chat with other aircraft in the multi-player<br />
environment.<br />
– Chat Menu (-) allows you to send common chat messages to other<br />
aircraft or ATC in the multi-player environment. Some menus contain<br />
sub-menus of options.<br />
– Pilot List displays list of the other multi-player pilots within range,<br />
along with their distance, heading and altitude.<br />
– MPCarrier Selection displays a list of the available MPCarriers.<br />
• Debug menu contains various options outside the scope of this guide.<br />
• Help<br />
– Help opens the help system in a browser window.<br />
– Aircraft Help displays information specific to the aircraft.<br />
– Common Aircraft Keys lists the basic keys for controlling the aircraft.<br />
– Basic Simulator Keys lists the basic keys for the controlling the simulator.<br />
– Joystick Information displays information about any joystick in use,<br />
including axis and button assignments.<br />
– Tutorials allows you to start an in-simulator tutorial for the current<br />
aircraft. This is only available on some aircraft. See Tutorials below<br />
for details.<br />
– About displays information about this version of <strong>FlightGear</strong>.
5.5. THE INSTRUMENT PANEL 73<br />
5.5 <strong>The</strong> Instrument Panel<br />
Fig. 6: <strong>The</strong> 3D cockpit of the Cessna 172.<br />
Aircraft within <strong>FlightGear</strong> can have both a 2-dimensional instrument panel<br />
and a 3-dimensional cockpit. <strong>The</strong> 3-dimensional cockpit provides a much more<br />
realistic pilot-eye view, but can be difficult to read with small monitors.<br />
<strong>The</strong> default Cessna 172P (c172p) has both a 3-dimensional and 2-dimensional<br />
cockpit. <strong>The</strong> 3-dimensional cockpit is activated by default when you start Flight-<br />
Gear, but you can overlay the 2-dimensional instrument panel by selecting View->Display<br />
Options->Show 2D Panel from the menu, or pressing the “P” key.<br />
All panel levers and knobs can be operated with the mouse. To change a control,<br />
just click with the left/middle mouse button on the corresponding knob/lever.<br />
For controls that have a range of positions, use the middle mouse button for larger<br />
adjustments. In general, clicking on the right side of a control will increase the<br />
value, while clicking the left side of the control will decrease the value.<br />
Some instruments (particularly radios) also support use of a mouse scrollwheel<br />
to change values.<br />
5.6 <strong>The</strong> Head Up Display<br />
<strong>FlightGear</strong> also provides a HUD (Head Up Display) . HUDs are generally found<br />
in military aircraft and some very advanced jets. However, <strong>FlightGear</strong> also allows
74 5. FLIGHT<br />
you to use a HUD on many GA aircraft. To activate the HUD, press ‘h’.<br />
<strong>The</strong> HUD shown in Fig. 7 displays all main flight parameters of the plane. In<br />
the center you find the pitch indicator (in degrees) with the aileron indicator above<br />
and the rudder indicator below. A corresponding scale for the elevator can be found<br />
to the left of the pitch scale along with a pitch trim indicator. On the bottom there<br />
is a simple turn indicator.<br />
<strong>The</strong>re are two scales at the extreme left: <strong>The</strong> inner one displays the speed (in<br />
kts) while the outer one indicates position of the throttle. <strong>The</strong> two scales on the<br />
extreme right display your height - the left one shows the height above ground<br />
while the right of it displays height above sea-level, both being displayed in feet.<br />
Besides this, the HUD delivers some additions information. On the upper left<br />
you will find date and time, along with your current position, in latitude and longitude.<br />
You can change color of the HUD using the “H” or “’h” key. Pressing the<br />
toggle “i/I” minimizes/maximizes the HUD.<br />
Fig. 7: <strong>The</strong> HUD, or Head Up Display.
Chapter 6<br />
Features<br />
<strong>FlightGear</strong> contains many special features, some of which are not obvious to the<br />
new user. This section describes how to enable and make use of some of the more<br />
advanced features.<br />
Many of the features are under constant development, so the information here<br />
may not be completely up-to-date. For the very latest information (and new features),<br />
see the <strong>FlightGear</strong> Wiki, available from http://wiki.flightgear.org/<br />
6.1 Multiplayer<br />
<strong>FlightGear</strong> supports a multiplayer environment, allowing you to share the air with<br />
other flight-simmers. For server details and to see who is online (and where they<br />
are flying), have a look at the excellent multiplayer map, available from<br />
http://mpmap02.flightgear.org<br />
Click on the ‘server’ tab to see a list of multiplayer servers.<br />
6.1.1 Quick Start<br />
You can connect to the MP environment from the MP Settings dialog under the<br />
Multiplayer menu. Simply select the server closest to you from the list, enter a<br />
callsign (which will be seen by other players), and click ”Connect”.<br />
To see a list of other pilots are in the area, select Pilot List from the Multiplayer<br />
menu.<br />
All the standard MP servers are interconnected, so there is no need to be on the<br />
same server as people you are flying with.<br />
6.1.2 Other Methods<br />
If you are connecting to a non-standard server, or the above method does not work,<br />
you can also connect using the methods below.<br />
75
76 CHAPTER 6. FEATURES<br />
Using the <strong>FlightGear</strong> Launcher<br />
<strong>The</strong> final screen of the <strong>FlightGear</strong> Launcher has a section for Multiplayer. Simply<br />
select the checkbox, enter the hostname and port number you noted above and<br />
choose a callsign to identify yourself. Your callsign can be up to 7 characters in<br />
length. You must also check <strong>The</strong> AI models checkbox under Features to make<br />
other aircraft visible.<br />
Using the Command Line<br />
<strong>The</strong> basic arguments to pass to fgfs for multiplayer are these:<br />
--multiplay=out,10,,<br />
--multiplay=in,10,,<br />
--callsign=<br />
--enable-ai-models<br />
Where<br />
1. is the port number of the server e.g. 5000.<br />
2. is the name of the multiplayer server e.g. mpserver01.flightgear.org.<br />
3. is the name of your computer, or the IP address ip address of the<br />
network interface being used by FG to connect to the server - even if that’s a<br />
local 192.168 type address. e.g. 192.168.0.1<br />
4. is the call sign to identify yourself, up to 7 characters, e.g. N-<br />
FGFS.<br />
Once the simulator has loaded, you should see yourself displayed on the map.<br />
If you don’t, check the console for error messages and see the Troubleshooting<br />
section below.<br />
6.1.3 Troubleshooting<br />
To get multiplayer to work, we need information about the IP address of our computer<br />
and the ability to communicate with the server. How to get this information<br />
depends on your configuration and is described below.<br />
Those using a USB modem to connect to the Internet<br />
First of all, you need to know the IP address of the network interface you’re going<br />
to be running FG multiplayer over. If your Internet connection is via an ADSL<br />
modem that plugs directly into your computer with a USB connection, you should<br />
be able to find your IP address by visiting http://www.whatismyip.com . Please<br />
note that this address may very well change every now and again - if MP stops<br />
working, check this first.
6.2. AIRCRAFT CARRIER 77<br />
Those using some kind of Ethernet router to connect to the Internet<br />
Otherwise, your connection is likely via some kind of router that connects to your<br />
computer via an RJ-45, or "Ethernet" connector (similar shape to most Western<br />
telephone plugs), or by a wireless link. You need to find the IP address of that<br />
network interface.<br />
Under Linux, this can be found by logging in as root and typing "ifconfig".<br />
You may find more than one interface listed, beginning with "lo" - ignore that one.<br />
You should have something like "eth0" or "wlan0" also listed - look through this<br />
block of text for "inet addr". This will be followed directly by the number you’re<br />
looking for, e.g. "inet addr:192.168.0.150"<br />
Under Windows XP, click start, run, and type "cmd". In the terminal window<br />
which appears, type "ipconfig" This should show you your IP address - note it<br />
down.<br />
With Windows 98, click start, run, and type "winipcfg" to get information about<br />
your IP address.<br />
If It Still Doesn’t Work<br />
You MUST give your local, behind-the-router IP address for MultiPlayer to work.<br />
Trust me on this one!<br />
You should check that your firewall is not causing problems - either turn it off<br />
temporarily or add an exception to allow incoming connections on port 5000.<br />
If it’s still just not working for you, ask nicely on the <strong>FlightGear</strong> IRC channel<br />
and someone should be able to assist.<br />
6.2 Aircraft Carrier<br />
<strong>FlightGear</strong> supports carrier operations on the Nimitz, (located near San Fransisco),<br />
Vinson, San Antonio, Foch, and Eisenhower. <strong>The</strong> carriers are equipped with working<br />
catapult, arrester wires, elevators, TACAN and FLOLS.<br />
To enable the carrier, you must edit your preferences.xml file in $FG_ROOT<br />
using a text editor (e.g. Notepad under Windows). Search for the word “nimitz”.<br />
You ought to find something that looks like this;<br />
<br />
You should remove the “comment” marks so that it looks like this;<br />
nimitz_demo<br />
Also ensure that the line above that referring to ai being enabled is set to "true"<br />
Save the file and quit the text editor.
78 CHAPTER 6. FEATURES<br />
6.2.1 Starting on the Carrier<br />
You are now ready to start <strong>FlightGear</strong>. To position your aircraft on the carrier at<br />
startup, use the following command line options:<br />
--carrier=Nimitz --aircraft=seahawk<br />
Please note the uppercase “N’ in “Nimitz’.<br />
If you are using the Windows or OS X launcher to run FG, you should find a<br />
text entry box in the gui that allows you to specify command line options, add the<br />
above options there.<br />
Note that several FG aircraft are carrier capable, but the seahawk is possibly<br />
the easiest to fly to begin with.<br />
6.2.2 Launching from the Catapult<br />
Once <strong>FlightGear</strong> has started, you should ensure that the parking brakes are off and<br />
press and hold “L” to engage the launchbar. You must hold down “L” until the<br />
launch bar has engaged. You should notice the aircraft being pulled into alignment<br />
with the catapult and see the strops appear and hold down the aircraft. This will<br />
only happen if your aircraft is close enough to the correct spot on the catapult; as a<br />
rough guide, for the default parking position the seahawk’s nose should be rougly<br />
level with the deck observation bubble.<br />
To get the carrier into as good a position as possible for launch, select the<br />
“ATC/AI” menu, then check the “Turn into wind” box under the “AI Carrier” section.<br />
You should now notice the carrier begin to pick up speed and turn into the<br />
wind, and naturally the deck may tilt somewhat as it turns. You should wait for<br />
this maneuver to finish and the deck to return to level before moving on to the next<br />
stage.<br />
Being attached to the catapult, you should spool up the engines to full power,<br />
ensure the brakes are off and that all flight controls are in a suitable position for<br />
launch (stick held right back with the seahawk.) When ready, press “C” to release<br />
the catapult. Your aircraft will be hurled forward off the deck, and you should<br />
be able to raise the undercarriage and climb slowly away, being careful to avoid<br />
stalling.<br />
6.2.3 Finding the Carrier - TACAN<br />
Actually finding the carrier in a vast expanse of open water can be very difficult,<br />
especially if visibility is poor. To assist with this task, Nimitz is equipped<br />
with TACAN, which allows a suitably-equipped aircraft (including the Seahawk)<br />
to obtain a range and bearing to the carrier. First, you must set the appropriate<br />
TACAN channel, 029Y in this case, in the radios dialogue (ctrl-r or choose Equipment/Radio<br />
Settings from the FG menubar). You should, if within range, notice<br />
the DME instrument show your distance from the carrier, and the ADF instrument
6.3. ATLAS 79<br />
(next to the DME in the seahawk) should indicate a bearing to the carrier. Turn to<br />
the indicated heading and you should see the DME dial indicate your closing in on<br />
the carrier.<br />
6.2.4 Landing on the Carrier<br />
This is the most difficult part of the operation, as in real life. You might well find<br />
Andy Ross’ tutorial on operating the A4 Skyhawk useful. It is available from here:<br />
http://wiki.flightgear.org/A-4F_Skyhawk_Operations_<strong>Manual</strong><br />
Once you have used the TACAN to locate the carrier, you must line up with<br />
the rear of the flight deck. As this part of the deck is at an angle to the course of<br />
the vessel, you may need to correct your alignment often. Ensure that the aircraft<br />
is in the correct configuration for approach (the Help/Aircraft Help menu should<br />
contain useful data for your aircraft) and that the gear and the arrestor hook are<br />
down.<br />
As you approach you should see, on the left hand side of the deck, a set of<br />
brightly coloured lights - called the Fresnel Lens Optical landing System (FLOLS).<br />
This indicates your position on the landing glideslope. You will see a horizontal<br />
row of green lights, and when approximately on the glideslope, an orange light<br />
(known in some circles as the “meatball”) approximately in line with the green<br />
lights. When approaching correctly, the meatball appears in line with the green<br />
lights. If you are high it is above, and when low it is below. If you are very low<br />
the meatball turns red. If you fly to keep the meatball aligned you should catch<br />
number 3 wire.<br />
Carrier landings are often described as “controlled crashes” and you shouldn’t<br />
waste your time attempting to flare and place the aircraft gently on the deck like<br />
you would with a conventional landing - ensuring that you catch the wires is the<br />
main thing.<br />
Immediately your wheels touch the deck, you should open the throttles to full<br />
power, in case you have missed the wires and need to “go around” again; the wires<br />
will hold the aircraft if you have caught them, even at full power.<br />
If you wish, you can then raise the elevators from the ATC/AI menu, taxi onto<br />
one of the elevators, lower it (uncheck the box on the menu) and taxi off into the<br />
hangar.<br />
Don’t be discouraged if you don’t succeed at first - it’s not an easy maneouver<br />
to master. If after a little practice you find the Seahawk too easy, you could move<br />
on to the Seafire for more of a challenge!<br />
6.3 Atlas<br />
Atlas is a "moving map" application for <strong>FlightGear</strong>. It displays the aircraft in relation<br />
to the terrain below, along with airports, navigation aids and radio frequencies.<br />
Further details can be found on the Atlas website:
80 CHAPTER 6. FEATURES<br />
http://atlas.sourceforge.net<br />
6.4 Multiple Displays<br />
<strong>FlightGear</strong> supports multiple displays. Using some straightforward XML, you<br />
can configure multiple "slave cameras" that are offset from the main view, so you<br />
can use multiple monitors to display a single view of the simulator. For example,<br />
you can have one display showing the view straight ahead, while two additional<br />
displays show the view to either side.<br />
Information on configuring multiple displays can be found in the README.multiscreen<br />
file in the docs directory of your <strong>FlightGear</strong> installation.<br />
6.5 Multiple Computer<br />
<strong>FlightGear</strong> allows you to connect multiple instances of the program using the very<br />
flexible I/O subsystem, and display completely different views and controls on<br />
different computers. This can be used in combination with the Multiple Display<br />
support to create a more sophisticated environment with separate cockpit panel displays<br />
and even a separate control station allowing an instructor to fail instruments,<br />
change the weather etc.<br />
An example of this is the 747 cockpit project.<br />
http://www.flightgear.org/Projects/747-JW/<br />
6.5.1 Setup<br />
Each instance of <strong>FlightGear</strong> can support a single display. Due to the complexity of<br />
the FDM and graphics, <strong>FlightGear</strong> is very processor-intensive, so running multiple<br />
instances of <strong>FlightGear</strong> on a single machine is not recommended.<br />
You will therefore need a computer for each view of the simulation you wish<br />
to display, including the panel. <strong>The</strong> computers obviously must be networked and<br />
for simplicity should be on the same subnet.<br />
One computer is designated as the master. This computer will run the FDM and<br />
be connected to controls such as yokes, joysticks and pedals. As the machine is<br />
running the FDM, it usually only displays a simple view, typically the main panel,<br />
to maximize performance.<br />
All other computers are designated as slaves. <strong>The</strong>y are purely used for display<br />
purposes and receive FDM information from the master.<br />
6.5.2 Basic Configuration<br />
Creating a basic configuration for multiple displays is straightforward. <strong>The</strong> master<br />
computer needs to broadcast the FDM and control information to the slaves. This<br />
is done using the following command line options:
6.6. RECORDING AND PLAYBACK 81<br />
--native-fdm=socket,out,60,,5505,udp<br />
--native-ctrls=socket,out,60,,5506,udp<br />
<strong>The</strong> slave computers need to listen for the information, and also need to have<br />
their own FDMs switched off:<br />
--native-fdm=socket,in,60,,5505,udp<br />
--native-ctrls=socket,in,60,,5506,udp<br />
--fdm=null<br />
6.5.3 Advanced Configuration<br />
<strong>The</strong> options listed above will simply show the same view on both machines. You<br />
will probably also want to set the following command-line options on both master<br />
and slave computers.<br />
--enable-game-mode (full screen for glut systems)<br />
--enable-full-screen (full screen for sdl or windows)<br />
--prop:/sim/menubar/visibility=false (hide menu bar)<br />
--prop:/sim/ai/enabled=false (disable AI ATC)<br />
--prop:/sim/ai-traffic/enabled=false (disable AI planes)<br />
--prop:/sim/rendering/bump-mapping=false<br />
If using the master computer to display a panel only, you may wish to create<br />
a full-screen panel for the aircraft you wish to fly (one is already available for the<br />
Cessna 172), and use the following options.<br />
--prop:/sim/rendering/draw-otw=false (only render the panel)<br />
--enable-panel<br />
6.6 Recording and Playback<br />
As well as the Instant Replay feature within the simulator, you can record your<br />
flight for later analysis or replay using the I/O system. Technical details of how to<br />
record specific FDM information can be found in the $FG_ROOT/protocol/README.protocol<br />
file.<br />
To record a flight, use the following command line options:<br />
--generic=file,out,20,flight.out,playback<br />
This will record the FDM state at 20Hz (20 times per second), using the playback<br />
protocol and write it to a file flight.out.<br />
To play it back later, use the following command line options:<br />
--generic=file,in,20,flight.out,playback<br />
--fdm=external
82 CHAPTER 6. FEATURES<br />
<strong>The</strong> playback.xml protocol file does not include information such as plane type,<br />
time of day, so you should use the same set of command line options as you did<br />
when recording.<br />
6.7 Text to Speech with Festival<br />
<strong>FlightGear</strong> supports Text To Speech (TTS) for ATC and tutorial messages through<br />
the festival TTS engine (http://www.cstr.ed.ac.uk/projects/festival/). This is available<br />
on many Linux distros, and can also be installed easily on a Cygwin Windows<br />
system. At time of writing, support on other platforms is unknown.<br />
6.7.1 Installing the Festival system<br />
1. Install festival from http://www.cstr.ed.ac.uk/projects/festival/<br />
2. Check if Festival works. Festival provides a direct console interface. Only<br />
the relevant lines are shown here. Note the parentheses!<br />
$ festival<br />
festival> (SayText "<strong>FlightGear</strong>")<br />
festival> (quit)<br />
3. Check if MBROLA is installed, or download it from here:<br />
http://tcts.fpms.ac.be/synthesis/mbrola/<br />
See under "Downloads"m "MBROLA binary and voices" (link at the bottom;<br />
hard to find). Choose the binary for your platform. Unfortunately, there’s no<br />
source code available. If you don’t like that, then you can skip the whole<br />
MBROLA setup. But then you can’t use the more realistic voices. See<br />
below for details of more voices. Run MBROLA and marvel at the help<br />
screen. That’s just to check if it’s in the path and executable.<br />
$ mbrola -h<br />
6.7.2 Running <strong>FlightGear</strong> with Voice Support<br />
First start the festival server:<br />
$ festival --server<br />
Now, start <strong>FlightGear</strong> with voice support enabled. This is set through the<br />
/sim/sound/voices/enabled property. You can do this through the command line<br />
as follows.
6.7. TEXT TO SPEECH WITH FESTIVAL 83<br />
$ fgfs --aircraft=j3cub \<br />
--airport=KSQL \<br />
--prop:/sim/sound/voices/enabled=true<br />
Of course, you can put this option into your personal configuration file. This<br />
doesn’t mean that you then always have to use <strong>FlightGear</strong> together with Festival.<br />
You’ll just get a few error messages in the terminal window, but that’s it. You<br />
cannot enable the voice subsystem when <strong>FlightGear</strong> is running.<br />
To test it is all working, contact the KSFO ATC using the ’ key. You should<br />
hear "your" voice first (and see the text in yellow color on top of the screen), then<br />
you should hear ATC answer with a different voice (and see it in light-green color).<br />
ou can edit the voice parameters in the preferences.xml file, and select different<br />
screen colors and voice assignments in $FG_ROOT/Nasal/voice.nas. <strong>The</strong><br />
messages aren’t written to the respective /sim/sound/voices/voice[*]/text properties<br />
directly, but rather to aliases /sim/sound/voices/atc,approach,ground,pilot,ai-plane.<br />
6.7.3 Troubleshooting<br />
On some Linux distros, festival access is restricted, and you will get message like<br />
the following.<br />
client(1) Tue Feb 21 13:29:46 2006 : \<br />
rejected from localhost.localdomain<br />
not in access list<br />
Details on this can be found from:<br />
http://www.cstr.ed.ac.uk/projects/festival/manual/festival_28.html#SEC130.<br />
You can disable access restrictions from localhost and localhost.localdomain<br />
by adding the following to a .festivalrc file in $HOME:<br />
(set! server_access_list ’("localhost"))<br />
(set! server_access_list ’("localhost.localdomain"))<br />
Or, you can just disable the access list altogether:<br />
(set! server_access_list nil)<br />
This will allow connections from anywhere, but should be OK if your machine<br />
is behind a firewall.<br />
6.7.4 Installing more voices<br />
I’m afraid this is a bit tedious. You can skip it if you are happy with the default<br />
voice. First find the Festival data directory. All Festival data goes to a common file<br />
tree, like in <strong>FlightGear</strong>. This can be /usr/local/share/festival/ on Unices. We’ll call<br />
that directory $FESTIVAL for now.
84 CHAPTER 6. FEATURES<br />
1. Check which voices are available. You can test them by prepending "voice_":<br />
$ festival<br />
festival> (print (mapcar (lambda (pair) (car pair)) \<br />
voice-locations))<br />
(kal_diphone rab_diphone don_diphone us1_mbrola \<br />
us2_mbrola us3_mbrola en1_mbrola)<br />
nil<br />
festival> (voice_us3_mbrola)<br />
festival> (SayText "I’ve got a nice voice.")<br />
festival> (quit)<br />
2. Festival voices and MBROLA wrappers can be downloaded here:<br />
http://festvox.org/packed/festival/1.95/<br />
<strong>The</strong> "don_diphone" voice isn’t the best, but it’s comparatively small and<br />
well suited for "ai-planes". If you install it, it should end up as directory<br />
$FESTIVAL/voices/english/don_diphone/. You also need to install "festlex_OALD.tar.gz"<br />
for it as $FESTIVAL/dicts/oald/ and run the Makefile<br />
in this directory. (You may have to add "–heap 10000000" to the festival<br />
command arguments in the Makefile.)<br />
3. Quite good voices are "us2_mbrola", "us3_mbrola", and "en1_mbrola". For<br />
these you need to install MBROLA (see above) as well as these wrappers:<br />
festvox_us2.tar.gz, festvox_us3.tar.gz, and festvox_en1.tar.gz. <strong>The</strong>y create<br />
directories $FESTIVAL/voices/english/us2_mbrola/ etc. <strong>The</strong> voice data, however,<br />
has to be downloaded separately from another site:<br />
4. MBROLA voices can be downloaded from the MBROLA download page<br />
(see above). You want the voices labeled "us2" and "us3". Unpack them in<br />
the directories that the wrappers have created: $FESTIVAL/voices/english/us2_mbrola/<br />
and likewise for "us3" and "en1".<br />
6.8 Air-Air Refuelling<br />
As the name suggests, Air-Air Refueling (AAR) involves refueling an aircraft (typically<br />
a short-range jet fighter) from a tanker aircraft by flying in close formation.<br />
<strong>The</strong>re are two types of refueling system supported. <strong>The</strong> KC135-E tanker has a<br />
boom that connects to a receiver on the refueling aircraft. <strong>The</strong> smaller KA6-D<br />
deploys a hose, into which the refueling aircraft inserts a probe.<br />
A number of aircraft support AAR, including the T-38, Lightning, A-4F, Vulcan,<br />
Victor (which can also act as a tanker) and A-6E. You can tell if a particular<br />
aircraft support AAR by looking at the AI/ATC menu. If the “Tanker” menu item<br />
is enabled, the aircraft support AAR.
6.8. AIR-AIR REFUELLING 85<br />
6.8.1 Setup<br />
To set up AAR, simply start <strong>FlightGear</strong> with an AAR-enabled aircraft, take-off<br />
and climb to 15,000ft. Once cruising at this altitude, select AI/ATC->Tanker, and<br />
select “Request”, which will spawn a new tanker in clear air at approximately your<br />
altitude.<br />
<strong>FlightGear</strong> will report the altitude, speed, and TACAN identifier of the tanker.<br />
Program your TACAN with the TACAN identifier reported by the tanker (from the<br />
Equipment->Radio Settings dialog, or your cockpit controls). Depending on your<br />
aircraft, the tanker may also appear on your radar. If you require more help to find<br />
the tanker, you can select “Get Position” to be told the tanker location relative to<br />
yourself<br />
Turn to an appropriate heading, guided by the TACAN bearing (you should try<br />
a "leading" approach to close in on the tanker) and look for the tanker on the radar<br />
or nav. screen. Around 5nm away, you should reduce your speed to around 20kts<br />
faster than the tanker - a "slow overtake". <strong>The</strong> KC135 will be visible from about<br />
10nm, the KA6-D, being smaller, just over 1 nm. If you find yourself overshootng,<br />
deploy your airbrakes.<br />
Close to within 50ft of the tanker (don’t get too close, or you may collide with<br />
the tanker itself). You should see indication in the cockpit that you are receiving<br />
fuel - there is a green light in the A4 fuel gauge, and you should see the indicated<br />
tank load increase.<br />
Once your tanks are full, or you have taken as much fuel as you wish, close the<br />
throttle a little, back away from the tanker and continue your intended flight.<br />
Successfully refueling is not easy and can take a lot of practise, as in real life.<br />
Here are some helpful hints for making contact.<br />
1. Approach the tanker slowly. It is very easy to overshoot and be unable to<br />
spot where the tanker has gone.<br />
2. If you are having difficulty matching the speed of the tanker due to the throttle<br />
being too sensitive, try deploying your airbrakes. This will require more<br />
power to achieve the same speed and will reduce the throttle sensitivity.<br />
3. To reduce your workload, you may be able to use the autpilot to stay at the<br />
correct altitude and/or speed. This is technically cheating, though NASA<br />
recently demonstrated that an advanced autopilot can perform AAR without<br />
pilot intervention.<br />
4. Bear in mind that as you receive fuel your aircraft will become heavier and<br />
the center of gravity will move, affecting the trim of the aircraft.<br />
5. <strong>The</strong> tanker aircraft fly a clock-wise "race-track" pattern in the sky. While it is<br />
possible to stay connected during these turns, you may find it easier to wait<br />
until the tanker has settled on its new course before refueling. <strong>The</strong> tanker<br />
aircraft provide warnings when they are intending to turn.
86 CHAPTER 6. FEATURES<br />
6.8.2 Multiplayer Refueling<br />
Refuelling is possible within a Multiplayer session using the KC135 or Victor. <strong>The</strong><br />
pilot of this aircraft should use the callsign "MOBIL1", "MOBIL2" or "MOBIL3".<br />
Other numbers are acceptable, but only these three have A-A TACAN channels<br />
assigned. <strong>The</strong>se are 060X, 061X and 062X respectively.<br />
If the receiving aircraft uses a YASim FDM, there are no further complications.<br />
Should the receiving aircraft be JSBSim based, the user must make sure that there<br />
are no AI tankers in their configuration. This means disabling (commenting out)<br />
all refuelling "scenarios" in the relevant aircraft-set.xml and in preferences.xml.<br />
MP refuelling works in exactly the same way as AI refuelling and is a fun<br />
challenge. It is best to ensure that your network connection is as free from interruptions<br />
as possible; the MP code does a degree of prediction if there is a "blip"<br />
in the stream of packets and this can make close formation flight very difficult or<br />
even impossible.
Part III<br />
Tutorials<br />
87
Chapter 7<br />
Tutorials<br />
If you are new to flying, an advanced simulator such as <strong>FlightGear</strong> can seem daunting:<br />
You are presented with a cockpit of an aircraft with little information on how<br />
to fly it.<br />
In real life, when learning to fly you would have an instructor sitting next to<br />
you to teach you how to fly and keep you safe.<br />
While we cannot provide a personal instructor for every virtual pilot, there are<br />
a number of tutorials available that you can follow to become a proficient virtual<br />
pilot.<br />
7.1 In-flight Tutorials<br />
<strong>FlightGear</strong> contains an in-flight tutorial system, where a simulated instructor provides<br />
a virtual ‘lesson’. <strong>The</strong>se vary between aircraft from simple tutorials teaching<br />
you how to start the engines on the aircraft, to full lessons teaching you how to fly<br />
for the first time. To access tutorials, Select Start Tutorial from the Help menu.<br />
<strong>The</strong> tutorial system works particularly well with the Festival TTS system (described<br />
above).<br />
For simplicity, run tutorials with AI aircraft turned off from the Options item<br />
on the AI/ATC menu. Otherwise, ATC messages may make it difficult to hear your<br />
instructor.<br />
Each tutorial consists of a number of discrete steps which you must complete.<br />
Your instructor will provide directions on how to complete each step, and observer<br />
how you perform them, providing additional guidance if required.<br />
Within a tutorial, to ask your instructor to repeat any instructions, press ‘+’.<br />
You can pause the tutorial at any time using the ‘p’ key. To stop the tutorial select<br />
Stop Tutorial from the Help menu.<br />
89
90 CHAPTER 7. TUTORIALS<br />
7.1.1 Cessna 172P tutorials<br />
If this is your first time flying, a number of tutorials exist for the Cessna 172P<br />
designed to teach you the basics of flight, in a similar way to a real flight school.<br />
<strong>The</strong> tutorials are based around Half-Moon Bay (KHAF) and Livermore Municipal<br />
(KLVK) airports near San Francisco. Both these airports are provided in the base<br />
package. To start the tutorials, select the Cessna 172P aircraft, and a starting airport<br />
of KHAF or KLVK, using the wizard, or the command line:<br />
$ fgfs --aircraft=c172p --airport=KHAF<br />
When the simulator has loaded, select Start Tutorial from the Help menu. You<br />
will then be presented with a list of the tutorials available. Select a tutorial and press<br />
Next. A description of the tutorial is displayed. Press Start to start the tutorial.<br />
7.2 <strong>FlightGear</strong> Tutorials<br />
<strong>The</strong> following chapters provide <strong>FlightGear</strong> specific tutorials to take the budding<br />
aviator from their first time in an aircraft to flying in the clouds, relying on their instruments<br />
for navigation. If you have never flown a small aircraft before, following<br />
the tutorials provides an excellent introduction to flight.<br />
Outside of this manual, there is an excellent tutorial written by David Megginson<br />
– being one of the main developers of <strong>FlightGear</strong> – on flying a basic airport<br />
circuit specifically using <strong>FlightGear</strong>. This document includes a lot of screen shots,<br />
numerical material etc., and is available from<br />
http://www.flightgear.org/Docs/Tutorials/circuit.<br />
7.3 Other Tutorials<br />
<strong>The</strong>re are many non-<strong>FlightGear</strong> specific tutorials, many of which are applicable.<br />
First, a quite comprehensive manual of this type is the Aeronautical Information<br />
<strong>Manual</strong>, published by the FAA, and available at<br />
http://www.faa.gov/ATPubs/AIM/.<br />
This is the Official Guide to Basic Flight Information and ATC Procedures by<br />
the FAA. It contains a lot of information on flight rules, flight safety, navigation,<br />
and more. If you find this a bit too hard work, you may prefer the FAA Training<br />
Book,<br />
http://avstop.com/AC/FlightTraingHandbook/,<br />
which covers all aspects of flight, beginning with the theory of flight and the<br />
working of airplanes, via procedures like takeoff and landing up to emergency
7.3. OTHER TUTORIALS 91<br />
situations. This is an ideal reading for those who want to learn some basics on flight<br />
but don’t (yet) want to spend bucks on getting a costly paper pilot’s handbook.<br />
While the handbook mentioned above is an excellent introduction on VFR (Visual<br />
Flight Rules), it does not include flying according to IFR (Instrument Flight<br />
Rules). However, an excellent introduction into navigation and flight according to<br />
Instrument Flight Rules written by Charles Wood can be found at<br />
http://www.navfltsm.addr.com/.<br />
Another comprehensive but yet readable text is John Denker’s ”See how it<br />
flies”, available at<br />
http://www.av8n.com/how/.<br />
This is a real online text book, beginning with Bernoulli’s principle, drag and<br />
power, and the like, with the later chapters covering even advanced aspects of VFR<br />
as well as IFR flying
92 CHAPTER 7. TUTORIALS
Chapter 8<br />
A Basic Flight Simulator Tutorial<br />
8.1 Foreword<br />
Aviation is about extremes:<br />
• An airplane is quite fragile and flies at high speeds. Yet it is one of the safest<br />
forms of transport.<br />
• Pilots must constantly follow rules and procedures. Yet an airplane is a symbol<br />
of freedom.<br />
• With a little training, flight a small aircraft is easy. Yet if a problem occurs,<br />
you must be able to resolve it in a few seconds.<br />
• Many flight tutorials are written with a lot of humor. Yet not taking flying<br />
seriously will bring you down to earth prematurely.<br />
<strong>The</strong> aircraft used in this tutorial is the Cessna 172p. This is the aircraft used in<br />
many real life flight schools and a great airplane to fly.<br />
<strong>The</strong> following articles complement this tutorial and will answer most questions<br />
that may arise as you read through. <strong>The</strong> first one in particular is a good introduction<br />
to the airplane’s main components and controls:<br />
93
94 CHAPTER 8. A BASIC FLIGHT SIMULATOR TUTORIAL<br />
• https://www.gleim.com/aviation/learn-to-fly/<br />
• http://www.pilotfriend.com/training/flight_training/aero/principa.htm<br />
• http://en.wikipedia.org/wiki/Aircraft<br />
• http://en.wikipedia.org/wiki/Flight_controls<br />
• http://en.wikipedia.org/wiki/Airplane_flight_mechanics<br />
• http://en.wikipedia.org/wiki/Aircraft_engine_controls<br />
• http://www.firstflight.com/flt1.html<br />
• http://flightsims.ig-wilson.com/index.php?f16land<br />
• http://www.navfltsm.addr.com/<br />
This tutorial is accurate to the best of my knowledge, but will inevitably contain<br />
some mistakes. I apologize in advance for these.<br />
8.2 Starting Up<br />
<strong>The</strong>re are a number of different ways to start <strong>FlightGear</strong> based on your platform<br />
and the distribution you are using.<br />
8.2.1 MS Windows<br />
On MS Windows, <strong>FlightGear</strong> has a GUI Wizard in which you can choose your<br />
aircraft and starting postion. First choose the Cessna 172p airplane as shown below.<br />
To match this tutorial do not choose the 2D panel version. (You may however find<br />
in the future that the 2D version is more appropriate for training). Click the Next<br />
button to choose your airport.<br />
You can start from any airport for this tutorial, but I will assume that you will<br />
start from <strong>FlightGear</strong>’s default airport of San Francisco (KSFO):
8.2. STARTING UP 95<br />
Once you have selected KSFO and clicked on the Next button, you can set any<br />
number of options for the simulator. For your first flight, I suggest starting at noon.<br />
I would also recommend that you start with a small resolution of 800 × 600. Later<br />
on, you can play around with the options and use a higher resolution, but this<br />
obviously adversly affects performance. Click on the Run button and <strong>FlightGear</strong><br />
will start with the options you selected.<br />
If you have problems running the latest version <strong>FlightGear</strong> on your Windows<br />
system, you may want to try an earlier version with lower graphics requirements<br />
(for example 0.9.8). You can find previous releases on the FTP mirrors mentioned<br />
at the top of the <strong>FlightGear</strong> download page: .<br />
If you are running under Windows Me and the flight simulator suddenly starts<br />
stuttering, with the frame rate dropping, try killing all tasks except Explorer and<br />
Systray before you launch <strong>FlightGear</strong>. If one of the tasks you kill is an antivirus<br />
or such protection software, this is an obvious security risk. Also, on one Windows<br />
Me machine, a <strong>FlightGear</strong> of 800 × 600 yielded good results, while a lower<br />
resolution of 640 × 480 triggered much lower FPS levels (Frames Per Second).)<br />
8.2.2 Linux and other unices<br />
On Linux and other Unix-like systems, you may have to run <strong>FlightGear</strong> from the<br />
command line. If you have installed <strong>FlightGear</strong> but cannot find it in your menu<br />
system, try the following:<br />
• From a terminal window (also named “console” window) try running the<br />
fgrun command. If installed, this will run the same GUI Wizard as under<br />
Windows as described above.
96 CHAPTER 8. A BASIC FLIGHT SIMULATOR TUTORIAL<br />
• Alternatively, open a terminal window and type the following command:<br />
fgfs --timeofday=noon --geometry=800x600.<br />
8.2.3 In the dark?<br />
Without the --timeofday=noon option, <strong>FlightGear</strong> will start at the current<br />
time in San Francisco - often night-time if you are in Europe. To change the time<br />
of day in the simulator to daytime, select Weather->Time of Day from the menu<br />
and select Noon.<br />
If running <strong>FlightGear</strong> from a menu (e.g. under KDE or Gnome), you can edit<br />
the <strong>FlightGear</strong> launch icon properties and change the simple fgfs fgfs command<br />
to something like fgfs --timeofday=noon --geometry=1024x768, or<br />
include whatever command options you wish. Further details of the command line<br />
options can be found in Chapter 4, Takeoff: How to start the program.<br />
8.3 <strong>The</strong> First Challenge - Flying Straight<br />
Once <strong>FlightGear</strong> is started you will see the following window and hear the sound<br />
of an engine:<br />
On startup, the aircraft is at the end of the runway with the engine running at<br />
low power. <strong>The</strong> airplane will occasionally tremble a little, but it won’t move.
8.3. THE FIRST CHALLENGE - FLYING STRAIGHT 97<br />
About the keyboard.<br />
• In this tutorial, a lowercase key letter indicates you should simply press that<br />
key. An uppercase means you must press shift and that key. (<strong>The</strong> ⇑ Shift<br />
keys are those two keys with a hollow fat arrow pointing upwards.) In other<br />
words: if you are told to type “v”, simply hit the v key briefly. If you are<br />
told to type “V”, press the Shift key down and while you have it pushed<br />
down, hit the v key, then release the Shift key. (In short: V is the same as<br />
Shift-v.)<br />
• <strong>The</strong> tutorial will assume you have the NumLock switched on. When switched<br />
on, you should find a small green light on at the right of your keyboard. Press<br />
the NumLock key repeatedly until the lamp is on.<br />
Press v, to view the aircraft from the outside. Type v repeatedly to scroll<br />
through a number of different views until you return to the cockpit. Typing V<br />
will cycle backwards through the views.):<br />
In real life, we would have inspected the airplane all around to check everything<br />
is working, nothing is hampering the moving parts, and nothing is obstructing the<br />
instrument openings. In the simulator, this is already done for us before we start.<br />
Hold the Page Up key down for about eight seconds. You will hear the engine<br />
sound rise.<br />
<strong>The</strong> airplane will start accelerating down the runway. As it does so, it will drift<br />
to the left, before finally taking off, banking to the left, falling to the ground and<br />
crashing (probably).<br />
You can see a replay of the crash using the View -> Instant Replay menu.<br />
Click the Replay button at the bottom of the dialog window, then use v and V<br />
to see the airplane from the outside. <strong>The</strong> picture below shows the end part of the<br />
flight. You can take a snapshot by typing the F3 key. You can also use the F10<br />
key to toggle the menu bar on or off.
98 CHAPTER 8. A BASIC FLIGHT SIMULATOR TUTORIAL<br />
Having observed your crash, exit from <strong>FlightGear</strong>(using File->Quit) and restart<br />
the simulator using the same options as before.<br />
In order to fly straight you need the airplane’s control yoke:<br />
You can control the yoke using a joystick, or by moving the mouse. To use the<br />
mouse you need to be in mouse yoke mode. Get in that mode by clicking the right<br />
mouse button. <strong>The</strong> mouse cursor becomes a + sign. Move the mouse and see the<br />
yoke moving accordingly. Type v to see the plane from the outside. If you move<br />
the mouse again you will see the tail elevator and the ailerons at both wings ends<br />
move. If your viewpoint is too far from the aircraft to see any movement, type x a<br />
few times to zoom in. Type X to zoom back out. Ctrl-x returns the view to the<br />
default zoom level. Type V to change the view back to the cockpit.<br />
Clicking the right mouse button again gets you in mouse view mode. In this<br />
mode the mouse cursor will be a ↔. sign. This allows you to look around easily.<br />
Clicking the left mouse button will re-center the view. A further right click will<br />
return you to the normal mouse mode.<br />
To summarize, the right mouse button cycles the mouse through three modes:<br />
• Normal mode. This mode allows you to click on the menu and on the instrument<br />
panel.<br />
• Yoke mode. <strong>The</strong> mouse controls the yoke (+ pointer shape).<br />
• View mode. <strong>The</strong> mouse controls the view direction (↔ pointer shape).
8.3. THE FIRST CHALLENGE - FLYING STRAIGHT 99<br />
Try taking off again using the mouse to control the yoke. Right-click to put the<br />
mouse in yoke mode (+pointer shape) and raise the engine throttle to maximum by<br />
holding the Page Up key down. Do not try to keep the airplane rolling straight<br />
on the runway using the mouse/yoke. Let it drift leftwards. Wait till it rises in the<br />
air. <strong>The</strong>n use the mouse to try and get the airplane to fly straight. (If you want to<br />
control the airplane on the ground see section 8.5.)<br />
You will find that you must prevent the airplane from banking to the left:<br />
... or to the right:<br />
... or from plunging to the ground:
100 CHAPTER 8. A BASIC FLIGHT SIMULATOR TUTORIAL<br />
Try to fly more or less straight, with the horizon stable slightly above the airplane<br />
nose:<br />
Whatever your skills at video games or simpler simulators, you will probably<br />
not succeed at first. <strong>The</strong> airplane will crash, probably quite soon after take-off.<br />
This is the moment where most candidates get desperate and abandon trying to fly<br />
a simulator or a real aircraft. Just hold tight and keep trying. Eventually you will<br />
develop a feel for the subtle control inputs required.<br />
<strong>The</strong> most common error is moving the mouse forwards to bring the nose up. In<br />
fact, you must pull the yoke by moving the mouse backwards to do this.<br />
Equally, when you want to lower the airplane’s nose, you must move the mouse<br />
forwards. This can seem odd, but all airplane control yokes are designed that way.<br />
With time, you will wonder how you every thought it worked any other way. You<br />
will also find that small mouse movements have a large effect on the aircraft. You<br />
may find that decreasing your mouse sensitivity may help initially.<br />
If you have difficulty visualising this, the following analogy may help. Imagine<br />
a soccer ball is on your desk and you have “glued” your hand to the top of it. If<br />
you move your hand forwards the ball will roll forwards and your fingers will point<br />
to to the desk. If you move your hand backwards the ball will roll back and your<br />
fingers will now point up at the ceiling. Your hand is the airplane:<br />
Another common error is the assumption that the control inputs directly match<br />
airplane bank. In other words, you believe if the control yoke is level, the airplane
8.3. THE FIRST CHALLENGE - FLYING STRAIGHT 101<br />
will fly level. This is not true. <strong>The</strong> yoke controls the rate at which the airplane<br />
banks. If the airplane is banked 20˚ to the left and the control yoke is level, the<br />
airplane will stay banked at 20˚ left until some other force affects it. If you want<br />
to return the airplane to level flight, you have to turn the control yoke slightly to<br />
the right (move the mouse slightly rightwards) and keep it slightly to the right for a<br />
while. <strong>The</strong> airplane will turn slowly rightwards. Once it is level with the horizon,<br />
bring the control yoke level too. <strong>The</strong>n the airplane will stay level (until some other<br />
force changes its orientation).<br />
A third error is trying to find “the right position” for the yoke/mouse. Naturally,<br />
you will want to find the fine tuning that will leave the airplane fly straight. Actually<br />
there is no such ideal yoke position. <strong>The</strong> airplane is inherintely unstable in the<br />
air. You must constantly correct the airplane’s attitude and keep it flying straight<br />
with tiny movements of the mouse. This may seem to take all your concentration<br />
intially, but just like driving a car, keeping the aircraft straight and level will soon<br />
become second nature. For longer flights, you will eventually use the autopilot to<br />
keep the airplane level, but this is outside the scope of this tutorial.<br />
To help fine-tune your senses to the control inputs required, keep your eyes on<br />
the outside scenery and not get fixated on the instruments or the yoke. Check the<br />
angle of the horizon and its height above the airplane’s nose. <strong>The</strong> horizon line and<br />
the airplane engine cover are your main flight instruments. Look at the instrument<br />
panel only once in a while.<br />
While the mouse is in yoke control mode (+ pointer shape), don’t move it<br />
close to the <strong>FlightGear</strong> window edges. Once the mouse leaves the window, it stops<br />
controlling the aircraft, often at the worse possible moment! If you wish to use the<br />
mouse outside of the window, first go back to standard mouse mode by clicking<br />
two times on the right mouse button.<br />
You can also control the yoke using the four keyboard arrow keys or the<br />
keypad 8, 2, 4 and 6 keys. While initially this may seem easier than the mouse,<br />
you cannot make the very fine adjustments required for accurate flying, so it is<br />
much better to persevere with the mouse.<br />
You may hear beeping sounds while flying around the airport. <strong>The</strong>se are landing<br />
aid signals. Don’t worry about them for the moment.<br />
You will know that you have mastered this when you can make the aircraft<br />
climb steadily in the air. <strong>The</strong> next step is to learn to keep the aircraft at a constant<br />
altitude, or to make it ascend or descend slowly and under your control.<br />
Keeping the aircraft at a constant altitude involves observing the altimeter and<br />
making small changes with the mouse forwards or backwards to stop the aircraft<br />
ascending or descending respectively.<br />
<strong>The</strong> altimeter instrument is at the middle top of the instrument panel. <strong>The</strong><br />
long needle shows hundreds of feet, the short needle shows thousands of feet. <strong>The</strong><br />
altimeter below shows an altitude of 300 feet, approximately 100 meters.
102 CHAPTER 8. A BASIC FLIGHT SIMULATOR TUTORIAL<br />
As you ascend or descend the altimeter will change accordingly, turning anticlockwise<br />
as you descend, and clockwise as you gain height. If you see the altimeter<br />
“unwinding” you will be able to tell that you are losing height and move<br />
the mouse backwards slightly to raise the nose. After a while you will notice that<br />
when flying level the nose of the aircraft is always in the same position relative to<br />
the horizon. This is the aircraft attitude for level flight. By putting the nose in that<br />
same position, you will achieve almost level flight without having to reference the<br />
instruments. From there you can fine-tune your altitude.<br />
Beware: an altimeter does not automatically show the absolute altitude above<br />
sea level. You must adjust for the local air pressive. <strong>The</strong> little black knob on the<br />
lower left side of the altimeter allows you to adjust the altimeter. Start <strong>FlightGear</strong><br />
and stay on the ground. Click (in normal mouse mode) inside the black knob. A<br />
click on the left half makes the altimeter turn back. On the right half the altimeter<br />
turns forward. Use that little knob to tune in the current altitude. <strong>The</strong> principle<br />
is you use the knob when you are sure about the altitude. If you know you are at<br />
1,100 feet altitude, tune in 1,100 feet on the altimeter. Clicking with the middle<br />
mouse button makes the knob turn faster. Type Ctrl-c to see the two button<br />
halves highlighted.<br />
To make settings the altimeter easier, airports advertise their altitude in various<br />
ways. <strong>The</strong>y may provide a radio service (called ATIS in the USA) to broadcast<br />
the current air pressure at sea level. This is expressed in inches of mercury. <strong>The</strong><br />
altimeter contains a small scale inside which is calibrated in this way. You can set<br />
your altimeter using this scale. Alternatively, if you are on the ground and know<br />
the altitude of the airport, you can simply adjust your altimeter until it displays the<br />
correct altitude.<br />
Note that there is an important difference between “altitude above sea level”<br />
and “altitude above the ground”. If you fly near Mount Everest at an altitude of<br />
24,000 feet above sea level (AMSL), your altitude above the ground (AGL) will be<br />
much less. Knowing the altitude of the ground around you is obviously useful.
8.4. BASIC TURNS 103<br />
8.4 Basic Turns<br />
While if you had enough fuel you could return to the same airport by flying straight<br />
head for thousands of miles, being able to change direction will make your flying<br />
more enjoyable and useful.<br />
Once you are able to fly more or less straight, it is time to learn to turn. <strong>The</strong><br />
principle is simple:<br />
• When the airplane is banked to the left, it turns to the left.<br />
• When the airplane is banked to the right, it turns to the right.<br />
To turn, you do not need high levels of bank. 20˚ is more than enough for a<br />
safe and steady turn. <strong>The</strong> turn coordinator indicates your angle of bank by showing<br />
a depiction of your aircraft from behind. <strong>The</strong> picture below shows the turn coordinator<br />
when the airplane is banked 20˚ to the right. You can also tell the bank angle<br />
by observing the angle of the horizon.<br />
Try the following: keep the airplane banked around those 20˚ for a few minutes<br />
and keep your eyes outside the aircraft You will see the same ground features<br />
appear again and again, every 120 seconds. This shows you need 120 seconds to<br />
make a 360˚ turn (or 60 seconds for a 180˚)turn). This is particularly useful when<br />
navigating. Whatever speed the airplane is flying, if you bank at 20˚ you always<br />
need 60 seconds to make a 180˚ turn in the Cessna 172P.<br />
So, by banking the airplane to the left or to the right, you make it turn to the left<br />
or to the right. Keeping the airplane level with the horizon keeps it flying straight.<br />
<strong>The</strong> little purple ball in the bottom of the turn indicator shows the sideways<br />
forces. In real life you would feel these as your turn, however it is not possible<br />
to simulate these, so you must simply keep an eye on the ball. If you turn neatly<br />
(using the rudder a little bit), the ball will remain centered. If the ball is pushed<br />
say rightwards, this means you the pilot too are pushed rightwards. Like in a<br />
car turning to the left. During a neat turn in an airplane, even a strong turn, the<br />
passengers never endure a sideways force. <strong>The</strong>y are only pushed a little harder on<br />
their seats by the centrifugal force.<br />
By experimenting you will notice you can make much steeper turns by banking<br />
the airplane to high angles and pulling back on the yoke. Turns at over 60˚ bank<br />
angle are the realm of aerobatics and military flying, and dangerous is aircraft such<br />
as the Cessna.
104 CHAPTER 8. A BASIC FLIGHT SIMULATOR TUTORIAL<br />
8.5 Taxiing on the ground<br />
While <strong>FlightGear</strong> starts you by default conveniently lined up on the runway and<br />
ready to go, you may be wondering how to get your aircraft from its hangar, along<br />
the taxi-ways to the runway. This is taxiing.<br />
<strong>The</strong> picture below shows the instrument. It displays how fast the engine is<br />
turning in hundreds of revolutions per minute (RPM).<br />
Type the Page Up key a few times, until the tachometer is showing 1,000<br />
RPM (as shown above). If required type the Page Down key to decrease the<br />
engine speed.<br />
At roughly 1,000 RPM, the airplane will move forward on the runway, but it<br />
will not accelerate and take off.<br />
Type the “.”key (Shift-; on Azerty keyboards). <strong>The</strong> airplane will make a<br />
sharp turn to the right. If you keep the “.”key down the airplane will halt. When<br />
you type the “.” key, you are activating the brake on the right wheel of the airplane.<br />
To activate the brake on the left wheel, use the “,” key.<br />
<strong>The</strong> “,” and “.” keys simulate two brake pedals located at your feet on a real<br />
airplane. Using the throttle and the brake pedals you can control the speed of the<br />
aircraft and cause it to turn on the ground.<br />
<strong>The</strong> brakes can be very useful when taxiing slowly on the runway. You can<br />
also steer the nose-wheel of the aircraft. In a real airplane this is done by pushing<br />
the rudder pedals with your feet. You push with your feet on the side you want to<br />
turn towards. If you don’t have real rudder pedals, there are two ways to control<br />
the virtual rudder pedals:<br />
• Using the keypad 0 and Enter keys . If you type the keypad Enter key<br />
say seven times, you will see the airplane firmly turns to the right and stays<br />
turning that way. Type the keypad 0 key seven times to get the airplane back<br />
rolling (almost) straight.<br />
• Using the mouse. While the mouse is in yoke control mode (+ pointer<br />
shape), if you hold the left mouse button down, the mouse controls the rudder<br />
pedals instead of the yoke. <strong>The</strong> rudder pedals are connected to both the<br />
rudder and nose-wheel. This method is much more precise.<br />
Start the simulator, Type v or V to view the airplane from the outside and keep<br />
x down a couple of seconds to zoom in on the airplane. Look at the front wheel
8.5. TAXIING ON THE GROUND 105<br />
and keep keypad 0 down. <strong>The</strong>n keep keypad Enter down. See the front wheel<br />
turn. Click on the right mouse button to get in yoke control mode (+ pointer<br />
shape). Keep the left mouse button down to get in rudder control mode and move<br />
the mouse to the left and to the right. Note that the rudder, that big vertical control<br />
surface at the rear of the plane, moves together with the front wheel.<br />
I tend to control the rudder pedals using the mouse while the front wheel is on<br />
the ground and use the keypad 0 and Enter keys once it has lifted off. In other<br />
words: I keep the left mouse button down while the front wheel is on the ground.<br />
This allows for a precise and easy rudder control on the ground. <strong>The</strong>n I simply<br />
release the left mouse button once the front wheel lifts off.<br />
8.5.1 Airspeed<br />
Just like driving a car, it is good to know how fast you are traveling. <strong>The</strong> aviation<br />
equivalent of a speedometer is the airspeed indicator (ASI), calibrate in nautical<br />
miles per hour (knots).<br />
A knot is 1.85325 kilometer/hour. So, if you want to have a rough idea of your<br />
speed in flight expressed in km/h, multiply the knots displayed by 2. A knot is<br />
1.15115 miles per hour, so very roughly, 1 knot is 1 mph. Note that some aircraft<br />
ASIs (in particular the Piper J3 Cub) display mph instead of knots.<br />
<strong>The</strong> airspeed indicator displays the speed of the aircraft compared to the surrounding<br />
air, not the speed compared to the ground like a car speedometer does. If<br />
the plane is halted on the ground and there is a 10 knot wind blowing from straight<br />
ahead, the airspeed indicator will display 10 knots airspeed, although the plane will<br />
not be moving relative to the ground.
106 CHAPTER 8. A BASIC FLIGHT SIMULATOR TUTORIAL<br />
When the airplane rolls over the runway at more than 40 knots, you must prevent<br />
the front wheel from touching the ground. <strong>The</strong> nosewheel is not designed for<br />
high speeds and in real life would shimmy and wear out.<br />
During take off, once over 40 knots you can make the front wheel leave the<br />
ground by pulling back gently on the control yoke. Don’t turn sharply at high<br />
speed on the ground. Doing so may cause the aircraft to tip over.<br />
<strong>The</strong> picture below shows the front wheel slightly lifted. Don’t overdo this.<br />
Keep the airplane’s white nose cover well below the horizon. You just need to lift<br />
the plane’s nose very slightly.<br />
Question: if the front wheel no longer touches the runway, how do you steer<br />
the airplane? Answer: still using the rudder pedals. As mentioned above, the<br />
rudder pedals are linked to both the nose-wheel and the tail rudder, that big vertical<br />
moving part at the tail of the plane:<br />
At airspeeds above 40 knots, the rudder has enought air-flow over it to steer the<br />
airplane.<br />
Note the front wheel and the tail rudder don’t make the airplane turn at exactly<br />
the same rate. So when the rudder takes over the front wheel, you must adapt the<br />
rudder pedals angle. That means fast typing keypad 0 and keypad Enter (or hold<br />
the left mouse button down and tightly control the rudder with the mouse).
8.6. ADVANCED TURNS 107<br />
Once you’ve become familiar with the nose-wheel and rudder, you can use<br />
these new controls to keep the airplane straight on the runway during take-off.<br />
Say the airplane is heading too much to the right. You type keypad 0 a few<br />
times to make it turn back to the left. Don’t wait till the aircraft has straightened up<br />
completely. Type keypad Enter before the aircraft reaches the direction you wish<br />
to travel. Otherwise you will find that you will over-correct and have to turn back<br />
again. If you use the mouse, such corrections are much easier and more precise.<br />
To summarise: two methods exist to steer the airplane on the ground: the differential<br />
brakes on the side wheels and the rudder pedals. This control redundancy<br />
is very common in aviation. If one method fails, you still have another method<br />
available to perform the task.<br />
You may be wondering why the aircraft drifts to the left when it rolls on the<br />
ground, forcing your to compensate with a little push on the right rudder pedal?<br />
<strong>The</strong> main reason is the flow of air produced by the propeller. It blows along the<br />
airplane body, but also corkscrews around the airplane fuselage. <strong>The</strong> upper part of<br />
that slight vortex pushes the vertical tail to the right. This causes makes the front<br />
of the aircraft to yaw to the left.<br />
You can center all yoke and rudder controls by typing 5 on the keypad. This is<br />
a good preflight precaution. Sometimes it can “save your life” in flight if you find<br />
yourself with controls all over the place!<br />
8.6 Advanced Turns<br />
As with turning on the ground, there are two methods of turning in the air. You can<br />
use the wing ailerons (steered by the yoke/mouse) as described above or you can<br />
use the tail rudder (steered by the rudder pedals / the keypad keys /0 and Enter.<br />
Why two ways? Partially for redundancy, but mainly because they are complementary.<br />
<strong>The</strong> main effect of the rudder is yaw (rotation around the vertical axis),<br />
while the main effect of the ailerons is roll (rotation around the longitudonal axis).<br />
• When flying close to the ground, it is better not to bank the airplane in order<br />
to turn. <strong>The</strong> rudder is used more instead. Acting on the rudder pedals allows<br />
you to turn the airplane without excessive banking.<br />
• When the plane is just above the runway, the two side wheels need to be at<br />
the same height above the runway for landing. That means the wings must<br />
be level with the horizon. <strong>The</strong> plane is not allowed to bank. You keep the<br />
plane wings level with the horizon by using the yoke/mouse/ailerons. Note<br />
this does not need to be perfect. A bank of a few degrees is harmless.<br />
• In flight, especially at high speed, the rudder is an in-efficient way to turn the<br />
aircraft:<br />
– It causes the airplane to present its flank to the airstream, increasing<br />
drag.
108 CHAPTER 8. A BASIC FLIGHT SIMULATOR TUTORIAL<br />
– <strong>The</strong> airplane turns very slowly.<br />
– You will lack control while turning.<br />
– At high flight speed the centrifugal force will be disturbing or even<br />
dangerous.<br />
Using the yoke/mouse/ailerons allows for efficient, fast, reliable and comfortable<br />
turns.<br />
• <strong>The</strong> rudder can be vital when the wings are stalled. Indeed, during a stall<br />
the wing ailerons become less effective or even useless. (Note that some<br />
airplanes can go in a very dangerous stall if you overdo the rudder control at<br />
low speed.)<br />
When you turn in flight, using the ailerons, you still need the rudder a little<br />
bit. You add a little bit of rudder. This allows you to compensate for the adverse<br />
yaw created when you roll using the ailerons. In a real aircraft, you can feel this<br />
sideways motion. In the simulator, you can check this visually on the turn coordinator.<br />
In the picture below the little ball is pushed rightwards during a strong turn<br />
to the right using the ailerons. That means you the pilot endure a rightwards force<br />
too. You can compensate this by pushing the right rudder pedal (type the keypad<br />
Enter key a few times). In normal flight you should use the rudder to keep the<br />
little ball centered.<br />
So, in normal flight use the ailerons to turn, while close to the ground at low<br />
speed use the rudder. However, one method never completely cancels out the other.<br />
You still need the rudder at high altitudes and speeds. Reciprocally you have to use<br />
the ailerons a little bit when close to the ground, to keep the wings level with the<br />
horizon.<br />
Even when taxiing, you should use the ailerons. Otherwise, strong winds can<br />
blow the aircraft onto its side. To counteract this, your should turn the ailerons into<br />
the wind. This raises the aileron in the wind, helping to keep the wing down.<br />
You should avoid making quick and agressive movements of the rudder. On<br />
the ground at high speed this can make the airplane turn too sharply. In flight at<br />
low speed it can cause a very dangerous type of stall. In flight at high speed it<br />
can cause all kinds of aerodynamic and physical discomfort. Instead, make gentle<br />
movements of the rudder.<br />
I recommend you practise turning with the rudder in flight. Fly at a low speed<br />
of about 70 knots. Try to keep the altitude stable by increasing and decreasing the<br />
engine power. Use the rudder to turn towards a ground feature and maintain a heading,<br />
then turn the aircraft towards a new heading. See how the plane yaws. Learn<br />
to anticipate rudder control. Don’t try to make steep turns. Use the yoke/ailerons<br />
to keep the wings level constantly.
8.7. A BIT OF WIEHEISTEROLOGY 109<br />
8.7 A Bit of Wieheisterology<br />
Wieheisterology comes from the German phrase “Wie heißt Er” – “What’s that<br />
name”. This section is about gauges, switches and controls of the aircraft. While<br />
in the simulator you can take off and land a basic airplane with just the engine<br />
throttle and the yoke, but you will need all the controls to perform securely and<br />
efficiently.<br />
8.7.1 Engine control<br />
An airplane engine is designed for simplicity, reliability and efficiency. Rather than<br />
use advanced electronic ignition and fuel injection systems found in modern cars,<br />
they instead use older technology that doesn’t rely on electrical power. That way,<br />
the plane can still fly even if it suffers complete electrical failure.<br />
Magneto<br />
On the bottom left, below the instrument panel you will find the magneto switch<br />
and engine starter:<br />
To see the switch, either type P to get the schematic instrument panel or type<br />
Shift-x to zoom out (x or Ctrl-x to zoom back in).<br />
You can move the switch with the { and } keys (use the Alt Gr key on Azerty<br />
keyboards).<br />
You are probably aware that the fuel inside a car engine is ignited by electric<br />
sparks. Modern car engines use electronic ignition. An airplane engine uses a<br />
more old-fashioned (but more reliable) magneto ignition instead. For redundancy,<br />
it contains two such magnetos: the “left” one and the “right” one. When you<br />
change the magneto switch on OFF, both magnetos are switched off and the engine<br />
will not run. With the magneto switch on L you are using the left magneto. On R<br />
you are using the right magneto. On BOTH you use both. In flight you will use<br />
BOTH.<br />
Given that you use both magnetos in flight, why have the switch? <strong>The</strong> reason<br />
is that during your pre-flight checks you will verify that each of the magnetos is<br />
working correctly. To do this, increase the RPM to about 1500 then switch the<br />
magneto switch to L and observe the tachometer. You should observe a slight
110 CHAPTER 8. A BASIC FLIGHT SIMULATOR TUTORIAL<br />
drop in RPM. If the engine cuts out, the left magneto is broken. If you do not see<br />
an RPM drop, then the switch may be faulty, as both magnetos are still switched<br />
on. You can then perform the same test on the right magneto. Of course, in the<br />
simulator, the magnetos are unlikely to fail!<br />
Should one of the two magnetos fail in flight, the other one will keep the engine<br />
running. <strong>The</strong> failure of one magneto is rare, the failure of both simultaneously is<br />
almost unheard of.<br />
You may have typed { to shut the engine down. To start the engine again after<br />
doing so, type } three times in order to put the magneto switch on BOTH. <strong>The</strong>n<br />
use the starter motor by pressing the s for a few seconds, till the engine is started.<br />
You can also turn the magneto switch and start the engine by clicking left and<br />
right of the switch in normal mouse mod). Type Ctrl-c to see the two click sides<br />
highlighted by yellow rectangles.<br />
If you turn the switch to OFF, the engine noise stops. If you quickly turn the<br />
switch back to L, the engine starts again as the propeller is still turning. If you<br />
wait for the propeller to stop, placing the switch on L, R or BOTH won’t start the<br />
engine. (Once the engine is halted, always place the magneto switch to OFF.)<br />
Throttle<br />
You already know that you increase the engine power by pushing that throttle<br />
rod in (Page Up key). You decrease the power by pulling the control out (Page<br />
Down key). You can also click left and right of the lever (middle mouse button for<br />
quicker moves, Ctrl-c to highlight the left and right halves).<br />
What does “increase the power” actually mean? Does it mean you increase<br />
the amount of fuel delivered to the engine? Yes, but this is not enough to fully<br />
understand what you are doing. You need to be aware that the engine is also fed<br />
with a huge amount of air. <strong>The</strong> engine’s cylinders burn an mixture of fuel and air.<br />
Fuel alone wouldn’t burn. Only a mixture of fuel and air can detonate and move<br />
the engine pistons. So when you push the throttle in, you increase both the fuel and<br />
the air fed to the engine.<br />
Mixture<br />
<strong>The</strong> amount of air compared to the amount of fuel is critical. <strong>The</strong> proportion of the<br />
two has to be tuned closely. This is the purpose of the mixture lever. <strong>The</strong> picture<br />
below displays the mixture lever, pulled out far too much.
8.7. A BIT OF WIEHEISTEROLOGY 111<br />
When the mixture lever is fully pushed in, you feed the engine with an lots<br />
of fuel and little air. This is known as a “rich” mixture. When the lever is pulled<br />
out completely, there is an excess of air, known as a “lean” mixture. <strong>The</strong> correct<br />
position to produce maximum power is in between these two extremes, usually<br />
quite close to fully pushed in.<br />
When you start the engine and when you take off, you need a fuel-rich mixture.<br />
That means the mixture lever should be pushed in. A fuel-rich mixture allows the<br />
engine to start easily. It also makes the engine a little more reliable. <strong>The</strong> drawback<br />
is that a part of the fuel is not burned inside the engine. It is simply wasted and<br />
pushed out the exhaust. This makes the engine more polluting, it decreases the<br />
energy the engine can deliver and it slowly degrades the engine by causing deposits<br />
of residues inside the cylinders.<br />
Once in normal flight, you have to pull the mixture lever a little, to get a more<br />
optimal mixture. Check this out by doing the following. Start the simulator. Put<br />
the parking brakes on with key B (that is Shift-b). Push the throttle in to its<br />
maximum. <strong>The</strong> engine RPM should now be close to the maximum. Slowly pull<br />
on the mixture lever (using the mouse in normal pointer mode). You will see the<br />
RPM increases a little. You get more power, without increasing the fuel intake. You<br />
waste no fuel and it pollutes less. If you continue to pull the mixture lever, the RPM<br />
will decrease back away, because now there is too much air. <strong>The</strong> excess of air slows<br />
the explosions down inside the cylinders and decreases the explosion temperature,<br />
hence the thermodynamic yield decreases. You have to tune in the optimal mixture.<br />
For thermodynamic reasons, the best mixture isn’t exactly at maximum power - it<br />
is better for the engine to be running very slight richer or leaner than maximum<br />
power. This also avoids the possibility of the fuel detonating explosively damaging<br />
the engine. You can find the maximum power point by the fact you get the highest<br />
RPM. (Another method is to check the engine exhaust temperature. Roughly, this<br />
is the point at which you get the highest temperature.)<br />
<strong>The</strong> mixture control allows you to burn less fuel for the same speed and distance,<br />
and therefore fly farther and pollute less. However, if you mis-manage it,<br />
it can cause serious problems. Suppose you go flying at high altitude and pull out<br />
the mixture lever accordingly. At high altitude there is less oxygen available so<br />
the correct mixture will be quite lean - i.e. with little fuel being used. <strong>The</strong>n you<br />
descend back in order to land. If you forget to push the mixture lever in as you<br />
descend, <strong>The</strong> fuel/air mixture will become far too lean and the engine will simply<br />
halt.
112 CHAPTER 8. A BASIC FLIGHT SIMULATOR TUTORIAL<br />
When landing, you have to tune back in a mixture that is a little too rich in<br />
fuel. This means pushing the mixture lever in. That way the engine becomes a<br />
little more reliable and will be better adapted to a decrease in altitude.<br />
I wrote above that placing the magneto on OFF is not the right way to stop the<br />
engine. <strong>The</strong> right method is to pull the mixture lever. First pull the throttle out<br />
completely, to get the engine to minimum power and fuel consumption. <strong>The</strong>n pull<br />
the mixture lever, till the engine stops because the mixture contains too much air.<br />
This ensures the engine doesn’t get choked by waste fuel residues. Finally, turn the<br />
magneto switch to OFF to ensure the engine won’t start again accidentally.<br />
An important warning: you may think the RPM indicator reflects the engine<br />
power. Wrong. Two things make the RPM increase: the engine power and the<br />
airplane speed. To check this, fly to a given altitude then pull the engine power<br />
to minimum. Try out diving to the ground then rising back to altitude. You will<br />
see the RPM varies significantly as does your airspeed. It rises while diving and<br />
decreases while climbing.<br />
One pitfall of this is when you intend to tune the engine power in for landing.<br />
Suppose you’re descending towards the airport, flying fast. You know the ideal<br />
RPM for landing is around 1,900 RPM. So you pull the throttle till you get 1,900<br />
RPM. You think you tuned in the appropriate RPM. You think you shouldn’t bother<br />
any more about it. But when you level off, the plane’s speed starts to decrease,<br />
along with the RPM. A few minutes later, you get the low flight speed you wanted.<br />
You don’t see the RPM is now far too slow. You will either lose altitude or stall.<br />
Or both. Be cautious with the throttle and with the RPM indicator. Either pull on<br />
the throttle more steadily or be mentally prepared to push it back in quickly.<br />
8.7.2 Wings and speed<br />
Say you are flying with full engine power. Dropping the nose a little makes you<br />
lose altitude and raising the nose a little makes you gain altitude. You may think<br />
this is quite straightforward. <strong>The</strong> plane travels in the direction it is heading; the<br />
direction the propeller is heading. This is not the best way to think about it. This<br />
model would be fine for a rocket, but not for an airplane. A rocket is lifted by its<br />
engine, while a plane is lifted by its wings. That’s a huge difference.<br />
Get a big rigid square of cardboard, hold it horizontally in your hand with your<br />
arm stretched out and make it do fast horizontal movements while rotating your<br />
torso. When the cardboard moves flat through the air, it experiences no lift force.<br />
If you twist your arm slightly to give the cardboard a slight upward angle, you will<br />
feel it tends to lift in the air. <strong>The</strong>re is an upward force acting on the cardboard.<br />
That’s the way a wing holds a plane in the air. <strong>The</strong> wings have a slight upward<br />
angle and lift the airplane. <strong>The</strong> more angle you give the cardboard, the more lift<br />
force. (Till you give it too steep an angle. <strong>The</strong>n you will rather feel a brake force.<br />
<strong>The</strong> cardboard is “stalling” (see below).)
8.7. A BIT OF WIEHEISTEROLOGY 113<br />
• When you pull the yoke, the airplane’s nose rises up. Hence the wings<br />
travel through the air at a steeper angle. Hence the lift force on the wings is<br />
stronger. Hence the plane rises in the air.<br />
• When you push the yoke, the airplane’s nose dives. Hence the wings travel<br />
through the air with less angle. Hence the lift force on the wings decreases.<br />
Hence the plane descends.<br />
What matters is the angle the wings travel through the air. This is the angle of<br />
attack.<br />
I wrote above that when the wings travel through the air with no angle of attack,<br />
they don’t produce lift. This is false. It would be true if the wings were a flat plate<br />
like the cardboard. But they aren’t. <strong>The</strong> wings are a slightly curved airfoil. This<br />
makes them create lift even when traveling through the air at no angle of attack.<br />
Actually, even with a little negative angle of attack they still create a lift force. At<br />
high speed the airplane flies with the wings slightly angled towards the ground!<br />
<strong>The</strong> angle at which the wings travel through the air matters. Something else<br />
matters too: the speed. Take the cardboard again in your hand. Hold it with a given<br />
slight angle and don’t change that angle. Move it at different speeds through the<br />
air. <strong>The</strong> faster you move the cardboard, the more upward force it experiences.<br />
• When you increase the engine power, the plane increases speed, the lift force<br />
on the wings increases and the plane gains altitude.<br />
• When you decrease the engine power, the plane decreases speed, the lift<br />
force on the wings decreases and the plane loses altitude.<br />
To make things a little more complicated: when rising in the air, the airplane<br />
tends to lose speed. When descending, it tends to gain speed.<br />
That’s all a matter of compromises. If you want to fly at a constant altitude and<br />
at a given speed, you will have to tune both the engine power and the yoke/elevator<br />
(or better: the trim (see below)), till you get what you want. If you want to descend<br />
yet keep the same speed, you have to push the yoke a little and decrease the engine<br />
power. And so on. You constantly have to tune both the engine power and the<br />
yoke. However, during a normal flight you can simplify this by simply choosing a<br />
comfortable engine power level then relying on the yoke and trim for altitude.
114 CHAPTER 8. A BASIC FLIGHT SIMULATOR TUTORIAL<br />
A very interesting exercise you can perform with the simulator is to fly straight<br />
with full engine power. Get maximum speed while keeping in horizontal flight.<br />
<strong>The</strong>n decrease the engine power to minimum. Pull steadily on the yoke to keep<br />
the plane at constant altitude. <strong>The</strong> plane slows down steadily, meanwhile you have<br />
pull more and more on the yoke to stay level. Since the speed decreases the lift<br />
from the wing will decrease, but you compensate the loss of speed by increasing<br />
the wing angle of attack. This proves the plane does not necessarily travel in the<br />
direction its nose is heading. In this experiment we make the nose rise in order to<br />
stay at constant altitude. Once the plane is flying very slowly, and the nose is very<br />
high, you may hear a siren yell. That’s the stall warning (see below). This indicates<br />
that the angle of attack is too high for the airfoil to produce lift. <strong>The</strong> wings are no<br />
longer producing lift and the plane quickly loses altitude. <strong>The</strong> only way to correct<br />
this is push the yoke forwards to reduce the angle of attach, making the nose drop,<br />
then apply full power to gain speed and finally bring the yoke carefully back to<br />
level flight.<br />
Question: is it better to control the airplane’s speed and altitude with the yoke<br />
or with the throttle? Answer: it depends on what exactly you intent to do and on the<br />
situation you are in. In normal flight, as said above, you tend to set a comfortable<br />
engine power level, forget about it and rely on the yoke and trim. During take off<br />
and landing the procedures are quite strict about the use of yoke and throttle. You<br />
do the opposite: control the speed with the yoke and trim, control the altitude and<br />
descent speed with the engine throttle. This will be discussed further below.<br />
8.7.3 <strong>The</strong> flaps<br />
<strong>The</strong> flaps are situated at the rear of the wings, either side of the aircraft fuselage.<br />
You deploy the flaps and retract them back in by using the flaps control lever:<br />
You can either click on it with the mouse or use the [ and ] keys. Key [ to<br />
retract the flaps one step, ] to deploy them one step at a time. Type v to view the<br />
plane from the outside and try out [ and ]. (On the schematic instrument panel the<br />
flaps lever is located at the lower right.)<br />
In the Cessna 172P. there are four flaps settings:
8.7. A BIT OF WIEHEISTEROLOGY 115<br />
• 0˚ - for normal flight and normal take off.<br />
• 10˚ - for short field take off, when you want to gain altitude while flying<br />
slowly. Or during the first stange of an approach to land.<br />
• 20˚ - to slow the aircraft and lose altitude quickly, for example when descending<br />
towards the runway to land.<br />
• 30˚ - To lose altitude even more quickly.<br />
<strong>The</strong> flaps are somewhat delicate. Do not deploy the first step of flaps above<br />
110 knots. Do not deploy the second or third stage of flaps above 85 knots.<br />
<strong>The</strong> flaps create large amounts of drag on the aircraft and brake the plane at<br />
high speed. This is one more reason not to forget to pull the flaps back in once you<br />
fly above 85 or 110 knots.<br />
To check the flaps position visually, either use the mouse view mode to look at<br />
the back of the wing, or type Shift-right arrow to shift the view to the right<br />
and then quickly Shift-up arrow to get back to front view.<br />
Flaps increase wing lift by altering the shape of the airfoil. <strong>The</strong> wing lifts more<br />
at a given speed with the first stage of flaps set. Hence you will get in the air a little<br />
sooner during take off. It also has the effect to make the plane fly with a lower nose<br />
attitude. This is useful as it provides a better view of the runway when taking off<br />
or landing.<br />
<strong>The</strong> flaps also increase drag on the aircraft. <strong>The</strong> second and third stage of flaps<br />
produce much more drag than lift, so they are used to brake the plane. This is<br />
particularly useful when landing, because the airplane glides very well. If you cut<br />
down the engine power completely, the plane will descend, yet but too slowly. You<br />
need to deploy two or three flaps steps in order to brake and really descend towards<br />
the ground.<br />
<strong>The</strong> fact that the flaps brake during landing makes you need more engine power<br />
during the landing. This can seem odd. Why not simply throttle the engine down<br />
to minimum and use less flaps steps? <strong>The</strong> answer is that it is better to have a<br />
strongly braking plane and lots of engine power, as the plane reacts faster to your<br />
commands. Should the engine fail, then just retract flaps as needed and glide to the<br />
runway.<br />
What can you do if you have full flaps extended and need to increase your rate<br />
of descent further? Slowly push the rudder pedals on one side. This will make the<br />
plane present its flank to the air stream and brake. Compensate the turning by using<br />
the ailerons (yoke). This is known as side-slipping, and is a very effective way to<br />
lose height progressively as it is easy to stop at any point.<br />
8.7.4 <strong>The</strong> stall<br />
An aircraft relies on the smooth flow of air over the surface of the wing to produce<br />
lift. However, if the wing is at too high an angle of attack, this flow is broken, and
116 CHAPTER 8. A BASIC FLIGHT SIMULATOR TUTORIAL<br />
the wing no-longer produces lift. With no lift, the aircraft cannot fly, and quickly<br />
drops back to earth. This is known as a stall.<br />
A stall is an emergency situation, whatever the While it can happen at any<br />
speed, it commonly occurs in slow flight. A given aircraft has a specific stall speed,<br />
at which no angle of attack can produce enough lift. You should always keep your<br />
aircraft well above the stall speed. To help, aircraft are equipped with stall sirens<br />
that sound when the angle of attack is approached.<br />
If you encounter a stall, the remedial action is to immediately drop the nose,<br />
and apply full power, bringing the nose level when flying speed has been attained<br />
again. However, doing so will cause the aircraft to lose altitude, which you may<br />
not have to spare when landing or taking off!<br />
A spin occurs when one wing stalls before the other, which can occur in a steep<br />
turn at low speed. As one wing is still flying, the aircraft turns around the stalled<br />
wing, spinning tighter and tighter. To get out of a spin, you need to apply rudder to<br />
straighten out the spin into a normal stall, then recover as above.<br />
Aircraft like the Cessna 172 and Piper Cub, have benign stalls, and are unlikely<br />
to enter a spin. High performance jets, such as the F16 have much more agressive<br />
stalls, and can easily enter a spin.<br />
To practise this in the simulator, do the following:<br />
• Fly at constant altitude and attitude.<br />
• Reduce engine power, raising the nose to avoid entering a descent.<br />
• Continue to reduce power until the stall begins.<br />
• Try to control the plane while it stalls and descends to the ground.<br />
• Keep the yoke pulled to the maximum and the plane in a steady attitude, the<br />
wings parallel with the horizon. Try to change direction.<br />
• Recover by lowering the nose, applying full power, and correcting the attitude<br />
once flying speed has been regained.<br />
You can also experiment with stalls with different flap settings, and high speed<br />
stalls by making abrupt attitude changes.<br />
Experiment with different aircraft. Compared with the Cessna 172 the Cessna<br />
Citation jet, stalls much more agressively and with little warning..<br />
8.7.5 <strong>The</strong> trim<br />
<strong>The</strong> trim is the dark big vertical wheel with gray dots located at the middle below<br />
the instrument panel:
8.7. A BIT OF WIEHEISTEROLOGY 117<br />
On <strong>FlightGear</strong>, the keys Home and End adjust the trim. Home rolls the wheel<br />
upwards while the End rolls the wheel downwards. You can also click on the upper<br />
or lower half of the trim wheel.<br />
In first approximation, the trim does the same as the yoke: it acts on the elevator.<br />
Turning the trim wheel downwards is the same as pulling on the yoke. Yet<br />
there is a key difference between the trim and the yoke. <strong>The</strong> trim remains in position<br />
after you make a change, while the yoke only continues to affect the elevator<br />
while you apply pressure and returns the elevator to neutral when you release it.<br />
During cruise flight, the required elevator position to keep the aircraft at constand<br />
altitude will not be completely neutral - it will vary depending on the air<br />
outside the aircraft, the current fuel level, and the payload. Obviously, holding the<br />
yoke continually to retain a constant attitude would quickly become tiring. By using<br />
the trim to “trim out” the elevator force required for cruise flight, the yoke can<br />
be kept neutral.<br />
During take off the trim should be neutral. Otherwise you may find that it either<br />
refuses to take-off with the normal level of yoke control, or takes off too quickly.<br />
During landing, try to get the yoke/mouse/elevator towards neutral position by<br />
tuning the trim. This makes making small adjustments to your attitude and position<br />
easier. On the Cessna 172p this means trim on neutral. On the Cherokee Warrior<br />
II this means the trim a little “pulled”.<br />
<strong>The</strong> trim wheel movement is much slower than the yoke, allowing for delicate<br />
changes in trim. Be patient.<br />
8.7.6 What direction am I flying?<br />
Knowing the direction you are going is obviously a good idea. <strong>The</strong>re are three<br />
basic ways to determine the direction you are flying:<br />
• Look through the windows. If you are flying regularly from the same airport,<br />
you will learn to recognize the ground features such as roads, hills, bridges,<br />
cities, forests. In a simulator, you only have a narrow view of the virtual<br />
outside world. Several ways exist to allow you to pan your virtual head<br />
inside the airplane:<br />
– Use Shift and the four arrow keys to look to the front, rear, left and<br />
right.
118 CHAPTER 8. A BASIC FLIGHT SIMULATOR TUTORIAL<br />
– Use Shift and the keypad keys to look in the four directions mentioned<br />
above and in four diagonal directions in-between.<br />
– Use the mouse in view mode (right button, ↔). This allows you to look<br />
in every direction, including up and down. Click the left mouse button<br />
to bring the view back to straight ahead.<br />
• <strong>The</strong> magnetic compass. This is located above the instrument panel. <strong>The</strong><br />
compass is simple, but is affected by the acceleration of the aircraft, and<br />
magnetic abnormalities on the ground. Also, the compass points towards<br />
magnetic north rather than true north. This deviation varies depending on<br />
your location.<br />
• <strong>The</strong> directional gyro (picture below) or “heading indicator”. <strong>The</strong> gyro is<br />
powered by a vacuum system. <strong>The</strong> gyro is set to match the magnetic compass,<br />
and is not affected by magnetic issues, or aircraft movement. However,<br />
due to gyroscopic precession and friction in the instrument, over time it drifts<br />
and must be reset by reference to the magnetic compass on ocassion. To reset<br />
the HI, during cruise flight, use the black knob on the bottom left of the<br />
instrument (normal mouse pointer mode, click left or right half of the knob,<br />
middle mouse button to move faster, Ctrl-c to highlight halves). (<strong>The</strong> red<br />
knob, bottom right, is used to tell the autopilot what direction you wish to<br />
fly (HDG = “heading”).<br />
8.7.7 A look around the panel<br />
Finally, let’s have a look at the instrument panel, combining the instruments described<br />
above with some new ones.
8.7. A BIT OF WIEHEISTEROLOGY 119<br />
<strong>The</strong> six-pack<br />
Let us start with the most important instruments any simulator pilot must know,<br />
these are known as the “holy six” or the “six-pack” . In the center of the instrument<br />
panel (Fig. 5), in the upper row, you will find the artificial horizon (attitude indicator)<br />
displaying pitch and bank of your plane. It has pitch marks as well as bank<br />
marks at 10, 20, 30, 60, and 90 degrees.<br />
Left of the artificial horizon, you’ll see the airspeed indicator. Not only does<br />
it provide a speed indication in knots but also several arcs showing characteristic<br />
velocity rages you have to consider. At first, there is a green arc indicating the normal<br />
operating range of speed with the flaps fully retracted. <strong>The</strong> white arc indicates<br />
the range of speed with flaps in action. <strong>The</strong> yellow arc shows a range which should<br />
only be used in smooth air. <strong>The</strong> upper end of it has a red radial indicating the speed<br />
you must never exceeded, unless you want to break up the plane in mid-flights. . .<br />
Below the airspeed indicator you can find the turn indicator. <strong>The</strong> airplane in<br />
the middle indicates the roll of your plane. If the left or right wing of the plane is<br />
aligned with one of the marks, this would indicate a standard turn, i.e. a turn of<br />
360 degrees in exactly two minutes.<br />
Below the plane, still in the turn indicator, is the inclinometer. It indicates<br />
whether the rudder and ailerons are co-ordinated. During turns, you always have to<br />
operate aileron and rudder in such a way that the ball in the tube remains centered;<br />
otherwise the plane is skidding. A simple rule says: “Step on the ball”, i.e. step<br />
onto the left rudder pedal when the ball is on the left-hand side.<br />
If you don’t have pedals or lack the experience to handle the proper ratio<br />
between aileron/rudder automatically, you can start <strong>FlightGear</strong> with the option<br />
--enable-auto-coordination.<br />
To the right-hand side of the artificial horizon you will find the altimeter showing<br />
the height above sea level (not ground!) in hundreds of feet. Below the altimeter<br />
is the vertical speed indicator indicating the rate of climbing or sinking of your<br />
plane in hundreds of feet per minute. While you may find it more convenient to<br />
use than the altimeter in certain cases, keep in mind that its display usually has a<br />
certain time-lag.<br />
Further below the vertical speed indicator is the propellor tachometer, or RPM<br />
(rotations per minute) indicator, which displays the rotations per minute in hundreds.<br />
<strong>The</strong> green arc marks the optimum region for cruise flight.<br />
<strong>The</strong> group of the main instruments further includes the gyro compass being<br />
situated below the artificial horizon. Besides this one, there is a magnetic compass<br />
sitting on top of the panel.<br />
Four of these gauges being arranged in the from of a “T” are of special importance:<br />
<strong>The</strong> air speed indicator, the artificial horizon, the altimeter, and the compass<br />
should be scanned regularly during flight.
120 CHAPTER 8. A BASIC FLIGHT SIMULATOR TUTORIAL<br />
Supplementary Instruments<br />
Beside the six-pack, there are several supplementary instruments. To the very left<br />
you will find the clock, obviously being an important tool for instance for determining<br />
turn rates. Below the clock there are several smaller gauges displaying the<br />
technical state of your engine. Certainly the most important of them is the fuel<br />
indicator - as any pilot should know.<br />
<strong>The</strong> ignition switch is situated in the lower left corner of the panel (cf. Fig. 4).<br />
It has five positions: “OFF”, “L”, “R”, “BOTH”, and “START”. <strong>The</strong> first one is<br />
obvious. “L” and “R” do not refer to two engines (as the Cessna 172 only has<br />
one) but the two magnetos, providing redundancy in the case of a failure.. <strong>The</strong><br />
two switch positions can be used for test puposes during preflight. During normal<br />
flight the switch should point on “BOTH”. <strong>The</strong> extreme right position is for using<br />
a battery-powered starter (operated with the “s” key).<br />
<strong>The</strong> handle below the yoke is the parking brake. In the vertical position, the<br />
parking brake is ON. <strong>The</strong> parking brake is operated with the “B” key.<br />
Radios<br />
<strong>The</strong> right hand side of the panel is occupied by the radio stack. Here you find two<br />
VOR receivers (NAV), an NDB receiver (ADF) and two communication radios<br />
(COMM1/2) as well as the autopilot.<br />
<strong>The</strong> communication radio is used for communication with air traffic facilities;<br />
it is just a usual radio transceiver working in a special frequency range. <strong>The</strong> frequency<br />
is displayed in the LEDs. Usually there are two COM transceivers; this<br />
way you can dial in the frequency of the next controller to contact while still being<br />
in contact with the previous one.<br />
<strong>The</strong> COM radio can be used to listen to the current weather conditions at an<br />
airport, known as ATIS. To do this, simply dial in the ATIS frequency of the relevant<br />
airport. You can find this by selecting ATC/AI->Frequencies from the<br />
menu, and selecting the 4-letter ICAO code of a nearby airport.<br />
Each COM radio has two frequencies configured - an ‘active’ frequency which<br />
the pilot is transmitting and receiving on, and a ‘standby’ frequency which may<br />
be changed. In this way, you can continue to listen on one frequency while tuning<br />
another one.<br />
You can change the radio frequency using the mouse. For this purpose, click<br />
left/right to the circular knob below the corresponding number. <strong>The</strong> corresponding<br />
switch left to this knob can be used for toggling between the active/standby<br />
frequency.<br />
Use of the autopilot and radio navigation equipement is covered in later tutorials.<br />
For the moment you can ignore these radio instruments as long as you are<br />
strictly flying according to VFR (visual flight rules).
8.8. LET’S FLY 121<br />
8.8 Let’s Fly<br />
By now you will be able to keep on runway while taking off by using the rudder and<br />
you’re able to fly straight, descend, climb and make gentle turns. This section will<br />
describe a slightly more realistic approach to taking off and landing, and introduce<br />
some of the more subtle concepts you should be aware of.<br />
8.8.1 A realistic take off<br />
<strong>The</strong> following general rules apply during a normal take-off:<br />
• <strong>The</strong> nose-wheel should be lifted from the runway at approximately 40 knots.<br />
• Immediately after take-off, you should accelerate to 70 knots, to stay well<br />
above stall speed, in case of a gust of wind, or engine failure.<br />
• Don’t fly much above 75 knots to ensure you gain height as quickly as possible.<br />
• Follow the runway heading until at 500 feet. This way, if you suffer an<br />
engine failure, you can easily land back on the runway you left.<br />
• Don’t over-fly buildings until at least 1,000 ft.<br />
• Close to the ground, turns should be gentle and well coordinated using the<br />
rudder.<br />
So, you need to take off and rise in the air at a steady speed of around 75 knots.<br />
However, when you raise the nose slightly at 40 knots, the aircraft will probably<br />
take-off at around 55 knots. To accelerate quickly to 75 knots, lower the nose<br />
slightly immediately on take-off, then raise it once 75 knots has been achieved.<br />
You are using the yoke to control the speed of the aircraft.<br />
Putting this all together with what you have learned previously, a normal takeoff<br />
using the mouse will consist of the following:<br />
1. Adjust the altimeter to the correct altitude, based on the airport altitude. For<br />
reference, KSFO is at sea level - 0ft.<br />
2. Check aileron and elevator are neutral by observing the yoke position.<br />
3. Change the mouse to control mode by pressing the right mouse button.<br />
4. Hold the left mouse button down to control the rudder.<br />
5. Apply full power (hold PgUp until the throttle is fully in).<br />
6. As the aircraft accelerates down the runway, keep it in the center by making<br />
small adjustments using the mouse.
122 CHAPTER 8. A BASIC FLIGHT SIMULATOR TUTORIAL<br />
7. As 40kts is reached, release the left mouse button, and pull back slightly to<br />
raise the nose-wheel. You are now controlling the yoke with the mouse.<br />
8. <strong>The</strong> aircraft will fly off the runway at approximately 55 knots.<br />
9. Lower the nose slightly to accelerate to 70 knots<br />
10. Keep alignment with the runway.<br />
11. Use the yoke to keep the ASI at 70 knots as you climb. If the airspeed is<br />
dropping, lower the nose. If the airspeed is increasing, raise the nose slightly.<br />
12. Once you reach 500 feet, turn to your required heading, staying away from<br />
buildings until you are over 1,000ft.<br />
8.8.2 Landing<br />
<strong>The</strong> rules for landing are almost identical to that of take-off, but in reverse order:<br />
• Close to the ground, turns should be gentle and well coordinated using the<br />
rudder.<br />
• Stay above 500ft until on final approach to the runway<br />
• Approach the runway at approximately 70 knots.<br />
• Touch down on the two main wheels at 55kts.<br />
• Let the nosewheel touch down at 40kts.<br />
Landings are much easier if you have an aiming point picked out on the runway.<br />
By observing the aiming point, you can easily tell if you are descending too fast or<br />
too slowly. If the aiming point appears to move upwards, you are descending too<br />
fast,<br />
Obviously, you need to be lined up with the runway.That means your flight<br />
direction has to match the middle line of the runway (drawing (a) below). In order<br />
to arrive at this, don’t aim at the start of the runway (b). Rather aim at a fictitious<br />
point well in front of the runway (c). And begin to turn gently towards the runway<br />
well before you reach that fictitious point (d). Note the turns and bankings you<br />
make for these flight corrections are often very soft. You wouldn’t even notice<br />
them on the turn coordinator. This is one example where you better rely on the<br />
outside horizon line than on the inside flight instruments.
8.8. LET’S FLY 123<br />
A straight in landing using the mouse would consist of the following:<br />
1. 1,500ft above the airport, and a couple of miles out, an in-line with the runway,<br />
reduce power to approximately 1500rpm. This will slow you down<br />
somewhat and start a gradual descent.<br />
2. Once below 115 knots, apply one step of flaps (]). This will increase lift,<br />
but also slow you down.<br />
3. Re-trim the aircraft so you continue to descend.<br />
4. At around 1,000 feet, apply another step of flaps (]). This increase drag<br />
significantly, but also improve the view over the nose.<br />
5. Tune the speed using the elevator and trim: push the yoke if you are flying<br />
below 70 knots, pull the yoke if you are flying above 70 knots. If using a<br />
joystick, use the trim to relieve any pressure on the elevator.<br />
6. Tune the altitude using the engine throttle. Add power if you are descending<br />
too fast, reduce power if you are too high. It is much easier to work out if<br />
you are too high or too low by observing the numbers on the runway. If they<br />
are moving up the screen, you are descending too fast - increase power. If<br />
they are moving down, you are too high and need to reduce power.
124 CHAPTER 8. A BASIC FLIGHT SIMULATOR TUTORIAL<br />
7. Make minor adjustments to heading to keep aligned with the runway.<br />
8. at about 500ft, apply the final step of flaps. (]). This increase drag significantly,<br />
so be prepared to increase power to keep your descent constant.<br />
9. When you are just above the runway, reduce power to idle, and use the yoke<br />
to gently pull back the aircraft to horizontal. This is the “round-out” and<br />
should result in the aircraft flying level with the runway a couple of feet<br />
above the surface. Performing the round-out at the correct height is a difficult<br />
task to master. To make it easier, observe the horizon rather than getting<br />
fixated on the aiming point.<br />
10. Keep the wings level using small inputs with the yoke. We want both wheels<br />
to touch down at the same time.<br />
11. Continue pulling back on the yoke. <strong>The</strong> main wheels should touch down at<br />
about 55 knots. This is the “flare”.<br />
12. As you touch down, be ready to use the rudder to keep the aircraft straight<br />
(keypad 0 and keypad Enter)<br />
13. Once you are below 40 knots, lower the nose-wheel to the ground.<br />
14. Hold down the left mouse button to control the nosewheel/rudder using the<br />
mouse.<br />
15. Once below 30 knots, use the brakes b to slow the aircraft further.<br />
Once the plane is halted or at very low speed, you can release the b key and<br />
add a little engine power to taxi to the parking or hangar.<br />
8.8.3 Engine Shutdown<br />
To shut the engine down:<br />
• Set the parking brake, type B.
8.9. DEALING WITH THE WIND 125<br />
• Engine throttle to minimum (hold Page Down down for a while).<br />
• Pull the mixture lever to halt the engine (mouse in normal pointer mode,<br />
click on the left of the red mixture lever to pull it out).<br />
• Rotate the magneto switch to OFF (a few hits on {).<br />
8.8.4 Aborted Landing<br />
You must be mentally prepared to abort landing any time the landing doesn’t look<br />
good, or due to external factors such as:<br />
• an order from the control tower<br />
• incorrect speed or landing angle when there is insufficient time to correct it.<br />
• a strong gust blow of wind<br />
• birds flying over the runway.<br />
To abort the landing, apply full power (hold PgUp), raise the nose to climb,<br />
and once you are climbing, retract the flaps (key[).<br />
Landing is much harder than taking off. Landing on a large runway, such as<br />
KSFO (San Francisco, the default) is much easier than smaller runways such as<br />
KHAF (Half Moon Bay, about 10 miles to the south west of KSFO).<br />
To practise landings, use the command line below in a terminal window to start<br />
the simulator in flight and heading for the runway. <strong>The</strong> airplane is placed 5 miles<br />
ahead of the runway, at an altitude of 1500 feet and a speed of about 120 knots.<br />
fgfs --offset-distance=5 --altitude=1500 --vc=120 --timeofday=noon<br />
Approaching to land at 65 knots instead of 70 knots allows to use a much<br />
shorter runway length. However, this requires better control, particularly as it is<br />
much closer to the stall speed. It is quite different from landing at 70 knots.<br />
8.9 Dealing with the Wind<br />
Consider a hot air balloon. Think of it as being in the middle of a gigantic cube<br />
of air. <strong>The</strong> cube of air may move at high speed compared to the ground, but the<br />
balloon itself is completely static in the middle of the cube. Whatever the wind<br />
speed, persons aboard a hot air balloon experience not a breath of wind.<br />
In the same way, an aircraft flies in the middle of a gigantic cube of air and flies<br />
relative to that air mass. <strong>The</strong> motion of the cube of air relative to the ground has no<br />
effect on the aircraft.<br />
You, the pilot, on the contrary, are interested in the speed of the surrounding<br />
air compared to the ground. It can make you drift to the left or to the right. It can<br />
make you arrive at your destination much later or much sooner than planed.
126 CHAPTER 8. A BASIC FLIGHT SIMULATOR TUTORIAL<br />
When the wind blows in the same direction as you fly, the speed of the wind<br />
adds itself to the airspeed of the plane. Hence you move faster compared to the<br />
ground. You will arrive earlier at your destination.<br />
When the wind blows in the opposite direction (towards the nose of the plane),<br />
the speed of the wind subtracts itself from the airspeed of the plane. Hence you<br />
move slower compared to the ground. You will arrive later at your destination and<br />
have more time to enjoy the landscape.<br />
<strong>The</strong> two cases above are quite simple. More complex is when the wind blows<br />
towards the side of the airplane. Consider the diagram below.<br />
• On picture (a) there is no wind. <strong>The</strong> pilot wants to reach the green hill<br />
situated to the North. He heads for the hill, towards the North, and reaches<br />
the hill after a while. When there is no wind, you just head towards your<br />
destination and everything’s fine.<br />
• On picture (b), the pilot keeps heading to the North. Yet there is wind blowing<br />
from the left; from the West. <strong>The</strong> airplane drifts to the right and misses<br />
the hill.<br />
• On picture (c), the pilot keeps heading towards the hill. This time he will<br />
arrive at the hill. Yet the plane flies a curved path. This makes the pilot lose<br />
time to get to the hill. Such a curved path is awful when you need to make<br />
precise navigation.<br />
• Picture (d) shows the optimal way to get to the hill. <strong>The</strong> plane is directed<br />
to the left of the hill, slightly towards the West and the wind. That way it<br />
compensates for the wind and remains on a straight path towards the hill.
8.9. DEALING WITH THE WIND 127<br />
How much to the left or to the right of the object must you head? At what<br />
angle? Serious pilots use geometry and trigonometric computations to calculate<br />
the correct angle. You need no computations at all to fly roughly straight. <strong>The</strong> trick<br />
is to choose an aiming point in the direction you wish to fly, then observe how it<br />
moves. You will become aware if you are drifting leftwards or rightwards. <strong>The</strong>n<br />
let your instinct slowly head the plane to the right or to the left to compensate the<br />
obvious drift. To begin with, you may need to think about what you are doing.<br />
Very soon this will become automatic, just like when you learned to fly straight.<br />
You will no more keep the plane headed towards the object. You will rather keep<br />
it flying towards the object.<br />
<strong>The</strong> faster the flight airspeed compared to the wind speed, the less correction<br />
you will need.<br />
8.9.1 Crosswind Take Off<br />
Taking off when the wind is coming from the side is tricky. Airport designers avoid<br />
this by placing runways so that they face into the prevailing wind. Often airports<br />
have multiple runways, placed such that there will be a runway facing straight into<br />
wind as much of the time as possible.<br />
Taking off with a wind blowing straight towards the nose of the aircraft makes<br />
life easier as it is the speed of the wing relative to the air that causes lift. When<br />
there is no wind, the aircraft must accelerate to 55 knots to take off. However,<br />
if there is a 10 knot head-wind, the aircraft has an airspeed of 10 knots standing<br />
still and only has to accelerate to 45 knots relative to the ground to take off. This<br />
shortens take-off distances.<br />
Just as a headwind shortens take-off, a tail-wind increases take-off length. Anything<br />
more than a knot or two makes a huge difference to take-off distance. As<br />
(most) runways can be flown from either end, you can easily take off from the<br />
other end of the runway and benefit from the headwing.<br />
<strong>The</strong> main way to know the wind direction and speed is to go to the control<br />
tower or ask the control tower by radio. A necessary and complementary tool are<br />
the windsocks at both ends of the runway. <strong>The</strong>y show the wind direction and speed.<br />
<strong>The</strong> longer and the stiffer the windsock, the more wind there is. <strong>The</strong> windsock on<br />
the picture below shows an airspeed of 5 knots:
128 CHAPTER 8. A BASIC FLIGHT SIMULATOR TUTORIAL<br />
Unfortunately, sometimes there isn’t a runway facing the wind, and you have<br />
to take off when the wind is blowing from the side.<br />
<strong>The</strong> technique is as for a normal take-off with two changes:<br />
• During the take-off roll, the aircraft will try to “weather-cock” into wind.<br />
You must react by using the rudder to keep the aircraft running straight. You<br />
will have to apply the rudder at quite a strong angle to stay aligned with the<br />
runway. You will need to keep applying rudder throughout the take-off.<br />
• As you take off, the aircraft will react to the rudder and try to turn. You will<br />
need to correct for this using the ailerons. Once the aircraft is in the air, you<br />
can reduce the rudder pressure and aileron, then correct for the wind, to keep<br />
aligned with the runway as described above.<br />
8.9.2 Crosswind Landing<br />
Landing in a crosswind is very similar to the take-off:<br />
• Stay aligned with the runway by compensating for the crosswind.<br />
• As you begin to round-out, use the yoke to straighten the aircraft so it is<br />
pointed down the runway. Apply rudder to stop the aircraft turning.<br />
• <strong>The</strong> aircraft will land on one wheel first. Use the rudder to keep the aircraft<br />
pointed straight down the runway as the other wheel touches down.<br />
<strong>The</strong> technique described here is the slip landing. Another crosswind landing<br />
technique is the crab landing.<br />
8.9.3 Taxiing in the Wind<br />
Under 10 knots wind the Cessna 172p seems not to need particular precautions<br />
when taxiing. Yet any sudden increase in wind speed can tilt it and tumble it over.<br />
So best apply the recommendations whenever there is wind.<br />
To train taxiing on the ground when there is wind, configure the simulator for<br />
a strong wind, like 20 knots. Such a wind can tilt the plane and blow it away<br />
tumbling any moment. One single error during taxiing and the plane is lost.<br />
Main rule is you must push the yoke towards the wind. This deserves some<br />
physical explanation:<br />
• When the wind is blowing from 12 o’clock, this is quite logical. <strong>The</strong> yoke<br />
is pushed (towards 12 o’clock) and the elevator makes the tail rise a little.<br />
That’s the most stable position to avoid the plane be tilted by the wind.<br />
• When the wind comes from 10 o’clock, pushing the yoke towards 10 o’clock<br />
means that the elevator is almost neutral, while the left aileron is upward and<br />
the right aileron is downward. This pushes the left wing down and lifts the
8.10. THE AUTOPILOT 129<br />
right wing. Again, that’s the most stable position to avoid the plane be tilted<br />
by the wind.<br />
• When the wind blows from 8 o’clock, you would think you should invert the<br />
position of the ailerons, to keep the left wing being pushed down. Hence<br />
you should push the yoke to 4 o’clock. Wrong! Keep pushing the yoke to<br />
8 o’clock. <strong>The</strong> reason is the downward position of the aileron on the right<br />
wing makes it act like a slat. This increases the lift on the right wing and<br />
this is all we want. Symmetrically, the upward position of the left aileron<br />
decreases the lift of the left wing.<br />
• When the wind comes from the rear, from 6 o’clock, the yoke is pulled<br />
(towards 6 o’clock). <strong>The</strong> upward position of the elevator tends to make the<br />
tail be pushed down. Once again this is the best. Strong wind can push<br />
the tail against the ground. This is impressive but the tail is conceived to<br />
withstand this.<br />
If you want to move towards the wind, you will need more engine power. When<br />
the wind blows from the rear you may need no engine power at all. Always keep<br />
the engine power to the minimum needed.<br />
Especially when turning, move very slowly. Make little changes at a time. Take<br />
your time and closely survey the yoke angle. Constantly keep it pushed towards the<br />
wind. Constantly try to reduce the engine power. Keep in mind using the brakes<br />
too firmly may shortly tilt the plane at an angle that allows the wind to tilt it and<br />
blow it away.<br />
8.10 <strong>The</strong> autopilot<br />
An autopilot is not an “intelligent” pilot. It just takes over simple tasks for the pilot.<br />
You still are the pilot aboard and have to keep aware of everything. Be prepared<br />
to shut the autopilot down as they often go wrong, both in real life, and in the<br />
simulator.<br />
<strong>The</strong> autopilot is mounted to the right of the yoke:<br />
Switch it on by pressing the AP button. <strong>The</strong> autopilot then controls the roll<br />
of the aircraft. It keeps the wings level with the horizon. This is displayed in the<br />
picture below by the “ROL” marking. To switch the autopilot off press AP again.
130 CHAPTER 8. A BASIC FLIGHT SIMULATOR TUTORIAL<br />
If you press the HDG button the autopilot will try to keep the plane flying<br />
towards the direction tuned on the directional gyro by the red marking (see section<br />
8.7.6). “HDG” stands for “heading”. Press again on the HDG button to get back<br />
to roll control mode (or AP to switch the autopilot off).<br />
<strong>The</strong> buttons ALT, UP and DN are used to tell the autopilot either to control the<br />
vertical speed VS or the altitude ALT.<br />
For more advanced use of the autopilot, see the reference document for the<br />
autopilot modeled in the Cessna 172:<br />
https://www3.bendixking.com/servlet/com.honeywell.aes.utility<br />
.PDFDownLoadServlet?FileName=/TechPubs/repository<br />
/006-18034-0000_2.pdf<br />
8.11 What Next?<br />
This tutorial has introduced you to the basics fo flight in the Cessna 172. From<br />
here you can explore the many features that <strong>FlightGear</strong> has to offer.<br />
Once you have mastered the content of this tutorial, you may want to look at<br />
the other tutorials in this <strong>Manual</strong>, covering flying to other airports, flying using<br />
instruments when clouds obscure the ground, and flying helicopters.<br />
This tutorial has skipped over a number of topics that a real-life pilot would<br />
have to consider:<br />
• How to follow real checklists.<br />
• How to make emergency landing on very short fields, after and engine failure.<br />
• How to navigate with regard to the laws of the air, charts, laws, radio beacons<br />
and weather conditions<br />
• How to create a flight plan and fly it accurately.
8.12. THANKS 131<br />
• How to place people, fuel and baggage in an airplane to get a correct center<br />
of gravity.<br />
• How to deal with the control tower and with other airplanes.<br />
• How to deal with several fuel tanks and their systems.<br />
• How to deal with the failure of every possible part of the plane.<br />
This tutorial has also not covered features of more advanced aircraft, including:<br />
• retractable landing gear<br />
• variable pitch propellers<br />
• multiple engines<br />
• jet engines.<br />
8.12 Thanks<br />
I wish to thank:<br />
• Benno Schulenberg who corrected lots of mistakes in my English in this<br />
tutorial.<br />
• Albert Frank who gave me key data on piloting and corrected technical errors.<br />
• Vassilii Khachaturov who learned me new things about <strong>FlightGear</strong>.<br />
• Roy Vegard Ovesen for pointing me to the official Autopilot Pilots Guide.<br />
• Dene Maxwell for his solution for problems under Windows Me.<br />
• Mark Akermann and Paul Surgeon for their remarks.<br />
• Michael “Sam van der Mac” Maciejewski who made the translation in Polish<br />
and converted the tutorial for use in the manual.<br />
• <strong>The</strong> <strong>FlightGear</strong> mailing list users for their hearty welcome.<br />
• 4p8 webmaster my friend Frï¿ 1<br />
2<br />
tutorial.<br />
8.13 Flying Other Aircraft<br />
1 dï¿ 2ric Cloth for the web space used by this<br />
I cross-checked all the data about the Cessna 172p, a pilot friend verified I did<br />
not write too much rubbish and I made numerous virtual test flights. This section<br />
contains less reliable data about other airplanes based on my experience in the<br />
simulator. You may find it useful as an introduction to those airplanes but bear in<br />
mind my only goal was to make flights that seem OK and acquire basic knowledge.
132 CHAPTER 8. A BASIC FLIGHT SIMULATOR TUTORIAL<br />
8.13.1 How to land the Cherokee Warrior II<br />
<strong>The</strong> Cherokee Warrior II has some advantages upon the Cessna 172p. Thanks to<br />
its low wings it is far less sensitive to crosswind. Fully extended flaps are provide<br />
more braking and allow it to land on a much shorter distance.<br />
Take off is the same as for the Cessna 172p in <strong>FlightGear</strong>. In real life their take<br />
off checklists are not exactly the same.<br />
You have to get used to some minor differences of the Cherokee Warrior II for<br />
the landing:<br />
• During the steady horizontal flight before landing, the trim must be pulled a<br />
little below neutral in order to get the yoke around neutral.<br />
• <strong>The</strong> optimal tachometer RPM during landing is at a lower RPM than the<br />
tachometer green zone. Roughly, keep the needle vertical.<br />
• Only put use two steps of flaps during landing.Don’t decrease the engine<br />
throttle too much.<br />
• If you remain at two flaps deployed during landing, the round-out and flar<br />
will be similar to the Cessna 172p. However, using the third set of flaps will<br />
slow the aircraft down dramatically. It will very quickly touch the runway<br />
then come to a near halt. Be prepared to lower the front wheel very soon. (It<br />
is possible to use the third flaps step during the descent towards the runway,<br />
instead of tuning the engine power down. Oscillating between two steps and<br />
three steps allows to aim the runway start. Yet keep two flaps steps and tune<br />
the engine seems easier. An interesting stunt is to fly stable till nearly above<br />
the runway start, then tune the engine to minimum and deploy three flaps<br />
steps. <strong>The</strong> plane almost falls to the runway. It’s impressive but it works.)<br />
In real life, an advantage of the Cessna 172p upon the Cherokee Warrior II is<br />
the fuel reservoirs of the Cessna are located in the wings close above the center of<br />
the plane and higher than the engine. What’s more an automatic system switches<br />
between the reservoirs. That means you almost don’t have to bother for the way<br />
the fuel gets to the engine in flight. On the contrary, on the Cherokee Warrior<br />
II the reservoirs are located separately, on both wings and lower than the engine.<br />
That means you have to constantly switch between the two reservoirs in flight.<br />
Should one reservoir become much lighter than the other, this would destabilize<br />
the airplane. <strong>The</strong> fact the reservoirs are lower than the engine means you have to<br />
control the fuel pumps and the backup fuel pumps.<br />
Some links:<br />
• http://en.wikipedia.org/wiki/Piper_Cherokee<br />
• http://www.alioth.net/flying/pa28-161/index.html<br />
• http://freechecklists.net/Resources/Piper/PA-28-151+Warrior/
8.13. FLYING OTHER AIRCRAFT 133<br />
8.13.2 How to take off and land the Piper J3 Cub<br />
<strong>The</strong> Piper J3 Cub is a very different airplane from the Cessna 172p and the Cherokee<br />
Warrior II. <strong>The</strong> Cessna 172p and the Cherokee Warrior II are nose-wheel airplanes,<br />
while the Piper J3 Cub is a tail wheel airplane. Take off and landing with<br />
tail wheel airplanes is more difficult. You have to tightly use the rudder pedals<br />
when rolling over the runway. <strong>The</strong> yoke often needs to be pulled backwards to the<br />
maximum. <strong>The</strong> Piper J3 Cub is a good introduction to tail-wheel aircraft and it is<br />
quite easy to take off and land provided you follow an appropriate procedure. Stall<br />
speed seems to be a little below 40 mph (the airspeed indicator is in mph) (about<br />
27 knots). Take-off is below 50 mph.<br />
My take off procedure for the Piper Cub is to fully pull the yoke backwards<br />
then throttle the engine to maximum. Once the front wheels clearly rises from the<br />
ground, gently push the yoke back to neutral, towards a normal flight close above<br />
the runway. Let the plane accelerate to 50 mph. <strong>The</strong>n pull the yoke to keep a little<br />
more than 50 mph while rising in the air.<br />
<strong>The</strong> landing procedure is quite different to that of 172, as the aircraft is very<br />
light, and has no flaps.<br />
1. Fly at say 500 feet constant altitude and "exactly" 52 mph speed towards the<br />
runway. Let the engine cover eat up the runway start. <strong>The</strong> engine cover<br />
will hide the runway completely. To see where the runway is, push the<br />
yoke/mouse very shortly then stabilize again in normal flight.<br />
2. Once the runway start matches with the set of instruments (if you could see<br />
through the instrument panel), reduce the throttle to a near minimum and<br />
begin the dive towards the runway start. Keep 52 mph using the yoke. Add<br />
some throttle if you are going to miss the runway edge. (Keep in mind just a<br />
little wind is enough to change things a lot for the Piper J3 Cub).<br />
3. Make the rounding and pull the throttle to minimum. Do not pull steadily on<br />
the yoke. Instead let the wheels roll on the runway immediately.<br />
4. Once the wheels roll on the runway, push firmly on the yoke, to its maximum.<br />
This rises the tail in the air. You would think the propeller will hit the runway<br />
or the airplane will tilt over and be damaged. But everything’s fine. <strong>The</strong><br />
wings are at a strong negative angle and this brakes the plane. (Don’t push<br />
the yoke this way on other airplanes, even if their shape seems close to that<br />
of the Piper J3 Cub. Most of them will tumble forwards.)<br />
5. <strong>The</strong> yoke being pushed in to its maximum, push the left mouse button and<br />
keep it pushed to go in rudder control mode. Keep the plane more or less<br />
centered on the runway. This is quite uneasy. One tip is to stop aiming the<br />
rudder to say the left already when the plane just starts to turn to the left.<br />
6. Once the speed is really low (and the rudder control stabilized), you will see<br />
the tail begins to sink to the ground. Release the left mouse button to go back
134 CHAPTER 8. A BASIC FLIGHT SIMULATOR TUTORIAL<br />
to yoke control. Pull the yoke backwards completely, to the other extreme.<br />
<strong>The</strong> tail now touches the ground and the nose is high up. Now you can use<br />
the wheel brakes (b). (If you use the brakes too early, the plane nose will hit<br />
the ground.)<br />
<strong>The</strong> take off procedure mentioned above is symmetrical to the first landing<br />
procedure. <strong>The</strong>re exists a second take off procedure, symmetrical to the second<br />
landing procedure. Yet I don’t succeed it properly so I won’t write about it.<br />
8.13.3 How to take off and land a jet<br />
Take off on a jet is easy but you must have fast reflexes. My favorite jet on Flight-<br />
Gear is the A-4 Skyhawk. You get it with the -aircraft=a4-uiuc parameter<br />
on Linux, provided it is installed.<br />
This is the “calm” procedure to take off:<br />
• Ask for a red and full HUD by typing h two times. <strong>The</strong> engine throttle<br />
indicator is the leftmost on the HUD.<br />
• <strong>The</strong> airspeed indicator is the one labeled "KIAS" on the upper left side of<br />
the instrument panel. You can also use the airspeed indicator on the HUD,<br />
of course.<br />
• Tune in 1<br />
2 engine power.<br />
• Keep the yoke pulled in 1<br />
2 of its total way (picture below: the red arrow on<br />
the right side of the vertical line in the middle of the picture).<br />
• It is not mandatory to use the rudder to keep on the runway. <strong>The</strong> airplane<br />
will take off before it drifts off the runway. (For sure it is better and more<br />
“secure” to keep in the middle of the runway. But using the rudder can make<br />
things hectic for a beginner.)
8.13. FLYING OTHER AIRCRAFT 135<br />
• Once above about 160 knots, the plane rises its nose in the air. Immediately<br />
push the yoke back to neutral or almost and stabilize at 200 knots airspeed<br />
(which makes a fair climb angle) (I’ve no idea whether 200 knots is the right<br />
climb speed for a real A-4. What’s more I suppose one should rather use the<br />
AOA (see below).).<br />
• Retract the landing gear using key g.<br />
• Either maintain 1<br />
2 engine power and a speed of 200 knots to get above the<br />
clouds, or reduce the engine power to less than 1<br />
4 and fly normally. (Off<br />
course you can “fly normally” with full engine power. Great fun.)<br />
<strong>The</strong> “nervous” take off procedure is the same but you push in full engine power.<br />
<strong>The</strong> plane takes off quickly and you need to settle a very steep climb angle to keep<br />
200 knots. Best retract the landing gear immediately.<br />
You don’t land a jet the same way you land a little propeller airplane. My way<br />
to land the A-4, inspired by some texts I found on the Web, is this:<br />
• Really far from the runway, keep below 2,000 feet and get the speed below<br />
200 knots. <strong>The</strong>n lower the landing gear (key G) and I deploy full flaps (all<br />
three steps, by hitting ] three times).<br />
• Keep a steady altitude of about 1,000 feet and a speed of “exactly” 150 knots.<br />
Use the mouse/yoke/elevator to tune the altitude and the engine throttle to<br />
tune the speed. (<strong>The</strong> opposite from the Cessna.)<br />
• Try to align with the runway.<br />
• When do you know the dive towards the runway must begin? For this you<br />
need the HUD; the full default HUD with lots of features. Look at the picture<br />
below. When you see the “distance” between the red “0” lines and the runway<br />
start is 25% the distance between the red “0” lines and the red “−10”<br />
dotted line, it is time to dive, aiming at the runway start. (In the picture<br />
below, that “distance” is 64%, far too much to start a landing.)
136 CHAPTER 8. A BASIC FLIGHT SIMULATOR TUTORIAL<br />
Let’s explain this. <strong>The</strong> two horizontal lines labeled “0” show the horizon<br />
line. Rather they show where the horizon would be if the Earth was flat.<br />
When your eyes aim at those “0” lines, you are looking horizontally. Look<br />
at the dotted red lines labeled “−10”. A feature on the ground situated there<br />
is situated 10˚ below the ideal horizon. In other words: when you look to<br />
objects “hidden” by the lines labeled “0”, you have to lower your eyes of 10˚<br />
to look at objects "hidden" by the dotted lines labeled “−10”. This implies,<br />
and it is very important, that a person in a rowboat, “hidden” by the dotted<br />
lines labeled “−10”, has to rise his eyes up 10˚ to look at your plane. He<br />
sees you 10˚ above the horizon. In the picture above, the start of the runway<br />
is situated at 64% of the way towards the red “-10” dotted lines. That means<br />
you have to lower your eyes of 6,4˚ to look at the runway start. This also<br />
means that if you start now to descent towards the runway start, the descent<br />
path will be of 6,4˚ (too steep). So, the HUD allows to measure precisely the<br />
angle of the descent path. On a jet plane you need an angle of 2,5˚ (up to 3˚),<br />
that is 25% of −10˚ (up to 30%).<br />
• Once descending towards the runway start, aim at it using the yoke/mouse.<br />
And keep 150 knots speed using the engine throttle lever.<br />
• Keep measuring the angle between the ideal horizon and the runway start. It<br />
must keep 2,5˚ (that is 25% of 10˚):<br />
◦ If the angle increases above 2,5˚, you are above the desired path and<br />
you must loose altitude faster. Both decrease the engine power and<br />
dive the nose a little.<br />
◦ If the angle decreases below 2,5˚, you are under the desired path. I<br />
wouldn’t say you should gain altitude, rather you should loose altitude<br />
less fast. Both add a little engine power and rise the nose a little.<br />
• Once very close to the runway start, do no rounding. Don’t pull steadily on<br />
the yoke like you would for the Cessna 172p. Simply let the plane touch the<br />
ground immediately, at high speed. Let it smash on the runway, so to say.<br />
All three wheels almost together. Just throttle the engine down to minimum.<br />
(If you try to pull steadily on the yoke and hover over the runway while<br />
the plane nose rises steadily, on a F-16 you would scrape the plane rear and<br />
probably destroy it.)<br />
• Keep the key b down to brake and use the rudder to stay aligned with the<br />
runway. Make only very little tunings with the rudder, otherwise the plane<br />
will tumble on one of its sides.
8.13. FLYING OTHER AIRCRAFT 137<br />
<strong>The</strong> HUD in a real jet contains a symbol to show towards what the airplane is<br />
moving. It is shown in the picture below. When you are flying at constant altitude,<br />
that symbol is on the ideal horizon line. Once you dive towards the runway start,<br />
you simply have to place that symbol on the runway start. This is quite an easy<br />
and precise way to aim at the runway start. (<strong>The</strong> diamond in the center of the<br />
<strong>FlightGear</strong> HUD sometimes can help but it does not have the same purpose. It<br />
shows towards what the airplane nose is pointing. For example is you descent<br />
towards the ground at low speed, the symbol would be somewhere on the ground<br />
while the <strong>FlightGear</strong> diamond will be up in the sky.) (By the way, the HUD on the<br />
virtual B-52 on <strong>FlightGear</strong> has that symbol. It is great to use while landing.)<br />
Also, a real HUD shows a dotted line at −2,5˚, to help find the correct descent<br />
path. Simply keep that dotted line on the runway thresh-hold.<br />
In additional to airspeed, military fast jet pilots rely on using the correct angle<br />
of attack during approach. <strong>The</strong> Angle Of Attack (AoA) is the angle at which the<br />
wings are pitched against the relative airflow. <strong>The</strong> advantage of keeping to an<br />
optimal AoA is that the optimal AoA for landing does not depend on the plane<br />
load, while the optimal airspeed speed does. By ensuring that the AoA is correct<br />
for every landing, you will land at the correct speed, whatever the plane load.<br />
<strong>The</strong> Angle of Attack is displayed within the HUD, and/or as a set of three lights<br />
shown below. When the upper ∨ is lit, your angle of attack (AoA) is too high and<br />
you need to pitch down. When the lower ∧ is lit, your AoA is too low and you<br />
need to pitch up. <strong>The</strong> center ○ indicates your the AoA is OK. Obviously, as you<br />
pitch up or down your airspeed and descent rate will change, so you will need to<br />
change your throttle setting appropriately.<br />
<strong>The</strong> Cessna 172 and the A-4 Skyhawk are two extremes. Most other airplanes<br />
are in-between these two extremes. If you trained them both (and one or two tail<br />
wheel airplanes), you should be able to find out how to take off and land most other<br />
airplanes.<br />
160 knots seems an appropriate landing speed for the F-16 Falcon. Also you<br />
need to throttle down the engine to minimum just before the plane should touch
138 CHAPTER 8. A BASIC FLIGHT SIMULATOR TUTORIAL<br />
the runway. Otherwise it will hover over the runway. Don’t bother for the flaps.<br />
It seems they are deployed automatically with the landing gear. (Read the section<br />
8.7.4 about the stall).<br />
140 up to 150 knots and all 8 flaps steps deployed seem appropriate to land<br />
the virtual Boeing 737. But don’t trust me especially on that one. I just made a<br />
few experiments and didn’t search for serious data. <strong>The</strong> landing speed varies a lot<br />
depending on the plane load, I suppose 140 knots is for a plane with no load. <strong>The</strong><br />
Boeing 737 seems to like a gentle rounding before the wheels touch the runway.<br />
Start the rounding early.<br />
In the take off procedure for the Cessna 172 and the A-4 Skyhawk I recommend<br />
you pull the yoke/mouse/elevator to 1<br />
2 the total way, from the start on. This seems<br />
to be a bad practice on the Pilatus PC-7. Keep the elevator neutral. Let the plane<br />
accelerate and wait till the speed gets over 100 knots. <strong>The</strong>n pull calmly on the<br />
yoke. During landing, deploy full flaps once you start plunging to the runway but<br />
don’t decrease the engine throttle. Decrease it only when the hovering above the<br />
runway starts. 100 knots seems a good landing speed.<br />
For the Cessna 310 too you better leave the elevator neutral during the acceleration<br />
on the runway. <strong>The</strong> plane will raise its nose by its own provided you deployed<br />
one flaps step. (If you keep the yoke pulled from the start on, the nose will rise<br />
sooner and you will get yawful yaw problems.)<br />
(Some virtual airplanes, like some big airliners or fast aircraft, need faster physical<br />
computations. <strong>The</strong>n add the -model-hz=480 parameter to the command<br />
line. If the plane is difficult to control during landings, try this.)<br />
<strong>The</strong> angle at which you land a Cessna 172p is far steeper than the narrow 2, 5˚<br />
for a jet. Nevertheless you are allowed to land the Cessna at a narrow angle too.<br />
(Provided the terrain around the runway allows for this, of course.) If you have<br />
passengers who have ears problems with the variation of air pressure. . .<br />
8.13.4 How to take off and land the P-51D Mustang<br />
Should you ever get a chance to pilot a P-51 Mustang, just say no. It is quite<br />
dangerous to take off and land. That’s the kind of airplane you fly only when<br />
your country is in danger. You need a lot of training. Yet once in the air the<br />
P-51 Mustang seems no more dangerous to its pilot than other common military<br />
airplanes. It is quite easy to pilot.<br />
At low and medium altitude the P-51 wasn’t better than the Spitfire and the<br />
Messerschmitts. <strong>The</strong> big difference was at high altitude. <strong>The</strong> P-51 kept efficient<br />
and maneuverable while enemy fighters were just capable to hang in the air. This<br />
was an advantage at medium altitude too because the P-51 was able to plunge<br />
towards enemy airplanes from high altitude. Another key difference was the P-51 is<br />
very streamlined. Hence it was capable to fly much further than the Spitfire. <strong>The</strong>se<br />
two differences let the P-51 Mustang fulfill its purpose: escort Allied bombers all<br />
the way to their targets in Germany. This allowed the bombings to be much more<br />
efficient and contributed to the defeat of the Nazis.
8.13. FLYING OTHER AIRCRAFT 139<br />
To get the P-51D Mustang on Linux use the -aircraft=p51d command<br />
line parameter.<br />
To take off the P-51D Mustang in <strong>FlightGear</strong>, deploy one flaps step, pull and<br />
keep the yoke completely backwards, push the engine throttle to maximum and<br />
keep the left mouse button pressed to control the rudder and keep on the runway.<br />
Once you reach exactly 100 mph, suddenly push the rudder 1/3 of its total way<br />
to the right. Immediately release the left mouse button and push the yoke to rise<br />
the tail (don’t push it too much, as the sooner the wheels leave the ground the<br />
better). From now on, keep the left mouse button released. Only make very short<br />
adjustments to the rudder. Let the plane rise from the runway and get to altitude at<br />
a speed of say 150 mph. Don’t forget to retract the landing gear and the flaps.<br />
Don’t make too steep turns. You would loose control on the plane and crash.<br />
To land, deploy full flaps and lower the landing gear from the start on. 130 mph<br />
speed seems fine, up to 140 mph. Make an approach from 1,000 feet altitude and<br />
a dive at a low angle, like for a jet. Once over the runway, shut the engine down<br />
completely (key{). Don’t hover over the runway. Get the wheels rolling soon (like<br />
for a jet). Hold the left mouse button down to steer the plane using the rudder.<br />
Once the tail sinks in, briskly pull the yoke (left mouse button shortly released) to<br />
force the tail on the runway. Go on steering the plane using the rudder. Now the<br />
tail is firmly on the ground, use the brakes if you want.<br />
8.13.5 How to take off and land the B-52 Stratofortress<br />
<strong>The</strong> B-52F bomber implemented in <strong>FlightGear</strong>is a success. It is one of my favorite<br />
airplanes. I’m sorry it was conceived to terrify me. One single B-52 bomber<br />
can wipe out every main town of my country and rise a nightmare of sicknesses<br />
and children malformation for centuries. All B-52 bombers united can wipe out<br />
mankind and almost every kinds of plants and animals on Earth.<br />
<strong>The</strong> differences between the virtual B-52F bomber and the Cessna 172p are<br />
these:<br />
• <strong>The</strong> B-52F starts with the flaps deployed and the parking brakes set.<br />
• <strong>The</strong>re are only two flaps steps: retracted and deployed. When deployed they<br />
are only meant to make the wings lift more, not to brake. If you want to<br />
brake, you need the spoilers. <strong>The</strong>y deploy on the upper side of the wings.<br />
Use the key k to deploy the spoilers and the key j to retract them. <strong>The</strong>re are<br />
seven steps of spoilers.<br />
• <strong>The</strong> main landing gear of the Cessna 172p is composed of two wheels, one<br />
on each side of the airplane. In order for these wheels to leave and touch the<br />
ground altogether, you need to keep the wings parallel with the ground. <strong>The</strong><br />
main landing gear of the B-52F is composed of a set of wheels at the front<br />
and a set of wheels at the rear. This implies that in order for these wheels
140 CHAPTER 8. A BASIC FLIGHT SIMULATOR TUTORIAL<br />
to leave and touch the ground altogether, you need to keep the airplane body<br />
parallel with the ground.<br />
This is my procedure to take off the virtual B-52F:<br />
• Push the yoke 1<br />
3 of the total way.<br />
• Push the engine throttle to maximum.<br />
• Release the parking brakes (key B).<br />
• Push down the left mouse button to control the rudder pedals and keep the<br />
airplane on the runway<br />
• <strong>The</strong> whole runway length is needed till the B-52F rises from the ground<br />
(KSFO).<br />
• Once the B-52F leaves the ground, around 190 knots seems appropriate to<br />
get to altitude.<br />
• Retract the flaps and the landing gear.<br />
To land, the B-52F’s HUD offers that great airplane-shaped symbol I talked<br />
about in the section about jets. So you just have to put that symbol on the airplane<br />
threshold (a few pixels further seems optimal) and keep the runway start 2,5˚ below<br />
the ideal horizon line. 130 up to 140 knots seems a good landing speed. (Instead<br />
of the speed you can make use of the AOA indicator displayed on the schematic<br />
instrument panel (P). ). Simply keep the AOA at 3˚. I must confess I prefer to tune<br />
the speed rather than the AOA.) If the plane gets to the runway at 130 up to 140<br />
knots, simply “let it smash” on the runway. Otherwise, if the speed is higher, make<br />
a rounding and a short hover. <strong>The</strong> brakes seem to be very effective b). <strong>The</strong>y allow<br />
to stop the B-52F on roughly the same short runway length as the Cessna 172p.<br />
Replays of the flights are a delight. <strong>The</strong>y allow to check the plane body left<br />
the runway and landed back parallel with it. One of the points of view is situated<br />
inside the B-52F rear turret, which allows you to be your own passenger and to<br />
compare what you see with what you experienced as a passenger in airliners. <strong>The</strong><br />
key K allows to visualize the airplane trajectory.<br />
To cause an accident with the B-52 do this:<br />
• Make a steep turn with a very strong bank; the wings nearly perpendicular<br />
to the ground.<br />
• Try to get the plane back level. It will obey but very slowly. You will get<br />
aware that the turn will go on for a while and that you will turn further than<br />
your intended flight direction.<br />
• Do something that accelerates the stabilization on some airplanes: push the<br />
rudder to an extreme, opposite to the current turn. This will suddenly make<br />
the airplane drop from the sky.
Chapter 9<br />
A Cross Country Flight Tutorial<br />
9.1 Introduction<br />
Figure 9.1: Flying over the San Antonio Dam to Livermore<br />
This tutorial simulates a cross-country flight from Reid-Hillview (KRHV) to<br />
Livermore (KLVK) under Visual Flight Rules (VFR). Both airports are included in<br />
the standard <strong>FlightGear</strong> package, so no additional scenery is required.<br />
I’ll assume that you are happy taking off, climbing, turning, descending and<br />
landing in <strong>FlightGear</strong>. If not, have alook at the tutorials listed above. This tutorial<br />
is designed to follow on from them and provide information on some of the slightly<br />
more complicated flight systems and procedures.<br />
9.1.1 Disclaimer and Thanks<br />
A quick disclaimer. I fly microlights rather than Cessnas in real life. Most of this<br />
information has been gleaned from various non-authoritive sources. If you find an<br />
error or misunderstanding, please let me know. Mail me at stuart_d_buchanan -atyahoo.co.uk.<br />
141
142 CHAPTER 9. A CROSS COUNTRY FLIGHT TUTORIAL<br />
I’d like to thank the following people for helping make this tutorial accurate<br />
and readable: Benno Schulenberg, Sid Boyce, Vassilii Khachaturov, James Briggs.<br />
9.2 Flight Planning<br />
Before we begin, we need to plan our flight. Otherwise we’ll be taking off not<br />
knowing whether to turn left or right.<br />
First, have a look at the Sectional for the area. This is a map for flying showing<br />
airports, navigational aids, and obstructions. <strong>The</strong>re are two scales of sectionals for<br />
VFR flight - the 1:500,000 sectionals themselves, and a number of 1:250,000 VFR<br />
Terminal Area Charts which cover particularly busy areas.<br />
<strong>The</strong>y are available from pilot shops, or on the web from various sources. You<br />
can access a Google-map style interface here:<br />
http://www.runwayfinder.com/<br />
Simple search for Reid-Hillview. An extract from the chart is shown in Figure<br />
9.2.<br />
If you want a map of the entire area showing exactly where the plane is, you<br />
can use Atlas. This is a moving-map program that connects to <strong>FlightGear</strong>. See<br />
Section 6.3 for details.<br />
So, how are we going to fly from Reid-Hillview to Livermore?<br />
We’ll be taking off from runway 31R at KRHV. KRHV is the ICAO code for<br />
Reid-Hillview airport, and is shown in the <strong>FlightGear</strong> wizard. (It is marked on the<br />
sectional as RHV for historic reasons. To get the ICAO code, simply prefix a ‘K’.)<br />
<strong>The</strong> 31 indicates that the magnetic heading of the runway is around 310 degrees,<br />
and the R indicates that it’s the runway on the right. As can be seen from<br />
the sectional, there are two parallel runways at KRHV. This is to handle the large<br />
amount of traffic that uses the airport. Each of the runways can be used in either<br />
direction. Runway 31 can be used from the other end as runway 13. So, the runways<br />
available are 13R, 13L, 31R, 31L. Taking off and landing is easier done into<br />
the wind, so when the wind is coming from the North West, runways 31L and 31L<br />
will be in use. <strong>The</strong> name of the runway is written in large letters at the beginning<br />
and is easily seen from the air.<br />
Once we take off we’ll head at 350 degrees magnetic towards Livermore (KLVK).<br />
We’ll fly at about 3,500ft about sea-level. This puts us at least 500ft above any terrain<br />
or obstructions like radio masts on the way.<br />
We’ll fly over the Calaveras Reservoir then the San Antonio Reservoir. <strong>The</strong>se<br />
are both large bodies of water and we can use them as navigation aids to ensure we<br />
stay on the right track.<br />
Once we get about 10 miles out of Livermore (above the San Antonia Reservoir),<br />
we’ll contact the Livermore Air Traffic Control (ATC) to find out where we<br />
should land. We’ll then join the circuit and land.
9.2. FLIGHT PLANNING 143<br />
Figure 9.2: Sectional extract showing Reid-Hillview and Livermore airports
144 CHAPTER 9. A CROSS COUNTRY FLIGHT TUTORIAL<br />
9.3 Getting Up<br />
OK, we know where we’re going and how we’ll get there. Time to get started.<br />
Start <strong>FlightGear</strong> using the Wizard (or command-line if you prefer). We want to<br />
use a C172P and take off from runway 31R at Reid-Hillview of Santa Clara County<br />
(KRHV). Dawn is a nice time to fly in California.<br />
If you want, you can fly in the current weather at KRHV by clicking the Advanced<br />
button on the final screen of the Wizard, selecting Weather from the lefthand<br />
pane, selecting ‘Fetch real weather’ and clicking OK.<br />
9.3.1 Pre-Flight<br />
Figure 9.3: On the runway at KRHV<br />
Before we take off, we need to pre-flight the aircraft. In the real world, this consists<br />
of walking around the aircraft to check nothing has fallen off, and checking we have<br />
enough fuel.<br />
In our case, we’ll take the opportunity to check the weather, set our altimeter<br />
and pre-set things that are easier to do when you’re not flying.<br />
<strong>The</strong> weather is obviously important when flying. We need to know if there is<br />
any sort of cross-wind that might affect take-off, at what altitude any clouds are<br />
(this is a VFR flight - so we need to stay well away from clouds at all times), and<br />
any wind that might blow us off course.<br />
We also need to calibrate our altimeter. Altimeters calculate the current alititude<br />
indirectly by measuring air pressure, which decreases as you ascend. However,<br />
weather systems can affect the air pressure and lead to incorrect altimeter<br />
readings, which can be deadly if flying in mountains.<br />
9.3.2 ATIS<br />
Conveniently, airports broadcast the current sea-level pressure along with useful<br />
weather and airport information over the ATIS. This is a recorded message that is
9.3. GETTING UP 145<br />
broadcast over the radio. However, to listen to it, we need to tune the radio to the<br />
correct frequency.<br />
<strong>The</strong> ATIS frequency is displayed on the sectional (look for ‘ATIS’ near the<br />
airport), but is also available from within <strong>FlightGear</strong>. To find out the frequencies<br />
for an airport (including the tower, ground and approach if appropriate), use the<br />
ATC/AI menu and select Frequencies. <strong>The</strong>n enter the ICAO code (KRHV) into the<br />
dialog box. <strong>The</strong> various frequencies associated with the airport are then displayed.<br />
Duplicates indicate that the airport uses multiple frequencies for that task, and you<br />
may use either.<br />
Either way, the ATIS frequency for Reid-Hillview is 125.2MHz.<br />
9.3.3 Radios<br />
We now need to tune the radio. <strong>The</strong> radio is located in the Radio Stack to the right<br />
of the main instruments. <strong>The</strong>re are actually two independent radio systems, 1 and<br />
2. Each radio is split in two, with a communications (COMM) radio on the left,<br />
and a navigation (NAV) radio on the right. We want to tune COMM1 to the ATIS<br />
frequency.<br />
Figure 9.4: <strong>The</strong> C172 communications stack with COMM1 highlighted<br />
<strong>The</strong> radio has two frequencies, the active frequency, which is currently in use,<br />
and the standby frequency, which we tune to the frequency we wish to use next.<br />
<strong>The</strong> active frequency is shown on the left 5 digits, while the standby frequency is<br />
shown on the right. We change the standby frequency, then swap the two over, so<br />
the standby becomes active and the active standby. This way, we don’t lose radio<br />
contact while tuning the radio.<br />
To change the frequency, click on the grey knob below the standby frequency<br />
(highlighted in Figure 9.5), just to the right of the ‘STBY’. Using the left mouse<br />
button changes the number after the decimal place, using the middle button changes<br />
the numbers before the decimal place. Click on the right side of the button to<br />
change the frequency up, and the left of the button to change the frequency down.<br />
Most of the <strong>FlightGear</strong> cockpit controls work this way. If you are having difficulty<br />
clicking on the correct place, press Ctrl-C to highlight the hot-spots for clicking.
146 CHAPTER 9. A CROSS COUNTRY FLIGHT TUTORIAL<br />
Figure 9.5: COMM1 adjustment knob<br />
Figure 9.6: COMM1 switch
9.3. GETTING UP 147<br />
Once you have changed the frequency to 125.2, press the white button between<br />
the words ‘COMM’ and ‘STBY’ to swap the active and standby frequencies (highlighted<br />
in Figure 9.6). After a second or so, you’ll hear the ATIS information.<br />
9.3.4 Altimeter and Compass<br />
Figure 9.7: Altimeter calibration knob<br />
Listen for the ‘Altimeter’ setting. If you are not using ‘real weather’, the value<br />
will be 2992, which is standard and already set on the plane. If you are using ‘real<br />
weather’, then the altimeter value is likely to be different. We therefore need to<br />
set the altimeter to the correct value. To do this, use the knob at the bottom left<br />
of the altimeter (circled in red in Figure 9.7), in the same way as you changed the<br />
radio frequency. This changes the value in the little window on the right of the<br />
altimeter, which is what you are trying to set, as well as the altitude displayed by<br />
the altimeter.<br />
<strong>The</strong> other way to set the altimeter is to match it to the elevation above sea-level<br />
of the airport. <strong>The</strong> elevation is listed on the sectional. For KRHV it is 133ft. This<br />
means you can double-check the pressure value reported over ATIS.<br />
Figure 9.8: Heading adjust knob
148 CHAPTER 9. A CROSS COUNTRY FLIGHT TUTORIAL<br />
We will also take the opportunity to set the heading bug on the compass to 350<br />
- our bearing from KRHV to KLVK. To do this, use the red button on the compass<br />
housing (highlighted in Figure 9.8), just as you’ve done before. Use the left mouse<br />
button for small adjustments, and middle mouse button to make big adjustments.<br />
<strong>The</strong> value of 350 is just anti-clockwise of the labeled value of N (North - 0 degrees).<br />
9.3.5 Take-Off<br />
Figure 9.9: Take-off from KRHV<br />
OK, now we’ve done that we can actually take off!. In my case this usually involves<br />
weaving all over the runway, and swerving to the left once I’ve actually left the<br />
ground, but you’ll probably have better control than me. Once above 1000ft, make<br />
a gentle turn to the right to a heading of 350 degrees. As we’ve set the heading<br />
bug, it will be easy to follow. We’re aiming for a fairly prominent valley.<br />
Continue climbing to 3,500 ft at around 500-700 fpm. Once you reach that<br />
altitude, reduce power, level off to level flight and trim appropriately. Check the<br />
power again and adjust so it’s in the green arc of the RPM guage. We shouldn’t run<br />
the engine at maximum RPM except during take-off.<br />
9.4 Cruising<br />
OK, we’ve taken off and are on our way to Livermore. Now we can make our life<br />
a bit easier by using the autopilot and our plane more fuel efficient by tuning the<br />
engine. We’ll also want to check we’re on-course<br />
9.4.1 <strong>The</strong> Autopilot<br />
We can make our life a bit easier by handing some control of the aircraft over to<br />
‘George’ - the autopilot.<br />
<strong>The</strong> autopilot panel is located towards the bottom of the radio stack (highlighted<br />
in Figure 9.10). It is easily distinguishable as it has many more buttons than
9.4. CRUISING 149<br />
Figure 9.10: <strong>The</strong> C172 Autopilot<br />
the other components on the stack. It can work in a number of different modes, but<br />
we are only interested in one of them for this flight - HDG. As the names suggest,<br />
HDG will cause the autopilot to follow the heading bug on the compass, which we<br />
set earlier.<br />
To set the autopilot, press the AP button to switch the autopilot on, then press<br />
the HDG button to activate heading mode. While the autopilot is switched on,<br />
it will use the trim controls to keep the plane on the heading. You can change the<br />
heading bug, and the autopilot will maneuver appropriately. However, the autopilot<br />
doesn’t make any allowances for wind speed or direction, it only sets the heading<br />
of the airplane. If flying in a cross-wind, the plane may be pointed in one direction,<br />
but be travelling in quite another.<br />
You should use the trim controls to keep a level flight. You can use the autopilot<br />
for this, but it is a bit more complicated.<br />
Once the aircraft has settled down under the autopilot’s control, we can pay<br />
more attention to the outside world and higher level tasks.<br />
9.4.2 Navigation<br />
Figure 9.11: <strong>The</strong> Calaveras Reservoir
150 CHAPTER 9. A CROSS COUNTRY FLIGHT TUTORIAL<br />
As we noted above, we’re going to be travelling over a couple of reservoirs.<br />
When you leveled off, the first (Calaveras) was probably right in front of you. You<br />
can use them to check your position on the map. If it looks like you’re heading off<br />
course, twist the heading bug to compensate.<br />
9.4.3 Mixture<br />
Figure 9.12: <strong>The</strong> Calaveras Reservoir<br />
As altitude increases, the air gets thinner and contains less oxygen. This means<br />
that less fuel can be burnt each engine cycle. <strong>The</strong> engine in the C172 is simple<br />
and doesn’t automatically adjust the amount of fuel to compensate for this lack of<br />
oxygen. This results in an inefficient fuel burn and a reduction in power because the<br />
fuel-air mixture is too ‘rich’. We can control the amount of fuel entering the engine<br />
every cycle using the mixture control. This is the red lever next to the throttle. By<br />
pulling it out, we ‘lean’ the mixture. We don’t want the mixture too rich, nor too<br />
lean. Both these conditions don’t produce as much power as we’d like. Nor do we<br />
want it perfect, because this causes the fuel-air to explode, rather than burn in a<br />
controlled manner, which is a quick way to trash an engine.<br />
Figure 9.13: Mixture Control
9.5. GETTING DOWN 151<br />
<strong>The</strong> mixture is controlled by the red lever to the right of the yoke. You may<br />
need to pan your cockpit view to see it.<br />
To pan the cockpit view, right-click with the mouse-button within the Flight-<br />
Gear window until the cursor becomes a double-headed arrow. Moving the mouse<br />
now pans the view. Once you can see the mixture lever clearly, right-click again to<br />
change the mouse back to the normal arrow.<br />
Figure 9.14: Fuel Flow and EGT guages<br />
Pull the mixture lever out slowly (use Ctrl-C to see the hot spots), leaning the<br />
mixture. As you do so, you’ll see various engine instruments (on the left of the<br />
panel) change. Fuel flow will go down (we’re burning less fuel), EGT (Exhaust<br />
Gas Temperature) will go up (we’re getting closer to a ‘perfect mixture’) and RPM<br />
will increase (we’re producing more power). Pull the mixture lever out until you<br />
see the EGT go off the scale, then push it in a bit. We’re now running slightly rich<br />
of peak. While at 3,500ft we don’t need to lean much, at higher altitudes leaning<br />
the engine is critical for performance.<br />
9.5 Getting Down<br />
Once you reach the second reservoir (the San Antonio Reservoir), we need to start<br />
planning our descent and landing at Livermore. Landing is a lot more complicated<br />
than taking off, assuming you want to get down in one piece, so you may want to<br />
pause the simulator (press ‘p’) while reading this.<br />
9.5.1 Air Traffic Control<br />
In the Real World, we’d have been in contact with Air Traffic Control (ATC) continually,<br />
as the bay area is quite congested in the air as well as on the ground. ATC<br />
would probably provide us with a ‘flight following’ service, and would continually<br />
warn us about planes around us, helping to avoid any possible collisions. <strong>The</strong><br />
<strong>FlightGear</strong> skies are generally clear of traffic, so we don’t need a flight following<br />
service. If you want to change the amount of traffic in the sky, you can do so from<br />
the AI menu.
152 CHAPTER 9. A CROSS COUNTRY FLIGHT TUTORIAL<br />
Livermore Airport is Towered (towered airports are drawn in blue on the sectional),<br />
so we will need to communicate with the tower to receive instructions on<br />
how and where to land.<br />
Before that, we should listen to the ATIS, and re-adjust our altimeter, just in<br />
case anything has changed. This is quite unlikely on such a short flight, but if<br />
flying hundreds of milesm it might make a difference. To save time when tuning<br />
radios, you can access the Radio Settings dialog from the Equipment menu. <strong>The</strong><br />
Livermore ATIS frequency is 119.65MHz.<br />
An ATIS message also has a phonetic letter (Alpha, Bravo, . . . Zulu) to identify<br />
the message. This phonetic is changed each time the recorded message is updated.<br />
When first contacting a tower, the pilot mentions the identifier, so the tower can<br />
double-check the pilot has up to date information.<br />
Besides the altitude and weather information, the ATIS will also say which<br />
runway is in use. This is useful for planning our landing. Normally, due to the<br />
prevalent Westerly wind, Livermore has runways 25R and 25L in use.<br />
Once you’ve got the ATIS, tune the radio to Livermore Tower. <strong>The</strong> frequency<br />
is 118.1MHz. Depending on the level of AI traffic you have configured on your<br />
system, you may hear Livermore Tower talking to other aircraft that are landing or<br />
departing. This information is not played over the speakers, it is only displayed on<br />
the screen.<br />
Once the frequency goes quiet, press the ’ key. This will bring up the ATC<br />
menu. Click on the radio button on the left to select what you wish to say (you<br />
only have one option), then OK.<br />
Your transmission will be displayed at the top of the screen. It will indicate<br />
who you are (type and tail number), where you are (e.g. 6 miles south), that you<br />
are landing, and the ATIS you have.<br />
After a couple of seconds, Livermore Tower will respond, addressing you by<br />
name and telling you what runway to use, which pattern is in use and when to<br />
contact them, for example<br />
“Golf Foxtrot Sierra, Livermore Tower, Report left downwind runway<br />
two five left.”<br />
To understand what this means, we’ll have to describe the Traffic Pattern.<br />
9.5.2 <strong>The</strong> Traffic Pattern<br />
With the number of aircraft flying around, there have to be standard procedures<br />
for take-off and landing, otherwise someone might try to land on-top of an aircraft<br />
taking off.<br />
<strong>The</strong> Traffic Pattern is a standard route all aircraft must follow when near an<br />
airport, either taking off or landing. <strong>The</strong> traffic pattern has four stages (or ‘legs’),<br />
shown in Figure 9.15. <strong>The</strong> ‘downwind’ mentioned above refers to one of these, the<br />
one with the number 3.
9.5. GETTING DOWN 153<br />
Figure 9.15: <strong>The</strong> Traffic Pattern<br />
1. Aircraft take off from the runway and climb. If they are leaving the airport,<br />
they just continue climbing straight ahead until clear of the pattern and then<br />
do whatever they like. If they are returning to the runway (for example to<br />
practise landing), they continue climbing until they reach a couple of hundred<br />
feet below ‘pattern altitude’. This varies from country to country, but is<br />
usually between 500ft and 1000ft Above Ground Level (AGL). This is called<br />
the upwind leg.<br />
2. <strong>The</strong> pilot makes a 90 degree left-hand turn onto the crosswind leg. <strong>The</strong>y<br />
continue their climb to ‘pattern altitude’ and level out.<br />
3. After about 45 seconds to a minute on the crosswind leg, the pilot again<br />
makes a 90 degree left turn onto the downwind leg. Aircraft arriving from<br />
other airports join the pattern at this point, approaching from a 45 degree<br />
angle away from the runway.<br />
4. When a mile or so past the end of the runway (a good guide is when the<br />
runway is 45 degrees behind you), the pilot turns 90 degrees again onto the<br />
base leg and begins the descent to the runway, dropping flaps as appropriate.<br />
A descent rate of about 500fpm is good.<br />
5. After about 45 seconds the pilot turns again onto the final leg. It can be<br />
hard to estimate exactly when to perform this turn. Final adjustments for<br />
landing are made. I usually have to make small turns to align with the runway<br />
properly.<br />
6. <strong>The</strong> aircraft lands. If the pilot is practising take-offs and landings, full power<br />
can be applied and flaps retracted for takeoff, and the aircraft can take off<br />
once more. This is known as ‘touch-and-go’.<br />
Most patterns at left-handed, i.e. all turns are to the left, as described above.<br />
Right-hand patterns also exist, and are marked as ‘RP’ on the sectional. ATC will<br />
also advise you what pattern is in use.
154 CHAPTER 9. A CROSS COUNTRY FLIGHT TUTORIAL<br />
Figure 9.16: Sectional extract showing approaches to Livermore<br />
9.5.3 Approach<br />
We’re approaching Livermore airport from the South, while the runways run East/West.<br />
Due to the prevailing Westerly wind, we’ll usually be directed to either runway 25R<br />
or 25L. 25R uses a right-hand pattern, while 25L uses a left-hand pattern. Both the<br />
patterns are illustrated in Figure 9.16. Depending on the runway we’ve been assigned,<br />
we’ll approach the airport in one of two ways. If we’ve been asked to land<br />
on runway 25R, we’ll follow the blue line in the diagram. If we’ve been asked to<br />
land on runway 25L, we’ll follow the green line.<br />
We also need to reduce our altitude. We want to end up joining the pattern at<br />
pattern altitude, about 1,000ft above ground level (AGL). Livermore airport is at<br />
400 ft above sea-level (ASL), so we need to descend to an altitude of 1400 ASL.<br />
We want to begin our maneuvers well before we reach the airport. Otherwise<br />
we’re likely to arrive too high, too fast, and probably coming from the wrong direction.<br />
Not the best start for a perfect landing :).<br />
So, let‘s start descending immediately.<br />
1. First switch off the autopilot by pressing the AP switch.<br />
2. Return mixture to fully rich (pushed right in). If we were landing at a high<br />
airport, we’d just enrich the mixture slightly and re-adjust when we reached<br />
the pattern.
9.5. GETTING DOWN 155<br />
3. Apply carb-heat. This stops ice forming when the fuel and air mix before<br />
entering the cylinder, something that can often happen during descent in<br />
humid air. <strong>The</strong> carb-heat lever is located between the throttle and mixture.<br />
Pull it out to apply heat.<br />
4. Reduce power quite a bit. Otherwise we might stress the airframe due to<br />
over-speeding.<br />
5. Drop the nose slightly to start the descent.<br />
6. Trim the aircraft.<br />
Use your location relative to the airport and the two towns of Pleasanton and<br />
Livermore to navigate yourself to the pattern following the general guide above.<br />
Once you’re established on the downwind leg, you’ll need to report to ATC<br />
again. Do this in the same way as before. <strong>The</strong>y will then tell you where you are<br />
in the queue to land. ‘Number 1’ means there are no planes ahead of you, while<br />
‘Number 9’ means you might want to go to a less busy airport! <strong>The</strong>y’ll also tell<br />
you who is ahead of you and where. For example ‘Number 2 for landing, follow<br />
the Cessna on short final’ means that there is a single aircraft in front of you that<br />
is currently on the final leg of the pattern. When they land and are clear of the<br />
runway, they’ll tell ATC, who can then tell you ‘Number 1 for landing’.<br />
9.5.4 VASI<br />
Figure 9.17: On Final at Livermore with VASI on the left<br />
Once on final, you’ll notice two sets of lights on the left of the runway (enhanced<br />
in Figure 9.17). This is the VASI and provides a nice visual clue as to<br />
whether you’re too low or too high on approach. Each set of lights can either be<br />
white or red. White means too high, red means too low. White and red together<br />
means just perfect. On a Cessna approaching at 60kts, a descent rate of about<br />
500fpm should be fine. If you are too high, just decrease power to increase your<br />
descent rate to 700fpm. If you are too low, increase power to decrease your descent<br />
rate to 200fpm.
156 CHAPTER 9. A CROSS COUNTRY FLIGHT TUTORIAL<br />
9.5.5 Go Around<br />
Figure 9.18: Missed approach at Livermore<br />
If for some reason it looks like you’re going to mess up the landing you can<br />
abort the landing and try again. This is called a ‘Go Around’. To do this<br />
1. Apply full power<br />
2. Wait until you have a positive rate of climb - i.e. your altitude is increasing<br />
according to the altimeter.<br />
3. Raise your flaps to 10 degrees (first-stage).<br />
4. Tell ATC you are ‘going around’<br />
5. Climb to pattern height<br />
6. If you aborted on final approach, continue over the runway to re-join the<br />
pattern on the crosswind leg. If on base, fly past the turn for final, then turn<br />
and fly parallel to the runway on the opposite side from downwind to rejoin<br />
on the crosswind leg.<br />
7. Fly the complete pattern, telling ATC when you are on downwind, and try<br />
again.<br />
9.5.6 Clearing the Runway<br />
Once you’re on the ground, you should taxi off the runway, then tell ATC you are<br />
clear. At high-altitude airports, you would lean the engine to avoid fouling the<br />
spark-plugs with an over-rich mixture. Find somewhere nice to park, shut down<br />
the engine by pulling mixture to full lean, then throttle off and magnetos to off<br />
(knob on the bottom left of the panel). Switch off the avionics master switch, tie<br />
down the aircraft, then go get that hamburger!<br />
I hope this tutorial is of some use. If you have any comments, please let me<br />
know at stuart_d_buchanan {at} yahoo.co.uk.
Chapter 10<br />
An IFR Cross Country Flight<br />
Tutorial<br />
10.1 Introduction<br />
Figure 10.1: Flying over the San Antonio Dam to Livermore. I think.<br />
In the cross country flight tutorial, you learned about VFR flight, and in the<br />
course of the flight you were introduced to most of the flight instruments in the<br />
C172p. Now we’re going to do an Instrument Flight Rules (IFR) flight. In this<br />
flight you’ll be introduced to the remaining instruments, learn a bit about IFR flight,<br />
and learn many, many TLAs (Three-Letter Acronyms).<br />
We’ll fly the same flight, from Reid-Hillview (KRHV), runway 31R, to Livermore<br />
(KLVK), runway 25R, only this time we’ll do it in IFR conditions: a ceiling<br />
200 feet above ground level, and 800 meter visibility. This tutorial assumes you’ve<br />
completed the cross country flight tutorial.<br />
157
158 CHAPTER 10. AN IFR CROSS COUNTRY FLIGHT TUTORIAL<br />
10.1.1 Disclaimer<br />
This is not intended to teach you how to fly IFR. Rather, it is meant to give a<br />
flavour of what IFR flying is like, and remove the mystery of the panel instruments<br />
not covered by the cross country flight tutorial.<br />
I’m not a pilot. Like the previous tutorial, this information has been gleaned<br />
from various non-authoritative sources. If you find an error or misunderstanding,<br />
please let me know. Mail me at bschack-flightgear -at- usa -dot- net.<br />
10.2 Before Takeoff<br />
We need to tell <strong>FlightGear</strong> about our flight conditions. <strong>The</strong>re are different ways to<br />
set our “desired” weather, but we’ll use the global weather menu. After launching<br />
<strong>FlightGear</strong>, click Environment ⇒ Global Weather to bring up the weather<br />
dialog. <strong>The</strong>n click on METAR Source and select CAT I minimum.<br />
This gives us a low ceiling and reduced visibility. Unfortunately, it also gives<br />
us rather stiff winds. If you don’t want to deal with them, then you can easily turn<br />
off the winds:<br />
• Click on METAR Source and select <strong>Manual</strong> input.<br />
• In the METAR string at the bottom, change “15015KT” (15 knot winds coming<br />
from 150 ◦ ) to “15000KT” (0 knot winds coming from 150 ◦ ), and hit<br />
Apply.<br />
10.2.1 Flight Planning<br />
After your weather settings settle down, you’ll see something like Figure 10.2.<br />
Those clouds don’t look very friendly, and it’s hard to even see past the end of the<br />
runway. Maybe we should just drive there in the Cessna. We had been planning to<br />
practice ground steering anyway . . .<br />
So how do you get from A to B when you can’t see? <strong>The</strong>re are a variety of<br />
ways that have evolved over the years, with various advantages and disadvantages.<br />
Our flight will use all of the navigation instruments the standard Cessna C172p has,<br />
just to give a taste of what’s possible.<br />
Our entire route, and the aids we’ll be using, are shown in Figure 10.3. Our<br />
route is in green, the navigational aids blue and red. <strong>The</strong> route looks a bit crazy —<br />
in fact, you might wonder if we’re more lost using our fancy equipment than just<br />
flying by the seat of our pants — but there is a method to the madness. Rather than<br />
overwhelming you with details by explaining it all now, I’ll explain it bit by bit as<br />
we go along.
10.2. BEFORE TAKEOFF 159<br />
Figure 10.2: On runway 31R at KRHV<br />
10.2.2 VHF Omnidirectional Range<br />
<strong>The</strong> first bit will involve VOR 1 (VHF (Very High Frequency) Omnidirectional<br />
Range) navigation, and will get us to a point about 5 nm (nautical miles) south<br />
of Livermore.<br />
VOR stations are indicated on the sectional by a big bluish-green circle with<br />
compass markings around the outside. I’ve helped you by marking their centers<br />
with a big blue dot as well. Reid-Hillview is very close to one, San Jose, which<br />
you can see in Figure 10.3. Near the centre of the circle, in a bluish-green rectangle,<br />
is the station information. According to the station information, it’s a VOR-DME<br />
station (I’ll explain DME later), its name is San Jose, its frequency is 114.1 MHz<br />
(or Channel 88, which is an alternative way to say the same thing), and its identifier,<br />
or “ident”, is SJC (which in Morse code is ... . --- - . - . ).<br />
To tune into a VOR station, we use one of the NAV receivers, which are paired<br />
with the COMM receivers (see Figure 10.4). And we navigate using the corresponding<br />
VOR gauge. We’ll choose the NAV1 receiver (and VOR1 gauge) in this<br />
case (NAV2 would have worked just as well). Before setting the frequency, check<br />
out the VOR1 gauge. It should look like VOR1 on the left in Figure 10.5. <strong>The</strong><br />
important thing is the red “NAV” flag. That means there’s no VOR signal, so we<br />
can’t trust the gauge.<br />
<strong>The</strong> NAV receiver has an active frequency, a standby frequency, and a tuning<br />
knob, just like the COMM receiver. 2 Tune it to 114.1, and press the swap button. NAV1 ⇒ 114.1 3<br />
1 See http://en.wikipedia.org/wiki/VHF_omnidirectional_range for more information.<br />
2 Operation of the COMM receivers was covered in the cross country flight tutorial.
160 CHAPTER 10. AN IFR CROSS COUNTRY FLIGHT TUTORIAL<br />
Figure 10.3: Green: our route, Blue: VORs and radials, Red: NDBs
10.2. BEFORE TAKEOFF 161<br />
Figure 10.4: IFR navigation Instruments
VOR1 OBS ⇒ 009<br />
162 CHAPTER 10. AN IFR CROSS COUNTRY FLIGHT TUTORIAL<br />
Figure 10.5: VOR1, before and after tuning<br />
If you look at VOR1, you should notice that the red “NAV” flag has disappeared,<br />
to be replaced with a “TO” flag, as shown on the right of Figure 10.5. That means<br />
we’re receiving a signal. But is it the correct one? What if we accidentally set the<br />
wrong frequency?<br />
To confirm that we’re tuned into the correct VOR, we listen for its ident. If you<br />
can’t hear the ident, or if it doesn’t match the chart, don’t trust the needle. So far,<br />
you probably haven’t heard a thing. That seems strange. After all, the red “NAV”<br />
flag turned off. We must be in range of some station, right? Why can’t we hear<br />
anything?<br />
When in doubt, look for the simplest solution. In this case, check the volume.<br />
<strong>The</strong>re’s a little knob on the NAV receivers, with “PULL IDENT” written beside it<br />
(see Figure 10.6). That’s our ident volume control. It’s pointing down and to the<br />
left in the picture, which means the volume is off. Click on the right side of the<br />
ident knob to increase the volume. Now you should hear the ident: ... . --- - . - . .<br />
Phew.<br />
Back to VOR1. <strong>The</strong>re’s a knob on the lower left, called the OBS (Omni Bearing<br />
Selector). As the name vaguely suggests, it is used to select a bearing. If you turn<br />
it, you should see the vertical needle, called the CDI (Course Deviation Indicator)<br />
move. 4 Try to center the needle. It should center when the little arrow at the top<br />
points to somewhere around 277. That number, and the TO flag means: “Flying at<br />
a heading of 277 ◦ will lead you directly to the station”.<br />
That’s great, except, according to our route, we don’t want to go to the station.<br />
We actually want to intercept the light blue line labelled “009 ◦ ” (the “9 degree<br />
radial”) coming from the station. How do we do that? Simple. Set the OBS to<br />
9. When we fly across the radial, the needle will center, and the flag will say<br />
FROM. This tells us: “flying at a heading of 9◦ will lead you directly away from<br />
3 All important actions and events will be given in the margin. This should provide a nice summary
10.3. IN THE AIR 163<br />
Figure 10.6: Ident volume knob and hot-spots<br />
the station”, which is what we want. At that point we’ll turn right to a heading of<br />
9 ◦ .<br />
One final thing — set the heading bug on the directional gyro to our current<br />
heading (about 310 ◦ ). Heading bug ⇒ 310<br />
10.2.3 Takeoff<br />
Now we’re ready to take off. It took a long time to get ready, but in fact there’s really<br />
more that we should have done. For example, there are all the things mentioned<br />
in the previous cross country flight tutorial. And there are other IFR preparations<br />
that we should have made. But again, in the interests of not overwhelming your<br />
brains, I’m only feeding you a bare minimum of information, and feeding it in<br />
trickles. This brings us to the most important control you have — the ‘p’ key. Use<br />
this often, especially when a new concept is introduced.<br />
Okay. Now take off, keeping a heading of 310◦ for now. Establish a steady Take off; climb on run-<br />
rate of climb. We plan to climb to 4000 feet. <strong>The</strong>re’s just one problem though — way heading<br />
those ugly-looking clouds are standing in our way.<br />
10.3 In the Air<br />
If this is your first attempt at IFR flight, you will find it impossible to fly once<br />
you enter the clouds. When you enter the clouds, you will be momentarily disconcerted<br />
by the lack of visual cues. “No matter,” you then think. “I’ll just keep<br />
things steady.” In a few moments, though, you’ll probably notice dials and needles<br />
spinning crazily, and without knowing it, you’ll be flying upside down, or diving<br />
towards the ground, or stalling, or all three.<br />
of the flight, uncluttered by the verbiage of the text.<br />
4 <strong>The</strong> horizontal needle is used in ILS landings, which will be explained later.
Engage autopilot; set<br />
vertical speed; engage<br />
heading mode<br />
164 CHAPTER 10. AN IFR CROSS COUNTRY FLIGHT TUTORIAL<br />
Figure 10.7: Autopilot after engaging<br />
It takes practice to get used to flying without external visual clues, although it’s<br />
a skill that you definitely must master if you want to fly IFR. For now though, we’ll<br />
use “George”, the autopilot, to make this part of flying easier.<br />
10.3.1 George I<br />
Once you’ve established a steady rate of climb and heading, engage the autopilot<br />
by pressing the AP button. You should see “ROL” displayed on the left to show<br />
that it’s in “roll mode” — it is keeping the wings level. In the middle it will display<br />
“VS”, to show it is in “vertical speed” mode — it is maintaining a constant vertical<br />
speed. On the right it will momentarily display that vertical speed (in feet per<br />
minute). Initially, the value is your vertical speed at the moment the autopilot is<br />
turned on. In the case of Figure 10.7, the autopilot has set the vertical speed to 300<br />
feet per minute.<br />
When you engage the autopilot, CHECK THIS CAREFULLY. Sometimes the<br />
autopilot gets a very funny idea about what your current rate of climb is, like 1800<br />
feet per minute. Our little Cessna cannot sustain this, and if the autopilot tries to<br />
maintain this (and it will), you will stall before you can say “Icarus”. This is a bug,<br />
to be sure, and a bit annoying, but it is also a useful cautionary lesson — don’t put<br />
blind faith in your equipment. Things fail. You have to monitor and cross-check<br />
your equipment, and be prepared to deal with problems.<br />
We want a vertical speed of around 500 to 700 feet per minute. Hit the up and<br />
down (UP and DN) buttons to adjust the vertical speed to a nice value. Take into<br />
account the airspeed as well. We want a sustainable rate of climb.<br />
Finally, once you’re climbing nicely, hit the heading (HDG) button. On the<br />
display, “ROL” will change to “HDG”, and the autopilot will turn the airplane to<br />
track the heading bug. Since you set the heading bug to the runway heading, and<br />
you took off straight ahead (didn’t you?), it shouldn’t turn much.<br />
10.3.2 MISON Impossible<br />
It’s around 8 nm to the 009 radial intercept, so we’ve got a bit of time. Since there’s<br />
no scenery to admire (eg, see Figure 10.8), we might as well prepare for the next<br />
phase of the flight.<br />
If you look along our route, just after we intercept the 009 radial and turn north,<br />
we pass by a point labelled MISON (see Figure 10.9 for a closeup of that section of
10.3. IN THE AIR 165<br />
Figure 10.8: Typical IFR scenery<br />
the chart without my fat blue and green lines drawn on top. MISON is in the lower<br />
right). Just above and to the left of MISON are two crossed arrows. MISON is an<br />
intersection. We’re actually going to pass east of MISON, but the radial passing<br />
roughly from northwest to southeast through MISON (and our route) is of interest<br />
to us. We’re going to use it to monitor our progress.<br />
Noting our passage of that radial isn’t strictly necessary — we can just keep<br />
flying along the 009 radial from San Jose until we need to turn. But it’s useful for<br />
two reasons: First, it’s nice to know exactly where we are. Second, it confirms we<br />
are where we think we are. If we fly and fly and never cross the radial, alarm bells<br />
should start going off.<br />
Looking at the sectional, we see that the radial is the 114 radial from the Oakland<br />
VORTAC (VOR TACAN, where TACAN stands for Tactical Air Navigation).<br />
Oakland’s frequency is 116.8, and its ident is OAK (--- . - - . -). NAV2 should<br />
already be tuned to Oakland, but if it isn’t, do it now. Turn on NAV2’s volume and NAV2 ⇒ 116.8<br />
make sure you’re getting the correct ident.<br />
We need to adjust the OBS, to tell VOR2 which radial we’re interested in. Set<br />
the OBS to 114. 5 See if you can guess whether the flag should read TO or FROM VOR2 OBS ⇒ 114<br />
when we cross the 114 radial. And see if you can guess whether the needle will<br />
move from left to right or right to left as we cross the radial.<br />
A final note: For our purposes, there’s nothing magical about the 114 radial —<br />
we could have used 113, or 115, or 100, or 090. <strong>The</strong> reason I chose 114 is because<br />
there was a line on the map already drawn along the 114 radial, which saved me<br />
the trouble of drawing a line myself.<br />
10.3.3 George II<br />
As we continue towards the 009 radial intercept, let’s look a bit more closely at<br />
the autopilot. First of all, if you aren’t in the habit of trimming the airplane, you’ll<br />
5 If you get tired of clicking on the knobs, much of this can be done more easily using the Equip-<br />
ment ⇒ Radio Settings dialog.
166 CHAPTER 10. AN IFR CROSS COUNTRY FLIGHT TUTORIAL<br />
Figure 10.9: Oakland VOR and 114 radial to MISON intersection
10.3. IN THE AIR 167<br />
Figure 10.10: Autopilot with altitude armed<br />
probably notice a flashing “PT” with an arrow on the autopilot. <strong>The</strong> autopilot is<br />
telling you to adjust the pitch trim. I tend to ignore it because, flying with a mouse,<br />
trimming is more trouble than it’s worth. Those of you lucky people with yokes<br />
and joysticks and who find flashing lights annoying might want to trim to get rid<br />
of it.<br />
Also, on the right there’s a big knob, the altitude select knob, which we can use<br />
to dial in a target altitude. We’re going to use it. Turn it until you see our desired<br />
cruising altitude, 4000 feet, displayed on the right. When you started turning it,<br />
“ALT ARM” should have appeared in the autopilot display (as in Figure 10.10).<br />
This indicates that you’ve selected a target altitude. <strong>The</strong> autopilot will maintain the Set autopilot altitude<br />
current rate of climb until reaching that altitude, at which point it will level off and to 4000<br />
change from vertical speed (VS) mode to altitude hold (ALT) mode. In altitude<br />
hold mode it maintains an altitude (in this case our target altitude of 4000 feet). 6<br />
Don’t forget that the autopilot won’t adjust the throttle, so when it levels out,<br />
the airplane (and engine) will speed up. You’ll need to adjust the throttle to get a<br />
proper cruise.<br />
10.3.4 Staying the Course<br />
At some point you’ll intercept the 009 radial (the VOR1 needle will centre). Turn<br />
to a heading of 009. You can do this using the heading bug on the directional gyro Turn to 009◦ upon<br />
if you’re using the autopilot.<br />
Unless you’re good or lucky, the needle probably won’t be centered. We need<br />
to adjust our course. <strong>The</strong> CDI needle (the vertical needle on the VOR) tells us<br />
where to go. If it’s to the left, that means the radial is to the left, so we need to go<br />
left. Ditto for right.<br />
It’s quite easy in theory, although in practice you may find that it’s hard to<br />
keep the needle centered, and that you are slaloming down the radial. <strong>The</strong> key is<br />
to realize this: the position of the needle tells us where we are, the motion of the<br />
needle tells us what to do.<br />
I’ll explain. If the needle is to our left, then, yes, the radial is definitely to our<br />
left.<br />
VOR1 intercept<br />
7 But if the needle is moving towards us, that means we’re going to cross the<br />
6 Of course, you don’t really have to do this — you could just watch the altimeter, and when it<br />
gets to 4000 feet, reduce the vertical speed to 0, or press the ALT button to enter altitude hold mode.<br />
But by using the altitude select knob, we’ve demystified one more mystery button.<br />
7 Unless you’re heading in the opposite direction, but that’s another story.
168 CHAPTER 10. AN IFR CROSS COUNTRY FLIGHT TUTORIAL<br />
radial, sooner or later, so our situation is improving, and we probably just need to<br />
wait for the needle to center. On the other hand, if the needle is moving away, we<br />
need to turn towards it to stop, and reverse, its motion.<br />
Note that the amount we need to turn is difficult to guess correctly at first, so<br />
experiment. Try 10 ◦ . If the needle moves too fast, cut it down to 5 ◦ (ie, turn back<br />
5 ◦ ). If, on the other hand, the needle moves too slowly, double it to 20 ◦ (ie, add<br />
another 10 ◦ ), and see what happens.<br />
10.3.5 Yet More Cross-Checks<br />
Cross-checking your position is always a good thing. <strong>The</strong> intersection with the<br />
Cross OAK 114 radial Oakland 114 radial is one way. Ahead of that lies the SUNOL intersection. If you<br />
look closely, 5 separate radials join at the point, so we have an embarrassment of<br />
choices with regards to the intersecting radial. Because it will come in useful later,<br />
we’re going to use the one coming in from the upper right. Another check of the<br />
sectional reveals that this is the 229 radial of the Manteca VORTAC, 116.0 MHz,<br />
ident ECA ( . - . - . . -).<br />
You should know the drill by now: Tune NAV2 to 116.0, set the OBS to 229,<br />
NAV2 ⇒ 116.0 and check the ident to confirm the station.<br />
VOR2 OBS ⇒ 229 Meanwhile, let’s introduce another piece of gear on the panel that will crosscheck<br />
the SUNOL passage. Some VOR stations have a distance capability, called<br />
DME8 (Distance Measuring Equipment). For example, San Jose does (remember<br />
it’s a VOR-DME station), as do Oakland and Manteca (VORTACs have DME<br />
capabilities).<br />
Using DME, you can find out how far you are, in straight-line distance, from<br />
the VOR station. In our scenario, the DME isn’t necessary, but we’ll use it anyway,<br />
just to see how it works, and to reconfirm our position.<br />
<strong>The</strong> DME is the instrument below the autopilot (refer to Figure 10.4). Make<br />
sure it’s turned on. <strong>The</strong> selector to the left of the on/off switch is probably set to<br />
N1, where “N1” means “listen to NAV1”. Since NAV1 is tuned to San Jose, it’s<br />
DME ⇒ N2<br />
telling us the distance to the San Jose VOR-DME. Switch the DME to N2. It now<br />
shows us the distance to the Manteca VOR.<br />
<strong>The</strong> DME shows you 3 things: the distance in nautical miles to the station,<br />
your speed towards or away from the station, and estimated time to the station at<br />
the current speed. Note that the distance is the direct distance from your plane to<br />
the station (called the “slant distance”), not the ground distance. Note as well that<br />
the speed is relative to the station, so unless you’re flying directly to or from the<br />
station, it will probably be lower than your true groundspeed. For example, the<br />
speed from San Jose, which is directly behind us, should be greater than the speed<br />
towards Manteca, which is off to the right.<br />
If we look up information about the SUNOL intersection, 9 it tells us that it is<br />
33.35 nm (as measured by a DME receiver) from ECA on the 229.00 radial (that’s<br />
8 See http://en.wikipedia.org/wiki/Distance_Measuring_Equipment for more information.<br />
9 For example, from http://www.airnav.com/airspace/fix/SUNOL.
10.4. GETTING DOWN 169<br />
what “ECAr229.00/33.35” means).<br />
Now we have two ways to confirm the SUNOL intersection: <strong>The</strong> VOR2 needle<br />
will center, and the DME will read 33.4 or so. Note that the DME doesn’t provide<br />
us with a very precise fix here because Manteca is at such an oblique angle. But it<br />
does give us a good warning of SUNOL’s impending arrival. Moreover, if it has an<br />
unexpected value (like 30), it should raise a few alarm bells.<br />
You may be wondering what “HLD” means (the setting between N1 and N2 on<br />
the DME). It stands for “hold”, and means “retain the current frequency, regardless<br />
of whether NAV1 or NAV2 are retuned”. For example, if we switch from N2 to<br />
HLD, the DME will continue to display (and update) information to Manteca. Even<br />
if we retune NAV2, the DME will remain tuned to Manteca. This is handy, because<br />
it basically represents a third independent receiver, and in IFR flight two receivers<br />
just never seem like enough.<br />
10.4 Getting Down<br />
We’re getting close to SUNOL, flying along the 009 radial from San Jose, monitoring<br />
our position with the DME. At SUNOL we’ll be less than 5 nm from Livermore,<br />
somewhere down there in the clouds. Perhaps if we just descended to 700 feet or so<br />
(Livermore is at 400, the ceiling is at 750) and headed more or less directly north<br />
after SUNOL, we’d get there? A recipe for disaster my friend, and you know it.<br />
10.4.1 Instrument Approach Procedures<br />
As you recall from the previous tutorial, when flying VFR, you don’t just point<br />
your airplane to the nearest runway to land. You need to fly a pattern. This helps<br />
you line up, and helps prevent planes from crashing into one another, which is a<br />
Good Thing.<br />
Similarly with IFR landings. <strong>The</strong>re’s a procedure to follow. In fact, there are<br />
procedures to follow. Because of the complexity of landing in IFR conditions,<br />
there’s no single procedure for all airports. You need to check for your particular<br />
airport. In fact, you usually need to check for your particular airport, runway, and<br />
navigation equipment.<br />
Our airport is Livermore (KLVK). Let’s check the information for that airport.<br />
Go to http://www.airnav.com/airport/KLVK to see what they’ve got. Down near<br />
the bottom, we have IAPs (Instrument Approach Procedures). <strong>The</strong>re are two listed<br />
for runway 25R. One is an ILS (Instrument Landing System) approach, the other<br />
a GPS (Global Positioning System) approach. Our plane has no GPS, but it does<br />
have ILS capabilities (I’ll explain ILS later), so we’ll choose that.<br />
Although Livermore only has two different instrument approach procedures,<br />
big airports have many many more. If you look at nearby San Francisco, you’ll see<br />
they have a slew of procedures. <strong>The</strong>re are ILS procedures, GPS procedures, LDA<br />
procedures, VOR procedures, . . . I wouldn’t be surprised if they had a procedure
ADF ⇒ 374<br />
170 CHAPTER 10. AN IFR CROSS COUNTRY FLIGHT TUTORIAL<br />
for someone with a sextant and an hourglass in there. To learn IFR flight, you’ll<br />
need to master all of them.<br />
Back to Livermore. If you download the procedure, you’ll see something like<br />
Figure 10.11 (except for the colour). It’s pretty overwhelming at first — it compresses<br />
a lot of information in a small space. We’ll ignore as much as we can,<br />
restricting ourselves to the three parts that have been coloured in. And we’ll do<br />
those parts on a “need to know” basis — we’ll only look at them when we really<br />
have to.<br />
Where to start? At the beginning of course. An IAP will have one or more Initial<br />
Approach Fixes (IAFs). <strong>The</strong>se are your entry points to the approach procedure<br />
and can be found in the “plan view”, which I’ve coloured purple in Figure 10.11.<br />
Our IAP lists two, one in the middle and one on the right (see Figure 10.12 for a<br />
close-up).<br />
An IAF is a fix, and a fix is an identifiable point in space. In fact, we’ve already<br />
encountered another kind of fix, namely a VOR intersection. Fixes are also<br />
usually named (eg, MISON, SUNOL). <strong>The</strong> IAF on the right is named TRACY, and<br />
consists of a radial, a distance, and an altitude. Specifically, it’s 15 DME (15 nm<br />
as measured by a DME receiver) along the 229 radial from the ECA (ie, Manteca)<br />
VOR.<br />
10.4.2 Nondirectional Beacons<br />
However, we’re not going to use TRACY as our IAF. We’re going to use the IAF<br />
in the middle, which is a marker (LOM stands for “Locator Outer Marker”). We’ll<br />
worry about what an outer marker is later. For now let’s concentrate on the locator<br />
part. <strong>The</strong> locator in an LOM is an NDB 10 (nondirectional beacon). It’s a bit like<br />
a VOR, in that it can be used to determine your heading and navigate from place<br />
to place. Like a VOR, it has a name (REIGA, in this case), a frequency (374 kHz),<br />
and an ident (LV, or . - .. ... - in Morse). NDBs also appear on sectionals, as fuzzy<br />
red circles with a small circle in the middle, with their identification information<br />
placed in a red box nearby. (see Figure 10.13 for a closeup. Don’t confuse the<br />
NDB, which is fuzzy, with the solid red circle on the left, nor the circle below with<br />
the “R” inside).<br />
An NDB station basically broadcasts a signal that says “I’m over here”, and<br />
the receiver on the plane can receive that signal and tell you, the pilot, “the station<br />
is over there”. You just need to tune the receiver and monitor the correct instruments.<br />
<strong>The</strong> receiver, labelled ADF (Automatic Direction Finder) Receiver, and the<br />
corresponding instrument, also labelled ADF, are shown in Figure 10.4.<br />
To tune into REIGA, turn the tuning knob on the receiver until 374 is displayed<br />
as the standby (STDBY) frequency. As usual, use the middle mouse button for<br />
big changes (100 kHz in this case), and the left mouse button for small changes (1<br />
kHz). <strong>The</strong>n hit the swap button (labelled “FRQ”). <strong>The</strong> 374 is now displayed as the<br />
10 See http://en.wikipedia.org/wiki/Non-directional_beacon for more information.
10.4. GETTING DOWN 171<br />
Figure 10.11: ILS approach plate for Livermore runway 25R
172 CHAPTER 10. AN IFR CROSS COUNTRY FLIGHT TUTORIAL<br />
Figure 10.12: Initial approach fixes<br />
Figure 10.13: REIGA nondirectional beacon
10.4. GETTING DOWN 173<br />
selected (SEL) frequency. <strong>The</strong> needle on the ADF should swing around, eventually<br />
pointing ahead to the right, to REIGA. But it won’t. Why? Because the receiver is<br />
in antenna mode (as show by the “ANT” in the upper-left portion of the display). 11<br />
Hit the ADF button so that “ADF” shows. Now the needle should swing to point<br />
to REIGA.<br />
Like VORs, to be sure we’re really tuned into the right station, we need to<br />
hear the ident as well. Like the NAV receivers, the ADF receiver has a dedicated<br />
volume control, this one labelled “VOL”. <strong>The</strong> volume also functions as an on/off<br />
switch, so if you turn it all the way counter-clockwise, it will shut the receiver off.<br />
Unfortunately, at the time of writing, the ident function doesn’t work.<br />
Notice there’s no OBS to set for an ADF — the needle just points to the station,<br />
which is nice. This leads us to our first rule for ADFs:<br />
ADF Rule 1: <strong>The</strong> needle points to the station.<br />
Pretty simple. In fact, you may not think it merits a “rule”, but it’s important<br />
to emphasize the difference between ADFs and VORs. A VOR, remember, tracks<br />
a single radial, which you specify by turning the OBS. An ADF has a knob, and a<br />
identical-looking compass card, so it’s tempting to believe it acts the same way. It<br />
doesn’t. Turn the ADF heading knob (labelled “HD”) and see what happens. <strong>The</strong><br />
compass card moves, but the arrow doesn’t. It just points to the station.<br />
In our current situation, where we just want to fly to REIGA, that’s all we need<br />
to know to use the ADF. If the needle points “over there”, then we’ll fly “over<br />
there”, and eventually we’ll pass over REIGA. However, for the sake of practice,<br />
and because it will be necessary later, I’m going to give the second rule for ADFs,<br />
which explains what the compass card is there for:<br />
ADF Rule 2: If the compass card reflects our current heading, then<br />
the needle gives the bearing to the station.<br />
In other words, the compass card gives “over there” a number.<br />
Now we’re ready to head to REIGA. Rotate the ADF heading knob until our<br />
current heading is at the top (basically, the ADF should match the directional gyro).<br />
When we pass the SUNOL intersection, look at the ADF needle, and set the DG<br />
bug to that heading (I assume you’re using the autopilot. If not, just turn to that<br />
heading). At the end of the turn, the ADF needle should point straight ahead. And Cross SUNOL; turn to<br />
if it doesn’t, adjust your heading so that it does. REIGA<br />
12<br />
By the way, the closer you get to REIGA, the more sensitive the needle becomes<br />
to changes in your heading. Don’t go crazy trying to keep the needle centered<br />
as you get close. Maintain a steady heading, and get ready for the . . .<br />
11 Antenna mode, by the way, is usually used to ident an NDB, because it gives better audio reception.<br />
While in antenna mode, however, the ADF will not point to the station — the needle will be<br />
parked pointing directly right.<br />
12 Which is actually bad technique in the presence of a crosswind, but I’m ignoring the wind to<br />
simplify the tutorial.
174 CHAPTER 10. AN IFR CROSS COUNTRY FLIGHT TUTORIAL<br />
10.4.3 Procedure Turn<br />
Figure 10.14: Livermore ILS procedure turn<br />
So, once we hit REIGA, do we just turn left and head down to the runway? Ah,<br />
if only life were so simple. No, we turn right, away from the airport, and do a<br />
procedure turn. We know there’s a procedure turn because of the barbed arrow in<br />
the plan view (see Figure 10.14). As you can see if you follow the arrow, we need<br />
to fly away, on a heading of 075 ◦ , then turn left 45 ◦ to a heading of 030 ◦ . We do a<br />
U-turn (to the right, away from the airport — that’s one of the rules about procedure<br />
turns) to come back at 210 ◦ , then a 45 ◦ right turn to 255 ◦ , heading straight towards<br />
the runway. All of this turning gives us time to set ourselves correctly on course,<br />
at the right altitude, to land on 25R.<br />
Hmmm. I mentioned “right altitude”, but how do we know that is? That’s<br />
down below, in the profile view (the yellow part of Figure 10.11). You can see that<br />
at the top is the LOM, our IAF. Now follow the arrows. After the IAF, we head<br />
out at 075 ◦ . During the procedure turn we can descend to 3300 feet, but no lower<br />
(that’s what the line under the 3300 means). After we finish our procedure turn<br />
and are heading back at 255 ◦ , we can descend to 2800 feet, but no lower, until we<br />
intercept the glide slope.<br />
One thing the instrument approach procedure does not tell you is the length of<br />
the procedure turn. <strong>The</strong> only constraint is that you must not fly more than 10 nm<br />
away from the NDB. You’ll notice there’s a 10 nm circle drawn around it in the<br />
plan view, and a note in the profile view saying “Remain within 10 NM”. <strong>The</strong>y’re<br />
not kidding. So, since we fly at around 110 knots, two minutes on each leg is<br />
reasonable — two minutes at 075 ◦ , and two minutes at 030 ◦ . On the way back we<br />
don’t care about times — we just want to intercept 255 ◦ .<br />
So, after we pass REIGA, turn right to 075 ◦ . Our ADF receiver has a builtin<br />
timer, so we’ll use that to time our two-minute leg. Hit the “FLT/ET” (flight<br />
time/elapsed time) button. <strong>The</strong> “FRQ” in the middle of the display will disappear,<br />
“FLT” will appear on the right, and the standby frequency will be replaced by
10.4. GETTING DOWN 175<br />
Figure 10.15: ADF with timer running<br />
a time. This is the total flight time, and cannot be changed, except by cycling<br />
the power. Hit “FLT/ET” again. Now you’ll see “ET” displayed, and a time,<br />
probably the same as the flight time. To reset the elapsed time, hit the next switch,<br />
labelled “SET/RST”. <strong>The</strong> timer should reset to 0, then start counting up (see Figure<br />
10.15). 13 In elapsed time mode, each time you hit “SET/RST”, the time resets to<br />
0. If you want to see the standby frequency again, hit “FRQ” once. <strong>The</strong> timers will<br />
continue to run.<br />
10.4.4 Chasing the Needle<br />
When we approached REIGA, we weren’t particularly concerned about our course<br />
— we just aimed for REIGA. Now, however, our course is important. We want to<br />
be flying directly away from REIGA on a course of 075 ◦ . Cross REIGA; fly<br />
Now, in an ideal world, after we turned to 075 ◦ , the ADF needle would be<br />
pointed directly behind you (ie, we’d be on course). Probably it isn’t, so we need<br />
to adjust our course. <strong>The</strong> key to adjusting our course is ADF Rule 2. If we’ve set<br />
the compass card correctly, then the needle shows us the current NDB bearing. If<br />
we turn and fly until we intercept the 255 bearing, then turn to 075 ◦ , we’ll be right<br />
on course.<br />
Figure 10.16 shows what I mean. In the figure, the plane, flying along the<br />
green line, is initially off course. 14 <strong>The</strong> heading is correct, 075 ◦ , but the station is<br />
at 225 ◦ , not 255 ◦ . To correct this, we turn right (remembering to adjust the ADF<br />
compass card to match our new heading). As we fly on this new heading, we get<br />
closer to the correct position, crossing the 235 and 245 bearings (shown in red).<br />
Finally, when we the ADF needle points to 255 ◦ , we turn left to 075 ◦ , and readjust<br />
the ADF compass card. 15 We are now on course.<br />
Of course, even when you get back on track, that won’t be the end of the story.<br />
Your airplane drifts; your mind drifts; your compass drifts; the wind pushes you<br />
around. What you find is that you will be constantly making little corrections.<br />
That’s okay, as long as we’re close. And anyway, before long (2 minutes actually),<br />
we’ll turn left 45 ◦ to 030 ◦ as part of our procedure turn, at which point we’ll just<br />
13<br />
<strong>The</strong> timer can also be set to count down from a time you specify — except that feature has not<br />
yet been implemented.<br />
14<br />
Way off course, actually. I’ve exaggerated the angles to make the explanation clearer.<br />
15<br />
You might be thinking “Wouldn’t it be nice if there was an ADF where the compass card rotated<br />
automatically?” Well, such an ADF does exist, and it comes with its own acronym — RMI (Radio<br />
Magnetic Indicator).<br />
at 075 ◦ away from<br />
REIGA for two minutes
Turn left to 030 ◦ ; fly<br />
for two minutes while<br />
descending to 3300<br />
176 CHAPTER 10. AN IFR CROSS COUNTRY FLIGHT TUTORIAL<br />
Figure 10.16: Getting back on course<br />
ignore the NDB anyway. Sigh. All that effort for just 2 minutes. Hardly seems<br />
worth it.<br />
10.4.5 FOOTO Time<br />
While you’re flying outbound, take an occasional look at VOR2, tuned to Manteca,<br />
and the DME. Assuming the OBS is still at 229, and the DME still tuned to N2, at<br />
some point the needle should center, meaning you’ve crossed the 229 radial, and,<br />
if you’re on course, at the same time the DME should read 20.8. How do I know<br />
that? If you look at the approach plate (Figure 10.11), you’ll notice an intersection,<br />
named FOOTO. FOOTO is on the approach, and is defined to be 20.8 DME from<br />
ECA. Although this intersection is not strictly necessary for us, it comes for free,<br />
and provides good confirmation of our position both outbound and, later, inbound.<br />
Depending on how fast you’re flying, you’ll probably pass FOOTO close to the<br />
time your two minutes at 075 ◦ are up. At the end of two minutes, turn left 45 ◦ to<br />
030 ◦ . Reset the timer, and fly for another two minutes on this heading.<br />
10.4.6 George III<br />
This leg is relatively uneventful, so we’ll take advantage of the lull in the action to<br />
descend to 3300. Assuming you’re using the autopilot, you will need to do a few<br />
things:<br />
1. If you’re in altitude hold (ALT) mode, you need to get back into vertical<br />
speed (VS) mode. Press the ALT button — the “ALT” in the middle of the<br />
display should change to “VS”, and your current vertical speed (probably 0)<br />
should be displayed momentarily on the right.<br />
2. Click the DN button until you get a vertical speed of -500 feet per minute.
10.4. GETTING DOWN 177<br />
3. If you want to set the target altitude, like before, rotate the big knob on the<br />
right until “3300” shows up on the right side of the display. “ALT ARM”<br />
should appear on the bottom.<br />
Note that if you’re using the autopilot to descend, it will just push the nose<br />
down, like a bad pilot, so the airplane will speed up. We want to go down, but we<br />
don’t want to speed up, so we need to reduce engine RPMs to keep the speed at<br />
110 knots. Later, when you level off at 3300 feet, you’ll have to increase power<br />
again.<br />
If you’re flying manually, then you just need to adjust the engine to get the<br />
descent rate you want — the plane should stay magically at 110 knots if it’s already<br />
trimmed for 110.<br />
10.4.7 ILS Landings<br />
While descending, we also need to start considering how we’re going to intercept<br />
255 ◦ on the way back and follow it down to the runway. You might think we’re<br />
going to use the NDB like we did on the outbound leg, but at this point, the NDB<br />
is not good enough. This is an ILS landing, a so-called “precision” landing, and<br />
an NDB is just not precise enough. It can get us close to the runway, but not close<br />
enough.<br />
So, we’re going to switch over to our ILS system. It is much more accurate<br />
horizontally. As well, it offers vertical guidance, something which the NDB does<br />
not give at all. And hey, it also gives you something else to learn in our few<br />
remaining minutes so that you don’t get bored.<br />
As with NDB and VOR navigation, the ILS system 16 has a transmitter (or<br />
transmitters — a localizer and a glide slope) on the ground, and a receiver and a<br />
gauge in the aircraft. <strong>The</strong> receiver, it turns out, is just a NAV receiver, of which<br />
we have two. <strong>The</strong> gauge is like a VOR indicator, but it has an added glide slope<br />
indicator, which is a horizontal (you hope) needle. Like a VOR, the vertical needle<br />
shows whether you’re left or right. <strong>The</strong> horizontal needle shows whether you’re<br />
high or low. Our ILS gauge is our old friend VOR1.<br />
As you might have guessed, the localizer has a frequency and ident associated<br />
with it (there’s no need to tune the glide slope separately. If you tune the localizer,<br />
you’ve tuned the glide slope). This is shown on the approach plate in two places:<br />
at the top left corner, and in the plan view by the runway (see Figure 10.17). As we<br />
can see, the frequency is 110.5 MHz, and the ident is I-LVK ( .. . - .. ... - - . -).<br />
If you look at VOR1 now, it should be showing a red “GS” flag (this can be<br />
seen in Figure 10.5). This indicates that there is no glideslope signal. Now tune<br />
NAV1 to 110.5. <strong>The</strong> red “GS” flag should disappear. Check for the ident. Sounds NAV1 ⇒ 110.5<br />
lovely, doesn’t it? That localizer is going to save your bacon and get you out of<br />
this interminable soup. When you tuned into the localizer, you’ll also have noticed<br />
the ILS needles move. And the OBS? Well, it’s useless. Try moving it. No matter<br />
16 See http://en.wikipedia.org/wiki/Instrument_Landing_System for more information.
VOR1 OBS ⇒ 255<br />
178 CHAPTER 10. AN IFR CROSS COUNTRY FLIGHT TUTORIAL<br />
Figure 10.17: Livermore 25R localizer<br />
how you turn it, the needles don’t move in response. That’s by design. A localizer<br />
is basically a VOR with one radial, the approach heading. We don’t care about any<br />
others, so we don’t need an OBS to declare interest in any others. However, it does<br />
serve as a useful reminder, so move the OBS to 255, our desired heading.<br />
10.4.8 Intercepting the Localizer<br />
We’re now ready to intercept the ILS localizer. When the two minutes on the 030◦ leg have passed, make your U-turn to the right to 210◦ Turn right 180 . Soon after you complete<br />
◦ to<br />
210◦ your turn, the vertical (localizer) needle on the ILS will begin to move. And it<br />
Intercept localizer will move fast, much faster than the ADF and VOR needles did. A localizer is 4<br />
times as sensitive as a VOR, relatively small movements of the aircraft make big<br />
changes in the needles. You’ll probably overshoot, but don’t worry, because we<br />
have around 5 or 10 minutes to get things straightened out.<br />
Slow to 75 knots; drop<br />
a notch of flaps; descend<br />
to 2800<br />
Just remember: don’t chase the needles. That mantra is now more important<br />
than ever. Those needles are sensitive — if you just turn left when the localizer<br />
needle is to the left and right when it’s to the right, you’ll be flying like a drunken<br />
sailor. If you’re lucky, the runway will be passing underneath you as you swing<br />
across the track for the umpteenth time. Luck, though, is something we should<br />
not be relying on. Determine on how the needles are moving before making your<br />
move.<br />
Now that you’re heading back inbound at 255◦ , slow to 75 knots, drop a notch<br />
of flaps, and descend to 2800 feet (but no lower). And check for the inbound<br />
passage of FOOTO to confirm your position. And pat your head and rub your<br />
stomach.
10.4. GETTING DOWN 179<br />
10.4.9 Intercepting the Glide Slope<br />
As we fly towards the runway, don’t forget to look at the horizontal needle, the<br />
glide-slope needle. When we intercepted the localizer, it should have been high<br />
above us, because we were actually under the glide slope. As we levelled out at<br />
2800, the glide slope started coming “down” to us. Eventually, you should see the<br />
needle start to move down. When the needle is horizontal, that means you’re on the<br />
glide slope. 17 And, soon after we intercept the glide slope, we should pass over the<br />
outer marker. Several things will happen more or less simultaneously, all of which<br />
confirm your position:<br />
1. You’ll hear a continuous series of dashes.<br />
2. <strong>The</strong> blue light labelled “O” above COMM1 will flash.<br />
3. <strong>The</strong> ADF needle will swing around.<br />
Once on the glideslope, we need to start descending. What’s a good rate? It<br />
depends on our groundspeed. In our case, we’re going at 75 knots (there’s almost<br />
no wind, so our airspeed and groundspeed are the same), and it turns out that we<br />
need to descend at around 400 feet per minute. With the autopilot, that’s pretty<br />
easy — just dial in -400, and you’re set (but remember to reduce power to keep<br />
our speed at 75 knots, or you’ll hit the runway going pretty fast, and be prepared<br />
to adjust things if you drift above or below the glide slope). Intercept glideslope;<br />
Without the autopilot, it’s also pretty easy — just reduce power. How much? In<br />
this case, with our plane, to around 1700 RPM. Again, it depends on many things<br />
— plane, elevation, winds, weight, . . . , so you’ll have to adjust things if you see<br />
the glide-slope needle start to move up or down. Like the localizer needle though,<br />
. . . (are you ready?) DON’T CHASE IT. Watch how it’s moving, then make your<br />
adjustment.<br />
Since we’re on final approach, you might want to drop a second notch of flaps.<br />
This will affect your trim, and you’ll have to adjust power a bit as well.<br />
10.4.10 Touchdown, Almost<br />
After all the excitement of the procedure turn, it will seem like a long way down<br />
to the runway from the outer marker. <strong>The</strong>re’s not much to do but stare at those<br />
needles. In fact, you’ll probably stare at them like you’ve never stared at them<br />
before. Take a look around at the other gauges too, though — they have useful<br />
things to tell you. Is our airspeed okay? We don’t want to stall. RPMs about<br />
right? If flying manually, you’ll want to constantly check the attitude indicator and<br />
directional gyro. This being a simulator, we don’t have to worry about oil pressure<br />
17 Maybe. <strong>The</strong>re can be false glideslopes, and <strong>FlightGear</strong> models these, so we have to make sure<br />
we’re on the real one. One purpose of the procedure turn is to get you in the correct position, at the<br />
correct altitude, to intercept the true glideslope.<br />
cross outer marker;<br />
drop second notch of<br />
flaps
180 CHAPTER 10. AN IFR CROSS COUNTRY FLIGHT TUTORIAL<br />
and engine temperature, but you might want to glance over there anyway, just to<br />
get into the habit. And I hope you’ve done things like set the mixture to full rich<br />
(you did lean it out while cruising, didn’t you?).<br />
10.4.11 A Confession<br />
I’ve actually made you do more work than you have to. We’ve been using the<br />
autopilot as a fancy steering wheel, but it’s capable of more than that. You may<br />
have noticed that the autopilot has some buttons I haven’t explained — NAV, APR,<br />
and REV. Well, using those buttons, the autopilot can:<br />
NAV: Track a VOR radial.<br />
APR: Do a direct ILS approach, tracking both the localizer and the glideslope.<br />
REV: Intercept the ILS before the procedure turn (ie, head away from the localizer.<br />
So, in fact, even more of the work you’ve done could have been done by the<br />
autopilot. After takeoff, you could have asked it to track the 009 radial from SJC<br />
all the way to SUNOL in NAV mode; at SUNOL, you could have asked it to fly<br />
the “back-course approach” from I-LVK in REV mode; done the procedure turn in<br />
HDG mode; finally, tracked the localizer and glideslope in APR mode.<br />
However, I didn’t give you this information for two reasons. First, flying by<br />
hand (even with the autopilot gently holding your hand, as we’ve been doing) gives<br />
you a better idea of what’s happening. Second, the autopilot doesn’t behave quite<br />
as the official manual says it should for some of these functions — best stick to the<br />
features that are known to work well.<br />
10.4.12 Touchdown, Not<br />
Although ILS approaches can get us close to the runway, closer than VFR, NDB,<br />
or VOR approaches can, we still need some visibility to land, 18 so we need a way<br />
to decide if landing is possible or not. That’s what the landing minimums section<br />
of the procedure plate is for (coloured green in Figure 10.11). In the category<br />
labelled “S-ILS 25R” (that’s us), you’ll see “597-1/2 200(200-1/2)”. This tells us<br />
that we can track the glide slope down to an altitude of 597 feet (200 feet above the<br />
runway). At 597 feet we make our decision — if we can’t see the runway, then we<br />
have to execute a missed approach. 597 feet is our decision height (DH).<br />
In addition to the altimeter, this particular approach also has another indication<br />
that we’re close — a middle marker (MM). This marker will sound — in this case,<br />
18 Well, unless it’s a Category IIIC ILS approach.
10.4. GETTING DOWN 181<br />
Figure 10.18: Missed approach procedure<br />
a dot dash series — and the yellow light labelled “M” above COMM1 will flash.<br />
Passage over the middle marker should coincide with reaching decision height. 19<br />
So, what if you can’t see the runway at decision height? As you might have<br />
expected, just as you can’t land willy-nilly, you can’t just go around willy-nilly.<br />
<strong>The</strong>re’s a Procedure. A Missed Approach Procedure. This is shown in several<br />
places on the approach plate (see Figure 10.18): At the top, where it says “MISSED<br />
APPROACH”, in the plan view, where you can see a dashed arrow coming off the<br />
end of the runway and a dashed oval on the right, and in the profile view, where a<br />
series of boxes shows graphically what to do. In our case, these all tell us to:<br />
1. Climb straight ahead to 1100 feet<br />
2. Make a climbing right turn to 3000 feet<br />
3. Fly to REIGA<br />
4. Fly outbound from REIGA at 062 ◦<br />
5. Fly a holding pattern at the TRACY intersection<br />
<strong>The</strong> holding pattern, as you might have guessed, is a place where you can<br />
“park” while sorting things out, and has its own set of procedures and techniques<br />
which we won’t go into here, because . . .<br />
19 As you may have guessed, the remaining light — white, and labelled “A” — indicates passage<br />
of the inner marker. Our approach doesn’t have one, but San Fransisco’s runway 28R does. While<br />
passing over it, you should hear a rapid, high-pitched series of dots. Why is it labelled “A” and not<br />
“I”? Because in ancient times, it was also used to identify passage over “airway” markers along radio<br />
range tracks.
Sight runway; disengage<br />
autopilot; cross<br />
middle marker<br />
182 CHAPTER 10. AN IFR CROSS COUNTRY FLIGHT TUTORIAL<br />
Figure 10.19: On course, runway in view. We’re going to live!<br />
10.4.13 Touchdown<br />
In our ideal simulator world, you probably won’t have to execute a missed approach.<br />
Assuming you stayed on the glide slope, you should have popped out of<br />
the murk at the decision height, and with 800 metre visibility, the runway should<br />
have been in view soon after. With the runway in sight, you could then turn wildly<br />
to get on course 20 (it’s very hard to be lined up perfectly) and land “normally”<br />
(which for me involves a lot of bouncing around and cursing). Park the plane, then<br />
Land; eat hamburger stagger out of the cockpit and have another hamburger!<br />
10.5 Epilogue<br />
That was a lot of information in a short time, a rather brutal introduction to ILS<br />
flying. Hopefully, instead of turning you off, it has whetted your appetite for more,<br />
because there is more. Some of the major issues I’ve ignored are:<br />
Wind This is a big one. Flying IFR in a crosswind affects everything you do, and<br />
you need to be aware of it or your navigation will suffer.<br />
Flying without the autopilot George tries his best, but he’s not completely trustworthy.<br />
You have to be prepared to go it alone.<br />
DG precession <strong>The</strong> directional gyro in the c172p is not perfect. Over time, the<br />
values it gives you are less and less reliable — it precesses. It needs to be<br />
20 Remembering, of course, to disengage the autopilot.
10.5. EPILOGUE 183<br />
periodically calibrated against the compass (using the OBS knob on the DG<br />
to adjust it).<br />
IFR charts We used sectionals, which are really intended for VFR flight. <strong>The</strong>re<br />
are a whole set of charts devoted exclusively to IFR flight.<br />
ATC <strong>The</strong> other people out there need to know what you’re doing. As well, they’ll<br />
probably tell you what to do, including to ignore the approach plate you so<br />
fastidiously studied.<br />
SIDs/DPs, Airways, and STARs This tutorial introduced IAPs, which are standard<br />
ways to make approaches. In IFR flight, there are standard ways to<br />
leave airports (Standard Instrument Departures, SIDs, or Departure Procedures,<br />
DPs), standard ways to travel between airports (airways), and standard<br />
ways to go from airways to IAPs (Standard Terminal Arrival Routes,<br />
STARs).<br />
Holding Patterns Most missed approaches end in a holding pattern somewhere,<br />
so you’d better know how to fly them.<br />
GPS Our Cessna doesn’t have a GPS, but nowadays most small planes do, and<br />
GPS is rapidly replacing radio-based navaids.<br />
If you want to learn more, try the following resources:<br />
• Flight Simulator Navigation, written by Charles Wood. It covers everything<br />
from basic navigation to ILS approaches, with lots of examples and practice<br />
flights to improve your skills. Everything is linked together by an entertaining<br />
storyline in which you are the pilot for a fictional charter service.<br />
Two caveats, though. First, it is Microsoft Flight Simulator-based, so you’ll<br />
have to translate into “<strong>FlightGear</strong>-ese” as appropriate. Second, it is a bit out<br />
of date, and things in the real world have changed since it was written. NDB<br />
beacons have been decommissioned, new approaches have replaced old ones<br />
— even an airport has disappeared (!). Treat this as a learning opportunity.<br />
You’ll get better at finding more up to date information, and learn not to<br />
blindly trust your charts, just as you have learned not to blindly trust your<br />
instruments.<br />
• If you’re really keen and want to hear it straight from the horse’s mouth,<br />
there’s the official FAA Instrument Flying Handbook. It’s big and detailed,<br />
and there’s no interesting storyline in which you’re a pilot for a fictional<br />
charter service. It can be downloaded as multiple PDF files.<br />
• If you’d like practice deciphering what the instruments are telling you, without<br />
the bother flying (or even virtual flying), you can try luizmonteiro.com,<br />
which has Flash tutorials of various instruments, including a VOR and an<br />
ADF.
184 CHAPTER 10. AN IFR CROSS COUNTRY FLIGHT TUTORIAL<br />
• Another simulated instrument site is Tim’s Air Navigation Simulator. It has<br />
a Java applet that simulates a plane flying in the vicinity of two navaids. <strong>The</strong><br />
simulation allows you to use different kinds of instruments and navaids, so<br />
you can see their behaviour, and the advantages and disadvantages of each.<br />
• If it’s navigation information you’re after, an excellent site is AirNav.Com,<br />
which I’ve used extensively in the course of this tutorial. It has detailed<br />
airport, navaid, and fix information, and links to IAPs. Unfortunately, the<br />
information is only for the USA.<br />
• Another source of airport and navaid information is World Aero Data. Its<br />
information isn’t as detailed as AirNav’s, but it is international.<br />
• FlightSim.Com has a very informative series of articles entitled “How To<br />
. . . Use Approach Plates”. It starts with a very, very dense tutorial on<br />
how to read an approach plate, then follows with a set of approaches at Kodiak,<br />
Alaska. <strong>The</strong>se are an excellent supplement to the approaches given in<br />
Charles Wood’s Flight Simulator Navigation (see above).<br />
Most interesting, though, is section two — “Dangerous Approaches.” Approaches<br />
at six airports around the world, from Penticton, BC to Kathmandu,<br />
Nepal, are described. Fly them if you dare!<br />
Warning — the series is even more Microsoft Flight Simulator-centric than<br />
Charles Wood’s, and some of it is out of date (some outside links are broken,<br />
and some of the approaches have changed).<br />
• Also from FlightSim.Com is “Golden Argosy”, a description of a flight from<br />
New York to Rome by Tony Vallillo, an American Airlines 767 captain. It<br />
gives some interesting information about navigation that doesn’t appear in<br />
the other sites mentioned here, such as the North Atlantic Tracks. However,<br />
its main appeal is that it gives a good answer to the question “What’s it<br />
really like to be a pilot?” <strong>The</strong> author’s love of flying is evident throughout<br />
the article.<br />
• For those who are interested in the ATC side of things, and want information<br />
from an authoritative source, check out Michael Oxner’s “Aviation Topic<br />
of the Week”, a series of articles about flying “in many types of airspaces<br />
in many situations.” Michael Oxner is a professional controller and private<br />
pilot who obviously can’t get enough of airplanes, because in his spare time<br />
he’s also an on-line controller with VatSim. Particularly interesting are a set<br />
of articles describing a complete IFR flight and a complete VFR flight.
Chapter 11<br />
A Helicopter Tutorial<br />
11.1 Preface<br />
First: in principle everything that applies to real helicopters, applies to <strong>FlightGear</strong>.<br />
Fundamental maneuvers are well described here:<br />
http://www.cybercom.net/˜copters/pilot/maneuvers.html Some details are simplified<br />
in <strong>FlightGear</strong>, in particular the engine handling and some overstresses are not<br />
simulated or are without any consequence. In <strong>FlightGear</strong> it is (up to now) not<br />
possible to damage a helicopter in flight.<br />
<strong>The</strong> helicopter flight model of <strong>FlightGear</strong> is quite realistic. <strong>The</strong> only exceptions<br />
are “vortex ring conditions”. <strong>The</strong>se occur if you descend too fast and perpendicularly<br />
(without forward speed). <strong>The</strong> heli can get into its own rotor downwash<br />
causing the lift to be substantially reduced. Recovering from this condition is possible<br />
only at higher altitudes. On the Internet you can find a video of a Seaking<br />
helicopter, which got into this condition during a flight demonstration and touched<br />
down so hard afterwards that it was completely destroyed.<br />
For all <strong>FlightGear</strong> helicopters the parameters are not completely optimized<br />
and thus the performance data between model and original can deviate slightly. On<br />
the hardware side I recommend the use of a “good” joystick. A joystick without<br />
185
186 CHAPTER 11. A HELICOPTER TUTORIAL<br />
springs is recommended because it will not center by itself. You can either remove<br />
the spring from a normal joystick, or use a force feedback joystick, with a<br />
disconnected voltage supply. Further, the joystick should have a “thrust controller”<br />
(throttle). For controlling the tail rotor you should have pedals or at least a twistable<br />
joystick - using a keyboard is hard. <strong>FlightGear</strong> supports multiple joysticks attached<br />
at the same time.<br />
11.2 Getting started<br />
<strong>The</strong> number of available helicopters in <strong>FlightGear</strong> is limited. In my opinion the<br />
Bo105 is the easiest to fly, since it reacts substantially more directly than other<br />
helicopters. For flight behavior I can also recommend the S76C. <strong>The</strong> S76C reacts<br />
more retarded than the Bo.<br />
Once you have loaded <strong>FlightGear</strong>, take a moment to centralize the controls by<br />
moving them around. In particular the collective is often at maximum on startup.<br />
<strong>The</strong> helicopter is controlled by four functions. <strong>The</strong> stick (joystick) controls two<br />
of them, the inclination of the rotor disc (and thus the inclination of the helicopter)<br />
to the right/left and forwards/back. Together these functions are called “cyclic<br />
blade control”. Next there is the “collective blade control”, which is controlled<br />
by the thrust controller. This causes a change of the thrust produced by the rotor.<br />
Since the powering of the main rotor transfers a torque to the fuselage, this must<br />
be compensated by the tail rotor. Since the torque is dependent on the collective<br />
and on the flight condition as well as the wind on the fuselage, the tail rotor is also<br />
controlled by the pilot using the pedals. If you push the right pedal, the helicopter<br />
turns to the right (!). <strong>The</strong> pedals are not a steering wheel. Using the pedals you can<br />
yaw helicopter around the vertical axis. <strong>The</strong> number of revolutions of the rotor is<br />
kept constant (if possible) by the aircraft.
11.3. LIFT-OFF 187<br />
11.3 Lift-Off<br />
First reduce the collective to minimum. To increase the rotor thrust, you have<br />
to “pull” the collective. <strong>The</strong>refore for minimum collective you have to push the<br />
control down (that is the full acceleration position (!) of the thrust controller).<br />
Equally, “full power” has the thrust controller at idle. Start the engine with }. After<br />
few seconds the rotor will start to turn and accelerates slowly. Keep the stick and<br />
the pedals approximately centered. Wait until the rotor has finished accelerating.<br />
For the Bo105 there is an instruments for engine and rotor speed on the left of the<br />
upper row.<br />
Once rotor acceleration is complete, pull the collective very slowly. Keep your<br />
eye on the horizon. If the heli tilts or turns even slightly, stop increasing the collective<br />
and correct the position/movement with stick and pedals. If you are successful,<br />
continue pulling the collective (slowly!).<br />
As the helicopter takes off, increase the collective a little bit more and try to<br />
keep the helicopter in a leveled position. <strong>The</strong> main challenge is reacting to the<br />
inadvertent rotating motion of the helicopter with the correct control inputs. Only<br />
three things can help you: practice, practice and practice. It is quite common for it<br />
to take hours of practice to achieve a halfway good looking hovering flight. Note:<br />
<strong>The</strong> stick position in a stable hover is not the center position of the joystick.<br />
11.4 In the air<br />
To avoid the continual frustration of trying to achieve level flight, you may want<br />
to try forward flight. After take off continue pulling the collective a short time and<br />
then lower the nose a slightly using the control stick. <strong>The</strong> helicopter will accelerate<br />
forward. With forward speed the tail rotor does not have to be controlled as precisely<br />
due to the relative wind coming from directly ahead. Altogether the flight<br />
behavior in forward flight is quite similar to that of an badly trimmed airplane. <strong>The</strong><br />
“neutral” position of the stick will depend upon airspeed and collective.<br />
Transitioning from forward flight to hovering is easiest if you reduce speed<br />
slowly by raising the nose of the helicopter. At the same time, reduce the collective
188 CHAPTER 11. A HELICOPTER TUTORIAL<br />
to stop the helicopter from climbing. As the helicopter slows, “translation lift”<br />
is reduced, and you will have to compensate by pulling the collective. When the<br />
speed is nearly zero, lower the nose to the position it was when hovering. Otherwise<br />
the helicopter will accelerate backwards!<br />
11.5 Back to Earth I<br />
To land the helicopter transition to a hover as described above while reducing the<br />
altitude using the collective. Briefly before hitting the ground reduce the rate of<br />
descent slowly. A perfect landing is achieved if you managed to zero the altitude,<br />
speed and descent rate at the same time (gently). However, such landing are extremely<br />
difficult. Most pilots perform a hover more or less near to the ground and<br />
then decent slowly to the ground. Landing with forward velocity is easier, however<br />
you must make sure you don’t land with any lateral (sideways) component to avoid<br />
a rollover.<br />
11.6 Back to Earth II<br />
It is worth mentioning autoration briefly. This is a unpowered flight condition,<br />
where the flow of air through the rotors rotates the rotor itelf. At an appropriate<br />
altitude select a landing point (at first in the size of a larger airfield) and then switch<br />
the engine off by pressing {. Reduce collective to minimum, place the tail rotor<br />
to approximately 0˚ incidence (with the Bo push the right pedal about half, with<br />
As350 the left). Approach at approximately 80 knots. Don’t allow the rotor speed<br />
to rise more than a few percent over 100%, otherwise the rotor will be damaged<br />
(though this is not currently simulated). As you reach the ground, reduce the airspeed<br />
by lifting the nose. <strong>The</strong> descent rate will drop at the same time, so you do not<br />
need to pull the collective. It may be the case that the rotor speed rises beyond the<br />
permitted range. Counteract this by raising the collective if required. Just above<br />
the ground, reduce the descent rate by pulling the collective. <strong>The</strong> goal is it to touch<br />
down with a very low descent rate and no forward speed. With forward speed it<br />
is easier, but there is a danger of a roll over if the skids are not aligned parallel to<br />
the flight direction. During the approach it is not necessary to adjust the tail rotor,<br />
since without power there is almost no torque. If you feel (after some practice),
11.6. BACK TO EARTH II 189<br />
that autorotation is too easy, try it with a more realistic payload via the payload<br />
menu.
190 CHAPTER 11. A HELICOPTER TUTORIAL
Part IV<br />
Appendices<br />
191
Part V<br />
Annexes<br />
193
Appendix A<br />
Missed approach: If anything<br />
refuses to work<br />
In the following section, we tried to sort some problems according to operating<br />
system, but if you encounter a problem, it may be a wise idea to look beyond<br />
“your” operating system – just in case. If you are experiencing problems, we would<br />
strongly advise you to first check the FAQ maintained by Cameron Moore at<br />
http://www.flightgear.org/Docs/<strong>FlightGear</strong>-FAQ.html.<br />
Moreover, the source code contains a directory docs-mini containing numerous<br />
ideas on and solutions to special problems. This is also a good place to go<br />
for further reading.<br />
A.1 <strong>FlightGear</strong> Problem Reports<br />
<strong>The</strong> best place to look for help is generally the mailing lists, specifically the [Flightgear-<br />
User] mailing list. If you happen to be running a Git version of <strong>FlightGear</strong>, you<br />
may want to subscribe to the [Flightgear-Devel] list. Instructions for subscription<br />
can be found at<br />
http://www.flightgear.org/mail.html.<br />
It’s often the case that someone has already dealt with the issue you’re dealing<br />
with, so it may be worth your time to search the mailing list archives at<br />
http://www.mail-archive.com/flightgear-users%40flightgear.org/<br />
http://www.mail-archive.com/flightgear-devel%40flightgear.org/.<br />
You should also consider searching the <strong>FlightGear</strong> forums for help, instructions<br />
and archives at<br />
http://www.flightgear.org/forums.<br />
<strong>The</strong>re are numerous developers and users reading those lists and forums, so<br />
questions are generally answered. However, messages of the type <strong>FlightGear</strong> does<br />
195
196 A. MISSED APPROACH<br />
not compile on my system. What shall I do? are hard to answer without any further<br />
detail given, aren’t they? Here are some things to consider including in your<br />
message when you report a problem:<br />
• Operating system: (Linux Fedora 17. . . /Windows Seven 64 bits. . . )<br />
• Computer: (Pentium Dual Core, 2,3GHz. . . )<br />
• Graphics board/chip: (ATI Radeon HD 770 XT/NVidia GeForce GTX<br />
590. . . )<br />
• Compiler/version: (GCC version 4.6.3. . . )<br />
• Versions of relevant libraries: (PLIB 1.8.5, OpenSceneGraph 3.0.1. . . )<br />
• Type of problem: (Linker dies with message. . . )<br />
• Steps to recreate the problem: Start at KSFO, turn off brakes . . .<br />
For getting a trace of the output which <strong>FlightGear</strong> produces, the following<br />
command may come in handy (may need to be modified on some OSs or may not<br />
work on others at all, though):<br />
%FG ROOT/BIN/fgfs >log.txt 2>&1<br />
One final remark: Please avoid posting binaries to these lists or forums! List<br />
subscribers are widely distributed, and some users have low bandwidth and/or metered<br />
connections. Large messages may be rejected by the mailing list administrator.<br />
Thanks.<br />
A.2 General problems<br />
• <strong>FlightGear</strong> runs SOOO slow.<br />
If <strong>FlightGear</strong> says it’s running with something like 1 fps (frame per second)<br />
or below you typically don’t have working hardware OpenGL support. <strong>The</strong>re<br />
may be several reasons for this. First, there may be no OpenGL hardware<br />
drivers available for older cards. In this case it is highly recommended to get<br />
a new board.<br />
Second, check if your drivers are properly installed. Several cards need additional<br />
OpenGL support drivers besides the “native” windows ones.<br />
• Either configure or make dies with not found PLIB headers or libraries.<br />
Make sure you have the latest version of PLIB (> version 1.8.4) compiled<br />
and installed. Its headers like pu.h have to be under /usr/include/plib<br />
and its libraries, like libplibpu.a should be under /lib. Double check<br />
there are no stray PLIB headers/libraries sitting elsewhere!<br />
Besides, check carefully the error messages of configure. In several<br />
cases, it says what is missing.
A.3. POTENTIAL PROBLEMS UNDER LINUX 197<br />
A.3 Potential problems under Linux<br />
Since we don’t have access to all possible flavors of Linux distributions, here are<br />
some thoughts on possible causes of problems. (This Section includes contributions<br />
by Kai Troester.)<br />
• Wrong library versions<br />
This is a rather common cause of grief especially when you prefer to install<br />
the libraries needed by <strong>FlightGear</strong> by hand. Be sure that especially the<br />
Mesa library contains support for the 3DFX board and that GLIDE libraries<br />
are installed and can be found. If a ldd `which fgfs` complains about<br />
missing libraries you are in trouble.<br />
You should also be sure to always keep the latest version of PLIB on your<br />
system. Lots of people have failed miserably to compile <strong>FlightGear</strong> just<br />
because of an outdated plib.<br />
• Missing permissions<br />
In case you are using XFree86 before release 4.0 the <strong>FlightGear</strong> binary may<br />
need to be setuid root in order to be capable of accessing some accelerator<br />
boards (or a special kernel module as described earlier in this document)<br />
based on 3DFX chips. So you can either issue a<br />
chown root.root /usr/local/bin/fgfs ;<br />
chmod 4755 /usr/local/bin/fgfs<br />
to give the <strong>FlightGear</strong> binary the proper rights or install the 3DFX module.<br />
<strong>The</strong> latter is the “clean” solution and strongly recommended!<br />
• Non-default install options<br />
<strong>FlightGear</strong> will display a lot of diagnostics while starting up. If it complains<br />
about bad looking or missing files, check that you installed them in<br />
the way they are supposed to be installed (i.e ˙with the latest version and in<br />
the proper location). <strong>The</strong> canonical location <strong>FlightGear</strong> wants its data files<br />
under /usr/local/lib. Be sure to grab the latest versions of everything<br />
that might be needed!<br />
• Compile problems in general<br />
Make sure you have the latest (official) version of gcc. Old versions of gcc<br />
are a frequent source of trouble! On the other hand, some versions of the<br />
RedHat 7.0 reportedly have certain problems compiling <strong>FlightGear</strong> as they<br />
include a preliminary version of gcc.<br />
A.4 Potential problems under Windows<br />
• <strong>The</strong> executable refuses to run.<br />
You may have tried to start the executable directly either by double-clicking
198 A. MISSED APPROACH<br />
fgfs.exe in Windows Explorer or by invoking it within a MS-DOS shell.<br />
Double-clicking via Explorer never works (unless you set the environment<br />
variable FG_ROOT in autoexec.bat or otherwise). Rather double-click<br />
fgrun. For more details, check Chapter 4.<br />
Another cause of grief might be that you did not download the most recent<br />
versions of the base package files required by <strong>FlightGear</strong>, or you did not<br />
download any of them at all. Have a close look at this, as the scenery/texture<br />
format is still under development and may change frequently. For more details,<br />
check Chapter 3.<br />
Next, if you run into trouble at runtime, do not use Windows utilities for<br />
unpacking the .tar.gz. If you did, try it in the Cygnus shell with tar<br />
xvfz instead.<br />
• L’exécutable refuse de se lancer.<br />
Vous pouvez avoir essayé de lancer l’exécutable directement en doublecliquant<br />
sur fgfs.exe dans l’explorateur Windows ou en l’invoquant au<br />
travers d’une invite de commandes MS-DOS. Double-cliquer via l’explorateur<br />
de fonctionne jamais (sauf si vous avez défini la variable d’environnement<br />
FG_ROOT dans l’autoexec.bat ou d’une autre manière). Préférez le<br />
double-clic sur fgrun. Pour plus de détails, consultez le chapitre 4.<br />
Une autre cause de grief peut s’expliquer par le fait que vous n’avez pas<br />
téléchargé les versions les plus récentes du paquetage de base nécessaires<br />
à <strong>FlightGear</strong>, ou que vous ne les avez pas téléchargé du tout. Jetez souvent<br />
un œil à ceux-ci, car le format des scènes et des textures fait toujours<br />
l’objet d’un développement intensif. Pour plus de détails, reportez-vous au<br />
chapitre 3.<br />
Ensuite, si vous rencontrez un problème au démarrage, n’utilisez pas les<br />
utilitaires Windows pour décompresser les fichiers .tar.gz. Si vous l’avez<br />
fait, essayez de le faire dans l’invite de commandes Cygnus en préférant un<br />
tar xvfz à la place.<br />
• <strong>FlightGear</strong> ignores the command line parameters.<br />
<strong>The</strong>re can be a problem with passing command line options containing a ”=”<br />
on the command line. Instead create a batch job to include your options and<br />
run that instead.<br />
• I am unable to build <strong>FlightGear</strong> under MSVC/MS DevStudio.<br />
By default, <strong>FlightGear</strong> is build with GNU GCC. <strong>The</strong> Win32 port of GNU<br />
GCC is known as Cygwin. For hints on Makefiles required for MSVC or<br />
MSC DevStudio have a look into<br />
https://www.gitorious.org/fg/flightgear/trees/next.<br />
In principle, it should be possible to compile <strong>FlightGear</strong> with the project<br />
files provided with the source code.
A.4. POTENTIAL PROBLEMS UNDER WINDOWS 199<br />
• Compilation of <strong>FlightGear</strong> dies.<br />
<strong>The</strong>re may be several reasons for this, including true bugs. However, before<br />
trying to do anything else or report a problem, make sure you have the latest<br />
version of the Cygwin compiler. In case of doubt, start setup.exe anew<br />
and download and install the most recent versions of bundles as they possibly<br />
may have changed.
200 A. MISSED APPROACH
Appendix B<br />
Landing: Some further thoughts<br />
before leaving the plane<br />
B.1 A Sketch on the History of <strong>FlightGear</strong><br />
History may be a boring subject. However, from time to time there are people<br />
asking for the history of <strong>FlightGear</strong>. As a result, we’ll give a short outline.<br />
<strong>The</strong> <strong>FlightGear</strong> project goes back to a discussion among a group of net citizens<br />
in 1996 resulting in a proposal written by David Murr who, unfortunately, dropped<br />
out of the project (as well as the net) later. <strong>The</strong> original proposal is still available<br />
from the <strong>FlightGear</strong> web site and can be found under<br />
http://www.flightgear.org/proposal-3.0.1.<br />
Although the names of the people and several of the details have changed over<br />
time, the spirit of that proposal has clearly been retained up to the present time.<br />
Actual coding started in the summer of 1996 and by the end of that year essential<br />
graphics routines were completed. At that time, programming was mainly<br />
performed and coordinated by Eric Korpela from Berkeley University. Early code<br />
ran under Linux as well as under DOS, OS/2, Windows 95/NT, and Sun-OS. This<br />
was found to be quite an ambitious project as it involved, among other things, writing<br />
all the graphics routines in a system-independent way entirely from scratch.<br />
Development slowed and finally stopped in the beginning of 1997 when Eric<br />
was completing his thesis. At this point, the project seemed to be dead and traffic<br />
on the mailing list went down to nearly nothing.<br />
It was Curt Olson from the University of Minnesota who re-launched the project<br />
in the middle of 1997. His idea was as simple as it was powerful: Why invent the<br />
wheel a second time? <strong>The</strong>re have been several free flight simulators available running<br />
on workstations under different flavors of UNIX. One of these, LaRCsim (developed<br />
by Bruce Jackson from NASA), seemed to be well suited to the approach.<br />
Curt took this one apart and re-wrote several of the routines such as to make them<br />
build as well as run on the intended target platforms. <strong>The</strong> key idea in doing so was<br />
201
202 B. LANDING<br />
to exploit a system-independent graphics platform: OpenGL.<br />
In addition, a clever decision on the selection of the basic scenery data was<br />
made in the very first version. <strong>FlightGear</strong> scenery is created based on satellite data<br />
published by the U. S. Geological Survey. <strong>The</strong>se terrain data are available from<br />
http://edc.usgs.gov/geodata/<br />
for the U.S., and<br />
http://edcdaac.usgs.gov/gtopo30/gtopo30.html,<br />
resp., for other countries. Those freely accessible scenery data, in conjunction with<br />
scenery building tools included with <strong>FlightGear</strong>, are an important feature enabling<br />
anyone to create his or her own scenery.<br />
This new <strong>FlightGear</strong> code - still largely being based on the original LaRCsim<br />
code - was released in July 1997. From that moment the project gained momentum<br />
again. Here are some milestones in the more recent development history.<br />
B.1.1 Scenery<br />
• Texture support was added by Curt Olson in spring 1998. This marked a<br />
significant improvement in terms of reality. Some high-quality textures were<br />
submitted by Eric Mitchell for the <strong>FlightGear</strong> project. Another set of highquality<br />
textures was added by Erik Hofman ever since.<br />
• After improving the scenery and texture support frame rate dropped down to<br />
a point where <strong>FlightGear</strong> became unflyable in spring 1998. This issue was<br />
resolved by exploiting hardware OpenGL support, which became available<br />
at that time, and implementing view frustrum culling (a rendering technique<br />
that ignores the part of the scenery not visible in a scene), done by Curt<br />
Olson. With respect to frame rate one should keep in mind that the code,<br />
at present, is in no way optimized, which leaves room for further improvements.<br />
• In September 1998 Curt Olson succeeded in creating a complete terrain<br />
model for the U.S. <strong>The</strong> scenery is available worldwide now, via a clickable<br />
map at:<br />
http://www.flightgear.org/download/scenery/.<br />
• Scenery was further improved by adding geographic features including lakes,<br />
rivers, and coastlines later. Textured runways were added by Dave Cornish<br />
in spring 2001. Light textures add to the visual impression at night. To cope<br />
with the constant growth of scenery data, a binary scenery format was introduced<br />
in spring 2001. Runway lighting was introduced by Curt Olson in<br />
spring 2001. Finally, a completely new set of scenery files for the whole<br />
world was created by William Riley based on preparatory documentation by
B.1. A SKETCH ON THE HISTORY OF FLIGHTGEAR 203<br />
David Megginson in summer 2002. This is based on a data set called VMap0<br />
as an alternative to the GSHHS data used so far. This scenery is a big improvement<br />
as it has world wide coverage of main streets, rivers, etc., while<br />
it’s downside are much less accurate coast lines. <strong>FlightGear</strong>’s base scenery<br />
is based on these new scenery files since summer 2002.<br />
• <strong>The</strong>re was support added for static objects to the scenery in 2001, which<br />
permits placing buildings, static planes, trees and so on in the scenery.<br />
• <strong>The</strong> world is populated with random ground objects with appropriate type<br />
and density for the local ground cover type since summer 2002. This marks a<br />
major improvement of reality and is mainly thanks to work by D. Megginson.<br />
• Today, the effort is still going on, with the use of Terrasync, the tool for<br />
on-the-fly scenery download, the powerful mapserver and scenemodels infrastructure<br />
laying behind, as well as webforms enabling to quickly add or<br />
update objects. Scenery generation tools have been updated in order to use<br />
more accurate data such as the 8.50 apt.dat format, as well as external data<br />
such as OpenStreetMap, when the licence is adequate.<br />
B.1.2 Aircraft<br />
• A HUD (head up display) was added based on code provided by Michele<br />
America and Charlie Hotchkiss in the fall of 1997 and was improved later<br />
by Norman Vine. While not generally available for real Cessna 172, the<br />
HUD conveniently reports the actual flight performance of the simulation<br />
and may be of further use in military jets later.<br />
• A rudimentary autopilot implementing heading hold was contributed by Jeff<br />
Goeke-Smith in April 1998. It was improved by the addition of an altitude<br />
hold and a terrain following switch in October 1998 and further developed<br />
by Norman Vine later.<br />
• Friedemann Reinhard developed early instrument panel code, which was<br />
added in June 1998. Unfortunately, development of that panel slowed down<br />
later. Finally, David Megginson decided to rebuild the panel code from<br />
scratch in January 2000. This led to a rapid addition of new instruments and<br />
features to the panel, resulting in nearly all main instruments being included<br />
until spring 2001. A handy minipanel was added in summer 2001.<br />
• Finally, LaRCsims Navion was replaced as the default aircraft when the<br />
Cessna 172 was stable enough in February 2000 - a move most users will<br />
welcome. <strong>The</strong>re are now several flight model and airplane options to choose<br />
from at runtime. Jon Berndt has invested a lot of time in a more realistic and<br />
versatile flight model with a more powerful aircraft configuration method.<br />
JSBSim, as it has come to be called, did replace LaRCsim as the default
204 B. LANDING<br />
flight dynamics model (FDM), and it is planned to include such features as<br />
fuel slosh effects, turbulence, complete flight control systems, and other features<br />
not often found all together in a flight simulator. As an alternative,<br />
Andy Ross added another flight dynamics model called YASim (Yet Another<br />
Flight Dynamics Simulator) which aims at simplicity of use and is based on<br />
fluid dynamics, by the end of 2001. This one bought us flight models for a<br />
747, an A4, and a DC-3. Alternatively, a group around Michael Selig from<br />
the UIUC group provided another flight model along with several planes<br />
since around 2000.<br />
• A fully operational radio stack and working radios were added to the panel<br />
by Curt Olson in spring 2000. A huge database of Navaids contributed by<br />
Robin Peel allows IFR navigation since then. <strong>The</strong>re was basic ATC support<br />
added in fall 2001 by David Luff. This is not yet fully implemented, but displaying<br />
ATIS messages is already possible. A magneto switch with proper<br />
functions was added at the end of 2001 by John Check and David Megginson.<br />
Moreover, several panels were continually improved during 2001 and<br />
2002 by John and others. <strong>FlightGear</strong> now allows flying ILS approaches and<br />
features a Bendix transponder.<br />
• In 2002 functional multi-engine support found its way into <strong>FlightGear</strong>. JS-<br />
BSim is now the default FDM in <strong>FlightGear</strong>.<br />
• Support of ‘’true” 3D panels became stable via contributions from John<br />
Check and others in spring 2002. In addition, we got movable control surfaces<br />
like propellers etc., thanks to David Megginson.<br />
B.1.3 Environment<br />
• <strong>The</strong> display of sun, moon and stars have been a weak point for PC flight<br />
simulators for a long time. It is one of the great achievements of <strong>FlightGear</strong><br />
to include accurate modeling and display of sun, moon, and planets very<br />
early. <strong>The</strong> corresponding astronomy code was implemented in fall 1997 by<br />
Durk Talsma.<br />
• Christian Mayer, together with Durk Talsma, contributed weather code in the<br />
winter of 1999. This included clouds, winds, and even thunderstorms.<br />
B.1.4 User Interface<br />
• <strong>The</strong> foundation for a menu system was laid based on another library, the<br />
Portable Library PLIB, in June 1998. After having been idle for a time, the<br />
first working menu entries came to life in spring 1999.<br />
PLIB underwent rapid development later. It has been distributed as a separate<br />
package by Steve Baker with a much broader range of applications in mind,
B.1. A SKETCH ON THE HISTORY OF FLIGHTGEAR 205<br />
since spring 1999. It has provided the basic graphics rendering engine for<br />
<strong>FlightGear</strong> since fall 1999.<br />
• In 1998 there was basic audio support, i. e˙an audio library and some basic<br />
background engine sound. This was later integrated into the abovementioned<br />
portable library, PLIB. This same library was extended to support<br />
joystick/yoke/rudder in October 1999, again marking a huge step in terms<br />
of realism. To adapt on different joystick, configuration options were introduced<br />
in fall 2000. Joystick support was further improved by adding a<br />
self detection feature based on xml joystick files, by David Megginson in<br />
summer 2002.<br />
• Networking/multiplayer code has been integrated by Oliver Delise and Curt<br />
Olson starting fall 1999. This effort is aimed at enabling <strong>FlightGear</strong> to run<br />
concurrently on several machines over a network, either an Intranet or the<br />
Internet, coupling it to a flight planner running on a second machine, and<br />
more. <strong>The</strong>re emerged several approaches for remotely controlling Flight-<br />
Gear over a Network during 2001. Notably there was added support for the<br />
“Atlas” moving map program. Besides, an embedded HTTP server developed<br />
by Curt Olson late in 2001 can now act a property manager for external<br />
programs.<br />
• <strong>Manual</strong>ly changing views in a flight simulator is in a sense always “unreal”<br />
but nonetheless required in certain situations. A possible solution was supplied<br />
by Norman Vine in the winter of 1999 by implementing code for changing<br />
views using the mouse. Alternatively, you can use a hat switch for this<br />
purpose, today.<br />
• A property manager was implemented by David Megginson in fall 2000. It<br />
allows parsing a file called .fgfsrc under UNIX/Linux and system.fgfsrc<br />
under Windows for input options. This plain ASCII file has proven useful<br />
in submitting the growing number of input options, and notably the joystick<br />
settings. This has shown to be a useful concept, and joystick, keyboard, and<br />
panel settings are no longer hard coded but set using *.xml files since spring<br />
2001 thanks to work mainly by David Megginson and John Check.<br />
During development there were several code reorganization efforts. Various<br />
code subsystems were moved into packages. As a result, code is organized as<br />
follows at present:<br />
<strong>The</strong> base of the graphics engine is OpenGL, a platform independent graphics<br />
library. Based on OpenGL, the Portable Library PLIB provides basic rendering,<br />
audio, joystick etc˙routines. Based on PLIB is SimGear, which includes all of the<br />
basic routines required for the flight simulator as well as for building scenery. On<br />
top of SimGear there are (i) <strong>FlightGear</strong> (the simulator itself), and (ii) TerraGear,<br />
which comprises the scenery building tools.
206 B. LANDING<br />
This is by no means an exhaustive history and most likely some people who<br />
have made important contributions have been left out. Besides the above-named<br />
contributions there was a lot of work done concerning the internal structure by:<br />
Jon S. Berndt, Oliver Delise, Christian Mayer, Curt Olson, Tony Peden, Gary R.<br />
Van Sickle, Norman Vine, and others. A more comprehensive list of contributors<br />
can be found in Chapter B as well as in the Thanks file provided with the code.<br />
Also, the <strong>FlightGear</strong> Website contains a detailed history worth reading of all of the<br />
notable development milestones at<br />
http://www.flightgear.org/News/<br />
B.2 Those, who did the work<br />
Did you enjoy the flight? In case you did, don’t forget those who devoted hundreds<br />
of hours to that project. All of this work is done on a voluntary basis within spare<br />
time, thus bare with the programmers in case something does not work the way<br />
you want it to. Instead, sit down and write them a kind (!) mail proposing what<br />
to change. Alternatively, you can subscribe to the <strong>FlightGear</strong> mailing lists and<br />
contribute your thoughts there. Instructions to do so can be found at<br />
http://www.flightgear.org/mail.html.<br />
Essentially there are two lists, one of which being mainly for the developers and the<br />
other one for end users. Besides, there is a very low-traffic list for announcements.<br />
<strong>The</strong> following names the people who did the job (this information was essentially<br />
taken from the file Thanks accompanying the code).<br />
A1 Free Sounds<br />
Granted permission for the <strong>FlightGear</strong> project to use some of the sound effects<br />
from their site. Homepage under<br />
http://www.a1freesoundeffects.com/<br />
Syd Adams<br />
Added clipping for 2D instruments, ATC volume control and created a wide variety<br />
of aircraft.<br />
Raul Alonzo<br />
Mr. Alonzo is the author of Ssystem and provided his kind permission for using the<br />
moon texture. Parts of his code were used as a template when adding the texture.<br />
Ssystem Homepage can be found at:<br />
http://www1.las.es/˜amil/ssystem/.<br />
Michele America<br />
Contributed to the HUD code.
B.2. THOSE, WHO DID THE WORK 207<br />
Michael Basler<br />
Author of Installation and Getting Started. Flight Simulation Page at<br />
http://www.geocities.com/pmb.geo/flusi.htm<br />
Jon S. Berndt<br />
Working on a complete C++ rewrite/reimplimentation of the core FDM. Initially he<br />
is using X15 data to test his code, but once things are all in place we should be able<br />
to simulate arbitrary aircraft. Jon maintains a page dealing with Flight Dynamics<br />
at:<br />
http://jsbsim.sourceforge.net/<br />
Special attention to X15 is paid in separate pages on this site. Besides, Jon contributed<br />
via a lot of suggestions/corrections to this Guide.<br />
Paul Bleisch<br />
Redid the debug system so that it would be much more flexible, so it could be<br />
easily disabled for production system, and so that messages for certain subsystems<br />
could be selectively enabled. Also contributed a first stab at a config file/command<br />
line parsing system.<br />
Jim Brennan<br />
Provided a big chunk of online space to store USA scenery for <strong>FlightGear</strong>!.<br />
Bernie Bright<br />
Many C++ style, usage, and implementation improvements, STL portability and<br />
much, much more. Added threading support and a threaded tile pager.<br />
Stuart Buchanan<br />
Updated various parts of the manual and wrote the initial tutorial subsystem.<br />
Bernhard H. Buckel<br />
Contributed the README.Linux. Contributed several sections to earlier versions<br />
of Installation and Getting Started.<br />
Gene Buckle<br />
A lot of work getting <strong>FlightGear</strong> to compile with the MSVC++ compiler. Numerous<br />
hints on detailed improvements.<br />
Ralph Carmichael<br />
Support of the project. <strong>The</strong> Public Domain Aeronautical Software web site at<br />
http://www.pdas.com/<br />
has the PDAS CD-ROM for sale containing great programs for astronautical engineers.<br />
Didier Chauveau<br />
Provided some initial code to parse the 30 arcsec DEM files found at:<br />
http://edcwww.cr.usgs.gov/landdaac/gtopo30/gtopo30.html.
208 B. LANDING<br />
John Check<br />
John maintains the base package CVS repository. He contributed cloud textures,<br />
wrote an excellent Joystick Howto as well as a panel Howto. Moreover, he contributed<br />
new instrument panel configurations. <strong>FlightGear</strong> page at<br />
http://www.rockfish.net/fg/.<br />
Dave Cornish<br />
Dave created new cool runway textures plus some of our cloud textures.<br />
Oliver Delise<br />
Started a FAQ, Documentation, Public relations. Working on adding some networking/multiuser<br />
code. Founder of the <strong>FlightGear</strong> MultiPilot<br />
Jean-Francois Doue<br />
Vector 2D, 3D, 4D and Matrix 3D and 4D inlined C++ classes. (Based on Graphics<br />
Gems IV, Ed. Paul S. Heckbert)<br />
http://www.animats.com/simpleppp/ftp/public_html/topics/developers.html.<br />
Dave Eberly<br />
Contributed some sphere interpolation code used by Christian Mayer’s weather<br />
data base system.<br />
Francine Evans<br />
Wrote the GPL’d tri-striper we use.<br />
http://www.cs.sunysb.edu/˜stripe/<br />
Oscar Everitt<br />
Created single engine piston engine sounds as part of an F4U package for FS98.<br />
<strong>The</strong>y are pretty cool and Oscar was happy to contribute them to our little project.<br />
Bruce Finney<br />
Contributed patches for MSVC5 compatibility.<br />
Olaf Flebbe<br />
Improved the build system for Windows and provided pre-built dependencies.<br />
Melchior Franz<br />
Contributed joystick hat support, a LED font, improvements of the telnet and the<br />
http interface. Notable effort in hunting memory leaks in <strong>FlightGear</strong>, SimGear,<br />
and JSBSim.<br />
Jean-loup Gailly and Mark Adler<br />
Authors of the zlib library. Used for on-the-fly compression and decompression<br />
routines,<br />
http://www.gzip.org/zlib/.<br />
Mohit Garg<br />
Contributed to the manual.
B.2. THOSE, WHO DID THE WORK 209<br />
Thomas Gellekum<br />
Changes and updates for compiling on FreeBSD.<br />
Neetha Girish<br />
Contributed the changes for the xml configurable HUD.<br />
Jeff Goeke-Smith<br />
Contributed our first autopilot (Heading Hold). Better autoconf check for external<br />
timezone/daylight variables.<br />
Michael I. Gold<br />
Patiently answered questions on OpenGL.<br />
Habibe<br />
Made RedHat package building changes for SimGear.<br />
Mike Hill<br />
For allowing us to concert and use his wonderful planes, available form<br />
http://www.flightsimnetwork.com/mikehill/home.htm,<br />
for <strong>FlightGear</strong>.<br />
Erik Hofman<br />
Major overhaul and parameterization of the sound module to allow aircraft-specific<br />
sound configuration at runtime. Contributed SGI IRIX support (including binaries)<br />
and some really great textures.<br />
Charlie Hotchkiss<br />
Worked on improving and enhancing the HUD code. Lots of code style tips and<br />
code tweaks.<br />
Bruce Jackson (NASA)<br />
Developed the LaRCsim code under funding by NASA which we use to provide<br />
the flight model. Bruce has patiently answered many, many questions.<br />
Maik Justus<br />
Added helicopter support, gear/ground interaction and aerotow/winch support to<br />
the YASim FDM.<br />
Ove Kaaven<br />
Contributed the Debian binary.<br />
Richard Kaszeta<br />
Contributed screen buffer to ppm screen shot routine. Also helped in the early<br />
development of the "altitude hold autopilot module" by teaching Curt Olson the<br />
basics of Control <strong>The</strong>ory and helping him code and debug early versions. Curt’s<br />
´Boss ´Bob Hain also contributed to that. Further details available at:<br />
http://www.menet.umn.edu/˜curt/fgfs/Docs/Autopilot/AltitudeHold/AltitudeHold.html.<br />
Rich’s Homepage is at
210 B. LANDING<br />
http://www.kaszeta.org/rich/.<br />
Tom Knienieder<br />
Ported the audio library first to OpenBSD and IRIX and after that to Win32.<br />
Reto Koradi<br />
Helped with setting up fog effects.<br />
Bob Kuehne<br />
Redid the Makefile system so it is simpler and more robust.<br />
Kyler B Laird<br />
Contributed corrections to the manual.<br />
David Luff<br />
Contributed heavily to the IO360 piston engine model.<br />
Sam van der Mac<br />
Contributed to <strong>The</strong> <strong>Manual</strong> by translating HTML tutorials to Latex.<br />
Christian Mayer<br />
Working on multi-lingual conversion tools for fgfs as a demonstration of technology.<br />
Contributed code to read Microsoft Flight Simulator scenery textures. Christian<br />
is working on a completely new weather subsystem. Donated a hot air balloon<br />
to the project.<br />
David Megginson<br />
Contributed patches to allow mouse input to control view direction yoke. Contributed<br />
financially towards hard drive space for use by the flight gear project.<br />
Updates to README.running. Working on getting fgfs and ssg to work without<br />
textures. Also added the new 2-D panel and the save/load support. Further, he<br />
developed new panel code, playing better with OpenGL, with new features. Developed<br />
the property manager and contributed to joystick support. Random ground<br />
cover objects<br />
Cameron Moore<br />
FAQ maintainer. Reigning list administrator. Provided man pages.<br />
Eric Mitchell<br />
Contributed some topnotch scenery textures being all original creations by him.<br />
Anders Morken<br />
Former maintainer of European web pages.<br />
Alan Murta<br />
Created the Generic Polygon Clipping library.<br />
http://www.cs.man.ac.uk/aig/staff/alan/software/<br />
Phil Nelson<br />
Author of GNU dbm, a set of database routines that use extendible hashing and<br />
work similar to the standard UNIX dbm routines.
B.2. THOSE, WHO DID THE WORK 211<br />
Alexei Novikov<br />
Created European Scenery. Contributed a script to turn fgfs scenery into beautifully<br />
rendered 2-D maps. Wrote a first draft of a Scenery Creation Howto.<br />
Curt Olson<br />
Primary organization of the project.<br />
First implementation and modifications based on LaRCsim.<br />
Besides putting together all the pieces provided by others mainly concentrating on<br />
the scenery subsystem as well as the graphics stuff. Homepage at<br />
http://www.menet.umn.edu/˜curt/<br />
Brian Paul<br />
We made use of his TR library and of course of Mesa:<br />
http://www.mesa3d.org/brianp/TR.html, http://www.mesa3d.org<br />
Tony Peden<br />
Contributions on flight model development, including a LaRCsim based Cessna<br />
172. Contributed to JSBSim the initial conditions code, a more complete standard<br />
atmosphere model, and other bugfixes/additions.<br />
Robin Peel<br />
Maintains worldwide airport and runway database for <strong>FlightGear</strong> as well as X-<br />
Plane.<br />
Alex Perry<br />
Contributed code to more accurately model VSI, DG, Altitude. Suggestions for<br />
improvements of the layout of the simulator on the mailing list and help on documentation.<br />
Friedemann Reinhard<br />
Development of an early textured instrument panel.<br />
Petter Reinholdtsen<br />
Incorporated the GNU automake/autoconf system (with libtool). This should streamline<br />
and standardize the build process for all UNIX-like platforms. It should have<br />
little effect on IDE type environments since they don’t use the UNIX make system.<br />
William Riley<br />
Contributed code to add ”brakes”. Also wrote a patch to support a first joystick<br />
with more than 2 axis. Did the job to create scenery based on VMap0 data.<br />
Andy Ross<br />
Contributed a new configurable FDM called YASim (Yet Another Flight Dynamics<br />
Simulator, based on geometry information rather than aerodynamic coefficients.<br />
Paul Schlyter<br />
Provided Durk Talsma with all the information he needed to write the astro code.<br />
Mr. Schlyter is also willing to answer astro-related questions whenever one needs<br />
to.
212 B. LANDING<br />
http://www.welcome.to/pausch/<br />
Chris Schoeneman<br />
Contributed ideas on audio support.<br />
Phil Schubert<br />
Contributed various textures and engine modeling.<br />
http://www.zedley.com/Philip/.<br />
Jonathan R. Shewchuk<br />
Author of the Triangle program. Triangle is used to calculate the Delauney triangulation<br />
of our irregular terrain.<br />
Gordan Sikic<br />
Contributed a Cherokee flight model for LaRCsim. Currently is not working and<br />
needs to be debugged. Use configure --with-flight-model=cherokee to<br />
build the cherokee instead of the Cessna.<br />
Michael Smith<br />
Contributed cockpit graphics, 3D models, logos, and other images. Project Bonanza<br />
Martin Spott<br />
Co-Author of <strong>The</strong> <strong>Manual</strong>.<br />
Jon Stockill<br />
Maintains a database of objects and their location to populate the worldwide scenery.<br />
Durk Talsma<br />
Accurate Sun, Moon, and Planets. Sun changes color based on position in sky.<br />
Moon has correct phase and blends well into the sky. Planets are correctly positioned<br />
and have proper magnitude. Help with time functions, GUI, and other<br />
things. Contributed 2-D cloud layer. Website at<br />
http://people.a2000.nl/dtals/.<br />
UIUC - Department of Aeronautical and Astronautical Engineering<br />
Contributed modifications to LaRCsim to allow loading of aircraft parameters from<br />
a file. <strong>The</strong>se modifications were made as part of an icing research project.<br />
Those did the coding and made it all work:<br />
Jeff Scott<br />
Bipin Sehgal<br />
Michael Selig<br />
Moreover, those helped to support the effort:<br />
Jay Thomas<br />
Eunice Lee<br />
Elizabeth Rendon<br />
Sudhi Uppuluri
B.2. THOSE, WHO DID THE WORK 213<br />
U. S. Geological Survey<br />
Provided geographic data used by this project.<br />
http://edc.usgs.gov/geodata/<br />
Mark Vallevand<br />
Contributed some METAR parsing code and some win32 screen printing routines.<br />
Gary R. Van Sickle<br />
Contributed some initial GameGLUT support and other fixes. Has done preliminary<br />
work on a binary file format. Check<br />
http://www.woodsoup.org/projs/ORKiD/fgfs.htm.<br />
His Ćygwin Tips´page might be helpful for you at<br />
http://www.woodsoup.org/projs/ORKiD/cygwin.htm.<br />
Norman Vine<br />
Provided more numerous URL’s to the “<strong>FlightGear</strong> Community”. Many performance<br />
optimizations throughout the code. Many contributions and much advice<br />
for the scenery generation section. Lots of Windows related contributions. Contributed<br />
wgs84 distance and course routines. Contributed a great circle route autopilot<br />
mode based on wgs84 routines. Many other GUI, HUD and autopilot contributions.<br />
Patch to allow mouse input to control view direction. Ultra hires tiled<br />
screen dumps. Contributed the initial ´goto airportánd ´reset´functions and the initial<br />
http image server code<br />
Roland Voegtli<br />
Contributed great photorealistic textures. Founder of European Scenery Project for<br />
X-Plane:<br />
http://www.g-point.com/xpcity/esp/<br />
Carmelo Volpe<br />
Porting <strong>FlightGear</strong> to the Metro Works development environment (PC/Mac).<br />
Darrell Walisser<br />
Contributed a large number of changes to porting <strong>FlightGear</strong> to the Metro Works<br />
development environment (PC/Mac). Finally produced the first Macintosh port.<br />
Contributed to the Mac part of Getting Started, too.<br />
Ed Williams<br />
Contributed magnetic variation code (impliments Nima WMM 2000). We’ve also<br />
borrowed from Ed’s wonderful aviation formulary at various times as well. Website<br />
at http://williams.best.vwh.net/.<br />
Jim Wilson<br />
Wrote a major overhaul of the viewer code to make it more flexible and modular.
214 B. LANDING<br />
Contributed many small fixes and bug reports. Contributed to the PUI property<br />
browser and to the autopilot.<br />
Jean-Claude Wippler<br />
Author of MetaKit - a portable, embeddible database with a portable data file format<br />
previously used in <strong>FlightGear</strong>. Please see the following URL for more info:<br />
http://www.equi4.com/metakit/<br />
Woodsoup Project<br />
While <strong>FlightGear</strong> no longer uses Woodsoup servies we appreciate the support<br />
provided to our project during the time they hosted us. Once they provided<br />
computing resources and services so that the <strong>FlightGear</strong> project could have a real<br />
home.<br />
http://www.woodsoup.org/<br />
Robert Allan Zeh<br />
Helped tremendously in figuring out the Cygnus Win32 compiler and how to link<br />
with ˙dll’s. Without him the first run-able Win32 version of <strong>FlightGear</strong> would have<br />
been impossible.<br />
Others<br />
<strong>The</strong> following individuals have contributed to the scenery object database: Jon<br />
Stockill, Martin Spott, Dave Martin, Thomas Foerster, Chris Metzler, Frederic<br />
Bouvier, Melchior Franz, Roberto Inzerillo, Erik Hofman, Mike Round, Innis Cunningham,<br />
David Megginson, Stuart Buchanan, Josh Babcock, Esa Hyytia, Mircea<br />
Lutic, Jens Thoms Toerring, Mark Akermann, Torsten Dreyer, Martin C. Doege,<br />
Alexis Bory, Sebastian Bechtold, Julien Pierru, Bertrand Augras, Gerard Robin,<br />
Jakub Skibinski, Morten Oesterlund Joergensen, Carsten Vogel, Dominique Lemesre,<br />
Daniel Leygnat, Bertrand Gilot, Morten Skyt Eriksen, Alex Bamesreiter, Oliver<br />
Predelli, Georg Vollnhals, and Paul Richter.<br />
B.3 What remains to be done<br />
If you read (and, maybe, followed) this guide up to this point you may probably<br />
agree: <strong>FlightGear</strong> even in its present state, is not at all for the birds. It is already a<br />
flight simulator which sports even several selectable flight models, several planes<br />
with panels and even a HUD, terrain scenery, texturing, all the basic controls and<br />
weather.<br />
Despite, <strong>FlightGear</strong> needs – and gets – further development. Except internal<br />
tweaks, there are several fields where <strong>FlightGear</strong> needs basics improvement and<br />
development. A first direction is adding airports, buildings, and more of those<br />
things bringing scenery to real life and belonging to realistic airports and cities.<br />
Another task is further implementation of the menu system, which should not be
B.3. WHAT REMAINS TO BE DONE 215<br />
too hard with the basics being working now. A lot of options at present set via<br />
command line or even during compile time should finally make it into menu entries.<br />
Finally, <strong>FlightGear</strong> lacks any ATC until now.<br />
<strong>The</strong>re are already people working in all of these directions. If you’re a programmer<br />
and think you can contribute, you are invited to do so.<br />
Achnowledgements<br />
Obviously this document could not have been written without all those contributors<br />
mentioned above making <strong>FlightGear</strong> a reality.<br />
First, I was very glad to see Martin Spott entering the documentation effort.<br />
Martin provided not only several updates and contributions (notably in the OpenGL<br />
section) on the Linux side of the project but also several general ideas on the documentation<br />
in general.<br />
Besides, I would like to say special thanks to Curt Olson, whose numerous<br />
scattered Readmes, Thanks, Webpages, and personal eMails were of special help<br />
to me and were freely exploited in the making of this booklet.<br />
Next, Bernhard Buckel wrote several sections of early versions of that Guide<br />
and contributed at lot of ideas to it.<br />
Jon S. Berndt supported me by critical proofreading of several versions of the<br />
document, pointing out inconsistences and suggesting improvements.<br />
Moreover, I gained a lot of help and support from Norman Vine. Maybe, without<br />
Norman’s answers I would have never been able to tame different versions of<br />
the Cygwin – <strong>FlightGear</strong> couple.<br />
We were glad, our Mac expert Darrell Walisser contributed the section on compiling<br />
under Mac OS X. In addition he submitted several Mac related hints and<br />
fixes.<br />
Further contributions and donations on special points came from John Check,<br />
(general layout), Oliver Delise (several suggestions including notes on that chapter),<br />
Mohit Garg (OpenGL), Kyler B. Laird (corrections), Alex Perry (OpenGL),<br />
Kai Troester (compile problems), Dave Perry (joystick support), and Michael Selig<br />
(UIUC models).<br />
Besides those whose names got lost withing the last-minute-trouble we’d like to<br />
express our gratitude to the following people for contributing valuable ‘bug fixes’<br />
to this version of <strong>The</strong> <strong>FlightGear</strong> <strong>Manual</strong> (in random order): Cameron Moore,<br />
Melchior Franz, David Megginson, Jon Berndt, Alex Perry,, Dave Perry, Andy<br />
Ross, Erik Hofman, and Julian Foad.
Index<br />
.fgfsrc, 37, 201<br />
joystick, 38<br />
2D cockpit, 62<br />
3D clouds, 43<br />
3D cockpit, 62<br />
3D panels, 200<br />
3DFX, 193<br />
A1 Free Sounds, 202<br />
abort, 121<br />
Adams, Syd, 202<br />
additional scenery, 19<br />
ADF, 116<br />
Adler, Mark, 204<br />
Aeronautical Information <strong>Manual</strong>, 86<br />
AI, 68<br />
aileron, 60, 115<br />
aileron indicator, 70<br />
Air Traffic Control, 147<br />
air traffic facilities, 116<br />
Air-Air Refuelling, 80<br />
aircraft<br />
installation, 22<br />
selection, 39<br />
aircraft aeronautical model, 40<br />
Aircraft Carrier, 73<br />
airport, 40, 210<br />
airspeed indicator, 115<br />
Airwave Xtreme 150, 16<br />
Alonzo, Raul, 202<br />
Altimeter, 143<br />
altimeter, 97, 115<br />
tuning, 98<br />
altitude<br />
absolute, 98<br />
altitude hold, 61, 63<br />
America, Michele, 199, 202<br />
artificial horizon, 115<br />
astronomy code, 200<br />
ATC, 200, 211<br />
ATIS, 140<br />
ATIS messages, 200<br />
Atlas, 75, 201<br />
attitude indicator, 115<br />
216<br />
audio library, 206<br />
audio support, 201<br />
auto coordination, 115<br />
auto-co-ordination, 38<br />
autopilot, 63, 66, 125, 144, 199, 205<br />
modes<br />
heading mode, 126<br />
roll control mode, 125<br />
vertical speed mode, 126<br />
autopilot controls, 63<br />
autothrottle, 61, 63<br />
Avionics, 45<br />
Baker, Steve, 200<br />
bank, 115<br />
Basler, Michael, 203<br />
Bendix transponder, 200<br />
Berndt, Jon, 211<br />
Berndt, Jon, S., 199, 202, 203, 211<br />
binaries<br />
pre-compiled, 6<br />
binary distribution, 5<br />
Bleisch, Paul, 203<br />
brakes, 61, 62, 100, 207<br />
left wheel [,] (colon), 100<br />
right wheel [.] (dot), 100<br />
Brennan, Jim, 203<br />
Bright, Bernie, 203<br />
BSD UNIX, 12<br />
Buchanan, Stuart, 203<br />
Buckel, Bernhard, 203, 211<br />
Buckle, Gene, 203<br />
Carmichael, Ralph, 203<br />
Cessna, 208<br />
Cessna 172, 199<br />
Chauveau, Didier, 203<br />
Check, John, 57, 200, 201, 204, 211<br />
Cherokee flight model, 208<br />
clock, 116<br />
cloud layers, 42<br />
clouds, 200, 208<br />
cockpit, 62<br />
COM transceiver, 116
INDEX 217<br />
COMM1, 116<br />
COMM2, 116<br />
command line options, 37<br />
communication radio, 116<br />
compiler, 15<br />
contributors, 202<br />
control mode, 38<br />
control surface, movable, 200<br />
Cornish, Dave, 198, 204<br />
Cygnus, 15, 210<br />
Cygwin, 15, 194<br />
debug, 68<br />
default settings, 37<br />
Delise, Oliver, 201, 202, 204, 211<br />
Denker, John, 87<br />
differential braking, 61, 62<br />
Direct3D, 14<br />
DirectX, 14<br />
disk space, 15<br />
display options, 62<br />
documentation, 13<br />
installation, 23<br />
DOS, 197<br />
Doue, Jean-Francois, 204<br />
Eberly, Dave, 204<br />
elevation indicator, 70<br />
elevator, 60<br />
engine<br />
shut down, 108<br />
starting, 59<br />
jet, 60<br />
piston, 59<br />
turboprop, 60<br />
engine controls, 60<br />
environment variables, 27<br />
equipment, 67<br />
Evans, Francine, 204<br />
Everitt, Oscar, 204<br />
exit, 65<br />
FAA, 86<br />
FAA Training Book, 86<br />
FAQ, 191<br />
FDM, 200, 203<br />
external, 16<br />
pipe, 16<br />
FG_ROOT, 27<br />
FG_SCENERY, 21, 27<br />
field of view, 44<br />
Finney, Bruce, 204<br />
flaps, 61, 62, 110, 115<br />
control lever, 110<br />
steps, 110<br />
Flebbe, Olaf, 204<br />
flight dynamics model, 16, 40, 200<br />
flight model, 16, 40, 199<br />
flight planner, 201<br />
Flight simulator<br />
civilian, 12<br />
free, 197<br />
multi-platform, 12<br />
open, 12, 13<br />
user-extensible, 12, 13<br />
user-supported, 12, 13<br />
<strong>FlightGear</strong>, 201<br />
versions, 15<br />
<strong>FlightGear</strong> documentation, 17<br />
<strong>FlightGear</strong> Flight School, 17<br />
<strong>FlightGear</strong> forums, 191<br />
<strong>FlightGear</strong> Programmer’s Guide, 17<br />
<strong>FlightGear</strong> Scenery Design Guide, 17<br />
<strong>FlightGear</strong> Website, 17, 202<br />
flightmodels, 16<br />
Foad, Julian, 211<br />
fog, 44<br />
fog effects, 206<br />
frame rate, 15, 44, 198<br />
Franz, Melchior, 204, 211<br />
FreeBSD, 205<br />
FS98, 204<br />
fuel indicator, 116<br />
full screen display, 43<br />
Gailly, Jean-loup, 204<br />
GameGLUT, 209<br />
Garg, Mohit, 204, 211<br />
gear, 61, 62<br />
Gellekum, Thomas, 205<br />
generic autopilot, 63<br />
geographic features, 198<br />
Girish, Neetha, 205<br />
GLIDE, 193<br />
GNU C++, 15<br />
GNU General Public License, 13<br />
Go Around, 152<br />
Goeke-Smith, Jeff, 199, 205<br />
Gold, Michael, I., 205<br />
GPL, 13<br />
graphics card, 14<br />
graphics routines, 197<br />
GSHHS data, 199<br />
gyro compass, 115<br />
Habibe, 205<br />
hang glider, 16<br />
head up display, 69, 199
218 INDEX<br />
heading hold, 61, 63<br />
height, 70<br />
help, 68<br />
Hill, Mike, 205<br />
History, 197<br />
history<br />
aircraft, 199<br />
environment, 200<br />
scenery, 198<br />
user interface, 200<br />
Hofman, Erik, 198, 205, 211<br />
hot air balloon, 206<br />
Hotchkiss, Charlie, 199, 205<br />
HTTP server, 201<br />
http server, 46<br />
HUD, 45, 69, 70, 199, 202, 205<br />
HUD (Head Up Display<br />
full mode), 130<br />
HUD (Head Up Display), 130–132<br />
icing<br />
modelling, 16<br />
IFR, 87<br />
ignition switch, 116<br />
inclinometer, 115<br />
installing aircraft, 22<br />
instrument panel, 43, 62, 69, 199<br />
Internet, 201<br />
Jackson, Bruce, 197, 205<br />
joystick, 38, 49, 60, 201<br />
.fgfsrc, 56<br />
joystick settings, 201<br />
joystick/self detection, 201<br />
joysticks, 15<br />
Justus, Maik, 205<br />
Kaaven, Ove, 205<br />
Kaszeta, Richard, 205<br />
keybindings<br />
configuration, 60<br />
keyboard, 93<br />
numeric, 93<br />
uppercase and lowercase keys, 93<br />
keyboard controls, 60<br />
autopilot, 61<br />
display, 62<br />
general, 63<br />
view, 62<br />
aircraft, 61<br />
autopilot, 63<br />
engine, 61<br />
primary, 60<br />
simulator controls, 62<br />
keyboard.xml, 60<br />
Knienieder, Tom, 206<br />
Koradi, Reto, 206<br />
Korpela, Eric, 197<br />
Kuehne, Bob, 206<br />
Laird, Kyler B., 206, 211<br />
landing, 118<br />
aid signals, 97<br />
landing gear, 61, 62<br />
LaRCsim, 197–199, 205, 207, 208<br />
latitude, 41, 70<br />
Launching Flightgear<br />
Linux, 28<br />
Mac OS X, 30<br />
Windows, 29<br />
leaflet, 7<br />
light textures, 198<br />
Linux, 12, 13, 15, 197<br />
Livermore, 138<br />
location, 66<br />
longitude, 41, 70<br />
Luff, David, 200, 206<br />
magnetic compass, 115<br />
magneto, 105<br />
magneto switch, 200<br />
mailing lists, 191, 202<br />
map, clickable, 198<br />
Mayer, Christian, 200, 202, 206<br />
Megginson, David, 86, 199–201, 206, 211<br />
menu, 200<br />
menu entries, 65<br />
menu system, 210<br />
MetaKit, 210<br />
Metro Works, 209<br />
Microsoft, 11<br />
Mitchell, Eric, 198, 206<br />
mixture, 106, 146<br />
lever, 107<br />
optimisation, 107<br />
Moore Cameron, 191<br />
Moore, Cameron, 206, 211<br />
Morken, Anders, 206<br />
mouse, 63<br />
normal mode, 94<br />
rudder control, 100<br />
view mode, 94<br />
yoke mode, 94<br />
mouse modes, 64<br />
mouse pointer, 43<br />
mouse, actions, 63<br />
mouse, control, 64<br />
mouse, normal, 64
INDEX 219<br />
mouse, view, 64<br />
MS DevStudio, 194<br />
MSVC, 194, 203<br />
multi-engine support, 200<br />
multi-lingual conversion tools, 206<br />
Multiplayer, 71<br />
multiplayer, 68<br />
multiplayer code, 201<br />
Multiple Displays, 76<br />
Murr, David, 197<br />
Murta, Alan, 206<br />
NAV, 116<br />
Navion, 199<br />
NDB, 116<br />
Nelson, Phil, 206<br />
network, 201<br />
network options, 46<br />
networking code, 201, 204<br />
Novikov, Alexei, 207<br />
NumLock, 60<br />
NVIDIA, 6<br />
offset, 44<br />
Olson, Curt, 197, 198, 200–202, 207, 211<br />
OpenGL, 6, 14, 15, 17, 192, 198, 201, 205<br />
drivers, 15<br />
Operating Systems, 12<br />
options<br />
aircraft, 39<br />
Aircraft Systems, 45<br />
debugging, 48<br />
environment, 42<br />
features, 38<br />
flight model, 40<br />
general, 37<br />
HUD, 45<br />
initial position, 40<br />
IO, 47<br />
joystick, 49<br />
network, 46<br />
orientation, 40<br />
rendering, 42<br />
route, 46<br />
sound, 39<br />
time, 45<br />
waypoint, 46<br />
orientation, 41<br />
OS/2, 197<br />
Others, 210<br />
panel, 69, 206, 207<br />
parking brake, 59, 61, 62<br />
Paul, Brian, 207<br />
pause, 63<br />
pedal, 49<br />
Peden, Tony, 202, 207<br />
Peel, Robin, 200, 207<br />
permissions, 193<br />
Perry, Alex, 207, 211<br />
Perry, Dave, 211<br />
PFE, 56<br />
pitch, 115<br />
pitch indicator, 70<br />
Playback, 77<br />
PLIB, 200, 201<br />
problem report, 191<br />
problems, 191<br />
general, 192<br />
Linux, 193<br />
Windows, 193<br />
programmers, 202<br />
property manager, 201<br />
proposal, 197<br />
radio, 141<br />
radio stack, 116, 200<br />
random ground objects, 199<br />
Reid-Hillview, 138<br />
Reinhard, Friedemann, 199, 207<br />
Reinholdtsen, Petter, 207<br />
reset flight, 65<br />
Riley, William, 198, 207<br />
Ross, Andy, 200, 207, 211<br />
RPM indicator, 115<br />
rudder, 60, 115<br />
keyboard control, 100<br />
mouse control, 100<br />
rudder indicator, 70<br />
rudder pedals, 15, 60<br />
runway lighting, 198<br />
scenery, 19, 198<br />
additional, 19<br />
Scenery Database, 210<br />
scenery directory<br />
path, 37<br />
scenery subsystem, 207<br />
Schlyter, Paul, 207<br />
Schoenemann, Chris, 208<br />
Schubert, Phil, 208<br />
screenshot, 65<br />
Sectional, 138<br />
See how it flies, 87<br />
Selig, Michael, 200, 211<br />
Shewchuk, Jonathan, 208<br />
shutdown, 120<br />
side-slip, 111
220 INDEX<br />
Sikic, Gordan, 208<br />
SimGear, 201<br />
Smith, Michael, 208<br />
sound card, 15<br />
sound effects, 15<br />
source code, 13<br />
speed, 70<br />
units<br />
knot [nautical mile per hour], 101<br />
spin, 112<br />
spoilers, 61, 62<br />
Spott, Martin, 208, 211<br />
stall, 111<br />
starter, 116<br />
Starting Flightgear<br />
Linux, 28<br />
Mac OS X, 30<br />
Windows, 29<br />
starting the engine, 116<br />
Startup latitude, 41<br />
Startup longitude, 41<br />
static objects, 199<br />
Stockill, Jon, 208<br />
Sun-OS, 12, 197<br />
system requirements, 14<br />
system.fgfsrc, 37, 201<br />
tachometer, 100<br />
tail-wheel lock, 61, 62<br />
Talsma, Durk, 200, 208<br />
telnet server, 46<br />
TerraGear, 201<br />
Text To Speech, 78<br />
texture, 198<br />
textures, 198, 206<br />
throttle, 60, 70<br />
throttle lever, 106<br />
thunderstorms, 200<br />
time options, 45<br />
Torvalds, Linus, 13<br />
Traffic Pattern, 148<br />
triangle program, 208<br />
trim, 60, 112<br />
Troester, Kai, 193, 211<br />
troubles<br />
mouse speed, 96<br />
stuttered simulation, 91<br />
turn coordinator, 99<br />
turn indicator, 70, 115<br />
tutorial, 86<br />
U. S. Geological Survey, 198, 209<br />
UIUC, 200, 208<br />
UIUC flight model, 16<br />
UNIX, 197<br />
Vallevand, Mark, 209<br />
van der Mac, Sam, 206<br />
van Sickle, Gary, R., 202, 209<br />
VASI, 151<br />
velocity rages, 115<br />
vertical speed indicator, 115<br />
VFR, 87, 116<br />
view, 65<br />
changing, 93<br />
instant replay, 93<br />
view direction, 62<br />
view directions, 62<br />
view frustrum culling, 198<br />
view modes, 62<br />
views, 201<br />
Vine, Norman, 199, 201, 202, 209, 211<br />
visual flight rules, 116<br />
VMap0 data, 199<br />
Voegtli, Roland, 209<br />
Volpe, Carmelo, 209<br />
VOR, 116<br />
Walisser, Darrell, 209, 211<br />
weather, 67, 206<br />
wiki, 7<br />
Williams, Ed, 209<br />
Wilson, Jim, 209<br />
window size, 44<br />
Windows, 15<br />
Windows 95/98/ME, 12<br />
Windows 95/NT, 197<br />
Windows NT/2000/XP/Seven, 12<br />
winds, 200<br />
windsock, 123<br />
Wippler, Jean-Claude, 210<br />
wireframe, 44<br />
Wood, Charles, 87<br />
Woodsoup, 210<br />
workstation, 197<br />
Wright Flyer, 16<br />
XFree86, 193<br />
YASim, 16<br />
yoke, 49, 60, 94<br />
mouse yoke mode, 94, 97<br />
pulling, 96<br />
yokes, 15<br />
Zeh, Allan, 210<br />
zlib library, 204