


You also want an ePaper? Increase the reach of your titles
YUMPU automatically turns print PDFs into web optimized ePapers that Google loves.
UNITED KINGDOM<br />
Dorel U.K.<br />
Hertsmere House<br />
Shenley Road<br />
Borehamwood, Hertfordshire WD6 1TE<br />
www.maxi-cosi.com<br />
www.maxi-cosi.com<br />
DRU0988<br />
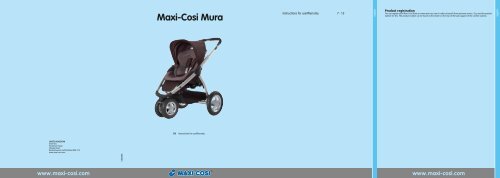
<strong>Maxi</strong>-<strong>Cosi</strong> <strong>Mura</strong><br />
EN Instructions for use/Warranty<br />
Instructions for use/Warranty 7 - 13<br />
English<br />
Product registration<br />
You can register your <strong>Maxi</strong>-<strong>Cosi</strong> <strong>Mura</strong> on www.maxi-cosi.com in order to benefi t from optimum service. You need the product<br />
number for this. The product number can be found on the sticker on the rear of the back support of the comfort cushion.<br />
www.maxi-cosi.com<br />
English
4.1 1<br />
2 3 4<br />
20 21 22 23<br />
5<br />
9<br />
13<br />
P<br />
6 7 8<br />
10 11 12<br />
14 15 16<br />
17 18<br />
19<br />
3<br />
3<br />
24 25 26 27<br />
28 29 30 31<br />
32 33 34 35<br />
36<br />
33<br />
max. 5kg<br />
37 38 39<br />
40 41 42 43<br />
44 45 46
DEAR PARENTS<br />
Congratulations on your purchase of the <strong>Maxi</strong>-<strong>Cosi</strong> <strong>Mura</strong>.<br />
Safety, user-friendliness, comfort and design played an<br />
important role in developing this pushchair. Your <strong>Maxi</strong>-<strong>Cosi</strong><br />
<strong>Mura</strong> therefore complies with the strictest standards and will<br />
provide you with a high level of user-friendliness and comfort.<br />
Read this instruction manual carefully. You will then be able<br />
to make full use of your pushchair. However, the safety and<br />
comfort of you and your child can only be guaranteed if the<br />
product is used correctly.<br />
We hope that you will fi nd your <strong>Maxi</strong>-<strong>Cosi</strong> <strong>Mura</strong> easy to<br />
use and that it will give you years of pleasure!<br />
Dorel<br />
CONTEN TS<br />
1 IMPORTANT: READ FIRST!<br />
2 SAFETY INSTRUCTIONS<br />
3 PRODUCT DESCRIPTION<br />
4 PREPARING THE MAXI-COSI MURA FOR USE /<br />
UNFOLDING AND FOLDING / DISASSEMBLING<br />
4.1 Preparing the pushchair for use<br />
4.2 Folding and disassembling<br />
5 PLACING YOUR CHILD IN THE MAXI-COSI MURA<br />
5.1 General<br />
5.2 Adjusting the length of the belt<br />
5.3 Adjusting the height of the shoulder belt<br />
6 CLEANING AND MAINTENANCE<br />
6.1 General<br />
6.2 Maintenance of the <strong>Maxi</strong>-<strong>Cosi</strong> <strong>Mura</strong><br />
6.3 Maintenance of the <strong>Maxi</strong>-<strong>Cosi</strong> <strong>Mura</strong> tyres<br />
7 SEPARATING WASTE<br />
8 WARRANTY<br />
9 QUESTIONS<br />
Disclaimer:<br />
The utmost care was exercised in designing and compiling this<br />
instruction manual. We cannot, however, offer any guarantees<br />
with regard to the completeness and correctness of the<br />
information contained herein.<br />
1 IMPORTANT: READ FIRST!<br />
WARNING<br />
- Read these instructions carefully before use and<br />
keep them for future reference. Your child’s<br />
safety may be affected if you do not follow these<br />
instructions.<br />
WARNING<br />
- You are personally responsible for the safety of<br />
your child.<br />
WARNING<br />
- It may be dangerous to leave your child<br />
unattended.<br />
WARNING<br />
- Always set the parking brake on the pushchair<br />
when you are standing still.<br />
WARNING<br />
- Always secure your child with the safety<br />
harness as soon as your child can sit up<br />
unassisted.<br />
WARNING<br />
- Use a harness as soon as your child can sit<br />
unaided.<br />
WARNING<br />
- Do not hang anything from the handlebar. This<br />
will make the pushchair less stable and will<br />
increase the risk of tipping over.<br />
WARNING<br />
- Keep all small parts like the tyre valve caps<br />
away from children. Your child may swallow<br />
them and they pose a choking hazard. Also<br />
keep the hand pump out of the reach of<br />
children.<br />
WARNING<br />
- Prevent the danger of suffocation and keep<br />
plastic bags out of the reach of children.<br />
WARNING<br />
- This product is not suitable for jogging or<br />
skating behind.<br />
WARNING<br />
- Check to make sure that all locks are secured<br />
before each use in order to avoid getting<br />
anything jammed between parts.<br />
WARNING<br />
- Before each use check that the prambody,<br />
adapters and/or seats are installed correctly and<br />
securely locked.<br />
WARNING<br />
- The black tyres may leave marks on some<br />
smooth fl oors (particularly synthetic laminates,<br />
parquet and linoleum).<br />
7<br />
English
English<br />
2 SAFETY INSTRUCTIONS<br />
- Use the <strong>Maxi</strong>-<strong>Cosi</strong> <strong>Mura</strong> for only one child at a time.<br />
- The <strong>Maxi</strong>-<strong>Cosi</strong> <strong>Mura</strong> is suitable for children from birth<br />
to maximum 15 kg (corresponding to 3.5 years on<br />
average).<br />
- The <strong>Maxi</strong>-<strong>Cosi</strong> <strong>Mura</strong> seat is not suitable for use in<br />
a car. Use a <strong>Maxi</strong>-<strong>Cosi</strong> baby or child car seat for this.<br />
- Keep your child and your fi ngers/hands away from<br />
moving/folding parts when folding, unfolding or adjusting<br />
the <strong>Maxi</strong>-<strong>Cosi</strong> <strong>Mura</strong>.<br />
- Never lift the <strong>Maxi</strong>-<strong>Cosi</strong> <strong>Mura</strong> or use escalators or stairs<br />
when your child is sitting or lying in the pushchair.<br />
- Check and clean your <strong>Maxi</strong>-<strong>Cosi</strong> <strong>Mura</strong> regularly.<br />
- Do not remove the logos from the fabric cover. This will<br />
avoid damage to the fabric cover.<br />
- Prevent the danger of suffocation and keep plastic bags<br />
out of the reach of children.<br />
- Only use original accessories and parts that have been<br />
approved by the manufacturer. Do not make any<br />
modifi cations to the product. Contact your supplier or<br />
importer if you have any complaints or problems.<br />
<strong>Maxi</strong>-<strong>Cosi</strong> <strong>Mura</strong> has been approved in accordance with<br />
EN 1888:2003 (amendments 1, 2 & 3).<br />
Type of<br />
pushchair<br />
Pushchair with<br />
prambody<br />
Pushchair with a<br />
<strong>Maxi</strong>-<strong>Cosi</strong><br />
baby car seat<br />
Pushchair with<br />
seat<br />
8<br />
Body weight<br />
of child<br />
max. 9 kg<br />
max. 13 kg<br />
max. 15 kg<br />
Age<br />
From birth to<br />
approx. 6 months<br />
From birth to<br />
approx. 12 months<br />
From birth to<br />
approx. 3.5 years<br />
3 PRODUCT DESCRIPTION<br />
21<br />
20<br />
17<br />
19<br />
1<br />
16<br />
2<br />
26 27<br />
Accessories:<br />
<strong>Maxi</strong>-<strong>Cosi</strong> baby car seat | Prambody | Footmuff<br />
Shopping bag | Parasol and parasol clamp<br />
7<br />
8<br />
9<br />
10<br />
18 11<br />
28<br />
22<br />
23<br />
24<br />
25<br />
1. Handlebar adjustment<br />
button<br />
2. Handlebar<br />
3. Seat<br />
4. Comfort cushion<br />
5. Safety harness<br />
6. Belt pad<br />
7. T-bar aperture protective<br />
cap<br />
8. T-bar<br />
9. T-bar release button<br />
10. Frame<br />
11. Leg rest adjustment<br />
button<br />
12. Leg rest<br />
13. Swivel wheel lock<br />
3<br />
4<br />
5<br />
6<br />
12<br />
13<br />
14<br />
15<br />
14. Front fork release button<br />
15. Front wheel<br />
16. Basket<br />
17. Rear wheel<br />
18. Transport hook<br />
19. Pump<br />
20. Fold release buttons<br />
21. Fold safety lock<br />
22. Sun canopy<br />
23. Back rest positioning<br />
handle<br />
24. Seat release button<br />
25. Sub-frame release button<br />
26. Brake<br />
27. Adapters<br />
28. Rain cover
4 PREPARING THE MAXI-COSI<br />
MURA FOR USE / UNFOLDING<br />
AND FOLDING / DISASSEMBLING<br />
Please note: the left and right sides are as seen from the<br />
handlebar/back<br />
4.1 Preparing the pushchair for use<br />
Fitting the wheels<br />
1. Press on the centre of the hubcap and insert the axle of<br />
the rear wheels into the frame until you hear it ‘click’<br />
(Fig. 1).<br />
2. Insert the front wheel into the front fork until you hear<br />
them ‘click’ (Fig. 2).<br />
3. Check that the wheels are correctly secured.<br />
Unfolding the frame<br />
1. Place the frame upright.<br />
2. Push the transport hook near the right rear leg aside<br />
(Fig. 3).<br />
3. Pull the handlebar toward you and then upward (Fig. 3).<br />
The frame will unfold and the handlebar will click into<br />
the locking device (Fig. 4).<br />
Adjusting the handlebar height<br />
- Press the adjustment button and slide the handlebar to<br />
the desired height. With a ‘click’ the handlebar is fi xed in<br />
position (Fig. 5).<br />
Parking brake<br />
- Note: always use the parking brake, even when standing<br />
still for only a few moments!<br />
1. Press the red surface of the pedal down to set the<br />
parking brake on your <strong>Maxi</strong>-<strong>Cosi</strong> <strong>Mura</strong> (Fig. 6).<br />
2. Put your foot under the pedal and press it up to release<br />
the parking brake on the <strong>Maxi</strong>-<strong>Cosi</strong> <strong>Mura</strong>.<br />
Adapters<br />
The adapters are marked on the inside with an A (right) and<br />
B (left).<br />
1. Slide the adapters onto the frame until you hear a ‘click’<br />
(Fig. 7).<br />
2. Check that both adaptors are secure.<br />
3. When using the prambody: fold the hinged parts of<br />
the adapters down (Fig. 8). For further use see the<br />
instructions for the prambody.<br />
4. When using a <strong>Maxi</strong>-<strong>Cosi</strong> baby car seat: fold the hinged<br />
parts of the adapters up (Fig. 9). For further instructions<br />
see the <strong>Maxi</strong>-<strong>Cosi</strong> baby car seat instruction manual.<br />
5. Remove the adapters by pushing the lip inward (toward<br />
the middle of the pushchair). Then slide the adapters off<br />
the frame (Fig. 10).<br />
Seat<br />
- Note: The <strong>Maxi</strong>-<strong>Cosi</strong> <strong>Mura</strong> is suitable for children from<br />
birth to a maximum weight of 15 kg (corresponding to<br />
3.5 years on average). Always secure your child with<br />
the safety harness. The <strong>Maxi</strong>-<strong>Cosi</strong> <strong>Mura</strong> seat is not<br />
suitable for use in a car.<br />
Preparing the seat for use<br />
1. Fold up the leg rest and attach the fabric cover (Fig. 11).<br />
2. Press the buttons on both sides to fold down the leg rest.<br />
The seat can be used in two positions.<br />
- Note: never allow your child to stand or sit on the<br />
footrest.<br />
3. Put the back rest in the upright position using the<br />
positioning handle (Fig 12).<br />
- Warning: any load attached to the handle affects the<br />
stability of the pram/pushair.<br />
4. Remove the protective cap from the crotch strap by<br />
pulling the click tab forward and then pushing it upward<br />
(Fig 13). Push the T-bar into the seat until you hear it<br />
click.<br />
5. Attach the elastic to the bottom (Fig. 14).<br />
To remove: loosen the elastic on the bottom. Push in the<br />
button on the front and pull the T-bar upward. Replace the<br />
protective cap.<br />
Fitting the seat and adjusting the sitting angle<br />
- Note: the seat can only be fi tted when the adapters have<br />
been removed.<br />
1. Place the seat on the frame with a ‘click’ (Fig. 15).<br />
2. Check to make sure everything is secure.<br />
3. Pull the back rest positioning handle up and tilt the back<br />
rest into the required position (Fig. 16).<br />
The seat can be adjusted to 3 positions: a sitting position,<br />
a semi-reclining position and a reclining position.<br />
Turning the seat around<br />
1. Pull the release handle on the <strong>Maxi</strong>-<strong>Cosi</strong> <strong>Mura</strong> seat<br />
back wards and remove the seat (Fig. 17).<br />
- Note: do not lift the <strong>Maxi</strong>-<strong>Cosi</strong> <strong>Mura</strong> up with the T-bar.<br />
2. Turn the seat around and place it in the frame until it<br />
‘clicks’ (Fig 18).<br />
3. Check to make sure everything is secure.<br />
There are D-rings for attaching an additional safety<br />
harness. The standard for this type of harness is<br />
BS EN 13210.<br />
4. Warning: always use the crotch strap in combination with<br />
the waist belt.<br />
9<br />
English
English<br />
Locking the swivel wheels<br />
1. Press the swivel lock on the wheel down and turn the<br />
front wheel to the rear position until you hear a ‘click’<br />
(Fig. 19).<br />
2. To release the lock lift up the swivel lock.<br />
<strong>Maxi</strong>-<strong>Cosi</strong> <strong>Mura</strong> sun canopy<br />
Attaching the sun canopy<br />
1. Attach the large clips around the tubes on the side of the<br />
seat. Place the top of the clip over the tube fi rst and<br />
then push the bottom until it ‘clicks’ into place (Fig. 20).<br />
2. Attach the small clip around the tube on the top of the<br />
seat. Place the top of the clip over the tube fi rst and<br />
then push the bottom until it ‘clicks’ into place (Fig. 21).<br />
3. Secure the elastic bands around the buttons (Fig. 22).<br />
Using the sun canopy<br />
4. Pull or push the sun canopy to fold it open or closed<br />
(Fig. 23).<br />
5. When the seat back is adjusted to the reclining position,<br />
pull the extra sun fl ap out and down (Fig. 24).<br />
Basket<br />
1. The basket can be used for shopping up to a maximum<br />
of 5 kg (Fig. 25).<br />
2. You can attach and remove the basket using the press<br />
studs, hooks and elastics (on the bottom of the<br />
<strong>Maxi</strong>-<strong>Cosi</strong> <strong>Mura</strong>).<br />
- Note: do not exceed the maximum permitted weight of<br />
5 kg!<br />
Rain cover<br />
1. Use the included rain cover to protect your child from<br />
rain.<br />
2. Use the zipper for easy contact with your child or extra<br />
fresh air (Fig. 46).<br />
10<br />
4.2 Folding and disassembling<br />
Folding<br />
1. If you want to fold the <strong>Maxi</strong>-<strong>Cosi</strong> <strong>Mura</strong> with the seat still<br />
attached, this is only possible when the seat is attached<br />
in the forward-facing position and the back rest is in the<br />
extreme forward position (Fig. 26).<br />
- We recommend that the seat is always removed before<br />
starting to fold the pushchair.<br />
2. Fold back the sun canopy parallel to the handlebar<br />
(Fig. 23).<br />
3. Turn the fold safety lock on the right side downwards<br />
and then simultaneously pull the folding-up release<br />
buttons on both sides upwards (Fig. 27).<br />
4. Tilt the handlebar forwards and then down until it ‘clicks’<br />
into the transport lock (Fig. 28).<br />
If you want to fold the frame even smaller<br />
5. Remove the seat before starting folding.<br />
6. Turn the front wheel forward.<br />
7. Press the release button (Fig. 29).<br />
8. The frame folds even smaller.<br />
9. Remove the wheels if necessary.<br />
Removing the wheels<br />
1. Rear wheels: press on the centre of the hubcap and at the<br />
same time pull the rear wheels out of the frame (Fig. 30).<br />
2. Front wheel: press in the release button and pull the front<br />
fork out of the frame (Fig. 31).
5 PLACING YOUR CHILD IN THE<br />
MAXI-COSI MURA<br />
5.1 General<br />
- Note: always set the brake on the <strong>Maxi</strong>-<strong>Cosi</strong> <strong>Mura</strong><br />
before placing your child in the seat. Ensure that the<br />
safety harness is open.<br />
1. Slide the buckle sections together and click them into<br />
the buckle. The lap belt and the shoulder belts are<br />
fastened to the crotch strap (Fig. 32).<br />
5.2 Adjusting the length of the belt<br />
1. Unfasten the Velcro on the Comfort cushion from the<br />
back rest. Unfasten the shoulder belt hook and remove<br />
the belt pad (Fig. 33).<br />
2. Adjust the belt length to the size of your child by<br />
lengthening or shortening the clasp (Fig. 34).<br />
3. Place the belt pads over the shoulder belts again. Attach<br />
the hooks to the loop. Slide the belt pad up over the<br />
shoulder belt and attach it using the press-stud (Fig. 35).<br />
4. Push both buttons to open the belt buckle (Fig. 36).<br />
5.3 Adjusting the height of the shoulder belt<br />
1. Unfasten the shoulder belt hook and remove the belt pad<br />
(Fig. 37).<br />
2. Pull the shoulder belt out of the loop and thread it<br />
through the other loop (Fig. 38).<br />
3. Adjust the belt length to the size of your child by<br />
lengthening or shortening the clasp (Fig. 39).<br />
4. Place the belt pads over the shoulder belts again. Attach<br />
the hooks to the loop. Slide the belt pad up over the<br />
shoulder belt and attach it using the press-stud (Fig. 40).<br />
6 CLEANING AND MAINTENANCE<br />
Warning<br />
- Check regularly to make sure that the <strong>Maxi</strong>-<strong>Cosi</strong> <strong>Mura</strong><br />
functions properly. This is essential for your child’s safety.<br />
- For reasons of safety, always use original parts.<br />
- In the event of damage have your retailer check and/or<br />
repair your <strong>Maxi</strong>-<strong>Cosi</strong> <strong>Mura</strong> before using it again.<br />
- When cleaning never use silicon lubricants. These attract<br />
dirt and grime.<br />
- Clean the frame, the fabric cover and the basket regularly<br />
using a damp cloth. Do not use abrasive cleaners.<br />
6.1 General<br />
- During rain always use the rain cover to protect the fabric<br />
cover. After use, dry the pushchair with a soft, absorbent<br />
cloth.<br />
- Remove the detachable wheels once a month, clean the<br />
axles and lubricate them with a dry Tefl on spray.<br />
- Never use the <strong>Maxi</strong>-<strong>Cosi</strong> <strong>Mura</strong> in seawater. After use on<br />
the beach, clean the frame and wheels thoroughly with<br />
water to prevent rusting.<br />
6.2 Cleaning the <strong>Maxi</strong>-<strong>Cosi</strong> <strong>Mura</strong> Comfort cushion<br />
1. Remove the <strong>Maxi</strong>-<strong>Cosi</strong> <strong>Mura</strong> seat from the frame.<br />
2. Remove the T-bar.<br />
3. Unfasten the shoulder belt hook and remove the<br />
belt pads.<br />
4. Loosen the fabric cover on the footrest (Fig. 41).<br />
5. Slide the tabs on the bottom of the cushion outwards<br />
(Fig. 42). The Comfort cushion will now be free of the<br />
seat.<br />
6. Remove the belt pad from the crotch strap by loosening<br />
the snap.<br />
7. Loosen all loops on the bottom of the seat (Fig. 43).<br />
8. Remove the fabric cover from the Comfort cushion. Start<br />
on one side and continue on the other side (Fig. 44).<br />
- Note! Remove the fabric cover around the T-bar aperture<br />
last (Fig. 45)!<br />
9. Finally, pull the safety harness fully out of the Comfort<br />
cushion.<br />
11<br />
English
English<br />
The fabric cover can be attached in the reverse order.<br />
- Note! The tabs on the bottom should be clicked back<br />
in again. Check that the Comfort cushion is securely<br />
attached to the seat.<br />
6.3 Maintenance of the <strong>Maxi</strong>-<strong>Cosi</strong> <strong>Mura</strong> tyres<br />
- Make sure that the pressure in all the tyres is correct<br />
and the same. The tyres can be infl ated to a maximum<br />
pressure of 26 PSI/1.8 bar. Properly pumped up tyres will<br />
ensure a lighter and smoother ride from the <strong>Maxi</strong>-<strong>Cosi</strong><br />
<strong>Mura</strong> and will prevent damage to rotating and hinging<br />
parts.<br />
- The tyres are fi tted with a car tyre valve. They can be<br />
infl ated using the hand pump supplied (to be found in<br />
the front compartment of the basket) or at a garage or<br />
petrol station. The tyres can be infl ated more easily once<br />
the wheels have been removed from the frame.<br />
- A punctured inner tube can be repaired in the same way<br />
as a bicycle tyre. You can buy separate inner tubes from<br />
your supplier.<br />
- Always defl ate the tyres before taking the <strong>Maxi</strong>-<strong>Cosi</strong><br />
<strong>Mura</strong> onto an aircraft, as the air pressure difference could<br />
cause the tyres to burst.<br />
12<br />
7 SEPARATING WASTE<br />
For environmental reasons, we request that you separate the<br />
packaging waste from the <strong>Maxi</strong>-<strong>Cosi</strong> <strong>Mura</strong>. In addition, waste<br />
at the end of the service life of the <strong>Maxi</strong>-<strong>Cosi</strong> <strong>Mura</strong> (product<br />
parts) should be separated.<br />
Warning<br />
Keep plastic wrapping material out of reach of your child in<br />
order to avoid the risk of suffocation.<br />
Packaging<br />
Cardboard box<br />
Plastic bag<br />
Product parts<br />
Fabric cover<br />
Plastic parts<br />
Metal parts<br />
Pneumatic tyres<br />
Tether<br />
Paper waste<br />
Residual waste<br />
Residual waste<br />
In the appropriate container<br />
Container for metal<br />
Residual waste<br />
Container for polyester
8 WARRANTY<br />
We guarantee that this product was manufactured in<br />
accordance with the current European safety requirements<br />
and quality standards which are applicable to this product,<br />
and that this product is free from defects in workmanship<br />
and material at the time of purchase. During the production<br />
process the product was subjected to various quality checks.<br />
If this product, despite our efforts, shows a material/<br />
manufacturing fault within the warranty period of 24 months<br />
(with normal use as described in the user instructions), we<br />
will comply with the warranty terms and conditions. In this<br />
case please contact your dealer. For extensive information on<br />
applying the warranty terms and conditions, you can contact<br />
the dealer or look on our website: www.maxi-cosi.com.<br />
The warranty is not valid in the following cases:<br />
• In case of a use or purpose other than described in the<br />
manual.<br />
• If the product is submitted for repair through a dealer<br />
that is not authorised by us.<br />
• If the product is not supplied to the manufacturer with<br />
the original purchase receipt (via the retailer and/or<br />
importer).<br />
• If repairs were carried out by third parties or a dealer<br />
that is not authorised by us.<br />
• If the defect is the result of improper or careless use or<br />
maintenance, negligence or impact damage to the fabric<br />
cover and/or frame.<br />
• If the parts show normal wear and tear that may be<br />
expected from daily use of a product (wheels, rotating<br />
and moving parts etc.)<br />
Date of effect<br />
The warranty becomes effective on the date the product is<br />
purchased.<br />
Warranty term<br />
The warranty period applies for a period of 24 consecutive<br />
months. The warranty only applies for the fi rst owner and is<br />
not transferable.<br />
What to do in case of defects:<br />
After purchasing the product, keep the purchase receipt.<br />
The date of purchase must be clearly visible on the receipt.<br />
Should problems or defects arise please contact your retailer.<br />
Exchanging or taking back the product cannot be requested.<br />
Repairs do not give entitlement to extension of the warranty.<br />
Products that are returned directly to the manufacturer are<br />
not eligible for warranty.<br />
This Warranty Clause conforms to European Directive 99/44/EG<br />
of 25 May 1999.<br />
9 QUESTIONS<br />
If you have any questions, please ring your supplier or<br />
importer (see the back of the instruction manual). Make sure<br />
that you have the following information to hand:<br />
- Serial number from the sticker on the bottom of the<br />
frame.<br />
- Age, height and weight of your child.<br />
13<br />
English
English<br />
NOTES<br />
14