Bricon Speedy User Guide
Bricon Speedy User Guide
Bricon Speedy User Guide
- No tags were found...

Create successful ePaper yourself
Turn your PDF publications into a flip-book with our unique Google optimized e-Paper software.
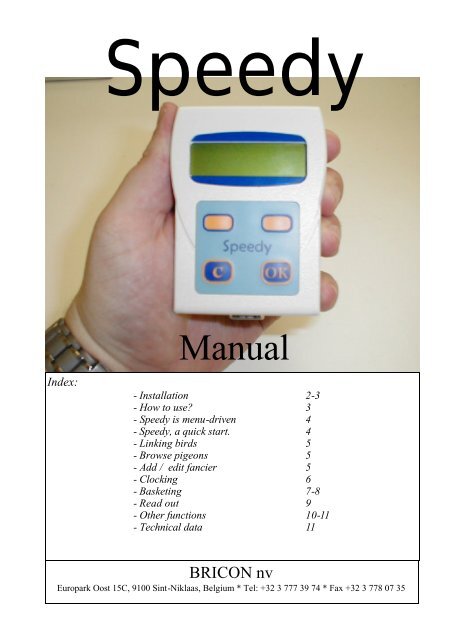
<strong>Speedy</strong><br />
Manual<br />
Index:<br />
- Installation 2-3<br />
- How to use 3<br />
- <strong>Speedy</strong> is menu-driven 4<br />
- <strong>Speedy</strong>, a quick start. 4<br />
- Linking birds 5<br />
- Browse pigeons 5<br />
- Add / edit fancier 5<br />
- Clocking 6<br />
- Basketing 7-8<br />
- Read out 9<br />
- Other functions 10-11<br />
- Technical data 11<br />
BRICON nv<br />
Europark Oost 15C, 9100 Sint-Niklaas, Belgium * Tel: +32 3 777 39 74 * Fax +32 3 778 07 35
- Installation<br />
• A <strong>Speedy</strong> pack contains: <strong>Speedy</strong> with holder, one loft-antenna<br />
and a power supply (12V) with adapter-cable.<br />
• Connect the adapter-cable to the holder. Connect the loftantenna<br />
cable to the adapter-cable. (the male cable-end ,with<br />
pins, pointing towards the holder) Before connecting additional<br />
antennas they first need to be programmed (page )<br />
• If there is more than 1 antenna to be installed, it is better to<br />
place the adapter-cable somewhere between the antennas. A<br />
heavier power-supply (more than 1 Amp) is necessary if several<br />
bigger loft-antennas are installed. (e.g. 4 six field-antennas).<br />
• If your installation contains more than one antenna, then<br />
• they first need to be numbered or programmed, by connecting<br />
them one by one to the <strong>Speedy</strong>. See item : programming antennas<br />
for additional information. (page 10 )<br />
• After programming all loft-antennas, the installation can be<br />
completed by connecting all antennas to each other. Male plug<br />
into female plug. Assure yourself that there is a male plug pointing<br />
to the holder. The adapter-cable can be installed somewhere<br />
between. At the end of the installation, connect an end-plug to<br />
close the circuit. With “antenna test” you can easily test the installation.<br />
(page 10 )<br />
• When the installation is completed you can connect the transformer<br />
(12V) in the adapter-cable and into the power-circuit.<br />
• To install the antennas in your loft, you can find an installation<br />
guide with your antennas.<br />
BRICON nv - <strong>Speedy</strong><br />
2
- Installation<br />
• Place <strong>Speedy</strong> in the holder. <strong>Speedy</strong> will be activated automatically<br />
from the moment that pigeons are listed in the database.<br />
• If a race is basketed, <strong>Speedy</strong> will automatically go in clocking<br />
mode (can only be de-activated <strong>Speedy</strong> by disconnecting the<br />
<strong>Speedy</strong>).<br />
• If no races are activated , <strong>Speedy</strong><br />
- How to use <br />
<strong>Speedy</strong> is easy to use. Only four buttons are on the key-path. They control the complete functionality.<br />
Explanation regarding their function you can find below.<br />
<br />
This button is used for returning<br />
or decrement.<br />
<br />
This button is used for forwarding<br />
or to increment.<br />
<br />
To stop an action, Undo or<br />
to select “No”..<br />
<br />
To confirm an action, to<br />
Continue an item or to select<br />
“Yes”<br />
BRICON nv - <strong>Speedy</strong><br />
3
- <strong>Speedy</strong> is menu driven.<br />
The complete function of <strong>Speedy</strong> is done by a menu-structure using 13 different items. All items<br />
are grafically presented by an icon. These icons are setup in order of frequent use. Below you<br />
will find all icons and there activities.<br />
Clocking<br />
Races<br />
Basketing<br />
Read out<br />
Delete<br />
Antenna test<br />
Antenna prog.<br />
Print clocking<br />
Print overview<br />
Linking birds<br />
Browse pigeons<br />
Add/edit fancier<br />
Set date- time<br />
Pushing , shows the referrence text hidden behind the icon.<br />
- <strong>Speedy</strong>, a quick start.<br />
First of all it is important to read all explanations regarding installation and use before you start<br />
up.<br />
Once all hardware installations are finished, the <strong>Speedy</strong> will be activated from the moment that<br />
the clock contains fancier– and pigeon-data.<br />
Entering pigeon and fancier-data :<br />
Input/ edit fancier (page 5 )<br />
Linking birds (page 5 )<br />
BRICON nv - <strong>Speedy</strong><br />
4
- Linking birds.<br />
There are two ways to enter birds in <strong>Speedy</strong>:<br />
- Trough the club with club-software, “ BRICON Club Manager soft“.<br />
- With <strong>Speedy</strong> and his antenna(s) explained in the box below.<br />
• Move in the menu to “Linking Birds” and press « OK ». Hold<br />
the electronic-ring on the antenna. After reading the chip a<br />
blank band-number pops up. The band-number can be entered<br />
with the keys or . Confirm by pressing<br />
the key. After entering the last character, the sex of the<br />
pigeon pops up. Blanco is male, ‘F’ is Female.<br />
• After the completion of the band-number, a confirmation is demanded.<br />
Confirm with , undo with .<br />
• By repeating the procedure a next pigeon can be entered<br />
- Browse pigeons<br />
• With this function you can move in the pigeon database and<br />
control the band-numbers. moves backwards<br />
moves forward.<br />
• If you desire to delete a pigeon, press , <strong>Speedy</strong> will ask<br />
• to confirm the deleting of the pigeon. to confirm and<br />
to cancel.<br />
• This function is blocked when races are active.<br />
- Add/Edit Fancier<br />
There are two ways to enter a fancier(s) in <strong>Speedy</strong> :<br />
- Trough the club with club-software, “ BRICON Club Manager “.<br />
- On <strong>Speedy</strong> as explained below.<br />
• Move to “Add/Edit fancier” and press “OK” to confirm. With<br />
and you can move in the fancier list.<br />
Press to confirm if you want to modify (change) the fancier.<br />
• An empty field of 20 characters pops up. With the keys<br />
and a letter will be formed. Push until<br />
you have found the correct letter and confirm it with .<br />
The spacebar moves to the right and you can repeat the action .<br />
To finalize confirm with and the fancier is added in the<br />
list.<br />
BRICON nv - <strong>Speedy</strong><br />
5
- Clocking<br />
• <strong>Speedy</strong> detects itself in what modus it should start-up. This will<br />
take a few seconds.<br />
• When no loft antennas are connected <strong>Speedy</strong> shows the main<br />
menu.<br />
• If races are activated <strong>Speedy</strong> will automatically activate the antennas<br />
and go in “clocking-mode”. No active races : <strong>Speedy</strong><br />
will set itself on training-mode.<br />
• For security reasons it is impossible to leave “clocking-mode”.<br />
•<br />
• Pushing deactivates the training-mode and the main menu<br />
will pop up. With and it is possible to<br />
scroll in the menu. Move to the item that you want to use and<br />
confirm with .<br />
• To repeat a training , it is necessary to delete the previous<br />
• clockings.<br />
• Delete : confirm with , all clockings will be erased.<br />
• Attention: clockings of active races or unclosed races can’t be<br />
deleted.<br />
• Clocking : can be restarted by selecting “Clocking” and confirm<br />
it with .<br />
• The keys and allows you to scroll<br />
trough the clocking-list . When a pigeon arrives the display<br />
will automatically show the latest clocking.<br />
• When the race is finished , disconnect <strong>Speedy</strong> from the holder<br />
and proceed to the clubhouse ...<br />
BRICON nv - <strong>Speedy</strong><br />
6
- Basketing<br />
• <strong>Speedy</strong> uses the normal BRICON club-unit. If there are already<br />
BRICON clocks active at the club, <strong>Speedy</strong> can join in<br />
immediate.<br />
• A club-unit is: a club-antenna, a transformer (12V) and a<br />
mother timer. A PC modem-cable is needed at linking. The<br />
mother timer-clock can be an atom-clock or a BRICON clock<br />
set as master-clock .<br />
• Basketing : as soon as <strong>Speedy</strong> is connected onto a clubantenna<br />
the display will show “Basketing”. Confirm with<br />
and the basketing will start.<br />
• A total of 8 races can be activated. They will be activated by a<br />
letter or figure of your choice. Select a Letter for a race by<br />
pressing and .<br />
• The display shows “Choose Race: ” + flight Letter. With<br />
your choice is confirmed.<br />
• Before confirming you can always re-enter a Letter by pressing<br />
the and/or buttons.<br />
• <strong>Speedy</strong> is synchronised over the mother-clock and the first pigeon<br />
can be basketed.<br />
• Hold the pigeon with the chip-ring in the club-antenna. You will<br />
• hear a beep and the light on the antenna will blink. The ringnumber<br />
of the pigeon appears on the display for control. Push<br />
after controlling the ring-number. The pigeon is basketed.<br />
Repeat this action for all pigeons.<br />
BRICON nv - <strong>Speedy</strong><br />
7
- Basketing<br />
• When a pigeon-ring is not linked <strong>Speedy</strong> will ask to do a<br />
“Emergency link”. This action is already explained on page 5<br />
(Linking birds).<br />
• To end the basketing process : press “C” to stop, and a basketing-list<br />
will be printed twice.<br />
• You may disconnect <strong>Speedy</strong> from the club-unit.<br />
• <strong>Speedy</strong> is now ready to start clocking. At home, plug in <strong>Speedy</strong><br />
in the holder.<br />
• The clock starts in clocking-mode.<br />
In Belgium <strong>Speedy</strong> only operates with a club-master.<br />
BRICON nv - <strong>Speedy</strong><br />
8
- Read out.<br />
• When the race is finished you return to your club with <strong>Speedy</strong>.<br />
<strong>Speedy</strong> is connected to the club-antenna. Select “Read out” in<br />
the menu and press <br />
• <strong>Speedy</strong> displays “Choose Race: 1” select the race by pushing<br />
or . Confirm with .<br />
• Synchronisation is done automatically by an atom– or <strong>Bricon</strong><br />
master-clock if they are linked to the club-antenna.<br />
• A clocking-list is printed twice.<br />
• After printing the <strong>Speedy</strong> display shows : “Close race”, press<br />
“OK”. This closes the race and releases the security-flag for the<br />
birds basketed in this race. If this is not confirmed by pressing<br />
, all data will stay secured, meaning that all these pigeons<br />
can’t be re-entered for a future race.<br />
• Connecting to the loft-antennas <strong>Speedy</strong> will start in training<br />
mode.<br />
• Attention !! First “delete” racing-data before clocking.<br />
• Chose “Delete” by pushing and confirm with .<br />
Then return to “Clocking” by pushing and confirm<br />
with .<br />
In Belgium <strong>Speedy</strong> only operates with a club-master.<br />
BRICON nv - <strong>Speedy</strong><br />
9
- Other functions.<br />
• PC– Connection: <strong>Speedy</strong> is connected to a PC via a special<br />
converter with modem-cable. Via a split-cable (Y) the clubantenna<br />
is also connected. Attention, you may only connect<br />
<strong>Speedy</strong> if the PC gives you the command to connect the clock.<br />
• Printing: Trough the menu on your <strong>Speedy</strong>, 2 printouts are possible.<br />
A complete overview-list or a clocking-list. To print,<br />
<strong>Speedy</strong> is connected over a printer-interface. You can use all<br />
DOS compatible printers.<br />
• Races: in this item you can see what and how many races are<br />
activated. A status is given by each active race.<br />
• Status:<br />
1 basketed<br />
3 readout and race not closed<br />
7 readout and race closed<br />
• Antenna test: to test the detection quality of the antennas. Press<br />
“OK” . <strong>Speedy</strong> will mention the number of antennas found.<br />
When you hold some rings over the antennas, <strong>Speedy</strong> will start<br />
beeping. This allows you to see if the antenna installation is<br />
done properly, and if the registration quality is good. <strong>Speedy</strong><br />
should already beep if the chip-ring is held on a height of 5 to 6<br />
cm (2 to 3 inches)<br />
• Programming antennas : if you want to connect several antennas<br />
to <strong>Speedy</strong>, first they need to be programmed or numbered.<br />
By default every antenna is numbered 1.<br />
• Start <strong>Speedy</strong> without a connection to the loft-antennas.<br />
• Choose “Antenna progr.” and confirm with , <strong>Speedy</strong><br />
prompts with number : 1. With or the<br />
number can be changed. Choose a number between 1 or 4.<br />
• Connect the antenna and confirm with .<br />
• <strong>Speedy</strong> starts programming the antenna and, once finished<br />
<strong>Speedy</strong> with “Programming OK”. Push to return to the<br />
main menu.<br />
• <strong>Speedy</strong> is now ready to program the next antenna.<br />
BRICON nv - <strong>Speedy</strong><br />
10
- Other functions.<br />
• Set Time / Date: in this item you can set the time and date of the<br />
<strong>Speedy</strong> clock. At basketing the clock is synchronized automatically.<br />
• This function is deactivated if a race is active.<br />
- Technical data.<br />
Pigeons: 200<br />
Races: 8<br />
Fanciers: 3<br />
Antennas: 4<br />
Max. number of fields: 4 x 6<br />
Max. cable-length: 100 m<br />
BRICON nv - <strong>Speedy</strong><br />
11