BMW R1200RT Hitch Installation Guide - Bushtec Trailers
BMW R1200RT Hitch Installation Guide - Bushtec Trailers
BMW R1200RT Hitch Installation Guide - Bushtec Trailers
- No tags were found...

Create successful ePaper yourself
Turn your PDF publications into a flip-book with our unique Google optimized e-Paper software.
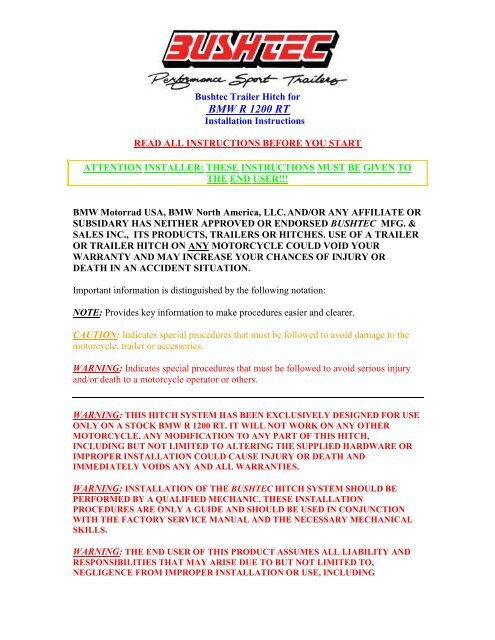
<strong>Bushtec</strong> Trailer <strong>Hitch</strong> for<br />
<strong>BMW</strong> R 1200 RT<br />
<strong>Installation</strong> Instructions<br />
READ ALL INSTRUCTIONS BEFORE YOU START<br />
ATTENTION INSTALLER: THESE INSTRUCTIONS MUST BE GIVEN TO<br />
THE END USER!!!<br />
<strong>BMW</strong> Motorrad USA, <strong>BMW</strong> North America, LLC. AND/OR ANY AFFILIATE OR<br />
SUBSIDARY HAS NEITHER APPROVED OR ENDORSED BUSHTEC MFG. &<br />
SALES INC., ITS PRODUCTS, TRAILERS OR HITCHES. USE OF A TRAILER<br />
OR TRAILER HITCH ON ANY MOTORCYCLE COULD VOID YOUR<br />
WARRANTY AND MAY INCREASE YOUR CHANCES OF INJURY OR<br />
DEATH IN AN ACCIDENT SITUATION.<br />
Important information is distinguished by the following notation:<br />
NOTE: Provides key information to make procedures easier and clearer.<br />
CAUTION: Indicates special procedures that must be followed to avoid damage to the<br />
motorcycle, trailer or accessories.<br />
WARNING: Indicates special procedures that must be followed to avoid serious injury<br />
and/or death to a motorcycle operator or others.<br />
WARNING: THIS HITCH SYSTEM HAS BEEN EXCLUSIVELY DESIGNED FOR USE<br />
ONLY ON A STOCK <strong>BMW</strong> R 1200 RT. IT WILL NOT WORK ON ANY OTHER<br />
MOTORCYCLE. ANY MODIFICATION TO ANY PART OF THIS HITCH,<br />
INCLUDING BUT NOT LIMITED TO ALTERING THE SUPPLIED HARDWARE OR<br />
IMPROPER INSTALLATION COULD CAUSE INJURY OR DEATH AND<br />
IMMEDIATELY VOIDS ANY AND ALL WARRANTIES.<br />
WARNING: INSTALLATION OF THE BUSHTEC HITCH SYSTEM SHOULD BE<br />
PERFORMED BY A QUALIFIED MECHANIC. THESE INSTALLATION<br />
PROCEDURES ARE ONLY A GUIDE AND SHOULD BE USED IN CONJUNCTION<br />
WITH THE FACTORY SERVICE MANUAL AND THE NECESSARY MECHANICAL<br />
SKILLS.<br />
WARNING: THE END USER OF THIS PRODUCT ASSUMES ALL LIABILITY AND<br />
RESPONSIBILITIES THAT MAY ARISE DUE TO BUT NOT LIMITED TO,<br />
NEGLIGENCE FROM IMPROPER INSTALLATION OR USE, INCLUDING
OVERLOADING, EXCEEDING THE RECOMMENDED LOAD LIMITS AND<br />
IMPROPER MAINTENANCE.<br />
WARNING: ALL HITCH HARDWARE SHOULD BE CHECKED PRIOR TO EACH<br />
USE. FAILURE TO DO SO COULD RESULT IN INJURY OR DEATH.<br />
<strong>BMW</strong> R 1200 RT HITCH SYSTEM CONTENTS<br />
1 Primary <strong>Hitch</strong> Hoop 1 8mm-1.25 x 40mm SHCS SS<br />
1 Right Side Hoop Arm 2 8mm-1.25 x 45mm SHCS SS<br />
1 Strut, Bent 1 8mm-1.25 x 55mm SHCS SS<br />
1 Round Clamp Half and Flat Tab 2 8mm-1.25 Nylock Nut<br />
1 Electronic Relay Isolator Package 2 ¼”-20 x ¾” Gr. 8 Hex Bolt<br />
1 CAN-bus SWS Trailer Isolator Adapter 2 ¼”-20 Nylock Nut<br />
1 Isolator Subharness for <strong>R1200RT</strong> 1 5/16”-18 x 1” SHCS SS<br />
Hardware Package to include: 1 5/16”-18 x 1 ¼” SHCS<br />
1 Short Spacer 1 5/16”-18 x ¾” Gr. 8 Hex Bolt<br />
1 Long Spacer 2 5/16-18 Nylock Nut<br />
TOOLS NEEDED FOR INSTALLATION<br />
Additional tools may be required<br />
FACTORY SERVICE MANUAL<br />
7/16” & 1/2” wrench T20 Torx Socket<br />
7/16” & 1/2” Socket T30 Torx Socket<br />
Ratchet w/Extension<br />
T40 Torx Socket<br />
5mm Allen Head Socket<br />
T45 Torx Socket<br />
6mm Allen Head Socket<br />
12mm & 13mm Wrench<br />
¼” Allen Head Socket Wire Cutters<br />
Crimping Tool<br />
Pliers<br />
Phillips Head Screw Driver<br />
Wire Ties (optional)<br />
Removable Thread Lock<br />
Electrical Tape (optional)<br />
CAUTION: THESE STEPS MUST BE PERFORMED IN THE FOLLOWING ORDER:<br />
WARNING: PLEASE FOLLOW ALL INSTALLATION INSTRUCTIONS ON THE<br />
PREVIOUS PAGES AND ABIDE BY ALL NOTES, CAUTIONS AND WARNINGS!<br />
CAUTION: THESE INSTRUCTIONS ARE FOR A STOCK MOTORCYCLE<br />
INSTALLATION. INSTALLATION OF BRAKE FLASHERS OR TURN SIGNAL<br />
CONVERSION MODULES REQUIRE ATTACHING THE TRIGGER WIRE<br />
CONNECTIONS FOR THE RELAY FORWARD OF ANY MODULE<br />
CONNECTIONS.
1. Place motorcycle on level ground, place on centerstand.<br />
2. Remove saddlebags, passenger seat, and rider seat. Remove tool kit and securing<br />
strap from under seat.<br />
3. Remove 2 Phillips head screws securing taillight. Twist each bulb socket out of<br />
the taillight housing. Set the housing on a soft surface to avoid damaging it.<br />
4. Remove 8 Torx bolts securing rear rack using T30 Torx; 2 each passenger handle<br />
(4), 2 above taillight recess, and 2 under rear edge of passenger seat.<br />
5. Using T20 Torx, remove three Torx screws securing right fairing side panel to<br />
side cover above rider peg on right side. (PHOTO 1) Remove right rear tail<br />
section plastic by removing 5 Torx screws using T20 Torx as follows; 1 behind<br />
fairing side panel where 3 screws were previously removed, 1 screw at rear inside<br />
of panel (between taillight and rear saddlebag mount), 1 screw between rear rack<br />
passenger handle screw bosses, 1 screw at seam between tail section and side<br />
cover/ false tank shelter and 1 screw above passenger peg on underside of panel.<br />
6. Remove left side tail section cover by repeating procedure from step 5.<br />
7. Remove 4 Torx bolts securing right saddlebag mount using T30 Torx. Remove<br />
mount and set aside.<br />
8. Remove 6 Torx screws securing rear inner fender using T30 Torx; 2 below rear<br />
shock adjusting knob, 2 outboard rear seat latch (one each side), and 2 forward of<br />
taillight. Push inner fender down toward tire as far as possible.<br />
9. Install supplied round clamp half in gap of rear rack passenger handle mount<br />
bracket over lower subframe tube. The clamp will locate to the outside of the<br />
frame tube when installed and the three hole tab that is secured to it will locate to<br />
the inside of the frame tube, with the third hole below and toward the rear of the<br />
round clamp. Install ¼-20 x ¾ Grade 8 hex bolt through the upper clamp hole,<br />
then through the upper tab hole and install the supplied ¼-20 nylock nut on the<br />
backside. Do not tighten. Rotate the clamp and tab, install ¼-20 x ¾ Grade 8 hex<br />
bolt through the lower tab (two holes in flat tab) from the back side then through<br />
the clamp, then secure with the supplied ¼-20 nylock nut. Do not tighten.<br />
(PHOTO 2)<br />
10. Secure long end of bent strut to bottom hole in tab using 5/16”-18 x ¾” bolt and<br />
5/16”-18 Nylock nut provided. Strut will mount to inside of tab and is secured<br />
with the bolt from outside in. Long end of strut will run vertically with short end<br />
at bottom bending away from rear tire. Do not tighten.<br />
11. Remove Torx bolt and stock nut securing right side passenger peg mount to frame<br />
bracket using T45 Torx. Replace bolt with supplied 8mm-1.25 x 45 mm Socket<br />
Head Cap Screw. Install short spacer on back side, then install right side arm to<br />
back side of bracket via flat tab end, securing with stock nut. (PHOTO 3) Do not<br />
tighten. The radius bend in arm should mirror the rear drive pumpkin on the rear<br />
wheel to maximize clearance.<br />
12. Attach strut to side arm with supplied 5/16-18 x 1 inch Socket Head Cap Screw,<br />
through collar on side arm, strut and secure with supplied 5/16-18 Nylock nut.<br />
13. Remove 2 Torx Bolts rearward of the left rider peg using T45 Torx.
14. Install supplied 8mm-1.25 x 55 mm Socket Head Cap Screw into upper hole.<br />
Install 8mm-1.25 x 40 mm Socket Head Cap Screw into lower hole. Tighten until<br />
¼ inch protrudes through back side of frame bracket.<br />
15. Remove Torx bolt and stock nut securing left side passenger peg mount to frame<br />
bracket using T45 Torx. Replace bolt with supplied 8mm-1.25 x 45 mm Socket<br />
Head Cap Screw. Install longer supplied spacer on back side.<br />
16. Install hitch by passing between tire/inner fender and exhaust hanger/frame<br />
bracket on left side. Install the front bracket on hitch hoop over inside of bolts<br />
rearward of left rider peg, tighten bolts and secure with supplied 8mm-1.25<br />
Nylock nuts. Do not tighten nuts.<br />
NOTE: The factory washers may be reused or omitted to achieve proper spacing of the<br />
bolts. Full penetration of the Nylock nut with the bolt is desired while maintaining<br />
clearance between the bolt end and the swingarm.<br />
17. Secure tab on hitch hoop to inside of left frame mount bracket (step 14) and<br />
secure with stock nut on backside. Do not tighten. (PHOTO 4)<br />
18. Attach right side arm to hitch at right rear with supplied 5/16-18 x 1 ¼ inch<br />
Socket Head Cap Screw. (PHOTO 5)<br />
19. Tighten in following order; 2 bolts and Nylock nuts securing front of hitch hoop,<br />
left and right passenger peg mount bolts and nuts, frame mount brackets, bolt<br />
securing right side arm to hitch hoop, two ¼-20 bolts and nuts securing clamp<br />
halves, and 5/16-18 bolts and nut securing upper and lower ends of strut to clamp<br />
and right side arm.<br />
20. Reinstall rear inner fender.<br />
21. Reinstall right side saddlebag mount with thread lock.<br />
22. Reinstall right and left tail section side covers, and secure fairing side panels on<br />
both sides.<br />
23. Reinstall rear rack.<br />
<strong>Installation</strong> of the hitch is now complete. You will reassemble the motorcycle<br />
after the following hitch pin and wiring installation instructions. If you are using<br />
this hitch for anything other than a <strong>Bushtec</strong> trailer, you will need to purchase the<br />
appropriate size ball and safety chain plate for your application, which are<br />
available from your local parts store. <strong>Installation</strong> and maintenance of these parts<br />
should be performed in accordance with their manufacturer instructions.<br />
WIRING INSTRUCTIONS<br />
NOTE: The CAN-bus SWS Trailer Isolator, Isolator Adaptor and Sub Harness package<br />
you received with your new hitch comes with less specific wiring instructions. The<br />
instructions you are holding are specific to installation with the <strong>Bushtec</strong> trailer hitch for<br />
<strong>BMW</strong> <strong>R1200RT</strong>, although wire routing, connections and isolator location is left up to the<br />
individual installer. These instructions will guide you through the process.
If you purchased this hitch will a new <strong>Bushtec</strong> trailer, you will have received a wire<br />
harness inside the trailer. If you need a new harness, they are available from the factory<br />
at an additional cost. If you are using this hitch with anything other than a <strong>Bushtec</strong> trailer,<br />
you will need to purchase the appropriate plug and sufficient wiring to reach the isolator<br />
package from your local parts store or your trailers manufacturer.<br />
1. (BUSHTEC APPLICATION) Mount the plug body of the harness within 2-3<br />
inches of the hitch pin adapter using wire ties, electrical tape or a fastener of your<br />
choice. Run the harness up the rear support strut and into the rear section of the<br />
motorcycle (under the seat). Fasten the harness so that it does not interfere with<br />
the movement of the trailer, exhaust pipe, rear tire or get in the way of<br />
reassembling your motorcycle.<br />
2. Mount the Isolator and Isolator Adaptor in an area as free from moisture and heat<br />
as possible, keeping in mind that you will need to reach the battery with the red<br />
and black wires, and the trailer harness with the solid color wires stemming from<br />
the isolator.<br />
NOTE: <strong>Bushtec</strong> recommends installing the Adaptor and Isolator forward of the taillight<br />
cavity in the tailsection of the motorcycle. This allows for ease of access with the<br />
subharness to the taillight.<br />
3. Locate the motorcycle wiring for the taillight and turnsignals to the bulb bases.<br />
Note the wire colors on all three sockets. One wire on each socket is the same<br />
color. This is your ground wire.<br />
4. On the ground wire for the right turn signal, unplug the wire from the socket.<br />
Plug in the black wire from the supplied subharness to the empty connector on the<br />
socket and into the factory wiring.<br />
5. On the NON ground wire for the right turn signal, unplug it from the socket. Plug<br />
in the yellow wire from the subharness to the empty connector on the socket and<br />
into the factory wiring.<br />
6. On the right tail/brake light socket unplug the NON ground wire from the socket.<br />
Plug in the blue wire from the subharness to the empty connector on the socket<br />
and into the factory wiring.<br />
7. On the left turn signal, unplug the NON ground wire from the socket. Plug in the<br />
brown wire from the subharness to the empty connector on the socket and into the<br />
factory wiring.<br />
8. Run the 4 pin connector from the subharness into the tailsection cavity along with<br />
the main tail light wiring harness.<br />
9. Reinstall the bulb sockets into the taillight and reinstall the taillight housing. Be<br />
sure to keep both wiring harnesses out of the way of the light housing.<br />
10. Connect the subharness to the CAN-bus SWS Adaptor.<br />
11. If your trailer is a 4 wire system, you will need a trailer light converter. <strong>Bushtec</strong><br />
recommends the Electrical Connection P/N 07664 5-to-4 wire adaptor.<br />
12. Connect the CAN-bus SWS Adaptor to the Isolator.
13. For a <strong>Bushtec</strong> trailer, connect the solid color output wires from the isolator as<br />
follows;<br />
ISOLATOR OUTPUT FUNCTION TRAILER COLOR<br />
Green Running Light Green<br />
Blue Brake Blue<br />
Brown Left Turn Brown<br />
Yellow Right Turn Yellow<br />
Black Ground White<br />
Interior Light Black (see step 14)<br />
14. (BUSHTEC APPLICATION) The black wire of the trailer harness operates the<br />
interior light, <strong>Bushtec</strong> recommends combining the black wire and green wire of<br />
the trailer harness and connecting both to the green wire output from the isolator<br />
so that the interior light operates only when running lights are functioning<br />
otherwise you may drain your battery if the light is left on. If you wish to be able<br />
to operate the interior light at any time, you will need to connect the black wire of<br />
the trailer harness directly to the positive (+) terminal of the battery with an the<br />
appropriate inline fuse. Connect the remaining wires according to the isolator<br />
package instructions.<br />
15. Route red and black wires to battery along frame. Connect the red wire to the<br />
12V positive terminal using the in-line fuse holder provided. Connect the black<br />
wire to the 12V negative terminal using the ring terminal provided.<br />
16. Secure all the wiring making sure that nothing will affect the reassembly of the<br />
motorcycle. Check wiring functions and complete reassembly of the motorcycle.<br />
CHECK ALL HARDWARE TO MAKE SURE ITS TIGHT. CHECK ALL<br />
ELECTRICAL CONNECTIONS.<br />
YOU ARE NOW READY TO REASSEMBLE YOUR MOTORCYCLE. REFER<br />
TO YOUR FACTORY SERVICE MANUAL FOR THE PROPER PROCEDURES!<br />
WARNING: DUE TO THE NATURE OF TOWING A TRAILER AND THE<br />
ENGINEERING INVOLVED WITH THIS HITCH OR ANY MOTORCYCLE<br />
HITCH, ALL HARDWARE MUST BE CHECKED BEFORE, DURING AND<br />
AFTER YOU TOW TO INSURE THE PROPER WORKING ORDER OF THIS<br />
PRODUCT!<br />
<strong>Installation</strong> of all the hitch components is now complete. Recheck all bolts to<br />
insure tightness and alignment of hitch.<br />
FINAL TRAILER HOOKUP
HITCH PIN ADAPTER INSTALLATION<br />
(AND STANDARD BALL)<br />
WARNING: USE OF A TRAILER BALL ON THIS HITCH REQUIRES A<br />
SAFETY CHAIN PLATE, DO NOT ATTEMPT TO USE THE 5/16” SLOT ON<br />
THE REAR OF THE HITCH PLATFORM OR ANY OTHER AREA OF THE<br />
HITCH!<br />
1. Install the appropriate size ball and safety chain plate to their manufacturers<br />
recommendation.<br />
(BUSHTEC APPLICATION)<br />
1. Wrap the hex base of the hitch pin adapter with ¾” masking tape to avoid chipping<br />
the chrome plating.(several layer will be necessary)<br />
2. Insert the adapter into the hole in the hitch platform. Tape the top of the platform to<br />
avoid scratching the hitch plating.<br />
3. Install the supplied safety chain bracket and hitch pin nut and tighten. Use a crescent<br />
wrench on the adapter and a 1 1/16” socket on the nut.<br />
CAUTION: DO NOT ALLOW THE ADAPTER TO SPIN, TURN THE NUT ONLY<br />
TO HELP AVOID SCRATING THE PLATFORM.<br />
Stainless steel lock: Place the key into the lock, hold the lock and turn the key ¼ turn<br />
clockwise to unlock. Place the lock on top of the pin and turn the key clockwise ¼ turn<br />
and remove the key. Lift up on the lock to insure lock is engaged on the pin. The supplied<br />
black cover is designed to keep the keyway free of debris.<br />
WARNING: THE KEY IS REMOVABLE REGARDLESS IF THE LOCK IS<br />
ENGAGED!<br />
WARNING: BUSHTEC TRAILERS HAVE A GVWR OF 350LBS AND A<br />
LOADED TONGUE WEIGHT NOT TO EXCEED 55LBS. THIS INFORMATION<br />
IS LOCATED IN YOUR BUSHTEC TRAILER OWNERS MANUAL AND MUST<br />
NOT BE MISTAKEN FOR THE MAXIMUM WEIGHT-RATINGS OF THIS<br />
PARTICULAR HITCH!<br />
1. With motorcycle reassembled, check if trailer is equipped with tongue stand, it is<br />
secured in the up position. Place the heim joint down over the hitch pin. Place<br />
the lock over the pin in the fully unlocked position. Hold the lock and turn the<br />
key ¼ turn. Remove the key. Lift on the lock to ensure it is engaged. Install dust<br />
cover.<br />
2. Connect safety chain to link under hitch pin.<br />
3. Place harness over top of chassis neck and connect to bike side harness, aligning<br />
the catch and lock. Snap to lock. Check lighting and you are ready to tow.
WARNING: DUE TO THE NATURE OF TOWING A TRAILER AND THE<br />
ENGINEERING INVOLVED WITH THIS HITCH OR ANY MOTORCYCLE<br />
HITCH, ALL HARDWARE MUST BE CHECKED BEFORE, DURING AND<br />
AFTER YOU TOW TO INSURE THE PROPER WORKING ORDER OF THIS<br />
PRODUCT!<br />
350 LBS. MAXIMUM GVWR<br />
55 LBS. MAXIMUM TONGUE WEIGHT<br />
All Manufacturers names, model designations, brand names, trademarks and registered<br />
trademarks are the property of their respective holders<br />
<strong>Bushtec</strong> Products Corporation<br />
180 Mt. Paran Rd.<br />
Jacksboro, TN 37757<br />
(888) 321-2516 * (423) 562-9911 Fax<br />
www.bushtec.com * E-mail info@bushtec.com<br />
PHOTO 1 PHOTO 2<br />
PHOTO 3 PHOTO 4
PHOTO 5