wachsfolien 2 en
wachsfolien 2 en
wachsfolien 2 en

You also want an ePaper? Increase the reach of your titles
YUMPU automatically turns print PDFs into web optimized ePapers that Google loves.
2<br />
STOCKMAR Decorating Wax, 200 x 100 mm<br />
How to Cover Objects<br />
Wrap a wax sheet around the object, press on<br />
lightly and cut off along the seam with a knife. At<br />
the seam, press both edges of the wax together<br />
well with your finger and smooth over (dia.<br />
below).<br />
You can cover whole objects using<br />
STOCKMAR Decorating Wax<br />
The top edge can <strong>en</strong>d at the edge of the object<br />
by cutting it off there, or you can let it overlap 1<br />
cm and fold it in over the edge; th<strong>en</strong> the ornam<strong>en</strong>tation<br />
can be added.<br />
TIP<br />
1- STOCKMAR Decorating Wax should be<br />
stored at room temperature prior to use.<br />
Material that is too cold won’t stick well.<br />
2- Before fixation with hairspray, the sheet<br />
wax can easily be removed from any surface<br />
by using a kitch<strong>en</strong> knife.<br />
Hans Stockmar GmbH & Co. KG • Postfach 1451 • 24562 Kalt<strong>en</strong>kirch<strong>en</strong> • Internet:www.stockmar.de • e-mail:hans@stockmar.de<br />
2<br />
1<br />
Cut into the side edges<br />
with a scissors so that<br />
the sheet wax better<br />
conforms to the curve of<br />
the ball.<br />
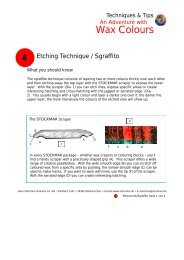
Tips and Techniques<br />
Experim<strong>en</strong>ting with<br />
Decorating Wax<br />
Covering Round Objects<br />
If you want to cover a ball or sphere with sheet<br />
wax, you should proceed as follows: wrap a<br />
sheet of the decorating wax around the ball, cut<br />
off overhanging strips and firmly press the seam<br />
edges together. Using a scissors, cut into the<br />
side edges (dia. 1) so that the sheet wax better<br />
conforms to the curve. Cut out squares from the<br />
remaining wax strips, round off the corners with<br />
a scissors and apply to the sides of the ball that<br />
are not yet covered (2). Warm up the ball in the<br />
palms of your hands; th<strong>en</strong> smooth out the<br />
unev<strong>en</strong> spots with your fingers.<br />
Working materials and practical use 2/3<br />
2