


You also want an ePaper? Increase the reach of your titles
YUMPU automatically turns print PDFs into web optimized ePapers that Google loves.
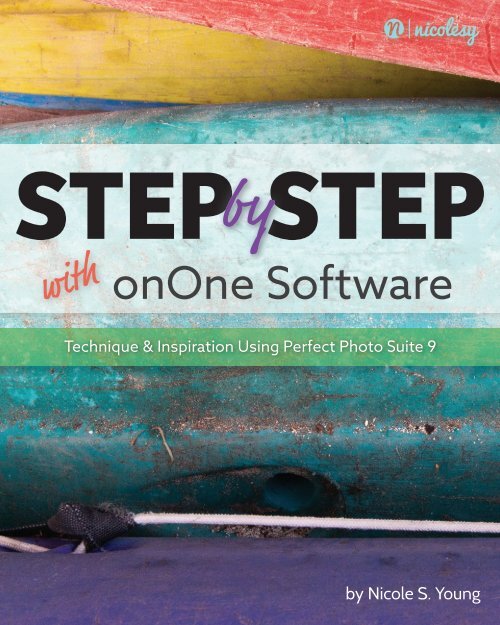
<strong>STEPbySTEP</strong><br />
with<br />
onOne Software<br />
Technique & Inspiration Using Perfect Photo Suite 9<br />
by Nicole S. Young
Step by Step with onOne Software<br />
Technique & Inspiration Using Perfect Photo Suite 9<br />
by Nicole S. Young
STEP BY STEP WITH ONONE SOFTWARE<br />
by Nicole S. Young<br />
STEP BY STEP WITH ONONE SOFTWARE<br />
Technique & Inspiration Using Perfect Photo Suite 9<br />
Published by Nicolesy, Inc.<br />
www.nicolesy.com<br />
Copyright © 2014 Nicole S. Young, All Rights Reserved<br />
Written by: Nicole S. Young<br />
Layout and Design: Nicole S. Young<br />
Copyeditor: Linda Laflamme<br />
Cover Photo: Nicole S. Young<br />
Author Photo: © dav.d<br />
Notice of Rights<br />
All rights reserved. No part of this book may be reproduced, stored in a retrieval system, or transmitted in any form or<br />
by any means without the prior written permission of the publisher, except in the case of brief quotations embodied<br />
in critical articles or reviews.<br />
Liability<br />
The information in this book is distributed on an “As-Is” basis, without warranty. Neither the author, the publisher nor<br />
the companies owned by the author shall have any liability to any person or entity with respect to any loss or damage<br />
caused by or alleged to be caused directly or indirectly by the instruction contained in this book or by the websites or<br />
products described in it.<br />
Trademarks<br />
Many of the designations used by manufacturers and sellers to distinguish their products are claimed as trademarks.<br />
Where those designations appear in this book, and Nicolesy, Inc. was aware of a trademark claim, the designations<br />
appear as requested by the owner of the trademark. All other product names and services identified throughout this<br />
book are used in editorial fashion only and for the benefit of such companies with no intention or infringement of the<br />
trademark. No such use, or the use of any trade name, is intended to convey endorsement or other affiliation with this<br />
book.<br />
ISBN-13: 978-0-9893876-4-4<br />
ISBN-10: 0-989-38764-X<br />
iii
STEP BY STEP WITH ONONE SOFTWARE<br />
Table of Contents<br />
Table of Contents<br />
INTRODUCTIONV<br />
Chapter 1<br />
WHAT’S NEW 1<br />
Smart Photos 2<br />
Masking Integration 3<br />
Noise Reduction 4<br />
Updates to Perfect Browse 5<br />
Additional New Features 6<br />
Chapter 2<br />
TOOLS & MODULES 7<br />
Perfect Browse 8<br />
Perfect Layers 9<br />
Perfect Enhance 10<br />
Perfect Portrait 11<br />
Perfect Effects 12<br />
Perfect B&W 13<br />
Perfect Resize 14<br />
Must-Know Keyboards Shortcuts 15<br />
Chapter 3<br />
BACK TO BASICS 18<br />
Pumpkins at the Market 19<br />
The Lighthouse 28<br />
Chapter 4<br />
LOVELY LANDSCAPES 36<br />
Butte Creek Falls 37<br />
Schwabacher Landing 52<br />
Chapter 5<br />
WILL IT BLEND 67<br />
Barn at Sunrise 68<br />
Trillium Lake 89<br />
Chapter 6<br />
GOODBYE, BLUE SKY! 107<br />
The Skateboarder 108<br />
The Juniper Tree 124<br />
CONCLUSION142
STEP BY STEP WITH ONONE SOFTWARE<br />
Introduction<br />
Introduction<br />
I am a long-time user of the onOne Software Perfect Photo Suite. In fact, it’s one of my favorite photography software programs and is a great complement<br />
to my existing Adobe products, such as Lightroom, and even Photoshop! Even though this is my third book on this software, I keep learning something<br />
new and finding new ways to process my images. And this book is my way of sharing my style and techniques for processing images.<br />
This book begins with a short Q&A, plus I have also dedicated the first two chapters to some of the basics: The first chapter lists many of the new features<br />
in Suite 9, and the second chapter shows each interface, along with a breakdown of some of the major panels and tools. So, let’s get started!<br />
v
STEP BY STEP WITH ONONE SOFTWARE<br />
Introduction<br />
How to use this eBook:<br />
With the exception of the first two chapters, the entire book is a stepby-step<br />
journey in post-processing using onOne’s Perfect Photo Suite 9.<br />
Here are some tips on getting the most out of this book:<br />
• If you purchased the Bonus Materials to go along with this book,<br />
then you have access to each file I process in Chapters 3 through<br />
6. This way you can follow along with each step and process the<br />
files yourself.<br />
• I recommend reading this eBook on either a computer monitor<br />
or a large tablet (such as the iPad). It will also work on smaller<br />
devices (for example, a smartphone), but may appear too small<br />
to read.<br />
• If you would like to view more detail of one of the images, just<br />
zoom in using either your computer, tablet, phone, or whichever<br />
method you are using to read the book.<br />
• There are video tutorials to complement this eBook where I<br />
process five additional photographs using the Perfect Photo<br />
Suite 9. The videos also include tutorials on processing images in<br />
HDR using Lightroom and Photoshop, and show how to use some<br />
of the features in onOne Software. For more information on the<br />
video tutorials, please click here (requires an Internet connection).<br />
Who is this eBook for<br />
This eBook is primarily for photographers who already use or would like<br />
to use onOne’s Perfect Photo Suite 9.<br />
What will I learn<br />
In this eBook I share some of my favorite techniques on using the Perfect<br />
Photo Suite 9, such as masking and advanced image processing, and<br />
focus on the following modules:<br />
• Perfect Browse<br />
• Perfect Layers<br />
• Perfect Enhance<br />
• Perfect Effects<br />
Why aren’t all of the modules in onOne<br />
Software covered in this eBook<br />
The modules I cover in this book consist of Perfect Browse, Layers,<br />
Enhance, and Effects. This eBook is not meant to be comprehensive.<br />
Rather it is a representation of how I use this software in my own<br />
photography. The good news is that onOne has you covered! They have<br />
some great video content over on their website.<br />
vi
STEP BY STEP WITH ONONE SOFTWARE<br />
Introduction<br />
Do I need specific equipment and software<br />
Many of the techniques used in this book can be applied across several<br />
different types of software. Because the onOne Software Perfect Photo<br />
Suite is the only software you will see used in this book, however, you<br />
will get the best technical information and learning experience by using<br />
onOne’s Perfect Photo Suite 9. If you are interested in following along,<br />
onOne offers a 30-day trial of their software. Click here to access and<br />
download it (works for both Mac and PC).<br />
Are the files used in this eBook available for<br />
download so that I can follow along<br />
Yes, they are! If you purchased the entire bundle (eBook, Videos, and<br />
Bonus Content), then you already have everything you need to follow<br />
along with the chapters in the book. If you have not yet purchased<br />
them and would like to access the download files for this eBook, along<br />
with other video content and presets, please visit the product page for<br />
more information.<br />
Do you have more training available on onOne<br />
Software’s products<br />
Yes! I originally started writing about onOne Software with the Perfect<br />
Photo Suite 7 and wrote a comprehensive print-published book<br />
through Peachpit Press titled Plug In with onOne Software. Then, after<br />
the release of Perfect Photo Suite 8, I wrote a self-published book<br />
titled Light & Process: onOne Software. In Light & Process, I share how I<br />
photographed ten scenes and then walk through the post-processing<br />
of those photographs using Adobe Photoshop Lightroom, Photoshop,<br />
and onOne Software.<br />
For this eBook, you can find additional video training focusing on onOne<br />
Software, as well as bonus files, available in my online store. Click here<br />
to access that content.<br />
Nicole S. Young<br />
Photographer & Author<br />
vii
CHAPTER 1<br />
What’s New<br />
An overview of the new features<br />
in Perfect Photo Suite 9<br />
If you are a long-time user of the Perfect Photo<br />
Suite, then you are in for a treat! And if this is your<br />
first time using the software, you are starting off<br />
on a great version. onOne has made some valuable<br />
updates to Suite 9, and to help you discover these<br />
new features, I will give you a tour of several of them<br />
in this chapter.
STEP BY STEP WITH ONONE SOFTWARE<br />
CHAPTER 1: What’s New in Perfect Photo Suite 9<br />
Smart Photos<br />
In the past, applying an effect and closing<br />
out a module (such as Perfect Effects,<br />
for example) meant that those filters and<br />
presets were “burned in” to the photo. Now,<br />
with Smart Photos, if you make and apply<br />
changes inside of one of the modules, you<br />
can exit the module, then return to re-edit<br />
the photo with all of your settings intact! This<br />
is a valuable feature for those of us who may<br />
want to make subtle changes to an effect<br />
without having to start from scratch.<br />
To use an image as a Smart Photo, open your<br />
photo and make sure that the Smart Photo<br />
Re-Editable PSD option is checked at the<br />
bottom. As you can see in my example, I<br />
need to open this image as a copy in order<br />
for this method to work.<br />
by Nicole S. Young<br />
2
STEP BY STEP WITH ONONE SOFTWARE<br />
CHAPTER 1: What’s New in Perfect Photo Suite 9<br />
Masking Integration<br />
In the Perfect Photo Suite 9, the entire Perfect<br />
Mask module has been removed and many of its<br />
tools integrated into Perfect Layers and Perfect<br />
Effects! Here are some of the new features and<br />
tools you’ll be able to use to mask your images:<br />
Quick Mask Brush: In addition to the masking<br />
tools being integrated to the rest of the suite,<br />
there is now a new Quick Mask Brush. This brush<br />
lets you quickly mask out an unwanted sky or<br />
background with just one swipe. Then you can<br />
use the additional masking tools to refine and<br />
perfect your mask area.<br />
Refine Brush: You use the Refine Brush to<br />
remove the excess color pixels out of your<br />
existing mask. This is similar to the Magic Brush<br />
in previous modules.<br />
Copy and Paste Masks: In previous modules,<br />
you were able to copy and paste masks within<br />
a module. Now, with Perfect Photo Suite 9, you<br />
can copy and paste masks across the modules.<br />
A<br />
B<br />
C<br />
D<br />
E<br />
F<br />
A. ...Masking Brush<br />
B. ...Quick Mask<br />
C. ...Masking Bug<br />
D. ...Refine Brush<br />
E. ...Chisel Mask tool<br />
F ....Blur Mask tool<br />
by Nicole S. Young<br />
3
STEP BY STEP WITH ONONE SOFTWARE<br />
CHAPTER 1: What’s New in Perfect Photo Suite 9<br />
Noise Reduction<br />
With the new Noise Reduction feature,<br />
you can now reduce the noise in your<br />
images very easily while still inside of<br />
the Suite! And, if you don’t want to apply<br />
the filter to the entire image, you are<br />
able to selectively add it to only certain<br />
portions of the scene. This is a good way<br />
to reduce noise in shadow areas, while<br />
still retaining the detail in the other parts<br />
of your photograph.<br />
by Nicole S. Young<br />
4
STEP BY STEP WITH ONONE SOFTWARE<br />
CHAPTER 1: What’s New in Perfect Photo Suite 9<br />
Updates to Perfect<br />
Browse<br />
Perfect Browse has had many new features added. Along<br />
with faster browsing (as mentioned in the previous section),<br />
it also has the following additions:<br />
• Faster image processing<br />
• The ability to rate, label, and “like” your images<br />
• Rotate support<br />
• Filtering and searching through your images based<br />
on labels, ratings, likes, and keywords<br />
• Editing metadata from within the Browse panel on<br />
the right<br />
• Printing directly from the Browse module<br />
• Updates to Favorites and Folders panels on the left<br />
• The ability to batch rename files<br />
• A Send To feature that allows you to send photos<br />
to other applications, such as Photoshop<br />
by Nicole S. Young<br />
5
STEP BY STEP WITH ONONE SOFTWARE<br />
CHAPTER 1: What’s New in Perfect Photo Suite 9<br />
Additional New Features<br />
Perfect Photo Suite 9 offers many more subtle new features<br />
that still deserve the spotlight! Here are some of the<br />
miscellaneous new items in this version of onOne Software:<br />
Printing: The ability to print from the modules is now<br />
supported in the Perfect Photo Suite! One thing to note is<br />
that the keyboard shortcut, Cmd/Ctrl+P, is now dedicated to<br />
this new printing feature. (The keyboard shortcut for toggling<br />
the before and after preview is now the \ key.)<br />
Lens Flare Filter: This is a new filter inside of Perfect Effects<br />
that allows you to add flare to your images.<br />
Retina Display Support: Support was added for largeresolution<br />
monitors.<br />
Modernized Crop Tool: The Crop tool has been updated<br />
and modernized. It also has an added leveling tool for<br />
straightening your images. (See the example at right.)<br />
Auto-Tone: The algorithm for the auto-tone across modules<br />
had been updated.<br />
Quick View Browser: This allows you to start up directly<br />
into your Favorites, Presets, or Filters view. It’s optional and<br />
can be turned on and off in the footer of each module that<br />
supports it.<br />
by Nicole S. Young<br />
6
CHAPTER 2<br />
Tools & Modules<br />
The Perfect Photo Suite Interface<br />
One of the most daunting things about using<br />
photography software, especially if you are new to it,<br />
is getting to know all of the tools and panels on the<br />
screen. In fact, it can be scary and intimidating to open<br />
up a photo and then be faced with so many options and<br />
menus that you don’t know how to use. In this chapter, I<br />
am going to do my best to demystify each of the Perfect<br />
Photo Suite modules, along with their primary tools.<br />
Then, at the end of the chapter, I will also share some of<br />
the important, “must-know” keyboard shortcuts that I<br />
use regularly inside of Perfect Photo Suite 9.
STEP BY STEP WITH ONONE SOFTWARE<br />
CHAPTER 2: The Perfect Photo Suite Interface<br />
Perfect Browse<br />
The Perfect Browse interface is similar to a file-browsing folder on your desktop. Here you can quickly browse<br />
through your images to find photos you would like to work on in one or more of the modules. It’s a great way to<br />
preview your files and prep your plan of attack for processing your images.<br />
A<br />
B<br />
C<br />
E<br />
J<br />
K<br />
A. ...Favorites panel<br />
B. ...Sources panel<br />
C. ...Filters panel<br />
D. ...Recently opened files<br />
E. ...Path bar<br />
F ....Image/Thumb View toggle<br />
G. ...Thumbnail Size<br />
H. ...Sort drop-down<br />
I. ....Rating & Label overlay<br />
J. ....Info panel<br />
K. ...Metadata panel<br />
L ....Smart Photo History<br />
D<br />
L<br />
F G H I<br />
by Nicole S. Young<br />
8
STEP BY STEP WITH ONONE SOFTWARE<br />
CHAPTER 2: The Perfect Photo Suite Interface<br />
Perfect Layers<br />
When it comes to masking, blending images, and doing basic edits (such as cropping or quickly removing a dust<br />
spot), Perfect Layers is the place to be. It’s also a good “home base” when working on a photograph where you<br />
will be using more than one module to refine your photograph.<br />
L<br />
A. ...File Browser & Extras<br />
M<br />
B. ...File Info<br />
A<br />
F<br />
N<br />
C. ...View Mode toggle<br />
D. ...Launch Quick View Browser<br />
E. ...Compare Mode toggle<br />
O<br />
F ....Navigator/Loupe/Histogram/Info<br />
G. ...Layers panel<br />
P<br />
H. ...Duplicate Selected Layer<br />
G<br />
Q<br />
I. ....Delete Selected Layer<br />
J. ....Merge Layer Down<br />
R<br />
K. ...Color Fill Layer<br />
L ....Transform tool<br />
H I J K<br />
S<br />
M ...Crop tool<br />
N. ...Trim tool<br />
T<br />
O. ...Perfect Eraser<br />
P. ...Retouch Brush<br />
U<br />
Q. ...Clone Stamp<br />
R. ...Red Eye tool<br />
B<br />
V<br />
S. ...Masking Brush<br />
T. ...Quick Mask<br />
W<br />
U. ...Masking Bug<br />
V. ...Refine Brush<br />
C D E<br />
X<br />
W. ..Chisel Mask tool<br />
X. ...Blur Mask tool<br />
Y<br />
Y. ...Hand tool<br />
Z. ...Zoom tool<br />
Z<br />
by Nicole S. Young<br />
9
STEP BY STEP WITH ONONE SOFTWARE<br />
CHAPTER 2: The Perfect Photo Suite Interface<br />
Perfect Enhance<br />
Sometimes a photograph just needs some minor edits to make it really pop. A little bit can go a very long way<br />
when it comes to post-processing! In the Perfect Enhance module, you can add minor corrections to tone, color,<br />
sharpening, noise correction, and more!<br />
A<br />
E<br />
I<br />
A. ...Favorites & Presets<br />
B. ...View Mode toggle<br />
C. ...Launch Quick View Browser<br />
F<br />
J<br />
D. ...Preview (before/after) toggle<br />
E. ...Navigator/Loupe/Histogram/Info<br />
G<br />
K<br />
F ....Fit & Zoom buttons<br />
G. ...Quick Fixes panel<br />
L<br />
H. ...Custom settings panels<br />
I. ....Crop tool<br />
J. ....Perfect Eraser<br />
H<br />
M<br />
N<br />
K. ...Retouch Brush<br />
L ....Red Eye tool<br />
M ...Hand tool<br />
N. ...Zoom tool<br />
B<br />
C<br />
D<br />
by Nicole S. Young<br />
10
STEP BY STEP WITH ONONE SOFTWARE<br />
CHAPTER 2: The Perfect Photo Suite Interface<br />
Perfect Portrait<br />
If you photograph portraits of people, Perfect Portrait is a great module to use for your post-processing. This<br />
module allows you to smooth skin, brighten eyes, and whiten teeth.<br />
A<br />
F<br />
K<br />
A. ...Favorites & Presets panel<br />
B. ...View Mode toggle<br />
C. ...Launch Quick View Browser<br />
D. ...Compare Mode toggle<br />
G<br />
H<br />
L<br />
M<br />
N<br />
E. ...Preview (before/after) toggle<br />
F ....Navigator/Loupe/Histogram/Info<br />
G. ...Fit & Zoom buttons<br />
H. ...Skin Retouching panel<br />
I. ....Color Correction panel (skin)<br />
J. ....Eyes & Mouth panel<br />
I<br />
O<br />
P<br />
K. ...Face Select tool<br />
L ....Face Edit tool<br />
M ...Perfect Eraser<br />
N. ...Retouch Brush<br />
J<br />
O. ...Hand tool<br />
P. ...Zoom tool<br />
B C D E<br />
by Nicole S. Young<br />
11
STEP BY STEP WITH ONONE SOFTWARE<br />
CHAPTER 2: The Perfect Photo Suite Interface<br />
Perfect Effects<br />
Perfect Effects is my personal favorite among the Perfect Photo Suite product lineup. This module works with any<br />
type of photograph and allows you a lot of control in stylizing and refining each photo to match your unique vision.<br />
A<br />
F<br />
P<br />
A. ...Favorites, Presets, & Filters<br />
B. ...View Mode toggle<br />
C. ...Launch Quick View Browser<br />
D. ...Compare Mode toggle<br />
G<br />
Q<br />
E. ...Preview (before/after) toggle<br />
F ....Navigator/Loupe/Histogram/Info<br />
H<br />
R<br />
G. ...Fit & Zoom buttons<br />
H. ...Filter Stack<br />
S<br />
I. ....Blending Options (not shown)<br />
J. ....Filter Options<br />
K. ...Add Layer<br />
T<br />
L ....Delete Layer<br />
M ...Add Adjustment Brush Filter<br />
U<br />
N. ...Add Adjustable Gradient Filter<br />
O. ...Delete All Layers<br />
I<br />
J<br />
V<br />
W<br />
P. ...Masking Brush<br />
Q. ...Quick Mask<br />
R. ...Masking Bug<br />
S. ...Refine Brush<br />
T. ...Chisel Mask tool<br />
U. ...Blur Mask tool<br />
V. ...Hand tool<br />
B<br />
C D E<br />
W. ..Zoom tool<br />
K L M N O<br />
by Nicole S. Young<br />
12
STEP BY STEP WITH ONONE SOFTWARE<br />
CHAPTER 2: The Perfect Photo Suite Interface<br />
Perfect B&W<br />
If you enjoy processing your photos in black and white, then this is a good place for you to be! The Perfect B&W<br />
module allows you to enhance your photos based on their colors and tones, and also give them a realistic film<br />
look as well.<br />
A<br />
F<br />
K<br />
A. ...Favorites & Presets panel<br />
B. ...View Mode toggle<br />
C. ...Launch Quick View Browser<br />
L<br />
D. ...Compare Mode toggle<br />
G<br />
M<br />
E. ...Preview (before/after) toggle<br />
F ....Navigator/Loupe/Histogram/Info<br />
H<br />
N<br />
G. ...Fit & Zoom buttons<br />
H. ...Tone Adjustments panel<br />
I. ....Color Response panel<br />
J. ....Additional panels:<br />
I<br />
O<br />
P<br />
(Tone Curve, Glow, Film Grain,<br />
Toner, Vignette, Borders,<br />
Sharpening, Noise Reduction, and<br />
Blending)<br />
K. ...Brightness Brush<br />
Q<br />
L ....Contrast Brush<br />
M ...Detail Brush<br />
N. ...Selective Color Brush<br />
J<br />
O. ...Targeted Brightness<br />
P. ...Hand tool<br />
Q. ...Zoom tool<br />
B<br />
C D E<br />
by Nicole S. Young<br />
13
STEP BY STEP WITH ONONE SOFTWARE<br />
CHAPTER 2: The Perfect Photo Suite Interface<br />
Perfect Resize<br />
Perfect Resize allows you to prep your photographs for printing, as well as resize them an enormous amount with<br />
very little (if any) deterioration to your pixels.<br />
A<br />
C<br />
D<br />
E<br />
F<br />
A. ...Filters & Presets panel<br />
B. ...View Mode toggle<br />
C. ...Navigator/Loupe/Histogram/Info<br />
D. ...Fit & Zoom buttons<br />
E. ...Pixel Dimensions panel<br />
F ....Document Size panel<br />
G. ...Settings panel<br />
H. ...Additional panels:<br />
Sharpening, Film Grain, Tiling, &<br />
Gallery Wrap<br />
B<br />
by Nicole S. Young<br />
14
STEP BY STEP WITH ONONE SOFTWARE<br />
CHAPTER 2: The Perfect Photo Suite Interface<br />
Must-Know Keyboards Shortcuts<br />
General<br />
I am a huge fan of keyboard shortcuts. They save time and help<br />
my post-processing become much more efficient and smooth. The<br />
Perfect Photo Suite 9 has several shortcuts you can use with each<br />
module, and so I have listed those that I feel are the most important<br />
shortcuts to know and use in this suite.<br />
Many of these shortcuts work across modules, but there are a few<br />
modules that have their own set of “unique” shortcuts, which I have<br />
listed out separately in the following pages.<br />
Mac PC Shortcut<br />
\ \ Toggle before/after preview<br />
Tab Tab Hide/reveal left and right sidebars<br />
Cmd + Left Arrow Ctrl + Left Arrow Hide/reveal left sidebar<br />
Cmd + Right Arrow Ctrl + Right Arrow Hide/reveal right sidebar<br />
Cmd + Z Ctrl + Z Undo<br />
Cmd + Shift + Z Ctrl + Shift + Z Redo<br />
Cmd + S Ctrl + S Save<br />
Cmd + Shift + S Ctrl +Shift + S Save As/Save Preset<br />
Cmd + Q Ctrl + Q Quit<br />
Cmd + A Ctrl + A Select All<br />
Cmd + D Ctrl + D Deselect<br />
Cmd + , Ctrl + , Preferences<br />
Cmd + Shift + K Ctrl + Shift + K View keyboard shortcuts<br />
Cmd + Ctrl + Zoom in<br />
Cmd - Ctrl - Zoom out<br />
Cmd + 0 Ctrl + 0 Fit to screen<br />
Cmd + Opt + 0 Ctrl + Alt + 0 Zoom to 100%<br />
Hold Spacebar Hold Spacebar Hand tool<br />
Return Enter Apply settings<br />
Escape Escape Cancel edits<br />
by Nicole S. Young<br />
15
STEP BY STEP WITH ONONE SOFTWARE<br />
CHAPTER 2: The Perfect Photo Suite Interface<br />
Must-Know Keyboards Shortcuts<br />
(Continued)<br />
Masking Shortcuts<br />
Toolbar Shortcuts<br />
Mac PC Shortcut<br />
Hold Spacebar Hold Spacebar Hand tool<br />
Return Enter Apply settings<br />
Esc Esc Cancel edits<br />
Ctrl + M Alt + M Preview Mask-Red<br />
Cmd + I Ctrl + I Invert mask<br />
Mac and PC<br />
V<br />
C<br />
T<br />
Q<br />
R<br />
S<br />
E<br />
B<br />
M<br />
W<br />
F<br />
K<br />
L<br />
Q<br />
H<br />
Z<br />
Shortcut<br />
Transform tool<br />
Crop tool<br />
Trim tool<br />
Perfect Eraser<br />
Retouch Brush<br />
Clone Stamp<br />
Red Eye tool<br />
Masking Brush<br />
Masking Bug<br />
Quick Mask<br />
Refine Brush<br />
Chisel tool<br />
Blur tool<br />
Perfect Eraser<br />
Hand tool<br />
Zoom tool<br />
by Nicole S. Young<br />
16
STEP BY STEP WITH ONONE SOFTWARE<br />
CHAPTER 2: The Perfect Photo Suite Interface<br />
Must-Know Keyboards Shortcuts<br />
(Continued)<br />
Perfect Browse<br />
Mac PC Shortcut<br />
G G Grid view<br />
E E Detail view<br />
Spacebar Spacebar Toggle Grid/Detail views<br />
+ + Increase thumbnail size<br />
- - Decrease thumbnail size<br />
Numbers 1 — 5 Numbers 1 — 5 Star ratings (1 — 5)<br />
P P Like<br />
D D Dislike<br />
U U Clear like status<br />
Perfect Layers<br />
Mac PC Shortcut<br />
Cmd + N Ctrl + N New blank file<br />
Cmd + O Ctrl + O Open file<br />
Cmd + Shift + N Ctrl + Shift + N Add layer from file<br />
Cmd + W Ctrl + W Close document<br />
Cmd + J Ctrl + J Duplicate layer<br />
Cmd + E Ctrl + E Merge with layer below<br />
Cmd + Shift + J Ctrl + Shift + J New stamped layer from composite<br />
Numbers 1 — 10 Numbers 1 — 10 Layer opacity 10% — 100%<br />
X X Toggle Paint In/Paint Out<br />
[ and ] [ and ] Brush size smaller and larger<br />
Cmd + Shift + S Ctrl + Shift + S Save-as<br />
by Nicole S. Young<br />
17
CHAPTER 3<br />
Back to Basics<br />
Enhancing Images with<br />
Straightforward Adjustments<br />
Post-processing does not need to be extreme.<br />
In fact, I prefer to do much more subtle edits to my<br />
own photographs, and oftentimes I will add only<br />
basic enhancements to make the photo look its best.<br />
onOne’s Perfect Photo Suite makes it easy to edit a<br />
photograph from start to finish while maintaining<br />
a “clean” look. In other words, your photo will not<br />
be over-processed but will still look great! In this<br />
chapter, I’ll walk you through the steps to make flat,<br />
boring images really pop with the help of only simple,<br />
subtle adjustments.
STEP BY STEP WITH ONONE SOFTWARE<br />
CHAPTER 3: Back to Basics<br />
Pumpkins at the Market<br />
Sometimes all a photo needs is a simple tone and color correction to turn<br />
it from blah to beautiful. In this example, I’ll show how you can use Perfect<br />
Enhance to get great results in just a few minutes.<br />
Modules used with this image:<br />
• Perfect Browse<br />
• Perfect Enhance<br />
Before<br />
After<br />
by Nicole S. Young<br />
19
STEP BY STEP WITH ONONE SOFTWARE<br />
CHAPTER 3: Back to Basics<br />
Step 1<br />
Pumpkins at the Market<br />
I start by opening up the Perfect Photo Suite<br />
9, and I make sure I am inside of the Browse<br />
module. Then, I navigate to my folder and<br />
select the file.<br />
I want to bring this image into Perfect<br />
Enhance, so with the image still highlighted I<br />
click Enhance at the top right of the screen.<br />
A window pops up and gives me two options.<br />
Because I want to retain the ability to edit<br />
the file, I select Edit a Copy. Then, I make sure<br />
that the Smart Photo option box is checked<br />
and click OK.<br />
by Nicole S. Young<br />
20
STEP BY STEP WITH ONONE SOFTWARE<br />
CHAPTER 3: Back to Basics<br />
Step 2<br />
Pumpkins at the Market<br />
The image opens into Perfect<br />
Enhance, and the first thing I do is<br />
head over on the right side of the<br />
window to the Quick Fixes panel.<br />
I’d like to see what some of the auto<br />
adjustments will do.<br />
To start, I click the Auto Tone<br />
button. The adjustment does a great<br />
job overall, but I think I may want to<br />
make a few additional alterations to<br />
the tones in the next step.<br />
by Nicole S. Young<br />
21
STEP BY STEP WITH ONONE SOFTWARE<br />
CHAPTER 3: Back to Basics<br />
Step 3<br />
Pumpkins at the Market<br />
(Before I make more adjustments, I want to<br />
view the image larger on my screen, so I use the<br />
keyboard shortcut Cmd/Ctrl+Left Arrow to<br />
hide the left sidebar.)<br />
There are two ways to make further<br />
adjustments to the tone of an image: by<br />
continuing to use the Quick Fixes panel or<br />
to dig a little deeper using the Color & Tone<br />
Adjustments panel. I like to have a little more<br />
control over this image, so I’m going to use<br />
the Color & Tone Adjustments panel.<br />
First, I hover over the panel and click Show to<br />
reveal its contents. Then, I use the sliders to<br />
make the image brighter with more contrast:<br />
Brightness +57<br />
Contrast +11<br />
Shadows +24<br />
Highlights +20<br />
Whites +54<br />
Blacks +3<br />
by Nicole S. Young<br />
22
STEP BY STEP WITH ONONE SOFTWARE<br />
CHAPTER 3: Back to Basics<br />
Step 4<br />
Pumpkins at the Market<br />
While still inside of the Color & Tone<br />
Adjustments panel, I click the Auto Color<br />
button to the right of the word “Color.” It<br />
makes a very subtle change, so I decide to use<br />
the sliders to edit it even further.<br />
I want to cool the image down a little bit, so I<br />
move the Temperature slider to the left to a<br />
setting of -20 and then move the Tint slider<br />
to -4. I increase the Vibrance setting to +8<br />
to slightly intensify the overall colors.<br />
When I’m finished with this panel, I collapse<br />
it by clicking Hide in the upper-right portion<br />
of the panel.<br />
by Nicole S. Young<br />
23
STEP BY STEP WITH ONONE SOFTWARE<br />
CHAPTER 3: Back to Basics<br />
Step 5<br />
Pumpkins at the Market<br />
Next I want to add a vignette, so I first reveal<br />
the Vignette panel by clicking Show to the<br />
right of the panel’s name.<br />
Then, I start by clicking the Subtle preset<br />
at the top of the panel. I like the effect but<br />
want to intensify it. So, I make the following<br />
adjustments to the sliders to darken and<br />
soften the vignette:<br />
Brightness -91<br />
Size +48<br />
Feather +81<br />
When I’m finished, I click Hide to collapse the<br />
Vignette panel.<br />
by Nicole S. Young<br />
24
STEP BY STEP WITH ONONE SOFTWARE<br />
CHAPTER 3: Back to Basics<br />
Step 6<br />
Pumpkins at the Market<br />
The next stop is the Sharpening panel, so I<br />
reveal the panel and click the Fix Focus preset.<br />
This adds a nice “crispness” to the image that<br />
I am happy with, so I hide the panel.<br />
by Nicole S. Young<br />
25
STEP BY STEP WITH ONONE SOFTWARE<br />
CHAPTER 3: Back to Basics<br />
Step 7<br />
Pumpkins at the Market<br />
The last adjustment I want to make is in the<br />
Noise Reduction panel. I reveal the panel by<br />
clicking (click Show), and then use the Preset<br />
drop-down and select the Shadows Only<br />
preset. The preset automatically zooms the<br />
image to 100%, so I use the Hand tool to<br />
move the view to a location in the image with<br />
the most noise.<br />
To preview the noise reduction effect, I use<br />
the On/Off switch at the top of the panel.<br />
After toggling this switch a few times, I’m<br />
satisfied with the results, so I click Hide to<br />
collapse the panel.<br />
by Nicole S. Young<br />
26
STEP BY STEP WITH ONONE SOFTWARE<br />
CHAPTER 3: Back to Basics<br />
Step 8<br />
Pumpkins at the Market<br />
The very last step is to save a preset of my<br />
adjustments. I do my best to save presets after<br />
every image I process, just in case the settings<br />
work well with another photograph. Using<br />
presets with batches of images from the same<br />
photo-shoot can save a lot of processing time.<br />
To save a preset, I choose Preset > Save Preset,<br />
and then fill in the information in the window<br />
that pops up. When finished, I click the Create<br />
button. My preset will now appear in the<br />
Presets panel to the left of the window.<br />
Then, I click the Save and Close button in the<br />
lower right of the window to save my image.<br />
by Nicole S. Young<br />
27
STEP BY STEP WITH ONONE SOFTWARE<br />
CHAPTER 3: Back to Basics<br />
The Lighthouse<br />
Filters and presets are great, but there are so many<br />
other ways to adjust your image. For instance, you can<br />
combine layers and blending modes with just one image<br />
file to brighten and even stylize your photographs. To<br />
demonstrate, I’ll use Perfect Layers to show you how I<br />
brightened up this dreary lighthouse.<br />
Modules used with this image:<br />
• Perfect Browse<br />
• Perfect Layers<br />
Before<br />
After<br />
by Nicole S. Young<br />
28
STEP BY STEP WITH ONONE SOFTWARE<br />
CHAPTER 3: Back to Basics<br />
Step 1<br />
The Lighthouse<br />
To get started, I go into Perfect Browse,<br />
navigate to the nicolesy-lighthouse.psd<br />
image file, make sure that it is selected,<br />
and then click the Layers module at the<br />
top of the window.<br />
A new window pops up asking me how I<br />
would like to edit this file. I select the Edit<br />
a Copy option, and click OK.<br />
by Nicole S. Young<br />
29
STEP BY STEP WITH ONONE SOFTWARE<br />
CHAPTER 3: Back to Basics<br />
Step 2<br />
The Lighthouse<br />
The first thing I do is hide the Files and Extras panels on<br />
the left by using the keyboard shortcut Cmd/Ctrl+Left<br />
Arrow. This gives me more window space to hone-in<br />
on the image.<br />
Then, I focus my attention to the Layers panel. I want<br />
to add some brightness to the image so first I duplicate<br />
the layer by clicking the Duplicate Layer button below<br />
the panel.<br />
Using the Blending drop-down, I set the blending mode<br />
to Screen, and I reduce the Opacity slider to 30%.<br />
by Nicole S. Young<br />
30
STEP BY STEP WITH ONONE SOFTWARE<br />
CHAPTER 3: Back to Basics<br />
Step 3<br />
The Lighthouse<br />
I want to brighten the image even more, so I add a<br />
Color Fill layer by clicking on the New Color Fill Layer<br />
icon at the bottom of the Layers panel.<br />
In the window that pops up, I use the Preset dropdown<br />
and select Lighten, change Blending Mode to<br />
Overlay, and change the Opacity to 25%.<br />
by Nicole S. Young<br />
31
STEP BY STEP WITH ONONE SOFTWARE<br />
CHAPTER 3: Back to Basics<br />
Step 4<br />
The Lighthouse<br />
Next, I’m going to add another Color Fill layer by clicking<br />
the New Color Fill Layer button.<br />
This time, I’m going to set Preset to Cooling, Blending<br />
Mode to Exclusion, and Opacity to 15%.<br />
This technique gives the image a subtle, warm, crossprocessed<br />
look.<br />
by Nicole S. Young<br />
32
STEP BY STEP WITH ONONE SOFTWARE<br />
CHAPTER 3: Back to Basics<br />
Step 5<br />
The Lighthouse<br />
Now I want to bump up the contrast in the image.<br />
To get started, I choose Layer > New Stamped Layer,<br />
which creates a new merged layer of all of the layers<br />
below it.<br />
I make sure that I click on the top layer to select<br />
it, and then change the Blending drop-down to<br />
Overlay. I also reduce the Opacity slider to 75%,<br />
which softens the effect.<br />
by Nicole S. Young<br />
33
STEP BY STEP WITH ONONE SOFTWARE<br />
CHAPTER 3: Back to Basics<br />
Step 6<br />
The Lighthouse<br />
I would like to intensify the contrast and brightness<br />
in the image even more, so I duplicate the top layer<br />
by making sure it’s highlighted and then clicking<br />
the Duplicate Layer button.<br />
I change the Blending setting to Hard Light and<br />
reduce the Opacity slider to 36%.<br />
by Nicole S. Young<br />
34
STEP BY STEP WITH ONONE SOFTWARE<br />
CHAPTER 3: Back to Basics<br />
Step 7<br />
The Lighthouse<br />
Lastly, I would like to add a vignette. So, I duplicate<br />
the top layer by clicking the Duplicate Layer button.<br />
Then, I change Blending to Multiply and set Layer<br />
Opacity to 30%.<br />
Over in the toobar, I select<br />
the Masking Bug. Then,<br />
from the Preset drop-down<br />
at the top, I click on the<br />
Vignette preset.<br />
I click in the center of the image to add the vignette<br />
and use the handles on the center-most circle of the<br />
vignette to shape it so that it is a little bit smaller.<br />
Finally, I drag the dotted circle outwards to soften the<br />
feather of the vignette.<br />
With a soft vignette to subtly frame and highlight<br />
my photograph, I’m satisfied and finished. I save and<br />
close my file.<br />
by Nicole S. Young<br />
35
CHAPTER 4<br />
Lovely<br />
Landscapes<br />
Processing Landscape Photos<br />
with Perfect Photo Suite 9<br />
One of my favorite things to do is photograph<br />
landscapes. You just can’t top being outdoors in a<br />
beautiful, serene location, creating art with a camera.<br />
Unfortunately, we can’t spend all of our time outdoors,<br />
and the photos we create need some processing on<br />
the computer before they are printed or shared. Sitting<br />
behind a computer is not my favorite way to spend the<br />
day, but that doesn’t mean that the work has to be<br />
tedious! I have found that the Perfect Photo Suite is a<br />
great companion, allowing me to process my landscape<br />
photographs in a fun, approachable manner. And,<br />
better yet, I get great results every time!
STEP BY STEP WITH ONONE SOFTWARE<br />
CHAPTER 4: Lovely Landscapes<br />
Butte Creek Falls<br />
Ever since moving to the Pacific Northwest, I have fallen in love with<br />
photographing waterfalls. There is always so much green, and the water is so<br />
clear! I also enjoy playing around with unique compositions, and then using<br />
the Perfect Photo Suite to refine my photo to perfection using lens blur,<br />
masking, and a few other techniques as well.<br />
Modules used with this image:<br />
• Perfect Browse<br />
• Perfect Effects<br />
Before<br />
After<br />
by Nicole S. Young<br />
37
STEP BY STEP WITH ONONE SOFTWARE<br />
CHAPTER 4: Lovely Landscapes<br />
Step 1<br />
Butte Creek Falls<br />
I start out in the Perfect Browse module and<br />
navigate to the nicolesy-waterfall.psd file.<br />
I click the image to select it, and then click<br />
Effects at the top of the screen.<br />
In the window that pops up, I choose Edit a<br />
Copy, make sure that the Smart Photo Reeditable<br />
PSD option is checked so that I can<br />
process this photo as a Smart Photo, and<br />
then click OK.<br />
by Nicole S. Young<br />
38
STEP BY STEP WITH ONONE SOFTWARE<br />
CHAPTER 4: Lovely Landscapes<br />
Step 2<br />
Butte Creek Falls<br />
The first thing I want to do here is brighten<br />
up the image. So, in the Filters panel on the<br />
left, I expand Tone Enhancer and select<br />
the Auto Contrast filter.<br />
This filter brightened up the photo nicely,<br />
but I notice that it washed away some<br />
of the detail in the waterfall. So, in the<br />
Blending Options section inside of the<br />
Filter Stack, I set the Protect Highlights<br />
slider to +64. This protects the brightest<br />
parts of the image (in this case, the white<br />
areas of the water) and prevents the filter<br />
from affecting them.<br />
I also set the Protect Shadows slider to<br />
+30 to remove some of the “flatness” from<br />
the filter.<br />
by Nicole S. Young<br />
39
STEP BY STEP WITH ONONE SOFTWARE<br />
CHAPTER 4: Lovely Landscapes<br />
Step 3<br />
Butte Creek Falls<br />
Next, I add a new layer to the Filter Stack<br />
by clicking the Add Empty Layer button. I<br />
want to enhance some of the colors in the<br />
scene, so I move my attention to the filters<br />
in the Color Enhancer folder and click on<br />
the Fall Enhancer filter.<br />
This filter enhances the warm colors in the<br />
image, but the effect is quite extreme. So I<br />
move the Layer Opacity for this layer down<br />
to 30%.<br />
by Nicole S. Young<br />
40
STEP BY STEP WITH ONONE SOFTWARE<br />
CHAPTER 4: Lovely Landscapes<br />
Step 4<br />
Butte Creek Falls<br />
Now I want to bring out the green colors<br />
in the scene, so I add a new empty layer<br />
and then select the Green Enhancer filter,<br />
which sits just below the filter from the<br />
previous step.<br />
I use this filter very frequently with my<br />
landscape work, and at full strength it<br />
is much too harsh. So to fix this, I reduce<br />
the Layer Opacity to 30%. This gives<br />
the image a nice “touch” of bright green,<br />
without overdoing the effect.<br />
by Nicole S. Young<br />
41
STEP BY STEP WITH ONONE SOFTWARE<br />
CHAPTER 4: Lovely Landscapes<br />
Step 5<br />
Butte Creek Falls<br />
Next I want to make some changes to the<br />
focus point in the image by adding selective<br />
blur. To do this, I first add a new empty<br />
layer to the Filter Stack, and then I go down<br />
to the Lens Blur folder in the Filters panel<br />
and select the Tilt Shift filter.<br />
I use my cursor move the gradient down<br />
closer to the bottom of the frame (just at<br />
the base of the large rocks). I also move<br />
each solid line of the gradient in towards<br />
the center to create a much more narrow<br />
area of focus.<br />
Finally, I move my attention to the Filter<br />
Options panel. The blur is a little harsh, so<br />
I change the Blur Amount to +10.<br />
by Nicole S. Young<br />
42
STEP BY STEP WITH ONONE SOFTWARE<br />
CHAPTER 4: Lovely Landscapes<br />
Step 6<br />
Butte Creek Falls<br />
I need to refine the mask to brush the blur<br />
out of the large rocks. So, I zoom in to the<br />
image at 50% using the Navigator panel.<br />
Then, I change the Mask View Mode to<br />
Mask-Red (View > Mask View Mode > Mask-<br />
Red), which will give me a better view of my<br />
mask.<br />
Next, I select the Masking Brush tool,<br />
and at the top of the window set Mode<br />
to Paint Out, Size to 125, Feather to 50,<br />
and Opacity to 100%. I roughly paint on<br />
the inside of the rocks, avoiding the edges.<br />
I continue painting until I have all of the<br />
inside area of the rocks completed.<br />
by Nicole S. Young<br />
43
STEP BY STEP WITH ONONE SOFTWARE<br />
CHAPTER 4: Lovely Landscapes<br />
Step 7<br />
Butte Creek Falls<br />
Now, I change the Mask Mode back to<br />
normal (View > Mask View Mode > None). I<br />
want to refine the edge of the mask on the<br />
rocks, and to do this I’m going to continue<br />
using the Masking Brush but at a lower<br />
opacity. I change the Opacity at the top of<br />
the screen to 50% and zoom in to 100%<br />
in the Navigator panel to see everything a<br />
little closer.<br />
I carefully brush along the edges of the rock<br />
to remove the blur from the moss. I have<br />
to make several brush strokes over the<br />
same area to completely remove the blur,<br />
but doing it at a lower opacity means that<br />
there will be less potential for harsh edges<br />
in the masking.<br />
I continue masking until the blur is removed<br />
from all edges of the large rocks.<br />
Pro Tip: If you make any mistakes in your brush strokes, such as painting outside of the<br />
rock area, then do the following:<br />
Place a check in the Erase Brush Strokes box at the top of the window, and then paint<br />
them out. This is the best way to erase mistakes when using the Lens Blur filter with a<br />
gradient mask, as it will keep the opacity settings in the gradient consistent.<br />
by Nicole S. Young<br />
44
STEP BY STEP WITH ONONE SOFTWARE<br />
CHAPTER 4: Lovely Landscapes<br />
Step 8<br />
Butte Creek Falls<br />
After the rocks have been brushed out, I set<br />
my preview to Fit using the Navigator panel.<br />
I notice that the area immediately behind the<br />
large rocks is a little too blurred for my taste,<br />
so I adjust the gradient by dragging the top<br />
solid line slightly upwards.<br />
by Nicole S. Young<br />
45
STEP BY STEP WITH ONONE SOFTWARE<br />
CHAPTER 4: Lovely Landscapes<br />
Step 9<br />
Butte Creek Falls<br />
Now I’m ready to add a little more stylization<br />
to the image. I would like to enhance the<br />
texture in the focused area (on the rocks),<br />
so I add a new layer to the Filter Stack,<br />
and then go into the Tone Enhancements<br />
folder and select the Tonal Contrast filter.<br />
I don’t want the filter to affect the entire<br />
image, just the rock area, and the best way<br />
to do that is through masking. Then I can<br />
just copy and paste it from the previous<br />
layer!<br />
To do this, I click on the Lens Blur layer and<br />
go to Mask > Copy Mask. Then, I click back<br />
on the top layer and choose Mask > Paste<br />
Mask. To flip the mask areas around, I go to<br />
Mask > Invert Mask. Now the filter is applied<br />
only to the areas I want.<br />
by Nicole S. Young<br />
46
STEP BY STEP WITH ONONE SOFTWARE<br />
CHAPTER 4: Lovely Landscapes<br />
Step 10<br />
Butte Creek Falls<br />
Next, I add a new empty layer to the Filter<br />
Stack and go to the Glow folder. There I add<br />
the Angel Glow filter and reduce the Layer<br />
Opacity to 45%.<br />
This brightens up the image and gives it a<br />
very subtle glow effect.<br />
by Nicole S. Young<br />
47
STEP BY STEP WITH ONONE SOFTWARE<br />
CHAPTER 4: Lovely Landscapes<br />
Step 11<br />
Butte Creek Falls<br />
I continue by adding a new empty layer and then the Warm Highlights filter from the Sunshine folder in the<br />
Filters panel. This adds some warmth to the bright areas in the image.<br />
by Nicole S. Young<br />
48
STEP BY STEP WITH ONONE SOFTWARE<br />
CHAPTER 4: Lovely Landscapes<br />
Step 12<br />
Butte Creek Falls<br />
The overall scene is a little too warm, so I decide to cool it down a bit. To do this, I add a new empty layer to<br />
the Filter Stack, and then go into the Color Enhancer folder in the Filters panel. Then, I click on the filter called<br />
Cooler and change Layer Opacity to 25%.<br />
by Nicole S. Young<br />
49
STEP BY STEP WITH ONONE SOFTWARE<br />
CHAPTER 4: Lovely Landscapes<br />
Step 13<br />
Butte Creek Falls<br />
Lastly, I want to finish off this image with a nice vignette. I add a new empty layer to the Filter Stack, select<br />
Big Softy from the Vignette folder in the Filters panel, and then move my attention to the Filter Options<br />
panel on the bottom right of the window.<br />
By default, the vignette is created from the very middle of the image, but I want to highlight the rocks in the<br />
lower-right area of the frame. So to complete this image, I click the icon in the lower left of this panel to set<br />
the center of the vignette, and then click over the large rocks to set the vignette.<br />
by Nicole S. Young<br />
50
STEP BY STEP WITH ONONE SOFTWARE<br />
CHAPTER 4: Lovely Landscapes<br />
Step 14<br />
Butte Creek Falls<br />
I’m finished processing this image, so the last<br />
step I do is create a preset of my settings.<br />
To save this preset, I go to Preset > Save Preset,<br />
and then fill in the information in the window<br />
that pops up. When finished, I click the Create<br />
button, and my preset will now appear in the<br />
Presets panel to the left of the window.<br />
Then, I click the Save and Close button in the<br />
lower right of the window to save my image.<br />
by Nicole S. Young<br />
51
STEP BY STEP WITH ONONE SOFTWARE<br />
CHAPTER 4: Lovely Landscapes<br />
Schwabacher Landing<br />
Photographs don’t always look perfect straight out of the camera. Most<br />
of the time, they are a little “flat” and need some TLC. However, it’s not<br />
always as simple as adding contrast and vibrance. For this photo, I will do<br />
some cropping and then use Adjustable Gradients (along with a few other<br />
techniques) to make the photo really “pop.”<br />
Modules used with this image:<br />
• Perfect Browse<br />
• Perfect Layers<br />
• Perfect Effects<br />
Before<br />
After<br />
by Nicole S. Young<br />
52
STEP BY STEP WITH ONONE SOFTWARE<br />
CHAPTER 4: Lovely Landscapes<br />
Step 1<br />
Schwabacher Landing<br />
First, I open the Perfect Photo Suite into<br />
Perfect Browse. Then I navigate to the file<br />
titled nicolesy-landscape.psd and select it so<br />
that it is highlighted. I press the Spacebar<br />
to view the image a little bit larger, and then<br />
click on the Layers module up at the top of<br />
the window.<br />
In the window that pops up, I choose Edit a<br />
Copy, make sure that the Smart Photo Reeditable<br />
PSD option is checked so that I can<br />
process this photo as a Smart Photo, and<br />
then click OK.<br />
by Nicole S. Young<br />
53
STEP BY STEP WITH ONONE SOFTWARE<br />
CHAPTER 4: Lovely Landscapes<br />
Step 2<br />
Schwabacher Landing<br />
Overall, the image looks slightly crooked. And,<br />
there is a small branch hiding in the bottomleft<br />
corner that I need to remove as well. So,<br />
to take care of both of these issues, I will crop<br />
this image.<br />
I want to select the Crop tool from the toolbar<br />
on the left side of the screen, but it seems to<br />
be greyed out. I decide to click on it anyways,<br />
and a window pops up asking me if I want to<br />
simplify the layer. Because I have not made<br />
any adjustments to the image, simplifying it is<br />
no big deal, so I go ahead and click Simplify.<br />
Note: If you have already made adjustments to<br />
your image and get this pop-up window, then<br />
you may want to hit Cancel and duplicate the<br />
layer before cropping. Simplifying a Smart Layer<br />
removes the ability to re-edit your adjustments<br />
in other modules.<br />
Pro Tip: Hiding the left and right panels:<br />
• Cmd/Ctrl+Left Arrow hides the panels on the LEFT<br />
• Cmd/Ctrl+Right Arrow hides the panels on the RIGHT<br />
• Tab key hides or reveals all panels<br />
by Nicole S. Young<br />
54
STEP BY STEP WITH ONONE SOFTWARE<br />
CHAPTER 4: Lovely Landscapes<br />
Step 3<br />
Schwabacher Landing<br />
Now that the layer is simplified, I can start<br />
cropping. First, I hover the cursor just<br />
outside the crop area until it turns into a<br />
broken circle with an arrow on it.<br />
I click and rotate the image slightly to the<br />
left until it looks straight.<br />
Next, I need to crop out the small branch<br />
in the lower-left portion of the screen.<br />
To do this, I hold the Shift key down on<br />
my keyboard and move the crop in from<br />
the bottom-left corner. To balance and<br />
center the image, I do the same with the<br />
upper-right corner, too.<br />
To commit the crop, I click Apply in the<br />
top-right portion of the Preview window.<br />
by Nicole S. Young<br />
55
STEP BY STEP WITH ONONE SOFTWARE<br />
CHAPTER 4: Lovely Landscapes<br />
Step 4<br />
Schwabacher Landing<br />
I’m just about ready to continue editing this<br />
image, but before I do so there is one very<br />
important step I need to take. Remember at<br />
the beginning when I simplified the layer in<br />
order to crop it Well, now that the image is<br />
cropped, I can turn it back into a Smart Photo<br />
so that the changes I make in other modules<br />
remain editable.<br />
To do this, I go over to the image in the<br />
Layers panel, right-click the layer, and select<br />
Convert to Smart Layer. A gear icon appears<br />
inside of the layer, indicating that the layer<br />
will now be re-editable.<br />
Next, I click Effects at the top of the window<br />
to open the image into Perfect Effects.<br />
by Nicole S. Young<br />
56
STEP BY STEP WITH ONONE SOFTWARE<br />
CHAPTER 4: Lovely Landscapes<br />
Step 5<br />
Schwabacher Landing<br />
One of the things I notice about this scene is<br />
that the sky is too bright, and the water is too<br />
dark. I’m going to fix that in Perfect Effects by<br />
using Adjustable Gradients.<br />
I open the Adjustable Gradients folder in the<br />
Filters panel on the left and select Darken.<br />
The sky is immediately darkened, but I want<br />
to move the gradient so it does not include<br />
too much of the trees.<br />
To do this, I hover over the image until the<br />
gradient lines appear, and I drag the gradient<br />
so it sits just over top of the trees.<br />
by Nicole S. Young<br />
57
STEP BY STEP WITH ONONE SOFTWARE<br />
CHAPTER 4: Lovely Landscapes<br />
Step 6<br />
Schwabacher Landing<br />
Now I need to lighten up the water, so I first<br />
add a new blank layer in the Filter Stack<br />
and then click on the Lighten filter in the<br />
Adjustable Gradient folder on the left.<br />
The gradient mask is the<br />
reverse of what I need,<br />
so to change it I select<br />
Linear Top from the<br />
Preset drop-down at the<br />
top of the window.<br />
Next I drag the center of the gradient about<br />
one-third down the frame so that it does not<br />
lighten the trees too intensely.<br />
Then, I lower the Layer Opacity to 50%.<br />
by Nicole S. Young<br />
58
STEP BY STEP WITH ONONE SOFTWARE<br />
CHAPTER 4: Lovely Landscapes<br />
Step 7<br />
Schwabacher Landing<br />
I want to intensify the colors a bit, so I add<br />
a new empty layer to the Filter Stack and go<br />
to the Color Enhance folder in the Filters<br />
panel. Then, I click the<br />
Fall Enhancer filter,<br />
which adds saturation<br />
to the yellow trees<br />
and grass.<br />
This level of saturation<br />
is too intense, so I<br />
reduce the Layer<br />
Opacity down to<br />
60%. I also go into<br />
the Blending Options<br />
and increase the<br />
Protect Highlights<br />
slider to +64, which<br />
removes some of<br />
the effect from the<br />
brightest portions of<br />
the image.<br />
by Nicole S. Young<br />
59
STEP BY STEP WITH ONONE SOFTWARE<br />
CHAPTER 4: Lovely Landscapes<br />
Step 8<br />
Schwabacher Landing<br />
Now I want to increase the overall color in<br />
the photo, so I add a new empty layer to the<br />
Filter Stack and click on the Increase Color<br />
filter on the left, just a few filters down from<br />
the filter I just applied.<br />
The effect is strong, so I reduce Layer Opacity<br />
to 50%.<br />
by Nicole S. Young<br />
60
STEP BY STEP WITH ONONE SOFTWARE<br />
CHAPTER 4: Lovely Landscapes<br />
Step 9<br />
Schwabacher Landing<br />
I continue by adding a new empty layer to the<br />
Filter Stack, and then I go into the Sunshine<br />
folder in the Filters panel. I scroll down and<br />
click on the Radiance filter, which adds a very<br />
beautiful, glowing vibrance to the scene. It’s<br />
a little heavy-handed, so I lower the Layer<br />
Opacity to 50%.<br />
by Nicole S. Young<br />
61
STEP BY STEP WITH ONONE SOFTWARE<br />
CHAPTER 4: Lovely Landscapes<br />
Step 10<br />
Schwabacher Landing<br />
Next I want to warm things up a bit, so I head<br />
over to the Photo Filter folder. I add a new<br />
empty layer to the Filter Stack, and then scroll<br />
down in the Filter menu until I get to the<br />
Tobacco filter. I click on it to apply it to my<br />
image.<br />
I want to edit this filter a little bit in the<br />
Filter Options panel on the right, so I set the<br />
Strength slider to 15%<br />
to lessen the effect<br />
of the color. Then, I<br />
increase the Polarizer<br />
slider to 20% to<br />
deepen the blues in<br />
the sky and water.<br />
by Nicole S. Young<br />
62
STEP BY STEP WITH ONONE SOFTWARE<br />
CHAPTER 4: Lovely Landscapes<br />
Step 11<br />
Schwabacher Landing<br />
Now it’s time to add some punch to the image<br />
and bring out some of the texture in the trees<br />
and sky. So I add a new empty layer to the<br />
Filter Stack, and then<br />
I select Natural from<br />
the Dynamic Contrast<br />
filters folder.<br />
I then reduce the Layer<br />
Opacity to 75% to<br />
lessen the effect.<br />
by Nicole S. Young<br />
63
STEP BY STEP WITH ONONE SOFTWARE<br />
CHAPTER 4: Lovely Landscapes<br />
Step 12<br />
Schwabacher Landing<br />
I want to add a vignette, so I add a new<br />
empty layer to the Filter Stack and select<br />
the Subtle Vignette filter.<br />
The vignette darkened up the bottom<br />
portion of the scene more than I would<br />
like, so instead of reducing the effect I<br />
will move the position of the vignette. To<br />
do this, I go into the Filter Options panel.<br />
I click the icon in the<br />
lower left of this panel<br />
to set the center of the<br />
vignette, and then click<br />
over the large rocks to<br />
set the vignette.<br />
by Nicole S. Young<br />
64
STEP BY STEP WITH ONONE SOFTWARE<br />
CHAPTER 4: Lovely Landscapes<br />
Step 13<br />
Schwabacher Landing<br />
Last but not least, I’m going to save my<br />
settings as a preset!<br />
To do this, I go to Preset > Save Preset, and<br />
then fill in the information in the window that<br />
pops up. When finished, I click on the Create<br />
button, and my preset will now appear in the<br />
Presets panel to the left of the window.<br />
Then, I click the Apply button in the lower<br />
right of the window to apply these settings.<br />
by Nicole S. Young<br />
65
STEP BY STEP WITH ONONE SOFTWARE<br />
CHAPTER 4: Lovely Landscapes<br />
Step 14<br />
Schwabacher Landing<br />
The image reopens in Perfect Layers, so I click<br />
the Save button on the bottom right to save<br />
my image.<br />
by Nicole S. Young<br />
66
CHAPTER 5<br />
Will it Blend<br />
Blending Different Exposures<br />
of the Same Scene<br />
When photographing a landscape, I am<br />
oftentimes bracketing my exposures to get three or<br />
more images of the same scene at different levels<br />
of brightness. Sometimes I do this to process the<br />
image as an HDR photograph (High Dynamic Range).<br />
However, in some cases, I find that it looks better, and<br />
more realistic, to blend the images together by hand.<br />
In this chapter, I will show you the techniques you<br />
can use to blend photos together using the gradient<br />
and masking tools inside Perfect Layers.
STEP BY STEP WITH ONONE SOFTWARE<br />
CHAPTER 5: Will it Blend<br />
Barn at Sunrise<br />
When I photographed this scene in Grand Teton National Park at sunrise, the light was gorgeous.<br />
The mountains turned pink with a few puffy clouds hanging in the air like cotton candy, and<br />
then the light hit the barn and made it glow. The problem is, these two things did not happen<br />
at the same time. So, by using the power of gradient masking, I will show you how to combine<br />
these two scenes together, making them seamlessly integrated for the final photograph.<br />
Modules used with this image:<br />
• Perfect Browse<br />
• Perfect Layers<br />
• Perfect Effects<br />
Before<br />
After<br />
by Nicole S. Young<br />
68
STEP BY STEP WITH ONONE SOFTWARE<br />
CHAPTER 5: Will it Blend<br />
Step 1<br />
Barn at Sunrise<br />
I start inside Perfect Browse and highlight<br />
the two barn images, nicolesy-barn-1.psd<br />
and nicolesy-barn-2.psd. (Hold the Cmd/Ctrl<br />
key and click on each image to highlight<br />
them simultaneously.) Then, I right-click one<br />
of the images and choose Edit in Perfect<br />
Layers.<br />
A window pops up, asking how I would like<br />
to edit these files. Because I want to add<br />
two images to one document as layers, I<br />
select Add as a layer and click OK.<br />
by Nicole S. Young<br />
69
STEP BY STEP WITH ONONE SOFTWARE<br />
CHAPTER 5: Will it Blend<br />
Step 2<br />
Barn at Sunrise<br />
The two images I selected are brought in as<br />
separate layers, but I would like to reverse<br />
the order of these layers. To do this, I click<br />
on the bottom layer and drag it above the<br />
top layer. Then I release the mouse, and the<br />
layer I dragged now appears as the new<br />
top layer.<br />
by Nicole S. Young<br />
70
STEP BY STEP WITH ONONE SOFTWARE<br />
CHAPTER 5: Will it Blend<br />
Step 3<br />
Barn at Sunrise<br />
Next I want to blend the two images together<br />
so that the colorful mountains and sky in the<br />
bottom layer blend with the sunlit barn in<br />
the top layer.<br />
To do this, I select the Masking Bug tool<br />
from the toolbar and check to make sure that<br />
Linear Top is selected as the Preset at the<br />
top of the window. Then, I click in the middle<br />
of the image to add the gradient.<br />
Next, I drag the top dashed line upwards to<br />
increase the feather and soften the transition<br />
of the gradient.<br />
by Nicole S. Young<br />
71
STEP BY STEP WITH ONONE SOFTWARE<br />
CHAPTER 5: Will it Blend<br />
Step 4<br />
Barn at Sunrise<br />
Now I need to go in and reveal some of the<br />
barn from the top layer that was covered<br />
up by the gradient. To do this, I select the<br />
Masking Brush tool, and at the top of the<br />
window I adjust the brush’s settings. I set<br />
Mode to Paint In, Size to 80, Feather to 50,<br />
Opacity to 100%, and then place a check in<br />
the Perfect Brush box.<br />
I also set Mask View Mode to Mask-Red<br />
so that I can see my changes (in the menu,<br />
choose View > Mask View Mode > Mask-Red).<br />
Then, I carefully brush along the edges of the<br />
barn to reveal the layer and continue painting<br />
until the tops and side edges of the barn are<br />
all visible.<br />
by Nicole S. Young<br />
72
STEP BY STEP WITH ONONE SOFTWARE<br />
CHAPTER 5: Will it Blend<br />
Step 5<br />
Barn at Sunrise<br />
Now I need to paint in the rest of the barn. I<br />
first un-check the Perfect Brush box at the<br />
top, and then I paint in the top half of the<br />
barn, being careful to not go past the edges.<br />
by Nicole S. Young<br />
73
STEP BY STEP WITH ONONE SOFTWARE<br />
CHAPTER 5: Will it Blend<br />
Step 6<br />
Barn at Sunrise<br />
Then, I set Mask View Mode back to All<br />
Layers so that I can preview the image<br />
without the mask overlay.<br />
I still need to paint the lower half of the barn<br />
back in to the scene. I change the brush’s<br />
Size to 300, reduce the Opacity to 40%,<br />
and then continue painting over the image to<br />
reveal the sunlit barn below.<br />
by Nicole S. Young<br />
74
STEP BY STEP WITH ONONE SOFTWARE<br />
CHAPTER 5: Will it Blend<br />
Step 7<br />
Barn at Sunrise<br />
I want to bring back some of the color in the<br />
trees, so I will continue to use the Masking<br />
Brush for this. I set the brush’s Size to 175,<br />
Feather to 100, and Opacity to 10%, and<br />
zoom in to get a closer look.<br />
Then, I make several brush strokes over the<br />
trees in the image on both sides of the barn<br />
to reveal the layer and make them brighter.<br />
by Nicole S. Young<br />
75
STEP BY STEP WITH ONONE SOFTWARE<br />
CHAPTER 5: Will it Blend<br />
Step 8<br />
Barn at Sunrise<br />
Now I would like to brighten up the grass in<br />
the foreground portion of the scene. First, I<br />
make sure that the top layer is still selected<br />
in the Layers panel, and then I go to Layer ><br />
New Stamped Layer in the menu. This creates<br />
a brand-new layer at the top of the Layers<br />
panel that combines all of the visible layers<br />
below it.<br />
by Nicole S. Young<br />
76
STEP BY STEP WITH ONONE SOFTWARE<br />
CHAPTER 5: Will it Blend<br />
Step 9<br />
Barn at Sunrise<br />
I need to change the blending mode of this<br />
new layer. So first, I click on the top layer to<br />
activate it and then change the Blending to<br />
Linear Dodge (Add).<br />
by Nicole S. Young<br />
77
STEP BY STEP WITH ONONE SOFTWARE<br />
CHAPTER 5: Will it Blend<br />
Step 10<br />
Barn at Sunrise<br />
The blending mode brightened up the entire<br />
scene, but I want to brighten up only the<br />
grass in the foreground. So I am going to use<br />
masking to blend the bright portion of the<br />
grass with the rest of the photograph.<br />
First, I select the Masking Brush from the<br />
toolbar. Then I click the Invert button on the<br />
top right of the Preview window. This hides<br />
the layer with a black mask (you can see the<br />
change in the Layers panel).<br />
Then, I set the brush Mode to Paint In, Size<br />
to 900, Feather to 100, and Opacity to<br />
10%, and begin painting over the grass in<br />
the foreground. I continue painting until the<br />
grass is lightened and blended well with the<br />
rest of the scene.<br />
by Nicole S. Young<br />
78
STEP BY STEP WITH ONONE SOFTWARE<br />
CHAPTER 5: Will it Blend<br />
Step 11<br />
Barn at Sunrise<br />
I’m almost ready to continue editing this<br />
photo in a different module, so I prepare the<br />
layer by going to Layer > New Stamped Layer<br />
in the menu to create a merged layer of the<br />
entire document.<br />
I notice that there is a person peeking out<br />
of the right side of the frame, so before I<br />
move on I’m going to do a quick crop of the<br />
image. To do this, I select the Crop tool from<br />
the toolbar and set the preset at the top to<br />
Original Ratio. Then I drag the bottom-right<br />
corner in to crop out the person and tripod.<br />
When I finish, I click Apply at the top right.<br />
Pro Tip: If a window pops up informing you that an action will<br />
simplify a mask, this means that if you have used Masking Bugs<br />
then you will no longer be able to manipulate the gradient (the<br />
mask will be flattened). It will not affect your layer or your mask,<br />
so it’s safe to do, assuming you no longer need to change anything<br />
with your gradient.<br />
by Nicole S. Young<br />
79
STEP BY STEP WITH ONONE SOFTWARE<br />
CHAPTER 5: Will it Blend<br />
Step 12<br />
Barn at Sunrise<br />
I’m ready to bring this photo into Perfect Effects,<br />
but first I need to make sure that it is a Smart<br />
Layer. To do this, I right-click the top layer and<br />
select Convert to Smart Layer. I know that the<br />
layer is a Smart Layer when I see the gear icon<br />
to the right of the thumbnail.<br />
Then, I click Effects at the top of the screen to<br />
open the image into Perfect Effects.<br />
by Nicole S. Young<br />
80
STEP BY STEP WITH ONONE SOFTWARE<br />
CHAPTER 5: Will it Blend<br />
Step 13<br />
Barn at Sunrise<br />
The first thing I want to do with this image<br />
in Perfect Effects is to enhance the tones<br />
by adding contrast and brightness. To get<br />
started, I select the Midtones Lighter<br />
filter from the Tone Enhancer folder. This<br />
does a nice job of boosing the brightness<br />
and contrast in the image.<br />
by Nicole S. Young<br />
81
STEP BY STEP WITH ONONE SOFTWARE<br />
CHAPTER 5: Will it Blend<br />
Step 14<br />
Barn at Sunrise<br />
Next, I add a new empty layer in the Filter<br />
Stack to prepare for the next filter I’m going<br />
to apply. I would like to darken the sky just a<br />
little bit, so I go into the Adjustable Gradient<br />
folder and select the Darken filter.<br />
The default gradient that is applied is a bit too<br />
harsh, so I soften the feather by pulling the<br />
top dashed line upwards so that it sits just<br />
at the top part of the barn. Then, I move the<br />
center of the gradient so that it sits directly<br />
over the top of the barn.<br />
Lastly, I reduce the Layer Opacity in the Filter<br />
Stack to 42%.<br />
by Nicole S. Young<br />
82
STEP BY STEP WITH ONONE SOFTWARE<br />
CHAPTER 5: Will it Blend<br />
Step 15<br />
Barn at Sunrise<br />
I add an empty layer to the Filter Stack and<br />
head over to the Color Enhancer folder in the<br />
Filters panel to enhance the overall color. I<br />
select the Fall Enhancer filter, which deepens<br />
the warm tones in the scene. The default<br />
application is quite intense, so I reduce the<br />
Layer Opacity to 25% to make the effect a<br />
bit more subtle.<br />
by Nicole S. Young<br />
83
STEP BY STEP WITH ONONE SOFTWARE<br />
CHAPTER 5: Will it Blend<br />
Step 16<br />
Barn at Sunrise<br />
I want to add some more color enhancements,<br />
so I add a new empty layer to the Filter Stack<br />
and select the Green Enhancer filter from<br />
the Color Enhancer folder. I really like the<br />
effect that this filter adds to the touches of<br />
green throughout the grass on the ground.<br />
by Nicole S. Young<br />
84
STEP BY STEP WITH ONONE SOFTWARE<br />
CHAPTER 5: Will it Blend<br />
Step 17<br />
Barn at Sunrise<br />
I still think that this photo needs to be a<br />
little bit brighter, but I haven’t found any<br />
filters that will work for the look I want.<br />
Instead I will add the brightness using the<br />
Filter Options panel.<br />
First, I add a new empty layer to the Filter<br />
Stack. Then, I go down to the Filter Options<br />
panel and select Tone Enhancer from the<br />
drop-down.<br />
At the bottom of the panel is a Tone<br />
Curve, so I click on the curve and create a<br />
very subtle S-shaped curve. This adds both<br />
brightness and contrast to the image.<br />
When I’m finished with the curve, I reduce<br />
the overall Layer Opacity to 49% to soften<br />
the effect.<br />
by Nicole S. Young<br />
85
STEP BY STEP WITH ONONE SOFTWARE<br />
CHAPTER 5: Will it Blend<br />
Step 18<br />
Barn at Sunrise<br />
I would like to add some “crispness” to this<br />
image, so I add a new empty layer and then<br />
go to the Dynamic Contrast folder and select<br />
the Natural filter. Then, I reduce the Layer<br />
Opacity to 67% to reduce the effect.<br />
by Nicole S. Young<br />
86
STEP BY STEP WITH ONONE SOFTWARE<br />
CHAPTER 5: Will it Blend<br />
Step 19<br />
Barn at Sunrise<br />
Last but not least, I would like to finish this<br />
image by adding a vignette. I first add a new<br />
empty layer, and then I head over to the<br />
Vignette folder in the Filters panel.<br />
I click on the Center Spot filter, and then<br />
go over to the Filter Options panel on the<br />
bottom right. By default, the vignette is<br />
created from the very middle of the image,<br />
but I want to reposition it a little bit lower in<br />
the frame. So to complete this image, I click<br />
on the icon in the lower left of this panel to<br />
set the center of the vignette, and then click<br />
in the grass to set it.<br />
by Nicole S. Young<br />
87
STEP BY STEP WITH ONONE SOFTWARE<br />
CHAPTER 5: Will it Blend<br />
Step 20<br />
Barn at Sunrise<br />
I’m finished processing this image, so the<br />
last step is to save the preset and apply my<br />
settings. First, I go to Preset > Save Preset<br />
in the menu and give my preset a name,<br />
Category, as well as fill in the Creator and<br />
Description settings. When I’m finished, I<br />
click the Create button.<br />
I click Apply in the bottom right of the<br />
window, and the image opens into Perfect<br />
Layers. Then, I save the image and close<br />
the document.<br />
by Nicole S. Young<br />
88
STEP BY STEP WITH ONONE SOFTWARE<br />
CHAPTER 5: Will it Blend<br />
Trillium Lake<br />
Scenes with a high dynamic range, such as sunrise<br />
and sunsets, can be a challenge to photograph. How<br />
do you get both the bright areas and the dark areas<br />
exposed properly in one shot You don’t. Instead,<br />
you photograph two (or more) exposures of the same<br />
scene and blend them together using post-processing<br />
software. Let me show you how it works with this<br />
image of Trillium Lake and Mount Hood.<br />
Modules used with this image:<br />
• Perfect Browse<br />
• Perfect Layers<br />
• Perfect Effects<br />
Before<br />
After<br />
by Nicole S. Young<br />
89
STEP BY STEP WITH ONONE SOFTWARE<br />
CHAPTER 5: Will it Blend<br />
Step 1<br />
Trillium Lake<br />
I start inside of Perfect Browse and locate my<br />
two files: nicolesy-trillium-1.psd and nicolesytrillium-2.psd.<br />
I highlight the files and then<br />
click the Layers module at the top of the<br />
screen.<br />
In the window that pops up, I select Add as a<br />
Layer so that my images open up together in<br />
one document. Then I click OK on the bottom<br />
right of the window.<br />
by Nicole S. Young<br />
90
STEP BY STEP WITH ONONE SOFTWARE<br />
CHAPTER 5: Will it Blend<br />
Step 2<br />
Trillium Lake<br />
My images open inside of Perfect Layers with the<br />
brighter one on top. I want to blend the brighter<br />
image’s foreground with the darker image’s sky.<br />
To get started, I first click the top layer to activate<br />
it. Then, I select the Gradient tool from the toolbar<br />
and make sure that Preset is set to Linear Top<br />
and Shape is set to Gradient in the Options bar<br />
at the top. Then I click the base of the tree line to<br />
add the gradient.<br />
by Nicole S. Young<br />
91
STEP BY STEP WITH ONONE SOFTWARE<br />
CHAPTER 5: Will it Blend<br />
Step 3<br />
Trillium Lake<br />
I like what the gradient did to the sky, but I don’t<br />
like how it darkened the trees. To fix that I’m going<br />
to first duplicate the top layer by clicking on the<br />
Duplicate layer button beneath the Layers panel.<br />
Then, with the Gradient tool still active, I click on<br />
the Reset button at the top of the window to reset<br />
the layer mask.<br />
Now I need to add a new gradient to the scene.<br />
This time, however, I’m going to change the Shape<br />
setting to Reflected Gradient, which will add a<br />
rectangular, feathered mask to my scene. I click<br />
the base of the tree line (where the trees meet<br />
the water) to apply the mask. This adds an initial<br />
reflected gradient, which I will adjust further in<br />
the next step.<br />
by Nicole S. Young<br />
92
STEP BY STEP WITH ONONE SOFTWARE<br />
CHAPTER 5: Will it Blend<br />
Step 4<br />
Trillium Lake<br />
I want to adjust the gradient so that it is affecting<br />
only the tree sections of the image, so I start out<br />
by moving both of the solid lines towards the<br />
center of the gradient to make the masked area<br />
very narrow.<br />
Once the solid lines are moved, I then move each<br />
of the dashed lines of the gradient so that they<br />
rest above the mountain at the top and just<br />
beneath the reflection of the mountain. This<br />
softens the feather of the mask to help blend it<br />
better with the other layers.<br />
by Nicole S. Young<br />
93
STEP BY STEP WITH ONONE SOFTWARE<br />
CHAPTER 5: Will it Blend<br />
Step 5<br />
Trillium Lake<br />
I’m not quite finished with this gradient, the<br />
mask is the reverse of what I want. I need to<br />
invert it: I choose Mask > Invert Mask from the<br />
menu. The mask is inverted so the brighter<br />
portion of the top layer shows through to the<br />
tree area of my scene.<br />
Note: After inverting the gradient, you can no<br />
longer edit the Masking Bug.<br />
by Nicole S. Young<br />
94
STEP BY STEP WITH ONONE SOFTWARE<br />
CHAPTER 5: Will it Blend<br />
Step 6<br />
Trillium Lake<br />
The overall scene is a little bit too dark for my<br />
taste, so I would like to brighten it up before<br />
stylizing it any further. To do this I first create<br />
a merged layer of the entire document by<br />
selecting Layer > New Stamped Layer.<br />
Then, I click on the new layer in the Layers<br />
panel, change the Blending to Linear Dodge<br />
(Add), and reduce the Layer Opacity to 25%.<br />
by Nicole S. Young<br />
95
STEP BY STEP WITH ONONE SOFTWARE<br />
CHAPTER 5: Will it Blend<br />
Step 7<br />
Trillium Lake<br />
Now I’m just about ready to bring this photo<br />
into Perfect Effects. But first I need to create<br />
another merged layer of the entire document<br />
so that I am editing a composite of all of the<br />
layers in this document. So, just like in step 6,<br />
I go to Layer > New Stamped Layer.<br />
Next, I right-click the top layer and select<br />
Convert to Smart Layer in the pop-up to<br />
retain all edits I make to this layer.<br />
I select the new layer to activate it and click<br />
on Effects at the top of the screen to open<br />
the image into Perfect Effects.<br />
by Nicole S. Young<br />
96
STEP BY STEP WITH ONONE SOFTWARE<br />
CHAPTER 5: Will it Blend<br />
Step 8<br />
Trillium Lake<br />
I want to brighten the image up, so I go down<br />
to the Filter Options panel and choose Tone<br />
Enhancer from the drop-down. A preset is<br />
automatically selected, so I make a few changes<br />
by setting the following:<br />
• Brightness: 28<br />
• Contrast: 28<br />
• Shadows: 30<br />
• Highlights: 0<br />
• Compression: 9<br />
• Whites: 46<br />
• Blacks: 5<br />
Then, I select the Masking Bug from the<br />
toolbar, set Shape to Reflected Gradient, and<br />
click in the middle of the image. This prevents<br />
the adjustment from overexposing the water to<br />
balance the tones in the overall scene.<br />
by Nicole S. Young<br />
97
STEP BY STEP WITH ONONE SOFTWARE<br />
CHAPTER 5: Will it Blend<br />
Step 9<br />
Trillium Lake<br />
I add a new blank layer to the Filter Stack and<br />
go into the Photo Filter folder in the Filters<br />
panel. I want to warm up the scene, so I select<br />
Tobacco near the bottom of the list.<br />
Then, I reduce the Layer Opacity to 80% to<br />
make the effect a little less intense.<br />
by Nicole S. Young<br />
98
STEP BY STEP WITH ONONE SOFTWARE<br />
CHAPTER 5: Will it Blend<br />
Step 10<br />
Trillium Lake<br />
I continue warming up the scene by adding a<br />
new blank layer to the Layers panel and then<br />
selecting the Warm Highlights filter from the<br />
Sunshine folder. This adds a subtle brightness<br />
and warmth to the bright portions of the scene.<br />
by Nicole S. Young<br />
99
STEP BY STEP WITH ONONE SOFTWARE<br />
CHAPTER 5: Will it Blend<br />
Step 11<br />
Trillium Lake<br />
I would like to increase the contrast to the<br />
image. First, I add a new blank layer and select<br />
the Normal filter from the Blur folder.<br />
Then, I change the Blending of this layer to<br />
Soft Light.<br />
I need to reduce the intensity of this effect,<br />
so I set the Layer Opacity to 40%.<br />
by Nicole S. Young<br />
100
STEP BY STEP WITH ONONE SOFTWARE<br />
CHAPTER 5: Will it Blend<br />
Step 12<br />
Trillium Lake<br />
When I preview this image using the \ key, I<br />
notice that I lost some precious detail in the<br />
sky to some of my edits. I need to backtrack<br />
and use gradients to mask the effects out of<br />
the sky.<br />
First, I select the Sunshine filter from the<br />
Filter Stack. Then, I click on the Masking Bug<br />
in the toolbar, make sure that the Preset is<br />
set to Linear Top, and click in the baseline of<br />
the trees to mask out the sky and mountain.<br />
I repeat this step on the Blur layer so that the<br />
details in the sky start to reappear.<br />
by Nicole S. Young<br />
101
STEP BY STEP WITH ONONE SOFTWARE<br />
CHAPTER 5: Will it Blend<br />
Step 13<br />
Trillium Lake<br />
Next I am going to add some crispness with<br />
the Tonal Contrast filter. I add a new empty<br />
layer to the Filter Stack, and then I select<br />
Tonal Contrast from the Tone Enhancer<br />
folder in the Filters panel.<br />
The effect is too strong, so I reduce the Layer<br />
Opacity to 25%.<br />
by Nicole S. Young<br />
102
STEP BY STEP WITH ONONE SOFTWARE<br />
CHAPTER 5: Will it Blend<br />
Step 14<br />
Trillium Lake<br />
Last but not least, I’m going to add a vignette<br />
to the image to finish it off. I add a new empty<br />
layer and then head over to the Vignette<br />
folder where I select the Subtle preset.<br />
by Nicole S. Young<br />
103
STEP BY STEP WITH ONONE SOFTWARE<br />
CHAPTER 5: Will it Blend<br />
Step 15<br />
Trillium Lake<br />
I’m finished with my image inside of Perfect<br />
Effects, but first I need to save the preset.<br />
I choose Preset > Save Preset and then fill in<br />
the information in the window that pops up.<br />
When I’m finished, I click Create.<br />
I click Apply to apply my settings in Perfect<br />
Effects, and the image opens up back into<br />
Perfect Layers.<br />
by Nicole S. Young<br />
104
STEP BY STEP WITH ONONE SOFTWARE<br />
CHAPTER 5: Will it Blend<br />
Step 16<br />
Trillium Lake<br />
I notice a couple of spots in the sky that I<br />
would like to remove, so I first click the 100<br />
button in the Navigator panel to zoom in to<br />
the area at 100% and see them more closely.<br />
I would like to use the Retouch Brush from<br />
the toolbar, but it is greyed out because the<br />
layer I have selected is a Smart Layer.<br />
To make this work (and still retain my edits<br />
from the Smart Layer), I first duplicate the<br />
layer by using the keyboard shortcut Cmd/<br />
Ctrl+J. Then I right-click this new layer and<br />
choose Simplify Smart Layer from the menu<br />
drop-down.<br />
by Nicole S. Young<br />
105
STEP BY STEP WITH ONONE SOFTWARE<br />
CHAPTER 5: Will it Blend<br />
Step 17<br />
Trillium Lake<br />
Now that my layer is simplified, I select the<br />
Retouch Brush from the toolbar. Then I brush<br />
over the spots in the sky to remove them.<br />
I continue moving through the sky to look for<br />
more spots to remove, and when I am finished<br />
I save and close my image.<br />
by Nicole S. Young<br />
106
CHAPTER 6<br />
Goodbye, Blue Sky!<br />
Using Masks to Replace<br />
Skies and Backgrounds<br />
When you are out with your camera<br />
photographing landscapes, nothing can ruin the<br />
occasion more than a boring sky. The good news<br />
is that oftentimes it’s easy to swap out the boring<br />
sky with clouds or color. Or maybe you just need<br />
to remove a background from a portrait or product<br />
shot. Either way, onOne has you covered. The newly<br />
integrated masking features inside of Perfect Layers<br />
make it easy to remove backgrounds and skies with<br />
just a few simple steps.
STEP BY STEP WITH ONONE SOFTWARE<br />
CHAPTER 6: Goodbye, Blue Sky!<br />
The Skateboarder<br />
Replacing backgrounds is not limited to just blue skies!<br />
In fact, one of the most common uses of masking is to<br />
take a studio photo, such as this image of a skateboarder,<br />
and remove or replace the white background. For this<br />
photo I will replace the backdrop with a blue sky using<br />
the newly integrated masking tools in Perfect Layers,<br />
and then add stylization in Perfect Effects.<br />
Modules used with this image:<br />
• Perfect Browse<br />
• Perfect Layers<br />
• Perfect Effects<br />
Before<br />
After<br />
by Nicole S. Young<br />
108
STEP BY STEP WITH ONONE SOFTWARE<br />
CHAPTER 6: Goodbye, Blue Sky!<br />
Step 1<br />
The Skateboarder<br />
The first step is to locate the skateboard<br />
file I want to work on. I click the nicolesyskateboarder.psd<br />
file to highlight it and then<br />
click Layers at the top to open the file into<br />
Perfect Layers.<br />
In the window that pops up, I select Add as a<br />
Layer and then click OK.<br />
by Nicole S. Young<br />
109
STEP BY STEP WITH ONONE SOFTWARE<br />
CHAPTER 6: Goodbye, Blue Sky!<br />
Step 2<br />
The Skateboarder<br />
Inside Perfect Layers, I make sure that I can see<br />
the sidebar on the left. (If you do not see it, use<br />
the keyboard shortcut Cmd/Ctrl+Left Arrow to<br />
reveal it.) Then, I navigate to a folder containing<br />
some of my sky images and double-click nicolesysky-5.psd.<br />
A window pops up asking how I would like to add<br />
this file. I select Add as a Layer and click OK.<br />
by Nicole S. Young<br />
110
STEP BY STEP WITH ONONE SOFTWARE<br />
CHAPTER 6: Goodbye, Blue Sky!<br />
Step 3<br />
The Skateboarder<br />
I need to reverse the order of the layers in the<br />
Layers panel. So I click on the bottom layer and<br />
drag it to the top. Now my skateboarder is the<br />
top layer, and the sky is on the bottom layer.<br />
Then, I use the keyboard shortcut Cmd/Ctrl+Left<br />
Arrow to hide the left panel.<br />
by Nicole S. Young<br />
111
STEP BY STEP WITH ONONE SOFTWARE<br />
CHAPTER 6: Goodbye, Blue Sky!<br />
Step 4<br />
The Skateboarder<br />
It’s time to start masking! From the toolbar,<br />
I select the Quick Mask tool and then paint<br />
the brush along the white portion of the<br />
image. This hides most of the white, but it<br />
still needs some touch-up.<br />
by Nicole S. Young<br />
112
STEP BY STEP WITH ONONE SOFTWARE<br />
CHAPTER 6: Goodbye, Blue Sky!<br />
Step 5<br />
The Skateboarder<br />
It looks like a big chunk of white is still showing<br />
in the bottom-right corner, so I continue<br />
with the Quick Mask tool and paint over the<br />
white area to the right of his foot. The rest<br />
of the big white areas disappear, including a<br />
section by his arm on the right.<br />
by Nicole S. Young<br />
113
STEP BY STEP WITH ONONE SOFTWARE<br />
CHAPTER 6: Goodbye, Blue Sky!<br />
Step 6<br />
The Skateboarder<br />
There is still a border of white around most<br />
of the skateboarder, and I will remove this<br />
using the Refine Brush. I select the Refine<br />
Brush from the toolbar, set the brush’s Size<br />
to 80, and then zoom in to 100% using the<br />
Navigator panel.<br />
Next, I start brushing along the edge of the<br />
skateboarder using short brush strokes. I<br />
continue with the Refine Brush all around<br />
the skateboarder until the large white chunks<br />
on the border have disappeared.<br />
by Nicole S. Young<br />
114
STEP BY STEP WITH ONONE SOFTWARE<br />
CHAPTER 6: Goodbye, Blue Sky!<br />
Step 7<br />
The Skateboarder<br />
There is still a subtle white border around the<br />
skateboarder, and to fix this I’m going to use one<br />
of my favorite masking tools: the Chisel Mask<br />
tool. This tool “chisels away” at the edge of the<br />
mask only a few pixels at a time, so it’s a great<br />
way to really refine and perfect your masks.<br />
I select the Chisel Mask tool from the toolbar,<br />
set the Size to 100, and then brush along the<br />
edge of the skateboarder until I can no longer<br />
see the white background peeking through.<br />
When I’m finished, I click the Fit button in the<br />
Navigator panel to view the entire image in the<br />
window.<br />
by Nicole S. Young<br />
115
STEP BY STEP WITH ONONE SOFTWARE<br />
CHAPTER 6: Goodbye, Blue Sky!<br />
Step 8<br />
The Skateboarder<br />
Next, I select the Transform tool at the top of<br />
the toolbar. I want to resize the skateboarder to<br />
be a little bit smaller in the frame, so I hold the<br />
Opt/Alt and the Shift keys and then drag from<br />
one of the corners of the image. This resizes the<br />
layer proportionally.<br />
I position the skateboarder so that he is in the<br />
middle of the frame, and when I am finished I<br />
click Apply at the top of the window.<br />
by Nicole S. Young<br />
116
STEP BY STEP WITH ONONE SOFTWARE<br />
CHAPTER 6: Goodbye, Blue Sky!<br />
Step 9<br />
The Skateboarder<br />
Now I am ready to move on to stylizing this<br />
photo. To prepare the image, I first choose<br />
Layer > New Stamped Layer, which creates a<br />
new merged layer of the entire document.<br />
Then, I right-click on the top layer and select<br />
Convert to Smart Layer. I save the file, and<br />
after it is finished saving I click Effects at the<br />
top to open the image into Perfect Effects.<br />
by Nicole S. Young<br />
117
STEP BY STEP WITH ONONE SOFTWARE<br />
CHAPTER 6: Goodbye, Blue Sky!<br />
Step 10<br />
The Skateboarder<br />
First I want to brighten up the image, so<br />
I head over to the Sunshine folder in the<br />
Filters panel (if you don’t see the sidebar, use<br />
the shortcut Cmd/Ctrl + Left Arrow). Then, I<br />
select Natural from the list. This adds a nice<br />
subtle burst of brightness.<br />
by Nicole S. Young<br />
118
STEP BY STEP WITH ONONE SOFTWARE<br />
CHAPTER 6: Goodbye, Blue Sky!<br />
Step 11<br />
The Skateboarder<br />
I add a new empty layer to the Filter Stack, and<br />
the next filter I select is the High Key Warm<br />
filter from the Bleach Bypass folder to make<br />
the image bold and contrasty with a touch of<br />
color.<br />
The default setting is too harsh, so I reduce the<br />
Layer Opacity to 30% to soften the effect.<br />
by Nicole S. Young<br />
119
STEP BY STEP WITH ONONE SOFTWARE<br />
CHAPTER 6: Goodbye, Blue Sky!<br />
Step 12<br />
The Skateboarder<br />
I add another new empty layer to the Filter Stack<br />
and then go into the Color Enhancer folder. I<br />
select the Auto Color filter, which adds a very<br />
nice warmth across the entire scene.<br />
by Nicole S. Young<br />
120
STEP BY STEP WITH ONONE SOFTWARE<br />
CHAPTER 6: Goodbye, Blue Sky!<br />
Step 13<br />
The Skateboarder<br />
I want to warm up the scene even more, so<br />
after adding a new empty layer, I select the<br />
Tobacco filter from the Photo Filter folder.<br />
The effect is a bit strong, so I reduce the<br />
Layer Opacity to 80%.<br />
by Nicole S. Young<br />
121
STEP BY STEP WITH ONONE SOFTWARE<br />
CHAPTER 6: Goodbye, Blue Sky!<br />
Step 14<br />
The Skateboarder<br />
I add a new empty layer to the Filter Stack,<br />
go into the Black & White folder, and then<br />
select the Roadie filter from the list.<br />
I don’t want my image to be in black and<br />
white, so I change the Blending setting to<br />
Luminosity. This retains the tone values of<br />
the filter but prevents the color in the filter<br />
from affecting the image.<br />
The effect is very intense, so I change the<br />
Layer Opacity to 35% to soften it.<br />
by Nicole S. Young<br />
122
STEP BY STEP WITH ONONE SOFTWARE<br />
CHAPTER 6: Goodbye, Blue Sky!<br />
Step 15<br />
The Skateboarder<br />
I’m finished with my image inside of Perfect<br />
Effects, but first I need to save the preset. I go to<br />
Preset > Save Preset and then fill in the information<br />
in the window that pops up. When I’m finished, I<br />
click Create.<br />
I click Apply to apply my settings in Perfect<br />
Effects, and the image opens up back into Perfect<br />
Layers where I save and close the file.<br />
by Nicole S. Young<br />
123
STEP BY STEP WITH ONONE SOFTWARE<br />
CHAPTER 6: Goodbye, Blue Sky!<br />
The Juniper Tree<br />
While photographing in Canyonlands National Park, I stumbled across<br />
this beautiful and photogenic juniper tree at Dead Horse Point. The only<br />
problem was that there was not one cloud in the sky! In this section, I will<br />
show you how to remove a boring blue sky and replace it with a sky filled<br />
with clouds.<br />
Modules used with this image:<br />
• Perfect Browse<br />
• Perfect Layers<br />
• Perfect Effects<br />
Before<br />
After<br />
by Nicole S. Young<br />
124
STEP BY STEP WITH ONONE SOFTWARE<br />
CHAPTER 6: Goodbye, Blue Sky!<br />
Step 1<br />
The Juniper Tree<br />
I start inside of Perfect Browse and<br />
highlight the nicolesy-juniper.psd file.<br />
Then, I click on Layers at the top to open<br />
the file in Perfect Layers.<br />
A window pops up asking me how to edit<br />
the file. I select Add as a Layer and then<br />
click OK.<br />
by Nicole S. Young<br />
125
STEP BY STEP WITH ONONE SOFTWARE<br />
CHAPTER 6: Goodbye, Blue Sky!<br />
Step 2<br />
The Juniper Tree<br />
The first thing I need to do in Perfect Layers<br />
is add a sky layer to the document. In the<br />
Files panel on the left, I navigate to the<br />
nicolesy-sky-4.psd file. I double-click the<br />
file, and a window pops up asking how I<br />
would like to edit the file. I select Add as a<br />
Layer and then click OK.<br />
by Nicole S. Young<br />
126
STEP BY STEP WITH ONONE SOFTWARE<br />
CHAPTER 6: Goodbye, Blue Sky!<br />
Step 3<br />
The Juniper Tree<br />
The sky image is added to the top of the<br />
Layers panel, but I need it to be at the bottom<br />
(below the juniper tree).<br />
To do this, I click and drag the bottom layer<br />
to bring it to the top. The sky image is now at<br />
the bottom of the Layers panel.<br />
I also use the keyboard shortcut Cmd/<br />
Ctrl+Left Arrow to hide the left sidebar,<br />
giving me more space to work with my image.<br />
by Nicole S. Young<br />
127
STEP BY STEP WITH ONONE SOFTWARE<br />
CHAPTER 6: Goodbye, Blue Sky!<br />
Step 4<br />
The Juniper Tree<br />
I’m ready to start masking, so I select the<br />
Quick Mask tool from the toolbar. I paint<br />
around the image, careful to keep the brush<br />
area touching only the sky.<br />
The Quick Mask did a great job of getting<br />
out most of the sky, but I need to refine the<br />
edges quite a bit.<br />
by Nicole S. Young<br />
128
STEP BY STEP WITH ONONE SOFTWARE<br />
CHAPTER 6: Goodbye, Blue Sky!<br />
Step 5<br />
The Juniper Tree<br />
To refine the mask, I select the Masking<br />
Brush from the toolbar, place a check in<br />
the Perfect Brush box at the top, and set<br />
the brush’s Size to 500.<br />
While holding down the Cmd/Ctrl key, I<br />
place the cursor over a blue portion of the<br />
blue sky surrounding the tree. Still holding<br />
the Cmd/Ctrl key on the keyboard, I paint<br />
all around the tree to remove as much of<br />
the unwanted blue sky as possible.<br />
I repeat this step in other areas of the image<br />
(while holding the Cmd/Ctrl key) until the<br />
blue sky is gone.<br />
Pro Tip: Holding the Cmd/Ctrl key while using the<br />
Perfect Brush prevents the brush from re-sampling<br />
other portions of the image while painting. In other<br />
words, in this image it will sample and mask out<br />
only the color you originally clicked on, regardless<br />
of where you paint.<br />
by Nicole S. Young<br />
129
STEP BY STEP WITH ONONE SOFTWARE<br />
CHAPTER 6: Goodbye, Blue Sky!<br />
Step 6<br />
The Juniper Tree<br />
Next, I zoom in to 50% using the Navigator<br />
panel. I can see that there is still a halo of<br />
the previous blue sky along the edges of the<br />
mask in the tree that needs to be removed.<br />
I select the Refine Brush, set the Size to<br />
250, and paint across the edge of the mask<br />
to try to remove most of the halo. I won’t<br />
be able to remove all of it, but I will fix this<br />
in the next step.<br />
by Nicole S. Young<br />
130
STEP BY STEP WITH ONONE SOFTWARE<br />
CHAPTER 6: Goodbye, Blue Sky!<br />
Step 7<br />
The Juniper Tree<br />
To see things a little closer I zoom to<br />
100% using the keyboard shortcut Cmd/<br />
Ctrl+Shift+0, and then I hold the Spacebar<br />
down to temporarily activate the Hand tool<br />
so that I can move around the image.<br />
Next, I select the Chisel Mask tool and<br />
paint over some of the trouble spots that<br />
still have a slight halo around them. I do this<br />
through the entire image until the halo has<br />
mostly disappeared.<br />
by Nicole S. Young<br />
131
STEP BY STEP WITH ONONE SOFTWARE<br />
CHAPTER 6: Goodbye, Blue Sky!<br />
Step 8<br />
The Juniper Tree<br />
There are still a few trouble spots in the<br />
tree area where the halo will not go away.<br />
For these sections, I’m going to select the<br />
Refine Brush once again to finish the job.<br />
Before I start painting, I place a check in the<br />
Color Decontamination box at the top of<br />
the window. I also reduce the brush’s Size<br />
to 40 and paint over only the areas where<br />
the halo is showing.<br />
Pro Tip: Using Color Decontamination with the<br />
Refine Brush is a “destructive” edit, meaning it will<br />
change the pixels in your original image. So use it<br />
sparingly and only when necessary to retain the<br />
editability and quality of your file.<br />
by Nicole S. Young<br />
132
STEP BY STEP WITH ONONE SOFTWARE<br />
CHAPTER 6: Goodbye, Blue Sky!<br />
Step 9<br />
The Juniper Tree<br />
I’m finished masking, so I save my document<br />
by clicking the Save button on the bottom<br />
right of the window.<br />
Then, I go to Layer > New Stamped Layer to<br />
create a merged composite of both images.<br />
I also want to retain the ability to edit the<br />
file, so I right-click the new layer and select<br />
Convert to Smart Layer. Then, I click<br />
Effects at the top to bring the image into<br />
Perfect Effects.<br />
by Nicole S. Young<br />
133
STEP BY STEP WITH ONONE SOFTWARE<br />
CHAPTER 6: Goodbye, Blue Sky!<br />
Step 10<br />
The Juniper Tree<br />
I start in Perfect Effects by going to the<br />
Color Enhancer folder, where I select the<br />
Fall Enhancer filter. This brings a lot of<br />
warmth to the tree bark and rock, and I<br />
scale it back by reducing the Layer Opacity<br />
to 40%.<br />
by Nicole S. Young<br />
134
STEP BY STEP WITH ONONE SOFTWARE<br />
CHAPTER 6: Goodbye, Blue Sky!<br />
Step 11<br />
The Juniper Tree<br />
Next, I add a new empty layer to the Filter<br />
Stack and then select the Green Enhancer<br />
filter inside the Color Enhancer folder. This<br />
is one of my favorite filters, as it makes the<br />
green foliage in a photo really stand out.<br />
by Nicole S. Young<br />
135
STEP BY STEP WITH ONONE SOFTWARE<br />
CHAPTER 6: Goodbye, Blue Sky!<br />
Step 12<br />
The Juniper Tree<br />
I add another empty layer, and, still<br />
inside the Color Enhancer folder,<br />
I select the Sky Enhancer filter to<br />
deepen the blues in the sky.<br />
by Nicole S. Young<br />
136
STEP BY STEP WITH ONONE SOFTWARE<br />
CHAPTER 6: Goodbye, Blue Sky!<br />
Step 13<br />
The Juniper Tree<br />
Next, I make my way to the Dynamic<br />
Contrast folder. I really enjoy using these<br />
filters, as they add a unique element of<br />
refinement to a photo.<br />
I first add a new empty layer to the Filter<br />
Stack and then select the Soft filter on<br />
the left.<br />
by Nicole S. Young<br />
137
STEP BY STEP WITH ONONE SOFTWARE<br />
CHAPTER 6: Goodbye, Blue Sky!<br />
Step 14<br />
The Juniper Tree<br />
I want to intensify the contrast in the photo,<br />
and to do this I expand the Tone Enhancer<br />
folder. Then, I add a new empty layer and<br />
select Contrast Only from the list on the<br />
left. This boosts the contrast and texture<br />
throughout the scene.<br />
by Nicole S. Young<br />
138
STEP BY STEP WITH ONONE SOFTWARE<br />
CHAPTER 6: Goodbye, Blue Sky!<br />
Step 15<br />
The Juniper Tree<br />
I would like to boost the brightness in the<br />
scene, and to do this I will use one of the<br />
Sunshine filters.<br />
So, I add a new empty layer to the Filter<br />
Stack and then click the Sunglow filter on<br />
the left. This warms up the image and gives<br />
it a soft, ethereal glow.<br />
by Nicole S. Young<br />
139
STEP BY STEP WITH ONONE SOFTWARE<br />
CHAPTER 6: Goodbye, Blue Sky!<br />
Step 16<br />
The Juniper Tree<br />
I’m nearly finished but would like to add<br />
one last filter. I add a new empty layer to<br />
the Filter Stack and then select Center<br />
Spot from the Vignette folder.<br />
The vignette effect is a little harsh, so I<br />
reduce the Layer Opacity to 80%.<br />
I also reduce the Master Opacity to 80%,<br />
which reduces the opacity of all the effects<br />
in the Filter Stack.<br />
by Nicole S. Young<br />
140
STEP BY STEP WITH ONONE SOFTWARE<br />
CHAPTER 6: Goodbye, Blue Sky!<br />
Step 17<br />
The Juniper Tree<br />
I’m finished adding effects, so I go to Preset ><br />
Save Preset and then fill in the information in<br />
the window that pops up. When I’m finished,<br />
I click Create.<br />
I click Apply to apply my settings in Perfect<br />
Effects, and the image opens up back into<br />
Perfect Layers where I save and close the file.<br />
by Nicole S. Young<br />
141
STEP BY STEP WITH ONONE SOFTWARE<br />
Conclusion<br />
Conclusion<br />
At the heart of every photographer is a unique viewpoint. Oftentimes, I will shoot the same scene alongside several other photographers, yet we all come<br />
out with completely different photographs. And even if we get similar images in-camera, onOne’s Perfect Photo Suite allows me to customize my photos<br />
with my own personal look. This look tends to change over time, but one thing is certain: It is always my own.<br />
I hope reading this book has inspired you to explore and experiment with the functions and tools in onOne’s Perfect Photo Suite 9. Software alone will not<br />
make your photography come alive, however. At the end of the day, it’s just a tool. But, when you find the perfect tool to fit into your workflow and make<br />
it fun, easy, and maybe even exciting—then you have struck gold.<br />
142
The Nicolesy Store: Tools for the Inspired Photographer<br />
All Products Presets Actions Textures eBooks & Tutorials<br />
A special discount for onOne Software customers:<br />
Save 50%<br />
With Discount Code:<br />
STEP50<br />
On the Step by Step videos & bonus materials!<br />
Was $25.00 Yours for $12.50!<br />
Step by Step with onOne Software<br />
Video Tutorials & Bonus Materials
STEP BY STEP with<br />
ONONE SOFTWARE<br />
Sometimes the best way to learn is to watch others<br />
do the job. This eBook helps you do just that: It<br />
teaches you how to use onOne’s Perfect Photo Suite<br />
9 by showing step-by-step processing tutorials with<br />
eight of Nicole’s beautiful photographs.<br />
Throughout these chapters you will see:<br />
• An overview of the new features in Perfect<br />
Photo Suite 9<br />
• A detailed “map” of each module in the Perfect<br />
Photo Suite<br />
• Layer masking to replace skies and backgrounds<br />
• How to stylize and enhance an image using both<br />
basic and advanced adjustments<br />
• ... and more!<br />
If you learn best by watching real photographers at<br />
work, then this eBook is for you! Nicole holds nothing<br />
back and shares all of her tricks and stylization<br />
techniques while using onOne Software’s Perfect<br />
Photo Suite 9.<br />
Nicole S. Young, a.k.a. “Nicolesy,” is a professional<br />
photographer and the author of several books and<br />
eBooks about photography and post-processing.<br />
She specializes in food, landscape, and travel<br />
photography, Nicole also operates an online store<br />
where she sells presets, eBooks, and tutorials for<br />
other photographers.<br />
You can find out more about Nicole on her website,<br />
as well as through social media sites such as Google+,<br />
Twitter, and Facebook.<br />
nicolesy.com<br />
$10.00<br />
ISBN 978-0-9893876-4-4<br />
51000><br />
9 780989 387644