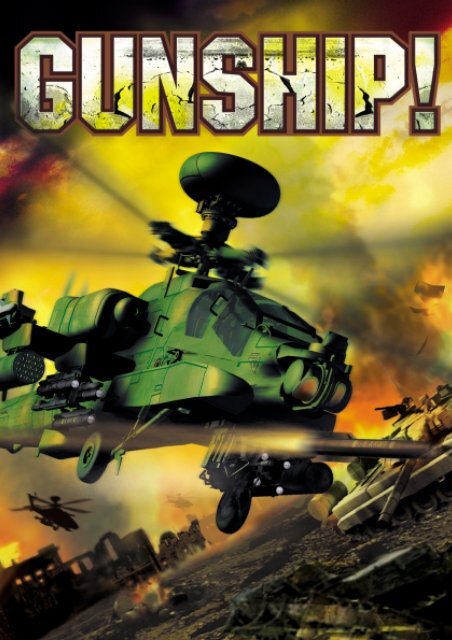
GUNSHIP UK MAN - Digitality
GUNSHIP UK MAN - Digitality
GUNSHIP UK MAN - Digitality

Create successful ePaper yourself
Turn your PDF publications into a flip-book with our unique Google optimized e-Paper software.
TABLE OF CONTENTS<br />
Requirements and Installation . . . . . . . . . . . . . . . . . . . . . . . . . . . . . . . . . . . .5<br />
Recommended System Requirements . . . . . . . . . . . . . . . . . . . . . . . . . . . . . . . .5<br />
Installing . . . . . . . . . . . . . . . . . . . . . . . . . . . . . . . . . . . . . . . . . . . . . . . . . . . . .5<br />
Playing . . . . . . . . . . . . . . . . . . . . . . . . . . . . . . . . . . . . . . . . . . . . . . . . . . . . . . .6<br />
Uninstalling . . . . . . . . . . . . . . . . . . . . . . . . . . . . . . . . . . . . . . . . . . . . . . . . . . .6<br />
The Readme File . . . . . . . . . . . . . . . . . . . . . . . . . . . . . . . . . . . . . . . . . . . . . . . .7<br />
The Main Menu . . . . . . . . . . . . . . . . . . . . . . . . . . . . . . . . . . . . . . . . . . . . . . . . . .7<br />
Fly Now . . . . . . . . . . . . . . . . . . . . . . . . . . . . . . . . . . . . . . . . . . . . . . . . . . . . . . . . .8<br />
Training . . . . . . . . . . . . . . . . . . . . . . . . . . . . . . . . . . . . . . . . . . . . . . . . . . . . . . . . .8<br />
Custom Configuration . . . . . . . . . . . . . . . . . . . . . . . . . . . . . . . . . . . . . . . . . . . .9<br />
Individual Missions . . . . . . . . . . . . . . . . . . . . . . . . . . . . . . . . . . . . . . . . . . . . .12<br />
Starting Single-Player . . . . . . . . . . . . . . . . . . . . . . . . . . . . . . . . . . . . . . . . . . .12<br />
Starting Multi-Player . . . . . . . . . . . . . . . . . . . . . . . . . . . . . . . . . . . . . . . . . . . .12<br />
Loading Weapons . . . . . . . . . . . . . . . . . . . . . . . . . . . . . . . . . . . . . . . . . . . . . .13<br />
Creating a New Mission . . . . . . . . . . . . . . . . . . . . . . . . . . . . . . . . . . . . . . . . .15<br />
Campaigns . . . . . . . . . . . . . . . . . . . . . . . . . . . . . . . . . . . . . . . . . . . . . . . . . . . . .20<br />
Starting a Campaign . . . . . . . . . . . . . . . . . . . . . . . . . . . . . . . . . . . . . . . . . . . .20<br />
Reading Intelligence Reports . . . . . . . . . . . . . . . . . . . . . . . . . . . . . . . . . . . . .22<br />
Reviewing the Preflight Briefing . . . . . . . . . . . . . . . . . . . . . . . . . . . . . . . . . . .22<br />
Assigning Pilots . . . . . . . . . . . . . . . . . . . . . . . . . . . . . . . . . . . . . . . . . . . . . . .23<br />
Loading Weapons . . . . . . . . . . . . . . . . . . . . . . . . . . . . . . . . . . . . . . . . . . . . . .24<br />
Mission Planning . . . . . . . . . . . . . . . . . . . . . . . . . . . . . . . . . . . . . . . . . . . . . .26<br />
The Post-Flight Debriefing . . . . . . . . . . . . . . . . . . . . . . . . . . . . . . . . . . . . . . .28<br />
Changing Crew Assignments . . . . . . . . . . . . . . . . . . . . . . . . . . . . . . . . . . . . .28<br />
Flying the Next Mission . . . . . . . . . . . . . . . . . . . . . . . . . . . . . . . . . . . . . . . . . .29<br />
The Cockpit MFD Displays . . . . . . . . . . . . . . . . . . . . . . . . . . . . . . . . . . . . . . .30<br />
AND Display . . . . . . . . . . . . . . . . . . . . . . . . . . . . . . . . . . . . . . . . . . . . . . . . . .30<br />
System Damage . . . . . . . . . . . . . . . . . . . . . . . . . . . . . . . . . . . . . . . . . . . . . . .30<br />
Tactical Situation Map . . . . . . . . . . . . . . . . . . . . . . . . . . . . . . . . . . . . . . . . . . .30<br />
Radar Advance Warning System (RAWS) . . . . . . . . . . . . . . . . . . . . . . . . . . . .32<br />
Fire Control Radar (FCR) . . . . . . . . . . . . . . . . . . . . . . . . . . . . . . . . . . . . . . . . .33<br />
Weapons Display . . . . . . . . . . . . . . . . . . . . . . . . . . . . . . . . . . . . . . . . . . . . . .33<br />
Target Acquisition Designation Sight (TADS) . . . . . . . . . . . . . . . . . . . . . . . . . .34<br />
Engine Display . . . . . . . . . . . . . . . . . . . . . . . . . . . . . . . . . . . . . . . . . . . . . . . .35<br />
Map Screen . . . . . . . . . . . . . . . . . . . . . . . . . . . . . . . . . . . . . . . . . . . . . . . . . .36<br />
In The Pilot’s Seat . . . . . . . . . . . . . . . . . . . . . . . . . . . . . . . . . . . . . . . . . . . . . .38<br />
Takeoff . . . . . . . . . . . . . . . . . . . . . . . . . . . . . . . . . . . . . . . . . . . . . . . . . . . . . .38<br />
Aggressive Takeoff . . . . . . . . . . . . . . . . . . . . . . . . . . . . . . . . . . . . . . . . . . . . .39<br />
3
Adjusting Airspeed . . . . . . . . . . . . . . . . . . . . . . . . . . . . . . . . . . . . . . . . . . . . .40<br />
Liftoff and Low Altitude Hover . . . . . . . . . . . . . . . . . . . . . . . . . . . . . . . . . . . . .42<br />
Liftoff and Hover at High Altitude . . . . . . . . . . . . . . . . . . . . . . . . . . . . . . . . . .43<br />
Transition to Hover . . . . . . . . . . . . . . . . . . . . . . . . . . . . . . . . . . . . . . . . . . . . .43<br />
Rapid Climb . . . . . . . . . . . . . . . . . . . . . . . . . . . . . . . . . . . . . . . . . . . . . . . . . .44<br />
Rapid Descent . . . . . . . . . . . . . . . . . . . . . . . . . . . . . . . . . . . . . . . . . . . . . . . .45<br />
Flying Backwards . . . . . . . . . . . . . . . . . . . . . . . . . . . . . . . . . . . . . . . . . . . . . .45<br />
Flying Sideways . . . . . . . . . . . . . . . . . . . . . . . . . . . . . . . . . . . . . . . . . . . . . . .46<br />
Engaging Ground Targets . . . . . . . . . . . . . . . . . . . . . . . . . . . . . . . . . . . . . . . .47<br />
Engaging Aerial Targets . . . . . . . . . . . . . . . . . . . . . . . . . . . . . . . . . . . . . . . . .47<br />
Navigating Waypoints . . . . . . . . . . . . . . . . . . . . . . . . . . . . . . . . . . . . . . . . . . .49<br />
Speed Control . . . . . . . . . . . . . . . . . . . . . . . . . . . . . . . . . . . . . . . . . . . . . . . .49<br />
Masking . . . . . . . . . . . . . . . . . . . . . . . . . . . . . . . . . . . . . . . . . . . . . . . . . . . . .50<br />
Flying Ridges and Valleys . . . . . . . . . . . . . . . . . . . . . . . . . . . . . . . . . . . . . . . .51<br />
The Communications Menu . . . . . . . . . . . . . . . . . . . . . . . . . . . . . . . . . . . . . .51<br />
Realistic Flight Mode . . . . . . . . . . . . . . . . . . . . . . . . . . . . . . . . . . . . . . . . . . .54<br />
Copilot/Gunner (CP/G) . . . . . . . . . . . . . . . . . . . . . . . . . . . . . . . . . . . . . . . . . .57<br />
Communicating with the Pilot . . . . . . . . . . . . . . . . . . . . . . . . . . . . . . . . . . . . .57<br />
Gunner’s and ORT Cockpits . . . . . . . . . . . . . . . . . . . . . . . . . . . . . . . . . . . . . .58<br />
Acquiring Targets with the FCR . . . . . . . . . . . . . . . . . . . . . . . . . . . . . . . . . . . .59<br />
Acquiring Targets with the TADS . . . . . . . . . . . . . . . . . . . . . . . . . . . . . . . . . . .60<br />
Engaging Targets . . . . . . . . . . . . . . . . . . . . . . . . . . . . . . . . . . . . . . . . . . . . . .61<br />
Basic Tactics . . . . . . . . . . . . . . . . . . . . . . . . . . . . . . . . . . . . . . . . . . . . . . . . . . .66<br />
Two Pieces of Advice . . . . . . . . . . . . . . . . . . . . . . . . . . . . . . . . . . . . . . . . . . .66<br />
Offensive Tactics . . . . . . . . . . . . . . . . . . . . . . . . . . . . . . . . . . . . . . . . . . . . . .66<br />
Defensive Tactics . . . . . . . . . . . . . . . . . . . . . . . . . . . . . . . . . . . . . . . . . . . . . .69<br />
Guide To Vehicles . . . . . . . . . . . . . . . . . . . . . . . . . . . . . . . . . . . . . . . . . . . . . .71<br />
AH-64D Apache . . . . . . . . . . . . . . . . . . . . . . . . . . . . . . . . . . . . . . . . . . . . . . .71<br />
WAH-64D Apache . . . . . . . . . . . . . . . . . . . . . . . . . . . . . . . . . . . . . . . . . . . . . .72<br />
UHT-2 Tiger . . . . . . . . . . . . . . . . . . . . . . . . . . . . . . . . . . . . . . . . . . . . . . . . . .74<br />
Mi-28N Havoc . . . . . . . . . . . . . . . . . . . . . . . . . . . . . . . . . . . . . . . . . . . . . . . .75<br />
Helicopter Weapon Systems . . . . . . . . . . . . . . . . . . . . . . . . . . . . . . . . . . . . . .76<br />
U.S. Vehicles . . . . . . . . . . . . . . . . . . . . . . . . . . . . . . . . . . . . . . . . . . . . . . . . .83<br />
British Vehicles . . . . . . . . . . . . . . . . . . . . . . . . . . . . . . . . . . . . . . . . . . . . . . . .86<br />
German Vehicles . . . . . . . . . . . . . . . . . . . . . . . . . . . . . . . . . . . . . . . . . . . . . .87<br />
Russian Federation Vehicles . . . . . . . . . . . . . . . . . . . . . . . . . . . . . . . . . . . . . .88<br />
Appendix: Guide to Acronyms . . . . . . . . . . . . . . . . . . . . . . . . . . . . . . . . . . . .93<br />
Technical Support . . . . . . . . . . . . . . . . . . . . . . . . . . . . . . . . . . . . . . . . . . . . . .95<br />
Grant of License . . . . . . . . . . . . . . . . . . . . . . . . . . . . . . . . . . . . . . . . . . . . . . . .96<br />
Credits . . . . . . . . . . . . . . . . . . . . . . . . . . . . . . . . . . . . . . . . . . . . . . . . . . . . . . . .98<br />
4
REQUIREMENTS AND INSTALLATION<br />
Recommended System Requirements<br />
Before you can install Gunship! and start playing, check this list to make sure that your<br />
computer has everything you need:<br />
Operating System: Windows ® 95/98<br />
Processor: Pentium ® 266MHz or higher<br />
Memory: 32MB RAM<br />
Hard Disk Space: 150MB Free<br />
CD-ROM Drive: 4X Speed<br />
Video: SVGA video card with 2MB video memory*<br />
Sound: Sound card*<br />
DirectX: DirectX version 7.0 (included) or higher<br />
Modem: 28.8kps (28,800 baud) for modem/Internet play<br />
* These devices should be compatible with both Windows 95/98 and DirectX version<br />
7.0 or higher.<br />
If you think you have all of these, but still have a problem running the game, please<br />
contact Customer Support for assistance. (Details can be found on page 95.)<br />
Installing<br />
If you have all of the required equipment, then it’s time to install the game. To do so,<br />
follow these instructions:<br />
• Turn on your computer (Windows 95/98 should load automatically).<br />
• Open the CD-ROM drive, place the Gunship! CD in it, and close the drive.<br />
• This is a Windows "AutoPlay" CD-ROM. That means that just putting the disk in the<br />
drive for the first time starts up the installation program.<br />
If Autoplay Doesn’t Work<br />
If the Autoplay feature does not work when you put the CD in the drive, here’s how to<br />
start the installation program yourself:<br />
• Double-click your "My Computer" desktop icon.<br />
• In the window that opens, double-click your CD-ROM drive (it’s usually the D drive).<br />
• In the list that appears, find a file named setup.exe and double-click it.<br />
The installation program should begin.<br />
5
• Click the Install button to continue. (If you change your mind at this point, close the<br />
window to Exit.)<br />
• Follow the on-screen instructions to install the game. The installation program copies<br />
some files to your hard drive from the CD-ROM, then adds Gunship! to the programs<br />
in your Start menu.<br />
• Gunship! requires DirectX 7.0 or higher in order to run. If you do not have this already<br />
installed on your computer, click Yes when asked if you would like to install it.<br />
Playing<br />
Once the automated installation and set-up are complete, the game is ready to play.<br />
To start:<br />
• Make sure that the CD-ROM is in your drive.<br />
• Now simply click on the Play Gunship! button when the title box appears.<br />
Alternatively (if the box doesn’t appear), you can click the Windows Start button, then<br />
choose Programs > MicroProse > Gunship! > Play Gunship! to run the game.<br />
Uninstalling<br />
If you decide to remove Gunship! from your computer, follow these easy instructions.<br />
• Put the Gunship! CD-ROM in your drive.<br />
• Now simply click on the Uninstall button when the title box appears.<br />
• If you do not have the Gunship! CD handy, you can still uninstall the game. Here’s how:<br />
• Click the Windows Start button.<br />
• Select Settings, then Control Panel.<br />
• In the Control Panel window, double-click on Add/Remove Programs.<br />
• Select Gunship! from the list of programs and click the Add/Remove button.<br />
• Follow the on-screen instructions to remove the game from your hard drive.<br />
Note: The uninstall procedure won’t remove files you’ve created—such as Saved Game<br />
files. You can delete these leftover files manually.<br />
6
THE README FILE<br />
The Gunship! CD-ROM game has a ReadMe file, where you can view updated information<br />
about the game. To view this file, click the Windows Start button, the Programs menu,<br />
the MicroProse sub-menu, then Gunship!. Finally, click the ReadMe option. You can also<br />
get to the ReadMe file by double-clicking on it in the Gunship! folder on your hard drive.<br />
THE MAIN MENU<br />
When you first fire up the game, you see the Main menu screen. Everything begins and<br />
ends here, so let’s briefly run through the available options, then move on to the action.<br />
Fly Now Jump right in and fly one of five action oriented missions with the<br />
current difficulty settings.<br />
Single Battle Fly an individual mission that is not part of a larger campaign.<br />
Play Campaign Fly and fight a number of missions for your chosen side as one part<br />
of a large, ongoing, military campaign.<br />
Configuration Modify the game difficulty settings and configure Gunship! to work<br />
well with your computer’s hardware.<br />
Training Fly training missions designed to help you learn the rudiments of<br />
flying a combat helicopter.<br />
One other thing you should know; there are a couple of useful features available on<br />
nearly every screen in the game:<br />
• In most places, there is a Main button in the lower right corner of the screen.<br />
Click this button to return directly to the Main menu (the first one you see when you<br />
start up Gunship!).<br />
• There’s also a Quit button in the lower left corner. Clicking Quit takes you out of the<br />
game completely.<br />
7
Terms We Use<br />
Just to avoid confusion, here are the meanings of a few common terms that we use<br />
throughout this manual:<br />
Click Click the left mouse button once.<br />
Select Click the named option.<br />
Double Click Click the left mouse button twice in quick succession.<br />
Right Click Click the right mouse button once.<br />
FLY NOW<br />
The Fly Now option is for those folks who just want to jump right into a helicopter and<br />
fly. Select this option from the Main menu to start an action-oriented battle using the<br />
current difficulty settings.<br />
After you click Fly Now, you go directly to the pre-flight briefing. You’ll be assigned at<br />
random to fly the AH-64D, the WAH-64, the Eurocopter Tiger, or the Mi-28. You can<br />
alter your flight path using the Mission Planning button and change your weapons<br />
loadout using the Arming button. (The details on how to do these things are in the<br />
Mission Planning and Loading Weapons portions of the Campaign section,<br />
respectively.) When you’ve configured your flight, click the Take Off button in the upper<br />
right corner.<br />
TRAINING<br />
For those of you whose attack helicopter skills are a little rusty, Gunship! provides<br />
training sessions to help you get back up to speed. Select Training from the Main<br />
menu to reach the Training Mission screen.<br />
The training missions are designed to help you learn to fly and fight a helicopter from<br />
the pilot’s seat. The Gunship! Quick Start guide was written to compliment this training.<br />
It can be helpful to read the corresponding section while you’re flying each mission.<br />
Don’t worry about getting shot down; enemy fire doesn’t damage you during training.<br />
Select a mission by clicking it, watch the training movies, read the basic briefing, then<br />
click the Take Off button to enter the mission and begin.<br />
8
CUSTOM CONFIGURATION<br />
The Configuration option on the Main menu lets you set up the game to work well with<br />
your computer’s hardware and adjust the overall difficulty of the game. There are three<br />
buttons along the lower edge of the Configuration screen, each of which illuminates<br />
when active.<br />
Windowed/Full Screen<br />
The first button, which is labelled Windowed, determines whether the game runs in a<br />
window or takes up the entire screen. When you click this button, the label changes to<br />
indicate the result of clicking the button again. That is, if the button "Windowed" is<br />
highlighted, you are currently in Windowed mode, and vice versa.<br />
Battle Settings<br />
The Battle Settings button calls up the Battle Settings screen, on which you control the<br />
difficulty and realism of the game. This rating affects the award, promotion, and experience<br />
points you receive for each campaign mission. The lower you set the difficulty rating, the<br />
more difficult it will be to earn promotions and medals. The options on this screen are:<br />
Default Settings These three buttons let you quickly configure your difficulty to<br />
one of three pre-designed modes of play.<br />
Action sets all options to their easiest and least realistic modes.<br />
Average puts all the options in the middle.<br />
Simulation uses the most difficult and realistic settings.<br />
Flight Model This determines the realism of the physics of flight.<br />
Easy greatly simplifies the flight mode and removes external<br />
influences such as wind and rain. The flight controls are<br />
simplified: Collective controls only altitude and is not affected<br />
by airspeed; the cyclic controls only airspeed and direction;<br />
and the pedals are completely disconnected from torque and<br />
remain fully functional at all airspeeds.<br />
Enhanced attenuates the effects of outside influences, such as<br />
wind, without removing them altogether. The flight controls<br />
are realistically interconnected, but simplified. For example,<br />
changes in torque require co-ordinated pedal changes, but the<br />
effect is less pronounced than in real life.<br />
Realistic mode has all outside influences fully functional and<br />
all controls fully cross connected. This setting most closely<br />
approaches real life flight.<br />
9
Player Weapon Effects This setting controls the overall effectiveness of your weapons.<br />
In addition to damage bonuses, this includes plusses to<br />
armour penetration, blast radius, and tracking ability.<br />
Note: This affects only your weapons; it has no effect on any<br />
other weapons in the game.<br />
Exaggerated weapons are two to three times more deadly<br />
than normal.<br />
Enhanced weapons are roughly 50% more effective than usual.<br />
This setting makes weapons like rockets and the cannon more<br />
effective against heavily armoured targets and reinforced bunkers.<br />
Realistic weapons operate at their normal, real-world<br />
effectiveness. Soft weapons, such as anti-personnel<br />
rockets, will not be particularly effective against armour and<br />
reinforced bunkers.<br />
View Mode Which viewpoint you begin each mission in is under your<br />
control through this option.<br />
Outside has you start in a viewpoint flying behind<br />
your helicopter.<br />
Pilot Cockpit causes you to begin in the Pilot cockpit.<br />
Gunner Cockpit (no surprise) starts you in the Gunner cockpit.<br />
Player Vulnerability This setting determines how much punishment your helicopter<br />
can take before damage effects set in.<br />
Invulnerable makes your helicopter completely invincible.<br />
Resistant doubles the armour protection of your helicopter,<br />
letting it take roughly twice as much damage as usual.<br />
Realistic sets your helicopter’s armour protection to<br />
real-world levels.<br />
Ammunition This option controls whether your helicopter has realistically<br />
limited amounts of ammunition.<br />
Unlimited gives you unlimited weapons.<br />
Normal limits you to your helicopter’s realistic weapons load.<br />
Enemy Skill The setting you choose for this option determines the overall<br />
quality of your enemies (the strength of the artificial intelligence).<br />
There are four possibilities: Poor, Good, Veteran and Elite.<br />
10
IHADSS All of the weapons your helicopter carries have limited zones<br />
of fire, which are reflected on the IHADSS (Integrated Helmet<br />
And Display Sight System) display you see in the various<br />
cockpits. This setting determines just how firm the limits on<br />
those zones are.<br />
Action loosens the weapon firing constraints on the IHADSS,<br />
making all weapons easier to use.<br />
Realistic displays realistic weapon firing constraints on<br />
the IHADSS.<br />
Game Settings<br />
The Game Settings button switches you over to the Game Configuration screen, where<br />
you can adjust the game according to your computer’s hardware and your preferences.<br />
Music Volume Sets the volume of the in-game music.<br />
Master Sound Volume Controls the overall volume of all sounds in the game.<br />
Sound Effects Volume Determines the volume of special sounds, such as weapons<br />
fire and explosions.<br />
3D Object Density This controls the number of three dimensional objects<br />
displayed on the screen at any given time. The setting cycles<br />
between Software, Low, Medium, and High. Using the lower<br />
settings can result in the game running faster, though it might<br />
also reduce the graphic quality somewhat.<br />
Graphics Mode Cycles through the available display drivers. The options are<br />
Software (no 3D accelerator card), and Direct 3D HAL.<br />
Screen Resolution Controls what screen resolution you use in the game. Choose<br />
the resolution that works best for you.<br />
In Game Language This option gives you control over what languages the units in<br />
the game speak. Use the Local setting to have all in-game<br />
speech use your default language. For example, in the US or<br />
<strong>UK</strong> version of the game, everyone would speak English, while<br />
in the German version, all units would speak German. Actual<br />
allows the units to speak in their actual languages. Thus,<br />
German forces would speak German, Russian forces would<br />
speak Russian, and so on.<br />
11
INDIVIDUAL MISSIONS<br />
Flying a campaign is great, but sometimes you don’t want to commit yourself to a long<br />
term project—or maybe you’re playing with friends. In both cases, what you want is to<br />
fly a single battle, one mission. That’s what the Single Battle option on the Main menu<br />
is all about. This mode lets you fly a pre-generated, individual mission completely<br />
separate from any campaign.<br />
Starting Single-player<br />
A single-player individual mission is similar to a Fly Now mission, except that the battle<br />
is set up entirely according to the current difficulty settings. (Fly Now missions are<br />
always action oriented.) To begin a single-player stand-alone mission:<br />
• Select Single Battle from the Main menu.<br />
• Choose a mission from the Battle List. Scroll up and down as necessary, and then<br />
select the name of the mission you wish to fly.<br />
• Click the Single Player button to indicate that this is a one player mission, not a multiplayer<br />
session.<br />
• Click the Play button to move on to the Mission Briefing.<br />
Once you have familiarised yourself with the contents of your briefing, you might want<br />
to alter the flight path for your flight or any of the other flights in your unit. To do so,<br />
click the Mission Planning button on the pre-flight briefing screen. This takes you to the<br />
Mission Planning screen. Please refer to Mission Planning in the Campaigns section for<br />
the details on how to use the Mission Planning screen.<br />
After the briefing and any changes to the flight plan, you have the opportunity to fix<br />
your weapons load-out before lifting off (use the Arming button).<br />
Starting Multi-player<br />
Single Battle mode also lets you fly pre-generated individual missions with friends over<br />
a modem, serial, LAN (Local Area Network) or Internet connection. One player must<br />
serve as the game "host"—the computer that manages the overall battle. Other players<br />
then join the hosted game session. The battle conforms to the current difficulty settings<br />
on the host’s computer. To begin a multi-player, stand-alone mission:<br />
• All players select Single Battle from the Main menu.<br />
• Only the host selects a mission from the Battle List, then clicks the Host button.<br />
(Generally, the player with the fastest computer should act as host. If multiple people<br />
plan to join an Internet-based session, the player with the fastest Internet connection<br />
should act as host.)<br />
12
• The host then selects a provider type, enters a name for the battle, and enters a player<br />
name and a session name.<br />
• The host can then click the Create button. This takes you to a chat screen. Once all of<br />
the players have joined, click Launch to send everyone to the Ready Room.<br />
• Players wishing to join the battle click the Multi-player button on the Single Battle<br />
screen, then the Join button.<br />
• Joiners then enter a player name for themselves and select a connection type.<br />
• Joiners can then choose from a list of the battles available over the connection they<br />
chose. Select one, then click the Join button. This takes each joiner to the Ready Room.<br />
In the multi-player Ready Room, players select the helicopters they will fly in the battle.<br />
They can also chat with each other until the mission begins. All players can and should<br />
view the mission briefing and make sure the weapons load-out of their individual<br />
helicopter is as they want it (use the Arming button).<br />
Important Notice Regarding Chat<br />
Hasbro Interactive does not monitor, control, endorse, or accept responsibility for the<br />
content of text or voice chat messages transmitted through the use of this product.<br />
Use of the chat function is at your own risk. Users are strongly encouraged not to<br />
give out personal information through chat transmissions.<br />
Kids, check with your parent or guardian before using the chat function or if you are<br />
concerned about any chat you receive.<br />
The player in the first helicopter on each side is the Flight Leader. Leaders can change<br />
the flight plan for their side. To do so, click the Mission Planning button. This takes you<br />
to the Mission Planning screen. Please refer to Mission Planning in the Campaigns<br />
section for the details on how to use the Mission Planning screen.<br />
• Joiners, when they’re ready to fly, must click the Take Off button. This locks out all<br />
further changes and tells the host that that player is ready to go.<br />
• The host, after all the players are locked in, should click the Take Off button to start<br />
the mission.<br />
Loading Weapons<br />
You can gain access to your weapons load-out by clicking the Arming button on the<br />
pre-flight Briefing screen. At the Load-out screen, you can change what weaponry your<br />
helicopter carries. Note, however, that your helicopter is always loaded with the maximum<br />
amount of 30mm ammunition (for the cannon) that that type of helicopter can carry.<br />
13
AH-64 Apache Uses High-Explosive, Dual Purpose (HEDP) rounds. These are<br />
most useful against soft targets and moderately armoured<br />
vehicles. The Apache can carry 1,200 rounds in all settings.<br />
Eurocopter Tiger Carries High-Explosive, Dual Purpose (HEDP) rounds. These are<br />
most useful against soft targets and moderately armoured<br />
vehicles. The number of rounds this copter can carry is determined<br />
by the Weapon Effects setting. Realistic mode loads 450 rounds;<br />
Enhanced loads 900 rounds; Exaggerated loads 1,200 rounds.<br />
Mi-28 Havoc Fires Armour Piercing, High-Explosive (APHE) rounds, best used<br />
against soft targets and lightly armoured vehicles. The number of<br />
rounds is determined by the Weapon Effects setting. Realistic<br />
mode loads 250 rounds; Enhanced loads 500 rounds; Exaggerated<br />
loads 750 rounds.<br />
First of all, use the Helicopter Select buttons (along the top of the Arming screen) to<br />
select which helicopter or helicopters your changes are to be applied to. Click the<br />
Select All button to make arming changes to all available helicopters.<br />
The Configuration is a shortcut that lets you choose between three pre-defined<br />
weapons load-outs:<br />
Std/Atk The Standard Attack load-out consists of anti-tank missiles on the<br />
outer hardpoints and rockets on the inner hardpoints.<br />
Anti-tank An Anti-tank configuration places anti-tank missiles on both the<br />
inner and outer hardpoints. Note: This option is not available for<br />
the Mi-28N.<br />
Reconnaissance This configuration trades off firepower to keep the helicopter<br />
light, fast, and agile. Rockets are loaded on both the inner and<br />
outer hardpoints.<br />
The AAM button adds air-to-air missiles to the selected helicopters.<br />
The ATGM button (directly below the AAM button) cycles through the anti-tank missiles<br />
available for the nationality you are flying for. The possible load-outs are:<br />
U.S. 8 Hellfire K (laser guided) missiles, or<br />
8 Hellfire L (radar guided) missiles, or<br />
4 Hellfire K and 4 Hellfire L missiles<br />
<strong>UK</strong> 8 Hellfire K (laser guided) missiles, or<br />
8 Hellfire L (radar guided) missiles, or<br />
4 Hellfire K and 4 Hellfire L missiles<br />
14
Germany 8 HOT 3 (wire guided) missiles, or<br />
8 TRIGAT (infrared) missiles<br />
Russia 16 AT-9 (laser guided) missiles, or<br />
16 AT-16 (laser guided) missiles<br />
Finally, the Rocket Selection buttons—A, B, and C—let you determine the type of<br />
rockets loaded at each of the three positions within the rocket pods.<br />
• Selection A chooses the rocket type loaded in the outer ring of the rocket pod.<br />
• Selection B chooses the rocket type loaded in the middle ring of the rocket pod.<br />
• Selection C chooses the rockets loaded in the middle of the pod.<br />
The available rocket types are:<br />
HE The High Explosive warhead is best used against soft targets and<br />
lightly armoured vehicles.<br />
MPSM The Multi-Purpose Sub-Munition warhead carries a mix of nine<br />
anti-personnel and anti-tank sub-munitions. This is effective<br />
against unarmoured vehicles up through moderately armoured<br />
vehicles, as well as structures and enemy troops.<br />
FLECHETTE Flechette rockets carry 1,200 hardened steel flechettes (steel darts)<br />
which are expelled like a shotgun blast on detonation. This is<br />
extremely effective against troops.<br />
Creating a New Mission<br />
Using the Gunship! Battle Builder, you can create your own, customised missions, add<br />
them to the Battle List, and play them—both as single-player battles and multi-player<br />
sessions. When you’re ready to begin designing your own missions:<br />
• From the main menu, select Single Mission.<br />
• Click on Battle Builder.<br />
The Battle Builder presents you with a set of screens on which you choose settings<br />
according to your preferences. The buttons along the bottom of every screen allow you<br />
to jump in any order from one to another, changing settings at will. Whenever you are<br />
happy with all the settings on all the screens, click the Build button to have Gunship!<br />
generate the mission based on the selections you’ve made. The mission, once<br />
generated, is added to the Battle List. You return to the Single Battle screen, where you<br />
can immediately try out your new mission.<br />
15
Setup<br />
The first of the Battle Builder screens allows you to select where your battle will take<br />
place (a theatre map) and provide some of the basic parameters for the mission.<br />
Theatre Map Use the buttons along the top of the screen to select which<br />
campaign map you want to use. The options are North Poland,<br />
Central Poland, Slovakia, Belarus, and the Ukraine. Once you have<br />
chosen an area, select the specific location of your battle by<br />
clicking that location on the displayed map.<br />
Nationality This determines which military force you’ll be flying for.<br />
The options are US (the default), <strong>UK</strong>, German and Russian.<br />
Weather You can choose the type of weather that will predominate during the<br />
mission. Select from Clear, Partly Cloudy, Overcast, Rain, and Storm.<br />
Time of Day This controls the time that the battle takes place. The options are<br />
Dawn, Day, Sunset, Twilight, and Night.<br />
Mission Name Enter the name by which you want your mission known. The name<br />
you enter appears in the Battle List.<br />
Enemy Nationality If you set your Nationality to Russian, you may choose to fight<br />
against the U.S. Army, the British Army, or the German Army. If you<br />
chose any other Nationality, the only possible enemy in Gunship! is<br />
the Russian forces.<br />
Place Units<br />
The Place Units screen is the one you use to determine the locations of both sides’<br />
forces on the map.<br />
• First of all, use the Nationality button to switch to the side for which you want to<br />
place units.<br />
• Next, use the side buttons to select a unit. The first click activates the button and<br />
makes the current platoon in that button active. Additional clicks cycle through the unit<br />
types available through that button. Each button represents a different type of units:<br />
Helicopters cycles through the different helicopter platoons.<br />
Combat includes the various tank, armour, and infantry platoons.<br />
Miscellaneous gives you the various Headquarters, supply, and emplacement platoons.<br />
Air Defense is where you get air defense gun and missile platoons.<br />
Support lets you place artillery and close support aircraft units.<br />
• Left click in your selected location on the map to place a platoon of the type you’ve<br />
chosen. Right click on a platoon to remove it.<br />
16
Unit Orders<br />
Once you’ve put some units into place, you can use this screen to give those units<br />
waypoints and orders. The Next and Previous buttons cycle through the platoons in the<br />
mission. Whatever unit is selected is the one you can give orders to and set waypoints for.<br />
Note: On this screen you can give orders to Helicopter units and Ground units, no others.<br />
To set waypoints, click on the map at each point where you want to place a navigation<br />
waypoint for the selected unit. For each unit, you may assign up to six waypoints.<br />
(If you make a mistake, you can delete a waypoint by right-clicking on it.)<br />
Once you’ve created the flight path, the unit has a route. Now, you can give the unit<br />
specific orders to follow at each waypoint along that route. You do this by configuring<br />
the waypoints. The buttons along the right side of the screen let you configure<br />
waypoints. First, select the waypoint you want to configure using the Waypoint<br />
Number button.<br />
The two types of unit you can give orders to on this screen—Helicopter and Ground<br />
units—each has its own format for orders. Let’s take them one at a time.<br />
Helicopters<br />
Waypoint Type This button cycles through the available types of waypoints.<br />
Each standard type has a default setting for all of the other entries.<br />
You can override these settings individually using the rest of<br />
the buttons.<br />
Speed This setting and the next (Flight Profile) are interconnected.<br />
With this, you control how quickly the pilot will fly to get to this<br />
waypoint. The actual speed varies, depending on the Flight Profile,<br />
because of the need to dodge terrain. There are three options:<br />
Slow is 30 to 50 kts.<br />
Tactical is 50 to 80 kts.<br />
Sprint is maximum possible speed at all times.<br />
Flight Profile This setting determines the altitude that the helicopter’s pilot<br />
should strive to maintain between the previous waypoint and this<br />
one. There are three options:<br />
Nap of the Earth orders the helicopter to maintain an altitude below<br />
60ft; 30ft is optimum. The pilot has permission to reduce speed as<br />
necessary to maintain this altitude.<br />
Contour tells the pilot to keep to an altitude below 100ft; 70ft<br />
is optimum.<br />
17
Cruise orders the altitude kept between 100 and 150ft, and the pilot<br />
can and should rise to 200ft if no enemies are present.<br />
Combat Mode This gives the helicopter its overall orders regarding its<br />
combat mission between the previous waypoint and this one.<br />
The options are:<br />
Search and Destroy orders are to open fire on and advance toward<br />
any enemy unit. The helicopter is to continue its mission once<br />
either all targets are destroyed or visual contact is lost.<br />
Suppression of Enemy Air Defenses (SEAD) tells the helicopter to<br />
open fire on and advance toward enemy air defense sites.<br />
Engage orders mean to open fire on any detected enemy only if<br />
doing so does not delay the mission for more than one minute.<br />
After one minute, the helicopter is to continue on its mission.<br />
Bypass orders the helicopter to seek cover, avoid contact, and<br />
continue toward the waypoint.<br />
Priority Target This determines what type of target the helicopter should attack<br />
first, if there is a choice.<br />
Ground Units<br />
Waypoint Type This button cycles through the available types of waypoints.<br />
Each standard type has a default setting for all of the other entries.<br />
You can override these settings individually using the rest of<br />
the buttons.<br />
Formation Use this to set what formation the platoon will use while travelling<br />
to the waypoint. The options are Line, Wedge, Vee, Echelon<br />
Right, Echelon Left, Column, Staggered Column, Extended Line,<br />
and Diamond.<br />
Speed This setting controls how quickly the platoon moves to<br />
the waypoint.<br />
Slow is 5mph or 9kph.<br />
Medium is 18mph or 30kph.<br />
Fast is maximum possible speed.<br />
Combat Mode This setting determines the action the unit should take when it sees<br />
the enemy. The options are:<br />
18
Assault orders the unit to open fire on and advance toward any<br />
enemy unit. The unit should then continue the mission once either<br />
all targets are destroyed or visual contact is lost.<br />
Attack by Fire tells the unit to find a hull down position if one is<br />
nearby and engage the enemy. The unit should then continue the<br />
mission once either all targets are destroyed or visual contact<br />
is lost.<br />
Engage orders the unit to open fire on any detected enemy while<br />
continuing to move to the waypoint.<br />
Bypass tells the unit to seek cover, avoid contact, and continue<br />
toward the waypoint.<br />
Orientation Orders the unit to face in a specific direction when it reaches the<br />
waypoint. This is critical if enemy contact is expected.<br />
Unit Timing<br />
Unit Timing is the screen where you set delay times, assign call signs, and determine<br />
the target status of all the units in your battle.<br />
Waypoint This button cycles through the waypoints you’ve set. Use this<br />
to choose one, then you can assign a delay time to the<br />
selected waypoint.<br />
Delay Time Using this, you can order a unit to pause for a set amount of time<br />
when it reaches the selected waypoint. Each click adds 30 seconds<br />
to the delay time of the selected waypoint. Right-click to subtract<br />
30 seconds.<br />
Callsign This button lets you cycle through the possible call signs for each<br />
type of unit. Choose one, and it will be used to identify the selected<br />
unit in all communications and identification in your mission.<br />
Objective Status Use this to determine how the player must treat specific units in<br />
order to achieve victory in the mission. That is, you are setting what<br />
someone playing your mission must do to win. Select each special<br />
or important unit in turn, and assign it one of the following roles:<br />
Primary Target is a unit that must be destroyed for the other side<br />
to win.<br />
Secondary Target is a unit that, if destroyed, gives bonus award<br />
points to the other side.<br />
Protection is a friendly unit that must live through the battle for its<br />
side to win.<br />
19
Objectives<br />
Finally, you can set the objectives for the entire battle—the victory conditions. Use the<br />
Next and Previous buttons to toggle between the sides of the fight. You can set multiple<br />
objectives for any battle, but there is a limit of three objectives per side.<br />
Objective Area Click on this repeatedly to cycle through the radius options: 1, 2,<br />
and 3km radii. When you’ve chosen a size for the objective area,<br />
click on the map to place the centre of a circular area with the<br />
indicated radius. (If you make a mistake, you can right-click on the<br />
are to remove the objective.) To win the mission, a player must<br />
ensure that there are no enemy units remaining in the objective<br />
area at the end of the battle.<br />
Define Sector After you click this, you "draw" a sector box on the map by clicking<br />
to mark the upper left and lower right corners of a rectangular area.<br />
To win the mission, a player must ensure that there are no enemy<br />
units remaining in this rectangular defensive sector at the end of<br />
the battle.<br />
Objective Line For this option, you click on the map to select the two end points of<br />
the line. This creates an objective line. A player must reach this line<br />
with ground units by the end of the battle in order to win.<br />
Defensive Line As above, for this option you click on the map to select the two end<br />
points of the line. This sets a "rear area line" that the enemy must<br />
not be allowed to reach with ground units. A player must prevent<br />
the enemy from reaching this line in order to win.<br />
CAMPAIGNS<br />
There’s nothing wrong with Single Battles, but sometimes you want to sink your teeth<br />
into something more. For those times, Gunship! offers the Campaign mode, in which<br />
you take your place as part of a large, ongoing military situation. Through the course of<br />
the campaign, you’ll fly quite a number of missions, with varying objectives and<br />
different styles of action needed for success. To begin, select the Play Campaign option<br />
from the Main menu.<br />
Starting a Campaign<br />
When you select Play Campaign from the Main menu, you are presented with the<br />
Campaign Selection screen. Your first decision is to choose which unit you’ll be flying<br />
for; the buttons along the sides of the screen represent the available units. Your choice<br />
determines the type of helicopter you’ll be flying, what nationalities you’ll be flying for<br />
20
and against, the available armament, and your forces’ starting positions. Your unit<br />
options include:<br />
Russia 20th Guards Army<br />
U.S. 1st Cavalry Division<br />
1st Armour Division (US)<br />
<strong>UK</strong> 1st Armour Division (<strong>UK</strong>)<br />
Germany 5th Panzer Division<br />
Once you’ve selected a unit, pertinent information about that unit appears in the<br />
Information Sidebar. The sidebar displays the unit’s patch and the following data:<br />
• Unit Name is the full name of the selected unit.<br />
• Mission is the next mission to be flown by this unit in the current campaign. If you<br />
are just starting a new campaign, the Mission number is 0 (zero).<br />
• Win/Loss notes the ratio of wins to losses in the campaign to date. When you<br />
succeed on a mission, it counts as a win. Any time you fail and have to re-fly a<br />
mission, it counts as a loss.<br />
• The Fatigue rating provides an overall estimate of the unit’s battle readiness.<br />
• Status describes the deployment status of the unit. "Ready" indicates that the unit has<br />
not been deployed to a campaign. "In Progress" means that this unit has already<br />
started a campaign. Joining a unit with "In Progress" status places you in the middle<br />
of that saved campaign. "Complete" tells you that the campaign has been finished.<br />
The buttons along the bottom of the screen provide access to the campaigns. If you<br />
select a unit with "Ready" status (a unit not currently involved in a campaign), you only<br />
have one valid option:<br />
Start Campaign Click this to begin a campaign with you assigned to the<br />
selected unit.<br />
If the unit you select is currently involved in a campaign (its status is "In Progress" or<br />
"Complete"), there are two options:<br />
Continue Campaign Click this to rejoin the saved campaign in progress, flying for the<br />
unit you selected.<br />
Reset Unit If you want to remove a unit from its current campaign so that<br />
you can use that unit, click this button. Note: This option clears<br />
all the campaign data associated with the specified unit,<br />
irrevocably deleting the campaign in progress. All forces return to<br />
their starting positions, and the unit’s status reverts to "Ready."<br />
21
Reading Intelligence Reports<br />
Once you start a campaign, you’re taken to the Intelligence screen, and your campaign<br />
intelligence briefing begins running. You can watch it start to finish (a good idea),<br />
or you can jump to specific sections using the buttons on the right.<br />
• The NATO Forces button provides whatever information is known about the positioning<br />
of NATO (North Atlantic Treaty Organisation) forces. When you select this, the map<br />
shows the location of blue units and indicates the lines separating battlefield sectors.<br />
Note: Because the situation changes once the campaign is underway, this button is<br />
available only at the start of a campaign, not after you have begun the first mission.<br />
• Likewise, the Russian Forces button provides any information known about Russian<br />
force locations, with the map similarly displaying red units and sector divisions.<br />
Note: Because the situation changes once the campaign is underway, this button is<br />
available only at the start of a campaign, not after you have begun the first mission.<br />
• The Situation button details friendly and enemy movements. The description indicates<br />
which forces are moving, while the map uses red and blue arrows to graphically<br />
illustrate the progress of red and blue forces, respectively.<br />
• The Sector Briefing button (the actual label changes based on your sector of operations)<br />
zooms the map in to display only the sector relevant to your actions. Force positions are<br />
displayed in greater detail, and a box highlights the Area of Operations (AOR) for your<br />
upcoming mission.<br />
The Intelligence screen is the jumping-off point to all other pre-flight activities. Buttons<br />
along the bottom edge of the screen provide access to the Mission Briefing, Mission<br />
Planner, Arming screen, and Crew Assignments.<br />
Reviewing the Pre-flight Briefing<br />
After you’ve got the information you need from the Intelligence screen, you should<br />
proceed to your Mission Briefing (click the appropriate button near the bottom of the<br />
screen). The map zooms in to display only your Area of Operations (AOR), and your<br />
briefing begins automatically. Like the campaign intelligence briefing, you have the option<br />
of watching start to finish (a good idea) or jumping to specific sections using the buttons<br />
on the right. These five buttons provide information about your current assignment:<br />
Mission The mission section of the briefing describes your objectives,<br />
identifies your flight’s call sign for this mission, and details your<br />
flight plan on the map.<br />
Operations This section lists any operational restrictions or warnings for your<br />
AOR. You might, for example, be instructed to remain within a<br />
certain zone or warned of enemy surface-to-air defenses.<br />
22
Friendly Forces This shows the last known positions of friendly forces operating<br />
within your AOR.<br />
Enemy Forces This displays the last known positions and headings of enemy<br />
forces within your AOR.<br />
Weather The weather section provides a forecast for the next 24 hours in<br />
your AOR. Poor weather reduces visibility and degrades laser and<br />
IR performance. Note: As with all weather forecasts, there is some<br />
margin for error.<br />
Assigning Pilots<br />
By using the Crew Assign button, you can take control over the assignment of crews to<br />
helicopters for your mission. During a campaign, your unit has a limited number of<br />
flight crews. Each crew consists of a pilot and a CP/G (co-pilot/gunner), and every<br />
crewmember has varying skills and capabilities.<br />
Flying is tough work to begin with, and flying combat sorties is doubly difficult. Action<br />
wears crews down, and they can become fatigued. Fatigued crew members are less<br />
effective, and their skills suffer temporary degradation. Flying increases crew fatigue,<br />
but when you allow them to skip a mission, a crew can rest and get over some or all of<br />
their fatigue.<br />
You can modify the crew assignments for each mission. Your goal should be to ensure<br />
that the highest-skilled and best-rested crew is assigned to each task. This can be a<br />
balancing act. If a mission is particularly critical, you might wish to assign a higher-skilled<br />
crew, even though their fatigue rating is rising—as long as their skills haven’t suffered.<br />
Of course, this means the crew must rest even longer after the mission before they’ll be<br />
ready for combat again.<br />
The Crew Assignment screen displays the available helicopters along the top and the<br />
available crews along the left side. Note: Only helicopters displayed in green can be<br />
assigned to the mission. Damaged aircraft are in red, and you cannot use those in this<br />
mission. The number of missions required to fix an aircraft is directly related to the<br />
severity of damage it sustained. Destroyed helicopters are dimmed out (and cannot be<br />
repaired). You have a limited number of replacement helicopters, so don’t waste them.<br />
If, during pre-flight, it turns out that there are fewer available aircraft than are required<br />
for the mission, the campaign is lost.<br />
Select a helicopter, then click on the crew you want. This assigns that crew to the<br />
selected helicopter. If there was already a crew assigned to that helicopter, they are<br />
removed and the currently selected crew replace them. The centre display provides<br />
information about the selected crew:<br />
23
Rank Indicates the current rank of the crew. Higher rank generally implies<br />
higher experience and better skill.<br />
Name Lists the names of the crew members. If you wish, you can edit<br />
your crew’s names as you see fit, using the Personnel screen.<br />
Position Notes whether each crew member is a Pilot or CP/G.<br />
Fatigue Tracks each crew member’s present fatigue rating. This scale runs<br />
from 1 to 10, with 10 being the worst fatigue. The higher this<br />
rating, the more skills suffer and the more rest the crew member<br />
needs to recover. As the fatigue rating rises, skill level temporarily<br />
decreases.<br />
Skill Describes this crew member’s overall capability, this scale runs<br />
from 1 to 10, with 10 being the best, highest skill rating. Skill<br />
ratings decrease temporarily as a crew member’s fatigue rises.<br />
Resting the crew member reduces the fatigue and returns the skill<br />
rating to normal. As the crew survives missions during a campaign,<br />
skill increases, reflecting combat experience gained.<br />
Awards Lists ribbons and medals awarded to this crew member. The small<br />
number adjacent to each ribbon indicates how many times the crew<br />
member has received that particular award.<br />
Note: Either the Company Commander’s crew or one of the two Platoon Leader crews<br />
must be assigned to each mission.<br />
Loading Weapons<br />
You can gain access to your weapons load-out by clicking the Arming button on the<br />
pre-flight Briefing screen. At the Load-out screen, you can change what weaponry your<br />
helicopter carries. Note, however, that your helicopter is always loaded with the<br />
maximum amount of 30mm ammunition (for the cannon) that that type of helicopter<br />
can carry.<br />
AH-64 Apache Uses High-Explosive, Dual Purpose (HEDP) rounds. These are most<br />
useful against soft targets and moderately armoured vehicles.<br />
The Apache can carry 1,200 rounds in all settings.<br />
Eurocopter Tiger Carries High-Explosive, Dual Purpose (HEDP) rounds. These are<br />
most useful against soft targets and moderately armoured vehicles.<br />
The number of rounds this copter can carry is determined by the<br />
Weapon Effects setting. Realistic mode loads 450 rounds;<br />
Enhanced loads 900 rounds; Exaggerated loads 1,200 rounds.<br />
24
Mi-28 Havoc Fires Armour Piercing, High-Explosive (APHE) rounds, best used<br />
against soft targets and lightly armoured vehicles. The number of<br />
rounds is determined by the Weapon Effects setting. Realistic<br />
mode loads 250 rounds; Enhanced loads 500 rounds; Exaggerated<br />
loads 750 rounds.<br />
First of all, use the Helicopter Select buttons (along the top of the Arming screen) to<br />
select which helicopter or helicopters your changes are to be applied to. Click the<br />
Select All button to make arming changes to all available helicopters.<br />
The Configuration is a shortcut that lets you choose between three pre-defined<br />
weapons load-outs:<br />
Std/Atk The Standard Attack load-out consists of anti-tank missiles on the<br />
outer hardpoints and rockets on the inner hardpoints.<br />
Anti-tank An Anti-tank configuration places anti-tank missiles on both the<br />
inner and outer hardpoints. Note: This option is not available for<br />
the Mi-28N.<br />
Reconnaissance This configuration trades off firepower to keep the helicopter light,<br />
fast, and agile. Rockets are loaded on both the inner and<br />
outer hardpoints.<br />
The AAM button adds air-to-air missiles to the selected helicopters.<br />
The ATGM button (directly below the AAM button) cycles through the anti-tank missiles<br />
available for the nationality you are flying for. The possible load-outs are:<br />
U.S. 8 Hellfire K (laser guided) missiles, or<br />
8 Hellfire L (radar guided) missiles, or<br />
4 Hellfire K and 4 Hellfire L missiles<br />
<strong>UK</strong> 8 Hellfire K (laser guided) missiles, or<br />
8 Hellfire L (radar guided) missiles, or<br />
4 Hellfire K and 4 Hellfire L missiles<br />
Germany 8 HOT 3 (wire guided) missiles, or<br />
8 TRIGAT (infrared) missiles<br />
Russia 16 AT-9 (laser guided) missiles, or<br />
16 AT-16 (laser guided) missiles<br />
Finally, the Rocket Selection buttons—A, B, and C—let you determine the type of<br />
rockets loaded at each of the three positions within the rocket pods.<br />
25
• Selection A chooses the rocket type loaded in the outer ring of the rocket pod.<br />
• Selection B chooses the rocket type loaded in the middle ring of the rocket pod.<br />
• Selection C chooses the rockets loaded in the middle of the pod.<br />
The available rocket types are:<br />
HE The High Explosive warhead is best used against soft targets and<br />
lightly armoured vehicles.<br />
MPSM The Multi-Purpose Sub-Munition warhead carries a mix of nine<br />
anti-personnel and anti-tank sub-munitions. This is effective against<br />
unarmoured vehicles up through moderately armoured vehicles, as<br />
well as structures and enemy troops.<br />
FLECHETTE Flechette rockets carry 1,200 hardened steel flechettes (steel darts)<br />
which are expelled like a shotgun blast on detonation. This is<br />
extremely effective against troops.<br />
Mission Planning<br />
Click the Mission Planning button to call up the Mission Planning screen. Here, you can<br />
control your flight path and waypoint actions for the upcoming mission.<br />
To begin creating your flight path, click on the map at each point where you want to<br />
place a navigation waypoint. You may assign up to six waypoints. (If you make a<br />
mistake and want to delete a waypoint, right-click on it.) Once you’ve created the flight<br />
path, the unit has a route. Now, you can give the unit specific orders to follow at each<br />
waypoint along that route. You do this by configuring the waypoints. The buttons along<br />
the right side of the screen let you configure waypoints.<br />
First, select the waypoint you want to configure using the Waypoint Number button.<br />
Waypoint Type This button cycles through the available types of waypoints. Each<br />
standard type has a default setting for the Speed, Flight Profile,<br />
Formation, Combat Mode, and Priority Target for the selected flight.<br />
You can override these settings individually using the rest of the<br />
buttons. The default settings are:<br />
Checkpoint (CP): Fly to this point and continue forward without<br />
stopping.<br />
Assembly Area (AA): Fly to this waypoint, avoiding combat, then<br />
loiter for 5 to 10 minutes or until the leader issues the "Go"<br />
command.<br />
Battle Position (BP): Fly slow NOE to this waypoint and assume a<br />
26
firing position. Engage enemy forces for 5 to 10 minutes or until<br />
the leader issues the "Go" command.<br />
Patrol Area (PA): Fly to this waypoint and patrol for 5 to 10<br />
minutes or until the leader issues the "Go" command.<br />
SAR Landing Zone: Attack helicopters treat this as a PA waypoint.<br />
Transport helicopters fly to this waypoint, avoiding combat, then<br />
search for friendly troops, land, and pick them up.<br />
Landing Zone (LZ): Attack helicopters treat this as a PA waypoint.<br />
Transport helicopters fly to this waypoint, avoiding combat, then<br />
land and drop off troops.<br />
Speed This setting and the next (Flight Profile) are interconnected.<br />
With this, you control how quickly the pilot will fly to get to this<br />
waypoint. The actual speed varies, depending on the Flight Profile,<br />
because of the need to dodge terrain. There are three options:<br />
Slow is 30 to 50 kts.<br />
Tactical is 50 to 80 kts.<br />
Sprint is maximum possible speed at all times.<br />
Flight Profile This setting determines the altitude that the helicopter’s pilot<br />
should strive to maintain between the previous waypoint and this<br />
one. There are three options:<br />
Nap of the Earth orders the helicopter to maintain an altitude below<br />
60ft; 30ft is optimum. The pilot has permission to reduce speed as<br />
necessary to maintain this altitude.<br />
Contour tells the pilot to keep to an altitude below 100ft; 70ft<br />
is optimum.<br />
Cruise orders the altitude kept between 100 and 150ft, and the pilot<br />
can and should rise to 200ft if no enemies are present.<br />
Combat Mode This gives the helicopter its overall orders regarding its combat<br />
mission between the previous waypoint and this one.<br />
The options are:<br />
Search and Destroy orders are to open fire on and advance toward<br />
any enemy unit. The helicopter is to continue its mission once<br />
either all targets are destroyed or visual contact is lost.<br />
Suppression of Enemy Air Defenses (SEAD) tells the helicopter to<br />
open fire on and advance toward enemy air defense sites.<br />
27
Engage orders mean to open fire on any detected enemy only if<br />
doing so does not delay the mission for more than one minute.<br />
After one minute, the helicopter is to continue on its mission.<br />
Bypass orders the helicopter to seek cover, avoid contact, and<br />
continue toward the waypoint.<br />
Priority Target This determines what type of target the helicopter should attack<br />
first, if there is a choice.<br />
The Post-flight Debriefing<br />
When your mission is over, win or lose, you’re led immediately to the Debriefing after<br />
you exit the cockpit. Three status buttons along the right side of the screen give you<br />
access to the detailed report on the results of your efforts.<br />
• The top button provides an overall summary of your mission, including your success<br />
or failure and the ramifications thereof. The updated map shows you the new<br />
positions of the friendly and enemy forces within your AOR.<br />
• The middle button provides casualty statistics for the overall mission.<br />
• The bottom button provides details on your specific performance, indicating your kills<br />
and awards.<br />
When you’re finished here, click any of the available buttons at the bottom of the screen<br />
to use one of the post-flight options, as described in the next two sections.<br />
Changing Crew Assignments<br />
One of the post-flight options on the Debriefing screen provides access to your flight<br />
crews. Click the Personnel button to move to the Personnel screen. This is where you<br />
manage the crews in your unit.<br />
Every unit is assigned eight crews to fly six helicopters; the extra crews allow you to<br />
rest battle-weary team members. Use the buttons along the right and left sides of the<br />
screen to select an individual crew. Statistics for the selected pilot and CP/G appear in<br />
the centre display. These include rank, skill level, fatigue, and awards. The buttons<br />
along the top of the screen provide these functions:<br />
Move Pilot Use this to swap pilots between two crews. Click Move Pilot, select<br />
a pilot, and then click the pilot position in any other crew. If the<br />
move is valid, the two pilots (or the pilot and the empty position)<br />
will be swapped.<br />
28
Move Gunner This button lets you move gunners in the same fashion as the<br />
Move Pilot button lets you move pilots.<br />
Promotion This button lets you promote crew members to higher rank. Each<br />
crew member in the platoon has a starting rank and a maximum<br />
rank. In addition, every platoon has a limit on the number of crew<br />
members that can hold any particular rank. After a mission, you<br />
have a limited number of "promotion points" that you may use to<br />
promote team members as you see fit. To promote someone,<br />
select a crew, click the crew member of that crew you want to<br />
promote, then click Promotion. You’ll notice that as a crew<br />
member rises in rank, further promotions require more points.<br />
For example, promotion from Warrant Officer 1 to Warrant Officer<br />
2 is "cheaper" than promoting a 1st Lieutenant to a Captain.<br />
Medals The button that allows you to award medals to outstanding<br />
members of your team is similar in function to the Promotion<br />
button. You have a limited number of "award points" that you may<br />
use to give medals to your crew members. Select a crew, click the<br />
member of that crew to whom you want to give a medal, and click<br />
Medal. You are presented with a list of available medals; pick one.<br />
(Note: Only crew members who flew in the mission just finished<br />
are eligible for awards.)<br />
Rename This button lets you rename any crew member. Changing your<br />
crew members’ names (giving them nicknames, if you prefer to<br />
think of it that way) often helps you remember who’s who, so that<br />
you can better manage their skills and assignments.<br />
Flying the Next Mission<br />
The Debriefing screen provides one of two options, depending on the outcome of the<br />
mission you just finished.<br />
• If your mission was a success, you have access to the Next Mission button. Click this<br />
to move on to the briefings for the next mission in the campaign.<br />
• If you failed the mission, you have the opportunity to Fly Again. Click this button to<br />
return to the briefings for the mission you just flew.<br />
29
THE COCKPIT MFD DISPLAYS<br />
The cockpit of a modern attack helicopter has changed drastically in the last decade.<br />
The analog dials and the banks of tape displays are mostly gone, and the few remaining<br />
non-digital instruments are relegated to the role of back-up instruments. In place of all<br />
this lost equipment is the Multi-Function Display—the MFD. This computer-like screen<br />
can not only show all of the information that was once shown by individual<br />
instruments, but also radar displays, maps, and views from the helicopter’s sensors.<br />
Where the cockpit was once crowded with dials, there is now room for ample window<br />
space. The new "glass cockpits" allow the crew much greater situational awareness,<br />
which makes it possible to engage targets faster.<br />
There are two MFDs in most cockpits. You control what information each one displays<br />
by cycling through the possible options using [E] for the left MFD and [R] for the<br />
right MFD.<br />
AND Display<br />
The AND display is a small screen that constantly displays the helicopter’s grid location.<br />
System Damage<br />
This MFD display shows any damage taken by<br />
the helicopter during flight. It is broken into two<br />
areas. The top of the display is a top-down line<br />
drawing of the helicopter. The bottom contains<br />
15 chip lights showing the status of the major<br />
systems. As systems are damaged or destroyed,<br />
the affected area will change colour from green<br />
to red. The corresponding chip lights will also<br />
change colour. Red coloured systems are<br />
damaged or destroyed.<br />
The major systems are as follows:<br />
Transmission The transmission transfers power from the engines to the rotor.<br />
Damage causes the rotor to lose power, lowers its maximum<br />
torque, and can cause the engines to overheat and catch fire.<br />
(Transmission damage is ignored in Easy flight mode.)<br />
Hydraulics A hydraulics failure results in slower response times and a stiffer<br />
stick. (Hydraulics damage is ignored in Easy flight mode.)<br />
Fuel A fuel hit results in a fuel leak that can shorten mission time.<br />
30
Avionics An Avionics hit results in losing the radar and some fire control<br />
equipment. You cannot fire missiles in LOBL FCR mode if you<br />
have avionics damage.<br />
Rotor Rotor damage causes the rotor to lose power, lowers its maximum<br />
torque, and can cause vibrations and eventual failure.<br />
(Rotor damage is ignored in Easy flight mode.)<br />
Drive Train The drive train affects the tail rotor and its ability to offset the<br />
main rotor torque. If damaged, it will require constant right pedal<br />
input to offset this torque. (Drive train damage is ignored in<br />
Easy flight mode.)<br />
MFD This means that one or both MFDs are damaged. A damaged MFD<br />
will go dark and display the word MALFUNCTION. Of course,<br />
if both MFDs are damaged, you can’t see the damage MFD.<br />
PNVS This is the Pilot’s Night Vision System. If it’s damaged, IHADSS<br />
mode, thermal mode, and zoom mode do not work in the Pilot’s<br />
Cockpit. The cannon is only able to fire fixed forward in LOS<br />
mode, but is not affected in TADS mode.<br />
TADS If the Target Acquisition and Designation System is damaged,<br />
IHADSS mode, thermal mode, and zoom mode do not work in the<br />
Gunner’s Cockpit or the ORT cockpit. Weapons cannot be placed<br />
in TADS mode. Additionally, the laser range finder and designator<br />
no longer function, preventing you from firing any laser<br />
guided missiles.<br />
Weapons This reports damage to the fire control system in the helicopter.<br />
Depending on the severity of the damage, the Air to Air Missiles,<br />
Anti-Tank Guided Missiles, or both can be unusable. If you try to<br />
use a damaged weapon, MALFUNCTION appears in your<br />
IHADSS display.<br />
Gun The cannon is disabled. If you try to use a damaged weapon,<br />
MALFUNCTION appears in your IHADSS display.<br />
Weapon Stub This message results from damage to the weapon pylons on one<br />
Wings of the stub wings. A damaged wing can prevent you from firing<br />
weapons mounted on that wing.<br />
Jammer This shows a malfunction in the jamming system, the countermeasures<br />
dispensers, or both. In addition, the RAWS MFD no<br />
longer functions.<br />
31
Left Engine An engine hit causes one engine to malfunction and shut down.<br />
A second hit can shut down the other engine. This results in<br />
immediate loss of power. You should use the power you have to<br />
exit the battle area and look for a good landing spot. While all of<br />
the helicopters can fly on one engine, they cannot operate in<br />
combat. You will have the ability to limp away. If both engines are<br />
hit, look for a spot to autorotate to.<br />
Right Engine This is the same as Left Engine, but on the other side of<br />
the helicopter.<br />
Tactical Situation Map<br />
This map is similar to the one on the Main Map<br />
screen, and you can zoom it from a 10x10 km<br />
view to a 5x5 km area. The map shows your<br />
aircraft and a small yellow number for each of<br />
your waypoints.<br />
Radar Advance Warning System (RAWS)<br />
This is the early warning and detection system used to detect enemy search and tracking<br />
radar and warn you about missile launches (incoming, that is) and the beginning of gun<br />
attacks. All threat symbols appear on the MFD at their relative bearing from your current<br />
heading. Once they’re identified, search radar strobes are replaced with the appropriate<br />
threat symbols on the indicator. You can set the RAWS for a 5 or 10km range.<br />
• Your helicopter is shown as the crossed circle in the centre of the display.<br />
• A helicopter with active radar or lasers shows as a small, sideways figure eight.<br />
• Fixed wing aircraft appear as small chevrons.<br />
• Surface to Air Missile radar systems are displayed as a letter S. By itself, an S indicates<br />
that the launcher is in search mode but has not acquired your helicopter. When the S is<br />
surrounded by a solid box, the launcher has started an active track of your helicopter.<br />
When the box is flashing, the launcher has fired a missile at you!<br />
• Anti-Aircraft artillery is shown as a small tetrahedron with a stick gun. By itself, the<br />
symbol indicates that the gun is in search mode but has not acquired your helicopter.<br />
When the symbol is surrounded by a solid box, the gun has started an active track of<br />
your helicopter. When the box is flashing, the launcher has fired a missile at you!<br />
32
• Threats that disappear from the environment are "ghosted" for a short time. The ghost<br />
symbol—a dashed outline of the appropriate target type—is used when a target has<br />
been blocked by terrain, destroyed, or you otherwise lose your track on it.<br />
When a target is locked on to you, the symbol flashes.<br />
Fire Control Radar (FCR)<br />
Two types of helicopter in Gunship! use millimetre-wave radar systems. (In Action<br />
mode, the FCR is combined with the RAWS on all aircraft.) The Longbow radar system<br />
combines air and ground radar into one package. It is available on the AH-64D and<br />
WAH-64D Apache. Only one in three Apaches will mount the radar. The Mi-28N Havoc<br />
also incorporates a Fire Control Radar system.<br />
You can switch the FCR between 5 km and 10 km ranges. It displays all vehicles in line<br />
of sight. Hills and large buildings can block the radar, but trees and small buildings do<br />
not. Infantry never show up on radar. The FCR functions differently in the Action and<br />
Realistic modes of the IHADSS.<br />
In Action mode, the FCR is combined with the RAWS on all aircraft. The radar sweeps a<br />
full 360 degrees around the helicopter and shows only living, enemy units. Surface to air<br />
missile (SAM) and air defense vehicle (ADV) units are displayed using the same symbols<br />
as on the RAWS. Other units are shown as follows:<br />
• A small square for heavy armoured or tracked vehicles.<br />
• A circle for lighter or wheeled vehicles.<br />
In Realistic mode, the radar is only available on those helicopters which mount a radar<br />
system. The FCR shows all vehicles—friendly as well as enemy—and does not lose<br />
contact when a vehicle is destroyed. This means that you should take care in engaging a<br />
target on radar information alone. In addition, the realistic radar sweep is 360 degrees<br />
only for air targets; it is limited to the front 60 degrees for ground targets. The two radial<br />
lines on the display represent the ground search area.<br />
Weapons Display<br />
The weapons display maintains an inventory of<br />
the helicopter’s munitions.<br />
33
Pilot Box The pilot box is the box in the upper left hand corner of the MFD.<br />
It displays the vision system that the pilot is currently using,<br />
the weapon presently selected, and that weapon’s active mode<br />
of operation.<br />
Gunner Box The gunner box is the box in the upper right hand corner of the<br />
MFD. It displays the vision system that the gunner is currently<br />
using, the weapon presently selected, and that weapon’s active<br />
mode of operation.<br />
Weapons The weapons display is in the centre of the screen. It shows the<br />
current weapon loads on each hardpoint. As the weapons are fired,<br />
the circles dim dramatically.<br />
Rocket Pods The rocket pods have two parts: the pod outline itself and the three<br />
letters in the lower centre of the MFD. These letters represent the<br />
three sectors in which the rockets are located. If rockets are the<br />
selected weapon, the sector presently selected is highlighted. The<br />
number displayed inside the rocket pod outline is the number of<br />
rockets remaining for that sector.<br />
Gun Ammo The counter for gun ammo is the centre box in the MFD. It shows<br />
the rounds remaining for your cannon.<br />
Chaff and Flare The chaff and flare counters are at the bottom of the MFD.<br />
These show the countermeasures remaining in each launcher.<br />
Target Acquisition Designation Sight (TADS)<br />
This MFD is only available in the Pilot’s Cockpit<br />
and the outside views. The TADS MFD shows<br />
what the gunner is looking at or has locked on to.<br />
(Note: We recommend that you do not leave this<br />
MFD selected unless you have a fast machine<br />
with a 3D accelerator card.)<br />
34
Engine Display<br />
The engine display shows engine temperature,<br />
rotor speed, and collective level. All of the gauges<br />
have digital readouts below them.<br />
Engine Torque The two torque gauges are the left-most set of vertical bars. The<br />
Top Chevron shows maximum level of operation. The Inside Dot<br />
shows the ideal level of operation. Top Arrows represent the<br />
maximum level of operation with a damaged Transmission or<br />
Rotor. Bottom Arrows represent the maximum level of operation<br />
at startup.<br />
Temperature Bars The temperature bars are the two right-most vertical bars on the<br />
MFD. They represent the temperature of both engines measured in<br />
TGT (Turbine Gas Temperature). The Top Outside Arrows represent<br />
the maximum level of operation, while the Inside Dot shows the<br />
ideal level of operation.<br />
RPM Bars These are the centre trio of bars. The two outside bars are the<br />
Engine RPM readings (left and right), and the centre bar is the<br />
Rotor RPM reading. On the Engine RPM Bars, the two dots<br />
represent the normal operating range of the engine. On the Rotor<br />
RPM Bar, similar dots show the normal operating range of the rotor.<br />
35
MAP SCREEN<br />
You can open the Map screen any time you’re in the helicopter by pressing N. This is a<br />
full-screen map of the battlefield. (To return to the game, use the keyboard shortcut for<br />
any other cockpit or view.) On the Map screen, you can:<br />
• Change waypoints and orders for all of your helicopter units. (This works as described<br />
on page 17.) Use the Next and Previous buttons below the map to cycle through your<br />
helicopter units.<br />
• Locate all friendly units in the battle. NATO units are always blue, while Russian<br />
Federation units are always red. The map displays one icon for each ground platoon<br />
and one for each individual helicopter and jet. The icons are:<br />
Attack Helicopter<br />
Aircraft<br />
Infantry Fighting Vehicle Platoon<br />
Transport Helicopter<br />
Main Battle Tank Platoon<br />
Armoured Personnel Carrier Platoon<br />
Armoured Reconnaissance Platoon<br />
Scout or Armoured Car Platoon<br />
Armoured Tank Destroyer Platoon<br />
Air Defense Vehicle Platoon<br />
36
Self Propelled Artillery Battery<br />
Mortar Battery<br />
Supply Transport Platoon<br />
Tank Destroyer Platoon<br />
Infantry Platoon<br />
Surface to Air Missile Battery<br />
Multiple Launch Rocket Battery<br />
Headquarters Unit<br />
Supply Installation<br />
• Locate all enemy units which have been spotted. That is, only those units observed by<br />
forces on your side are shown. The map displays one icon for each ground platoon and<br />
one for each individual helicopter and jet. The icons are the same ones listed above.<br />
• Call in artillery fire. Click the Support button, below the map. Your workspace<br />
changes into a list of artillery and support assets. Set your Target Reference Point<br />
(TRP) by clicking anywhere on the map. (To move the TRP, just click another location.)<br />
To call for artillery support once your TRP is set, select any of the support units with<br />
an "Available" rating.<br />
37
IN THE PILOT’S SEAT<br />
As pilot, you’re responsible for the safety of your crew and your helicopter. It’s your job<br />
to navigate into hostile territory, close on enemy forces, and provide a stable firing<br />
platform while the CP/G shoots enemies. After the battle, it’s your job to find your way<br />
home and safely land the helicopter. Ducking and weaving between trees and over hills at<br />
50, 70, or even 100 knots while flying just 20 or 30ft above the ground, evading<br />
enemy fire, and navigating through hostile territory requires a steady hand and finely<br />
honed reflexes.<br />
In the Pilot’s Cockpit, you have access to the MFDs, the helicopter flight controls, and a<br />
tailored version of the IHADSS—one that focuses on flying and navigation rather than<br />
weapons employment. Your first duty is to fly the helicopter, sometimes under the<br />
direction of the CP/G. Until you’ve got that well in hand, don’t worry about the weapons;<br />
your gunner will take care of them.<br />
Takeoff<br />
Getting a helicopter airborne without endangering your life, your crew’s life, or the lives<br />
of those around you is not a particularly easy task. It requires co-ordinated cyclic,<br />
collective, and pedal adjustments. In this exercise, we will rise into a hover and transition<br />
to forward flight.<br />
First, note your current heading on the IHADSS. It is also helpful to identify some<br />
landmark, such as a tree or building, directly ahead of your helicopter. Increase the<br />
collective very slowly. This increases the angle of attack of the main rotor blades,<br />
thereby increasing the downward thrust they generate. As the thrust increases, the<br />
helicopter will rise.<br />
Once the fuselage is off the ground, it will attempt to rotate and twist opposite the<br />
direction the rotor blades are moving. Consequently, as soon as the helicopter lifts off,<br />
you should immediately apply pedal opposite this rotation. Watch the heading scale on<br />
the IHADSS or a landmark to verify that you’ve stopped the rotation. If the nose begins<br />
to turn back in the other direction, you’ve applied too much pedal. Let up slightly until<br />
your heading remains constant. At the same time, the helicopter’s nose will try to dip.<br />
Immediately, but gently, pull the cyclic back to maintain a level attitude. The faster you<br />
increase the collective, the faster you will ascend—and the faster you must apply<br />
counter pedal and cyclic inputs.<br />
38
Apply rudder and cyclic as necessary during<br />
the ascent to maintain current heading and a<br />
level pitch.<br />
Let the helicopter climb to 50ft, then gently push the nose down by moving the cyclic<br />
forward. This tilts the plane of the rotor blades, directing some of the thrust backwards.<br />
The helicopter will begin to move forward. Since some of the thrust is directed<br />
backwards rather than downward, the helicopter will begin to descend slightly.<br />
Increase the collective (while applying corrective pedal and cyclic inputs) until the<br />
altitude holds steady.<br />
Aggressive Takeoff<br />
Combat situations might require a more expedient departure. Rapid takeoffs require<br />
substantially more co-ordination between the collective, cyclic, and rudder inputs. Begin<br />
by noting both your current heading (as indicated on the IHADSS) and the desired<br />
departure heading. Use this info to determine whether you should initially turn right or<br />
left to get to your departure heading.<br />
Begin your takeoff by applying pedal to the direction you want to turn. That is, if you<br />
planned your initial turn to the left, apply a generous amount of left pedal. Next—quickly,<br />
but smoothly—increase collective to 70 percent or more (depending on the helicopter<br />
type and payload weight). The helicopter should leap off the ground and begin spinning<br />
toward the desired heading. As the nose swings to the departure course, reduce<br />
the pedal input (or apply opposite pedal, if necessary) to hold the nose on the<br />
desired heading.<br />
Push the nose forward to build speed quickly<br />
during the ascent.<br />
39
Meanwhile, let the nose dip slightly as the helicopter rises. If you dip the nose too much,<br />
you’ll accelerate quickly, but will also drop back to the ground and crash. If you don’t<br />
lower the nose enough, the helicopter will climb like a rocket, quickly reaching several<br />
hundred feet.<br />
If you properly co-ordinate all these factors, the helicopter will leap off the ground,<br />
simultaneously spinning to the desired course and lunging forward. Adjust collective as<br />
necessary to maintain the desired altitude during departure.<br />
Adjusting Airspeed<br />
Altering your airspeed in a helicopter is more difficult than in a fixed-wing aircraft. In a<br />
helicopter, the collective doesn’t impact speed like the throttle does in a jet fighter. The<br />
collective alters the pitch of the rotor blades, thereby altering the amount of downward<br />
force being generated. To change the helicopter’s airspeed, you pitch its nose up and<br />
down to alter the direction of the rotor blades’ thrust. To accelerate, push the nose<br />
forward, directing the thrust backwards. To decelerate, pull the nose up, thereby<br />
directing the thrust forward.<br />
Altering the direction of the thrust, however, reduces the amount of thrust pointing<br />
directly downward. Consequently, you need increased collective to maintain your altitude.<br />
Of course, increasing collective requires increased pedal input to counter the torque.<br />
Pushing the nose forward builds forward<br />
airspeed but causes loss of altitude.<br />
Level off and increase collective to maintain<br />
altitude and forward speed.<br />
40
To increase speed, push the cyclic forward while simultaneously increasing collective<br />
and applying left pedal. If your altitude drops, add more collective. If your altitude<br />
increases, lessen the collective. If the nose yaws to either direction, apply pedal to the<br />
opposite direction. Likewise, to decrease speed, pull back on the cyclic and pitch the<br />
nose upwards. Again, adjust collective up or down as necessary to maintain altitude,<br />
along with any necessary pedal corrections.<br />
The IHADSS navigation symbols change based on your airspeed. All modes show the<br />
current waypoint number, distance to that waypoint, TADS range readout, target<br />
designation, heading, and selected weapon, but information about the helicopter’s<br />
position and movement change according to its airspeed.<br />
Below 7 knots, the IHADSS switches into Hover mode. In Hover mode, a position box<br />
represents the helicopter’s location when the hover began. If the helicopter drifts, the<br />
position box moves across the display. If you want to return to the original hover point,<br />
simply return the position box to the centre of the screen.<br />
Hover mode<br />
Next, from 7 to 60 knots forward airspeed, the IHADSS enters Transition mode. Note the<br />
velocity vector extending from the IHADSS gun cross. This line shows you the general<br />
direction of the aircraft’s motion. Any side slip causes the line to point to the left or right,<br />
and flying backwards causes the line to point down. The longer the line, the faster the<br />
helicopter is moving.<br />
Transition mode<br />
41
Finally, above 60 knots the IHADSS switches to Flight mode. This is very similar to<br />
Transition mode, minus the velocity vector line.<br />
Flight mode<br />
Liftoff and Low Altitude Hover<br />
Hovering requires that the downward thrust generated by the rotor blades be equal to<br />
the weight of the helicopter (including the weight of fuel and weapons). Further, you<br />
must keep the fuselage level; pitching or banking the plane of the rotor blades redirects<br />
the downward thrust and moves the helicopter. Finally, you must maintain sufficient<br />
pedal input to prevent any yawing.<br />
At low altitude, the rotor downwash essentially reflects off the ground, creating a<br />
"cushion of lift" beneath the helicopter. This cushion, called "ground effect", extends to<br />
approximately 50ft above the surface, depending on the type of terrain. Rough surfaces<br />
tend to reflect the downwash in random directions, degrading the cushion and reducing<br />
the height of the ground effect. It takes somewhat less torque to hover "in ground effect"<br />
(below 50ft or so) than it does at 100ft.<br />
IHADSS Hover mode shows.<br />
42
Begin your takeoff normally by slowly increasing collective until the helicopter begins to<br />
gently lift off the ground. Apply appropriate left pedal to halt yawing, and carefully keep<br />
the cyclic centred to prevent gaining any airspeed. Note the torque reading on the<br />
IHADSS; the torque required to hover within ground effect will be slightly less than the<br />
current reading.<br />
Let the helicopter ascend straight up, being careful to maintain a level attitude and<br />
airspeed at zero. At about 40ft, lower the collective until the torque reading drops by<br />
2 percent. Continue lowering the torque in 1 or 2 percent intervals until your climb<br />
stops. If the helicopter descends, you’ve lowered the torque too much and need to<br />
increase it slightly. When you’re sitting in a stable hover, you’ve taken advantage of<br />
ground effect.<br />
Liftoff and Hover at High Altitude<br />
The process for hovering out of ground effect is practically identical to hovering in<br />
ground effect, except that above 50ft or so you’ll need somewhat more torque to<br />
maintain the hover.<br />
Begin the process by executing a smooth lift-off, applying just enough torque to begin<br />
an ascent. Since you’re currently in ground effect, it requires less torque to climb than<br />
when above ground effect. Maintain the current torque reading, applying pedal and<br />
cyclic as necessary to prevent any other movement. If you’ve applied the minimum<br />
collective required to climb within ground effect, the ascent should slow and ultimately<br />
stop as you climb above 50ft. Without any further control inputs, the helicopter should<br />
hover at this torque setting.<br />
If the helicopter continues to climb, you’ve applied a little extra collective. Reduce the<br />
collective by 1 or 2 percent at a time until the ascent stops. If you reduce collective to<br />
the torque required for an in ground effect hover, the helicopter will continue to descend<br />
until about 50ft. It will then slow and eventually enter a hover somewhere within the<br />
ground effect cushion.<br />
Transition to Hover<br />
Slowing forward motion and entering a hover is a critical skill, useful during landings as<br />
well as when darting between hills on a battlefield. As you approach the desired hover<br />
point, pull the cyclic back to lift the nose forward. This redirects some of the rotor<br />
downwash forward, reducing your forward airspeed. Of course, this reduces lift, and the<br />
helicopter will begin to descend. Increase collective to maintain altitude. This has the<br />
added benefit of redirecting more thrust forward, thus decelerating the helicopter even<br />
more quickly.<br />
43
Watch your forward airspeed closely. As it drops below 15 knots, lower the nose slightly.<br />
If you maintain the nose up attitude, the helicopter eventually slows down, then begins<br />
flying backwards. You must ease the cyclic forward as your speed approaches zero,<br />
so that the helicopter is level when you reach zero forward speed.<br />
Keep in mind that you increased the collective earlier. As you lower the nose and direct<br />
more of the downwash straight down, the helicopter will begin to rise. As you lower the<br />
cyclic, ease the collective down to reduce torque and prevent a rapid climb. As your<br />
airspeed reaches zero, set the collective to provide the necessary thrust for an in ground<br />
effect or out of ground effect hover, as applicable.<br />
If your initial airspeed is very high (80 knots or more) or you need to stop very quickly,<br />
it will be necessary to pull the nose well above the horizon. The higher you pull the nose,<br />
the more downwash you direct forward, and thus the quicker you slow the helicopter.<br />
Naturally, this requires substantially increased collective to maintain altitude. You must<br />
monitor your airspeed closely. Again, as airspeed drops to 15 knots, push the nose down<br />
by moving the cyclic forward. Reduce collective at the same time. As your airspeed<br />
reaches zero, move the helicopter into a level flight attitude and set the collective for the<br />
amount of torque required for a hover.<br />
Rapid Climb<br />
Generally speaking, at a constant torque setting you’ll maintain a constant height over<br />
rolling terrain, with the helicopter descending and ascending in synch with the ground.<br />
If you approach a steep vertical surface or find yourself about to collide with a ground<br />
object, however, you might need to climb—and in a hurry.<br />
The vertical velocity indicator shows a<br />
rapid ascent.<br />
A fixed-wing aircraft pilot initiates a climb by pulling back the stick. In a helicopter,<br />
pulling back the cyclic first slows the helicopter (since some of the downwash is being<br />
directed forward) and also causes it to descend (since not all the thrust is being directed<br />
downward). Slowing down in the face of an obstacle might be beneficial, but descending<br />
almost certainly will not be helpful.<br />
44
You must increase the collective to make the helicopter climb. The faster you need to<br />
climb, the more torque you need to apply. As you approach an obstacle or steep vertical<br />
surface, do not pull back on the cyclic unless you want to slow down.<br />
Rapid Descent<br />
If you increase collective to rapidly increase altitude, it stands to reason that you would<br />
rapidly decrease collective to rapidly decrease altitude, right? Not necessarily. A rapid<br />
descent with little or no forward motion can lead to a disastrous condition called<br />
"settling with power." Basically, the helicopter is caught in a descent and even full torque<br />
might not break out of it. The helicopter can continue to sink until it crashes.<br />
Reducing collective to reduce altitude works well only as long as you don’t need to drop<br />
too far, too fast. For a safer rapid descent, push the cyclic forward as well as reducing<br />
the collective. Pushing the nose down will build forward airspeed and prevent settling<br />
with power.<br />
Flying Backwards<br />
The helicopter has the almost unique ability to fly backwards. This can be very useful<br />
when manoeuvring into a firing position—or backing away from enemy forces. To make<br />
the helicopter back up, begin by pulling back on the collective. This raises the nose,<br />
directs some of the downwash forward, and slows the helicopter. Eventually, the<br />
helicopter will come to a complete stop, then begin moving backwards.<br />
Flying backwards at 13 knots.<br />
The more you pitch the helicopter up, the faster your backwards motion becomes.<br />
Keep in mind, though, that this reduces the amount of downwash being directed down,<br />
causing the helicopter to descend. If you need to back up in a hurry and pitch the nose<br />
very high, be sure to add collective in order to maintain your altitude.<br />
Also, keep in mind that you can’t see out the back of the helicopter. You’re basically<br />
flying blind while moving backwards, and could collide with a building or a hill.<br />
45
To stop the backwards motion, simply pull the nose down by pushing the cyclic forward.<br />
As the nose drops, the downwash will be directed backwards, thereby pushing the<br />
helicopter forward (and up). Your reverse speed will slow, the helicopter will stop, and it<br />
will then eventually begin to move forward again.<br />
Flying Sideways<br />
Flying sideways, or "slipping", is another unique helicopter ability. It is especially useful<br />
on the battlefield. Rising over a hill or building to engage enemy troops exposes you to<br />
return fire. The higher your altitude, the more likely you’ll be detected and fired upon.<br />
Using slipping, however, the helicopter can "slide" around an obstacle to obtain a clear<br />
view of the target while remaining at very low altitude.<br />
To practice slipping, begin by entering a hover. Once you’re hovering, apply either left or<br />
right pedal to yaw the nose until you’re facing a large object, such as a building.<br />
Alternatively, you can monitor the heading reading on the IHADSS or use a distant hill for<br />
a landmark, but using a nearby building tends to work much better.<br />
Very gently apply left cyclic. This will bank the helicopter to the left, direct the downwash<br />
to the right, and therefore push the helicopter left. The nose of the helicopter may yaw to<br />
the left as well, creating a slight turn—especially if you have any forward motion. In this<br />
case, apply opposite pedal (the right pedal in this case). Apply just enough pedal to stop<br />
the yawing. If you’ve done this correctly, the building should appear to slide to the right<br />
across your windscreen while your heading remains constant.<br />
Note that the ball on the skid/slip indicator will move in conjunction with your slip; when<br />
this ball is centred, the helicopter is not slipping. The velocity vector (extending from the<br />
crosshairs) also points out the general direction in which the helicopter is moving.<br />
The velocity vector and skid/slip indicator show<br />
this helicopter to be skidding forward and left.<br />
To stop the sideways motion, apply right cyclic and bank the aircraft slightly to the right.<br />
This redirects the downwash to the left and slows the aircraft. It might be necessary to<br />
adjust your pedal inputs to maintain a constant heading. When the sideways motion<br />
stops, returning the helicopter to a level attitude will re-enter you in a hover. If you<br />
continue banking to the right, the helicopter will begin sliding to the right, and you might<br />
46
need to apply left pedal to prevent the nose from yawing. Again, if this manoeuvre is<br />
performed correctly, the building should appear to slide to the left across the windscreen<br />
while the helicopter maintains a constant heading.<br />
Engaging Ground Targets<br />
The attack helicopter’s primary mission is to seek out and destroy ground targets.<br />
However, that’s not your worry. As pilot, you’re responsible for getting the aircraft to the<br />
battle, manoeuvring into firing position, and getting home again. The CP/G, your gunner,<br />
is responsible for finding targets and locking them up. During a fight, the CP/G could<br />
choose to engage targets well off to either side of the helicopter’s nose—and therefore<br />
well outside of a weapon’s firing envelope. You have to work closely with the CP/G to<br />
make sure that the helicopter is pointed at the right spot so that he can fire.<br />
The Alternate Sensor Bearing indicates where the<br />
CP/G is looking.<br />
The CP/G notifies you when he’s engaging (locking) a target and announces the type of<br />
target (air, ground, infantry, and so on). That’s your cue to turn the helicopter toward his<br />
target. Look at the compass at the top of the IHADSS display. Along the bottom edge,<br />
you’ll note a solid triangle called the Alternate Sensor Bearing (ASB). This marker<br />
indicates where the CP/G is looking. If the CP/G hasn’t chosen a target, the Alternate<br />
Sensor Bearing marker will cycle from side to side, indicating his search pattern. Once<br />
he’s locked a target, the marker will stay fixed. Simply turn the helicopter until the ASB<br />
marker is directly centred on your compass display.<br />
For more information on working with the gunner and using your weapons from the<br />
Pilot’s Cockpit, please refer to the Gunship! Quick Start guide.<br />
Engaging Aerial Targets<br />
Although the attack helicopter’s primary mission is engaging enemy ground forces, most<br />
operators have adapted some form of air-to-air missile for helicopter use. Intended<br />
primarily for self defense, such systems are usually short-ranged, heat-seeking missiles.<br />
47
Missile seeker tracking a target without a radar<br />
lock on.<br />
When you press 8 to select your air-to-air missile, a circle appears on the forward view.<br />
(This is, of course, assuming you are armed with them; if not, go back to the Arming<br />
screen and add them to your load-out.) Inside this circle, a small diamond executes a<br />
search pattern. The diamond represents where the missile seeker is looking. You will<br />
initially hear a low-pitched "growl," indicating that the missile is not tracking a target.<br />
Missile seeker tracking a target with a radar lock,<br />
but outside of launch parameters.<br />
To engage aerial targets, turn the helicopter to bring a target within the circle. You can<br />
engage aerial targets with or without a radar lock. Once the missile’s seeker acquires<br />
the target, the diamond will track the target’s position and the "growl" will increase to a<br />
higher pitch. If the target moves outside of the missile’s firing envelope, the seeker<br />
diamond and the TD box (if you have a lock on) will become dashed. Turn the helicopter<br />
to bring the target back toward the centre of the circle. When the diamond and TD box<br />
turn solid, you may fire.<br />
The solid TD box indicates the target is within<br />
firing parameters.<br />
48
Navigating Waypoints<br />
Most battles occur over unfamiliar terrain, often at night or in poor visibility. Navigating<br />
under such circumstances is hard enough—and then the enemy starts shooting at you.<br />
Once the CP/G has begun engaging targets, you’ll need to make frequent manoeuvres to<br />
bring your weapons to bear. All of this is very distracting, and it’s easy to become<br />
disoriented and lost.<br />
The IHADSS shows distance and bearing to the<br />
current waypoint.<br />
Fortunately, the helicopter’s onboard computers are keeping track of not only where<br />
you are but where you ought to be, as well. The pilot’s IHADSS display shows the<br />
current waypoint number and the range and bearing to it. The waypoint number and<br />
distance to the waypoint (in kilometres) appear in the lower left region of the IHADSS.<br />
The bearing to the waypoint is marked by the Command Heading indicator—the caret<br />
(^) just below the compass display. Simply turn the helicopter until the Command<br />
Heading indicator is centred on the compass, and you’ll be flying right toward the next<br />
waypoint—no matter how lost or off course you might have become.<br />
Note that your waypoints are all set before the mission begins. You can alter them and<br />
your flight path using the Mission Planning button on the pre-flight Briefing screen.<br />
Speed Control<br />
During typical combat operations, attack helicopter pilots are expected to reach their<br />
targets within 30 seconds before or after the assigned time. Although the Apache, for<br />
example, is capable of flying in excess of 100 knots, such strict Time on Target (ToT)<br />
requirements rarely necessitate such speeds. During the opening minutes of the 1991<br />
Gulf War, U.S. Army AH-64 Apaches penetrated Iraqi airspace and engaged various radar<br />
sites in preparation for massive fixed-wing air strikes. Taking these radar sites down<br />
would be crucial to the survival of Coalition aircraft heading into Iraq. The Apaches,<br />
however, did not charge into Iraqi territory at 90 knots. Instead, they moved slowly—<br />
as slowly as 25 knots by some accounts—to minimise their visibility to Iraqi forces.<br />
49
A well-planned mission will time your waypoints and ToT such that breakneck, reckless<br />
speed is not required. Controlling your speed is critical to battlefield survival. On average,<br />
you should expect to fly at 60 knots or less through the majority of your flight. Slower<br />
targets are more difficult for the enemy to detect—plus, it’s easier to slow the helicopter<br />
and enter a hover (especially behind an obstacle) should you unexpectedly encounter<br />
enemy forces.<br />
Masking<br />
On the modern battlefield, you can encounter a variety of weapons platforms with optical,<br />
laser, thermal, and radar guidance systems. Despite the diversity, all of these systems<br />
share one common weakness; they can’t hit what they can’t see. Hills, rocks, mountains,<br />
ridges, and other mounds of dirt (as well as buildings) are extremely effective at blocking<br />
all types of electromagnetic energy. Trees, especially heavy foliage, are also effective at<br />
hiding objects, especially in the optical, laser, and thermal bandwidths.<br />
Attack helicopters, whose very mission takes them into the heart of the battlefield, rely<br />
heavily on such terrain features to hide them from enemy air defenses. This tactic of<br />
hiding behind buildings, hills, and trees is called masking. Masking is a dual-edged<br />
sword, however. While it prevents the enemy from shooting at you, it also prevents you<br />
from shooting at them. Consequently, it is necessary to unmask, or move from behind<br />
the obstacle and obtain a clear line of sight to the enemy, in order to fire your<br />
weapons effectively.<br />
Masked behind trees.<br />
When you are transiting the battlefield, you should pay close attention to the terrain.<br />
Watch for terrain features or structures that can hide your helicopter from the enemy.<br />
When you’re ready to engage enemy forces, unmask slowly. You want to expose as little of<br />
your helicopter as is absolutely necessary. If masked behind a building, consider sliding right<br />
or left while maintaining the current altitude. Generally speaking, the higher you fly, the more<br />
likely it becomes that you’ll be spotted. Sliding out from behind the building usually presents<br />
less risk than rising above it. In the case of hills, cliffs, and other terrain features, sliding is<br />
still preferable, but might not always be an option. If you’re hovering behind a long ridgeline,<br />
your only option might be to slowly increase altitude until you’ve crested the ridge.<br />
50
Unmasked above trees to fire.<br />
Once you’re unmasked, the CP/G will have a clear line of sight to the target. He can lock<br />
targets using either the radar or the TADS. Keep in mind, though, that you’re exposed to<br />
return fire as well. This is where Lock On After Launch (LOAL) mode becomes effective.<br />
If, after you unmask, the CP/G fires weapons in LOAL mode, you can then re-mask the<br />
helicopter, wait for the missiles to close on the target area, then unmask again. With<br />
LOAL, the CP/G can re-lock the targets and guide the missiles home.<br />
Flying Ridges and Valleys<br />
When manoeuvring through valleys, always stay along the edge of the ridge, near the top.<br />
Avoid flying along the centre of the valley floor. Flying either behind the top edge of a<br />
ridge or along a valley floor provides an equal amount of protection; the helicopter is<br />
sufficiently masked in either case. However, if you unexpectedly encounter enemy forces<br />
moving up the same valley, it is much more advantageous to be near the edge of the<br />
valley. If you’re flying along the ridgeline, you can quickly move up and over the ridge,<br />
masking yourself along the opposite side. If, on the other hand, you’re caught in the<br />
middle of the valley—along its floor and besieged by anti-aircraft fire—you’re basically<br />
stuck out in the open, and your chances of escape are low.<br />
The Communications Menu<br />
The days when a solo warrior battled alone among the enemy hordes are gone.<br />
Today’s battlefield requires co-ordinated, carefully orchestrated manoeuvres by multiple<br />
participants. You might have as many as four groups, or flights, of helicopters in the air<br />
during a given mission. Although these other flights will have individual missions and<br />
flight paths, always remember the old adage, "No plan survives contact with the enemy".<br />
In other words, the battlefield is a fluid, rapidly changing environment. Plans made just<br />
two hours prior to the mission might be hopelessly outdated by the time the mission<br />
launches. It’s up to you to assess the ever-changing battle conditions during your flight<br />
and re-deploy the other helicopters (and yours!) as necessary.<br />
51
Press t to call up the Communications menu. Using this, you can issue orders to<br />
your wingman and any other flights under your command. When it first opens, the<br />
Communications menu lists the available flights—one through four. Option 5 is All<br />
Helicopters, and 6 represents any support artillery or air support you have available.<br />
Select who you want to contact by pressing the number key (along the top row of the<br />
standard keyboard, not the numeric keypad) that corresponds to the option. This opens<br />
the Command menu for the unit. (If you make a mistake, you can use t to back out<br />
level by level.)<br />
The options on the Command menu depend on what type of unit you selected. They can<br />
include the following:<br />
Waypoint Number Use this to select any one of the unit’s waypoints. You can then<br />
modify the unit’s orders for that waypoint.<br />
Waypoint Type This button cycles through the available types of waypoints. Each<br />
standard type has a default setting for the Speed, Flight Profile,<br />
Formation, Combat Mode, and Priority Target for the selected flight.<br />
You can override these settings individually using the rest of the<br />
buttons. The default settings are:<br />
Checkpoint (CP): Fly to this point and continue forward<br />
without stopping.<br />
Assembly Area (AA): Fly to this waypoint, avoiding combat,<br />
then loiter for 5 to 10 minutes or until the leader issues the<br />
"Go" command.<br />
Battle Position (BP): Fly slow NOE to this waypoint and assume a<br />
firing position. Engage enemy forces for 5 to 10 minutes or until the<br />
leader issues the "Go" command.<br />
Patrol Area (PA): Fly to this waypoint and patrol for 5 to 10 minutes<br />
or until the leader issues the "Go" command.<br />
SAR Landing Zone: Attack helicopters treat this as a PA waypoint.<br />
Transport helicopters fly to this waypoint, avoiding combat, then<br />
search for friendly troops, land, and pick them up.<br />
Landing Zone (LZ): Attack helicopters treat this as a PA waypoint.<br />
Transport helicopters fly to this waypoint, avoiding combat, then<br />
land and drop off troops.<br />
Speed This setting and the next (Flight Profile) are interconnected. With<br />
this, you control how quickly the pilot will fly to get to this waypoint.<br />
The actual speed varies, depending on the Flight Profile, because of<br />
the need to dodge terrain. There are three options:<br />
52
Slow is 30 to 50kts.<br />
Tactical is 50 to 80kts.<br />
Sprint is maximum possible speed at all times.<br />
Flight Profile This setting determines the altitude that the helicopter’s pilot should<br />
strive to maintain between the previous waypoint and this one.<br />
There are three options:<br />
Nap of the Earth orders the helicopter to maintain an altitude below<br />
60ft; 30ft is optimum. The pilot has permission to reduce speed as<br />
necessary to maintain this altitude.<br />
Contour tells the pilot to keep to an altitude below 100ft; 70ft<br />
is optimum.<br />
Cruise orders the altitude kept between 100 and 150ft, and the pilot<br />
can and should rise to 200ft if no enemies are present.<br />
Combat Mode This gives the helicopter its overall orders regarding its combat<br />
mission between the previous waypoint and this one.<br />
The options are:<br />
Search and Destroy orders are to open fire on and advance toward<br />
any enemy unit. The helicopter is to continue its mission once either<br />
all targets are destroyed or visual contact is lost.<br />
Suppression of Enemy Air Defenses (SEAD) tells the helicopter to<br />
open fire on and advance toward enemy air defense sites.<br />
Engage orders mean to open fire on any detected enemy only if<br />
doing so does not delay the mission for more than one minute.<br />
After one minute, the helicopter is to continue on its mission.<br />
Bypass orders the helicopter to seek cover, avoid contact,<br />
and continue toward the waypoint.<br />
Priority Target This determines what type of target the helicopter should attack<br />
first, if there is a choice.<br />
Orders Use this to give immediate action instructions to other helicopters.<br />
Possible orders are:<br />
Fire at Will lets the aircraft’s crew use their weapons as they see fit.<br />
Hold Fire restricts weapon use and engagement to immediate<br />
self defense.<br />
53
Go to next Waypoint tells a helicopter flight to ignore their current waypoint and continue<br />
to the next one. This is the "Go" order.<br />
Make Active Waypoint orders a flight to make the selected waypoint<br />
their active, current waypoint. All waypoints previous to that one are<br />
ignored and deleted.<br />
Support This calls in artillery and air support. To use this, you must have an<br />
active Target Reference Point (TRP) and support units available.<br />
To set a TRP, place your view over a target or area and press 7.<br />
(To move the point, repeat the procedure.) Once a TRP is set, you<br />
can open the Command menu, select Support, and an entry appears<br />
for each available type of support mission. When you select a<br />
mission, it is automatically called in on your current TRP.<br />
Realistic Flight Mode<br />
When you start Gunship!, one of the reality options is a choice between Easy simplified<br />
flight, Enhanced flight and Realistic flight. Realistic flight is more difficult for novices, but<br />
once you get the hang of it, the controls are more flexible and useful, especially at high<br />
speeds. However, if Realistic flying is too frustrating, start with Easy flight and work your<br />
way up. Enhanced is the midpoint between the two other modes. When you've conquered<br />
Easy, but you don't yet feel ready for Realistic, Enhanced is a useful in-between step.<br />
Easy Flight vs. Realistic<br />
In Easy Flight, neither the pitch nor roll, altitude nor airspeed of the helicopter has any<br />
effect on lift. This means that regardless of how you manoeuvre the cyclic joystick, lift is<br />
not affected. (Thus, power dives will not work.) The collective is the only control that<br />
affects lift in Easy flight. Any time you want to add lift (to climb, slow your descent, and<br />
so on) or reduce lift (to slow your ascent, begin or increase a descent, and such), you<br />
must move the collective.<br />
In Realistic flight, the pitch, roll, altitude, and airspeed affect lift as they would in a real<br />
helicopter. Among other things, Realistic flight means that at high speed you can fly the<br />
helicopter like an aeroplane. A slight pitch up slows the helicopter and causes a climb<br />
(by reducing speed into the 30-90 knot area for maximum translational lift), while a steep<br />
pitch down puts the helicopter into a fast power dive. Here are some of the other features<br />
of Realistic flight:<br />
Ground Cushion Effect: At altitudes of 25 feet or less, your helicopter gains a little extra<br />
lift at low speeds. The lift you gain varies with altitude, and it<br />
disappears entirely if you’re flying too fast.<br />
54
Translational Lift: At speeds of 30 to 90 knots, you gain considerable extra lift.<br />
The amount varies with your helicopter’s speed.<br />
Roll and Lift: Whenever it experiences any significant amount of roll, the<br />
helicopter loses some lift. This lift loss increases as the helicopter<br />
rolls further left or right.<br />
Altitude and Lift: At higher altitudes, you have less lift due to the thinner air. This<br />
lift loss is really only noticeable above 1,000 feet, and it increases<br />
as you get higher and higher. What this boils down to is that you<br />
must adjust the collective to maintain level flight.<br />
A Few Realistic Manoeuvres<br />
Here’s a brief introduction to a few manoeuvres using Realistic flight. They are in order so<br />
that you can do one immediately following the other.<br />
Climb to Hover Move the collective up slowly until you rise off the ground.<br />
At about 50 feet, return the collective to the neutral position. Here,<br />
the helicopter is truly level, with no pitch down or up. Note that<br />
the reticle is on the horizon line and airspeed is zero. The<br />
collective is adjusted so the Rate of Climb indicator is centred.<br />
From a hover, you can cause your helicopter to ascend straight<br />
upwards or descend straight downwards by changing the<br />
collective.<br />
Rotate in Hover This is only possible at extremely low speeds or when hovering.<br />
Move your rudder slightly to the right. If you’re using the<br />
keyboard, press the right arrow once. Your helicopter begins to<br />
rotate to the right. Return the rudder to centre or press the<br />
opposite arrow key, and you’ll stop turning. Now, rotate to the<br />
left. The more rudder you add, the faster the helicopter rotates.<br />
Stop your rotation. You’re ready to begin flying.<br />
Skid Sideways This is only possible at speeds under 40 knots or when<br />
hovering. Move the cyclic joystick left or right to roll the<br />
helicopter. Due to your lack of airspeed, the helicopter skids left<br />
or right without forward motion. Unless the collective is<br />
adjusted appropriately, a skidding helicopter loses some lifting<br />
power and, thus, loses altitude.<br />
55
Forward Flight Begin pushing forward lightly on the joystick to "pitch down" the<br />
helicopter. At the same time, slightly increase collective to keep<br />
from losing altitude. You’ll begin to move forward. The farther<br />
you pitch down, the more your speed increases, and the more<br />
collective you have to add. Try not to push all the way, as this can<br />
cause you to lose altitude too quickly. When your speed reaches<br />
50 to 100 knots, ease off the stick until your speed stabilises.<br />
You are now in level flight. To slow down, pull the stick back<br />
toward you. You will both slow down and gain altitude; this is<br />
called "flaring". If you wish to keep a steady altitude, decrease<br />
collective as you flare. The further you pitch up, the more your<br />
speed decreases, and the more collective you have to subtract.<br />
Watch your speed! When you have stopped, release the stick.<br />
If you maintain this attitude, you will begin to fly backwards.<br />
Practice level flight until you’re comfortable with all this.<br />
Turning Return to level flight at about 75 knots. Next, push the stick left<br />
slightly. Your helicopter rolls into a banking left turn and begins to<br />
lose altitude. Slightly increase collective to offset this loss. As you<br />
turn, observe the change in your digital heading readout at the<br />
top of the screen. Return the stick to centre. You’ll roll back to the<br />
right, level out, and return to level flight. Practice turning in both<br />
directions until you are satisfied with your skills.<br />
Level Flight In level flight, the helicopter is pitched down ("nose down").<br />
The greater the pitch, the faster the forward flight. Note that in<br />
forward flight, the reticle is always below the horizon line.<br />
The Rate of Climb indicator is centred, indicating flight is level.<br />
In combat flying, a typical level flight speed is 100 to 150 knots.<br />
If you’re descending (the marker is below centre), add some<br />
Collective Up until the marker is centred. Conversely, if you’re<br />
ascending, put in some Collective Down. When the Rate of Climb<br />
indicator is on the centre mark, you are in level flight.<br />
Change Altitude When flying, the easiest way to climb or descend is to raise or<br />
lower the collective. When you reach your new altitude, put in an<br />
equal and opposite amount of collective for a second, then set the<br />
collective in a neutral position. Remember, it’s easy to overcorrect<br />
and put in too much collective. This results in you<br />
"chasing the needle." After each change in the collective, wait a<br />
second or two for the aircraft to stabilise. Practice flying around<br />
until you are ready to move on.<br />
56
Power Dive When flying level at 100-150 knots, another way to descend is to<br />
push the cyclic joystick forward (pitch down) into a power dive.<br />
As you approach the altitude you desire, gently pull the cyclic<br />
joystick back (pitch up) until the Rate of Climb indicator again<br />
stabilises at zero. Similarly, another way to climb is to pitch up<br />
slightly, reducing your airspeed to 50-100 knots. When you reach<br />
the desired altitude, pitch down again until the Rate of Climb<br />
indicator stabilises. This method exchanges speed for altitude or<br />
vice-versa. This technique of flying is not unlike flying an<br />
aeroplane. Using it, you can change altitude without disturbing<br />
the collective.<br />
CO-PILOT/GUNNER (CP/G)<br />
The modern, high-tech battlefield is a fast-paced, demanding, and very unforgiving<br />
environment. Detecting, identifying, and locking targets on a confused and chaotic<br />
battlefield, combined with selecting and firing the appropriate weapon within its launch<br />
envelope, demands your full attention. Consequently, the modern attack helicopter carries<br />
a crew of two, so that the CP/G can focus full attention on finding and destroying enemy<br />
targets—while someone else flies the chopper.<br />
From the CP/G’s seat—the Gunner’s Cockpit—you have access to the MFDs, the ORT,<br />
weapons selection, and a tailored version of the IHADSS—one that focuses on weapons<br />
and targeting rather than the helicopter’s speed and attitude. In addition, you can also<br />
communicate to the pilot through a series of brief commands. Your duty is to find, lock,<br />
and kill targets, often with the help of the pilot.<br />
Communicating with the Pilot<br />
As CP/G, your job is to find and engage targets; the pilot is responsible for flying the<br />
helicopter. When you locate enemy forces, however, you’ll need to guide the helicopter<br />
into a proper attack position. To do this, you need to communicate your needs to the<br />
pilot. You do so through a set of handy command keys, which allow you to give your pilot<br />
a wide variety of instructions:<br />
8 1/3 Speed<br />
9 2/3 Speed<br />
0 Full Speed<br />
W No Orders (Give control back to the pilot.)<br />
H Stop and Hover<br />
= Increase Altitude by 25ft<br />
57
- Decrease Altitude by 25ft<br />
[ Turn Left<br />
] Turn Right<br />
G Turn to my Direction<br />
; Slide Left<br />
! ’<br />
Slide Right<br />
0 Break to Cover<br />
P Pop-Up<br />
Gunner’s and ORT Cockpits<br />
The gunner actually has two views to work with; the Gunner’s Cockpit and the Optical<br />
Relay Tube (ORT) Cockpit. The former gives you a larger field of view and better<br />
awareness of the overall situation, while the latter gives you a magnified, stabilised,<br />
but much limited view for precise targeting.<br />
Press 2 to move to the CP/G position in the Gunner’s Cockpit view (also called head’s<br />
up mode). The MFDs and instrument panel are all visible, along with your IHADSS<br />
display. The CP/G’s IHADSS is similar to the pilot’s display, showing airspeed, heading,<br />
and altitude, but the crosshairs are replaced by a targeting box. As gunner, you do not<br />
see the velocity vector or waypoint information—you don’t need them. Along the bottom<br />
edge of the display, the Target Acquisition and Designation System (TADS) readout waits<br />
to show the range to the target (when the laser is activated). Along the compass at the<br />
top of the display, the alternate sensor bearing indicates the direction you are facing,<br />
as compared to the direction the helicopter is facing.<br />
The CP/G’s IHADSS display.<br />
The field of view display spans the bottom of the screen. The large outer box, called the<br />
Sensor Field of Regard, shows the available range of motion for your sensor. The centre<br />
of the box represent the nose of the helicopter, while the sides of the box represents the<br />
sensor’s left and right gimbal limits. The smaller box within, called the Field of View<br />
display, indicates the actual view position of the sensor.<br />
58
Press 3 to switch into the ORT view. This is a full-screen, heads down targeting<br />
readout. The ORT is very similar to the periscope on a submarine; it provides a stabilised,<br />
magnified view through the TADS. When you’re using the ORT, you are no longer fighting<br />
the helicopter’s movement to get a target lock (that’s what we mean by stabilised). This<br />
makes it much easier to engage targets at long range. The major disadvantage of using<br />
the ORT view is that you lose the situational awareness that the IHADSS provides. Try<br />
both of these "cockpits" and use the one that better fits your style of play—or alternate<br />
depending on the situation.<br />
The ORT view.<br />
Acquiring Targets with the FCR<br />
The Fire Control Radar (FCR) is your primary tool for locating enemy targets at long<br />
range. To activate it, cycle the MFD until the radar display appears. (If the radar is not<br />
selected in an active MFD, it is automatically placed in standby mode.)<br />
Cycle radar contacts with the < and > keys.<br />
You can use C and V as necessary to adjust the magnification level of the MFD so<br />
that your intended targets are readily distinguishable. Next, use < and > to cycle<br />
through your radar contacts. When you do, a targeting box on the IHADSS moves to<br />
overlay each new contact, and so does the designator box on the radar MFD. IF you<br />
want to lock on a particular target, press / when the designator is on that contact. The<br />
IHADSS targeting becomes a solid, target designator (TD) box, highlighting the locked<br />
target. Note that the FCR TD box is yellow, to distinguish it from the TADS TD box. You<br />
can have up to four targets locked up at one time with the FCR.<br />
59
(To unlock a target, cycle to it and press / again.) You can launch radar guided<br />
missiles (and only radar guided missiles) at targets locked with the fire control radar.<br />
For more detail on these weapons, read the description of LOBL, in the section on<br />
Anti-Tank Missiles.<br />
Lock the radar contact using the / key.<br />
A quick cautionary note: When the IHADSS is in Easy mode, only "living" enemy units are<br />
displayed in your radar. When you’re in Realistic mode, all targets, both friend and foe<br />
living and already destroyed, are shown. Be very careful when you’re engaging targets<br />
with only radar contact.<br />
Acquiring Targets with the TADS<br />
The laser-based Target Acquisition and Designation System (TADS) provides an alternative<br />
method for designating contacts. The TADS laser, effective only within visual range, follows<br />
the IHADSS targeting box, giving you a quick way to lock visually acquired targets.<br />
The TADS targeting box prior to locking a target.<br />
Using the TADS is relatively simple. First, activate the laser by pressing the z.<br />
A letter ‘L’ starts flashing along the bottom of the IHADSS, to indicate that the laser is<br />
active. The numeric readout to the right of this L reads the range in meters, as measured<br />
by the laser range finder, to the point under the IHADSS targeting box. Steer the targeting<br />
box over the desired enemy vehicle, then press L. The target designator (TD) box<br />
appears over the target and the range to the target (in meters) appears on the bottom of<br />
the IHADSS. The TADS will track the locked target until the lock is broken, either by the<br />
gunner or by an intervening physical object.<br />
60
A TADS locked target.<br />
You can now launch weapons at the locked target. For more detail on engaging with your<br />
weapons, read the next section, Engaging Targets.<br />
Engaging Targets<br />
The attack helicopter was designed to do exactly that: attack! Fancy flying and clever<br />
manoeuvres have yet to destroy an enemy tank. Success on the battlefield demands that<br />
you be intimately familiar with your weapon systems and their use.<br />
Cannon<br />
The onboard 30mm cannon automatically follows your IHADSS movements, always<br />
pointing exactly where you’re looking. It has a 120 degree arc of movement to either side<br />
of the helicopter and can fire almost straight down. The cannon’s rate of fire varies based<br />
on the helicopter you’re flying, but is generally in excess of 600 rounds per minute and is<br />
effective to a range of roughly 1 km. The cannon is effective against a wide variety of<br />
targets, including lightly armoured vehicles. Wheels and tracks on heavily armoured<br />
vehicles are susceptible to 30mm fire, which can reduce their capability to fight even if<br />
the 30mm rounds do not actually penetrate their armour. You can select the cannon as<br />
the active weapon by pressing 5.<br />
The cannon tracks the TADS.<br />
61
When the cannon is the active weapon, the targeting box becomes targeting crosshairs.<br />
The gun follows any IHADSS movements, and you can fire it in two ways:<br />
• Lock the desired target using the TADS. The gun then fires wherever the TD<br />
box indicates.<br />
• Fire the cannon without locking a target by simply pointing the crosshairs at the desired<br />
object and pulling the trigger. The cannon will fire where the crosshairs point. This<br />
method works well in emergency situations for firing quickly at close range targets.<br />
Since the target is not locked, however, the crosshairs move as the helicopter moves,<br />
making this method less accurate in the normal Gunner Cockpit view. In the ORT,<br />
however, the view is stabilised, which allows you to engage targets more accurately at<br />
longer ranges.<br />
You may fire the cannon without first locking<br />
a target.<br />
Unguided Rockets<br />
Every attack helicopter in Gunship! can carry some form of unguided rocket. As the name<br />
implies, rockets are self-propelled, unguided (they just fly straight ahead) weapons. They<br />
have an effective range of 2 to 3km. Since rockets are unguided, they’re not particularly<br />
accurate. Numerous factors, like movement of the helicopter during firing and gusts of<br />
wind during flight, can and will cause them to miss their mark. Consequently, rockets are<br />
usually fired in bunches—salvos—in an effort to blanket the target area with fire.<br />
Target locked, but rocket I-beam too far<br />
from target.<br />
62
Rockets can be equipped with a wide variety of warheads. Which one you want to use<br />
depends on the intended target. Warheads range in power from high explosives to antipersonnel<br />
sub-munitions. Rockets are generally used against "soft" and "medium" targets,<br />
including enemy troops, trucks, lightly armoured vehicles, and buildings. Rockets are not<br />
particularly effective against hardened bunkers, nor against heavily armoured vehicles<br />
like tanks.<br />
Target locked, I-beam on target, ready to fire.<br />
Make rockets the current weapon by pressing 6. If you have more than one type<br />
loaded, pressing 6 more than once cycles through the available rocket types.<br />
The IHADSS crosshairs become an I-beam. This I-beam is dashed when you have it<br />
aimed outside of the proper firing parameters—out of its targeting cone. Lock a target<br />
using either the FCR radar or the TADS laser, then have the pilot turn the helicopter to line<br />
up the I-beam over the desired target. (Use G to tell the pilot to turn to your current<br />
heading.) Instruct the pilot to move forward if it’s necessary to get into rocket range.<br />
When the I-beam turns solid, fire when ready!<br />
You may fire rockets without first locking a target.<br />
You can also fire rockets without first locking a target. The rockets will strike wherever the<br />
I-beam points when they’re launched. This method is less accurate, but it can work well<br />
in emergencies or after your avionics sustain battle damage.<br />
63
Anti-tank Missiles<br />
Anti-tank missiles come in two basic varieties: laser guided and radar guided. In both<br />
cases, the launching platform (your helicopter) must illuminate the target with the<br />
appropriate energy source. The missile then homes in on the reflected energy—laser or<br />
radar. Although anti-tank missiles are the attack helicopter’s most powerful weapon, the<br />
need to maintain a target lock can leave the helicopter exposed to enemy fire. As a result,<br />
anti-tank missiles have been developed to fire in one of two modes: Lock On Before<br />
Launch (LOBL) and Lock On After Launch (LOAL).<br />
There are also two less ordinary types of anti-tank missile—Optical Wire Guided (OPWIRE)<br />
and Infrared Fire and Forget (IRFF). These are only available to you when flying the Tiger.<br />
LOBL<br />
Lock On Before Launch is the easiest and most intuitive method of firing anti-tank<br />
missiles. Press 7 to cycles through the available missile types and modes.<br />
The current type and mode appear in the lower right of the IHADSS. When LOBL<br />
appears, that indicates that your current weapon is a laser guided anti-tank missile<br />
ready to be fired in LOBL mode. Similarly, LOBL FCR indicates a radar guided anti-tank<br />
missile ready to be fired in LOBL mode.<br />
Cycle the 7 key until the weapon readout<br />
displays LOBL.<br />
As the name implies, LOBL launches require you to establish the appropriate radar or laser<br />
lock before firing the missile. Once a lock has been established, the target designator box<br />
appears on the IHADSS over the designated target. If the box is dashed, your target is<br />
outside the missile’s launch envelope. To get it into the envelope, instruct the pilot to turn<br />
toward the target and close the range. Once the box becomes solid, you can fire the missile.<br />
Here’s the catch; you must maintain the laser or radar lock for the entire flight of the<br />
missile (and while you’re out there, you are a target for enemy fire). Any obstruction that<br />
gets between you and the target—including hills, trees, and buildings—will block the<br />
laser beam or radar waves and break the target lock. If that happens, the missile "goes<br />
dumb" and (eventually) flies into the ground.<br />
64
LOAL<br />
To protect your helicopter from enemy fire while the missile is in flight, you can choose to<br />
fire anti-tank missiles in Lock On After Launch mode. With LOAL, you locate the desired<br />
target, but do not establish a lock. Next, instruct the pilot to manoeuvre the helicopter near<br />
some obstacle—a ridge line or a building, for example. With your helicopter hovering just<br />
above the obstacle and facing the target, select the appropriate missile type and mode by<br />
cycling with 7 and observing the launch mode indicator in the lower right of the<br />
IHADSS. LOAL indicates that a laser guided missile is ready to be fired in LOAL mode.<br />
When you’ve selected, fire a missile in the general direction of the target. As soon as<br />
the missile is away (and beyond the obstacle), instruct the pilot to decrease altitude<br />
until you’re safely hidden behind the obstacle. The launch mode indicator changes to a<br />
Time of Flight (TOF) counter. This displays, in seconds, how much longer the missile<br />
will fly. During the final seconds of the missile’s flight, the TOF counter changes to<br />
display the word LASE. This is your cue to unmask and lock the target. Quickly order<br />
the pilot to manoeuvre above or around the obstacle, then find and lock the target—<br />
using laser or radar, depending on the type of missile you fired—before the counter<br />
reaches zero. If the missile hasn’t already passed the newly locked target, it will detect<br />
the reflected energy, turn and engage the target.<br />
A more aggressive approach calls for firing multiple missiles, staggered 10 to 15 seconds<br />
apart. (This one takes some serious skill to perform.) After you’ve fired the missiles, order<br />
the pilot to descend and wait until the first missile nears the target. Order a climb above the<br />
obstacle and quickly lock a target. Once the first missile strikes the target, quickly select<br />
another target. Repeat this process until all of the missiles in flight have struck targets.<br />
OPWIRE<br />
To improve on accuracy, some missiles—like the HOT 3 carried by the Eurocopter<br />
Tiger—were designed to unreel a thin copper wire behind them as they fly. In this way,<br />
the launching helicopter remains in constant contact with the missile, and the gunner can<br />
provide additional guidance instructions until the wire is broken. Wire guidance missiles<br />
follow the current TADS aim-point. In some situations, this even allows you to change<br />
targets in mid-flight. Sudden turns or drastic course adjustments, however, might break<br />
the wire. If the wire breaks, you lose all control over the missile.<br />
IRFF<br />
The Infrared Fire and Forget is possibly the most convenient missile for the helicopter<br />
crew. Once launched, a fire and forget missile lives up to its name; you can go on your<br />
way without worrying about it. These weapons have an internal infrared (heat) sensor<br />
that they use to guide themselves to their target, which you designate for them using a<br />
TADS lock. Once launched, the missile neither needs nor accepts further guidance.<br />
Used correctly, flares can "distract" these missiles.<br />
65
BASIC TACTICS<br />
You know how to fly and shoot, but that’s only the beginning. There’s a world of tactics<br />
and strategies you can use, both in combat and out of it. This section introduces a few<br />
basic tactical ideas. Hopefully, these will help you keep your helicopter alive long enough<br />
that you can start developing tactics of your own.<br />
Two Pieces of Advice<br />
Make a plan. Before takeoff, you should always examine the map of the operations area.<br />
Based on what you already know of your mission, you can do several things to increase<br />
your chances of success even before you get into the helicopter. Among them:<br />
• Look for flight paths that give you cover all or most of the way to your target area.<br />
Also look for good hiding places. Even if you don’t use them, the enemy might.<br />
• Don’t trust intelligence regarding enemy locations. While your briefing includes the best<br />
information available to you, that info could be out of date or incomplete.<br />
Remember your mission. When you’re in the air, don’t get sidetracked by other targets<br />
until after the mission is complete. It’s easy to take a little time and hit a few targets of<br />
opportunity, but it’s all worthless if you miss your main target or run out of ammo<br />
before you reach it.<br />
• Be willing to change your flight plan. The plan devised by Operations is usually a good<br />
one, but it might not be the best one for you. The same goes for the flight plan you<br />
made before takeoff. If the situation changes once you’re in the air, your ability to be<br />
flexible and adapt in mid-mission might be what saves the day.<br />
• Set Battle Positions in good firing spots, at least 1 or 2 kilometres from your target.<br />
This gives you a good selection of targets in your weapons range and makes it harder<br />
for them to fire at you.<br />
• The indirect approach is generally best. Setting your waypoints on the primary target<br />
and flying full speed at a few hundred feet of altitude toward the target might work on<br />
training missions, but its pure suicide in combat.<br />
Offensive Tactics<br />
You will not be sent out in your helicopter gunship on a mission to defend yourself.<br />
You are assigned targets, and your success is measured based on your ability to destroy<br />
those targets. That’s where offensive tactics come in handy.<br />
66
The Approach<br />
The vast majority of gunship flights are ground-attack missions. You are ordered to knock<br />
out hard or soft targets in a certain area—often an area protected by SAMs (Surface-to-<br />
Air Missiles) and AA (Anti-Aircraft) guns.<br />
The standard technique is to fly in quick dashes ("bounds"). Fly from one covered position<br />
to another, staying below 100 feet. Before making a dash, hover and pop up briefly to<br />
between 100 and 200 feet. Search quickly for potential enemies, then drop low again and<br />
check your instruments. Your RAWS and RADAR can give you critical information.<br />
Pick your next covered position, rotate to face that direction, then pitch down and zoom<br />
forward! Stay as low as possible. When selecting routes, use cover such as hills, trees,<br />
and buildings to screen yourself from enemy fire.<br />
The Battle Position<br />
Once you have detected your targets, do not swoop in for a close range attack! Find a<br />
good covered position and go into a hover behind it. Conduct a pop-up (described below)<br />
and engage one target. As soon as that target is destroyed—but no more than 20<br />
seconds later—drop back down behind cover. Move a short distance, staying under<br />
cover, and repeat the pop-up. This gives you the maximum time to use your weapons,<br />
but keeps you always able to get under cover before your opponents can hit you.<br />
Pop-up Attacks<br />
The "pop-up" technique is simple. Hover behind a cover that screens you from suspected<br />
enemy positions. Climb up over the obstruction until you're just above the top of the<br />
cover. Scan around and watch your threat display. If you recognise an important target<br />
immediately, open fire. If not, drop back down into cover. You can now consider your<br />
situation and decide if you want to pop up again and attack those targets or bound on,<br />
avoiding them. If you decide to attack, pop up just long enough to knock out your<br />
selected target, then drop back into cover.<br />
Selecting Weapons<br />
Use the right weapon for the job. At longer ranges (over 2 kilometres), use ATGMs<br />
against vehicles and bunkers; use FFARs against infantry, AA gun sites, and buildings;<br />
and use AAMs against enemy aircraft. If you are brave enough to get in close, your best<br />
all-around weapon is the cannon. At ranges beyond 700 meters or when making side<br />
shots, however, the cannon consumes large amounts of ammunition for each hit, due to<br />
its poor accuracy at longer ranges.<br />
67
SEAD<br />
SEAD stands for Suppression of Enemy Air Defense. One of the strengths of the<br />
helicopter is that it can sneak up on targets, taking full advantage of terrain cover.<br />
Therefore, it is much better suited to attacking air defense units than traditional<br />
fixed-wing aircraft. US Army-Air Force co-operation tactics plan for helicopters to attack<br />
anti-aircraft units while ground attack jets bombard ground targets.<br />
The key to eliminating enemy air defenses is engaging them quickly. Enemy anti-aircraft<br />
defenses have a reaction time of 5 to 20 seconds, depending on the quality of the<br />
equipment and skill of the crew. When targeting any AA site, you must destroy it during<br />
this time. Against enemy SAMs, you have a little extra time and some warning, because<br />
you can see the missile coming on the threat display. Use that time to activate<br />
countermeasures (chaff and flares) or dive for cover. Enemy guns are tougher, due to the<br />
combination of the short range and their high muzzle velocity. Guns are also not affected<br />
by chaff and flares.<br />
Tank Hunting<br />
The helicopter gunship was designed to kill tanks. It’s just a matter of loading up with<br />
ATGMs and heading out to the happy hunting grounds. At a range of 4 or 5 kilometres,<br />
it’s like shooting fish in a barrel. If you prefer, you can come closer and cut them apart<br />
with the cannon or bomblet rockets. Keep in mind that the U.S. Army expects a 14 to 1<br />
kill ratio. (That is, when you destroy your 14th tank, the helicopter has paid for itself; it’s<br />
become a cost-effective weapon.) In your eagerness to create scrap metal, make sure you<br />
don't blast friendly tanks by accident.<br />
Most tanks don't carry any AA weapon larger than a heavy machine gun, but recent<br />
doctrine and field tests indicate that some tanks can use their main guns effectively<br />
against slow moving helicopters. Infantry Fighting Vehicles (IFVs) are a greater threat,<br />
because most are armed with a 20 to 30mm auto-cannon, and their companion infantry<br />
carry light IR (infrared) homing missiles. The biggest problem in tank hunting is that<br />
specialised air defense vehicles have a nasty habit of travelling with the tanks and IFVs.<br />
Whenever you see a large concentration of armour, expect to find an air defense vehicle.<br />
Find it and take it out first. Then make sure it was alone before moving on to the armour.<br />
Infantry and Bunkers<br />
Infantry in open ground are difficult to see with the naked eye. Thermal sights make<br />
spotting infantry easier, but only at relatively short ranges-1 to 2 kilometres. Infantry<br />
might carry machine guns and other light weapons, and they are sometimes equipped<br />
with light IR homing missiles. You can attack infantry with rockets or the cannon. If you<br />
charge in fast and low, you might get them before they're ready to get you!<br />
68
Attacking infantry is tricky, because it’s often hard to tell the good guys from the bad<br />
guys. Always check your map to avoid making costly and painful mistakes. On the plus<br />
side, bunkers are easy to destroy. They can be seen at range and destroyed using ATGMs.<br />
However, most bunkers have thick roofs that are nearly impervious to cannon fire.<br />
Defensive Tactics<br />
The most common problem you'll have in the air is surviving enemy ground fire.<br />
This includes enemy anti-aircraft artillery (AAA) and surface-to-air missiles (SAMs). From<br />
a pilot’s point of view, these fall into three categories: radar-guided threats, IR threats, and<br />
optically guided (which your instruments don’t warn you about).<br />
Enemy Sensors<br />
Only the higher quality Air Defense Vehicles and SAMs use radar-guided systems.<br />
These weapons have search radar which can "see" you at long ranges—day or night and<br />
through light cover. Radar, like normal eyesight, is blocked by objects on the ground.<br />
As a result, ground-based radar has a "dead zone" into which it cannot see. Above this<br />
dead zone, the radar can and will find you. The dead zone becomes smaller and lower as<br />
you approach the radar. (Think of the radar as extending in a cone upward and outward<br />
from the site, and you’ll have a good visualisation of how this works.) The best defense<br />
against radar is to stay low and use cover.<br />
Units using visual or thermal systems generally have a much more difficult time finding<br />
your helicopter. The accuracy of both is degraded by weather and time of day, just as<br />
your systems are. Pay attention to visual and thermal conditions during any battle.<br />
When visibility is bad, it usually results in close in, split-second engagements.<br />
Surviving Gunfire<br />
After tracking you for sufficient time, enemy guns will open fire and continue firing until<br />
they knock you down. You must either break their track on you or destroy the weapon.<br />
There are no other options. If you can’t take out the gun in a hurry, the best way to<br />
survive is skillful evasive flying.<br />
Surviving SAMs<br />
After a SAM battery has tracked you for a few seconds, it launches a missile.<br />
Missiles come in all three flavours: IR-guided, radar-guided, and visually-guided.<br />
Bear in mind that IR-guided missiles have their "seeker" on board the missile, while radar<br />
and visual guidance missiles are controlled from the launching vehicle.<br />
When a missile is homing in on you, you have several options. If you detect the incoming<br />
missile early, you can fly behind cover and break the lock. For radar and optically guided<br />
missiles, once the line of sight between them and you is broken, you are reasonably safe.<br />
IR missiles, however, can reacquire you if you leave cover (break cover) too soon.<br />
69
Your other option is to drop chaff and flare countermeasures. These work only over short<br />
ranges, and you drop them in groups (so you don’t have to pick). It's important to wait a<br />
bit before launching these decoys, since they bum out after a short while and the missile<br />
might then home in on you again. Countermeasures are best used in combination with<br />
evasive flying. It is always better to let the terrain take the missile hit than your helicopter.<br />
All missiles have a universal weak point—they have a huge turning radius. If you let one<br />
get close, then dart off perpendicular to its flight path, it will be unable to turn fast enough<br />
to hit you. This tactic is fairly easy to use in a high-speed jet aircraft, but it is far more<br />
difficult to accomplish in a relatively slow-moving helicopter—especially when the missile<br />
you’re trying to avoid is flying at 1,000 mph or faster. It takes enormous skill, split-second<br />
timing, and steady nerves to "turn inside" a missile with a helicopter.<br />
Evasive Flying<br />
Another way to avoid a threat is to dive to a lower altitude while turning parallel to or away<br />
from the threat. If you get lower and avoid closing the range, an enemy often loses sight<br />
of you. Enemy weapons aimed by eyeball (many AA guns and a few SAMs) cannot be<br />
jammed or decoyed. Against these threats, evasive flying is your only defense. Another<br />
evasive technique is to slow your speed once you're low. Slow movement at low altitude<br />
is very hard to spot at a distance. It is quite possible to "sneak up" on enemy positions<br />
unnoticed with a helicopter.<br />
Evasive flying is also superior to jamming and decoys because it doesn't broadcast your<br />
position. Both types of countermeasures, not to mention firing your weapons, reveal your<br />
presence to the enemy.<br />
Damage<br />
If you don't respond in time to a threat, the gunfire or missile will hit you. You'll see the<br />
flash of explosions around the edge of the cockpit. In training that’s all you'll see; your<br />
helicopter cannot be damaged. In a real battle, however, the explosion might penetrate<br />
your armour. You will know immediately when something has been damaged and is<br />
malfunctioning. Check the damage display to find out what’s wrong.<br />
If you suffer too many damaging hits, the structural integrity of your helicopter will fail,<br />
causing a general power failure. The actual number of hits varies with the situation, and<br />
enemy weaponry, but a good rule of thumb is expect the worst after you've suffered three<br />
or four damaging hits. The only way to survive a general power failure is to successfully<br />
"auto-rotate" to a landing. (Explaining how to perform this advanced manoeuvre is beyond<br />
the scope of this guide. We only mentioned it so that you’d know it’s possible.)<br />
If your helicopter is heavily damaged, you should abort its mission and send it to safety.<br />
Transfer your view to another helicopter, if there are any, and continue the mission.<br />
Few targets are worth the risk of losing an aircraft that is incapable of finishing the<br />
mission anyway.<br />
70
GUIDE TO VEHICLES<br />
AH-64D Apache<br />
The AH-64D Apache first entered service in 1998<br />
with the U.S. Army. It is currently replacing the A<br />
model through new construction and<br />
remanufacture. One in three deployed Apaches will<br />
mount the millimetre wave, Longbow radar. This<br />
will greatly increase its ability to locate targets<br />
through the rain, fog, and smoke that defeat FLIR<br />
and Thermal imaging. The complete Longbow<br />
system can be installed in less than four hours in<br />
the field, allowing this system to be moved from<br />
non-mission capable aircraft to operational ones.<br />
Other modifications in the D model include the "manprint" cockpit, with large Multi-<br />
Function Displays, more powerful 701C engines, larger generators, air to air missile<br />
capability, a digital auto-stabiliser, an integrated navigation system that includes Global<br />
Positioning capability, digital communications, and data transfer abilities. This last<br />
upgrade allows the AH-64D to be part of an integrated battlefield data system, in which<br />
information is passed from units down to command headquarters and then back to the<br />
units, allowing real-time information exchange.<br />
Specifications<br />
Dimensions<br />
Length: 51ft (15.54m)<br />
Rotor Width: 48ft (14.63m)<br />
Airframe Width: 19ft 1in. (5.82m) with weapon racks<br />
Height: 14ft 1.25in. (4.3m)—16ft 3in. (4.95m) with Longbow Radar installed<br />
Weight<br />
Empty Weight: 11,800lb (5,352kg)<br />
Maximum Fuel Weight: 2,442lb (1,108kg)<br />
Mission Gross Weight: 17,650lb (8,006kg)<br />
Power Plant<br />
Engines: two GE T700-701C turboshaft engines<br />
Continuous OEI: 1,890 SHP (1,409kW)<br />
71
Emergency OEI: 1,940 SHP (1,447kW)<br />
Maximum Combat Speed: 158kts (293kph)—141kts (261kph) with Longbow<br />
Rate of Climb (combat load): 2,530ft/min (771m/min)<br />
Range: 105 nautical miles (168km)<br />
Armament<br />
M230 30mm chain gun (1,200rds.)<br />
Up to 16x AGM-114K or L Hellfire II ATGM<br />
Up to 76x M261 70mm FFAR rockets<br />
2x AIM-9L Sidewinder missiles<br />
Armour<br />
Aircraft can continue flying for 30 minutes after being hit by 12.7mm rounds<br />
from below. Resistant to 23mm fire in critical areas.<br />
WAH-64D Apache<br />
This is the British Army version of the Apache,<br />
built by GKN Westland. The WAH-64D’s formidable<br />
surveillance and target acquisition capability,<br />
combined with weapon systems and avionics<br />
improvements, represent a significant increase in<br />
capability compared to the Lynx Mk 7 TOW<br />
currently in service with the British Army. Unlike<br />
the U.S. Army, the Royal Army plans to equip all of<br />
their WAH-64Ds with the Longbow radar system.<br />
Several modifications have been incorporated to meet specific <strong>UK</strong> requirements.<br />
The biggest is the incorporation of the Rolls Royce Turbomeca RTM322 turboshaft<br />
engine. The Helicopter Integrated Defensive Aids System (HIDAS), provides an integrated<br />
Radar; Laser and Missile warning sensors and countermeasures system. Other changes<br />
include folding main rotor blades, a new communications system that is compatible with<br />
<strong>UK</strong> standards, and a new rocket launcher system able to use the Canadian CRV7 rockets.<br />
72
Specifications<br />
Dimensions<br />
Length: 51ft 10in. (15.8m)<br />
Rotor Width: 42ft 7 3/4in. (13m)<br />
Airframe Width: 14ft 10in. (4.52m) with weapon racks<br />
Height: 17ft 1/4in. (5.2m)<br />
Weight<br />
Empty Weight: 7,275lb (3,300kg)<br />
Maximum Fuel Weight: 2,249lb. (1,020kg)<br />
Mission Gross Weight: 13,227lb (6,000kg)<br />
Power Plant<br />
Engines: two MTU/Rolls Royce RTM322 turboshaft engines<br />
Continuous OEI: 1,990 SHP (1,474kW)<br />
Emergency OEI: 2,100 SHP (1,556kW)<br />
Maximum Combat Speed: 147kts (272kph)<br />
Rate of Climb (combat load): 2,530ft/min (771m/min)<br />
Range: 119 nautical miles (191km)<br />
Armament<br />
M230 30mm chain gun (1,200rds.)<br />
Up to 16x AGM-114K or L Hellfire II ATGM<br />
Up to 76x 2.75in. CVR-7 FFAR rockets<br />
4x Starstreak missiles<br />
Armour<br />
Aircraft can continue flying for 30 minutes after being hit by 12.7mm rounds<br />
from below. Resistant to 23mm fire in critical areas.<br />
73
UHT-2 Tiger<br />
This is the German anti-tank and support version<br />
of the Eurocopter Tiger. The Tiger is a joint<br />
development project of Germany, France, and<br />
Spain; the first German Tigers are scheduled for<br />
delivery next year. The original plan for the UHT<br />
version did not include a gun system, but recent<br />
information indicates that they are reviewing this<br />
option. The Gunship! version of the helicopter is<br />
built to this latest specification.<br />
The Tiger differs from the other attack helicopters in Gunship! in that it has its main<br />
targeting sensor in a mast-mounted sight. The mast sight includes TV, FLIR, and laser<br />
ranging and designation systems. The pilot uses a separate FLIR system under the nose<br />
of the aircraft. The Tiger does not incorporate a Fire Control Radar system.<br />
The Tiger is smaller than either the Apache or the Havoc. It is very manoeuvrable and has<br />
a faster response time. This is somewhat offset by its lighter weapons and lack of radar.<br />
Specifications<br />
Dimensions<br />
Length: 51ft (15.54m)<br />
Rotor Width: 48ft (14.63m)<br />
Airframe Width: 19ft 1in. (5.82m) with weapon racks<br />
Height: 16ft 3in. (4.95m)<br />
Weight<br />
Empty Weight: 11,800lb (5,352kg)<br />
Maximum Fuel Weight: 2,442lb (1,108kg)<br />
Mission Gross Weight: 17,041lb (7,746kg)<br />
Power Plant<br />
Engines: two Rolls Royce RTM322 turboshaft engines<br />
Continuous OEI: 1,285 SHP (958kW)<br />
Emergency OEI: 1,556 SHP (1,160 kW)<br />
Maximum Combat Speed: 145kts (269kph)<br />
Rate of Climb (combat load): 2,106ft/min (642m/min)<br />
Combat Range: 205 nautical miles (342km)<br />
74
Armament<br />
Giat AM-30-781 30mm cannon (450rds.)<br />
Up to 16x TRIGAT or HOT3 ATGM<br />
Up to 44x 2.75in. FFAR rockets<br />
4x Stinger missiles<br />
Armour<br />
Aircraft is resistant to hits by 12.7mm rounds, and tolerant of 23mm fire in<br />
critical areas. It has less armour than the Apache, requiring some care be<br />
taken.<br />
Mi-28N Havoc<br />
Development of the Havoc started in 1980, and this<br />
helicopter was ready to go into production in the late<br />
1980s. The fall of the Soviet Union, however,<br />
delayed any deployment of the aircraft. The N model,<br />
designed with a mast-mounted radar and advanced<br />
night and all weather capabilities, was first flown in<br />
1997. Although the Russian government announced<br />
that same year that the Ka-50 had "won" the<br />
competition to replace the venerable Mi-24 Hind,<br />
production planning for the Mi-28N proceeded normally—but it was not offered for foreign<br />
sale. This follows standard Soviet-style procedures, intended to increase sales of one type of<br />
weapon system while development continues on a second system meant for their own use.<br />
Mission critical features of the Mi-28 include a mast-mounted millimetre wave radar<br />
system, advanced thermal sensors under the nose, an armoured cockpit, advanced fuel<br />
tanks, a self contained auxiliary power unit, and a state of the art navigation system.<br />
Little is known about the exact specifications of the Russian radar system.<br />
Specifications<br />
Dimensions<br />
Length: 55ft 9 1/4in. (17.01m)<br />
Rotor Width: 56ft 5in. (17.2m)<br />
Airframe Width: 16ft 1/4in. (4.88m) with weapon racks<br />
Height: 18ft 5in. (5.61m)<br />
75
Weight<br />
Empty Weight: 17,846lb (8,095kg)<br />
Maximum Fuel Weight: 2,947lb (1,337kg)<br />
Mission Gross Weight: 25,705lb (11,600kg)<br />
Power Plant<br />
Engines: two Klimov TV3-117VM turboshaft engines<br />
Continuous OEI: 2,070 SHP (1,545kW)<br />
Maximum Combat Speed: 145kts (270kph)<br />
Rate of Climb (combat load): 2,677ft/min (816m/min)<br />
Combat Range: 108 nautical miles (200km)<br />
Armament<br />
2A42 30mm chain gun (250rds.)<br />
16x 9M114 Kokon or 9M120 Vikhr Anti-Tank Guided Missiles<br />
Up to 80x 80mm UB-20 FFAR rockets<br />
4x 9M29 Igla AD Air to Air missiles<br />
Armour<br />
Armour is similar to that of the Apache, with additional protection of the cockpit<br />
and engine areas.<br />
Helicopter Weapon Systems<br />
The data in this section provides the basic, unclassified information on the major weapons<br />
systems used by the helicopters in Gunship! that you can fly. The name of each weapon<br />
includes both its type and model number, and there are separate entries for different<br />
ammunition types. For those of you who might not be familiar with military terminology,<br />
a few of the categories deserve a little explanation:<br />
Platforms Simply indicates which helicopters can be armed with the weapon.<br />
Muzzle Velocity Describes how fast a shell is moving when it leaves the gun. Missiles<br />
and rockets do not have a muzzle velocity, instead, they have an<br />
Average Flight Speed.<br />
Penetration Is a rough indication of how much armour the round can go through.<br />
Penetration is listed in terms of a number of millimetres of Rolled<br />
Homogenous Armour (RHA) at optimum striking angles. For kinetic<br />
energy weapons, this number is the value for a hit at a range of<br />
76
approximately 1,500 to 2,000 meters. Beyond this range, penetration<br />
for these weapons begins to fall off radically as the range increases.<br />
Penetration is the most likely information to be classified, and in many<br />
cases, the information here has been estimated from calculations based<br />
on other data.<br />
Rate of Fire Measures the speed at which automatic weapons can fire. In all cases,<br />
this information is listed as a number of rounds the gun could fire in<br />
one minute (rds/min).<br />
Guidance Describes the type of system used to get guided missiles to<br />
their targets.<br />
Guns<br />
M230 30mm Chain Cannon<br />
Platform: AH-64D and WAH-64D Apache<br />
M789 HEDP (High Explosive Dual Purpose)<br />
Penetration: 250mm<br />
Muzzle Velocity: 805m/sec<br />
Rate of Fire: 625rd/min maximum<br />
M799 HEI (High Explosive Incendiary)<br />
Penetration: 50mm<br />
Muzzle Velocity: 805m/sec<br />
Rate of Fire: 225rd/min maximum<br />
Giat AM-30-781 30mm cannon<br />
Platform: UHT-2 Tiger<br />
HEAPI (High Explosive, Armour Piercing, Incendiary)<br />
Penetration: 200mm<br />
Muzzle Velocity: 1,025m/sec<br />
Rate of Fire: 750rd/min maximum<br />
SAPHEI (Semi Armour Piercing, High Explosive, Incendiary)<br />
Penetration: 100mm<br />
Muzzle Velocity: 1,025m/sec<br />
Rate of Fire: 750rd/min maximum<br />
77
2A42 30mm Cannon<br />
Platform: Mi-28N Havoc<br />
30mm API (Armour Piercing Incendiary)<br />
Penetration: 84mm<br />
Muzzle Velocity: 990m/sec<br />
Rate of Fire: 800rd/min<br />
30mm HEI (High Explosive Incendiary)<br />
Penetration: 35mm<br />
Muzzle Velocity: 940m/sec<br />
Rate of Fire: 800rd/min<br />
Anti-Tank Guided Missiles<br />
AGM-114K Hellfire<br />
AGM-114L (Longbow) Hellfire 2<br />
Platform: AH-64D and WAH-64D Apache<br />
Range: 8000m<br />
Penetration: 1200mm<br />
Average Speed: 450m/sec<br />
Guidance: Laser Homing<br />
Special: Top Attack, Tandem Warhead<br />
Platform: AH-64D and WAH-64D Apache<br />
Range: 8000m<br />
Penetration: 1200mm<br />
Average Speed: 450m/sec<br />
Guidance: Active Millimetre Wave Radar<br />
78
HOT 3<br />
ATGW-3LR TRIGAT<br />
9M114 Kokon (AT6 Spiral) ATGM<br />
Platform: UHT-2 Tiger<br />
Range: 4000m<br />
Penetration: 1067mm<br />
Average Speed: 300m/sec<br />
Guidance: Wire Guided<br />
Special: Top Attack, Tandem Warhead<br />
Platform: UHT-2 Tiger<br />
Range: 5000m<br />
Penetration: 1800mm<br />
Average Speed: 475m/sec<br />
Guidance: Imaging Infra-red fire and forget<br />
Special: Top Attack, Tandem Warhead<br />
Platform: Mi-28N Havoc<br />
Range: 4000m<br />
Penetration: 711mm<br />
Average Speed: 200m/sec<br />
Guidance: Wire Guided<br />
Special: Tandem Warhead<br />
79
9M120 Vikhr M (AT16) ATGM<br />
Air to Air Missiles<br />
AIM-9L Sidewinder<br />
Starstreak<br />
Platform: Mi-28N Havoc<br />
Range: 6000m<br />
Penetration: 1300mm<br />
Average Speed: 300m/sec<br />
Guidance: Laser Guided<br />
Special: Tandem Warhead<br />
Platform: AH-64D Apache<br />
Range: 5000m<br />
Average Speed: 600m/sec<br />
Guidance: InfraRed Seeker<br />
Platform: WAH-64D Apache<br />
Range: 6000m<br />
Average Speed: 600m/sec<br />
Guidance: Laser Guided, kinetic warhead<br />
80
FIM-92C STINGER<br />
9M29 Igla-AD (SA16 Gimlet) SAM<br />
Platform: UHT-2 Tiger<br />
Range: 4500m<br />
Average Speed: 500m/sec<br />
Guidance: InfraRed Seeker<br />
Platform: Mi-28N Havoc<br />
Range: 4000m<br />
Average Speed: 350m/sec<br />
Guidance: InfraRed Seeker<br />
Rockets<br />
M261 Launcher<br />
Platform: AH-64D Apache<br />
M151 High explosive Warhead<br />
Penetration: 80mm<br />
Target Type: light vehicles, structures, infantry<br />
M261 Multi-Purpose Sub-Munition (MPSM)<br />
Penetration: 500mm (each bomblet)<br />
Target Type: medium and light armour, infantry<br />
M255 Flechette Warhead<br />
Penetration: 5mm<br />
Target Type: helicopters, infantry<br />
M264 WP White Phosphorus Warhead<br />
Penetration: 0mm<br />
Target Type: Create smoke screen with limited anti-personnel ability<br />
81
CRV7 Launcher<br />
Platform: WAH-64D Apache<br />
RA79 High Explosive, Incendiary, Semi-Armour Piercing (HEISAP) Warhead<br />
Penetration: 80mm<br />
Target Type: light vehicles, structures, infantry<br />
M261 Multi-Purpose Sub-Munition (MPSM)<br />
Penetration: 500mm (each bomblet)<br />
Target Type: medium and light armour, infantry<br />
WDU500 Flechette Warhead<br />
Penetration: 5mm<br />
Target Type: helicopters, infantry<br />
TDA Type 68-22 Launcher<br />
Platform: UHT-2 Tiger<br />
253 ECC High Explosive Warhead<br />
Penetration: 80mm<br />
Target Type: light vehicles, structures, infantry.<br />
256 EAP Multi-Purpose Sub-Munition (MPSM)<br />
Penetration: 500mm (each bomblet)<br />
Target Type: medium and light armour, infantry<br />
ABL Flechette Warhead<br />
Penetration: 5mm<br />
Target Type: helicopters, infantry.<br />
S-8 Launcher<br />
Platform: Mi-28N Havoc<br />
S-8BM High Explosive Warhead<br />
Penetration: 90mm<br />
Target Type: light vehicles, structures, infantry<br />
S-8RM Multi-Purpose Sub-Munition<br />
Penetration: 500mm (each bomblet)<br />
Target Type: medium and light armour, infantry<br />
82
S-8KM Flechette Warhead<br />
Penetration: 5mm<br />
Target Type: helicopters, infantry<br />
S-8 II Smoke Warhead<br />
Penetration: 0mm<br />
Target Type: Create smoke screen with limited anti-personnel ability<br />
U.S. Vehicles<br />
H60 Blackhawk Light Attack/Recon Helicopter<br />
The Blackhawk is the U.S. Army’s mainstay<br />
transport helicopter. Unarmoured and only lightly<br />
armed, it cannot fight its way to a target. Instead,<br />
it requires gunship escorts to clear the way so it<br />
can deliver its payload behind enemy lines<br />
M1A2 Abrams Main Battle Tank<br />
This latest version of the Abrams MBT has new<br />
armour, a commander’s independent thermal<br />
viewer, and a new land navigation system.<br />
The U.S. is the only nation to use depleted<br />
uranium in both its armour arrays and its antitank<br />
gun rounds.<br />
M2A3/M3A3 Bradley Infantry/<br />
Cavalry Fighting Vehicle<br />
The Bradley IFV is the replacement for the M-113<br />
APC in the U.S. Army. Originally placed in<br />
service in 1981, the Bradley has many variants,<br />
including the Cavalry Fighting Vehicle or M3. The<br />
major difference between these two vehicles is<br />
that the IFV is designed to carry infantry, while<br />
the cavalry vehicle carries a 2-man scout team<br />
and more ammunition. The Linebacker air defense version of the Bradley is basically a<br />
cavalry version with the TOW launcher replaced by a Stinger missile launcher.<br />
83
M4C2V Tactical Operations Centre based<br />
on Bradley<br />
This new command and control vehicle is based on<br />
the Bradley chassis. It carries the latest command<br />
and control equipment and computer systems.<br />
HUMMV M2, M19, or TOW Hummer with .50 cal<br />
MG or 40mm Auto Grenade<br />
The HMMWV entered service in the 1980s and has<br />
a multitude of variants. This vehicle is replacing the<br />
jeep in service throughout the U.S. Military. It can<br />
be armed with a variety of weapons, including the<br />
M2 .50 calibre heavy machine gun, the M19 40mm<br />
Auto Grenade launcher, and the TOW2 launch tube.<br />
HMMWV Avenger Hummer with Avenger Air<br />
Defense Turret<br />
This air defense version of the ‘Hummer’ carries<br />
the Stinger missile and a Vulcan 20mm cannon.<br />
M113 A3 APC<br />
This latest version of the M-113 entered service in<br />
1987 and featured a more powerful engine,<br />
appliqué armour and other improvements.<br />
84
M901 ITOW Cherry Picker TOW on M-113<br />
This variant of the M-113 adds TOW (Tubelaunched<br />
Optical Wire guidance) capabilities to the<br />
basic vehicle design.<br />
M577 TOC Tactical Operations Centre on M-113<br />
The M577 is a command and control version of<br />
the M-113 Armoured Personnel Carrier. It is fitted<br />
with additional radios, a table, a map-board, and a<br />
tent on the rear (for additional space).<br />
M109A6 PALADIN SPG 155mm Howitzer<br />
This is the newest version of the standard, selfpropelled<br />
howitzer that has been in use by the U.S.<br />
Army since the 1950s. The latest version, the A6,<br />
includes an automatic fire control system, global<br />
positioning system, upgraded suspension, and<br />
improved armour.<br />
MLRS Multiple Launch Rocket System<br />
The MRLS is designed to be an area coverage<br />
weapon to complement regular artillery.<br />
85
British Vehicles<br />
Challenger II MBT<br />
The Challenger II was developed privately by<br />
Vickers Defence Systems. The British Army<br />
selected it as a replacement for the Chieftain MBT<br />
in 1991. Deliveries of this new tank started in 1994.<br />
The Challenger’s main weapon is a fully stabilised,<br />
rifled 120mm main gun.<br />
Warrior II IFV<br />
The Warrior IFV first entered service in 1986,<br />
and has now finished production. The Warrior II<br />
is fitted with the additional protection of<br />
passive armour<br />
.<br />
Scimitar CFV<br />
The Scimitar is a small, light reconnaissance<br />
vehicle. While it looks like a small tank, it does not<br />
have the armour or armament for the job. As a<br />
scout, this fast, easy-to-hide vehicle more than<br />
holds its own. The 30mm cannon makes it deadly<br />
to light vehicles.<br />
Marconi ADV IFV<br />
The newest British air defense vehicle mounts a<br />
Marconi radar-controlled twin 30mm turret on a<br />
Challenger hull.<br />
86
German Vehicles<br />
Leopard 2A5 MBT<br />
This latest member of the remarkable Leopard line<br />
adds Chobham type armour and a longer 120mm<br />
smoothbore cannon. The distinctive angled shape<br />
of the turret is unmistakable. In addition, a hunterkiller<br />
system similar to the M1A2’s CITV has been<br />
added. The Leopard is once again one of the best<br />
tanks in the world.<br />
Marder II IFV<br />
The Marder II IFV is an upgrade of the original<br />
Marder, intended to replace the BMP-1s<br />
inherited from East Germany. The Marder’s<br />
smaller size makes it harder to spot than the<br />
Bradley or Warrior.<br />
Gepard ADV<br />
The Gepard is an improved version of a venerable<br />
air defense vehicle. It incorporates a new digital<br />
fire control computer, optronic auto tracking<br />
sensors (to allow the gun to be used without the<br />
radar), and a laser range finder for use against<br />
ground targets. The twin 35mm guns are effective<br />
against all attack helicopters.<br />
TH-800 Puma CV<br />
The TH-800 is a new series of 8-wheeled<br />
reconnaissance vehicles currently in development.<br />
This version is based on the most likely<br />
configuration. It should reach deployment in the<br />
next 3 to 5 years.<br />
87
Russian Federation Vehicles<br />
Mi-24P Hind-F Heavy Attack Helicopter<br />
The USSR’s first fire support helicopter, the Hind<br />
entered service in the late 1960s. The Hind-F<br />
version started production in the late 1970s and is<br />
the version currently in service.<br />
Ka-50 Black Shark Light Attack Helicopter<br />
This attack helicopter is in direct competition with<br />
the Mi-28 for the Soviet market. It is currently in<br />
small-scale production.<br />
MI-8 HIP Heavy Transport Helicopter<br />
Developed in the early 1960s, the HIP has<br />
undergone constant upgrade and improvements.<br />
The most current version is the MI-17, with its<br />
more powerful engines. This helicopter is the<br />
standard transport helicopter in Russian service.<br />
T-80UM2 Black Eagle MBT Main Battle Tank<br />
A mockup of the Black Eagle was first seen in 1997<br />
at the Omsk weapons show. It is a major upgrade<br />
of the T-80U tank. The biggest change moves the<br />
autoloader to the back of the turret, correcting a<br />
major design flaw in the older versions. The Black<br />
Eagle incorporates better armour protection and the<br />
Arena missile defense system. This information has<br />
not been confirmed, but it is rumoured to mount a<br />
gun larger than the standard 125mm.<br />
This tank equips most Guards Tank units.<br />
88
T-90E MBT Main Battle Tank<br />
The T-90E is basically an upgrade to the T-72<br />
that contains the improvements of the T-80 MBT,<br />
2nd generation reactive armour (RA), and an<br />
ATGM defense suite. The tank retains the diesel<br />
engine of the T-72, however. It is also rumoured<br />
that the T-90 can fire an additional missile type<br />
besides the AT-11, with its 5,000m range and<br />
700mm of armour penetration. It is used by<br />
Russian Federation and Belarus tank units.<br />
T-80U Snow Leopard MBT Main Battle Tank<br />
First seen by the west in 1989 and equipped with<br />
2nd generation reactive armour and a turbine<br />
engine, the T-80 is the follow-on to the T-64.<br />
The T-80U can fire the AT-11 ATGW through its<br />
main gun. The AT-11 rides a laser beam and has a<br />
range of 5,000m. The main gun is also fully<br />
stabilised for fire while on the move. This tank is<br />
used by both Russian Federation and<br />
Ukrainian forces.<br />
BMP-3 Infantry Fighting Vehicle with 100mm +<br />
30mm Gun<br />
First seen in public in 1990, the BMP-3 is a very<br />
intelligent design. It combines the high explosive<br />
and missile firing capability of the 100mm low<br />
pressure gun with the rate of fire and light antiarmour<br />
ability of the 30mm autocannon. Other<br />
design features correct most of the problems<br />
with the BMP design.<br />
BMP-2 Infantry Fighting Vehicle with<br />
30mm Gun<br />
This Infantry Fighting Vehicle was first seen in<br />
public in 1982. It is based on the BMP-1.<br />
Improvements include a two-man turret and a<br />
new engine.<br />
89
BTR-T Tracked APC<br />
This unique vehicle is basically the hull of a T62<br />
tank, modified to carry a 30mm auto cannon<br />
turret and an infantry squad. It is the most<br />
armoured APC in service.<br />
BTR-80a 8-Wheeled APC<br />
This replacement for the BTR-80 adds a heavier<br />
punch to counter the success of the Bradley<br />
IFV’s 25mm chain gun.<br />
BTR-80 8-Wheeled APC<br />
First used in the 1980s by the Soviet Army, the<br />
BTR-80 was a replacement for the BTR-70 and<br />
BTR-60 series of vehicles. Its major improvements<br />
included the reduction to one engine, easier<br />
ingress and egress, and improved elevation for the<br />
main armament.<br />
BRDM-3 4-Wheeled AC with ATGM<br />
First seen in 1977, this upgrade to the BRDM-2<br />
vehicle carries the AT-5 ATGW, which has the<br />
capability to penetrate up to 600mm of armour<br />
with its heat warhead.<br />
90
BRDM-2 4-Wheeled Armoured Car<br />
The BRDM-2 boasts better performance than the<br />
BRDM-1, heavier armament, an NBC system,<br />
and night vision equipment. This vehicle entered<br />
service in 1966.<br />
2K22M TUNGUSKA-M Air Defense Vehicle<br />
The replacement for the ZSU-23/4 Shilka was<br />
first observed in 1986. It has a computerised fire<br />
control system with a laser range finder and<br />
radar. The cannon are effective out to 3,000m,<br />
and the missiles out to 8km.<br />
ZSU-23/4 Shilka Air Defense Vehicle<br />
The ZSU 23-4 Shilka first entered service in<br />
1965. This anti-aircraft system uses radar for<br />
tracking and aiming of its weapon system.<br />
2S19 MSTA-S SPG SP 155mm Gun<br />
First seen in 1990, this artillery platform uses the<br />
chassis of a T-80 tank. The weapon system has a<br />
range of 24,700m, and with extended range<br />
projectiles it can reach 40,000m. With the autoloader,<br />
the 2S19 can fire eight rounds a minute.<br />
91
FROG Launcher Large Ballistic Missile Launch<br />
Vehicle<br />
The FROG-7 (Free Rocket Over Ground) system<br />
is designed to engage targets in the enemy’s rear<br />
and normally operates at ranges from 8 to 18km<br />
behind the front lines.<br />
BM9A52 Smerch MLRS Multiple Launch<br />
Rocket System<br />
The RUSSIAN FEDERATION equivalent of<br />
America’s MLRS, the Smerch (Sandstorm) can<br />
launch its 12 missiles in 38 to 40 seconds.<br />
The range of the missiles or rockets is from<br />
20,000 to 70,000m.<br />
9K35M3 Strela-10M3 Self Propelled SAM<br />
Launcher<br />
First seen in the 1970s, the SA-13 Gopher is<br />
based on the MTLB chassis. The missile has an<br />
engagement range of 800-5,000m at altitudes<br />
from 10-4,000m.<br />
9K331 TOR-M1 Self Propelled SAM Launcher<br />
The SA-15 system provides air defense at ranges<br />
less than 12,000m and altitudes less than<br />
6,000m. Developed during the 1980s, this<br />
system can track and lock onto the 10 most<br />
dangerous targets simultaneously.<br />
92
APPENDIX: GUIDE TO ACRONYMS<br />
AA Anti-Aircraft or Assembly Area<br />
AAA Anti-Aircraft Artillery<br />
AAM Air to Air Missile<br />
AOR Area Of Operations<br />
APHE Armour Piercing High Explosive<br />
ASB Alternate Sensor Bearing<br />
ATGM Anti-Tank Guided Missile<br />
AVI Avionics<br />
BP Battle Position<br />
CASREP Casualty Report<br />
CO CMDR Company Commander<br />
CP Checkpoint<br />
CP/G Co-Pilot/Gunner<br />
DPICM Dual Purpose Improved Conventional Munitions<br />
DRV TRN Drive Train<br />
FCR Fire Control Radar<br />
FFAR Folding Fin Aerial Rocket<br />
FOV Field Of View<br />
FRAGO Fragmentary Order<br />
FROG Free Rocket Over Ground<br />
HE High Explosive<br />
HEAPI High Explosive Armour Piercing Incendiary<br />
HEDP High Explosive Dual Purpose<br />
HEISAP High Explosive, Incendiary, Semi-Armour Piercing<br />
HIDAS Helicopter Integrated Defensive Aids System<br />
HUD Heads Up Display<br />
HYD Hydraulic System<br />
IFV Infantry Fighting Vehicles<br />
IHADSS Integrated Helmet And Display Sight System<br />
IR Infrared<br />
IRFF Infra-Red Fire and Forget<br />
JAMR Countermeasures and Jamming system<br />
L ENG Left Engine<br />
LASE Target must be designated by laser at this time.<br />
LOAL Lock On After Launch<br />
LOBL Lock On Before Launch<br />
LOBL FCR Lock On Before Launch - Fire Control Radar<br />
93
LOS Line Of Sight<br />
LZ Landing Zone<br />
MLRS Multiple Launch Rocket System<br />
MFD Multi-Function Display<br />
MFDs See MFD<br />
MPSM Multi-Purpose Sub-Munition<br />
MSL LNCH Missile Launch<br />
NOE Nap Of the Earth<br />
OPWIRE Optical Wire Guided<br />
ORT Optical Relay Tube<br />
PA Patrol Area<br />
PLT LDR Platoon Leader<br />
PNVS Pilot’s Night Vision System<br />
R ENG Right Engine<br />
RTB Return To Base<br />
R/IR-CM-SET See JAMR<br />
RA Reactive Armour<br />
RAWS Radar Advance Warning System<br />
RF Russian Federation<br />
RKTS Rockets<br />
ROC Rate Of Climb<br />
RP Recon Point<br />
SAM Surface to Air Missile<br />
SAPHEI Semi Armour Piercing High Explosive Incendiary<br />
SEAD Suppression of Enemy Air Defense<br />
SPOTREP Spotting Report<br />
SRBM Short Range Ballistic Missile<br />
TADS Target Acquisition and Designation System<br />
TD Target Designator<br />
TGT Turbine Gas Temperature<br />
TOF Time Of Flight<br />
TOT Time On Target<br />
TOW Tube launched Optical Wire guidance<br />
TRANS Transmission<br />
TRP Target Reference Point<br />
VT Variable Time Fused<br />
WAYPT Waypoint<br />
WPNS Weapons<br />
94
TECHNICAL SUPPORT<br />
For technical support, the Infogrames United Kingdom Helpline is open to telephone<br />
calls from 10:00 to 19:00 Monday to Friday (except Bank Holidays):<br />
Technical Helpline Infogrames <strong>UK</strong><br />
21 Castle Street - Castlefield<br />
Manchester<br />
M3 4SW<br />
ENGLAND<br />
Tel: 0161 827 8060/1<br />
E-mail: helpline@uk.infogrames.com<br />
For further information visit the official web sites :<br />
http://www.uk.infogrames.com<br />
http://www.infogrames.com<br />
INFOGRAMES END USER LICENSE AGREEMENT<br />
PLEASE READ CAREFULLY. BY USING THIS SOFTWARE, YOU ARE AGREEING TO BE<br />
BOUND BY THE TERMS OF THIS LICENSE. IF YOU DO NOT AGREE TO THESE TERMS,<br />
PROMTLY RETURN THE PRODUCT IN ITS PACKAGING TO THE PLACE WHERE YOU<br />
OBTAINED IT.<br />
95
GRANT OF LICENCE:<br />
INFOGRAMES (hereinafter "the Licensor") grants you a non-exclusive licence to use this<br />
disc and any accompanying documentation (hereinafter collectively known as 'the<br />
Software')subject to your acceptance of the following provisions.<br />
USE:<br />
You are permitted to use the Software in machine–readable only on a single computer,<br />
except that the multi-player executable file may be installed on more than one computer<br />
solely for the purposes of enabling multi-player play in accordance with the Software’s<br />
documentation. You may copy the Software only to install it on a single computer and for<br />
backup purposes in support of your use of the Software, except that the multi-player<br />
executable file may be copied for the purposes of enabling multi-player play in accordance<br />
with the Software’s documentation. If you copy the Software you must reproduce all<br />
copyright and other proprietary notices that are on the original copy of the Software.<br />
RESTRICTIONS:<br />
You may not use, copy, modify or transfer the Software, or any copy thereof, in whole<br />
or in part, except as expressly provided for in this Agreement. Any attempt to transfer<br />
any of the rights, duties or obligations hereunder is void. You may not rent, lease, loan,<br />
resell for profit or distribute the Software, or any part hereof. You may not reverse<br />
engineer, disassemble, decompile or translate the Software or otherwise attempt to<br />
derive the source code of the Software except to the extent that reverse engineering<br />
cannot be contractually restricted.<br />
NO WARRANTY:<br />
THE SOFTWARE IS LICENSED TO YOU ON AN "AS IS" BASIS, AND THE LICENSOR<br />
(INCLUDING ITS SUB-CONTRACTORS, SUPPLIERS AND/OR RESELLERS) MAKES NO<br />
EXPRESS OR IMPLIED WARRANTIES OF ANY KIND, INCLUDING WITHOUT<br />
LIMITATION, THE IMPLIED WARRANTIES OF MERCHANTABILITY, FITNESS FOR A<br />
PARTICULAR PURPOSE, SUITABILITY FOR PURPOSE, SATISFACTORY QUALITY AND<br />
THEIR EQUIVALENTS UNDER THE LAWS OF ANY JURISDICTION AND YOU ACCESS<br />
THE SOFTWARE ENTIRELY AT YOUR OWN RISK AND OF YOUR OWN VOLITION. THE<br />
DISCLAIMER OF WARRANTY REFERRED TO ABOVE CONSTITUTES AN ESSENTIAL<br />
PART OF THIS AGREEMENT AND ANY AND ALL USE OF THE SOFTWARE HEREUNDER<br />
IS ONLY AUTHORISED SUBJECT TO YOUR ACCEPTANCE OF THE PROVISIONS<br />
RELATING TO 'NO WARRANTY' AS DETAILED ABOVE. THIS CLAUSE DOES NOT<br />
EFFECT YOUR STATUTORY RIGTHS AS A CONSUMER.<br />
96
TITLE:<br />
Title, ownership rights, and intellectual property rights in the Software shall remain with<br />
the Licensor. The Software is protected by copyright and other intellectual property<br />
laws and by international treaties. Title and related rights in the content accessed<br />
through the Software is the property of the applicable content owner and is protected<br />
by applicable law. The license granted under this Agreement gives you no rights to<br />
such content.<br />
TERMINATION:<br />
This Agreement and the licence granted hereunder will terminate automatically if you<br />
fail to comply with the provisions contained herein. Upon termination, you must<br />
destroy any and all copies of the Software and any related documentation.<br />
LIMITATION OF LIABILITY:<br />
IN NO CIRCUMSTANCES SHALL THE LICENSOR (INCLUDING ITS SUB-CONTRACTORS,<br />
SUPPLIERS AND/OR RESELLERS) BE LIABLE TO YOU OR ANY OTHER PERSON FOR<br />
ANY INDIRECT, SPECIAL, INCIDENTAL, OR CONSEQUENTIAL DAMAGES (WHETHER<br />
FORESEEABLE OR NOT) NOR FOR DAMAGES FOR LOSS OF BUSINESS, LOSS OF<br />
PROFITS, LOSS OF CONTRACTS OR ANTICIPATED SAVINGS, LOSS OF GOODWILL,<br />
WORK STOPPAGE, COMPUTER FAILURE OR MALFUNCTION (WHETHER FORESEEABLE<br />
OR NOT) IN CONTRACT, TORT (INCLUDING NEGLIGENCE), BREACH OF STATUTORY<br />
DUTY, PRODUCT LIABILITY OR OTHERWISE ARISING FROM OR IN ANY WAY<br />
CONNECTED WITH THE USE OF THE SOFTWARE OR THIS AGREEMENT AS SHALL<br />
APPLY HAVING REGARD TO THE LAWS OF APPLICABLE JURISDICTIONS. IN NO EVENT<br />
WILL THE LICENSOR BE LIABLE FOR ANY DAMAGES IN EXCESS OF THE AMOUNT<br />
LICENSOR RECEIVED FROM YOU FOR A LICENCE TO THE SOFTWARE, EVEN IF THE<br />
LICENSOR SHALL HAVE BEEN INFORMED OF THE POSSIBILITY OF SUCH DAMAGES.<br />
YOUR STATUTORY RIGHTS AS A CONSUMER ARE NOT EFFECTED BY THIS PROVISION.<br />
NON-ASSIGNMENT:<br />
For the avoidance of any doubt, nothing in this Agreement shall entitle you to in any<br />
way assign or transfer any or all of the rights granted to you in accordance with the<br />
provisions of this Agreement to any third party.<br />
GENERAL:<br />
This Agreement represents the complete agreement concerning the licence granted<br />
hereunder and may be amended only by a writing executed by both parties. Any action<br />
related to this Agreement will be governed by English law. If any provision of this<br />
Agreement is held to be unenforceable, that provision will be removed and the<br />
remaining provisions will remain in full force.<br />
97
CREDITS<br />
Development Team<br />
Executive Producer Scott Spanburg<br />
Producers Chris Bowling<br />
Tim Goodlett<br />
Designers Tim Goodlett<br />
Warren Capps<br />
Lead Programmer Scott Spanburg<br />
Lead Artist Mike Bates<br />
Programmers Brandon Gamblin<br />
Nathan Mefford<br />
Michael Braley<br />
Rob Knopf<br />
Artists Mathew Bell<br />
Evan Brown<br />
Rob Cloutier<br />
Erik Ehoff<br />
Joe Morel<br />
Sam Laskowski<br />
Betsy Kirk<br />
David Austin<br />
Music Roland J. Rizzo<br />
Sound FX Mark G. Reis<br />
Voice Talent Marc Biagi<br />
Rick Bowman<br />
Ryan Drummond<br />
Mike Keeney<br />
Gary Kohler<br />
Debra Matthews<br />
Lani Minella<br />
Dave Rivas<br />
Doug Terry<br />
Tom Zahorik<br />
Lance Baldwin<br />
Manuals Tom Basham<br />
Tim Goodlet<br />
98
© 2000 copyright Infogrames Interactive, Inc.