2010 Kenworth T440/T470 Body Builder Manual
2010 Kenworth T440/T470 Body Builder Manual
2010 Kenworth T440/T470 Body Builder Manual
- No tags were found...

Create successful ePaper yourself
Turn your PDF publications into a flip-book with our unique Google optimized e-Paper software.
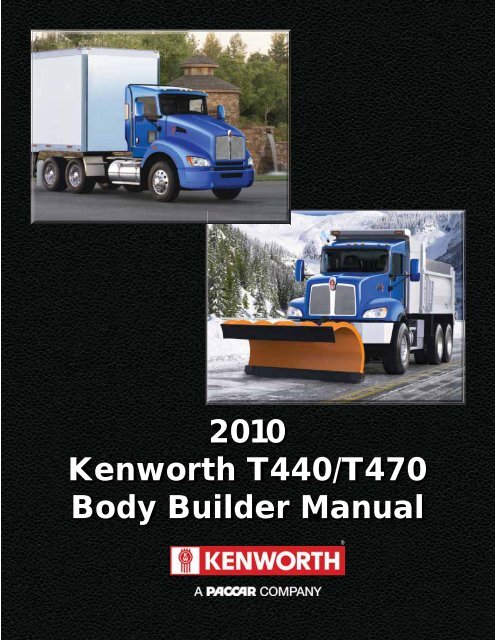
<strong>2010</strong><br />
<strong>Kenworth</strong> <strong>T440</strong>/<strong>T470</strong><br />
<strong>Body</strong> <strong>Builder</strong> <strong>Manual</strong><br />
®
<strong>2010</strong> Emissions<br />
<strong>Kenworth</strong> <strong>T440</strong>/<strong>T470</strong><br />
<strong>Body</strong> <strong>Builder</strong> <strong>Manual</strong>
<strong>T470</strong>/<strong>T440</strong> <strong>Body</strong> <strong>Builder</strong><br />
<strong>Manual</strong> Contents<br />
SECTION 1: INTRODUCTION 1-1<br />
SECTION 2: SAFETY AND COMPLIANCE 2-1<br />
SAFETY SIGNALS . . . . . . . . . . . . . . . . . . . . . . . . . . . . . . . . . . . . . . 2-1<br />
FEDERAL MOTOR VEHICLE SAFETYSTANDARDS COMPLIANCE . . . . . . . . . . . . 2-2<br />
SECTION 3: DIMENSIONS 3-1<br />
DIMENSIONS . . . . . . . . . . . . . . . . . . . . . . . . . . . . . . . . . . . . . . . . . 3-1<br />
ABBREVIATIONS . . . . . . . . . . . . . . . . . . . . . . . . . . . . . . . . . . . . . . . 3-1<br />
TURNING RADIUS . . . . . . . . . . . . . . . . . . . . . . . . . . . . . . . . . . . . . . 3-1<br />
KENWORTH AXLE TRACK/TIRE WIDTH SUMMARY . . . . . . . . . . . . . . . . . . . . 3-4<br />
OVERALL DIMENSIONS . . . . . . . . . . . . . . . . . . . . . . . . . . . . . . . . . . . 3-5<br />
<strong>T470</strong> FIXED GRILLE HOOD W/O EXTENDED FRONT FRAME . . . . . . . . . . . . . . . 3-6<br />
<strong>T440</strong> DAYCAB . . . . . . . . . . . . . . . . . . . . . . . . . . . . . . . . . . . . . . . . . 3-7<br />
<strong>T470</strong> FIXED GRILLE HOOD WITH EXTENDED FRONT FRAME . . . . . . . . . . . . . . 3-9<br />
38” AEROCAB . . . . . . . . . . . . . . . . . . . . . . . . . . . . . . . . . . . . . . . . . 3-10<br />
RIDE HEIGHTS . . . . . . . . . . . . . . . . . . . . . . . . . . . . . . . . . . . . . . . . 3-12<br />
REAR SUSPENSION LAYOUTS . . . . . . . . . . . . . . . . . . . . . . . . . . . . . . . 3-14<br />
REYCO 79KB SINGLE REAR AXLE . . . . . . . . . . . . . . . . . . . . . . . . . . . . . 3-14<br />
REYCO 102 TANDEM REAR AXLE . . . . . . . . . . . . . . . . . . . . . . . . . . . . . . 3-15<br />
NEWAY AD 123 SINGLE REAR AXLE . . . . . . . . . . . . . . . . . . . . . . . . . . . . 3-16<br />
NEWAY AD 246 TANDEM SUSPENSION . . . . . . . . . . . . . . . . . . . . . . . . . . . 3-17<br />
HENDRICKSON PRIMAAX TANDEM SUSPENSION . . . . . . . . . . . . . . . . . . . . . 3-18<br />
HENDRICKSON HMX TANDEM SUSPENSION . . . . . . . . . . . . . . . . . . . . . . . 3-19<br />
HENDRICKSON RT TANDEM SUSPENSION. . . . . . . . . . . . . . . . . . . . . . . . . 3-20<br />
KENWORTH AG 380 TANDEM SUSPENSION . . . . . . . . . . . . . . . . . . . . . . . . 3-22<br />
KENWORTH AG 400/460 TANDEM SUSPENSION. . . . . . . . . . . . . . . . . . . . . . 3-23<br />
KENWORTH AG 400L TANDEM SUSPENSION . . . . . . . . . . . . . . . . . . . . . . . 3-24<br />
KENWORTH AG 460 TANDEM SUSPENSION . . . . . . . . . . . . . . . . . . . . . . . . 3-25<br />
CHALMERS 856-46 TANDEM SUSPENSION. . . . . . . . . . . . . . . . . . . . . . . . . 3-26<br />
PUSHER AXLES . . . . . . . . . . . . . . . . . . . . . . . . . . . . . . . . . . . . . . . 3-27<br />
PTO CLEARANCES . . . . . . . . . . . . . . . . . . . . . . . . . . . . . . . . . . . . . . 3-32<br />
SECTION 4: EXHAUST AND AFTERTREATMENT 4-1<br />
EXHAUST AND AFTER-TREATMENT INFORMATION . . . . . . . . . . . . . . . . . . . . 4-1<br />
GENERAL GUIDELINES FOR DEF SYSTEM . . . . . . . . . . . . . . . . . . . . . . . . 4-3<br />
INSTALLATION REQUIREMENTS AND DIMENSIONS FOR DEF SYSTEM . . . . . . . . . 4-3<br />
MEASUREMENT REFERENCE POINTS . . . . . . . . . . . . . . . . . . . . . . . . . . . 4-4<br />
GENERAL EXHAUST INFORMATION . . . . . . . . . . . . . . . . . . . . . . . . . . . . 4-10<br />
EXHAUST INFORMATION . . . . . . . . . . . . . . . . . . . . . . . . . . . . . . . . . . 4-19<br />
SECTION 5: FRAME LAYOUTS 5-1<br />
FRAME LAYOUTS . . . . . . . . . . . . . . . . . . . . . . . . . . . . . . . . . . . . . . . 5-1<br />
COMMON OPTIONAL COMPONENTS . . . . . . . . . . . . . . . . . . . . . . . . . . . . 5-2<br />
FRAME LAYOUT INDEX. . . . . . . . . . . . . . . . . . . . . . . . . . . . . . . . . . . . 5-4<br />
CHARTS . . . . . . . . . . . . . . . . . . . . . . . . . . . . . . . . . . . . . . . . . . . . 5-5<br />
SECTION 6: BODY MOUNTING 6-1<br />
FRONT FRAME DIMENSIONS . . . . . . . . . . . . . . . . . . . . . . . . . . . . . . . . 6-1<br />
FRAME INFORMATION . . . . . . . . . . . . . . . . . . . . . . . . . . . . . . . . . . . . 6-2<br />
BODY MOUNTING USING BRACKETS. . . . . . . . . . . . . . . . . . . . . . . . . . . . 6-3<br />
MOUNTING HOLES . . . . . . . . . . . . . . . . . . . . . . . . . . . . . . . . . . . . . . 6-5<br />
BODY MOUNTING USING U–BOLTS . . . . . . . . . . . . . . . . . . . . . . . . . . . . . 6-6<br />
12/09<br />
iv
<strong>T470</strong>/<strong>T440</strong> <strong>Body</strong> <strong>Builder</strong><br />
<strong>Manual</strong> Contents<br />
SECTION 7: FRAME MODIFICATIONS 7-1<br />
FRAME MODIFICATIONS . . . . . . . . . . . . . . . . . . . . . . . . . . . . . . . . . . . 7-1<br />
MODIFYING FRAME LENGTH . . . . . . . . . . . . . . . . . . . . . . . . . . . . . . . . 7-2<br />
CHANGING WHEELBASE . . . . . . . . . . . . . . . . . . . . . . . . . . . . . . . . . . 7-3<br />
CROSSMEMBERS . . . . . . . . . . . . . . . . . . . . . . . . . . . . . . . . . . . . . . 7-5<br />
WELDING . . . . . . . . . . . . . . . . . . . . . . . . . . . . . . . . . . . . . . . . . . . 7-6<br />
TORQUE REQUIREMENTS. . . . . . . . . . . . . . . . . . . . . . . . . . . . . . . . . . 7-7<br />
SECTION 8: ELECTRICAL 8-1<br />
ELECTRICAL . . . . . . . . . . . . . . . . . . . . . . . . . . . . . . . . . . . . . . . . . 8-1<br />
MULTIPLEX INSTRUMENTATION. . . . . . . . . . . . . . . . . . . . . . . . . . . . . . . 8-1<br />
ACCESSING GAUGES AND SWITCHES . . . . . . . . . . . . . . . . . . . . . . . . . . . 8-9<br />
TELLTALE SYMBOLS . . . . . . . . . . . . . . . . . . . . . . . . . . . . . . . . . . . . . 8-17<br />
SPARE RELAYS BODY BUILDER INSTALLED(FOR LOADS EXCEEDING 20 AMPS) . . . 8-23<br />
ADDITIONAL SPARE CIRCUITS . . . . . . . . . . . . . . . . . . . . . . . . . . . . . . . 8-25<br />
REMOTE PTO/THROTTLE HARNESS . . . . . . . . . . . . . . . . . . . . . . . . . . . . 8-27<br />
MULTIFUNCTION TURN SIGNAL STALK, CHASSIS NODE & CHASSIS LOAD CENTER . 8-28<br />
CHASSIS LOAD CENTER DIMENSIONS. . . . . . . . . . . . . . . . . . . . . . . . . . . 8-30<br />
<strong>2010</strong> ELECTRICAL HARDWARE . . . . . . . . . . . . . . . . . . . . . . . . . . . . . . . 8-31<br />
TRAILER CABLE CONNECTIONS . . . . . . . . . . . . . . . . . . . . . . . . . . . . . . 8-35<br />
FACTORY INSTALLED SNOW PLOW LIGHT WIRING . . . . . . . . . . . . . . . . . . . . 8-37<br />
SECTION 9: ROUTING 9-1<br />
ROUTING . . . . . . . . . . . . . . . . . . . . . . . . . . . . . . . . . . . . . . . . . . . 9-1<br />
ROUTING REQUIREMENTS . . . . . . . . . . . . . . . . . . . . . . . . . . . . . . . . . 9-2<br />
APPENDIX A: VEHICLE IDENTIFICATION A-1<br />
VEHICLE IDENTIFICATION LABELS . . . . . . . . . . . . . . . . . . . . . . . . . . . . . A-2<br />
v 12/09
Figures<br />
FIGURE 2-1: INCOMPLETE VEHICLE CERTIFICATION DOCUMENT . . . . . . . . . . 2-2<br />
FIGURE 2-2: LOCATIONS OF CERTIFICATION LABELS . . . . . . . . . . . . . . . . . 2-2<br />
FIGURE 2-3: WEST COAST MIRROR OAT SENSOR, . . . . . . . . . . . . . . . . . . . 2-6<br />
FIGURE 2-4: AERODYNAMIC MIRROR OAT SENSOR LOCATION. . . . . . . . . . . . 2-7<br />
FIGURE 2-5:<br />
INSTRUMENT CLUSTER FOR <strong>T440</strong>/<strong>T470</strong> USED WITH<br />
EPA<strong>2010</strong> EMISSION COMPLIANT ENGINES. . . . . . . . . . . . . . . . 2-7<br />
FIGURE 3-1: PROSPECTOR TURN CIRCLE ANALYSIS . . . . . . . . . . . . . . . . . 3-3<br />
FIGURE 4-1: MEASUREMENT LOCATION OF DEF SUPPLY MODULE (PUMP). . . . . 4-4<br />
FIGURE 4-2: MEASUREMENT LOCATION OF DEF DOSING MODULE (INJECTOR) . . 4-4<br />
FIGURE 4-3: ORIENTATION OF DOSING MODULE . . . . . . . . . . . . . . . . . . . 4-5<br />
FIGURE 4-4: RH UNDER CAB EXHAUST WITH SMALL, MEDIUM, OR LARGE TANKS. 4-5<br />
FIGURE 4-5: VERTICAL EXHAUST WITH SMALL, MEDIUM, OR LARGE TANKS. . . . . 4-6<br />
FIGURE 4-6: RH UNDER CAB EXHAUST WITH CLEAR BACK OF CAB TANK. . . . . . 4-7<br />
FIGURE 4-7: VERTICAL WITH CLEAR BACK OF CAB TANK . . . . . . . . . . . . . . . 4-8<br />
FIGURE 4-8: ROUTING DEF LINES AND DEF TRAP . . . . . . . . . . . . . . . . . . . 4-9<br />
FIGURE 4-9: SUPPLY MODULE ALLOWED CLOCKING ANGLES . . . . . . . . . . . . 4-9<br />
FIGURE 4-10: ISOMETRIC VIEW OF RIGHT HAND UNDER DPF AND SCR<br />
WITH SINGLE SOC TAILPIPE . . . . . . . . . . . . . . . . . . . . . . . . 4-11<br />
FIGURE 4-11: TOP VIEW OF RIGHT HAND UNDER DPF AND SCR<br />
WITH SINGLE SOC TAILPIPE . . . . . . . . . . . . . . . . . . . . . . . . 4-11<br />
FIGURE 4-12: RIGHT VIEW OF RIGHT HAND UNDER DPF AND SCR<br />
WITH SINGLE SOC TAILPIPE . . . . . . . . . . . . . . . . . . . . . . . . 4-12<br />
FIGURE 4-13: BACK VIEW OF RIGHT HAND UNDER DPF AND SCR<br />
WITH SINGLE SOC TAILPIPE . . . . . . . . . . . . . . . . . . . . . . . . 4-12<br />
FIGURE 4-14: ISOMETRIC VIEW OF RIGHT HAND UNDER DPF AND SCR<br />
WITH SINGLE BACK OF CAB TAILPIPE . . . . . . . . . . . . . . . . . . 4-13<br />
FIGURE 4-15: TOP VIEW OF RIGHT HAND UNDER DPF AND SCR<br />
WITH SINGLE BACK OF CAB TAILPIPE . . . . . . . . . . . . . . . . . . 4-13<br />
FIGURE 4-16: RIGHT VIEW OF RIGHT HAND UNDER DPF AND SCR<br />
WITH SINGLE BACK OF CAB TAILPIPE . . . . . . . . . . . . . . . . . . 4-14<br />
FIGURE 4-17: BACK VIEW OF RIGHT HAND UNDER DPF AND SCR<br />
WITH SINGLE BACK OF CAB TAILPIPE . . . . . . . . . . . . . . . . . . 4-14<br />
FIGURE 4-18: ISOMETRIC VIEW OF VERTICAL DPF AND SCR . . . . . . . . . . . . . 4-15<br />
FIGURE 4-19: TOP VIEW OF VERTICAL DPF AND SCR . . . . . . . . . . . . . . . . . 4-15<br />
FIGURE 4-20: RIGHT VIEW OF VERTICAL DPF AND SCR . . . . . . . . . . . . . . . . 4-16<br />
FIGURE 4-21: BACK VIEW OF VERTICAL DPF AND SCR . . . . . . . . . . . . . . . . 4-16<br />
FIGURE 4-22: ISOMETRIC VIEW OF RIGHT HAND UNDER DPF AND SCR ON<br />
AEROCAB WITH SINGLE SOC TAILPIPE. . . . . . . . . . . . . . . . . . 4-17<br />
FIGURE 4-23: TOP VIEW OF RIGHT HAND UNDER DPF AND SCR ON<br />
AEROCAB WITH SINGLE SOC TAILPIPE. . . . . . . . . . . . . . . . . . 4-17<br />
FIGURE 4-24: RIGHT VIEW OF RIGHT HAND UNDER DPF AND SCR ON<br />
AEROCAB WITH SINGLE SOC TAILPIPE. . . . . . . . . . . . . . . . . . 4-17<br />
FIGURE 4-25: BACK VIEW OF RIGHT HAND UNDER DPF AND SCR ON<br />
AEROCAB WITH SINGLE SOC TAILPIPE. . . . . . . . . . . . . . . . . . 4-18<br />
FIGURE 5-1: DEF TANK DIMENSIONS. . . . . . . . . . . . . . . . . . . . . . . . . . . 5-3<br />
FIGURE 6-1:<br />
MINIMUM CLEARANCE BETWEEN TOP OF REAR TIRES<br />
AND BODY STRUCTURE OVERHANG.. . . . . . . . . . . . . . . . . . . 6-2<br />
FIGURE 6-2: MINIMUM BACK OF CAB CLEARANCE . . . . . . . . . . . . . . . . . . 6-3<br />
FIGURE 6-3: SPACER BETWEEN FRAME SILL AND BODY RAIL . . . . . . . . . . . . 6-4<br />
FIGURE 6-4: HIGH COMPRESSION SPRING. . . . . . . . . . . . . . . . . . . . . . . 6-4<br />
FIGURE 6-5:<br />
RUBBER SPACER BETWEEN BRACKETS BETWEEN THE<br />
MOUNTING BOLT AND UPPER BRACKET . . . . . . . . . . . . . . . . . 6-4<br />
12/09<br />
vi
Figures<br />
FIGURE 6-6: CROSSMEMBER-GUSSET HOLE PATTERN REQUIREMENTS.. . . . . . 6-5<br />
FIGURE 6-7: ACCEPTABLE U-BOLT MOUNTING WITH WOOD AND<br />
FABRICATED SPACERS. . . . . . . . . . . . . . . . . . . . . . . . . . . 6-6<br />
FIGURE 6-8: CLEARANCE SPACE FOR AIR LINES AND CABLES . . . . . . . . . . . 6-7<br />
FIGURE 6-9: EXAMPLE OF FISHPLATE BRACKET AT REAR END OF BODY,<br />
USED WITH U-BOLTS . . . . . . . . . . . . . . . . . . . . . . . . . . . . 6-8<br />
FIGURE 7-1: DETAIL OF FRAME EXTENSION AND JOINT WELDING. . . . . . . . . . 7-2<br />
FIGURE 7-2: FRAME INSERT . . . . . . . . . . . . . . . . . . . . . . . . . . . . . . . 7-3<br />
FIGURE 7-3: COMPARISON OF ORIGINAL, SHORTENED, AND<br />
EXTENDED WHEELBASES.. . . . . . . . . . . . . . . . . . . . . . . . . 7-4<br />
FIGURE 7-4: CROSSMEMBER ADDED WHEN DISTANCE<br />
EXCEEDS 60 INCHES (1524 MM). . . . . . . . . . . . . . . . . . . . . . 7-5<br />
FIGURE 8-1: KENWORTH <strong>T440</strong>/<strong>T470</strong> DASH . . . . . . . . . . . . . . . . . . . . . . . 8-2<br />
FIGURE 8-2: DIESEL EXHAUST FLUID GAUGE . . . . . . . . . . . . . . . . . . . . . 8-2<br />
FIGURE 8-3: MULTIPLEXED INSTRUMENTATION BLOCK DIAGRAM.. . . . . . . . . . 8-3<br />
FIGURE 8-4: CECU LOCATION. . . . . . . . . . . . . . . . . . . . . . . . . . . . . . . 8-4<br />
FIGURE 8-5: INSTRUMENT CLUSTER COMPONENTS . . . . . . . . . . . . . . . . . 8-5<br />
FIGURE 8-6: CVSG GAUGES . . . . . . . . . . . . . . . . . . . . . . . . . . . . . . . 8-6<br />
FIGURE 8-7: FIREWALL AIR JUNCTION BLOCK (VIEW FROM INSIDE OF CAB) . . . . 8-7<br />
FIGURE 8-8: AIR FILTER RESTRICTION SENSOR ON FIREWALL<br />
FIGURE 8-9:<br />
AIR JUNCTION BLOCK (VIEW FROM ENGINE) . . . . . . . . . . . . . . 8-7<br />
FUEL FILTER RESTRICTION PRESSURE GAUGE SENSOR LOCATION<br />
(TYPICAL) . . . . . . . . . . . . . . . . . . . . . . . . . . . . . . . . . . 8-8<br />
FIGURE 8-10: TELLTALE SYMBOL STANDARD CARDS . . . . . . . . . . . . . . . . . . 8-17<br />
FIGURE 8-11: BLANK TELLTALE CARD . . . . . . . . . . . . . . . . . . . . . . . . . . 8-18<br />
FIGURE 8-12: TELLTALE ICONS . . . . . . . . . . . . . . . . . . . . . . . . . . . . . . 8-19<br />
FIGURE 8-13: KENWORTH SPARE SWITCHES . . . . . . . . . . . . . . . . . . . . . . 8-20<br />
FIGURE 8-14: SPARE SWITCH HARNESS . . . . . . . . . . . . . . . . . . . . . . . . . 8-21<br />
FIGURE 8-15: SPECIALTY SWITCHES . . . . . . . . . . . . . . . . . . . . . . . . . . . 8-22<br />
FIGURE 8-16: SPARE RELAY CONNECTORS . . . . . . . . . . . . . . . . . . . . . . . 8-23<br />
FIGURE 8-17: SPARE RELAY HARNESSES . . . . . . . . . . . . . . . . . . . . . . . . 8-24<br />
FIGURE 8-18: SPARE BULLET CONNECTORS . . . . . . . . . . . . . . . . . . . . . . 8-25<br />
FIGURE 8-19: SPARE PIGTAIL CONNECTOR . . . . . . . . . . . . . . . . . . . . . . . 8-26<br />
FIGURE 8-21: CHASSIS POWER DISTRIBUTION CENTER DIMENSIONS . . . . . . . . 8-30<br />
FIGURE 8-22: DAYCAB HARDWARE LOCATIONS . . . . . . . . . . . . . . . . . . . . . 8-31<br />
FIGURE 8-23: AEROCAB STANDARD HARDWARE LOCATIONS . . . . . . . . . . . . . 8-31<br />
FIGURE 8-25: CHASSIS NODE DIMENSIONS . . . . . . . . . . . . . . . . . . . . . . . 8-32<br />
FIGURE 8-25: SAE J560 TRAILER CONNECTOR . . . . . . . . . . . . . . . . . . . . . . .<br />
FIGURE 8-26: ISO 3731 TRAILER CONNECTOR . . . . . . . . . . . . . . . . . . . . . 8-35<br />
FIGURE 8-27: JUNCTION BOX . . . . . . . . . . . . . . . . . . . . . . . . . . . . . . . 8-36<br />
FIGURE 8-31: SNOW PLOW ICON . . . . . . . . . . . . . . . . . . . . . . . . . . . . . 8-37<br />
FIGURE 8-32: CIRCUIT LOCATION . . . . . . . . . . . . . . . . . . . . . . . . . . . . . 8-37<br />
FIGURE 9-1: CLAMP AND BUTTERFLY CLAMP . . . . . . . . . . . . . . . . . . . . . 9-1<br />
FIGURE 9-2: BUTTERFLY TIE . . . . . . . . . . . . . . . . . . . . . . . . . . . . . . . 9-1<br />
FIGURE 9-3: TIE STRAP . . . . . . . . . . . . . . . . . . . . . . . . . . . . . . . . . . 9-1<br />
FIGURE 9-4: HEAVY DUTY (HD) MOUNT.. . . . . . . . . . . . . . . . . . . . . . . . . 9-2<br />
FIGURE 9-5: DEFINITION OF MEASUREMENTS. . . . . . . . . . . . . . . . . . . . . 9-4<br />
FIGURE A-1: VEHICLE IDENTIFICATION NUMBER (VIN). . . . . . . . . . . . . . . . . A-1<br />
FIGURE A-2: DRIVERS DOOR AND DOOR FRAME LABELS . . . . . . . . . . . . . . A-2<br />
FIGURE A-4: FRONT AXLE IDENTIFICATION . . . . . . . . . . . . . . . . . . . . . . . A-4<br />
FIGURE A-5: REAR AXLE IDENTIFICATION . . . . . . . . . . . . . . . . . . . . . . . A-4<br />
vii 12/09
Tables<br />
TABLE 3-1: ABBREVIATIONS USED . . . . . . . . . . . . . . . . . . . . . . . . . . . . 3-1<br />
TABLE 3-2: TURNING RADIUS. . . . . . . . . . . . . . . . . . . . . . . . . . . . . . . 3-1<br />
TABLE 3-3: AXLE TRACK. . . . . . . . . . . . . . . . . . . . . . . . . . . . . . . . . . 3-4<br />
TABLE 3-4: RIDE HEIGHTS IN INCHES . . . . . . . . . . . . . . . . . . . . . . . . . . 3-12<br />
TABLE 3-5: REAR SUSPENSION OPTIONS . . . . . . . . . . . . . . . . . . . . . . . . 3-14<br />
TABLE 3-6: REAR SUSPENSION OPTIONS . . . . . . . . . . . . . . . . . . . . . . . . 3-15<br />
TABLE 3-7: REAR SUSPENSION OPTIONS . . . . . . . . . . . . . . . . . . . . . . . . 3-16<br />
TABLE 3-8: REAR SUSPENSION OPTIONS . . . . . . . . . . . . . . . . . . . . . . . . 3-17<br />
TABLE 3-9: REAR SUSPENSION OPTIONS . . . . . . . . . . . . . . . . . . . . . . . . 3-18<br />
TABLE 3-10: REAR SUSPENSION OPTIONS . . . . . . . . . . . . . . . . . . . . . . . . 3-19<br />
TABLE 3-11: REAR SUSPENSION OPTIONS . . . . . . . . . . . . . . . . . . . . . . . . 3-20<br />
TABLE 3-13: REAR SUSPENSION OPTIONS . . . . . . . . . . . . . . . . . . . . . . . . 3-22<br />
TABLE 3-14: REAR SUSPENSION OPTIONS . . . . . . . . . . . . . . . . . . . . . . . . 3-23<br />
TABLE 3-15: REAR SUSPENSION OPTIONS . . . . . . . . . . . . . . . . . . . . . . . . 3-24<br />
TABLE 3-16: REAR SUSPENSION OPTIONS . . . . . . . . . . . . . . . . . . . . . . . . 3-25<br />
TABLE 3-17: REAR SUSPENSION OPTIONS . . . . . . . . . . . . . . . . . . . . . . . . 3-26<br />
TABLE 3-18: GROUND CLEARANCE FOR FUEL TANKS. . . . . . . . . . . . . . . . . . 3-29<br />
TABLE 3-19: GROUND CLEARANCE FOR BATTERY BOXES . . . . . . . . . . . . . . . 3-30<br />
TABLE 3-20: GROUND CLEARANCE FOR BATTERY BOXES . . . . . . . . . . . . . . . 3-31<br />
TABLE 5-1: ABBREVIATIONS . . . . . . . . . . . . . . . . . . . . . . . . . . . . . . . 5-1<br />
TABLE 5-2: FUEL TANK OVERALL LENGTH (IN) . . . . . . . . . . . . . . . . . . . . . 5-2<br />
TABLE 5-3: BATTERY BOX CENTERFRAME LENGTHS (IN) . . . . . . . . . . . . . . . 5-2<br />
TABLE 5-4: DEF TANKS SYSTEMS . . . . . . . . . . . . . . . . . . . . . . . . . . . . 5-3<br />
TABLE 6-1: SINGLE STEEL RAILS. . . . . . . . . . . . . . . . . . . . . . . . . . . . . 6-2<br />
TABLE 6-2: INSERTED STEEL RAILS . . . . . . . . . . . . . . . . . . . . . . . . . . . 6-2<br />
TABLE 7-1: CUSTOMARY GRADE 8 UNF OR UNC. . . . . . . . . . . . . . . . . . . . . 7-7<br />
TABLE 7-2: U.S. CUSTOMARY – GRADE 8. METRIC CLASS 10.9 . . . . . . . . . . . . 7-7<br />
TABLE 8-1: TELLTALES POSITION AND COLOR . . . . . . . . . . . . . . . . . . . . . 8-18<br />
TABLE 8-3: CHASSIS NODE GUIDELINE . . . . . . . . . . . . . . . . . . . . . . . . . 8-28<br />
TABLE 8-4: WIRE NUMBER GENERAL CATEGORIES . . . . . . . . . . . . . . . . . . 8-33<br />
TABLE 8-6: SAE J560 CONNECTOR. . . . . . . . . . . . . . . . . . . . . . . . . . . . 8-34<br />
TABLE 8-7: ISO 3731 CONNECTOR . . . . . . . . . . . . . . . . . . . . . . . . . . . . 8-35<br />
TABLE 9-1: EXHAUST – SYSTEM CLEARANCE . . . . . . . . . . . . . . . . . . . . . 9-4<br />
TABLE A-1: MODEL YEAR (CODE) DESIGNATIONS. . . . . . . . . . . . . . . . . . . . A-1<br />
12/09<br />
viii
Section 1<br />
Introduction<br />
This manual was created to provide body builders with appropriate information and guidelines<br />
useful in the body planning and installation process. This information will be helpful when installing<br />
bodies or other associated equipment.<br />
This manual contains appropriate dimensional information, guidelines for mounting bodies, guidelines<br />
for modifying frames, electrical wiring information, and other information useful in the body<br />
installation process. This manual is specifi c to chassis with <strong>2010</strong> engines.<br />
The <strong>Body</strong> <strong>Builder</strong> <strong>Manual</strong> can be very useful when specifying a vehicle, particularly when the body<br />
builder is involved in the vehicle defi nition and ordering process. Early in the process, professional<br />
body builders can often contribute valuable information that reduces the ultimate cost of the body<br />
installation.<br />
In the interest of continuing product development, <strong>Kenworth</strong> reserves the right to change specifi<br />
cations or products at any time without prior notice. It is the responsibility of the user to ensure<br />
that he is working with the latest released information. Check <strong>Kenworth</strong>.com for the latest released<br />
version.<br />
If you require additional information or reference materials, please contact your local <strong>Kenworth</strong><br />
dealer.<br />
1-1<br />
12/09
Section 2<br />
Safety & Compliance<br />
SAFETY SIGNALS<br />
We’ve put a number of alerting messages in this book. Please read and follow them. They are there for your protection<br />
and information. These alerting messages can help you avoid injury to yourself or others and help prevent costly damage<br />
to the vehicle.<br />
Key symbols and “signal words” are used to indicate what kind of message is going to follow. Pay special attention to<br />
comments prefaced by “WARNING”, “CAUTION”, and “NOTE.” Please don’t ignore any of these alerts.<br />
Warnings, cautions, and notes<br />
WARNING<br />
When you see this word and symbol, the message that follows is especially vital. It signals a<br />
potentially hazardous situation which, if not avoided, could result in death or serious injury.<br />
This message will tell you what the hazard is, what can happen if you don’t heed the warning,<br />
and how to avoid it.<br />
Example:<br />
WARNING! Be sure to use a circuit breaker designed to meet liftgate amperage requirements. An incorrectly<br />
specified circuit breaker could result in a electrical overload or fire situation. Follow the liftgate<br />
installation instructions and use a circuit breaker with the recommended capacity.<br />
CAUTION<br />
Signals a potentially hazardous situation which, if not avoided, could result in minor or moderate<br />
injury or damage to the vehicle.<br />
Example:<br />
CAUTION: Never use a torch to make a hole in the rail. Use the appropriate drill bit.<br />
NOTE<br />
Provides general information: for example, the note could warn you on how to avoid damaging<br />
your vehicle or how to drive the vehicle more effi ciently.<br />
Example:<br />
Note: Be sure to provide maintenance access to the battery box and fuel tank fill neck.<br />
Please take the time to read these messages when you see them, and remember:<br />
WARNING<br />
Indicates a potentially hazardous situation which, if not avoided, could result in death or serious injury.<br />
CAUTION<br />
Signals a potentially hazardous situation which, if not avoided, could result in minor or moderate<br />
injury or damage to the vehicle.<br />
NOTE<br />
Useful information that is related to the topic being discussed.<br />
2-1<br />
12/09
Section 2<br />
Safety & Compliance<br />
FEDERAL MOTOR VEHICLE SAFETY<br />
STANDARDS COMPLIANCE<br />
As an Original Equipment Manufacturer (OEM), <strong>Kenworth</strong> Truck Co. ensures that our products comply with all applicable<br />
U.S. or Canadian Federal Motor Vehicle Safety Standards. However, the fact that this vehicle has no fi fth wheel and that a<br />
<strong>Body</strong> <strong>Builder</strong> (Intermediate or Final Stage Manufacturer) will be doing additional modifications means that the vehicle was<br />
incomplete when it left the build plant. See next section and Appendix A for additional information.<br />
Incomplete Vehicle Certification<br />
An Incomplete Vehicle Document is shipped with the vehicle, certifying that the vehicle is not complete. See Figure 2–1.<br />
In addition, affi xed to the driver’s side door frame or edge is an Incomplete Vehicle Certification label. See Figure 2–2. For<br />
further information on Vehicle Certification and Identifi cation, see APPENDIX A “VEHICLE IDENTIFICATION.”<br />
NOTE<br />
These documents list the U.S. or Canadian Federal Motor Vehicle Safety Standard regulations that the<br />
vehicle complied with when it left the build plant. You should be aware that if you add, modify or alter any<br />
of the components or systems covered by these regulations, it is your responsibility as the Intermediate or<br />
Final Stage Manufacturer to ensure that the complete vehicle is in compliance with the particular regulations<br />
upon completion of the modifications.<br />
U.S. EPA Noise Label (U.S. registered vehicles only)<br />
Tire, Rim and<br />
Weight Rating<br />
Data label<br />
Final Stage Manufacturer<br />
Label to be Installed by<br />
Final Stage Manufacturer<br />
Chassis Serial<br />
Number<br />
Safety Mark (Canadian<br />
Registry Only)<br />
Major Components and<br />
Weights Label<br />
FIGURE 2-1. Incomplete Vehicle<br />
Certifi cation Document<br />
Incomplete Vehicle<br />
Certifi cation Label<br />
FIGURE 2-2. Locations of Certification<br />
Labels - Driver’s Door and Frame<br />
As the Intermediate or Final Stage Manufacturer, you should retain the Incomplete Vehicle Document for your records. In<br />
addition, you should record and retain the manufacturer and serial number of the tires on the vehicle. Upon completion<br />
of the vehicle (installation of the body and any other modifications), you should affi x your certifi cation label to the vehicle<br />
as required by Federal law. This tag identifies you as the “Intermediate or Final Stage Manufacturer” and certifi es that the<br />
vehicle complies with Federal Motor Vehicle Safety Standards. (See Figure 2–2.) Be advised that regulations affecting the<br />
intermediate and final stage manufacturer may change without notice. Ensure you are referencing the most updated copy<br />
of the regulation during the certification and documentation processes.<br />
In part, if the final stage manufacturer can complete and certify the vehicle within the instruction in the incomplete vehicle<br />
document (IVD) the certification label would need a statement that reads, “This vehicle has been completed in accordance<br />
with the prior manufacturers‚ IVD where applicable. This vehicle conforms to all applicable Federal Motor Vehicle Safety<br />
Standards [and Bumper and Theft Prevention Standards if applicable] in effect in (month, year).”<br />
However, if the vehicle can not be completed and certifi ed with in the guidance provided in the IVD, the final stage manufacturer<br />
must ensure the vehicle conforms to all applicable Federal Motor Vehicle Safety Standards (FMVSS). The fi nal<br />
stage manufactures certification label would need a statement that reads, “This vehicle conforms to all applicable Federal<br />
Motor Vehicle Safety Standards [and Bumper and Theft Prevention Standards if applicable] in effect in (month, year).”<br />
12/09 2-2
Section 2<br />
Safety & Compliance<br />
These statements are just part of the changes to the new certification regulation. Please refer to the Feb 15, 2005<br />
fi nal rule for all of the details related to this regulation. You can contact NTEA Technical Services Department at<br />
1-800-441-NTEA for a copy of the final rule (DocID 101760).<br />
For Canadian final stage manufacturers see:<br />
http://www.gazette.gc.ca/archives/p2/2002/2002-02-13/html/sor-dors55-eng.html; and<br />
http://www.tc.gc.ca/acts-regulations/regulations/crc-c1038/menu.htm for the regulations.<br />
Or contact:<br />
Transport Canada<br />
Tower C, Place de Ville, 330 Sparks Street<br />
Ottawa, Ontario K1A 0N5<br />
(613) 990-2309<br />
TTY: 1-888-675-6863<br />
Noise and Emissions Requirements<br />
NOTE<br />
This truck may be equipped with specific emissions control components/systems* in order to<br />
meet applicable Federal and California noise and exhaust emissions requirements. Tampering<br />
with these emissions control components/systems* is against the rules that are established by the<br />
U.S Code of Federal Regulations, Environment Canada Regulations and California Air Resources<br />
Board (CARB). These emissions control components/systems* may only be replaced with original<br />
equipment parts.<br />
Modifying (i.e. altering, substituting, relocating) any of the emissions control components/systems<br />
defi ned above will affect the noise and emissions performance/certifi cation. If modifi cations<br />
are required, they must first be approved by the engine manufacturer. Unapproved modifi cations<br />
could negatively effect emissions performance/certifi cation. There is no guarantee that proposed<br />
modifi cations will be approved.<br />
Contact the engine manufacturer for any requirements and restrictions prior to any modifications.<br />
• For Cummins Contact: Please call 1-800-DIESELS or contact your local Cummins Distributor Reference<br />
AEB 21.102.<br />
It is possible to relocate the DEF tank, however the relocation requirements need to be followed. Any variance from the<br />
relocation requirements may cause the emissions control components/systems to operate improperly potentially resulting<br />
in engine de-rate. See page 4-3 for relocation requirements.<br />
NOTE<br />
Some <strong>2010</strong> engine emissions certifi ed vehicles will be equipped with an On-Board Diagnostics<br />
(OBD) system. The OBD system is designed to detect malfunctions of any engine or vehicle<br />
component that may increase exhaust emissions or interfere with the proper performance of the<br />
OBD system itself.<br />
The OBD system consists of computer program on one or more of the vehicle’s Electronic Control<br />
Units (ECUs). This program uses information from the control system and from additional sensors<br />
to detect malfunctions. When a malfunction is detected, information is stored in the ECU(s) for<br />
diagnostic purposes. A Malfunction Indicator Light (MIL) is illuminated in the dash to alert the<br />
driver of the need for service of an emission-related component or system.<br />
2-3<br />
12/09
Section 2<br />
Safety & Compliance<br />
To ensure compliance to emissions regulations, the final confi guration of certain features of the completed vehicle<br />
must meet specific requirements. This section describes requirements relevant for only the most common or critical modifi -<br />
cations done by body builders. For a complete description of acceptable modifications, see the application<br />
guidance available from the manufacturer of the engine installed in the chassis.<br />
Fuel System<br />
The following are highlights of some of the more common or critical aspects of this system.<br />
The overall system restriction may not exceed the restriction limitations set forth by the engine manufacturer for both<br />
supply and return.<br />
• Ensure that fuel lines are not pinched or can potentially be damaged when installed between body and frame<br />
• Fuel lines must be routed and secured without dips or sags<br />
• There must be easy access to filter(s) and fi ll cap<br />
• The tank vent may not obstructed<br />
• Added accessories (heaters, generators) cannot introduce air into system<br />
• Fuel tank must be located so that the full level is not above cylinder head<br />
• “Ultra Low Sulfur Fuel Only” labels must be present on the dash and fuel fill<br />
• Modifi cation of the pressure side secondary fi lter and plumbing is not allowed without engine manufacturer<br />
approval<br />
• <strong>Body</strong> installation of fuel tank or routing of lines must not cause signifi cant increase in fuel temperature<br />
• Fuel hoses shall meet or exceed OEM supplied hose material construction specifications<br />
Compressed Air System<br />
The following are highlights of some of the more common or critical aspects of this system.<br />
• Air system modifi cation must meet applicable FMVSS regulations<br />
• Compressed Air tank may not be modified (exception – addition or removal of fittings or relocation of the tank)<br />
• Added devices or bodywork may not interfere with or rub air lines<br />
• Air supply to the engine doser may not be restricted or disconnected<br />
• Air lines should be routed, protected from heat, and properly secured to prevent damage from other<br />
components<br />
• Care should be taken so that air lines do not rub against other components<br />
• Care should be taken to protect the air system from heat sources.<br />
Exhaust and Exhaust After-treatment System<br />
The following are highlights of some of the more common or critical aspects of this system.<br />
• The following after-treatment and exhaust system components may not be modified:<br />
• DPF assembly<br />
• SCR Catalyst assembly<br />
• Exhaust pipes between the engine and after-treatment devices (DPF, SCR Catalyst) and between<br />
after-treatment devices<br />
12/09 2-4
Section 2<br />
Safety & Compliance<br />
• NOx Sensor<br />
• The following modifications may only be done within the guidelines of the “DEF System Relocation Guide.”<br />
• Modifications to Diesel Exhaust Fluid (DEF) throttle, suction, or pressure lines<br />
• Modification or relocation of the DEF tank<br />
• Modification of coolant lines to and from the DEF tank<br />
• All DEF and coolant lines should be routed, protected, and properly secured to prevent damage during vehicle<br />
operation or other components<br />
• If relocation of the DCU or ACM is necessary, use existing frame brackets and mount inside of frame flanges<br />
where necessary. Do not extend the harnesses<br />
• Exhaust pipes between the engine and after-treatment devices or between after-treatment devices may not be<br />
modifi ed or replaced<br />
• The DPF, the SCR catalyst, or their mounting may not be modified<br />
• The NOx sensor may not been relocated or altered in any way<br />
•<br />
•<br />
•<br />
•<br />
•<br />
•<br />
•<br />
•<br />
•<br />
•<br />
Exhaust pipes used for tailpipes/stacks must be properly sized, and must prevent water from entering the<br />
exhaust system<br />
Ensure adequate clearance between the exhaust and body panels, hoses, and wire harnesses<br />
The body in the vicinity of the DPF must be able to withstand temperatures up to 400°C (750°F)<br />
Do not add thermal insulation to the external surface of the DPF<br />
The SCR water drain hole may not be blocked<br />
Allow adequate clearance (25mm (1 inch)) for servicing the DPF sensors, wiring, and clamped joints<br />
Drainage may not come in contact with the DPF, SCR catalyst, sensors or wiring<br />
Allow suffi cient clearance for removing sensors from DPF. Thermistors require four inches. Other sensors<br />
require one inch<br />
Wiring should be routed, protected from heat, and properly secured to prevent damage from<br />
other components<br />
The exhaust system from an auxiliary power unit (APU) must not be connected to any part of the vehicle<br />
after-treatment system or vehicle tail pipe.<br />
Cooling System<br />
The following are highlights of some of the more common or critical aspects of this system.<br />
• Modifi cations to the design or locations of fill or vent lines, heater or defroster core, and surge tank are not<br />
recommended<br />
• With the exception of post-thermostat installation, additional accessories plumbed into the engine cooling<br />
system are not permitted, and may void vehicle warranty<br />
• Coolant level sensor tampering will void warranty<br />
• When installing auxiliary equipment in front of the vehicle, or additional heat exchangers, ensure that<br />
adequate air flow is available to the vehicle cooling system. Refer to engine manufacturer application<br />
guidelines for further detail<br />
• When installing FEPTO drivelines, the lower radiator anti-recirculation seal must be retained with FEPTO<br />
driveline clearance modification only<br />
2-5<br />
12/09
Section 2<br />
Safety & Compliance<br />
• Changes made to cooling fan circuit and controls are not allowed, with the exception of AC minimum fan on<br />
time parameter<br />
• See owner’s manual for appropriate winter front usage<br />
Electrical System<br />
The following are highlights of some of the more common or critical aspects of this system.<br />
• Electrical harnesses providing battery power and electronic control signals to engine and emissions control/<br />
vehicle OBD components including datalinks may not be spliced. These emissions control/vehicle OBD<br />
components include the following:<br />
• throttle pedal<br />
• vehicle speed sensor<br />
• after-treatment wiring<br />
• If the alternator or battery is substituted, it must meet the requirements of the engine manufacture’s guidelines.<br />
This includes alternator ground voltage drop and alternator ground cable effectiveness. See the engine<br />
manufacture’s guidelines for recommended test procedure. Additionally the maximum voltage differential and<br />
the peak-peak voltage differential between the engine ECM block ground stud and battery negative terminal<br />
may not exceed 500 mV under any combination of loads or operating conditions.<br />
• Installation of aftermarket transfer-cases must address the vehicle speed sensor position. The standard position<br />
of the speed sensor is at the transmission tail shaft. When a transfer-case is added it is best to relocate<br />
the sensor to the axle side output shaft of the transfer-case. This is typically accomplished by adding a tone<br />
wheel into the driveline yoke assembly.<br />
• Wiring extensions for the after-treatment wiring are available for relocating the DEF tank from your dealer via<br />
Paccar Parts. For relocation of DEF tank, refer to the after-treatment section of this manual.<br />
• The emission system requires an accurate Outside Air Temperature (OAT) reading in order to properly run<br />
its control algorithms. The OAT sensor is located in the driver’s side mirror assembly on <strong>Kenworth</strong> trucks and<br />
is shown in the figures below. If the body builder needs to modify the mirror assembly in any way, it is important<br />
the OAT sensor stay positioned on the mirror assembly. Running the vehicle without the OAT sensor<br />
connected will cause the MIL lamp to illuminate. If needed, a replacement sensor can be ordered from your<br />
<strong>Kenworth</strong> dealer.<br />
FIGURE 2-3: West Coast Mirror OAT sensor, located in overmold on mirror harness.<br />
12/09 2-6
Section 2<br />
Safety & Compliance<br />
FIGURE 2-4: Aerodynamic Mirror OAT Sensor Location<br />
• Coolant Sensor considerations are given in the Cooling section above<br />
• The OBD/Diagnostic connector port is located below the dash to the left of the steering wheel. This connector<br />
or its location may not be changed.<br />
• Vehicles using EPA <strong>2010</strong> compliant engines must be equipped with a Malfunction Indicator Lamp (MIL) lamp.<br />
This lamp is required to be an engine outline symbol as defined by ISO (International Standards Organization).<br />
The fi gure below shows the instrument cluster and MIL lamp position. Note this lamp location is fi xed<br />
with respect to the controls and its location may not be changed if you are updating the warning lamp cards.<br />
FIGURE 2-5: Instrument Cluster for <strong>T440</strong>/<strong>T470</strong> used with EPA<strong>2010</strong> Emission compliant<br />
engines. The Check Engine lamp is symbol 21 and the MIL is symbol 8.<br />
• In addition to the sensors and lamps above, the emission system also depends on signals from the exhaust<br />
DPF (Diesel Particulate Filter), SCR (Selective Catalytic Reduction), and NOx sensor. Wiring between these<br />
devices, the Dosing Control Unit (DCU) and engine ECM should not be tampered with or altered in any way.<br />
2-7<br />
12/09
Section 2<br />
Safety & Compliance<br />
Air Intake System<br />
The following are highlights of some of the more common or critical aspects of this system.<br />
• The air intake screen may not be blocked, either fully or partially<br />
• Modifi cation to the air intake system may not restrict airfl ow. For example, pipe diameter may not be reduced<br />
• All sensors must be retained in existing locations<br />
• To retain system seal, proper clamp torque must be used. Refer to service manual for proper clamp torque<br />
Charge Air Cooler System<br />
The following are highlights of some of the more common or critical aspects of this system.<br />
• The Charge Air Cooler may not be modifi ed<br />
• The installation of engine overspeed shutdown devices must not introduce restriction in the intake system<br />
• All plumbing associated with the charge air cooler may not be modified<br />
12/09 2-8
Section 3<br />
Dimensions<br />
DIMENSIONS<br />
This section has been designed to provide enough information to successfully layout chassis in the body planning<br />
process. Optional equipment may not be depicted. Please contact your local <strong>Kenworth</strong> dealer if more dimensional<br />
information is desired.<br />
ABBREVIATIONS<br />
Throughout this section, and in other sections as well, abbreviations are used to describe certain characteristics on your<br />
vehicle. The chart below lists the abbreviated terms used.<br />
TABLE 3-1. Abbreviations Used<br />
AF<br />
CA<br />
EOF<br />
FS<br />
RS<br />
WB<br />
SOC<br />
BOC<br />
AFTER FRAME – FRAME RAIL OVERHANG BEHIND REAR AXLE OR MEASURED FROM CENTERLINE OF TANDEM<br />
BACK OF CAB TO CENTERLINE OF REAR AXLE OR CENTERLINE OF TANDEMS ON TANDEM SUSPENSION<br />
FRAME RAIL OVERHANG BEHIND REAR AXLE – MEASURED FROM THE CENTERLINE OF TANDEMS<br />
FRONT SUSPENSION HEIGHT<br />
REAR SUSPENSION HEIGHT<br />
WHEELBASE<br />
SIDE OF CAB<br />
BACK OF CAB<br />
TURNING RADIUS<br />
Approximate turning radius specifications are listed in the following tables as a general guide. It is important to note that<br />
optional components may alter the results.<br />
TABLE 3-2. Turning Radius<br />
Model Steering Gear Front Axle Front Wheel Front Tire<br />
<strong>T440</strong>/<strong>T470</strong><br />
Single<br />
TAS 65<br />
Dana Spicer<br />
E-1202I 12K<br />
Accuride 28487<br />
22.5 X 8.25<br />
Bridgestone<br />
R287<br />
295/75R22.5<br />
Rear<br />
Suspension<br />
Tandem<br />
52” Axle<br />
Spacing<br />
Est Curb to<br />
Wheel Base Curb Turning<br />
Radius (ft)<br />
181 28<br />
193 29.5<br />
201 30.5<br />
213 32<br />
220 33<br />
232 34.5<br />
240 35.5<br />
252 37<br />
260 38<br />
272 39.5<br />
280 40.5<br />
291 42<br />
303 43.5<br />
323 46<br />
331 47<br />
TABLE 3-2 CONTINUES ON NEXT PAGE…<br />
3-1<br />
12/09
Section 3<br />
Dimensions<br />
TABLE 3-2 CONTINUED<br />
Model Steering Gear Front Axle Front Wheel Front Tire<br />
<strong>T440</strong>/<strong>T470</strong><br />
Dual<br />
TAS 65<br />
Dana Spicer<br />
D2000 20K<br />
Standard Track<br />
Alcoa 82365<br />
22.5 X 12.25<br />
Bridgestone<br />
M844<br />
425/65R22.5<br />
Rear<br />
Suspension<br />
Tandem<br />
52” Axle<br />
Spacing<br />
Wheel Base<br />
Est Curb to<br />
Curb Turning<br />
Radius (ft)<br />
181 31.5<br />
193 33.5<br />
201 34.5<br />
213 36.5<br />
220 37.5<br />
232 39<br />
240 40<br />
252 42<br />
260 43<br />
272 45<br />
280 46<br />
291 47.5<br />
303 49.5<br />
323 52.5<br />
331 53.5<br />
12/09 3-2
Section 3<br />
Dimensions<br />
Prospector Turn Circle Analysis:<br />
Please see Figure 3-2 as an example of <strong>Kenworth</strong>’s turn circle calculation made in Prospector for your specifi c chassis.<br />
Your local <strong>Kenworth</strong> dealer can provide this information to you.<br />
<strong>T470</strong><br />
<strong>T470</strong><br />
FIGURE 3-1. Prospector Turn Circle Analysis<br />
Please consult your local <strong>Kenworth</strong> Dealer for this information, as it is chassis specific.<br />
3-3<br />
12/09
Section 3<br />
Dimensions<br />
AXLE TRACK AND TIRE WIDTH<br />
The dimensions provided in this section are representative of some typical product combinations. The purpose of this section<br />
is to demonstrate some of the typical dimensions.<br />
• Axle Track: The distance between the dual tire centerlines on a dual tire arrangement or the distance between the tire<br />
centerlines on a single tire arrangement.<br />
• Width: The distance over the outermost tire sidewall to sidewall.<br />
These dimensions may be significant to the following:<br />
• Appearance relative to other tires and chassis mounted equipment.<br />
• Load carrying capacity. Different wheel disc offset can have a positive or negative impact on the axle carrying capacity<br />
of the axle.<br />
KENWORTH AXLE TRACK/TIRE WIDTH SUMMARY<br />
TABLE 3-3. Axle Track<br />
Axle - Drive Wheel Tire Configuration Track Dim ”A” Overall Width Dim ”B”<br />
Dana Spicer D46-170(H)(P)<br />
Alcoa 88364 BR M726EL<br />
4-4 73.3” 97.8”<br />
46K Dual<br />
22.5X8.25 11R22.5<br />
Dana Spicer D46-170(H)(P)<br />
46K Dual<br />
Dana Spicer D46-170W(H)(P)<br />
46K Dual Wide Track<br />
Dana Spicer D46-170W(H)(P)<br />
46K Dual Wide Track<br />
Dana Spicer D46-170(H)(P)<br />
46K Dual<br />
Dana Spicer D46-170W(H)(P)<br />
46K Dual Wide Track<br />
Alcoa 98364<br />
24.5X8.25<br />
Alcoa 88364<br />
22.5X8.25<br />
Alcoa 98364<br />
24.5X8.25<br />
Alcoa 82360<br />
22.5X12.25<br />
Alcoa 82360<br />
22.5X12.25<br />
BR M726EL<br />
11R24.5<br />
BR M726EL<br />
11R22.5<br />
BR M726EL<br />
11R24.5<br />
BR M844F<br />
425/65R22.5<br />
BR M844F<br />
425/65R22.5<br />
4-4 73.6” 98.0”<br />
4-4 79.2” 103.7”<br />
4-4 79.5” 103.9”<br />
2-4 72.7” 88.9”<br />
2-4 78.7” 94.9”<br />
Axle - Steer Wheel Tire Brake Drum Type Track Dim ”A” Overall Width Dim ”B”<br />
Dana Spicer E-1322I 13.2K Alcoa 98364 BR R250F<br />
Cast 80.2” 91.0”<br />
24.5X8.25 11R24.5<br />
Dana Spicer E-1322W 13.2K Alcoa 98364<br />
24.5X8.25<br />
Dana Spicer D2000 20K Alcoa 82365<br />
24.5X12.25<br />
Dana Spicer D2000 20K Alcoa 82364<br />
24.5X12.25<br />
BR R250F<br />
11R24.5<br />
BR M844F<br />
425/65R22.5<br />
BR M844F<br />
425/65R22.5<br />
Cast 82.2” 93.0”<br />
Cast 86.5” 102.7”<br />
Cast 82.6” 98.8”<br />
Axle - Pusher Non-Steerable Wheel Tire Wheel Orientation “Track Dim ”A” “Overall Width Dim ”B”<br />
NS PSHR: WCAL ATLAS<br />
Alcoa 82365 BR M844F Default-<br />
79.4” 95.6”<br />
Std Track (72.5”) 16K GAWR<br />
24.5X12.25 425/65R22.5 Same as RR<br />
NS PSHR: WCAL ATLAS<br />
Wide Track (77.5”)<br />
“Alcoa 82365<br />
24.5X12.25<br />
BR M844F<br />
425/65R22.5<br />
12/09 3-4<br />
Option<br />
Same as FR<br />
71.1” 87.3”
Section 3<br />
Dimensions<br />
OVERALL DIMENSIONS<br />
This section includes drawings and charts. The Extended Day Cab is also included.<br />
On the pages that follow, detail drawings show particular views of each vehicle, all dimensions are in inches (in). They<br />
illustrate important measurements critical to designing bodies of all types. See the “Contents” at the beginning of the<br />
manual to locate the drawing that you need.<br />
Note: To determine overall height please locate the chart Table 3-4 on page 3-8 and 3-9 and add that value to the height.<br />
All heights are given from the bottom of the frame rail.<br />
<strong>Kenworth</strong> also offers .dxf fi les and frame layouts of ordered chassis four weeks prior to build. Please speak with your<br />
salesman to request this feature when specifying your chassis.<br />
3-5<br />
12/09
Section 3<br />
Dimensions<br />
<strong>T470</strong> FIXED GRILLE HOOD W/O EXTENDED FRONT FRAME<br />
The following drawings are shown with standard chassis components and the <strong>T470</strong> fi xed grille hood.<br />
12/09 3-6
Section 3<br />
Dimensions<br />
<strong>T440</strong> DAYCAB<br />
The following drawings are shown with standard chassis components and the <strong>T440</strong> daycab.<br />
3-7<br />
12/09
Section 3<br />
Dimensions<br />
<strong>T440</strong> EXTENDED DAYCAB<br />
The following drawings are shown with standard chassis components and the <strong>T440</strong> extended daycab.<br />
12/09 3-8
Section 3<br />
Dimensions<br />
<strong>T470</strong> FIXED GRILLE HOOD WITH EXTENDED FRONT FRAME<br />
The following drawings are of a <strong>T470</strong> fi xed grille hood with the optional extended front frame. These extended frame rails<br />
can be used with or without FEPTO adapters.<br />
3-9<br />
12/09
Section 3<br />
Dimensions<br />
38” AEROCAB<br />
The 38” Aerocab is shown on a standard <strong>T440</strong> chassis. It is important to note that the 38” will increase any of the models<br />
bumper to back of cab dimension and front axle to back of cab dimension by 28”. The height (from the bottom of the frame<br />
rail) will be 93.2” across the models.<br />
12/09 3-10
Section 3<br />
Dimensions<br />
EXTENDED DAY CAB<br />
It is important to note that the Extended Day Cab will increase any of the models bumper to back of cab dimension and<br />
front axle to back of cab dimension by 5.7”. The height (from the bottom of the frame rail) will be 86.9”. Below drawings<br />
shown with <strong>T470</strong> fi xed grille hood.<br />
Suspension heights are measured from the centerlines of the axle spindle to the bottom of the frame rail. Add the tire<br />
radius dimension to determine overall height to the bottom of the frame rail. Note: The frame rail height itself will not affect<br />
the overall cab height as all components are located from the bottom of the frame rail.<br />
3-11<br />
12/09
Section 3<br />
Dimensions<br />
RIDE HEIGHTS<br />
The front (FS) and rear (RS) suspension ride heights are provided as a basic tool to determine the overall height of the<br />
cab, height of exhaust components, and frame heights. The heights are all calculated from the centerlines of the axles,<br />
please be sure to include the tire radius dimension to determine overall height. Note: the frame rail height itself will not<br />
affect the overall height as all components are located from the bottom of the frame rail. Ride height information is also<br />
available in Prospector.<br />
TABLE 3-4. Ride Heights In Inches<br />
To calculate Frame Heights use the following formula:<br />
Front Frame Height = FS + 1/2 Front Tire Diameter<br />
Rear Frame Height = RS + 1/2 Rear Tire Diameter<br />
Front Suspension Laden Unladen<br />
12K Taperleaf 10.3” 11.5”<br />
13.2K Taperleaf 10.3” 11.5”<br />
14.6K Taperleaf 10.3” 11.7”<br />
16K Taperleaf 10.6” 12.3”<br />
20K Taperleaf 10.4” 11.9”<br />
22K Multi-stage Taperleaf 10.7” 12.7”<br />
Rear Suspensions<br />
<strong>Kenworth</strong> AG380 38K Rating 8.5” 8.5”<br />
<strong>Kenworth</strong> AG400L 40K Rating 8.5” 8.5”<br />
<strong>Kenworth</strong> AG400 40K Rating 9.0” 9.0”<br />
<strong>Kenworth</strong> AG460 46K Rating 10.5” 10.5”<br />
Reyco 79KB 21K Rating 6.6” 9.0”<br />
Reyco 79KB 23K Rating 8.3” 10.8”<br />
12/09 3-12
Section 3<br />
Dimensions<br />
Reyco 79KB 26K Rating 8.2” 11.3”<br />
Reyco 102 38K Rating 9.2” 10.8”<br />
Reyco 102 40 K Rating 9.2” 10.8”<br />
Chalmers 854-40-L-HS 40K Rating 9.6” 11.0”<br />
Chalmers 854-40-H-HS 40K Rating 10.9” 12.4”<br />
Chalmers 854-46-L 46K Rating 8.9” 11.3”<br />
Chalmers 854-46-L-HS 46K Rating 9.6” 11.3”<br />
Chalmers 854-46-H 46K Rating 10.1” 12.4”<br />
Chalmers 854-46-H-HS 46K Rating 10.9” 12.5”<br />
Chalmers 860-46-H-HS 46K Rating 10.9” 12.5”<br />
Chalmers 872-46-H-HS 46K Rating 11.0” 12.5”<br />
Hendrickson HAS 230 23K Rating 10.0” 10.0”<br />
Hend HMX460 16.5” Saddle 46K Rating 9.5” 10.6”<br />
Hend HMX460 17.5” Saddle 46K Rating 10.5” 11.6”<br />
Hend HMX460 18.5” Saddle 46K Rating 11.5” 12.6”<br />
Hendrickson Primaax 46K Rating 10.0” 10.0”<br />
Hendrickson RT403 40K Rating 9.7” 10.7”<br />
Hendrickson RT463 6.0” Saddle 46K Rating 10.0” 11.1”<br />
Hendrickson RT463 7.19 Saddle 46K Rating 11.2” 12.5”<br />
Hendrickson RT463 7.94 Saddle 46K Rating 11.9” 13.3”<br />
Neway AD123 23K Rating 10.0” 10.0”<br />
Neway AD126 26K Rating 10.0” 10.0”<br />
Neway AD246 46K Rating 10.0” 10.0”<br />
3-13<br />
12/09
Section 3<br />
Dimensions<br />
REAR SUSPENSION LAYOUTS<br />
The rear suspension layouts are provided as a tool to help layout bodies prior to arrival. Be sure to check the axle spacing<br />
that is shown, as alternate spacings may exist and could change some of the dimensions. The dimensions shown below<br />
are the most typical installations, in special cases some hole locations will move. If you are planning on using the holes<br />
shown for your body installation, please confirm with your local KW dealer that the drawing below will be the installation<br />
used on your specific truck. Ensure that proper torque is used to reinstall any suspension components. See Tables 5-1 and<br />
5-2 on page 5-7.<br />
It would be a good idea in this case to order the frame layout of your chassis along with your truck order. This can be done<br />
on any <strong>Kenworth</strong> truck, and will be provided 4 weeks ahead of the build schedule.<br />
If there are hole locations that are not detailed please work with your local <strong>Kenworth</strong> Dealer to request that information.<br />
Additionally optional axle spacings are shown in the charts, if you would like details on the frame drilling with optional<br />
spacings, please contact your local <strong>Kenworth</strong> dealer.<br />
12/09 3-14
Section 3<br />
Dimensions<br />
KENWORTH AG 380 TANDEM SUSPENSION<br />
Shown with a 52” Axle Spacing<br />
<strong>Kenworth</strong> AG 380 Suspension Data<br />
TABLE 3-5. Rear Suspension Options<br />
Suspension Type Rating Axle Spacing<br />
Laden Ride<br />
Height<br />
Unladen Ride<br />
Height<br />
AG 380 38K 52” 8.5” 8.5”<br />
3-15<br />
12/09
Section 3<br />
Dimensions<br />
KENWORTH AG 400/460 TANDEM SUSPENSION<br />
Shown with a 52” Axle Spacing<br />
Optional <strong>Kenworth</strong> Tandem Suspensions<br />
TABLE 3-6. Rear Suspension Options<br />
Suspension Type Rating Axle Spacing<br />
Laden Ride<br />
Height<br />
Unladen Ride<br />
Height<br />
<strong>Kenworth</strong> AG 400 40K 52” 9” 9”<br />
<strong>Kenworth</strong> AG 400 40K 54” 9” 9’<br />
<strong>Kenworth</strong> AG 460 46K 54” 10.5” 10.5”<br />
12/09 3-16
Section 3<br />
Dimensions<br />
KENWORTH AG 400L TANDEM SUSPENSION<br />
Shown with a 52” Axle Spacing<br />
Optional <strong>Kenworth</strong> Tandem Suspensions<br />
TABLE 3-7. Rear Suspension Options<br />
Suspension Type Rating Axle Spacing<br />
Laden Ride<br />
Height<br />
Unladen Ride<br />
Height<br />
<strong>Kenworth</strong> AG 400L 40K 52” 8.5” 8.5”<br />
<strong>Kenworth</strong> AG 400L 40K 54” 8.5” 8.5”<br />
3-17<br />
12/09
Section 3<br />
Dimensions<br />
KENWORTH AG 460 TANDEM SUSPENSION<br />
Shown with a 60” Axle Spacing<br />
Optional <strong>Kenworth</strong> Tandem Suspensions<br />
TABLE 3-8. Rear Suspension Options<br />
Suspension Type Rating Axle Spacing<br />
Laden Ride<br />
Height<br />
Unladen Ride<br />
Height<br />
<strong>Kenworth</strong> AG 460 46K 60” 10.5” 10.5”<br />
12/09 3-18
Section 3<br />
Dimensions<br />
REYCO 79KB SINGLE REAR AXLE<br />
Optional Reyco 79KB Suspensions<br />
TABLE 3-9. Rear Suspension Options<br />
Suspension Type Rating Axle Spacing<br />
Laden Ride<br />
Height<br />
Unladen Ride<br />
Height<br />
Reyco 79KB single 21K - 8.3” 10.8”<br />
Reyco 79KB single 23K - 8.3” 10.8”<br />
Reyco 79KB single 26K - 8.2” 11.3”<br />
Reyco 79KB single 30K - 8.9” 11.7”<br />
3-19<br />
12/09
Section 3<br />
Dimensions<br />
REYCO 102 TANDEM REAR AXLE<br />
Shown with a 52” Axle Spacing<br />
Reyco 102 Suspension Data<br />
TABLE 3-10. Rear Suspension Options<br />
Suspension Type Rating Axle Spacing Laden Ride Height<br />
Unladen Ride<br />
Height<br />
Reyco 102 Tandem 38K 52” 9.2” 10.8”<br />
Reyco 102 Tandem 40K 52” 9.2” 10.8”<br />
12/09 3-20
Section 3<br />
Dimensions<br />
NEWAY AD 123 SINGLE REAR AXLE<br />
Optional Neway AD Single Suspensions<br />
TABLE 3-11. Rear Suspension Options<br />
Suspension Type Rating Axle Spacing<br />
Laden Ride<br />
Height<br />
Unladen Ride<br />
Height<br />
Neway AD123 single 23K - 10” 10”<br />
Neway AD126 single 26K - 10” 10”<br />
3-21<br />
12/09
Section 3<br />
Dimensions<br />
NEWAY AD 246 TANDEM SUSPENSION<br />
Shown with a 54” Axle Spacing<br />
Optional Neway AD Tandem Suspensions<br />
TABLE 3-12. Rear Suspension Options<br />
Suspension Type Rating Axle Spacing<br />
Laden Ride<br />
Height<br />
Unladen Ride<br />
Height<br />
Neway AD246 tandem 46K 54” 10” 10”<br />
Neway AD246 tandem 46K 60” 10” 10”<br />
12/09 3-22
Section 3<br />
Dimensions<br />
HENDRICKSON PRIMAAX TANDEM SUSPENSION<br />
Shown with 54” Axle Spacings<br />
Optional Hendrickson Primaax Tandem Suspensions<br />
TABLE 3-13. Rear Suspension Options<br />
Suspension Type Rating Axle Spacing<br />
Laden Ride<br />
Height<br />
Unladen Ride<br />
Height<br />
Hendrickson Primaax Tandem 46K 54” 10” 10”<br />
Hendrickson Primaax Tandem 46K 60” 10” 10”<br />
Hendrickson Primaax Tandem 46K 72” 10” 10”<br />
3-23<br />
12/09
Section 3<br />
Dimensions<br />
HENDRICKSON HAS 230 SINGLE REAR SUSPENSION<br />
Optional Hendrickson HAS 230 Suspensions<br />
TABLE 3-14. Rear Suspension Options<br />
Suspension Type Rating Axle Spacing<br />
Laden Ride<br />
Height<br />
Unladen Ride<br />
Height<br />
Hendrickson HAS 230 23K – 10.0” 10.0”<br />
12/09 3-24
Section 3<br />
Dimensions<br />
HENDRICKSON HMX TANDEM SUSPENSION<br />
Shown with 54” Axle Spacing<br />
Optional Hendrickson HMX Tandem Suspensions<br />
TABLE 3-15. Rear Suspension Options<br />
Suspension Type Rating Axle Spacing<br />
Laden Ride<br />
Height<br />
Unladen Ride<br />
Height<br />
Hendrickson HMX400 16.5” saddle 40K 54” 9.5” 10.6”<br />
Hendrickson HMX400 17.5” saddle 40K 54” 10.5” 11.6”<br />
Hendrickson HMX460 16.5” saddle 46K 54” 9.5” 10.6”<br />
Hendrickson HMX460 17.5” saddle 46K 54” 10.5” 11.6”<br />
Hendrickson HMX460 18.5” saddle 46K 54” 11.5” 12.6”<br />
Hendrickson HMX460 18.5” saddle 46K 60” 11.5” 12.6”<br />
3-25<br />
12/09
Section 3<br />
Dimensions<br />
HENDRICKSON RT TANDEM SUSPENSION<br />
Shown with a 54” Axle Spacing Without Track Rods<br />
Optional Hendrickson RT Tandem Suspensions<br />
TABLE 3-16. Rear Suspension Options<br />
Suspension Type Rating Axle Spacing<br />
Laden Ride<br />
Height<br />
Unladen Ride<br />
Height<br />
Hendrickson RT463 6” saddle 46K 54” 10.0” 11.1”<br />
Hendrickson RT463 7.19” saddle 46K 54” 11.2” 12.5”<br />
Hendrickson RT463 7.94” saddle 46K 54” 11.9” 13.3”<br />
Hendrickson RT463 6” saddle 46K 60” 10.0” 11.1”<br />
Hendrickson RT403 7.19” saddle 40K 52” 9.7” 10.7”<br />
12/09 3-26
Section 3<br />
Dimensions<br />
CHALMERS 856-46 TANDEM SUSPENSION<br />
Shown with a 54” Axle Spacing<br />
Optional Chalmers Tandem Suspensions<br />
TABLE 3-17. Rear Suspension Options<br />
Suspension Type Rating Axle Spacing<br />
Laden Ride<br />
Height<br />
Unladen Ride<br />
Height<br />
Chalmers 854-40-H 40K 54” 10.2” 12.4”<br />
Chalmers 854-40-L 40K 54” 8.9” 11.1”<br />
Chalmers 854-40-L-HS 40K 54” 9.6” 11.1”<br />
Chalmers 854-40-H-HS 40K 54” 10.9” 12.4”<br />
Chalmers 854-40-H-SR 40K 54” 10.5” 12.4”<br />
Chalmers 854-40-L-SR 40K 54” 9.2” 11.1”<br />
Chalmers 854-46-L 46K 54” 8.9” 11.3”<br />
Chalmers 854-46-L-HS 46K 54” 9.6” 11.3”<br />
Chalmers 854-46-L-SR 46K 54” 9.2” 11.3”<br />
Chalmers 854-46-H 46K 54” 10.1” 12.5”<br />
Chalmers 854-46-H-HS 46K 54” 10.9” 12.5”<br />
Chalmers 854-46-H-SR 46K 54” 10.5” 12.2”<br />
Chalmers 860-46-H 46K 60” 10.1” 12.5”<br />
Chalmers 860-46-H-HS 46K 60” 10.9” 12.5”<br />
Chalmers 872-46-H-HS 46K 72” 11.0” 12.5”<br />
3-27<br />
12/09
Section 3<br />
Dimensions<br />
PUSHER AXLES<br />
The rear pusher axle layouts are provided as a tool to help layout bodies prior to arrival. When using the pusher layouts to<br />
determine available frame space please be aware that clearances required are not shown. For information that may not be<br />
detailed in these drawings work with your local <strong>Kenworth</strong> Dealer to request that information.<br />
Watson & Chalin Tru Track Alumilite 13.2K Steerable Pusher<br />
Watson & Chalin Tru Track 20K Steerable Pusher<br />
12/09 3-28
Section 3<br />
Dimensions<br />
Watson & Chalin Atlas 22.5K Non-Steerable Pusher<br />
3-29<br />
12/09
Section 3<br />
Dimensions<br />
GROUND CLEARANCE<br />
This information is provided as a reference, not all optional equipment is included. In order to calculate the height on your<br />
specifi c chassis, please use the ride height information provided on page 3-14. For comparison the FS value shown is<br />
11.4” unladen and 10.4” laden.<br />
A<br />
B<br />
TABLE 3-18. Ground Clearance for Fuel Tanks<br />
Front<br />
Suspension<br />
Front Tires<br />
Rear<br />
Suspension<br />
Rear Tires<br />
Component<br />
Dimension<br />
“A”<br />
Distance<br />
from<br />
Bottom of<br />
Frame Rail<br />
(in)<br />
Dimension “B” Ground<br />
Clearance (in)<br />
Unladen<br />
Laden<br />
20K Taperleaf<br />
Spring<br />
M844F<br />
425/65R22.5<br />
Tires<br />
Hendrickson<br />
HMX 460<br />
17.5” Saddle<br />
Height<br />
M711<br />
11R24.5<br />
22” Fuel Tank 16.3 17.2 14.9<br />
24.5” Fuel<br />
Tank<br />
18.2 15.3 13<br />
12/09 3-30
Section 3<br />
Dimensions<br />
A<br />
B<br />
TABLE 3-19. Ground Clearance for Battery Boxes<br />
Front<br />
Suspension<br />
Front Tires<br />
Rear<br />
Suspension<br />
Rear Tires<br />
Component<br />
Dimension<br />
“A”<br />
Distance<br />
from<br />
Bottom of<br />
Frame Rail<br />
(in)<br />
Dimension “B” Ground<br />
Clearance (in)<br />
Unladen<br />
Laden<br />
Battery Box<br />
with Air Tanks<br />
17.3 16.2 13.9<br />
20K Taperleaf<br />
Spring<br />
M844F<br />
425/65R22.5<br />
Tires<br />
Hendrickson<br />
HMX 460<br />
17.5” Saddle<br />
Height<br />
M711<br />
11R24.5<br />
Vocational<br />
Battery Box<br />
with Air Tanks<br />
17.8 15.7 13.4<br />
Single DPF<br />
Box<br />
15.5 17.9 15.6<br />
3-31<br />
12/09
Section 3<br />
Dimensions<br />
A<br />
B<br />
TABLE 3-20. Ground Clearance for Battery Boxes<br />
Front<br />
Suspension<br />
Front Tires<br />
Rear<br />
Suspension<br />
Rear Tires<br />
Component<br />
Dimension<br />
“A”<br />
Distance<br />
from<br />
Bottom of<br />
Frame Rail<br />
(in)<br />
Dimension “B” Ground<br />
Clearance (in)<br />
Unladen<br />
Laden<br />
Battery Box<br />
with Air Tanks<br />
17.3 16.2 13.9<br />
20K Taperleaf<br />
Spring<br />
M844F<br />
425/65R22.5<br />
Tires<br />
Hendrickson<br />
HMX 460<br />
17.5” Saddle<br />
Height<br />
M711<br />
11R24.5<br />
Vocational<br />
Battery Box<br />
with Air Tanks<br />
17.8 15.7 13.4<br />
DPF 1 Box 15.6 17.8 15.5<br />
1<br />
Dimensions shown are for daycabs with high route exhaust. Sleeper ground clearance is reduced by 1.3 inches.<br />
12/09 3-32
Section 3<br />
Dimensions<br />
PTO CLEARANCES<br />
The following visuals are provided to help aid in determining PTO locations and clearances. For specific dimensions<br />
please work through your local <strong>Kenworth</strong> dealer. Multiple PTO’s are shown for layout purposes only. Power equipment,<br />
i.e., drive shafts & power pumps are not included. <strong>Body</strong> builders should select the appropriate PTO for their application<br />
and customer requirements. NOTE: Installations depict multiple PTOs. PTO locations shown below are for reference only.<br />
Some PTOs may interfere with frame rail and/or other components.<br />
In order to ensure the PTO area remains clear of air equipment, electrical and emissions equipment, <strong>Kenworth</strong> recommends<br />
always ordering PTO controls, even when installing the PTO aftermarket. <strong>Kenworth</strong> does offer a variety of factory<br />
installed PTOs. Contact your local dealer for assistance.<br />
<strong>Manual</strong> Transmission:<br />
3-33<br />
12/09
Section 3<br />
Dimensions<br />
Allison Transmission:<br />
12/09 3-34
Section 4<br />
Exhaust & Aftertreatment<br />
EXHAUST AND AFTER-TREATMENT INFORMATION<br />
The following section is designed to give you information regarding the exhaust and after-treatment systems on <strong>Kenworth</strong><br />
chassis.<br />
All <strong>Kenworth</strong>’s equipped with <strong>2010</strong> emission level engines will utilize Selective Catalyst Reduction (SCR). SCR is a<br />
process in which Diesel Exhaust Fluid (DEF) is injected into the exhaust down stream of the engine. DEF is converted to<br />
ammonia by the heat of the exhaust system. Inside of the SCR canister a catalyst causes a chemical reaction to occur<br />
between the ammonia and NOx, turning it into water and nitrogen. For more information on the specific details of how<br />
SCR works, please contact your local <strong>Kenworth</strong> dealer.<br />
DEF System Schematic:<br />
On most <strong>Kenworth</strong> chassis the DEF Supply Module (or pump) is integrated into the DEF tank. <strong>Kenworth</strong> does not allow<br />
relocation of this pump. The following schematic details how the DEF lines route to the after-treatment system.<br />
DEF Tank<br />
(10-gallon shown)<br />
DEF Return Line<br />
(Backfl ow from<br />
Supply Module)<br />
DEF Draw Line<br />
(Inlet to Supply Module)<br />
See Detail A<br />
Coolant Draw<br />
(from Draw Tee)<br />
Detail A<br />
Scale 1:2<br />
Coolant Return<br />
(to Coolant Valve)<br />
DEF Return Line (Backflow)<br />
DEF Draw Line (Inlet)<br />
DEF Supply Module<br />
(Pump)<br />
DEF Pressure Line<br />
(Outlet)<br />
DEF Dosing Module<br />
(Injector)<br />
4-1<br />
12/09
Section 4<br />
Exhaust & Aftertreatment<br />
DEF will freeze at approximately 11° F. In order to keep DEF from freezing all tanks will be heated with engine coolant.<br />
The following schematic shows the routing of these lines. The coolant lines that run to and from the SCR system must not<br />
be tampered with, or used for a source of heat and/or cooling for other components on the chassis. It is critical that the<br />
system is not compromised in any manner.<br />
DEF Tank<br />
(Small Tank Shown)<br />
5/8” Coolant Hose<br />
(Green - Draw)<br />
DEF Tank<br />
Heating<br />
Element<br />
Return Tee<br />
Draw Tee<br />
3/8” Coolant Hose<br />
(Blue - Return)<br />
2/2 Coolant<br />
Valve<br />
Coolant<br />
Bulkhead<br />
(Framemounted)<br />
3/8” Coolant Hose<br />
(Green - Draw)<br />
Draw Port<br />
Return Port<br />
DEF Dosing Module<br />
(Injector)<br />
5/8” Coolant Hose<br />
(Blue - Return)<br />
12/09 4-2
Section 4<br />
Exhaust & Aftertreatment<br />
GENERAL GUIDELINES FOR DEF SYSTEM<br />
The installation of the DEF tank is a critical component of the SCR system. While <strong>Kenworth</strong> does not recommended relocating<br />
the DEF tank, there are applications and body installations that will require it. The guidelines below must be strictly<br />
followed by any entity relocating the tank. Failure to follow the guidelines completely and accurately may result in engine<br />
shutdown situations.<br />
<strong>Kenworth</strong> offers a variety of DEF tank sizes to meet every application. The DEF tank volume is regulated by the E.P.A.<br />
<strong>Kenworth</strong> advises against modifying the tank volume after the truck has been delivered from the factory.<br />
• Total DEF capacity must meet or exceed 6% of the usable fuel capacity on the truck. The calculation<br />
to determine DEF capacity is:<br />
Minimum DEF Tank Volume = Useable Fuel Capacity (gal) x 0.06<br />
Example: For a truck with 200 useable gallons of fuel, the equation is<br />
DEF required = 200 x 0.06 = 12 gallons or more of DEF.<br />
PACCAR-approved DEF hoses are required when retrofitting for system to function properly. The use of unapproved hoses<br />
for DEF lines will void warranty and may cause engine shutdown situations. The DEF pump (or Supply Module) can not be<br />
relocated from the DEF tank.<br />
INSTALLATION REQUIREMENTS AND DIMENSIONS FOR DEF SYSTEM<br />
When relocating any DEF system components, the locations must meet the guidelines below. Failure to comply may result<br />
in non-conformance to EPA standards and engine shutdown.<br />
DEF piping relative heights: In order to ensure proper functionality of DEF system, the height differences in the guidelines<br />
below must be followed during line routing and component placement.<br />
With all relocating procedures, general clearances and routing guidelines must be followed. See section 9 of this manual<br />
for general routing guidelines.<br />
When relocating the components the maximum pressure DEF hose length, from Supply module to Dosing Module, is 3<br />
meters (118”).<br />
Maintain a minimum of 3” clearance to shielded exhaust components when routing DEF lines to prevent possible melting.<br />
If the DEF tank is relocated the coolant lines will need to be modified. During this process if the tank is moved forward on<br />
the chassis (ie closer to the engine) it is necessary to remove excess coolant lines and maintain the original routing path.<br />
If the tank is moved rearward on the chassis the additional length of cooling line required to complete the installation must<br />
be installed in a straight section of the existing coolant routing lines. This process will minimizes the change in coolant flow<br />
by minimizing changes in restrictions. Increases in restriction occur with excessive line length and bends. Work with your<br />
local <strong>Kenworth</strong> dealer if you are unsure about the coolant line modifications.<br />
4-3<br />
12/09
Section 4<br />
Exhaust & Aftertreatment<br />
MEASUREMENT REFERENCE POINTS<br />
For all relocation procedures, the measurement points referenced in the guidelines are taken from the following specific<br />
points:<br />
Supply Module: The supply module is commonly called a pump. The measurement point on the supply module is the top<br />
of the DEF fl uid pressure line. See Figure 4-1.<br />
FIGURE 4-1: Measurement Location of DEF Supply Module (Pump)<br />
Dosing Module: The dosing module is commonly called an injector, this injector is located on the SCR mixing pipe which<br />
is between the DPF and SCR canister. The measurement point on the dosing module is the top of the DEF fluid pressure<br />
line. See Figure 4-2.<br />
FIGURE 4-2: Measurement Location of DEF Dosing Module (Injector)<br />
The following relocation guidelines are dependant on exhaust configuration and DEF tank type and location.<br />
The Dosing Module should not need to be relocated. However if it is removed for any reason, it is critical that the module<br />
be reinstalled at the correct orientation. Figure 4-3 below illustrates the correct installation orientations. The angle references<br />
the vertical plane.<br />
12/09 4-4
Section 4<br />
Exhaust & Aftertreatment<br />
FIGURE 4-3: Orientation of Dosing Module<br />
Right Hand Under DPF and SCR with Small, Medium, or Large DEF Tanks<br />
FIGURE 4-4: RH Under Cab Exhaust with Small, Medium, or Large Tanks.<br />
The height differential between the supply module and dosing module can not exceed one meter. The supply module is<br />
integrated into the DEF tank assembly, separation of the module from the tank is not allowed.<br />
When relocating the components the maximum pressure DEF hose length, from Supply module to Dosing Module, is 3<br />
meters (118”).<br />
DEF Pressure hose must include a “trap” in the routing if Dosing Module is below the highest point of the Supply Module<br />
(See Figure 4-9 on page 4-9).<br />
4-5<br />
12/09
Section 4<br />
Exhaust & Aftertreatment<br />
Horizontal (Crossover) DPF and SCR with Rectangular Small or Medium DEF Tanks<br />
FIGURE 4-5: Horizontal Exhaust with Small or Medium Tanks.<br />
The height differential between the supply module and dosing module cannot exceed one meter. The supply module is<br />
integrated into the DEF tank assembly, separation of the module frm the tank is not allowed.<br />
When relocating the components the maximum pressure DEF hose length, from Supply module to Dosing Module is<br />
3 meters (118”).<br />
Vertical DPF and SCR with Rectangular Small or Medium DEF Tanks<br />
FIGURE 4-6: Vertical Exhaust with Small or Medium Tanks.<br />
The height differential between the supply module and dosing module can not exceed one meter. The supply module is<br />
integrated into the DEF tank assembly, separation of the module from the tank is not allowed.<br />
When relocating the components the maximum pressure DEF hose length, from Supply module to Dosing Module, is 3<br />
meters (118”).<br />
12/09 4-6
Section 4<br />
Exhaust & Aftertreatment<br />
Right Hand Under DPF and SCR with Clear Back of Cab DEF Tank<br />
FIGURE 4-7: RH Under Cab Exhaust with Clear Back of Cab Tank.<br />
The installation and design of the Clear Back of Cab (CBOC) tank is highly integrated into the chassis and cooling system.<br />
<strong>Kenworth</strong> does not allow relocation of this tank, only relocation of the supply module.<br />
The height differential between the supply module and dosing module can not exceed one meter. The CBOC tank does<br />
not have an integrated supply module. The standard KW installation is a supply module located inside of the frame rail.<br />
When relocating either the supply module or the tank, the maximum height differential between the supply module and the<br />
bottom of the tank is one meter. The maximum line length is 2 meters between supply module and DEF tank sending unit.<br />
When relocating the components the maximum pressure DEF hose length, from Supply module to Dosing Module, is 3<br />
meters (118”).<br />
DEF Pressure hose must include a “trap” in the routing if Dosing Module is below the highest point of the Supply Module<br />
(See Figure 4-8 on page 4-9).<br />
4-7<br />
12/09
Section 4<br />
Exhaust & Aftertreatment<br />
Vertical DPF and SCR with Clear Back of Cab DEF Tank<br />
FIGURE 4-7: Vertical with Clear Back of Cab Tank<br />
The installation and design of the Clear Back of Cab (CBOC) tank is highly integrated into the chassis and cooling system.<br />
<strong>Kenworth</strong> does not allow relocation of this tank, only relocation of the supply module.<br />
The height differential between the supply module and dosing module can not exceed one meter. The Clear Back of Cab<br />
(CBOC) tank does not have an integrated supply module. The standard KW installation is a supply module located inside<br />
of the frame rail. When relocating either the supply module or the tank, the maximum height differential between the supply<br />
module and the bottom of the tank is one meter. The maximum line length is 2 meters between supply module and<br />
DEF tank sending unit.<br />
When relocating the components the maximum pressure DEF hose length, from Supply module to Dosing Module, is 3<br />
meters (118”).<br />
Routing to the Dosing Module (Injector)<br />
It is important for the function of the dosing module to ensure that the dosing module is not routed downstream of DEF<br />
lines or components. If this is unavoidable (for example on RH under exhaust systems) a routing trap must be installed. A<br />
minimum of 12” of line length must be routed below the dosing module, in order to catch any leftover DEF when system is<br />
purged.<br />
12/09 4-8
Section 4<br />
Exhaust & Aftertreatment<br />
Minimum 12” Line<br />
Length Below<br />
Dosing Module<br />
FIGURE 4-8: Routing DEF Lines and DEF Trap<br />
Clear Back of Cab Supply Module<br />
The CBOC Supply Module (or Pump) standard mounting location is inside of the frame rail back of cab. <strong>Body</strong> builders<br />
may need to relocate this component, and should follow the location and length restrictions above. Additionally the<br />
mounting and the orientation of the Supply Module must not exceed 45° (from vertical) in two directions as shown in<br />
Figure 4-9 below.<br />
FIGURE 4-9: Supply Module Allowed Clocking Angles<br />
4-9<br />
12/09
Section 4<br />
Exhaust & Aftertreatment<br />
GENERAL EXHAUST INFORMATION<br />
<strong>Kenworth</strong> will offer two main DPF and SCR exhaust systems on <strong>T440</strong>/<strong>T470</strong> chassis in <strong>2010</strong>. A Right Hand Under DPF<br />
and SCR system, in which both canisters are located underneath the cab access step, and an Independent DPF and SCR<br />
located vertically back of cab on stanchion brackets.<br />
RH Under DPF and SCR<br />
Independent Back of Cab<br />
The following images depict the typical exhaust routings for each system, and can be used to determine exhaust routing<br />
paths for systems you choose. Dimensional information can be found in Section 5 of this manual.<br />
<strong>Body</strong> <strong>Builder</strong>s must not modify (including altering, substituting, and relocating) the DPF and SCR canisters. The exhaust<br />
piping after it exits the SCR canister may be modifi ed, however using smaller diameter piping or piping with numerous<br />
bends is not recommend as the backpressure requirements of the system may be exceeded.<br />
12/09 4-10
Section 4<br />
Exhaust & Aftertreatment<br />
Right Hand Under DPF and SCR on Daycab with Single Side of<br />
Cab Tailpipe<br />
FIGURE 4-10: Isometric View of Right Hand Under DPF and SCR with Single SOC Tailpipe<br />
FIGURE 4-11: Top View of Right Hand Under DPF and SCR with Single SOC Tailpipe<br />
4-11<br />
12/09
Section 4<br />
Exhaust & Aftertreatment<br />
FIGURE 4-12: Right View of Right Hand Under DPF and SCR with Single SOC Tailpipe<br />
FIGURE 4-13: Back View of Right Hand Under DPF and SCR with Single SOC Tailpipe<br />
12/09 4-12
Section 4<br />
Exhaust & Aftertreatment<br />
Right Hand Under DPF and SCR with Single Back of Cab Tailpipe<br />
FIGURE 4-14: Isometric View of Right Hand Under DPF and SCR with Single Back of Cab Tailpipe<br />
FIGURE 4-15: Top view of Right Hand Under DPF and SCR with Single Back of Cab Tailpipe<br />
4-13<br />
12/09
Section 4<br />
Exhaust & Aftertreatment<br />
FIGURE 4-16: Right view of Right Hand Under DPF and SCR with Single Back of Cab Tailpipe<br />
FIGURE 4-17: Back view of Right Hand Under DPF and SCR with Single Back of Cab Tailpipe<br />
12/09 4-14
Section 4<br />
Exhaust & Aftertreatment<br />
Vertical Independent DPF and SCR with Horizontal Tailpipe<br />
FIGURE 4-18: Isometric View of Vertical DPF and SCR<br />
FIGURE 4-19: Top View of Vertical DPF and SCR<br />
4-15<br />
12/09
Section 4<br />
Exhaust & Aftertreatment<br />
FIGURE 4-20: Right View of Vertical DPF and SCR<br />
FIGURE 4-21: Back View of Vertical DPF and SCR<br />
12/09 4-16
Section 4<br />
Exhaust & Aftertreatment<br />
Right Hand Under DPF and SCR on Aerocabs with Single Side of<br />
Cab Tailpipe<br />
FIGURE 4-22: Isometric View of Right Hand Under DPF and SCR on Aerocab with Single SOC Tailpipe<br />
FIGURE 4-23: Top View of Right Hand Under DPF and SCR on Aerocab with Single SOC Tailpipe<br />
4-17<br />
12/09
Section 4<br />
Exhaust & Aftertreatment<br />
FIGURE 4-24: Right View of Right Hand Under DPF and SCR on Aerocab with Single SOC Tailpipe<br />
FIGURE 4-25: Back View of Right Hand Under DPF and SCR on Aerocab with Single SOC Tailpipe<br />
12/09 4-18
Section 4<br />
Exhaust & Aftertreatment<br />
EXHAUST INFORMATION<br />
This section includes information on how to calculate tailpipe heights, and reference information for PTO clearance.<br />
Optional equipment is not shown.<br />
Tailpipe Stack Height Calculation<br />
TABLE 4-1. Stack Height<br />
Dimension A<br />
Tailpipes side of Aerocab, RH<br />
under DPF<br />
Tailpipes independent back of<br />
sleeper, RH under DPF<br />
DPF mounted independent back<br />
of cab or sleeper<br />
Tailpipes side of cab mount,<br />
DPF RH under<br />
Tailpipes back of cab mount, w/<br />
side extenders, DPF RH under<br />
Tailpipes back of cab mount, w/o<br />
side extenders, DPF RH under<br />
Cummins<br />
(not ISL)<br />
78.0”<br />
75.0”<br />
75.0”<br />
68.5”<br />
68.0”<br />
Cummins<br />
ISL<br />
75.0”<br />
DIMENSION “B” IS THE TAILPIPE LENGTH.<br />
TABLE 4-2. Unladen Stack Height<br />
For approximate unladen stack height (12,000 pound springs) use the following frame heights:<br />
Tire Size Top of Rail Ft. Suspension<br />
11R24.5 43.5” 12K<br />
11R22.5 42.5” 12K<br />
285/75R24.5 42” 12K<br />
295/75R22.5 41.5” 12K<br />
425/65R22.5 43.2 20K<br />
385/65R22.5 42.4 20K<br />
*Use Prospector frame heights for more accurate results.<br />
Sample: Tailpipe height 13’6” = Desired overall stack height = 162.0”<br />
(–) Prospector frame height (–) 43.5”<br />
(+) Frame rail depth (+) 10.6”<br />
(–) Dimension ‘A’ from chart (–) 68.6”<br />
= Tail pipe length = 60.5”<br />
4-19<br />
12/09
Section 4<br />
Exhaust & Aftertreatment<br />
This page intentionally left blank.<br />
12/09 4-20
Section 5<br />
Frame Layouts<br />
FRAME LAYOUTS<br />
The dimensions in the frame layout section are intended to aid in layout of the chassis, and to help determine the best<br />
possible combination of fuel tanks, battery boxes, the diesel particulate fi lter (DPF), SCR canister, and Diesel Exhaust<br />
Fluid (DEF) tank. For your application, the layouts focus on the under cab area, with appropriate dimensional information<br />
included for pertinent back of cab components. Not all optional equipment is included in this section. Additional components<br />
may be placed on the rail behind components shown. The Back of Cab components are shown primarily for reference.<br />
For more specifi c requirements please work with your local <strong>Kenworth</strong> Dealer. Please read the instructions carefully.<br />
The following dimensions are consistent across the entire section to aid in the comparison of one layout option versus<br />
another.<br />
TABLE 5-1.<br />
B = Battery box<br />
D = DEF tank<br />
E = Exhaust<br />
F1 = Fuel Tank RHS<br />
F2 = Fuel Tank LHS<br />
T = Tool Box<br />
The layouts are organized by type, specifi cally the arrangement of under cab components. The visual index that follows<br />
will give you a quick overview of the layouts that are included. Using the index locate the layout that you are interested in,<br />
then turn to the specified pages. The charts that follow are then model specific. It is important that the correct chart is used<br />
for accurate dimensional information.<br />
Visual Index<br />
Symbol Description Symbol Description<br />
RHUC DPF/SCR<br />
Vertical DPF/SCR<br />
Parallel Battery Box, Standard Length<br />
In Cab Battery Box<br />
Tool Box<br />
DEF Tank<br />
Clear BOC DEF Tank<br />
Fuel Tank<br />
Cantilever Battery Box<br />
5-1<br />
12/09
Section 5<br />
Frame Layouts<br />
COMMON OPTIONAL COMPONENTS<br />
The frame layouts that follow contain the minimum frame requirements to be operational (fuel tanks, battery<br />
box, and after-treatment components). All layouts are shown with standard length battery boxes unless otherwise<br />
noted. Dimensions for these components have been provided below to help complete the frame layout for<br />
chassis with more fuel tanks, additional tool boxes, etc.<br />
TABLE 5-2. Fuel Tank Overall Length (in)<br />
Fuel Tank Overall Length (in)<br />
Fuel Tank Diameter<br />
Gallons 22” 24.5”<br />
45 N/A 23.0<br />
56 35.6 N/A<br />
60 38.0 30.6<br />
75 47.3 38.5<br />
90 N/A 45.5<br />
100 62.2 50.0<br />
105 N/A N/A<br />
110 N/A 55.0<br />
120 74.3 60.6<br />
135 N/A 67.2<br />
150 N/A 74.5<br />
177 N/A N/A<br />
TABLE 5-3. Battery Box Centerframe Lengths (in)<br />
Battery Box Centerframe Lengths (in)<br />
<strong>T440</strong>/<strong>T470</strong><br />
Parallel Short 34.8<br />
Parallel Extended 42.0<br />
Parallel BOC 34.8<br />
Cantilever 17.8<br />
Vocational 15.2<br />
12/09 5-2
Section 5<br />
Frame Layouts<br />
FIGURE 5-1. DEF Tank Dimensions.<br />
TABLE 5-4. DEF Tanks Systems<br />
Description<br />
Usable Volume,<br />
Gallons<br />
Small DEF Tank 9<br />
Medium DEF Tank 18<br />
Large DEF Tank 27<br />
Fuel Tank<br />
Diameter<br />
A<br />
22” 27.4 15.3<br />
24.5” 27.4 15.8<br />
22” 27.7 15.0<br />
24.5” 27.7 15.5<br />
22” 27.7 15.0<br />
24.5” 27.7 15.5<br />
B<br />
Acronyms Index<br />
Throughout the Frame Layout section you will see these acronyms. They are defi ned here to help you decode<br />
the layouts.<br />
BOC Back Of Cab DSOC Dual Side Of Cab<br />
BOS Back Of Sleeper LHUC Left Hand Under Cab<br />
CBOC Clear Back Of Cab RHUC Right Hand Under Cab<br />
DEF Diesel Exhaust Fluid SOAC Side Of AeroCab<br />
DSOAC Dual Side Of AeroCab SOC Side Of Cab<br />
5-3<br />
12/09
Section 5<br />
Frame Layouts<br />
FRAME LAYOUT INDEX<br />
Day Cab Chassis Layout Options<br />
D1 is used with RHUC DPF/SCR, LHUC fuel tank, RH BOC DEF tank, and LH BOC cantilever battery box. Chart located<br />
on page 5–8.<br />
D2 is used with RHUC DPF/SCR, LHUC fuel tank, RH BOC cantilever battery box, and LH BOC DEF tank. Chart<br />
located on page 5–9.<br />
D3 is used with RHUC DPF/SCR, LHUC battery box, RH BOC DEF tank, and LH BOC fuel tank. Chart located on<br />
page 5–10.<br />
D4 is used with RHUC DPF/SCR, LHUC battery box, LH BOC DEF tank, and RH BOC fuel tank. Chart located on<br />
page 5–11.<br />
D5 is used with RHUC DPF/SCR, LHUC fuel tank, RH BOC DEF tank, and in cab battery box. Chart located on<br />
page 5–12.<br />
12/09 5-4
Section 5<br />
Frame Layouts<br />
D6 is used with RHUC DPF/SCR, LHUC fuel tank, Clear BOC DEF tank, and in cab battery box. Chart located on<br />
page 5–13.<br />
D7 is used with Vertical-Vertical DPF/SCR, LH vertical tailpipe, RHUC fuel tank, LHUC battery box, and LH BOC DEF<br />
tank. Charts located on page 5–14.<br />
D8 is used with Vertical-Vertical DPF/SCR, LH vertical tailpipe, RHUC fuel tank, LHUC battery box, and RH BOC DEF<br />
tank. Chart located on page 5–15.<br />
D9 is used with Vertical-Vertical DPF/SCR, LH vertical tailpipe, LHUC & RHUC fuel tanks, RH BOC cantilever battery box,<br />
and LH BOC DEF tank. Chart located on page 5–16.<br />
D10 is used with Vertical-Vertical DPF/SCR, LH vertical tailpipe, LHUC fuel tank, RHUC battery box, and Clear BOC DEF<br />
tank. Charts located on page 5–17.<br />
5-5<br />
12/09
Section 5<br />
Frame Layouts<br />
Sleeper Chassis Layout Options<br />
S1 is used with 38” AeroCab sleeper with RHUC DPF/SCR, LHUC fuel tank, RH BOC DEF tank, and LH BOC cantilever<br />
battery box. Chart located on page 5–18.<br />
S2 is used with 38” AeroCab sleeper with RHUC DPF/SCR, LHUC fuel tank, LH BOC DEF tank, and RH BOC cantilever<br />
battery box. Chart located on page 5–19.<br />
S3 is used with 38” AeroCab sleeper with RHUC DPF/SCR, LHUC battery box, RH BOC DEF tank, and LH BOC fuel tank.<br />
Chart located on page 5–20.<br />
S4 is used with 38” AeroCab sleeper with RHUC DPF/SCR, LHUC battery box, LH BOC DEF tank, and RH BOC fuel tank.<br />
Chart located on page 5–21.<br />
S5 is used with 38” AeroCab sleeper with Vertical-Vertical DPF/SCR, LH vertical tailpipe, RHUC fuel tank, LHUC battery<br />
box, and LH BOC DEF tank. Chart located on page 5–22.<br />
12/09 5-6
Section 5<br />
Frame Layouts<br />
S6 is used with 38” AeroCab sleeper with Vertical-Vertical DPF/SCR, LH vertical tailpipe, RHUC fuel tank, LHUC battery<br />
box, and RH BOC DEF tank. Chart located on page 5–23.<br />
S7 is used with 38” AeroCab sleeper with Vertical-Vertical DPF/SCR, LH vertical tailpipe, RHUC & LHUC fuel tanks, LH<br />
BOC DEF tank and RH BOC cantilever battery box. Chart located on page 5–24.<br />
5-7<br />
12/09
Section 5<br />
Frame Layouts<br />
D1—Use with the following models: <strong>T470</strong>/<strong>T440</strong><br />
Dimension E (BOC to DPF/SCR)* = 0.4in<br />
TABLE 5-5.<br />
Fuel Tank Size<br />
Diameter Gallons Length (in)<br />
22”<br />
Diameter<br />
Tank<br />
24.5”<br />
Diameter<br />
Tank<br />
Dimension F<br />
BOC to Fuel Tank,<br />
Daycab* (in)<br />
<strong>T470</strong>/<strong>T440</strong><br />
Dimension B<br />
BOC to Battery Box,<br />
Daycab* (in)<br />
56 35.5 -3.7 17.0<br />
60 38.0 -1.2 19.5<br />
75 47.3 8.1 28.8<br />
100 62.2 23.0 43.7<br />
120 74.2 35.0 55.7<br />
60 30.5 -8.7 12.0<br />
75 38.5 -0.7 20.0<br />
90 45.5 6.3 27.0<br />
100 50.0 10.8 31.5<br />
110 54.9 15.7 36.4<br />
120 60.5 21.3 42.0<br />
135 67.2 28.0 48.7<br />
150 74.5 35.3 56.0<br />
Dimension D<br />
BOC to DEF Tank, Daycab* (in)<br />
DEF Tank Size<br />
Small Medium Large<br />
18.4 24.8 32.9<br />
*Subtract 5.7 inches for the extended Daycab.<br />
NOTE: DIMENSION “B” IS CALCULATED USING A CANTILEVER SIZED BATTERY BOX. OPTIONAL BOXES WILL AFFECT THIS DIMENSION.<br />
12/09 5-8
Section 5<br />
Frame Layouts<br />
D2—Use with the following models: <strong>T470</strong>/<strong>T440</strong><br />
Dimension E (BOC to DPF/SCR)* = 0.4in<br />
Dimension B (BOC to Cantilever Battery Box)* = 21.8in<br />
TABLE 5-6.<br />
Fuel Tank Size<br />
<strong>T470</strong>/<strong>T440</strong><br />
Dimension F<br />
BOC to Fuel Tank,<br />
Daycab* (in)<br />
Dimension D<br />
BOC to DEF Tank* (in)<br />
DEF Tank Size<br />
Diameter Gallons Length (in) Small Medium Large<br />
56 35.5 -3.7 7.4 17.1 25.2<br />
60 38.0 -1.2 10.1 19.3 27.4<br />
22” Diameter Tank 75 47.3 8.1 23.9 28.2 36.2<br />
100 62.2 23.0 34.9 44.7 52.8<br />
120 74.2 35.0 46.0 55.7 63.8<br />
60 30.5 -8.7 1.9 11.6 19.7<br />
75 38.5 -0.7 10.1 19.3 27.4<br />
90 45.5 6.3 18.4 28.2 36.2<br />
24.5” Diameter Tank<br />
100 50.0 10.8 23.9 30.9 39.0<br />
110 54.9 15.7 29.4 36.4 44.5<br />
120 60.5 21.3 34.9 42.0 50.0<br />
135 67.2 28.0 40.5 47.5 55.5<br />
150 74.5 35.3 46.0 55.7 63.8<br />
*Subtract 5.7 inches for the extended Daycab.<br />
NOTE: DIMENSION “B” IS CALCULATED USING A CANTILEVER SIZED BATTERY BOX. OPTIONAL BOXES WILL AFFECT THIS DIMENSION.<br />
5-9<br />
12/09
Section 5<br />
Frame Layouts<br />
D3—Use with the following models: <strong>T470</strong>/<strong>T440</strong><br />
Dimension E (BOC to DPF/SCR)* = .04in<br />
Dimension B (BOC to Battery Box)* = -4.5in<br />
TABLE 5-7.<br />
Fuel Tank Size<br />
<strong>T470</strong>/<strong>T440</strong><br />
Dimension F<br />
BOC to Fuel Tank,<br />
Daycab* (in)<br />
Dimension D<br />
BOC to DEF Tank, Daycab* (in)<br />
DEF Tank Size<br />
Diameter Gallons Length (in) Small Medium Large<br />
56 35.5 33.0<br />
22” Diameter Tank<br />
24.5” Diameter Tank<br />
60 38.0 35.5<br />
75 47.3 44.8<br />
100 62.2 59.7<br />
120 74.2 71.7<br />
60 30.5 28.0<br />
75 38.5 36.0<br />
90 45.5 43.0<br />
100 50.0 47.5<br />
110 54.9 52.4<br />
120 60.5 58.0<br />
135 67.2 64.7<br />
150 74.5 72.0<br />
18.4 24.8 32.9<br />
*Subtract 5.7 inches for the extended Daycab.<br />
NOTE: DIMENSIONS “B” AND “F” ARE CALCULATED USING A STANDARD BATTERY BOX. OPTIONAL EXTENDED BOXES WILL CHANGE<br />
DIMENSIONS “B” AND “F”<br />
12/09 5-10
Section 5<br />
Frame Layouts<br />
D4—Use with the following models: <strong>T470</strong>/<strong>T440</strong><br />
Dimension E (BOC to DPF/SCR)* = 0.4in<br />
Dimension B (BOC to Battery Box)* = -4.5in<br />
TABLE 5-8.<br />
Fuel Tank Size<br />
<strong>T440</strong>/<strong>T470</strong><br />
Dimension F<br />
BOC to Fuel Tank,<br />
Daycab* (in)<br />
Dimension D<br />
BOC to DEF Tank, Daycab* (in)<br />
DEF Tank Size<br />
Diameter Gallons Length (in) Small Medium Large<br />
56 35.5 38.6<br />
60 38.0 41.1<br />
22” Diameter Tank 75 47.3 50.4<br />
100 62.2 65.3<br />
120 74.2 77.3<br />
60 30.5 33.6<br />
75 38.5 41.6<br />
7.4 17.1 25.2<br />
90 45.5 48.6<br />
24.5” Diameter Tank<br />
100 50.0 53.1<br />
110 54.9 58.0<br />
120 60.5 63.6<br />
135 67.2 70.3<br />
150 74.5 77.6<br />
*Subtract 5.7 inches for the extended Daycab.<br />
NOTE: DIMENSIONS “B” AND “D” ARE CALCULATED USING A STANDARD BATTERY BOX. OPTIONAL EXTENDED BOXES WILL CHANGE<br />
DIMENSIONS “B” AND “D”<br />
5-11<br />
12/09
Section 5<br />
Frame Layouts<br />
D5—Use with the following models: <strong>T470</strong>/<strong>T440</strong> and In-cab battery box.<br />
Dimension E (BOC to DPF/SCR)* = 0.4in<br />
TABLE 5-9.<br />
Fuel Tank Size<br />
<strong>T440</strong>/<strong>T470</strong><br />
Dimension F<br />
BOC to Fuel Tank,<br />
Daycab* (in)<br />
Dimension D<br />
BOC to DEF Tank, Daycab* (in)<br />
DEF Tank Size<br />
Diameter Gallons Length (in) Small Medium Large<br />
22” Diameter Tank<br />
24.5” Diameter Tank<br />
*Subtract 5.7 inches for the extended Daycab.<br />
56 35.5 -3.7<br />
60 38.0 -1.2<br />
75 47.3 8.1<br />
100 62.2 23.0<br />
120 74.2 35.0<br />
60 30.5 -8.7<br />
75 38.5 -0.7<br />
90 45.5 6.3<br />
100 50.0 10.8<br />
110 54.9 15.7<br />
120 60.5 21.3<br />
135 67.2 28.0<br />
150 74.5 35.3<br />
18.4 24.8 32.9<br />
12/09 5-12
Section 5<br />
Frame Layouts<br />
D6—Use with the following models: <strong>T470</strong>/<strong>T440</strong> and In-cab battery box.<br />
Dimension E (BOC to DPF/SCR)* = 0.4in<br />
Dimension D (BOC to DEF tank)* = 0.7in<br />
TABLE 5-10.<br />
<strong>T440</strong>/<strong>T470</strong><br />
Fuel Tank Size<br />
Diameter Gallons Length (in)<br />
22” Diameter Tank<br />
24.5” Diameter Tank<br />
*Subtract 5.7 inches for the extended Daycab.<br />
Dimension F<br />
BOC to Fuel Tank,<br />
Daycab* (in)<br />
56 35.5 -3.7<br />
60 38.0 -1.2<br />
75 47.3 8.1<br />
100 62.2 23.0<br />
120 74.2 35.0<br />
60 30.5 -8.7<br />
75 38.5 -0.7<br />
90 45.5 6.3<br />
100 50.0 10.8<br />
5-13<br />
12/09
Section 5<br />
Frame Layouts<br />
D7—Use with the following models: <strong>T470</strong>/<strong>T440</strong><br />
Dimension B (BOC to Battery Box)* = -4.5in<br />
Dimension E (BOC to DPF/SCR) = 19.6in<br />
TABLE 5-11.<br />
Fuel Tank Size<br />
Dimension F<br />
BOC to<br />
Fuel Tank,<br />
Daycab (in)<br />
<strong>T440</strong>/<strong>T470</strong><br />
Dimension D<br />
BOC to DEF Tank, Daycab (in)<br />
DEF Tank Size<br />
Dimension F<br />
BOC to Fuel<br />
Tank, Ext.<br />
Daycab (in)<br />
Dimension D<br />
BOC to DEF Tank, Ext. Daycab (in)<br />
DEF Tank Size<br />
Diameter Gallons Length (in) Small Medium Small Medium<br />
22”<br />
Diameter<br />
Tank<br />
24.5”<br />
Diameter<br />
Tank<br />
56<br />
60<br />
35.5<br />
38.0<br />
-3.7<br />
-1.2<br />
-9.4<br />
-6.9<br />
75 47.3 8.1 2.4<br />
100 62.2 23.0 17.3<br />
120 74.2 35.0 29.3<br />
60 30.5 -8.7 -14.4<br />
75 38.5 -0.7 7.4 39.2<br />
-6.4<br />
90 45.5 6.3 0.6<br />
100 50.0 10.8 5.1<br />
110 54.9 15.7 10.0<br />
120 60.5 21.3 15.6<br />
135 67.2 28.0 22.3<br />
150 74.5 35.3 29.6<br />
1.7 39.0<br />
*Subtract 5.7 inches for the extended Daycab.<br />
NOTE: DIMENSIONS “B” AND “D” ARE CALCULATED USING A STANDARD BATTERY BOX. OPTIONAL EXTENDED BOXES WILL CHANGE<br />
DIMENSIONS “B” AND “D”<br />
12/09 5-14
Section 5<br />
Frame Layouts<br />
D8—Use with the following models: <strong>T470</strong>/<strong>T440</strong><br />
Dimension B (BOC to Battery Box)* = -4.5in<br />
Dimension E (BOC to DPF/SCR) = 19.6in<br />
TABLE 5-12.<br />
Fuel Tank Size<br />
Dimension F<br />
BOC to<br />
Fuel Tank,<br />
Daycab (in)<br />
<strong>T440</strong>/<strong>T470</strong><br />
Dimension D<br />
BOC to DEF Tank, Daycab (in)<br />
DEF Tank Size<br />
Dimension F<br />
BOC to Fuel<br />
Tank, Ext.<br />
Daycab (in)<br />
Dimension D<br />
BOC to DEF Tank, Ext. Daycab (in)<br />
DEF Tank Size<br />
Diameter Gallons Length (in) Small Medium Small Medium<br />
22”<br />
Diameter<br />
Tank<br />
24.5”<br />
Diameter<br />
Tank<br />
56 35.5 -3.7 18.4 39.2 -9.4 18.2 39.0<br />
60 38.0 -1.2 18.4 39.2 -6.9 18.2 39.0<br />
75 47.3 8.1 29.4 39.2 2.4 18.2 39.0<br />
100 62.2 23.0 34.9 42.6 17.3 29.2 36.9<br />
120 74.2 35.0 46.0 55.7 29.3 40.3 50.0<br />
60 30.5 -8.7 18.4 39.2 -14.4 18.2 39.0<br />
75 38.5 -0.7 18.4 39.2 -6.4 18.2 39.0<br />
90 45.5 6.3 18.4 39.2 0.6 18.2 39.0<br />
100 50.0 10.8 29.4 39.2 5.1 18.2 39.0<br />
110 54.9 15.7 29.4 39.2 10.0 29.2 39.0<br />
120 60.5 21.3 34.9 42.6 15.6 29.2 36.9<br />
135 67.2 28.0 40.5 55.7 22.3 34.8 50.0<br />
150 74.5 35.3 46.0 55.7 29.6 40.3 50.0<br />
*Subtract 5.7 inches for the extended Daycab.<br />
NOTE: DIMENSION “B” IS CALCULATED USING A STANDARD BATTERY BOX. OPTIONAL EXTENDED BOXES WILL CHANGE DIMENSION “B”<br />
5-15<br />
12/09
Section 5<br />
Frame Layouts<br />
D9—Use with the following models: <strong>T470</strong>/<strong>T440</strong><br />
Dimension E (BOC to DPF/SCR) = 19.6in<br />
TABLE 5-13.<br />
<strong>T440</strong>/<strong>T470</strong><br />
Dimension<br />
Dimension B<br />
Dimension D<br />
Dimension<br />
Dimension D<br />
Dimension B<br />
F1 & F2<br />
Fuel Tank Size<br />
BOC to<br />
BOC to DEF Tank, Daycab (in) F1 & F2<br />
BOC to DEF Tank,<br />
BOC to<br />
BOC to<br />
BOC to Fuel<br />
Ext. Daycab (in)<br />
Battery Box,<br />
Battery Box,<br />
Fuel Tank,<br />
DEF Tank Size Tank, Ext.<br />
DEF Tank Size<br />
Daycab (in)<br />
Ext Daycab (in)<br />
Diameter Gallons Length (in)<br />
Daycab (in)<br />
Small Medium<br />
Daycab (in)<br />
Small Medium<br />
22”<br />
Diameter<br />
Tank<br />
24.5”<br />
Diameter<br />
Tank<br />
56 35.5 -3.7 24.1 7.4 39.2 -9.4 24.1 1.7 39.0<br />
60 38.0 -1.2 24.1 18.4 39.2 -6.9 24.1 4.4 39.0<br />
75 47.3 8.1 29.6 29.4 39.2 2.4 24.1 18.2 39.0<br />
100 62.2 23.0 43.7 34.9 44.7 17.3 29.3 29.2 39.0<br />
120 74.2 35.0 55.7 46.0 55.7 29.3 50.0 40.3 50.0<br />
60 30.5 -8.7 24.1 1.9 39.2 -14.4 24.1 -3.8 39.0<br />
75 38.5 -0.7 24.1 18.4 39.2 -6.4 24.1 4.4 39.0<br />
90 45.5 6.3 29.6 18.4 39.2 0.6 29.6 18.2 39.0<br />
100 50.0 10.8 35.1 29.4 39.2 5.1 29.6 18.2 39.0<br />
110 54.9 15.7 36.4 29.4 39.2 10.0 35.1 29.2 39.0<br />
120 60.5 21.3 42.0 34.9 42.0 15.6 35.1 29.2 39.0<br />
135 67.2 28.0 48.7 40.5 47.5 22.3 43.0 34.8 41.8<br />
150 74.5 35.3 56.0 46.0 55.7 29.6 50.3 40.2 50.0<br />
NOTE: DIMENSION “B” IS CALCULATED USING A CANTILEVER SIZED BATTERY BOX. OPTIONAL BOXES WILL AFFECT THIS DIMENSION.<br />
12/09 5-16
Section 5<br />
Frame Layouts<br />
D10—Use with the following models: <strong>T470</strong>/<strong>T440</strong><br />
Dimension B (BOC To Battery Box)* = -4.5in<br />
Dimension E (BOC to DPF/SCR) = 19.6in<br />
Dimension D (BOC to DEF tank)* = 0.7in<br />
TABLE 5-14.<br />
Fuel Tank Size<br />
<strong>T440</strong>/<strong>T470</strong><br />
Diameter Gallons Length (in)<br />
Dimension F<br />
BOC to Fuel Tank,<br />
Daycab (in)<br />
Dimension F<br />
BOC to Fuel Tank,<br />
Extended Daycab (in)<br />
22” Diameter Tank<br />
24.5” Diameter Tank<br />
56 35.5 -3.7 -9.4<br />
60 38.0 -1.2 -6.9<br />
75 47.3 8.1 2.4<br />
100 62.2 23.0 17.3<br />
120 74.2 35.0 29.3<br />
60 30.5 -8.7 -14.4<br />
75 38.5 -0.7 -6.4<br />
90 45.5 6.3 0.6<br />
100 50.0 10.8 5.1<br />
*Subtract 5.7 inches for the extended Daycab.<br />
NOTE: DIMENSION “B” IS CALCULATED USING A STANDARD BATTERY BOX. OPTIONAL EXTENDED BOXES WILL CHANGE DIMENSION “B”<br />
5-17<br />
12/09
Section 5<br />
Frame Layouts<br />
S1—Use with the following models: <strong>T470</strong>/<strong>T440</strong> 38”<br />
Dimension E (BOS to DPF/SCR) = -17..9in.<br />
TABLE 5-15.<br />
Fuel Tank Size<br />
<strong>T440</strong>/<strong>T470</strong> 38”<br />
Dimension F<br />
BOS to<br />
Fuel Tank (in)<br />
Dimension B<br />
BOS to<br />
Battery Box (in)<br />
Dimension D<br />
BOS to DEF Tank (in)<br />
DEF Tank Size<br />
Diameter Gallons Length (in) Small Medium Large<br />
22” Diameter Tank<br />
24.5” Diameter Tank<br />
56 35.5 -31.7 0.9<br />
60 38.0 -29.2 0.9<br />
75 47.3 -19.9 0.9<br />
100 62.2 -5.0 18.4<br />
120 74.2 7.0 27.7<br />
60 30.5 -36.7 -16.0<br />
75 38.5 -28.7 0.9<br />
90 45.5 -21.7 0.9<br />
100 50.0 -17.2 18.4<br />
110 54.9 -12.3 18.4<br />
120 60.5 -6.7 18.4<br />
135 67.2 0.0 18.4<br />
150 74.5 7.3 28.0<br />
12.7 17.0 25.1<br />
NOTE: DIMENSION “B” IS CALCULATED USING A CANTILEVER SIZED BATTERY BOX. OPTIONAL BOXES WILL AFFECT THIS DIMENSION.<br />
12/09 5-18
Section 5<br />
Frame Layouts<br />
S2—Use with the following models: <strong>T470</strong>/<strong>T440</strong> 38”<br />
Dimension E (BOS to DPF/SCR) = -17.9in<br />
Dimension B (BOS to Cantilever Battery Box) = 2.9in<br />
TABLE 5-16.<br />
Fuel Tank Size<br />
<strong>T440</strong>/<strong>T470</strong> 38”<br />
Dimension F<br />
BOS to Fuel Tank (in)<br />
Dimension D<br />
BOS to DEF Tank (in)<br />
DEF Tank Size<br />
Diameter Gallons Length (in) Small Medium Large<br />
56 35.5 -31.7 -20.6 -10.9 25.1<br />
60 38.0 -29.2 -15.1 17.0 25.1<br />
22” Diameter Tank 75 47.3 -19.9 12.7 17.0 25.1<br />
100 62.2 -5.0 12.7 17.0 25.1<br />
120 74.2 7.0 18.0 27.7 35.8<br />
60 30.5 -36.7 -26.1 -16.4 25.1<br />
75 38.5 -28.7 -15.1 17.0 25.1<br />
90 45.5 -21.7 12.7 17.0 25.1<br />
24.5” Diameter Tank<br />
100 50.0 -17.2 12.7 17.0 25.1<br />
110 54.9 -12.3 12.7 17.0 25.1<br />
120 60.5 -6.7 12.7 17.0 25.1<br />
135 67.2 0.0 12.7 19.5 27.5<br />
150 74.5 7.3 18.0 27.7 35.8<br />
NOTE: DIMENSION “B” IS CALCULATED USING A CANTILEVER SIZED BATTERY BOX. OPTIONAL BOXES WILL AFFECT THIS DIMENSION.<br />
5-19<br />
12/09
Section 5<br />
Frame Layouts<br />
S3—Use with the following models: <strong>T470</strong>/<strong>T440</strong> 38”<br />
Dimension E (BOS to DPF/SCR) = -17.9in<br />
Dimension B (BOS to Battery Box) = -32.5in<br />
TABLE 5-17.<br />
Fuel Tank Size<br />
<strong>T440</strong>/<strong>T470</strong> 38”<br />
Dimension F<br />
BOS to Fuel Tank (in)<br />
Dimension D<br />
BOS to DEF Tank (in)<br />
DEF Tank Size<br />
Diameter Gallons Length (in) Small Medium Large<br />
56 35.5 5.0<br />
60 38.0 7.5<br />
22” Diameter Tank 75 47.3 16.8<br />
100 62.2 31.7<br />
120 74.2 43.7<br />
60 30.5 0.0<br />
75 38.5 8.0<br />
12.7 17.0 25.1<br />
90 45.5 15.0<br />
24.5” Diameter Tank<br />
100 50.0 19.5<br />
110 54.9 24.4<br />
120 60.5 30.0<br />
135 67.2 36.7<br />
150 74.5 44.0<br />
NOTE: DIMENSIONS “B” AND “F” ARE CALCULATED USING A STANDARD BATTERY BOX. OPTIONAL EXTENDED BOXES WILL CHANGE<br />
DIMENSIONS “B” AND “F”<br />
12/09 5-20
Section 5<br />
Frame Layouts<br />
S4—Use with the following models: <strong>T470</strong>/<strong>T440</strong> 38”<br />
Dimension E (BOS to DPF/SCR) = -17.9in<br />
Dimension B (BOS to Battery Box) = -32.5in<br />
TABLE 5-18.<br />
Fuel Tank Size<br />
<strong>T440</strong>/<strong>T470</strong> 38”<br />
Dimension F<br />
BOS to Fuel Tank (in)<br />
Dimension D<br />
BOS to DEF Tank (in)<br />
DEF Tank Size<br />
Diameter Gallons Length (in) Small Medium Large<br />
56 35.5 20.3<br />
60 38.0 22.8<br />
22” Diameter Tank 75 47.3 32.1<br />
100 62.2 47.0<br />
120 74.2 59.0<br />
60 30.5 15.3<br />
75 38.5 23.3<br />
-20.6 -10.9 -2.8<br />
90 45.5 30.3<br />
24.5” Diameter Tank<br />
100 50.0 34.8<br />
110 54.9 39.7<br />
120 60.5 45.3<br />
135 67.2 52.0<br />
150 74.5 59.3<br />
NOTE: DIMENSIONS “B” AND “D” ARE CALCULATED USING A STANDARD BATTERY BOX. OPTIONAL EXTENDED BOXES WILL CHANGE<br />
DIMENSIONS “B” AND “D”<br />
5-21<br />
12/09
Section 5<br />
Frame Layouts<br />
S5—Use with the following models: <strong>T470</strong>/<strong>T440</strong> 38”<br />
Dimension B (BOS to Battery Box) = -32.5in<br />
Dimension E (BOS to DPF/SCR) = 19.6in<br />
TABLE 5-19.<br />
Fuel Tank Size<br />
<strong>T440</strong>/<strong>T470</strong> 38”<br />
Dimension F<br />
BOS to Fuel Tank (in)<br />
Dimension D<br />
BOS to DEF Tank (in)<br />
DEF Tank Size<br />
Diameter Gallons Length (in) Small Medium<br />
56 35.5 -31.7<br />
60 38.0 -29.2<br />
22” Diameter Tank 75 47.3 -19.9<br />
100 62.2 -5.0<br />
120 74.2 7.0<br />
60 30.5 -36.7<br />
75 38.5 -28.7<br />
-20.6 -10.9<br />
90 45.5 -21.7<br />
24.5” Diameter Tank<br />
100 50.0 -17.2<br />
110 54.9 -12.3<br />
120 60.5 -6.7<br />
135 67.2 0.0<br />
150 74.5 7.3<br />
NOTE: DIMENSIONS “B” AND “D” ARE CALCULATED USING A STANDARD BATTERY BOX. OPTIONAL EXTENDED BOXES WILL CHANGE<br />
DIMENSIONS “B” AND “D”<br />
12/09 5-22
Section 5<br />
Frame Layouts<br />
S6—Use with the following models: <strong>T470</strong>/<strong>T440</strong> 38”<br />
Dimension B (BOS to Battery Box) = -32.5in<br />
Dimension E (BOS to DPF/SCR) = 19.6in<br />
TABLE 5-20.<br />
Fuel Tank Size<br />
<strong>T440</strong>/<strong>T470</strong> 38”<br />
Dimension F<br />
BOS to Fuel Tank (in)<br />
Dimension D<br />
BOS to DEF Tank (in)<br />
DEF Tank Size<br />
Diameter Gallons Length (in) Small Medium<br />
56 35.5 -31.7 -20.6 -9.4<br />
60 38.0 -29.2 -17.9 -9.4<br />
22” Diameter Tank 75 47.3 -19.9 29.3 39.0<br />
100 62.2 -5.0 29.3 39.0<br />
120 74.2 7.0 29.3 39.0<br />
60 30.5 -36.7 -26.1 -9.4<br />
75 38.5 -28.7 -17.9 -9.4<br />
90 45.5 -21.7 29.3 39.0<br />
24.5” Diameter Tank<br />
100 50.0 -17.2 29.3 39.0<br />
110 54.9 -12.3 29.3 39.0<br />
120 60.5 -6.7 29.3 39.0<br />
135 67.2 0.0 29.3 39.0<br />
150 74.5 7.3 29.3 39.0<br />
NOTE: DIMENSION “B” IS CALCULATED USING A STANDARD BATTERY BOX. OPTIONAL EXTENDED BOXES WILL CHANGE DIMENSION “B”<br />
5-23<br />
12/09
Section 5<br />
Frame Layouts<br />
S7—Use with the following models: <strong>T470</strong>/<strong>T440</strong> 38”<br />
Dimension E (BOS to DPF/SCR) = 19.6in<br />
TABLE 5-21.<br />
Fuel Tank Size<br />
<strong>T440</strong>/<strong>T470</strong> 38”<br />
Dimension F1 & F2<br />
BOS to<br />
Fuel Tank (in)<br />
Dimension B<br />
BOS to<br />
Battery Box (in)<br />
Dimension D<br />
BOS to DEF Tank (in)<br />
DEF Tank Size<br />
Diameter Gallons Length (in) Small Medium<br />
22” Diameter<br />
Tank<br />
24.5” Diameter<br />
Tank<br />
56 35.5 -31.7 0.9 -20.6 -10.9<br />
60 38.0 -29.2 0.9 -17.9 39.0<br />
75 47.3 -19.9 0.9 18.2 39.0<br />
100 62.2 -5.0 37.1 18.2 39.0<br />
120 74.2 7.0 37.1 18.2 39.0<br />
60 30.5 -36.7 -16.0 -26.1 -16.4<br />
75 38.5 -28.7 0.9 -17.9 39.0<br />
90 45.5 -21.7 0.9 18.2 39.0<br />
100 50.0 -17.2 37.1 18.2 39.0<br />
110 54.9 -12.3 37.1 18.2 39.0<br />
120 60.5 -6.7 37.1 18.2 39.0<br />
135 67.2 0.0 37.1 18.2 39.0<br />
150 74.5 7.3 37.1 18.2 39.0<br />
NOTE: DIMENSION “B” IS CALCULATED USING A CANTILEVER SIZED BATTERY BOX. OPTIONAL BOXES WILL AFFECT THIS DIMENSION.<br />
12/09 5-24
Section 6<br />
<strong>Body</strong> Mounting<br />
FRONT FRAME DIMENSIONS<br />
This section includes drawings of the <strong>T470</strong> extended front frame (73”) and standard (50.5”) front frame settings. All<br />
dimensions are in inches (in). They illustrate measurements useful to the installation of front frame equipment and<br />
bumpers. <strong>Kenworth</strong> also offers .dxf files and frame layouts of ordered chassis four weeks prior to build. Please work with<br />
your <strong>Kenworth</strong> sales representative to request this feature when specifying your chassis.<br />
Extended Front Frame<br />
Standard Front Frame<br />
44.8” 27.0”<br />
44.8” 27.0”<br />
72.8”<br />
50.3”<br />
10.2”<br />
10.2”<br />
Extended Front Frame<br />
Standard Front Frame<br />
6-1 12/09
Section 6<br />
<strong>Body</strong> Mounting<br />
FRAME INFORMATION<br />
Frame information provided is per rail, some specifi cations are written for RBM requirements per pair of rails. Make sure<br />
to know the requirement before deciding on the frame rail.<br />
TABLE 6-1. Single Steel Rails<br />
Rail Height Flange Width Web Thickness Section Modulus RBM (in lbs) Weight (lbs/in)*<br />
H W T S R W<br />
10 - 5/8” x 3 -1/2” x 5/16” 14.80 1,776,000 2.90<br />
10 - 3/4” x 3 -1/2” x 3/8” 17.80 2,132,000 3.46<br />
10 - 11/16” x 3 -1/2” x 1/2” 22.35 2,683,000 4.53<br />
11 - 5/8” x 3 -7/8” x 3/8” 21.43 2,572,000 3.80<br />
* Per pair of rails.<br />
TABLE 6-2. Inserted Steel Rails<br />
Rail Height Insert Material Section Modulus RBM (in lbs) Weight (lbs/in)*<br />
10 - 5/8” Single 9-7/8”x 2-7/8” x 1/4” 24.37 2,925,000 4.96<br />
10 - 3/4” Single 9-7/8”x 2-7/8” x 1/4” 27.33 3,280,000 5.53<br />
11 - 5/8” Single 10-3/4”x 3-1/2” x 3/8” 39.20 4,704,000 7.28<br />
* Per pair of rails.<br />
CRITICAL CLEARANCES<br />
Rear Wheels and Cab<br />
CAUTION:<br />
Insufficient clearance between rear tires and body structure may cause damage to the<br />
body during suspension movement. Allow at least 8 inches clearance (See Figure 6–1.)<br />
Normal suspension movement could cause contact between the tires and the body. To prevent this, mount the body so<br />
that the minimum clearance between the top of the tire and the bottom of the body is 8 inches (203 mm). This should be<br />
measured with the body empty. See Figure 6–1.<br />
FIGURE 6-1. Minimum Clearance Between Top Of Rear Tires And <strong>Body</strong> Structure Overhang.<br />
CAUTION:<br />
Maintain adequate clearance between back of cab and the front (leading edge) of mounted<br />
body. Failure to comply may result in equipment damage. See Figure 6–2.<br />
12/09<br />
6-2
Section 6<br />
<strong>Body</strong> Mounting<br />
Note:<br />
Be sure to provide maintenance access to battery box and fuel tank fi ll neck.<br />
4”<br />
FIGURE 6-2. Minimum Back of Cab Clearance<br />
WARNING:<br />
If the frame rail flanges are modified or damaged, the rail may fail prematurely and cause<br />
an accident. When mounting a body to the chassis, DO NOT drill holes in the upper or<br />
lower flange of the frame rail. Mount the body using body mounting brackets or U–bolts.<br />
Failure to comply may result in personal injury, death, equipment or property damage.<br />
BODY MOUNTING USING BRACKETS<br />
CAUTION:<br />
Always install a spacer between the body subframe and the top flange of the frame<br />
rail. Failure to do so may result in corrosion due to dissimilar materials and equipment<br />
damage.<br />
Installation of a spacer between the body subframe and the top flange of the frame rail will help prevent premature wear of<br />
the components due to chafing or corrosion.<br />
6-3 12/09
Section 6<br />
<strong>Body</strong> Mounting<br />
Frame Sill<br />
If the body is mounted to the frame with brackets, we recommend that the frame sill spacer be made from a strip of rubber<br />
or plastic (delrin or nylon). These materials will not undergo large dimensional changes during periods of high or low<br />
humidity. The strip will be less likely to fall out during extreme relative motion between body and chassis. See Figure 6–3.<br />
<strong>Body</strong> Subframe<br />
(Rail)<br />
Chassis Frame<br />
(Rail) Sill<br />
Spacer<br />
FIGURE 6-3. Spacer Between Frame Sill and <strong>Body</strong> Rail - Rubber or Plastic<br />
Brackets<br />
When mounting a body to the chassis with brackets, we recommend designs that offer limited amount of relative movement,<br />
bolted securely but not too rigid. Brackets should allow for slight movement between the body and the chassis. For<br />
instance, Figure 6–4 shows a high compression spring between the bolt and the bracket.<br />
Spring<br />
Rubber Spacer<br />
FIGURE 6-4. High Compression Spring<br />
Between the Mounting Bolt and Upper Bracket<br />
FIGURE 6-5. Rubber Spacer Between Brackets<br />
Another possibility is mounting a rubber spacer between the brackets. See Figure 6–5.<br />
These designs will allow relative movement between the body and the chassis during extreme frame racking situations.<br />
Extreme frame racking, and mountings that are too rigid, could cause damage to the body. This is particularly true with<br />
tanker installations.<br />
12/09<br />
6-4
Section 6<br />
<strong>Body</strong> Mounting<br />
MOUNTING HOLES<br />
When installing the lower bracket on frame rails the mounting holes in the chassis frame bracket and frame rail must comply<br />
with the general spacing and location guidelines illustrated in Figure 6–6. The hole diameter should not exceed the bolt<br />
diameter by more than .060 inches (1.5 mm).<br />
4 HOLES 4 HOLES<br />
.63 IN. .5 IN. DIA. DIA.<br />
(16mm) (12.7mm)<br />
6 HOLES 6 HOLES<br />
.5.63 IN. DIA. IN. DIA.<br />
(12.7mm) (16mm)<br />
5.63<br />
(143mm)<br />
5.63<br />
(143mm)<br />
2.0<br />
(50mm)<br />
2.0<br />
(50mm)<br />
5.5<br />
(140mm)<br />
5.5<br />
(140mm)<br />
11.0<br />
(279mm)<br />
FIGURE 6-6. Crossmember-Gusset Hole Pattern Requirements. [inch (mm)]<br />
Frame Drilling<br />
WARNING:<br />
When mounting a body to the chassis, DO NOT drill holes in the<br />
upper or lower flange of the frame rail. If the frame rail flanges are<br />
modified or damaged, the rail may fail prematurely. Mount the body using<br />
body mounting brackets or U–bolts. Failure to comply may result<br />
in personal injury, death, equipment or property damage.<br />
WARNING:<br />
Use care when drilling the frame web so the wires and air lines routed inside the rail are<br />
not damaged, failure to do so may cause an inoperable electrical or air system circuit.<br />
Failure to comply may result in personal injury, death, equipment or property damage.<br />
WARNING:<br />
Do not drill closely spaced holes in the frame rail. Hole centers of two adjacent holes<br />
should be spaced no less than twice the diameter of the largest hole. Closer spacing may<br />
induce a failure between the holes. Failure to comply may result in personal injury, death,<br />
equipment or property damage.<br />
6-5 12/09
Section 6<br />
<strong>Body</strong> Mounting<br />
BODY MOUNTING USING U–BOLTS<br />
Spacers<br />
If the body is mounted to the frame with U–bolts, use a hardwood sill (minimum 1/2 inch (12 mm) thick) between the frame<br />
rail and body frame to protect the top surface of the rail fl ange.<br />
WARNING:<br />
Do not allow the frame rails or flanges to deform when tightening the U–bolts. It will weaken<br />
the frame. Use suitable spacers made of steel or hardwood on the inside of the frame<br />
rail to prevent collapse of the frame flanges. Failure to comply may result in personal<br />
injury, death, equipment or property damage.<br />
Use a hardwood spacer between the bottom fl ange and the U–bolt to prevent the U–bolt from notching the frame fl ange.<br />
See Figure 6–7.<br />
<strong>Body</strong> Structure<br />
U-Bolt<br />
Wood Sill 0.5 (12) Minimum<br />
Truck Frame<br />
Frame Rail Spacer<br />
(Fabricated Steel or<br />
Hardwood)<br />
U-Bolt Spacer (Hardwood)<br />
FIGURE 6-7. Acceptable U-Bolt Mounting with Wood and Fabricated Spacers [inch (mm)]<br />
WARNING:<br />
Do not allow spacers and other body mounting parts to interfere with brake lines, fuel<br />
lines, or wiring harnesses routed inside the frame rail. Crimped or damaged brake lines,<br />
fuel lines, or wiring may result in loss of braking, fuel leaks, electrical overload or a fire.<br />
Carefully inspect the installation to ensure adequate clearances for air brake lines, fuel<br />
lines, and wiring. Failure to comply may result in personal injury, death, equipment or<br />
property damage. See Figure 6–8.<br />
CAUTION:<br />
Mount U–bolts so they do not chafe on frame rail. Failure to do so may result in<br />
premature wear of the U-bolt or frame rail.<br />
12/09<br />
6-6
Section 6<br />
<strong>Body</strong> Mounting<br />
Frame Rail<br />
U-Bolt<br />
Air Lines and Wiring<br />
Harness<br />
Frame Rail Spacer<br />
(Hardwood or Steel<br />
Check Clearance<br />
Space for Air<br />
Lines and Wiring<br />
U-Bolt Spacer<br />
FIGURE 6-8. Clearance Space for Air Lines and Cables<br />
WARNING:<br />
Do not notch frame rail flanges to force a U–bolt fit. Notched or damaged frame flanges<br />
may result in premature frame failure. Use a larger size U–bolt. Use a hardwood spacer as<br />
shown in Figure 6-7. Failure to comply may result in personal injury, death, equipment or<br />
property damage.<br />
6-7 12/09
Section 6<br />
<strong>Body</strong> Mounting<br />
Rear <strong>Body</strong> Mount<br />
When U–bolts are used to mount a body we recommend that the last body attachment be made with a “fishplate” bracket.<br />
See Figure 6–9. This provides a firm attaching point and helps prevent any relative fore or aft movement between the body<br />
and frame.<br />
<strong>Body</strong> Structure<br />
Frame Rail<br />
FIGURE 6-9. Example of Fishplate Bracket at Rear End of <strong>Body</strong>, used with U-Bolts<br />
12/09<br />
6-8
Section 7<br />
Frame Modifications<br />
FRAME MODIFICATIONS<br />
Introduction<br />
<strong>Kenworth</strong> offers customer specified wheelbases. So, in most cases frame modifi cations to produce a certain wheelbase<br />
should not be necessary.<br />
However, some installations may require slight modifi cations, while other installations will require extensive modifications.<br />
Sometimes an existing dealer stock chassis may need to have the wheelbase changed to better fit a customer’s application.<br />
The modifi cations may be as simple as shortening or lengthening the frame cutoff, or they may be as complex as<br />
changing the wheelbase.<br />
DRILLING RAILS<br />
Location and Hole Pattern<br />
If holes need to be drilled to attach anything to the rail, see SECTION 6 “BODY MOUNTING” for more information. Follow<br />
the general spacing and hole location guidelines on Page 6–5, Figure 6–6.<br />
WARNING!<br />
When mounting a body to the chassis, DO NOT drill holes in the upper or lower flange of<br />
the frame rail. If the frame rail flanges are modified or damaged, the rail may fail prematurely.<br />
Mount the body using body mounting brackets or U–bolts. Failure to comply may result<br />
in personal injury, death, equipment or property damage.<br />
WARNING!<br />
CAUTION:<br />
WARNING!<br />
CAUTION:<br />
CAUTION:<br />
Do not drill closely spaced holes in the web of the frame. Hole centers of two adjacent<br />
holes should be spaced no less than twice the diameter of the largest hole. Closer spacing<br />
may induce a failure between the holes. Failure to comply may result in personal injury,<br />
death, equipment or property damage.<br />
An appropriately sized bolt and nut must be installed and torqued properly in all unused<br />
frame holes. Failure to do so may result in frame crack initiation around the hole and<br />
equipment damage.<br />
Use care when drilling the frame web so the wires and air lines routed inside the rail are<br />
not damaged, failure to do so may cause an inoperable electrical or air system circuit.<br />
Failure to comply may result in personal injury, death, equipment or property damage.<br />
Never use a torch to make holes in the rail. Use the appropriate diameter drill bit. Heat<br />
from a torch will affect the material properties of the frame rail and may result in frame rail<br />
cracks and equipment damage.<br />
Hole diameter should not exceed the bolt diameter by more than .060 inches (1.5 mm).<br />
Oversized holes may result in excessive frame wear around the hole and equipment<br />
damage.<br />
7-1<br />
12/09
Section 7<br />
Frame Modifications<br />
MODIFYING FRAME LENGTH<br />
The frame cutoff after the rear axle can be shortened to match a particular body length. Using a torch is acceptable;<br />
however, heat from a torch will affect the material characteristics of the frame rail. The affected material will normally be<br />
confi ned to within 1 to 2 inches (25 to 50 mm) of the fl ame cut and may not adversely affect the strength of the chassis or<br />
body installation.<br />
The frame cutoff can be lengthened by adding frame extenders.<br />
When extending 10.5” frame rails, the additional sections can be welded to the existing rails. The joint should be welded<br />
and reinforced as illustrated in Figure 7–1.<br />
Note:<br />
See page 7-6 for more information on welding frames.<br />
Frame Insert<br />
A frame insert must be added after welding a frame rail extension to compensate for lost strength. The insert should be<br />
of the same material as the frame member, or of steel, and at least equal to the frame rail in thickness. Attachment of<br />
the insert to the frame should be made with Ream-Fit heat-treated bolts, 5/8 in. (16 mm) dia. or the next larger size. Both<br />
the reinforcement and frame holes should be reamed to provide a fit of from .001 in. to .003 in. (.025 to .076 mm) clearance.<br />
Do not weld reinforcing members. The insert should span a distance of at least 24 in. (610 mm) on either side of the<br />
joint to insure an even distribution of stresses. Cut the ends of the insert at 45° as shown in Figure 7–2 unless the insert<br />
extends to the end of the frame.<br />
FIGURE 7-1. Detail of Frame Extension and Joint Welding<br />
12/09<br />
7-2
Section 7<br />
Frame Modifications<br />
WELDED<br />
JOINT<br />
24 Inch<br />
Minimum<br />
(610 mm)<br />
FIGURE 7-2. Frame Insert<br />
Where possible, use existing bolt holes to attach the insert to the frame. Bolt holes must not be located closer to the frame<br />
fl anges than the present bolt pattern.<br />
If the insert is placed in a section of the main frame where few bolts are located, additional bolts are required. Use the following<br />
guideline for locating additional bolt holes.<br />
CHANGING WHEELBASE<br />
We do not recommend modifying the wheelbase. Occasionally, however, a chassis wheelbase will need to be reduced or<br />
lengthened. When this needs to be done there are a few guidelines that should to be considered.<br />
WARNING!<br />
When changing the wheelbase, be sure to follow the driveline manufacturer’s recommendations<br />
for driveline length or angle changes. Incorrectly modified drivelines may fail prematurely<br />
due to excessive vibration. Failure to comply may result in personal injury, death,<br />
equipment or property damage.<br />
Before changing the wheelbase the driveline angles of the proposed wheelbase need to be examined to ensure that no<br />
harmful vibrations are created. Consult the driveline manufacturer for appropriate recommendations.<br />
WARNING!<br />
When changing the wheelbase, a continuous blank frame insert/outsert must be added in<br />
the area of the new rear suspension mounting bolts. All new mounting holes must pass<br />
through the original rail and the insert/outsert. Failure to do so may cause excessive<br />
stress in the original rail due to additional holes. Failure to comply may result in personal<br />
injury, death, equipment or property damage.<br />
Before the rear suspension is relocated, check the new location of the spring hanger brackets. The new holes for the<br />
spring hanger brackets must not overlap existing holes and should not come any closer than 2 inches (50 mm) to existing<br />
holes in the frame.<br />
WARNING!<br />
When relocating a suspension bracket, do not mount it on the extended (added) section<br />
of a frame rail. The suspension loading may result in premature failure of the added section<br />
splice. Use care when planning the wheelbase so that the rear suspension bracket is<br />
always mounted on the original rail section. See Figure 7–3. Failure to comply may result<br />
in personal injury, death, equipment or property damage.<br />
7-3<br />
12/09
Section 7<br />
Frame Modifications<br />
When reducing the wheelbase, we recommend that the suspension be moved forward and relocated on the original rail.<br />
The rail behind the suspension can then be cut to achieve the desired frame cutoff. See Figure 7–3.<br />
WARNING!<br />
Do not drill new holes any closer than 2 inches (50 mm) to existing holes. Frame drilling<br />
affects the strength of the rails. Failure to comply may result in personal injury, death,<br />
equipment or property damage.<br />
Before the rear suspension is relocated, check the new location of the spring hanger brackets. The new holes for the<br />
spring hanger brackets must not overlap existing holes and should not come any closer than 2 inches (50 mm) to existing<br />
holes.<br />
Mount the suspension Brackets On the<br />
Original Rail (see frame insert section &<br />
Figures 7-1 and 7-2)<br />
Extended Wheelbase<br />
Do Not Mount the<br />
Suspension Bracket<br />
On the Added<br />
Frame Rail<br />
Original Wheelbase<br />
Relocated Rear<br />
Suspension<br />
Shortened Wheelbase<br />
Cut Frame at Rear to<br />
Obtain Desired Cutoff<br />
FIGURE 7-3. Comparison of Original, Shortened, and Extended Wheelbases.<br />
12/09<br />
7-4
Section 7<br />
Frame Modifications<br />
CROSSMEMBERS<br />
After changing a wheelbase, an additional crossmember may be required to maintain the original frame strength.<br />
The maximum allowable distance between adjacent crossmembers is 60 inches (1524 mm). If the distance between<br />
adjacent crossmembers exceeds this dimension, add a crossmember between them. See Figure 7–4.<br />
Less Than 60”<br />
Before Wheelbase is Lengthened<br />
Greater Than 60”<br />
Additional Crossmember<br />
FIGURE 7-4. Crossmember Added When Distance Exceeds 60 Inches (1524 mm)<br />
7-5<br />
12/09
Section 7<br />
Frame Modifications<br />
WELDING<br />
<strong>Kenworth</strong> DOES NOT recommend frame welding. The high heat of welding nullifi es the special heat treatment of the<br />
rails, greatly reducing the tensile strength of the frame rail. If a frame member becomes cracked from overloading, fatigue,<br />
surface damage or a collision, the only permanent repair is to replace the damaged frame member with a new part.<br />
The following information is provided (for temporary emergency repair). Prior to welding a cracked frame rail, the area<br />
should be beveled (V’d out) to allow for a better weld. To prevent spreading of the crack, a 7 to 9 mm (1/4 in. to 3/8 in.) dia.<br />
hole should be drilled at the end of the crack. Widen the crack along its full length by using two hack saw blades together.<br />
When welding steel frames use the shielded arc method. When welding aluminum frames use either the tungsten inert<br />
gas (TIG) or consumable electrode method. Be sure to obtain full weld penetration along the entire length of the crack.<br />
Precautions<br />
CAUTION:<br />
Before welding, disconnect the negative terminal battery cable. Failure to comply may<br />
result in equipment damage.<br />
CAUTION:<br />
Before welding, disconnect the alternator terminals. Failure to do so may result in<br />
damage to the voltage regulator and/or alternator.<br />
CAUTION:<br />
To prevent damage to electrical equipment, disconnect battery cables before arc-welding<br />
on a truck, and be sure that the welding ground lead is connected to the frame. Bearings<br />
and other parts will be damaged if current must pass through them in order to complete<br />
the circuit.<br />
Welding Precautions: All Electronic Engines<br />
Before welding on vehicles with electronic engines, the following precautions should be observed.<br />
1. Disconnect all electrical connections to the vehicle batteries.<br />
2. Disconnect all ECM connectors.<br />
3. Do no use the ECM or engine ground stud for the ground of the welding probe.<br />
4. Ensure that the ground connection for the welder is as close to the weld point as possible. This ensures maximum<br />
weld current and minimum risk to damage electrical components on the vehicle.<br />
5. Turn off key.<br />
Note:<br />
Bendix ABS, Bosch ABS and Wabco ABS: Disconnect ECU.<br />
12/09<br />
7-6
Section 7<br />
Frame Modifications<br />
TORQUE REQUIREMENTS<br />
TABLE 7-1. Customary Grade 8 UNF or UNC.<br />
Fastener<br />
Torque<br />
Size Nm Lb.-Ft<br />
5/16 22–30 16–22<br />
3/8 41–54 30–40<br />
7/16 77–88 57–65<br />
1/2 109–122 80–90<br />
9/16 156–190 117-140<br />
5/8 226–265 167–195<br />
3/4 396–462 290–340<br />
7/8 517–626 380–460<br />
1 952–1129 800–830<br />
1-1/8 1346–1591 990–1170<br />
1-1/4 1877–2217 1380–1630<br />
Torque values apply to fasteners with clean threads, lightly lubricated, with hardened steel washers, and nylon-insert nuts.<br />
TABLE 7-2. U.S. Customary – Grade 8. Metric Class 10.9<br />
Torque<br />
Fastener Nm Lb-Ft<br />
M6 9–15 7–11<br />
M8 23–31 17–23<br />
M10 33–43 26–32<br />
M12 77–101 57–75<br />
M14 136–164 99–121<br />
M16 163–217 120–160<br />
M20 352–460 260–340<br />
7-7<br />
12/09
This page intentionally left blank.
Section 9<br />
Routing<br />
ROUTING<br />
Introduction<br />
This section specifi es the general requirements for securing hoses and electrical wires to present an orderly appearance,<br />
facilitate inspection and maintenance, and prevent potential damage to these lines.<br />
Definitions<br />
Bundle: Two or more air, electrical, fuel, or other lines tied together to form a unitized assembly.<br />
Clamp: A cushioned rigid or semi-rigid, anti-chafing device for containing the bundle and securing it to the frame or other<br />
structural support. Standard clamps have a black elastomer lining. High temperature clamps (e.g., those used with compressor<br />
discharge hose) have a white or red elastomer lining (most applications for these are called out in the bills of<br />
material). An assembly of two clamps fastened together to separate components is referred to as a “butterfly” clamp. Note:<br />
the metal portion of clamps shall be stainless steel or otherwise made capable, through plating or other means, of passing<br />
a 200 hour salt spray test per ASTM B117 without rusting.<br />
FIGURE 9-1. Clamp and Butterfly Clamp<br />
Butterfly Tie: A tough plastic (nylon or equivalent) locking dual clamp tie strap used to separate bundles or single lines,<br />
hoses, etc. These straps must be UV stable. (Tyton DCT11)<br />
FIGURE 9-2. Butterfl y Tie<br />
Tie Strap: A tough plastic (nylon, or equivalent) locking strap used to tie the lines in a bundle together between clamps or<br />
to otherwise secure hoses and wires as noted below. These straps must be UV stable.<br />
FIGURE 9-3. Tie Strap<br />
Heavy Duty (HD) Mount: A black rigid device used for securing a tie strap to the frame or other structural support.<br />
Mounts are made of impact modified, heat stabilized UV resistant nylon capable of continuous operation between temperatures<br />
220°F (150°) and -40°F (-40°).<br />
9-1<br />
12/09
Section 9<br />
Routing<br />
Note:<br />
Heavy duty tie straps 0.50in (12.7mm) wide (Tyton T255ROHIR or similar) shall be used<br />
whenever HD mounts are specified, although 0.25in (6.4mm) tie straps may be used in<br />
some specified applications.<br />
FIGURE 9-4. Heavy Duty (HD) Mount.<br />
Excess of material: More than 3 inches of slack for every 14 inch section of hose routing, except for air conditioner<br />
hoses. See section 4.1.3 for air conditioner hose requirements.<br />
Shortness of material: Less than 1 inch of slack on a 14 inch section of hose routing.<br />
ROUTING REQUIREMENTS<br />
Wiring<br />
Electrical ground wire terminals must be securely attached and the complete terminal surface must contact a clean bare<br />
metal surface. See R414-558 for grounding wire connection practice. Apply electrical contact corrosion inhibitor Nyogel<br />
759G grease (made by William F. Nye, Inc., New Bedford, MA) per R414-558.<br />
Don’t bend wires or use tie straps within 3 inches (75 mm) of (connected) wire connectors or plugs.<br />
Wires in Bundles<br />
Electrical wires (other than the exceptions covered below) running parallel with air or coolant hose bundles, may be included<br />
in the bundle if they are isolated from the hoses with a covering of convoluted plastic tubing.<br />
EXCEPTIONS:<br />
Battery cables (including jump start cables) may be bundled with or tied to the charging wire harness.<br />
They shall not be bundled with or tied directly to any other components, including hoses, wires, or<br />
bundles. They shall be separated from other routed components using butterfly ties at intervals not<br />
exceeding 14 inches (356 mm). Battery strap (W84-1000) tie down shall be used without exception to<br />
secure battery cables to frame mounted or other major component (e.g. engine, tmsn, etc.) mounted<br />
standoffs at intervals not exceeding 14 inches (356 mm). The (positive) battery cable shall be covered<br />
with convoluted plastic tubing from terminal to terminal.<br />
110/220 volt wires for engine heaters, oil pan heaters, transmission oil heaters and battery pad warmers,<br />
shall not be included in any hose/wire bundle with a fuel hose. Individual heater wires not in a<br />
bundle shall be separated from other components by using butterfly clamps or butterfly ties at intervals<br />
not exceeding 14 inches (356 mm). Heater wires with a secondary covering shall be covered with convoluted<br />
tubing whether they are in bundles or not.<br />
12/09<br />
9-2
Section 9<br />
Routing<br />
Wires Crossing other Components<br />
Electrical wires crossing over other components, such as lines, bolt heads, fittings, engine components lifting eyes, engine<br />
block, cylinder head, etc., close enough to rub shall be isolated with a covering of convoluted tubing and separated from<br />
the component by using butterfl y clamps, butterfly ties, or plastic sheathing. 110/220 volt engine heater wiring shall be<br />
installed with butterfly ties or butterfl y clamps<br />
Piping<br />
Use no street elbows in air brake, water, fuel, or hydraulic systems unless specifi ed on the piping diagram and the build<br />
instructions.<br />
Use no elbows in the air brake system unless specified on the air piping diagram and the build instructions.<br />
Hoses Crossing Components<br />
Hoses crossing over other components close enough to rub shall be protected with a secured covering of convoluted plastic<br />
tubing (KW part number K344-813), another section of hose, or plastic sheathing (KW part number K213-1312). The<br />
usage of butterfly ties, or butterfl y clamps are also recommended.<br />
Air Compressor Discharge Hoses<br />
Wires or hoses shall not be tied to the high temperature air compressor discharge hose. Hoses and wires may be routed<br />
across the air compressor discharge hose at a distance of 18 inches (457 mm) or greater from the compressor discharge<br />
port. In this case the crossing hoses and wires shall be “butterfly” clamped to the air compressor discharge hose and covered<br />
with convoluted tubing at the clamp point (use high temperature clamps on the compressor hose).<br />
Bundles<br />
HD mount and tie strap, or clamp shall be located at intervals not to exceed 14 inches (356 mm) along the bundle.<br />
Regular tie straps shall be located at intervals not to exceed 7 inches (178 mm) between HD mount or clamps. Extra tie<br />
straps may be used as needed to contain the hoses and wires in the bundle.<br />
Routing of Wires and Hoses near Moving Components<br />
Wires and Hoses shall be routed away from moving components, such as fans, shackle links, drivelines, steering linkages,<br />
etc. so that there is at least 0.5 inches (12.7 mm) clearance when the component is operating at its maximum travel limits.<br />
A minimum clearance of 1.0 inchs (25.4) shall be maintained between steering axle tires (and associated rotating parts) in<br />
all positions and routed components, such as hoses, oil lines, wires, pipes, etc.<br />
9-3<br />
12/09
Section 9<br />
Routing<br />
Routing of Wires and Hoses near Exhaust System<br />
TABLE 9-1. Exhaust – System Clearance<br />
Description Shielded Unshielded<br />
Coolant hoses, HVAC hoses and tubing, and electrical wires<br />
within 15” of the turbo and/or over 15” from the turbo 2” minimum 3” minimum<br />
Fuel hoses<br />
within 15” of the turbo<br />
over 15” from the turbo<br />
Fuel tanks and hydraulic tanks<br />
crossing tank<br />
parallel to tank<br />
end of tank<br />
aluminum/ceramic-coated exhaust pipe crossing tank<br />
Air hose<br />
nylon<br />
wire braid<br />
n/a<br />
2” minimum<br />
n/a<br />
n/a<br />
n/a<br />
n/a<br />
3” minimum<br />
2” minimum<br />
4” minimum<br />
3” minimum<br />
2” minimum<br />
2” minimum<br />
1” minimum<br />
1.5” minimum<br />
8” minimum<br />
3” minimum<br />
Shielded dimension<br />
Unshielded dimension<br />
Component<br />
Exhaust system<br />
(pipe, muffl er)<br />
Heatshield (or blanket)<br />
FIGURE 9-5. Definition of measurements.<br />
12/09<br />
9-4
Appendix A<br />
Vehicle Identification<br />
VEHICLE IDENTIFICATION NUMBER<br />
A 17–character number (numeral and letter combination) forms the Vehicle Identification Number (VIN) which includes the<br />
Chassis Number. It contains among other information, the model year (4), assembly plant (5), and vehicle serial number<br />
(6). See Figure A–1.<br />
M<br />
Serial Number<br />
Chassis Number<br />
FIGURE A-1. Vehicle Identification Number (VIN).<br />
The model year (4) is designated by an alphanumeric code in the tenth character position in the VIN. See Table A-1 and<br />
Figure A–1.<br />
Code Year Code Year<br />
5 2005 A <strong>2010</strong><br />
6 2006 B 2011<br />
7 2007 C 2012<br />
8 2008 D 2013<br />
9 2009<br />
TABLE A-1. Model Year (Code) Designations.<br />
VIN Location<br />
The VIN is marked on the Incomplete Vehicle Certification Label (on trucks). It is located either on the driver’s door edge or<br />
door frame. See Figure A–2.<br />
Chassis Number Locations<br />
The Chassis Number comprises the last six characters of the VIN.<br />
• The vehicle chassis number is shown in multiple locations.<br />
• Left side of cab, lower right corner of door frame: stamped plate.<br />
• Tire, Rim, and Weight Rating Data label.<br />
• Major Components and Weights label.<br />
• Noise Emission label.<br />
• Paint Identifi cation label.<br />
A-1<br />
12/09
Appendix A<br />
Vehicle Identification<br />
VEHICLE IDENTIFICATION LABELS<br />
Vehicle Identification Labels are located on the driver’s side door edge or on either the driver’s or passenger’s side door<br />
frames. See Figure A-2. Labels include Vehicle Certifi cation, Components and Weights, Tire/Rim and Weight Rating<br />
Data, Noise Emissions, and Paint Identifi cation. Quantity and location of labels may differ based on Complete/Incomplete<br />
vehicle, and Single/Dual certification.<br />
FIGURE A-2. Drivers Door and Door Frame Labels<br />
Chassis Serial<br />
Number<br />
Labels:<br />
Tire, Rim & Weight Rating,<br />
Certifi cation,<br />
Major Components &<br />
Weights,<br />
Paint,<br />
Canadian Safety Mark -<br />
(Canadian registry only),<br />
U.S. EPA Noise,<br />
Patent, and others.<br />
Note: Final Stage<br />
Manufacturer Label to be<br />
installed by Final Stage<br />
Manufacturer on driver’s<br />
door edge or driver’s door<br />
frame.<br />
Tire/Rim and Weight Rating Data Label<br />
The Tire/Rim and Weight Rating Data Label is used in conjunction with the Incomplete Vehicle Certification Label on<br />
Incomplete Vehicles. It contains chassis serial number and the following information:<br />
•<br />
•<br />
•<br />
GVWR — Gross Vehicle Weight Rating<br />
GAWR FRONT and REAR — Gross Axle Weight Ratings for Front and Rear Axle<br />
TIRE/RIM SIZES AND INFLATION PRESSURES — Tire/Rim Sizes and Cold Pressure Minimums<br />
Note:<br />
GVWR is the TOTAL WEIGHT the vehicle is designed to carry. This includes the weight of the<br />
empty vehicle, loading platform, occupants, fuel, and<br />
any load.<br />
Incomplete Vehicle Certification Label<br />
The Incomplete Vehicle Certification Label contains the chassis VIN, date of manufacture, and listing of applicable motor<br />
vehicle safety standards.<br />
Components and Weights Label<br />
The Major Components and Weights Label includes chassis weight and gross weight information, as well as model and<br />
serial numbers for the vehicle, engine, transmission, and axles.<br />
12/09<br />
A-2
Appendix A<br />
Vehicle Identification<br />
Noise Emission Label<br />
The Noise Emission Label contains the chassis serial number, date of manufacture, and information regarding US noise<br />
emission regulations. This label is not provided on Canadian registered vehicles.<br />
Paint Identification Label<br />
The Paint Identification Label contains the paint colors used by the factory to paint the truck. It lists frame, wheels, cab interior<br />
and exterior colors. This label is located either underneath the dash to the left of the steering column support, inside<br />
the glovebox, or on the passenger’s door frame.<br />
COMPONENT IDENTIFICATION<br />
Each of the following components has their own identification label.<br />
Engine Identification<br />
The engine serial number is stamped on a plate located on the left front of the engine. For further information, please refer<br />
to the Engine Operation and Maintenance <strong>Manual</strong> (included in the glove compartment of each vehicle).<br />
Engine Identifi cation<br />
Location<br />
(PACCAR PX-8 Shown)<br />
Figure A-3. Engine Identifi cation Location<br />
Transmission Identification<br />
The transmission identification number is stamped on a tag affixed to the right forward side of the transmission case. It<br />
includes among other specifications the transmission model, serial, and part number.<br />
A-3<br />
12/09
Appendix A<br />
Vehicle Identification<br />
Front Axle Identification<br />
The front axle has a identification tag located on the front axle beam. It includes the axle model, part number and serial<br />
number.<br />
FIGURE A-4. Front Axle Identifi cation<br />
Rear Axle Identification<br />
The rear axle identifi cation numbering system includes two labels or stamps.<br />
1.<br />
2.<br />
Axle Housing Number Tag, located on the left forward side of the housing arm. This tag identifi es the axle<br />
housing.<br />
Axle Differential Carrier Identifi cation, located on the top side of the differential carrier. The following<br />
information is either stamped, or marked with a metal tag: Model No., Carrier Production Assembly No.,<br />
Carrier Assembly Serial No., Gear Ratio, Axle Specifications Number and OEM part number and country of<br />
origin.<br />
2<br />
1<br />
FIGURE A-5. Rear Axle Identifi cation<br />
Note:<br />
Illustrated identification tag locations are typical. Actual locations may vary by axle manufacturer<br />
and with single versus tandem axles.<br />
12/09<br />
A-4
Appendix A<br />
Vehicle Identification<br />
This page intentionally left blank.<br />
A-5<br />
12/09
Appendix A<br />
Vehicle Identification<br />
®<br />
<strong>Kenworth</strong> Truck Company<br />
P.O. Box 1000<br />
Kirkland, WA 98083<br />
(425) 828-5000<br />
12/09<br />
A-6