

USB peripheral-to-ethernet adapter user guide - Portsmith
USB peripheral-to-ethernet adapter user guide - Portsmith
USB peripheral-to-ethernet adapter user guide - Portsmith

You also want an ePaper? Increase the reach of your titles
YUMPU automatically turns print PDFs into web optimized ePapers that Google loves.
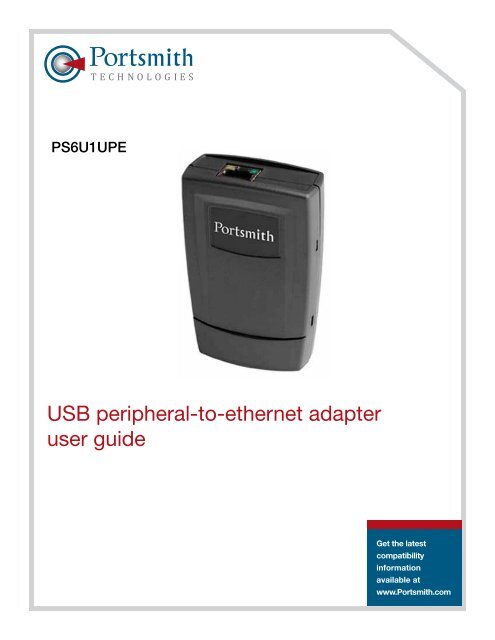
PS6U1UPE<br />
<strong>USB</strong> <strong>peripheral</strong>-<strong>to</strong>-<strong>ethernet</strong> <strong>adapter</strong><br />
<strong>user</strong> <strong>guide</strong><br />
Get the latest<br />
compatibility<br />
information<br />
available at<br />
www.<strong>Portsmith</strong>.com
PS6U1UPE<br />
Copyright© 2007 <strong>Portsmith</strong>, LLC. All rights reserved.<br />
The information in this document is subject <strong>to</strong> change without notice.<br />
Disclaimer<br />
<strong>Portsmith</strong>, LLC assumes no responsibility for any damage or loss resulting from the use of this <strong>user</strong> <strong>guide</strong>. <strong>Portsmith</strong>, LLC assumes no responsibility for any loss<br />
or claims by third parties that may arise through the use of this product. <strong>Portsmith</strong>, LLC assumes no responsibility for any damage or loss caused by deletion<br />
of data as a result of malfunction, dead battery, or repairs. Be sure <strong>to</strong> make backup copies of all important data on other media <strong>to</strong> protect against data loss.<br />
First Edition — July 2007<br />
Trademarks<br />
Symbol is a registered trademark of Symbol, Inc.<br />
Microsoft, Windows, Window CE, ActiveSync, and Windows Mobile are either registered trademarks or trademarks of Microsoft Corporation in the United States<br />
and/or other countries.<br />
All other registered trademarks, trademarks, service marks, and/or logos are the property of their respective companies.<br />
<strong>Portsmith</strong>, LLC.<br />
850 East Franklin Road, Suite 401, Meridian, Idaho 83642<br />
208-888-5813 | www.<strong>Portsmith</strong>.com
Table of contents<br />
Introduction ........................................................................................................................................... 1<br />
Getting started ...................................................................................................................................... 2<br />
Before you begin ................................................................................................................................... 2<br />
Connecting <strong>to</strong> the PS6U1UPE .............................................................................................................. 2<br />
Setting up the MC50 ............................................................................................................................. 2<br />
Installing the MC50 Software Drivers .................................................................................................... 3<br />
Connecting the MC50 <strong>to</strong> the PS6U1UPE .............................................................................................. 5<br />
Setting up the MC3000 ......................................................................................................................... 6<br />
Connecting the PS6U1UPE <strong>to</strong> your Network ........................................................................................ 7<br />
Product/technical support ..................................................................................................................... 8<br />
Product Registration ............................................................................................................................. 8<br />
Troubleshooting ..................................................................................................................................... 9<br />
Other ActiveSync Problems ................................................................................................................ 10<br />
Appendix A - regula<strong>to</strong>ry information ................................................................................................... 11<br />
Radio Frequency Interference Requirement ........................................................................................ 11<br />
FCC Statement .................................................................................................................................... 11<br />
Radio Frequency Interference Requirement - Canada ........................................................................ 11<br />
Appendix B - Warranty ........................................................................................................................ 12
Introduction<br />
The <strong>Portsmith</strong> PS6U1UPE serves as an essential data communications device, enabling you <strong>to</strong><br />
connect <strong>to</strong> a standard Ethernet network via the <strong>USB</strong> connection on your Handheld. Internet access and<br />
synchronizing files and settings of the handheld with your PC across the network are made available with<br />
the established connection.<br />
There are 3 connection ports on the PS6U1UPE. These are described below:<br />
<strong>Portsmith</strong> Peripheral-<strong>to</strong>-Ethernet Adapter Manual 1
Before You Begin<br />
IMPORTANT: Before you can successfully connect your MC50 or MC3000 <strong>to</strong> your network with<br />
your PS6U1UPE, you must have successfully configured your device for ActiveSync operations. For<br />
assistance with ActiveSync operations, please refer <strong>to</strong> your Symbol Integra<strong>to</strong>r Guide.<br />
Only after you have successfully created an ActiveSync partnership between your MC50 or your<br />
MC3000 and your host computer, and completed an ActiveSync operation, should you attempt<br />
<strong>to</strong> connect your device <strong>to</strong> your network. This is important even if you plan <strong>to</strong> use other 3rd Party<br />
synchronization software, because using ActiveSync allows you <strong>to</strong> validate your software/hardware<br />
installation. Then, if you have problems later making your 3rd Party software work, you can focus on<br />
the 3rd Party software configuration because you know that everything else works properly.<br />
Connecting <strong>to</strong> the PS6U1UPE<br />
Setting up the MC50<br />
Installing the MC50 Software Drivers: the MC50 requires the installation of software drivers <strong>to</strong> enable<br />
it <strong>to</strong> communicate through your network <strong>to</strong> complete ActiveSync, or sychronization operations. By<br />
design, the MC50 functions as a <strong>USB</strong> client device. With the installation of these drivers, the MC50 will<br />
now be able <strong>to</strong> also function as a <strong>USB</strong> host device.<br />
If you have not already done so, go <strong>to</strong> www.<strong>Portsmith</strong>.com and download the latest PS6U1UPE<br />
drivers. The drivers are provided in a self-extracting ZIP file. Simply download the file <strong>to</strong> your computer<br />
and follow these simple steps:<br />
Step 1: Unpack the software. Double-click the downloaded file <strong>to</strong> extract the drivers. The ZIP file will<br />
au<strong>to</strong>matically unpack the MC50 driver software components <strong>to</strong> a default direc<strong>to</strong>ry called<br />
C://MC50Drivers. You may change this direc<strong>to</strong>ry if you wish. However, if you change the direc<strong>to</strong>ry, be<br />
sure that you remember where you put it, as this is the location where you will move the files “from”.<br />
Step 2: Verify MC50 Configuration. If you have not already<br />
configured ActiveSync, please do so now and ensure that you<br />
successfully synchronize between the MC50 and your PC before<br />
you continue. If you need help, refer <strong>to</strong> your MC50 Integra<strong>to</strong>r’s<br />
Guide or contact <strong>Portsmith</strong> Technical Support for assistance.<br />
<strong>Portsmith</strong> Peripheral-<strong>to</strong>-Ethernet Adapter Manual 2
Step 3: CAB File Installation. To install the CAB file directly on<strong>to</strong> the MC50,<br />
follow these simple steps:<br />
• Connect the MC50 <strong>USB</strong> Cable <strong>to</strong> a <strong>USB</strong> port on your computer.<br />
• Open your Windows Explorer and browse <strong>to</strong> the /MC50 Drivers folder <strong>to</strong> locate<br />
the file <strong>USB</strong>OTG.MC50.CAB.<br />
• Next, open the ActiveSync and click the Explore but<strong>to</strong>n.<br />
• Then, drag and drop the <strong>USB</strong>OTG.MC50.CAB file on<strong>to</strong> the My Pocket PC<br />
icon in the ActiveSync window. You will be prompted that the file may need<br />
conversion. Simply click OK <strong>to</strong> continue.<br />
Step 4: Install the CAB file.<br />
• Use the MC50’s stylus <strong>to</strong> open Start>Programs>File<br />
Explorer. You should find the <strong>USB</strong>OYG.MC50.CAB file<br />
below the bot<strong>to</strong>m of the folder list. Use the stylus <strong>to</strong> doubleclick<br />
on the <strong>USB</strong>OTG.MC50.CAB file and execute it.<br />
• After the CAB installation completes, you will need <strong>to</strong> use the<br />
stylus <strong>to</strong> perform a soft reset of the MC50. The reset but<strong>to</strong>n<br />
can be found on the bot<strong>to</strong>m of the MC50. Consult your MC50<br />
documentation if you need help finding the reset but<strong>to</strong>n.<br />
Step 5: Install the additional drivers<br />
• After the MC50 has reset, return <strong>to</strong> your<br />
computer’s ActiveSync window and doubleclick<br />
on the My Pocket PC icon <strong>to</strong> display the main folder<br />
structure on the MC50. When you see the adjacent file<br />
structure, double-click on the<br />
/Windows folder <strong>to</strong> gain access <strong>to</strong> the bvd_udc_ser.dll file<br />
which must be replaced by a cus<strong>to</strong>m version of the <strong>USB</strong><br />
function driver. This new driver is included in the MC50<br />
Drivers folder. To correctly replace the file, browse <strong>to</strong> the<br />
MC50 /Windows folder with the ActiveSync File Explorer<br />
and rename the bvd_udc_ser.dll file <strong>to</strong> bvd_udc_ser_old.dll.<br />
<strong>Portsmith</strong> Peripheral-<strong>to</strong>-Ethernet Adapter Manual 3
• Next, click on Windows Explorer and select the<br />
four files shown in the adjacent window:<br />
(1) <strong>USB</strong>Mode.cpl, (2) <strong>USB</strong>Mode.exe,<br />
(3) bvd_udc_ser.dll and (4) <strong>USB</strong>PSMDM.dll.<br />
To select all four files at one time, press the<br />
CTRL key as you left-click on each file’s name.<br />
When finished, all four files will be highlighted.<br />
• Now, drag and drop all four files <strong>to</strong> the<br />
/Windows folder on the MC50. The<br />
bvd_udc_ser.dll file should au<strong>to</strong>matically<br />
overwrite the older file. If prompted <strong>to</strong> overwrite<br />
the existing file, select YES and continue.<br />
If you have problems getting the new version <strong>to</strong><br />
replace the old version, then try it again.<br />
• After you have successfully copied all four files <strong>to</strong> ?Windows, the MC50 must be rest (soft reset).<br />
Step 6: Configuring the <strong>USB</strong> Mode. To use the <strong>USB</strong> client modem on the MC50, go <strong>to</strong><br />
Start>Settings>System><strong>USB</strong> Mode.<br />
• Select Enable Host Mode Only<br />
• Check Load modem driver at startup<br />
• Check Set host mode on port open<br />
• Tap OK in the upper right corner of the MC50 display screen<br />
Step 7: Finishing Up<br />
• Place the MC50 in<strong>to</strong> its cradle and connect the MC50 <strong>USB</strong> cable <strong>to</strong> the PS6U1UPE device with the<br />
<strong>USB</strong> Adapter Cable as described in the next section.<br />
NOTE: From this point on, Host mode will be enabled whenever COM9 is opened.<br />
<strong>Portsmith</strong> Peripheral-<strong>to</strong>-Ethernet Adapter Manual 4
Connecting the MC50 <strong>to</strong> the PS6U1UPE<br />
Setting up your PS6U1UPE is easy and includes only these simple steps:<br />
• Connect the Power Supply (PN 170140-000),<br />
as shown below.<br />
• Connect the Mini <strong>USB</strong> Adapter Cable<br />
(PN 190087-000) <strong>to</strong> the MC50 <strong>USB</strong> cable and <strong>to</strong><br />
the PS6U1UPE, as shown below.<br />
• Connect the Ethernet Cable <strong>to</strong> the network<br />
(see the Section Connecting the PS6U1UPE <strong>to</strong><br />
your Network for more information).<br />
WARNING: The PS6U1UPE requires a power supply when it is connected <strong>to</strong> the MC50. Although the<br />
solid green LED is lit whenever the <strong>USB</strong> cable is correctly connected, there is not enough power <strong>to</strong><br />
operate the device. Failure <strong>to</strong> connect the power supply before using could damage the device.<br />
IMPORTANT: The PS6U1UPE is provided without a power supply or any <strong>USB</strong> <strong>adapter</strong> cables. Since<br />
the MC50 uses a different cable than the MC3000, and the MC3000 doesn’t require a power supply,<br />
each <strong>peripheral</strong> device is provided separately <strong>to</strong> ensure you don’t have <strong>to</strong> buy items you cannot use.<br />
<strong>Portsmith</strong> Peripheral-<strong>to</strong>-Ethernet Adapter Manual 5
Setting up the MC3000<br />
Setting up your PS6U1UPE is easy and includes only these simple steps:<br />
• Connect the <strong>USB</strong> Mini-A <strong>to</strong> Mini-B <strong>adapter</strong> Cable<br />
(PN 170373-000) <strong>to</strong> the MC3000 cradle and <strong>to</strong> the<br />
PS6U1UPE, as shown below.<br />
• Connect the Power Supply (PN 1700140-000), if<br />
you have one, as shown below. The power supply<br />
is not required because the PS6U1UPE can draw<br />
power directly from the MC3000.<br />
• Connect the Ethernet cable <strong>to</strong> the network (see<br />
the section Connecting the PS6U1UPE <strong>to</strong> your<br />
Network for more information).<br />
IMPORTANT: The PS6U1UPE is provided without a power supply or any <strong>USB</strong> <strong>adapter</strong> cables. Since<br />
the MC50 uses a different cable than the MC3000, and the MC3000 doesn’t require a power supply,<br />
each <strong>peripheral</strong> device is provided separately <strong>to</strong> ensure you don’t have <strong>to</strong> buy items you cannot use.<br />
To purchase a cable or power supply, contact <strong>Portsmith</strong>.<br />
If you have any questions regarding requirements or availability, please contact <strong>Portsmith</strong>.<br />
<strong>Portsmith</strong> Peripheral-<strong>to</strong>-Ethernet Adapter Manual 6
Connecting the PS6U1UPE <strong>to</strong> the Network<br />
Completing the setup of the PS6U1UPE <strong>to</strong> your network is simple:<br />
• Connect one end of a standard RJ45 Ethernet cable <strong>to</strong> the PS6U1UPE, as shown below.<br />
• Connect the other end of the cable <strong>to</strong> an open port on your network’s hub, switch or router, as<br />
shown below.<br />
<strong>Portsmith</strong> Peripheral-<strong>to</strong>-Ethernet Adapter Manual 7
Product/Technical Support<br />
<strong>Portsmith</strong> is committed <strong>to</strong> providing its cus<strong>to</strong>mers with first-class cus<strong>to</strong>mer service and technical<br />
support. For your convenience, a few troubleshooting techniques are provided below that might help<br />
you fix your problem quickly and easily. If you have a different issue, or if you have tried these and they<br />
didn’t resolve your problem, please feel free <strong>to</strong> contact<br />
Technical Support at:<br />
<strong>Portsmith</strong>, LLC<br />
850 East Franklin Road, Suite 401, Meridian, Idaho 83642<br />
208-888-5813<br />
www.<strong>Portsmith</strong>.com<br />
Product Registration / Warranty<br />
For complete <strong>Portsmith</strong> product registration and warranty please go <strong>to</strong>:<br />
http://portsmith.com/online-warranty-registration/.<br />
<strong>Portsmith</strong> Peripheral-<strong>to</strong>-Ethernet Adapter Manual 8
Troubleshooting<br />
Symp<strong>to</strong>m: Nothing Works!<br />
<strong>Portsmith</strong> Peripheral-<strong>to</strong>-Ethernet Adapter Manual 9
Troubleshooting cont.<br />
Symp<strong>to</strong>m: It won’t ActiveSync!<br />
Other Connection Problems<br />
If you require more information on the ActiveSync process, please refer <strong>to</strong> the ActiveSync chapter in<br />
your Symbol Integra<strong>to</strong>r Guide or visit www.Microsoft.com and search for ActiveSync. For help with other<br />
technical issues, contact Portmsith Technical Support using the contact information provided at the start<br />
of this chapter.<br />
<strong>Portsmith</strong> Peripheral-<strong>to</strong>-Ethernet Adapter Manual 10
Appendix A – Regula<strong>to</strong>ry Information<br />
Radio Frequency Interference Requirement<br />
FCC Statement<br />
This equipment has been tested and found <strong>to</strong> comply with the limits for a<br />
Class B digital device, pursuant <strong>to</strong> Part 15 of the FCC Rules. These limits<br />
are designed <strong>to</strong> provide reasonable protection against harmful interference<br />
in a residential installation. This equipment generates, uses, and can radiate<br />
radio frequency energy and, if not installed and used in accordance with the<br />
instructions, may cause harmful interference <strong>to</strong> radio communications. However, there is no guarantee<br />
that interference will not occur in a particular installation. If this equipment does cause harmful<br />
interference <strong>to</strong> radio or television reception, which can be determined by turning the equipment off and<br />
on, the <strong>user</strong> is encouraged <strong>to</strong> try <strong>to</strong> correct the interference by one or more of the following measures:<br />
• Reorient or relocate the receiving antenna<br />
• Increase the separation between the equipment and receiver<br />
• Connect the equipment in<strong>to</strong> an outlet on a circuit different from that <strong>to</strong> which the receiver is connected<br />
• Consult the dealer or an experienced radio or television technician for help.<br />
Changes or modifications not expressly approved by Mobility Electronics could void the <strong>user</strong>’s authority<br />
<strong>to</strong> operate the product.<br />
Radio Frequency Interference Requirement - Canada<br />
This Class B digital apparatus complies with Canadian ICES-003. Cet appareil numérique de la classe B<br />
est conforme à la norme NMB-003 du Canada.<br />
<strong>Portsmith</strong> Peripheral-<strong>to</strong>-Ethernet Adapter Manual 11
Appendix B – Warranty<br />
<strong>Portsmith</strong>, LLC warrants this product against defects in materials and workmanship <strong>to</strong> the original<br />
purchaser (or the first purchaser in the case of an authorized resller) for a period of one (1) year from<br />
the date of shipment. This warranty is limited <strong>to</strong> a repair or replacement of the product. To obtain<br />
warranty service, the purchaser must first call <strong>Portsmith</strong>, LLC, for an RMA number, then return the<br />
product <strong>to</strong> <strong>Portsmith</strong>, LLC, for repair or replacement.<br />
Purchaser shall prepay shipping charges for products returned <strong>to</strong> <strong>Portsmith</strong>, LLC, will pay for return<br />
of the products <strong>to</strong> purchaser, except that purchaser shall pay all shipping charges, duties, and taxes<br />
for products returned <strong>to</strong> <strong>Portsmith</strong>, LLC, from a country other than the United States. <strong>Portsmith</strong>, LLC,<br />
makes no other warranty of any kind with regard <strong>to</strong> this material.<br />
<strong>Portsmith</strong>, LLC, shall not be liable for errors contained herein or for incidental or consequential<br />
damages in connection with the furnishing, performance, or use of this material.<br />
Within thirty (30) days of receipt should the product fail for any reason other than damage due <strong>to</strong><br />
cus<strong>to</strong>mer negligence; purchaser has the right <strong>to</strong> return the product for a full refund of the purchase<br />
price. If the purchaser wishes <strong>to</strong> upgrade or convert <strong>to</strong> another <strong>Portsmith</strong>, LLC, product within the<br />
thirty (30) day period, purchaser has the right <strong>to</strong> return the product and apply the full purchase price<br />
<strong>to</strong>ward the purchase of the other product. Any other return will be subject <strong>to</strong> <strong>Portsmith</strong>, LLC’s existing<br />
res<strong>to</strong>cking policy.<br />
<strong>Portsmith</strong>, LLC, WARRANTS THAT THIS PRODUCT IS NEW OR HAS BEEN REMANUFACTURED<br />
TO MEET NEW STANDARDS USING NEW OR SERVICEABLE USED PARTS. <strong>Portsmith</strong>, LLC,<br />
MAKES NO OTHER WARRANTY, EITHER EXPRESSED OR IMPLIED, WITH RESPECT TO THIS<br />
PRODUCT. <strong>Portsmith</strong>, LLC, I N C. SPECIFICALLY DISCLAIMS THE IMPLIED WARRANTIES OF<br />
MERCHANTABILITY AND FITNESS FOR A PARTICULAR PURPOSE.<br />
Some states or provinces do not allow limitations on how long an implied warranty lasts, so the above<br />
limitation or exclusion may not apply <strong>to</strong> you.<br />
THE REMEDIES PROVIDED HEREIN ARE CUSTOMER’S SOLE AND EXCLUSIVE REMEDIES. IN NO<br />
EVENT SHALL <strong>Portsmith</strong>, LLC BE LIABLE FOR ANY LOST PROFITS, DIRECT, INDIRECT, SPECIAL,<br />
INCIDENTAL, OR CONSEQUENTIAL DAMAGES, WHETHER BASED ON CONTRACT, TORT, OR ANY<br />
OTHER LEGAL THEORY.<br />
<strong>Portsmith</strong>, LLC.<br />
850 East Franklin Road, Suite 401, Meridian, Idaho 83642<br />
208-888-5813 | www.<strong>Portsmith</strong>.com<br />
<strong>Portsmith</strong> Peripheral-<strong>to</strong>-Ethernet Adapter Manual 12