Raw Materials cookbook 2005 - Alfred's Clay Store - Alfred University
Raw Materials cookbook 2005 - Alfred's Clay Store - Alfred University
Raw Materials cookbook 2005 - Alfred's Clay Store - Alfred University

You also want an ePaper? Increase the reach of your titles
YUMPU automatically turns print PDFs into web optimized ePapers that Google loves.
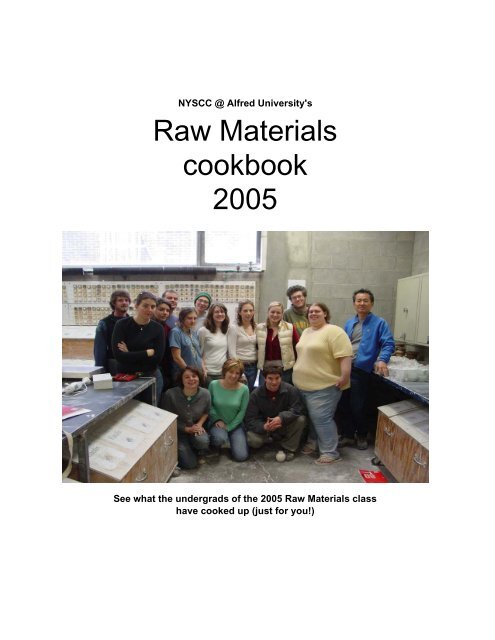
NYSCC @ <strong>Alfred</strong> <strong>University</strong>'s<br />
<strong>Raw</strong> <strong>Materials</strong><br />
<strong>cookbook</strong><br />
<strong>2005</strong><br />
See what the undergrads of the <strong>2005</strong> <strong>Raw</strong> <strong>Materials</strong> class<br />
have cooked up (just for you!)
<strong>Raw</strong> Mats - Spring <strong>2005</strong> - Carlo Sammarco - NYSCC @ <strong>Alfred</strong> <strong>University</strong><br />
Name:<br />
Type:<br />
Ada Van Hecke<br />
Casting<br />
Color: Various<br />
Texture: Smooth<br />
Cone: 04<br />
Recipe: Talc 50<br />
OM-4 50<br />
100%<br />
Add: Water 45%<br />
Darvan 2.7%<br />
Development Process:<br />
I worked on creating a pallate of colored casting slips that would fire to C. 04. I began by<br />
defloculating a body made of equal portions of talc and OM-4 ball clay. I then selected<br />
colorants to work with, based on other tests I had done in the past, and began to add them to<br />
the casting body. As I worked I found it necessary to adjust the amount of water in the slip in<br />
order to compensate for the added colorant. If additional water was not added the slip would<br />
quickly gel and become extremely difficult to pour out of the mold. The slip would have to be<br />
agitated several times in order to get a sufficient amount of slip out of the mold. While I wanted<br />
to thin the slip down, it was important for the slip to gel slightly in order to keep the colorant in<br />
suspension. With the amounts of additional water listed below, the slip only had to be agitated<br />
slightly in order to pour out completely, significantly lessening the possibility of destroying the<br />
cast piece.<br />
The fired pieces showed a poor color response, most likely attributed to the high content of<br />
magnesium provided by the talc; therefore my next step in the process will be to begin with a<br />
new fritted body where the talc will be eliminate. In addition to problems with color response,<br />
many of the slips had soluble salts rise to the surface on the interior of the cast pieces. To<br />
eliminate this will most likely require the addition of a small amount of barium to the body.<br />
Base without colorants<br />
1
<strong>Raw</strong> Mats - Spring <strong>2005</strong> - Carlo Sammarco - NYSCC @ <strong>Alfred</strong> <strong>University</strong><br />
2
<strong>Raw</strong> Mats - Spring <strong>2005</strong> - Carlo Sammarco - NYSCC @ <strong>Alfred</strong> <strong>University</strong><br />
3
<strong>Raw</strong> Mats - Spring <strong>2005</strong> - Carlo Sammarco - NYSCC @ <strong>Alfred</strong> <strong>University</strong><br />
The following additional amounts of water were required over and above the 45% needed for the base alone in order to standardize viscosity.<br />
Colorant Colorant %<br />
Grams of<br />
Additional<br />
Water (100<br />
gram batch)<br />
Blackberry Wine Stain 0.3 0.0<br />
Blackberry Wine Stain 1.0 0.0<br />
Blackberry Wine Stain 3.3 5.0<br />
Blackberry Wine Stain 6.7 6.3<br />
Blackberry Wine Stain 10.0 7.0<br />
Blackberry Wine Stain 13.3 7.7<br />
Chrome Oxide 3.3 5.0<br />
Chrome Oxide 6.7 6.3<br />
Chrome Oxide 13.3 7.7<br />
Cobalt Carbonate 3.3 5.0<br />
Cobalt Carbonate 6.7 6.3<br />
Cobalt Carbonate 13.3 7.7<br />
Copper Carbonate 3.3 5.0<br />
Copper Carbonate 6.7 6.3<br />
Copper Carbonate 13.3 7.7<br />
Crocus Martis 3.3 5.0<br />
Crocus Martis 6.7 6.3<br />
Crocus Martis 13.3 7.7<br />
Red Copper Oxide 1.7 0.0<br />
Red Copper Oxide 3.3 5.0<br />
Red Copper Oxide 5.0 5.7<br />
Red Copper Oxide 6.7 6.3<br />
Red Copper Oxide 8.3 7.0<br />
4
<strong>Raw</strong> Mats - Spring <strong>2005</strong> - Carlo Sammarco - NYSCC @ <strong>Alfred</strong> <strong>University</strong><br />
Name:<br />
Type:<br />
Andrew Chanania<br />
Throwing<br />
Color: Off white<br />
Texture: Smooth<br />
Cone: 10<br />
Modified V.C. body<br />
Recipe: Helmer 15<br />
Goldart 32<br />
Tennessee #10 20<br />
Kona F-4 15<br />
Alumina 8<br />
Flint 10<br />
100%<br />
Add: Fireclay Fine Grog (48/00) 10<br />
Fireclay Medium Grog (20/48) 2<br />
Black Coarse Grog (10/20) 8<br />
Development Process:<br />
My objective was to create a white body with large pieces of black grog. I started with Val's body:<br />
Original V.C. body<br />
Helmer 12<br />
Goldart 26<br />
Tennessee #10 16<br />
Kona F-4 15<br />
Hawthorn 35 mesh 20<br />
Kona F-4 12<br />
Alumina 6<br />
Flint 8<br />
I took out the Hawthorn due to its coarseness and its impurities (i.e. lack of whiteness). The Hawthorn<br />
omission made room for the grog. However, the body may be better to throw with if the Hawthorn is left in<br />
the formula. I reached the 20% grog addition because that amount of black grog (40% of the 20% total<br />
grog) I felt looked the best in the body.<br />
The coarse grog was stained black using 10% Best Black Mason stain. To make the grog, I mixed the clay<br />
in a slurry, then added the stain. After drying the clay to a workable state, I wedged it and rolled it out in<br />
slabs about 1/2" thick. After the slabs were bone dry, I broke them up and passed then through a 10 mesh,<br />
and then a 20 mesh screen. The material between 10 and 20 mesh was fired to cone 10. I then mixed up a<br />
batch of clay and added the grog.<br />
Upon inspection, the wood-fired piece is too dark, too brown and some revisions in the body are necessary.<br />
Also, I do not think the body is open enough and there is too large a jump from the fine clay particles to the<br />
fine grog size. Also, I would like to have a wider range of particle sizes for my personal throwing<br />
preference.<br />
5
<strong>Raw</strong> Mats - Spring <strong>2005</strong> - Carlo Sammarco - NYSCC @ <strong>Alfred</strong> <strong>University</strong><br />
Woodfired<br />
6
<strong>Raw</strong> Mats - Spring <strong>2005</strong> - Carlo Sammarco - NYSCC @ <strong>Alfred</strong> <strong>University</strong><br />
Name:<br />
Type:<br />
Beck Ferguson<br />
Casting<br />
Color: Off White<br />
Texture: Smooth<br />
Cone: Various (C. 6-10)<br />
Recipe: <br />
Development Process:<br />
My research will explore burnout bodies and organic fillers. I will be using different types of<br />
coral sponges and some manufactured sponges along with other organic matter found in<br />
nature.<br />
Various natural sponges dipped in slip (details next page)<br />
7
<strong>Raw</strong> Mats - Spring <strong>2005</strong> - Carlo Sammarco - NYSCC @ <strong>Alfred</strong> <strong>University</strong><br />
8
Reticulated plastic sponge dipped in slip<br />
<strong>Raw</strong> Mats - Spring <strong>2005</strong> - Carlo Sammarco - NYSCC @ <strong>Alfred</strong> <strong>University</strong><br />
Reticulated plastic sponge dipped in thinner slip than above. Very thin network.<br />
9
<strong>Raw</strong> Mats - Spring <strong>2005</strong> - Carlo Sammarco - NYSCC @ <strong>Alfred</strong> <strong>University</strong><br />
Thin slip detail.<br />
Thin network allows passage of light.<br />
10
Nylon bath sponge…$1.99 at Wal-Mart<br />
<strong>Raw</strong> Mats - Spring <strong>2005</strong> - Carlo Sammarco - NYSCC @ <strong>Alfred</strong> <strong>University</strong><br />
Nylon bath sponge dipped and fired<br />
11
<strong>Raw</strong> Mats - Spring <strong>2005</strong> - Carlo Sammarco - NYSCC @ <strong>Alfred</strong> <strong>University</strong><br />
Name:<br />
Type:<br />
Color:<br />
Texture:<br />
Cone:<br />
Recipe:<br />
Bracken Feldman<br />
Paperclay<br />
White<br />
Smooth<br />
10 oxidation / reduction<br />
(Jeff Cole's Porcelain)<br />
Grolleg 55<br />
Kona F-4 35<br />
Flint 15<br />
Add: Macaloid 3%<br />
Toilet paper or nonwoven,<br />
varies<br />
white<br />
roll<br />
Development Process:<br />
I first started with mixing 2600 grams of Jeff Cole. I dry mixed it first and<br />
then added the water with the Macaloid in to the mixture slowly with a hand<br />
drill. I then placed the Jeff Cole mixture under the shar with broken down<br />
toilet paper. I shared the mixture for a good 15 minutes at the speed of<br />
650rpms any faster the mixture will overflow. The reason for choosing Jeff<br />
Coles body is because I was looking for a body that would have the best<br />
translucency.<br />
I’ve tried working with a couple of batches of Jeff Cole porcelain with paper<br />
added and here’s what I’ve found so far.<br />
My 1st attempt: I mixed a whole roll of Toilet paper into the 2600gram<br />
batch. I didn’t shar the toilet paper 1st I just broke it down in hot water. This<br />
batch of paper porcelain didn’t work the paper wasn’t broken down enough<br />
into the clay body and I ended up getting chunks of paper in my body. The<br />
body was very unworkable.<br />
Next attempt:<br />
I broke down a whole roll of toilet paper yet again. But this time I shared it for<br />
a good hour until it looked like a thick pulp. I then drained off all of the water<br />
and weighted out the roll into three different batches. Then mixed it into<br />
three 2600 gram batches with different amounts of paper.<br />
Paper amounts are after pushing paper into the sieve (wet but not dripping)<br />
150 gm paper - was the best to work with though still hard to roll-out into<br />
coils. The paper didn't stick together<br />
250 gm paper - was very hard t work with. Didn't stick together at all. Not<br />
even during throwing<br />
350 gm paper - The worst all together. Unusable.<br />
12
<strong>Raw</strong> Mats - Spring <strong>2005</strong> - Carlo Sammarco - NYSCC @ <strong>Alfred</strong> <strong>University</strong><br />
Various bodies tested<br />
13
<strong>Raw</strong> Mats - Spring <strong>2005</strong> - Carlo Sammarco - NYSCC @ <strong>Alfred</strong> <strong>University</strong><br />
Name:<br />
Type:<br />
Catherine Hagerty<br />
Tape Cast Overglaze<br />
Color: Black<br />
Texture: Smooth<br />
Cone: 04<br />
Recipe:<br />
Varies (see below)<br />
Development Process:<br />
The purpose of this research was to make ceramic tape out of an overglaze and to then transfer it<br />
onto a pre-fired glazed surface. CS<br />
ATG #190 VAR4 (underlying white matt glaze)<br />
Recipe: Nepheline Syenite 8.03<br />
Spodumene 38.47<br />
Wollastonite 23.11<br />
Flint 15.87<br />
Frit 3124 14.52<br />
Add: Veegum 2%<br />
Zircopax 5%<br />
Tiles with cone 04 white mat glaze (ATG #190 VAR4) before firing.<br />
14
<strong>Raw</strong> Mats - Spring <strong>2005</strong> - Carlo Sammarco - NYSCC @ <strong>Alfred</strong> <strong>University</strong><br />
OG #1 (OG=Overglaze)<br />
Recipe: 3124 45<br />
EPK 10<br />
Stain (Mason Best Black) 45<br />
Add: Elmer's/Glycerin (80/20 ratio) 100%<br />
Overglaze tape cast shown with 50 % glue /glycerin content.<br />
Tiles after being fired with tape at 50% glue/glycerin content.<br />
15
Tiles after being fired with tape at 60% glue/glycerin content.<br />
<strong>Raw</strong> Mats - Spring <strong>2005</strong> - Carlo Sammarco - NYSCC @ <strong>Alfred</strong> <strong>University</strong><br />
OG #2<br />
Recipe: 3124 54<br />
EPK 10<br />
Stain (Mason Best Black) 36<br />
Add: Elmer's/Glycerin (80/20 ratio) 100%<br />
OG #3<br />
Recipe: 3124 63<br />
EPK 10<br />
Stain (Mason Best Black) 27<br />
Add: Elmer's/Glycerin (80/20 ratio) 100%<br />
OG #4<br />
Recipe: 3124 72<br />
EPK 10<br />
Stain (Mason Best Black) 18<br />
Add: Elmer's/Glycerin (80/20 ratio) 100%<br />
16
<strong>Raw</strong> Mats - Spring <strong>2005</strong> - Carlo Sammarco - NYSCC @ <strong>Alfred</strong> <strong>University</strong><br />
Overglaze tape cast #’s 2, 3 and 4, all with 50% glue/glycerin content.<br />
Tiles after being fired with tape at 50% glue/glycerin content and in number order 2, 3 and 4.<br />
From the above tests, OG#3 seems to have greatest potential as an overglaze. Many defects<br />
exist in these samples due to inconsistent mixing and uneven thickness during casting. We will<br />
have to work on getting the coatings more uniformly even and on making the tape thickness<br />
much thinner (i.e. >.5 millimeters). CS<br />
17
<strong>Raw</strong> Mats - Spring <strong>2005</strong> - Carlo Sammarco - NYSCC @ <strong>Alfred</strong> <strong>University</strong><br />
Name:<br />
Type:<br />
Corinne Gretch<br />
Tape Casting<br />
Color: Various<br />
Texture: Smooth<br />
Cone: 10<br />
Recipe:<br />
See below<br />
Development Process:<br />
I began with these two recipes:<br />
Pinnell Clear glaze<br />
Custer Feldspar 25%<br />
Flint 35%<br />
Whiting 20%<br />
Grolleg China <strong>Clay</strong> 20%<br />
Porcelain #3 from Val’s book (page 34)<br />
Tile #6 Kaolin 30%<br />
EPK 25%<br />
C&C 5%<br />
Kona F4 20%<br />
Flint 10%<br />
Pyrax 10%<br />
In creating a two layer tape, first I cast a layer of the glaze beginning with a batch of 116% and 100%<br />
ratio Elmer’s glue to dry mix. This was allowed to dry over night before I cast a layer of the porcelain<br />
over the glaze using the same ratio of Elmer’s glue to dry mix. For each of these recipes I added<br />
12% of the amount of Elmer’s glue of glycerin. Here are the recipes for my first 2 batches:<br />
100% batch<br />
150 grams dry mix<br />
150 grams Elmer’s glue<br />
18 grams glycerin<br />
116% batch<br />
150 grams dry mix<br />
175 grams Elmer’s glue<br />
20 grams glycerin<br />
I observed that both of these batches were difficult to get thoroughly wet mixed and there were many<br />
small chunks in the cast sheet. When dried it was easily cut with an Exacto knife but broke, chipped<br />
and tore very easily. I found it best to cut a general shape with scissors of the Exacto knife and then<br />
shave it down to shape with the Exacto knife. If heat was applied to the tape is was more easily<br />
shaped, however these two batches broke and cracked when bent. Pieces could be connected by<br />
wetting them and sticking them together, but when fired the glaze adhesive was not enough to hold<br />
the pieces together.<br />
Also the porcelain was so thin and the glaze too heavy then the pieces all slumped. Pieces that<br />
were pressed into wet clay stayed in place better then pieces stick to bisque ware. Shrinkage was<br />
12-13%.<br />
18
<strong>Raw</strong> Mats - Spring <strong>2005</strong> - Carlo Sammarco - NYSCC @ <strong>Alfred</strong> <strong>University</strong><br />
Two-layer tape: Pinnell's clear cast over Porcelain #3<br />
To improve the tapes workability I tried two more batches, one of 135% and one 150% ratio of<br />
Elmer’s glue to dry powder continuing to add 12% glycerin. Here are the recipes for the next two<br />
batches:<br />
135% batch<br />
150 grams dry mix<br />
200 grams Elmer’s glue<br />
24 grams glycerin<br />
150% batch<br />
150 grams dry mix<br />
225 grams Elmer’s glue<br />
27 grams glycerin<br />
These two batches turned out to be much more workable. They cut easily, were less likely to rip or<br />
chip, bent easily, and formed around a three dimensional form. The heat from my hand was enough<br />
to shape the pieces. I did a few different tests including a geometric form test where I built a box with<br />
5 separate pieces, leaving an open top. The pieces were connected by wetting them and sticking<br />
them together. When fired these forms collapsed. I think that the glue melted out and the pieces fell<br />
over before the glaze was melted enough to hold the pieces together. I also did a test to see how a<br />
piece would stand up on its own. A one inch strip of tape was bent into a bell shapes curve, standing<br />
about 2 inches high, the ends were stuck to a test tile, and the edges were marked with iron oxide to<br />
measure slipping. When fired, although the edges did not slip, the stress on the upper most point of<br />
the curve caused the piece to break and slump over.<br />
Another test was done to measure slipping on a vertical surface. Three pieces, a large square<br />
(1.5inches), a small square (.5inch), and a thin strip vertically orientated were stuck to a vertical test<br />
tile and the edges were marked with iron oxide. Upon firing most of the pieces had slipped all the<br />
way to the bottom of the test tile with the exception of one of the thin strips which held its position.<br />
Shrinkage was 15-16%. I chose to continue working with 135% batch.<br />
19
<strong>Raw</strong> Mats - Spring <strong>2005</strong> - Carlo Sammarco - NYSCC @ <strong>Alfred</strong> <strong>University</strong><br />
Vertical test<br />
Next I used stains, Mason Best Black and a new red (Mason Dark Red), to experiment with color in<br />
the porcelain layer of the tape. I began with the first layer of the clear glaze. To the second layer of<br />
porcelain, 135% batch, I added 10% stain in two separate batches, one red, one black. I then cast<br />
the red layer, drizzled on a little black and marbleized it with a fork, and vice versa. This technique<br />
worked well however the fork created a few weak spot in the tape where it took away too much clay. I<br />
then experimented with attaching the pieces using another wet mixed glaze. I used Mamo Tan Matte<br />
applied underneath the pieces to adhere them to the stoneware and also the method of wetting the<br />
piece and sticking it to the tile then applying glaze over this. Both ways were successful in keeping<br />
the tape in place on the horizontal test tile and showed potential aesthetically too. I had much less<br />
success when I tried to use these methods for a vertical surface. Some pieces stayed in place,<br />
some moved slightly, but for the most part the tape pieces slid off the pot.<br />
Mamo Tan Matte underneath (Tan color); Mason Best Black and Mason Dark Red overtop<br />
20
<strong>Raw</strong> Mats - Spring <strong>2005</strong> - Carlo Sammarco - NYSCC @ <strong>Alfred</strong> <strong>University</strong><br />
Glaze/Stain interface is clearly visible here<br />
Applied design using tape (150% batch using Porcelain #3) on pre-bisqued vessel. Bird design was glazed over after<br />
application. Sqwiggly lines were left unglazed<br />
A few extra notes and thoughts:<br />
The longer this tape is left out in the air, the less workable it is. Even after a few days to a week one<br />
can notice the difference. Ideally the tape should be made right before it will be used.<br />
Perhaps the layer of glaze intended to be an adhesive is less effective then using a wet glaze to<br />
adhere a single layer of porcelain to a piece. The extra layer of glaze seems to add too much weight<br />
and therefore causing the piece to slip down or off the vertical surface.<br />
21
<strong>Raw</strong> Mats - Spring <strong>2005</strong> - Carlo Sammarco - NYSCC @ <strong>Alfred</strong> <strong>University</strong><br />
Name:<br />
Type:<br />
Jackie Rines & Devon Sparks<br />
Handbuilding<br />
Color: Various<br />
Texture: Various<br />
Cone: 04/6<br />
Recipe:<br />
Various (see below)<br />
Development Process:<br />
Our goal this semester was to develop a pallet of colored clay at cone 04 and 6. To do this we<br />
used four different clay bodies that had different fluxes, and tested numerous levels of added<br />
oxides and combinations to each body. The Fluxes affected the color greatly because of their<br />
different chemical makeup's. We chose oxides instead of Mason Stains because they are more<br />
cost efficient.<br />
The recipes were:<br />
A B C D<br />
grolleg 25 grolleg 25 grolleg 25 grolleg 25<br />
tile 6 20 tile 6 20 tile 6 20 tile 6 20<br />
C&C 15 C&C 15 C&C 15 C&C 15<br />
frit 3110 40 frit 3124 40 frit 3195 40 talc 40<br />
total 100 100 100 100<br />
On our first run we experimented with different levels of red iron oxide, chrome oxide,<br />
manganese, yellow ochre, and cobalt oxide. (see poster board for results and numbers) We<br />
chose initial levels based on recommendations from James Chappell’s book The Potter’s<br />
Complete Book of <strong>Clay</strong> and Glazes, a good reference if you are interested in doing this yourself.<br />
In the second run of tests we adjusted the oxide levels in some of the bodies depending on how<br />
well the first results came out.<br />
Our results in both runs were interesting. The 04 tiles range from dark to light, but in general are<br />
not as bold as some of the results in cone 6. Some cone 6 tests bloated or melted, but some<br />
tiles were really rich in color. Some color burned out in the kiln at both temperatures. We also<br />
tested compatibility because the pallet could only be achieved with the use of multiple bodies.<br />
We had no compatibility problems on a small scale.<br />
The combination of oxides can be explored extensively to achieve a wide range of color. We<br />
will probably also start experimenting with mason stains once our pallet is refined enough to<br />
know what few desired colors or highlights we would like and are difficult to achieve using<br />
oxides.<br />
22
<strong>Raw</strong> Mats - Spring <strong>2005</strong> - Carlo Sammarco - NYSCC @ <strong>Alfred</strong> <strong>University</strong><br />
Cone 04 Series<br />
23
<strong>Raw</strong> Mats - Spring <strong>2005</strong> - Carlo Sammarco - NYSCC @ <strong>Alfred</strong> <strong>University</strong><br />
Cone 6 Series<br />
24
<strong>Raw</strong> Mats - Spring <strong>2005</strong> - Carlo Sammarco - NYSCC @ <strong>Alfred</strong> <strong>University</strong><br />
25
<strong>Raw</strong> Mats - Spring <strong>2005</strong> - Carlo Sammarco - NYSCC @ <strong>Alfred</strong> <strong>University</strong><br />
Second Cone 04 Series<br />
Second Cone 6 Series<br />
26
<strong>Raw</strong> Mats - Spring <strong>2005</strong> - Carlo Sammarco - NYSCC @ <strong>Alfred</strong> <strong>University</strong><br />
27
<strong>Raw</strong> Mats - Spring <strong>2005</strong> - Carlo Sammarco - NYSCC @ <strong>Alfred</strong> <strong>University</strong><br />
Name:<br />
Type:<br />
Elisavet Papatheodorou & Diogo Shin<br />
Handbuilding<br />
Color: Black<br />
Texture: Smooth<br />
Cone: 04<br />
Recipe: Redart 37.5<br />
Laguna Blackbird Substitute 37.5<br />
OM-4 25<br />
100%<br />
Add: Mason Chrome Free<br />
10<br />
Black #6616<br />
Development Process:<br />
Our labs were carried out with the goal of formulating a low-temperature black hand-building<br />
clay body. Our method included triaxial tests, line blends, and building samples. We have<br />
succeeded in developing a black, fine particle-body. However, the formula needs several more<br />
modifications to be viable as a building body.<br />
The body is mature and vitreous at cone 04. It has a smooth, buttery surface; Without the<br />
stain, it is a dark brown. The Chrome Free stain makes the truest black in this body at this<br />
temperature. We also suggest testing the body in reduction, where it might attain a true black<br />
with little or no commercial stain.<br />
Although we have a good solution as far as color, surface, and temperature are concerned, the<br />
body lacks workability. We would compare the workability of the body to that of porcelain--<br />
although the particles are fine and the clay has a nice consistency, it lacks the ability to stretch<br />
and mold, and cracks and breaks easily. The body barely holds its own weight and cannot hold<br />
up vertically. To be a good building body, some non-plastic fillers must be added to improve<br />
green strength and prevent slumping. We suggest adding fine, medium, and course grog to the<br />
body, in a percentage of fifteen to twenty-five percent. Paper or fibers would also increase the<br />
green strength. Also, as the body is vitreous at cone 04, it may need something to decrease<br />
the melting temperature. We may try 5-10% kyanite as this is dark and refractory.<br />
15% additions of stain. C.C.<br />
from the top: Best Black, Cobalt<br />
Free Black, and Chrome Free<br />
Black<br />
28
<strong>Raw</strong> Mats - Spring <strong>2005</strong> - Carlo Sammarco - NYSCC @ <strong>Alfred</strong> <strong>University</strong><br />
Triaxial blend of clays<br />
Additions of commercial stains<br />
29
Additions of oxides<br />
<strong>Raw</strong> Mats - Spring <strong>2005</strong> - Carlo Sammarco - NYSCC @ <strong>Alfred</strong> <strong>University</strong><br />
Handbuilt using base body + 10% Mason Chrome Free Black #6616. This piece was underfired, which accounts for the<br />
dark brown color. Firing closer to maturity (cone 04) would have brought it closer to black.<br />
30
<strong>Raw</strong> Mats - Spring <strong>2005</strong> - Carlo Sammarco - NYSCC @ <strong>Alfred</strong> <strong>University</strong><br />
Name:<br />
Type:<br />
Jennifer Jewett<br />
Casting<br />
Color: Off White<br />
Texture: Smooth<br />
Cone: <br />
Recipe: <br />
Development Process:<br />
My objective is to work with slips to determine which ones are better for the the burnout<br />
process. I will be experimenting with a paper porcelain slip, and porcelain slip to obtain a body<br />
that has minor shrinkage but also strength so that I can cast objects that won't allow shrinkage<br />
I am going to use organic object like sponges, string, and things from nature; pretty much<br />
anything that burns and doesn't let off toxic fumes. Also my firing temperatures are going to be<br />
cone 04 and cone 6<br />
Banana dipped in slip and fired<br />
31
<strong>Raw</strong> Mats - Spring <strong>2005</strong> - Carlo Sammarco - NYSCC @ <strong>Alfred</strong> <strong>University</strong><br />
Name:<br />
Type:<br />
Jessica Fitzgibbon<br />
Tape Casting<br />
Color: Various<br />
Texture: Smooth<br />
Cone: 10<br />
Recipe: <br />
Development Process:<br />
I am interested in testing sculptural possibilities through the use of tape casting and applied wire. I<br />
plan to test the material capability of holding shape by relying on the wire to support the structure.<br />
Wire will be embedded, adhered by pressure or will be sewn.<br />
Tape: Laminated and fired<br />
32
<strong>Raw</strong> Mats - Spring <strong>2005</strong> - Carlo Sammarco - NYSCC @ <strong>Alfred</strong> <strong>University</strong><br />
Fired ribbons of tape<br />
Despite being underfired, the tape is quite translucent<br />
33
<strong>Raw</strong> Mats - Spring <strong>2005</strong> - Carlo Sammarco - NYSCC @ <strong>Alfred</strong> <strong>University</strong><br />
Ceramic perogie<br />
Sides of perogie were moisted and crimped with pliers to create a good seal. Plier marks are clearly visible.<br />
34
<strong>Raw</strong> Mats - Spring <strong>2005</strong> - Carlo Sammarco - NYSCC @ <strong>Alfred</strong> <strong>University</strong><br />
Fired porcelain tape with copper wire wire embedded right after casting<br />
Copper wire fumes during firing giving soft green halo effects. It also eats through the porcelain tape.<br />
35
<strong>Raw</strong> Mats - Spring <strong>2005</strong> - Carlo Sammarco - NYSCC @ <strong>Alfred</strong> <strong>University</strong><br />
Fired tape: Hardware cloth embedded into ceramic tape immediately after casting.<br />
36
<strong>Raw</strong> Mats - Spring <strong>2005</strong> - Carlo Sammarco - NYSCC @ <strong>Alfred</strong> <strong>University</strong><br />
Name:<br />
Type:<br />
Josh Araujo<br />
Handbuilding<br />
Color: Grey<br />
Texture: Porous<br />
Cone: 04<br />
Recipe: Lumnite Varies<br />
<strong>Clay</strong> <br />
Varies<br />
Add:<br />
Development Process:<br />
The purpose of this project was to see what happens when Lumnite cement is added to a clay<br />
body. CS<br />
37
<strong>Raw</strong> Mats - Spring <strong>2005</strong> - Carlo Sammarco - NYSCC @ <strong>Alfred</strong> <strong>University</strong><br />
Cement additions<br />
38
<strong>Raw</strong> Mats - Spring <strong>2005</strong> - Carlo Sammarco - NYSCC @ <strong>Alfred</strong> <strong>University</strong><br />
Name:<br />
Type:<br />
Megan Thompson<br />
Handbuilding<br />
Color: Various<br />
Texture: Smooth<br />
Cone: 10<br />
Recipe:<br />
Base<br />
Grolleg 30<br />
Tile-6 25<br />
C&C ball 5<br />
Kona F-4 20<br />
Flint 10<br />
Pyrax 10<br />
100%<br />
Add: Vee Gum 1<br />
Oxides<br />
varies<br />
Development Process:<br />
For my final project I created a palette of cone 10 colored porcelains using approximately ten<br />
different oxides in different percentages and combinations with each other. Once my palette<br />
was established I began testing their reactions to each other through different techniques such<br />
as laminating and marbling clay in thrown pieces.<br />
My process involved laminating, or alternating, the white clay body with one of the colored clays<br />
until I created the amount of clay I wished to throw with. The throwing process only took<br />
approximately two or three pulls before I was forced to finish so that I would not disrupt the<br />
colored “swirl” too much. But it was after the piece was trimmed that the colors really came<br />
alive.<br />
After the pieces were fired I tested certain glazes on them. Since the pieces were never<br />
bisqued (it was simply fired to temperature) they didn’t take glaze very easily. The areas that<br />
the clear glaze had shown up on really made the colors pop while the other areas were quite<br />
muted.<br />
Through trial and error and learning ‘what not to do’ I learned a great deal about color and<br />
oxides and feel that I through this project I became aware of how to apply the knowledge of raw<br />
materials to my work.<br />
39
<strong>Raw</strong> Mats - Spring <strong>2005</strong> - Carlo Sammarco - NYSCC @ <strong>Alfred</strong> <strong>University</strong><br />
40
<strong>Raw</strong> Mats - Spring <strong>2005</strong> - Carlo Sammarco - NYSCC @ <strong>Alfred</strong> <strong>University</strong><br />
41
<strong>Raw</strong> Mats - Spring <strong>2005</strong> - Carlo Sammarco - NYSCC @ <strong>Alfred</strong> <strong>University</strong><br />
Name:<br />
Type:<br />
Ada Van Hecke<br />
Casting<br />
Color: Various<br />
Texture: Smooth<br />
Cone: 04<br />
Recipe: Talc 50<br />
OM-4 50<br />
100%<br />
Add: Water 45%<br />
Darvan 2.7%<br />
Development Process:<br />
I worked on creating a pallate of colored casting slips that would fire to C. 04. I began by<br />
defloculating a body made of equal portions of talc and OM-4 ball clay. I then selected<br />
colorants to work with, based on other tests I had done in the past, and began to add them to<br />
the casting body. As I worked I found it necessary to adjust the amount of water in the slip in<br />
order to compensate for the added colorant. If additional water was not added the slip would<br />
quickly gel and become extremely difficult to pour out of the mold. The slip would have to be<br />
agitated several times in order to get a sufficient amount of slip out of the mold. While I wanted<br />
to thin the slip down, it was important for the slip to gel slightly in order to keep the colorant in<br />
suspension. With the amounts of additional water listed below, the slip only had to be agitated<br />
slightly in order to pour out completely, significantly lessening the possibility of destroying the<br />
cast piece.<br />
The fired pieces showed a poor color response, most likely attributed to the high content of<br />
magnesium provided by the talc; therefore my next step in the process will be to begin with a<br />
new fritted body where the talc will be eliminate. In addition to problems with color response,<br />
many of the slips had soluble salts rise to the surface on the interior of the cast pieces. To<br />
eliminate this will most likely require the addition of a small amount of barium to the body.<br />
Base without colorants<br />
42
<strong>Raw</strong> Mats - Spring <strong>2005</strong> - Carlo Sammarco - NYSCC @ <strong>Alfred</strong> <strong>University</strong><br />
43
<strong>Raw</strong> Mats - Spring <strong>2005</strong> - Carlo Sammarco - NYSCC @ <strong>Alfred</strong> <strong>University</strong><br />
44
<strong>Raw</strong> Mats - Spring <strong>2005</strong> - Carlo Sammarco - NYSCC @ <strong>Alfred</strong> <strong>University</strong><br />
The following additional amounts of water were required over and above the 45% needed for the base alone in order to standardize viscosity.<br />
Colorant Colorant %<br />
Grams of<br />
Additional<br />
Water (100<br />
gram batch)<br />
Blackberry Wine Stain 0.3 0.0<br />
Blackberry Wine Stain 1.0 0.0<br />
Blackberry Wine Stain 3.3 5.0<br />
Blackberry Wine Stain 6.7 6.3<br />
Blackberry Wine Stain 10.0 7.0<br />
Blackberry Wine Stain 13.3 7.7<br />
Chrome Oxide 3.3 5.0<br />
Chrome Oxide 6.7 6.3<br />
Chrome Oxide 13.3 7.7<br />
Cobalt Carbonate 3.3 5.0<br />
Cobalt Carbonate 6.7 6.3<br />
Cobalt Carbonate 13.3 7.7<br />
Copper Carbonate 3.3 5.0<br />
Copper Carbonate 6.7 6.3<br />
Copper Carbonate 13.3 7.7<br />
Crocus Martis 3.3 5.0<br />
Crocus Martis 6.7 6.3<br />
Crocus Martis 13.3 7.7<br />
Red Copper Oxide 1.7 0.0<br />
Red Copper Oxide 3.3 5.0<br />
Red Copper Oxide 5.0 5.7<br />
Red Copper Oxide 6.7 6.3<br />
Red Copper Oxide 8.3 7.0<br />
45
<strong>Raw</strong> Mats - Spring <strong>2005</strong> - Carlo Sammarco - NYSCC @ <strong>Alfred</strong> <strong>University</strong><br />
Name:<br />
Type:<br />
Andrew Chanania<br />
Throwing<br />
Color: Off white<br />
Texture: Smooth<br />
Cone: 10<br />
Modified V.C. body<br />
Recipe: Helmer 15<br />
Goldart 32<br />
Tennessee #10 20<br />
Kona F-4 15<br />
Alumina 8<br />
Flint 10<br />
100%<br />
Add: Fireclay Fine Grog (48/00) 10<br />
Fireclay Medium Grog (20/48) 2<br />
Black Coarse Grog (10/20) 8<br />
Development Process:<br />
My objective was to create a white body with large pieces of black grog. I started with Val's body:<br />
Original V.C. body<br />
Helmer 12<br />
Goldart 26<br />
Tennessee #10 16<br />
Kona F-4 15<br />
Hawthorn 35 mesh 20<br />
Kona F-4 12<br />
Alumina 6<br />
Flint 8<br />
I took out the Hawthorn due to its coarseness and its impurities (i.e. lack of whiteness). The Hawthorn<br />
omission made room for the grog. However, the body may be better to throw with if the Hawthorn is left in<br />
the formula. I reached the 20% grog addition because that amount of black grog (40% of the 20% total<br />
grog) I felt looked the best in the body.<br />
The coarse grog was stained black using 10% Best Black Mason stain. To make the grog, I mixed the clay<br />
in a slurry, then added the stain. After drying the clay to a workable state, I wedged it and rolled it out in<br />
slabs about 1/2" thick. After the slabs were bone dry, I broke them up and passed then through a 10 mesh,<br />
and then a 20 mesh screen. The material between 10 and 20 mesh was fired to cone 10. I then mixed up a<br />
batch of clay and added the grog.<br />
Upon inspection, the wood-fired piece is too dark, too brown and some revisions in the body are necessary.<br />
Also, I do not think the body is open enough and there is too large a jump from the fine clay particles to the<br />
fine grog size. Also, I would like to have a wider range of particle sizes for my personal throwing<br />
preference.<br />
46
<strong>Raw</strong> Mats - Spring <strong>2005</strong> - Carlo Sammarco - NYSCC @ <strong>Alfred</strong> <strong>University</strong><br />
Woodfired<br />
47
<strong>Raw</strong> Mats - Spring <strong>2005</strong> - Carlo Sammarco - NYSCC @ <strong>Alfred</strong> <strong>University</strong><br />
Name:<br />
Type:<br />
Beck Ferguson<br />
Casting<br />
Color: Off White<br />
Texture: Smooth<br />
Cone: Various (C. 6-10)<br />
Recipe: <br />
Development Process:<br />
My research will explore burnout bodies and organic fillers. I will be using different types of<br />
coral sponges and some manufactured sponges along with other organic matter found in<br />
nature.<br />
Various natural sponges dipped in slip (details next page)<br />
48
<strong>Raw</strong> Mats - Spring <strong>2005</strong> - Carlo Sammarco - NYSCC @ <strong>Alfred</strong> <strong>University</strong><br />
49
Reticulated plastic sponge dipped in slip<br />
<strong>Raw</strong> Mats - Spring <strong>2005</strong> - Carlo Sammarco - NYSCC @ <strong>Alfred</strong> <strong>University</strong><br />
Reticulated plastic sponge dipped in thinner slip than above. Very thin network.<br />
50
<strong>Raw</strong> Mats - Spring <strong>2005</strong> - Carlo Sammarco - NYSCC @ <strong>Alfred</strong> <strong>University</strong><br />
Thin slip detail.<br />
Thin network allows passage of light.<br />
51
Nylon bath sponge…$1.99 at Wal-Mart<br />
<strong>Raw</strong> Mats - Spring <strong>2005</strong> - Carlo Sammarco - NYSCC @ <strong>Alfred</strong> <strong>University</strong><br />
Nylon bath sponge dipped and fired<br />
52
<strong>Raw</strong> Mats - Spring <strong>2005</strong> - Carlo Sammarco - NYSCC @ <strong>Alfred</strong> <strong>University</strong><br />
Name:<br />
Type:<br />
Color:<br />
Texture:<br />
Cone:<br />
Recipe:<br />
Bracken Feldman<br />
Paperclay<br />
White<br />
Smooth<br />
10 oxidation / reduction<br />
(Jeff Cole's Porcelain)<br />
Grolleg 55<br />
Kona F-4 35<br />
Flint 15<br />
Add: Macaloid 3%<br />
Toilet paper or nonwoven,<br />
varies<br />
white<br />
roll<br />
Development Process:<br />
I first started with mixing 2600 grams of Jeff Cole. I dry mixed it first and<br />
then added the water with the Macaloid in to the mixture slowly with a hand<br />
drill. I then placed the Jeff Cole mixture under the shar with broken down<br />
toilet paper. I shared the mixture for a good 15 minutes at the speed of<br />
650rpms any faster the mixture will overflow. The reason for choosing Jeff<br />
Coles body is because I was looking for a body that would have the best<br />
translucency.<br />
I’ve tried working with a couple of batches of Jeff Cole porcelain with paper<br />
added and here’s what I’ve found so far.<br />
My 1st attempt: I mixed a whole roll of Toilet paper into the 2600gram<br />
batch. I didn’t shar the toilet paper 1st I just broke it down in hot water. This<br />
batch of paper porcelain didn’t work the paper wasn’t broken down enough<br />
into the clay body and I ended up getting chunks of paper in my body. The<br />
body was very unworkable.<br />
Next attempt:<br />
I broke down a whole roll of toilet paper yet again. But this time I shared it for<br />
a good hour until it looked like a thick pulp. I then drained off all of the water<br />
and weighted out the roll into three different batches. Then mixed it into<br />
three 2600 gram batches with different amounts of paper.<br />
Paper amounts are after pushing paper into the sieve (wet but not dripping)<br />
150 gm paper - was the best to work with though still hard to roll-out into<br />
coils. The paper didn't stick together<br />
250 gm paper - was very hard t work with. Didn't stick together at all. Not<br />
even during throwing<br />
350 gm paper - The worst all together. Unusable.<br />
53
<strong>Raw</strong> Mats - Spring <strong>2005</strong> - Carlo Sammarco - NYSCC @ <strong>Alfred</strong> <strong>University</strong><br />
Various bodies tested<br />
54
<strong>Raw</strong> Mats - Spring <strong>2005</strong> - Carlo Sammarco - NYSCC @ <strong>Alfred</strong> <strong>University</strong><br />
Name:<br />
Type:<br />
Catherine Hagerty<br />
Tape Cast Overglaze<br />
Color: Black<br />
Texture: Smooth<br />
Cone: 04<br />
Recipe:<br />
Varies (see below)<br />
Development Process:<br />
The purpose of this research was to make ceramic tape out of an overglaze and to then transfer it<br />
onto a pre-fired glazed surface. CS<br />
ATG #190 VAR4 (underlying white matt glaze)<br />
Recipe: Nepheline Syenite 8.03<br />
Spodumene 38.47<br />
Wollastonite 23.11<br />
Flint 15.87<br />
Frit 3124 14.52<br />
Add: Veegum 2%<br />
Zircopax 5%<br />
Tiles with cone 04 white mat glaze (ATG #190 VAR4) before firing.<br />
55
<strong>Raw</strong> Mats - Spring <strong>2005</strong> - Carlo Sammarco - NYSCC @ <strong>Alfred</strong> <strong>University</strong><br />
OG #1 (OG=Overglaze)<br />
Recipe: 3124 45<br />
EPK 10<br />
Stain (Mason Best Black) 45<br />
Add: Elmer's/Glycerin (80/20 ratio) 100%<br />
Overglaze tape cast shown with 50 % glue /glycerin content.<br />
Tiles after being fired with tape at 50% glue/glycerin content.<br />
56
Tiles after being fired with tape at 60% glue/glycerin content.<br />
<strong>Raw</strong> Mats - Spring <strong>2005</strong> - Carlo Sammarco - NYSCC @ <strong>Alfred</strong> <strong>University</strong><br />
OG #2<br />
Recipe: 3124 54<br />
EPK 10<br />
Stain (Mason Best Black) 36<br />
Add: Elmer's/Glycerin (80/20 ratio) 100%<br />
OG #3<br />
Recipe: 3124 63<br />
EPK 10<br />
Stain (Mason Best Black) 27<br />
Add: Elmer's/Glycerin (80/20 ratio) 100%<br />
OG #4<br />
Recipe: 3124 72<br />
EPK 10<br />
Stain (Mason Best Black) 18<br />
Add: Elmer's/Glycerin (80/20 ratio) 100%<br />
57
<strong>Raw</strong> Mats - Spring <strong>2005</strong> - Carlo Sammarco - NYSCC @ <strong>Alfred</strong> <strong>University</strong><br />
Overglaze tape cast #’s 2, 3 and 4, all with 50% glue/glycerin content.<br />
Tiles after being fired with tape at 50% glue/glycerin content and in number order 2, 3 and 4.<br />
From the above tests, OG#3 seems to have greatest potential as an overglaze. Many defects<br />
exist in these samples due to inconsistent mixing and uneven thickness during casting. We will<br />
have to work on getting the coatings more uniformly even and on making the tape thickness<br />
much thinner (i.e. >.5 millimeters). CS<br />
58
<strong>Raw</strong> Mats - Spring <strong>2005</strong> - Carlo Sammarco - NYSCC @ <strong>Alfred</strong> <strong>University</strong><br />
Name:<br />
Type:<br />
Corinne Gretch<br />
Tape Casting<br />
Color: Various<br />
Texture: Smooth<br />
Cone: 10<br />
Recipe:<br />
See below<br />
Development Process:<br />
I began with these two recipes:<br />
Pinnell Clear glaze<br />
Custer Feldspar 25%<br />
Flint 35%<br />
Whiting 20%<br />
Grolleg China <strong>Clay</strong> 20%<br />
Porcelain #3 from Val’s book (page 34)<br />
Tile #6 Kaolin 30%<br />
EPK 25%<br />
C&C 5%<br />
Kona F4 20%<br />
Flint 10%<br />
Pyrax 10%<br />
In creating a two layer tape, first I cast a layer of the glaze beginning with a batch of 116% and 100%<br />
ratio Elmer’s glue to dry mix. This was allowed to dry over night before I cast a layer of the porcelain<br />
over the glaze using the same ratio of Elmer’s glue to dry mix. For each of these recipes I added<br />
12% of the amount of Elmer’s glue of glycerin. Here are the recipes for my first 2 batches:<br />
100% batch<br />
150 grams dry mix<br />
150 grams Elmer’s glue<br />
18 grams glycerin<br />
116% batch<br />
150 grams dry mix<br />
175 grams Elmer’s glue<br />
20 grams glycerin<br />
I observed that both of these batches were difficult to get thoroughly wet mixed and there were many<br />
small chunks in the cast sheet. When dried it was easily cut with an Exacto knife but broke, chipped<br />
and tore very easily. I found it best to cut a general shape with scissors of the Exacto knife and then<br />
shave it down to shape with the Exacto knife. If heat was applied to the tape is was more easily<br />
shaped, however these two batches broke and cracked when bent. Pieces could be connected by<br />
wetting them and sticking them together, but when fired the glaze adhesive was not enough to hold<br />
the pieces together.<br />
Also the porcelain was so thin and the glaze too heavy then the pieces all slumped. Pieces that<br />
were pressed into wet clay stayed in place better then pieces stick to bisque ware. Shrinkage was<br />
12-13%.<br />
59
<strong>Raw</strong> Mats - Spring <strong>2005</strong> - Carlo Sammarco - NYSCC @ <strong>Alfred</strong> <strong>University</strong><br />
Two-layer tape: Pinnell's clear cast over Porcelain #3<br />
To improve the tapes workability I tried two more batches, one of 135% and one 150% ratio of<br />
Elmer’s glue to dry powder continuing to add 12% glycerin. Here are the recipes for the next two<br />
batches:<br />
135% batch<br />
150 grams dry mix<br />
200 grams Elmer’s glue<br />
24 grams glycerin<br />
150% batch<br />
150 grams dry mix<br />
225 grams Elmer’s glue<br />
27 grams glycerin<br />
These two batches turned out to be much more workable. They cut easily, were less likely to rip or<br />
chip, bent easily, and formed around a three dimensional form. The heat from my hand was enough<br />
to shape the pieces. I did a few different tests including a geometric form test where I built a box with<br />
5 separate pieces, leaving an open top. The pieces were connected by wetting them and sticking<br />
them together. When fired these forms collapsed. I think that the glue melted out and the pieces fell<br />
over before the glaze was melted enough to hold the pieces together. I also did a test to see how a<br />
piece would stand up on its own. A one inch strip of tape was bent into a bell shapes curve, standing<br />
about 2 inches high, the ends were stuck to a test tile, and the edges were marked with iron oxide to<br />
measure slipping. When fired, although the edges did not slip, the stress on the upper most point of<br />
the curve caused the piece to break and slump over.<br />
Another test was done to measure slipping on a vertical surface. Three pieces, a large square<br />
(1.5inches), a small square (.5inch), and a thin strip vertically orientated were stuck to a vertical test<br />
tile and the edges were marked with iron oxide. Upon firing most of the pieces had slipped all the<br />
way to the bottom of the test tile with the exception of one of the thin strips which held its position.<br />
Shrinkage was 15-16%. I chose to continue working with 135% batch.<br />
60
<strong>Raw</strong> Mats - Spring <strong>2005</strong> - Carlo Sammarco - NYSCC @ <strong>Alfred</strong> <strong>University</strong><br />
Vertical test<br />
Next I used stains, Mason Best Black and a new red (Mason Dark Red), to experiment with color in<br />
the porcelain layer of the tape. I began with the first layer of the clear glaze. To the second layer of<br />
porcelain, 135% batch, I added 10% stain in two separate batches, one red, one black. I then cast<br />
the red layer, drizzled on a little black and marbleized it with a fork, and vice versa. This technique<br />
worked well however the fork created a few weak spot in the tape where it took away too much clay. I<br />
then experimented with attaching the pieces using another wet mixed glaze. I used Mamo Tan Matte<br />
applied underneath the pieces to adhere them to the stoneware and also the method of wetting the<br />
piece and sticking it to the tile then applying glaze over this. Both ways were successful in keeping<br />
the tape in place on the horizontal test tile and showed potential aesthetically too. I had much less<br />
success when I tried to use these methods for a vertical surface. Some pieces stayed in place,<br />
some moved slightly, but for the most part the tape pieces slid off the pot.<br />
Mamo Tan Matte underneath (Tan color); Mason Best Black and Mason Dark Red overtop<br />
61
<strong>Raw</strong> Mats - Spring <strong>2005</strong> - Carlo Sammarco - NYSCC @ <strong>Alfred</strong> <strong>University</strong><br />
Glaze/Stain interface is clearly visible here<br />
Applied design using tape (150% batch using Porcelain #3) on pre-bisqued vessel. Bird design was glazed over after<br />
application. Sqwiggly lines were left unglazed<br />
A few extra notes and thoughts:<br />
The longer this tape is left out in the air, the less workable it is. Even after a few days to a week one<br />
can notice the difference. Ideally the tape should be made right before it will be used.<br />
Perhaps the layer of glaze intended to be an adhesive is less effective then using a wet glaze to<br />
adhere a single layer of porcelain to a piece. The extra layer of glaze seems to add too much weight<br />
and therefore causing the piece to slip down or off the vertical surface.<br />
62
<strong>Raw</strong> Mats - Spring <strong>2005</strong> - Carlo Sammarco - NYSCC @ <strong>Alfred</strong> <strong>University</strong><br />
Name:<br />
Type:<br />
Jackie Rines & Devon Sparks<br />
Handbuilding<br />
Color: Various<br />
Texture: Various<br />
Cone: 04/6<br />
Recipe:<br />
Various (see below)<br />
Development Process:<br />
Our goal this semester was to develop a pallet of colored clay at cone 04 and 6. To do this we<br />
used four different clay bodies that had different fluxes, and tested numerous levels of added<br />
oxides and combinations to each body. The Fluxes affected the color greatly because of their<br />
different chemical makeup's. We chose oxides instead of Mason Stains because they are more<br />
cost efficient.<br />
The recipes were:<br />
A B C D<br />
grolleg 25 grolleg 25 grolleg 25 grolleg 25<br />
tile 6 20 tile 6 20 tile 6 20 tile 6 20<br />
C&C 15 C&C 15 C&C 15 C&C 15<br />
frit 3110 40 frit 3124 40 frit 3195 40 talc 40<br />
total 100 100 100 100<br />
On our first run we experimented with different levels of red iron oxide, chrome oxide,<br />
manganese, yellow ochre, and cobalt oxide. (see poster board for results and numbers) We<br />
chose initial levels based on recommendations from James Chappell’s book The Potter’s<br />
Complete Book of <strong>Clay</strong> and Glazes, a good reference if you are interested in doing this yourself.<br />
In the second run of tests we adjusted the oxide levels in some of the bodies depending on how<br />
well the first results came out.<br />
Our results in both runs were interesting. The 04 tiles range from dark to light, but in general are<br />
not as bold as some of the results in cone 6. Some cone 6 tests bloated or melted, but some<br />
tiles were really rich in color. Some color burned out in the kiln at both temperatures. We also<br />
tested compatibility because the pallet could only be achieved with the use of multiple bodies.<br />
We had no compatibility problems on a small scale.<br />
The combination of oxides can be explored extensively to achieve a wide range of color. We<br />
will probably also start experimenting with mason stains once our pallet is refined enough to<br />
know what few desired colors or highlights we would like and are difficult to achieve using<br />
oxides.<br />
63
<strong>Raw</strong> Mats - Spring <strong>2005</strong> - Carlo Sammarco - NYSCC @ <strong>Alfred</strong> <strong>University</strong><br />
Cone 04 Series<br />
64
<strong>Raw</strong> Mats - Spring <strong>2005</strong> - Carlo Sammarco - NYSCC @ <strong>Alfred</strong> <strong>University</strong><br />
Cone 6 Series<br />
65
<strong>Raw</strong> Mats - Spring <strong>2005</strong> - Carlo Sammarco - NYSCC @ <strong>Alfred</strong> <strong>University</strong><br />
66
<strong>Raw</strong> Mats - Spring <strong>2005</strong> - Carlo Sammarco - NYSCC @ <strong>Alfred</strong> <strong>University</strong><br />
Second Cone 04 Series<br />
Second Cone 6 Series<br />
67
<strong>Raw</strong> Mats - Spring <strong>2005</strong> - Carlo Sammarco - NYSCC @ <strong>Alfred</strong> <strong>University</strong><br />
68
<strong>Raw</strong> Mats - Spring <strong>2005</strong> - Carlo Sammarco - NYSCC @ <strong>Alfred</strong> <strong>University</strong><br />
Name:<br />
Type:<br />
Elisavet Papatheodorou & Diogo Shin<br />
Handbuilding<br />
Color: Black<br />
Texture: Smooth<br />
Cone: 04<br />
Recipe: Redart 37.5<br />
Laguna Blackbird Substitute 37.5<br />
OM-4 25<br />
100%<br />
Add: Mason Chrome Free<br />
10<br />
Black #6616<br />
Development Process:<br />
Our labs were carried out with the goal of formulating a low-temperature black hand-building<br />
clay body. Our method included triaxial tests, line blends, and building samples. We have<br />
succeeded in developing a black, fine particle-body. However, the formula needs several more<br />
modifications to be viable as a building body.<br />
The body is mature and vitreous at cone 04. It has a smooth, buttery surface; Without the<br />
stain, it is a dark brown. The Chrome Free stain makes the truest black in this body at this<br />
temperature. We also suggest testing the body in reduction, where it might attain a true black<br />
with little or no commercial stain.<br />
Although we have a good solution as far as color, surface, and temperature are concerned, the<br />
body lacks workability. We would compare the workability of the body to that of porcelain--<br />
although the particles are fine and the clay has a nice consistency, it lacks the ability to stretch<br />
and mold, and cracks and breaks easily. The body barely holds its own weight and cannot hold<br />
up vertically. To be a good building body, some non-plastic fillers must be added to improve<br />
green strength and prevent slumping. We suggest adding fine, medium, and course grog to the<br />
body, in a percentage of fifteen to twenty-five percent. Paper or fibers would also increase the<br />
green strength. Also, as the body is vitreous at cone 04, it may need something to decrease<br />
the melting temperature. We may try 5-10% kyanite as this is dark and refractory.<br />
15% additions of stain. C.C.<br />
from the top: Best Black, Cobalt<br />
Free Black, and Chrome Free<br />
Black<br />
69
<strong>Raw</strong> Mats - Spring <strong>2005</strong> - Carlo Sammarco - NYSCC @ <strong>Alfred</strong> <strong>University</strong><br />
Triaxial blend of clays<br />
Additions of commercial stains<br />
70
Additions of oxides<br />
<strong>Raw</strong> Mats - Spring <strong>2005</strong> - Carlo Sammarco - NYSCC @ <strong>Alfred</strong> <strong>University</strong><br />
Handbuilt using base body + 10% Mason Chrome Free Black #6616. This piece was underfired, which accounts for the<br />
dark brown color. Firing closer to maturity (cone 04) would have brought it closer to black.<br />
71
<strong>Raw</strong> Mats - Spring <strong>2005</strong> - Carlo Sammarco - NYSCC @ <strong>Alfred</strong> <strong>University</strong><br />
Name:<br />
Type:<br />
Jennifer Jewett<br />
Casting<br />
Color: Off White<br />
Texture: Smooth<br />
Cone: <br />
Recipe: <br />
Development Process:<br />
My objective is to work with slips to determine which ones are better for the the burnout<br />
process. I will be experimenting with a paper porcelain slip, and porcelain slip to obtain a body<br />
that has minor shrinkage but also strength so that I can cast objects that won't allow shrinkage<br />
I am going to use organic object like sponges, string, and things from nature; pretty much<br />
anything that burns and doesn't let off toxic fumes. Also my firing temperatures are going to be<br />
cone 04 and cone 6<br />
Banana dipped in slip and fired<br />
72
<strong>Raw</strong> Mats - Spring <strong>2005</strong> - Carlo Sammarco - NYSCC @ <strong>Alfred</strong> <strong>University</strong><br />
Name:<br />
Type:<br />
Jessica Fitzgibbon<br />
Tape Casting<br />
Color: Various<br />
Texture: Smooth<br />
Cone: 10<br />
Recipe: <br />
Development Process:<br />
I am interested in testing sculptural possibilities through the use of tape casting and applied wire. I<br />
plan to test the material capability of holding shape by relying on the wire to support the structure.<br />
Wire will be embedded, adhered by pressure or will be sewn.<br />
Tape: Laminated and fired<br />
73
<strong>Raw</strong> Mats - Spring <strong>2005</strong> - Carlo Sammarco - NYSCC @ <strong>Alfred</strong> <strong>University</strong><br />
Fired ribbons of tape<br />
Despite being underfired, the tape is quite translucent<br />
74
<strong>Raw</strong> Mats - Spring <strong>2005</strong> - Carlo Sammarco - NYSCC @ <strong>Alfred</strong> <strong>University</strong><br />
Ceramic perogie<br />
Sides of perogie were moisted and crimped with pliers to create a good seal. Plier marks are clearly visible.<br />
75
<strong>Raw</strong> Mats - Spring <strong>2005</strong> - Carlo Sammarco - NYSCC @ <strong>Alfred</strong> <strong>University</strong><br />
Fired porcelain tape with copper wire wire embedded right after casting<br />
Copper wire fumes during firing giving soft green halo effects. It also eats through the porcelain tape.<br />
76
<strong>Raw</strong> Mats - Spring <strong>2005</strong> - Carlo Sammarco - NYSCC @ <strong>Alfred</strong> <strong>University</strong><br />
Fired tape: Hardware cloth embedded into ceramic tape immediately after casting.<br />
77
<strong>Raw</strong> Mats - Spring <strong>2005</strong> - Carlo Sammarco - NYSCC @ <strong>Alfred</strong> <strong>University</strong><br />
Name:<br />
Type:<br />
Josh Araujo<br />
Handbuilding<br />
Color: Grey<br />
Texture: Porous<br />
Cone: 04<br />
Recipe: Lumnite Varies<br />
<strong>Clay</strong> <br />
Varies<br />
Add:<br />
Development Process:<br />
The purpose of this project was to see what happens when Lumnite cement is added to a clay<br />
body. CS<br />
78
<strong>Raw</strong> Mats - Spring <strong>2005</strong> - Carlo Sammarco - NYSCC @ <strong>Alfred</strong> <strong>University</strong><br />
Cement additions<br />
79
<strong>Raw</strong> Mats - Spring <strong>2005</strong> - Carlo Sammarco - NYSCC @ <strong>Alfred</strong> <strong>University</strong><br />
Name:<br />
Type:<br />
Megan Thompson<br />
Handbuilding<br />
Color: Various<br />
Texture: Smooth<br />
Cone: 10<br />
Recipe:<br />
Base<br />
Grolleg 30<br />
Tile-6 25<br />
C&C ball 5<br />
Kona F-4 20<br />
Flint 10<br />
Pyrax 10<br />
100%<br />
Add: Vee Gum 1<br />
Oxides<br />
varies<br />
Development Process:<br />
For my final project I created a palette of cone 10 colored porcelains using approximately ten<br />
different oxides in different percentages and combinations with each other. Once my palette<br />
was established I began testing their reactions to each other through different techniques such<br />
as laminating and marbling clay in thrown pieces.<br />
My process involved laminating, or alternating, the white clay body with one of the colored clays<br />
until I created the amount of clay I wished to throw with. The throwing process only took<br />
approximately two or three pulls before I was forced to finish so that I would not disrupt the<br />
colored “swirl” too much. But it was after the piece was trimmed that the colors really came<br />
alive.<br />
After the pieces were fired I tested certain glazes on them. Since the pieces were never<br />
bisqued (it was simply fired to temperature) they didn’t take glaze very easily. The areas that<br />
the clear glaze had shown up on really made the colors pop while the other areas were quite<br />
muted.<br />
Through trial and error and learning ‘what not to do’ I learned a great deal about color and<br />
oxides and feel that I through this project I became aware of how to apply the knowledge of raw<br />
materials to my work.<br />
80
<strong>Raw</strong> Mats - Spring <strong>2005</strong> - Carlo Sammarco - NYSCC @ <strong>Alfred</strong> <strong>University</strong><br />
81
<strong>Raw</strong> Mats - Spring <strong>2005</strong> - Carlo Sammarco - NYSCC @ <strong>Alfred</strong> <strong>University</strong><br />
82