

"Stockings/Chausses Pattern Workshop", taught by Annisa Gabrielli ...
"Stockings/Chausses Pattern Workshop", taught by Annisa Gabrielli ...
"Stockings/Chausses Pattern Workshop", taught by Annisa Gabrielli ...

Create successful ePaper yourself
Turn your PDF publications into a flip-book with our unique Google optimized e-Paper software.
"<strong>Stockings</strong>/<strong>Chausses</strong> <strong>Pattern</strong> Workshop", <strong>taught</strong> <strong>by</strong> <strong>Annisa</strong> <strong>Gabrielli</strong>.<br />
Working in pairs, each student will develop a custom pattern for bias-cut stockings or<br />
chausses. You will learn how to find the bias grain of the fabric, and experiment with<br />
the basics of draping muslin on a body and transferring that information to a paper<br />
pattern. We will discuss fabric choices, construction and finishing, and samples of<br />
finished garments will be available to examine. If there is time, you may cut your<br />
patterns out in real fabric and learn how to assemble the stockings.<br />
Maximum: 6 students<br />
Cost: $8<br />
Instructor will provide muslin, Sharpies, safety pins, paper, pencils, tracing wheels and<br />
cheapo shears to use.<br />
If you want to start making up a real fabric version (there will probably be time for some<br />
of you to do this), you should bring 1-1.5 yards of plain-weave medium weight linen or<br />
light weight wool for stockings, or 1.5-2 yds for chausses. You may bring a portable<br />
sewing machine too, or needle and thread. If you want to use better quality shears,<br />
please bring your own.<br />
We will be partnering up and draping on bare feet & legs. Please wear socks prior to<br />
class so that nobody has to deal with stinky feet. If you will be making a pattern for<br />
knee-length stockings, wear clothing which you can roll up to above the knee. If you<br />
will be making a pattern for chausses (long hose for men which tie to the waist cord of<br />
the underwear), wear boxer briefs or bike shorts, and leave your modesty at home.<br />
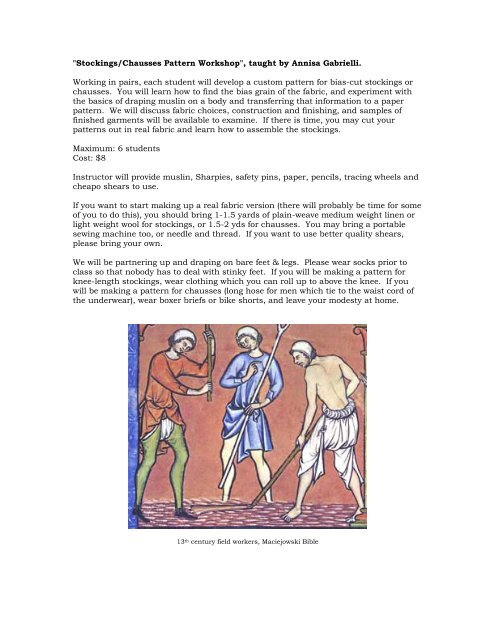
13 th century field workers, Maciejowski Bible
History<br />
There are a few archaeological finds which include remains of bias-cut woven fabric<br />
hose, for example the Bocksten Man and the Herjolfsnes finds in Greenland.<br />
Information about these can be found at:<br />
http://www.personal.utulsa.edu/~marc-carlson/cloth/hose.html<br />
They may be called chausses, calze, hosen, stockings, or a variety of other names,<br />
depending on your time and place.<br />
Fabric<br />
Fabric with a plain, balanced weave works best. Avoid synthetic fibers and fabrics with<br />
elastic. Wool is the most durable choice, but for hot weather, linen works well too.<br />
There are a few records of linen hose, for example, this quote from Bertus Brokamp on<br />
the AOTC yahoo list, a discussion group for 14 th century enthusiasts:<br />
I have read through a few accounts of Jan van Blois (yes Charles de Blois was his uncle), a<br />
nobleman with his court and lands in the county of Holland. And except for 1 pair of brown linen<br />
hosen (out of over 300 entries for clothing!) all other linen clothing mentioned is underwear made out of<br />
undyed linen and linen linings for his clothes, also made out of undyed linen.<br />
Wool has natural stretch, so it will fit more snugly than linen, which tends to stretch<br />
out with wear. Linen is also susceptible to degrading in contact with salt water such as<br />
the sweat from your feet. That said, my linen hose have held up for three seasons of<br />
wear when worn with soft leather turnshoes. The friction of wearing them inside<br />
structured modern shoes, which don’t move as much with the foot, wears them out<br />
rapidly. Silk has very little stretch, and fabrics of a good weight tend to be very closely<br />
woven, which limits the stretch even more. Silk also has very good insulating<br />
properties and is susceptible to rotting in contact with sweat, so is probably a good<br />
choice only for light-use, cool weather hose.<br />
Left: 14 th century bishop’s hose. Right: 15 th century man with rolled-down chausses
Draping<br />
You will need:<br />
45” square of muslin or other plain-woven fabric (can be 36” square for knee-high<br />
stockings)<br />
Felt pen with a good point (Sharpies work well)<br />
Safety pins- about 30 medium-sized<br />
Shears suitable for fabric<br />
Paper- medium weight brown craft paper or similar<br />
Pencil<br />
Shears suitable for paper<br />
Tracing wheel<br />
Ruler- transparent plastic sewing rulers are best for this<br />
Flat surface<br />
Step 1- determine the true bias<br />
Start with an appropriately-sized piece of muslin.<br />
“True bias” refers to a 45 degree angle from the straight grain of the fabric (which is<br />
parallel to the selvedge). To find this, make a clean straight cut across the fabric- with<br />
muslin, you can make a snip in one selvedge and rip across the fabric. The fabric will<br />
tear in a straight line. Another method is to pull one cross-grain thread out and cut<br />
along the resulting line. This works well on linen, where the threads are too strong to<br />
rip neatly, and wools which don’t tear well.<br />
Fold the cut or torn edge over to line up with one selvedge, and gently press the<br />
resulting diagonal fold. Mark this fold with a felt pen.<br />
Step 2- prepare the fabric for draping<br />
Cut off one corner perpendicular to the marked bias line, about 10” from the corner.<br />
Save this triangle for patterning the front of the foot.<br />
On the large piece, cut a slit up from the cut end about 5” long along the bias line.<br />
Step 3- drape the fabric on the leg<br />
For stockings, center the bias line at the front of the leg, with the slit spread over the<br />
instep. The edges should reach the floor at the sides of the foot. If they do not, extend<br />
the slit along the bias line until they do.<br />
For chausses, pin the corner at the other end of the bias line to the waistband of the<br />
undergarment. If needed, cut more off the lower edge and make a new slit along the<br />
bias line. Take care not to stretch the fabric too much along the bias line during this<br />
step.<br />
Start pinning the fabric at the back of the leg. Keep the bias line centered at the front<br />
of the leg, and the pin-line centered at the back of the leg. Having the model stand on a<br />
box may be useful.<br />
Trim away excess fabric as needed, setting the large scraps aside to use for patterning<br />
the soles. Be patient, and keep adjusting until you are happy with the fit. The stocking<br />
should be snug, but not super-tight, and there should not be an excess of wrinkles or<br />
gathers in the seam.<br />
Check that the edges still reach the floor, and mark where the fabric touches the floor<br />
around the back of the foot. If one side is very far forward of the other, trim it away to<br />
balance, tapering to the top of the slit. You may need to round the top of the slit<br />
slightly to get a smooth fit at the ankle.<br />
With the felt pen, mark both sides of the pin line, and write “outside” on the outside of<br />
the leg. On some patterns this will be obvious, on some it will not.<br />
For stockings, mark a line about 2” above mid-knee.<br />
For chausses, mark the top edge, as high as will be comfortable, and trim away the<br />
excess fabric. You may want to unpin the back for a few inches to avoid frightening the<br />
model when trimming. Re-pin and check the fit.
Step 4- Drape the fabric on the front of the foot<br />
With the leg piece still in place, tuck the scrap with the bias line on it under the slit,<br />
aligning the bias line from the line on the leg to the end of the second toe.<br />
Smooth the fabric down over the sides of the foot, and mark where the fabric touches<br />
the floor, and where the edges of the slit in the leg overlap the foot piece.<br />
Mark the little-toe side of the line “outside” and remove the foot piece.<br />
Step 5- check for removability<br />
With the back of the leg piece still pinned, have the model try to slip the stocking off<br />
over their foot.<br />
Often the ankle area needs to be loosened, gradually, until the stocking is removable.<br />
Mark the new pin-line and remove the leg piece.<br />
Step 6- mark the sole<br />
Take one of the larger scrap pieces and put it on the floor (or box if you’re using one).<br />
Mark the straight grain of the fabric with a line.<br />
Have the model stand on the fabric with the line extending from the heel to the second<br />
toe.<br />
Trace around the foot with the felt pen, keeping the pen upright (don’t trace in under<br />
the arch).<br />
Step 6- transfer the information to paper<br />
Put the muslin pieces down on a piece of paper, straightening the grain if needed.<br />
Pin or use weights to fasten the muslin to the paper (foam core craft board makes a nice<br />
temporary pinning and tracing surface).<br />
Using the tracing wheel, copy all of the lines to the paper, including the grain & bias<br />
lines.<br />
Remove the muslin and transfer the “outside” marks.<br />
Draw over the tracing wheel lines with pen.<br />
Mark the bias grain lines as bias. For ease of cutting, you may want to mark straight<br />
grain lines on the pattern pieces as well.<br />
Make a small mark at the top of the slit, perpendicular to the bias line.<br />
On the sole pattern only, add ½” of seam allowance.<br />
Mark each pattern piece with the name of the model, garment type (stockings or<br />
chausses), piece name (leg, foot, sole), date, and seam allowance (1/4”).<br />
On all pieces, ¼” seam allowance will be used. Adding seam allowance only to the sole<br />
just works, you’ll have to trust me.<br />
Mark foot pattern piece at the points where the bias or grain line meets the edge of the<br />
pattern piece.<br />
Mark sole pattern piece at the points where the bias or grain line meets the edge of the<br />
pattern piece.<br />
Cut all pieces out on the cutting lines.<br />
13 th century chausses. Right, left: unknown medical text.
Cutting and assembly<br />
Lay out 2 layers of fabric, aligning grain and smoothing out wrinkles.<br />
Pin pattern pieces to fabric, aligning grain lines with fabric grain.<br />
Cut on cutting lines, making small (less than ¼”!) snips at the marks.<br />
For chausses, cut a facing for the top of the leg, using the leg pattern, and cutting<br />
straight across about 6” down from the lowest point (at the back seam).<br />
Pin the front of the foot piece into the slit in the leg piece, matching the notch to the top<br />
of the slit, checking that the outsides of the foot and leg are matching up, and making<br />
sure that they are opposites (one right leg, one left leg). Stitch. The center may be a<br />
little tricky- be patient, and reinforce with small stitches if needed. Hand-stitching may<br />
be easier than machine-stitching for this seam.<br />
Pin the back seams of the leg pieces. Stitch.<br />
Pin the sole to the stocking, again checking that outsides and notches match. Stitch.<br />
For chausses, stitch the back seam of the facing, then stitch the facing to the top of the<br />
leg, right sides together, and turn.<br />
Finishing<br />
In my experience, seam-finishing for linen hose is optional. The fabric wears out before<br />
the seams do. However, finished seams look nice, and for worsted wool or loosely<br />
woven fabrics it helps to prevent fraying. On thicker wool, it keeps the seams flat and<br />
smooth.<br />
The simplest thing to do is to open the seam allowances out on the inside, and use a<br />
plain running stitch on each side to hold them there.<br />
Felling the seams is another option, though this doesn’t work very well on the tightly<br />
curved front of foot seam, and tends to make a bigger lump against the foot on the sole<br />
seam, so I would recommend that finish only for the back seam.<br />
The top of stockings may be finished with a rolled hem or a simple narrow hem, using<br />
running stitch, hem stitch or whatever other stitch you prefer. Remember that the tops<br />
will fold down over the garters, so something which looks nice on the inside is a good<br />
choice.<br />
On chausses, the lower edge of the facing should be finished with a fairly flat treatment<br />
to avoid chafing and a visible ridge on the outside. Overcasting the cut edge works<br />
nicely.<br />
The back seam may be tacked to the outer layer to prevent it rolling out, and a running<br />
stitch around the top will keep the edge crisp.<br />
Make 2 eyelets in the top point of each chausse, about ¾” apart and ½” from the edge.<br />
A point (approx. 16” cord with aiglet on one end) will be threaded through these to tie<br />
them to the waist cord on the braies (underwear). Use an awl to make the holes, and<br />
whip stitch or buttonhole stitch to keep the threads apart and reinforce the hole.<br />
Cutting the holes or using grommets makes eyelets which are not durable enough.<br />
Early 14 th century braies. Left: Petits Heures of Jeanne d’Evreux. Right: unknown manuscript.
Wearing<br />
For stockings, all that is needed is a pair of garters. This can be as simple as a strip of<br />
fabric (fulled wool works well), or as fancy as tablet-weaving or leather with nice buckles<br />
and strap-ends. Fasten them over the stocking snugly but not tightly below the knee<br />
and fold the top of the stocking down over them.<br />
For chausses, garters may also be worn below the knee. This supports the lower part of<br />
the leg to prevent excessive tugging at the waist. At the top, there must be something to<br />
tie the point to, so appropriate underwear is necessary.<br />
Braies are best made of medium or heavy weight (opaque) white or natural linen. For<br />
the 12 th century, these are quite full, and reach to the knee or even below the knee. In<br />
the 14 th century, they have more in common with modern boxer shorts, being loose but<br />
not baggy and reaching to about mid thigh. By the 15 th century, they are still smaller,<br />
looking rather like a linen “speedo”, though <strong>by</strong> that time the chausses are often<br />
extended to the waist and tied to the upper-body garment. There are images in the<br />
Maciejowski Bible and the Petits Heures of Jeanne d’Evreux which may show an<br />
opening in the casing for access to the waist cord. Here is my technique:<br />
When making the braies, make a pair of eyelets 1” apart at the front of each hip, and<br />
another pair at the front, each one ½” from the center front seam. These should end up<br />
on the outside of the waist cord casing once the casing is complete. Thread the waist<br />
cord through the casing, exiting at each hip, to create an inch of exposed cord to tie to.<br />
For the waist cord, and the points, fingerloop braid works well- it is strong, but does not<br />
make as large a knot against the hip bones as commercially made cord.<br />
15 th century chausses and braies. Left, center: unknown. Right: St John Altarpiece, Rogier Van der Weyden