Specifications are subject to change without notice ... - Soyntec
Specifications are subject to change without notice ... - Soyntec
Specifications are subject to change without notice ... - Soyntec

Create successful ePaper yourself
Turn your PDF publications into a flip-book with our unique Google optimized e-Paper software.
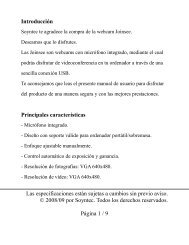
Introduction<br />
<strong>Soyntec</strong> thanks you for purchasing your new Joinsee 300. We wish<br />
you enjoy using it.<br />
Joinsee 300 is a VGA webcam with built-in microphone which<br />
provides an easy way <strong>to</strong> enjoy videoconference using a USB<br />
connection <strong>to</strong> your computer.<br />
We suggest reading this user manual for enjoying this product is a safe<br />
way and with the best performance.<br />
Main features<br />
- Built-in microphone with audio via USB.<br />
- Innovative design suitable for both lap<strong>to</strong>p and desk<strong>to</strong>p computers.<br />
- Adjustable focus.<br />
- Au<strong>to</strong>matic exposure and gain control.<br />
- Still image resolution: VGA 640x480.<br />
- Video resolution: VGA 640x480.<br />
<strong>Specifications</strong> <strong>are</strong> <strong>subject</strong> <strong>to</strong> <strong>change</strong> <strong>without</strong> <strong>notice</strong>.<br />
© 2006 by <strong>Soyntec</strong>. All rights reserved.<br />
Page 1 of 6
- Capture speed: Up <strong>to</strong> 30 fps (QVGA) and up <strong>to</strong> 15 fps (VGA).<br />
- Includes special but<strong>to</strong>n for taking pho<strong>to</strong>s.<br />
- Features status LED indica<strong>to</strong>r.<br />
- USB 2.0/1.1/1.0 connection.<br />
- Compatible with Windows XP / 2000 / 98SE / ME.<br />
Product contents<br />
- Webcam.<br />
- CD with drivers and softw<strong>are</strong>.<br />
- User manual.<br />
<strong>Specifications</strong> <strong>are</strong> <strong>subject</strong> <strong>to</strong> <strong>change</strong> <strong>without</strong> <strong>notice</strong>.<br />
© 2006 by <strong>Soyntec</strong>. All rights reserved.<br />
Page 2 of 6
Product overview<br />
The following picture shows the main parts of the webcam:<br />
Snapshot but<strong>to</strong>n<br />
Lens with<br />
adjustable focus<br />
Status LED<br />
indica<strong>to</strong>r<br />
Adjustable neck<br />
Figura A: Webcam main parts<br />
<strong>Specifications</strong> <strong>are</strong> <strong>subject</strong> <strong>to</strong> <strong>change</strong> <strong>without</strong> <strong>notice</strong>.<br />
© 2006 by <strong>Soyntec</strong>. All rights reserved.<br />
Page 3 of 6
Webcam installation<br />
Please note that in order <strong>to</strong> install the Joinsee 300 webcam you need a<br />
free USB connec<strong>to</strong>r in your computer.<br />
Follow these steps <strong>to</strong> install the webcam:<br />
1. Insert the provided drivers CD and select “Install Joinsee 300<br />
Driver”.<br />
2. Click the “Next” but<strong>to</strong>n.<br />
3. Select the type of installation (“Complete” is recommended). Click<br />
“Next”.<br />
4. Click “Install” <strong>to</strong> start copying the files <strong>to</strong> the computer.<br />
5. Click “Finish” <strong>to</strong> close the installation wizard.<br />
6. Connect the Joinsee 300 webcam <strong>to</strong> a free USB connec<strong>to</strong>r. The<br />
operating system will detect the webcam and it will be ready <strong>to</strong> use.<br />
7. Press the snapshot but<strong>to</strong>n on <strong>to</strong>p of the webcam <strong>to</strong> launch the<br />
moni<strong>to</strong>ring softw<strong>are</strong> and check that the Joinsee 300 has been properly<br />
installed.<br />
<strong>Specifications</strong> <strong>are</strong> <strong>subject</strong> <strong>to</strong> <strong>change</strong> <strong>without</strong> <strong>notice</strong>.<br />
© 2006 by <strong>Soyntec</strong>. All rights reserved.<br />
Page 4 of 6
ArcSoft VideoImpression softw<strong>are</strong> installation<br />
1. Insert the provided drivers CD and select “ArcSoft<br />
VideoImpression”.<br />
2. Select the installation language.<br />
3. Click the “Next” but<strong>to</strong>n.<br />
4. The license contract will appear. Click “Yes”.<br />
5. The installation folder can be modified. It is recommended <strong>to</strong> leave<br />
the default folder. Click the “Next” but<strong>to</strong>n.<br />
6. The new program group can also be modified. Just leave the default<br />
program group and click “Next”. The copy of files will start.<br />
7. Click “Finish” <strong>to</strong> close the installation wizard.<br />
<strong>Specifications</strong> <strong>are</strong> <strong>subject</strong> <strong>to</strong> <strong>change</strong> <strong>without</strong> <strong>notice</strong>.<br />
© 2006 by <strong>Soyntec</strong>. All rights reserved.<br />
Page 5 of 6
Trademarks<br />
All company, brand and product names <strong>are</strong> trademarks or registered<br />
trademarks of their respective companies.<br />
<strong>Specifications</strong> <strong>are</strong> <strong>subject</strong> <strong>to</strong> <strong>change</strong> <strong>without</strong> <strong>notice</strong>.<br />
© 2006 by <strong>Soyntec</strong>. All rights reserved.<br />
Page 6 of 6