Applying Resene Broadwall Surface Prep & Seal to plasterboard
Applying Resene Broadwall Surface Prep & Seal to plasterboard
Applying Resene Broadwall Surface Prep & Seal to plasterboard

Create successful ePaper yourself
Turn your PDF publications into a flip-book with our unique Google optimized e-Paper software.
DIY project #6<br />
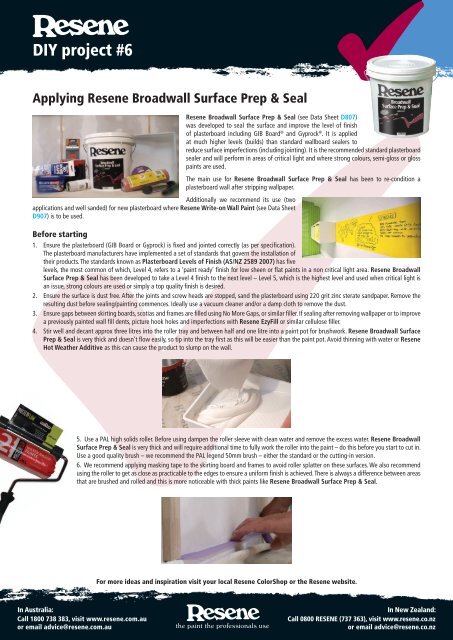
<strong>Applying</strong> <strong>Resene</strong> <strong>Broadwall</strong> <strong>Surface</strong> <strong>Prep</strong> & <strong>Seal</strong><br />
Additionally we recommend its use (two<br />
applications and well sanded) for new <strong>plasterboard</strong> where <strong>Resene</strong> Write-on Wall Paint (see Data Sheet<br />
D907) is <strong>to</strong> be used.<br />
Before starting<br />
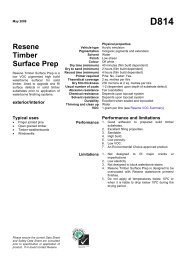
<strong>Resene</strong> <strong>Broadwall</strong> <strong>Surface</strong> <strong>Prep</strong> & <strong>Seal</strong> (see Data Sheet D807)<br />
was developed <strong>to</strong> seal the surface and improve the level of finish<br />
of <strong>plasterboard</strong> including GIB Board ® and Gyprock ® . It is applied<br />
at much higher levels (builds) than standard wallboard sealers <strong>to</strong><br />
reduce surface imperfections (including jointing). It is the recommended standard <strong>plasterboard</strong><br />
sealer and will perform in areas of critical light and where strong colours, semi-gloss or gloss<br />
paints are used.<br />
The main use for <strong>Resene</strong> <strong>Broadwall</strong> <strong>Surface</strong> <strong>Prep</strong> & <strong>Seal</strong> has been <strong>to</strong> re-condition a<br />
<strong>plasterboard</strong> wall after stripping wallpaper.<br />
1. Ensure the <strong>plasterboard</strong> (GIB Board or Gyprock) is fixed and jointed correctly (as per specification).<br />
The <strong>plasterboard</strong> manufacturers have implemented a set of standards that govern the installation of<br />
their products. The standards known as Plasterboard Levels of Finish (AS/NZ 2589 2007) has five<br />
levels, the most common of which, Level 4, refers <strong>to</strong> a ‘paint ready’ finish for low sheen or flat paints in a non critical light area. <strong>Resene</strong> <strong>Broadwall</strong><br />
<strong>Surface</strong> <strong>Prep</strong> & <strong>Seal</strong> has been developed <strong>to</strong> take a Level 4 finish <strong>to</strong> the next level – Level 5, which is the highest level and used when critical light is<br />
an issue, strong colours are used or simply a <strong>to</strong>p quality finish is desired.<br />
2. Ensure the surface is dust free. After the joints and screw heads are s<strong>to</strong>pped, sand the <strong>plasterboard</strong> using 220 grit zinc sterate sandpaper. Remove the<br />
resulting dust before sealing/painting commences. Ideally use a vacuum cleaner and/or a damp cloth <strong>to</strong> remove the dust.<br />
3. Ensure gaps between skirting boards, scotias and frames are filled using No More Gaps, or similar filler. If sealing after removing wallpaper or <strong>to</strong> improve<br />
a previously painted wall fill dents, picture hook holes and imperfections with <strong>Resene</strong> EzyFill or similar cellulose filler.<br />
4. Stir well and decant approx three litres in<strong>to</strong> the roller tray and between half and one litre in<strong>to</strong> a paint pot for brushwork. <strong>Resene</strong> <strong>Broadwall</strong> <strong>Surface</strong><br />
<strong>Prep</strong> & <strong>Seal</strong> is very thick and doesn’t flow easily, so tip in<strong>to</strong> the tray first as this will be easier than the paint pot. Avoid thinning with water or <strong>Resene</strong><br />
Hot Weather Additive as this can cause the product <strong>to</strong> slump on the wall.<br />
5. Use a PAL high solids roller. Before using dampen the roller sleeve with clean water and remove the excess water. <strong>Resene</strong> <strong>Broadwall</strong><br />
<strong>Surface</strong> <strong>Prep</strong> & <strong>Seal</strong> is very thick and will require additional time <strong>to</strong> fully work the roller in<strong>to</strong> the paint – do this before you start <strong>to</strong> cut in.<br />
Use a good quality brush – we recommend the PAL legend 50mm brush – either the standard or the cutting-in version.<br />
6. We recommend applying masking tape <strong>to</strong> the skirting board and frames <strong>to</strong> avoid roller splatter on these surfaces. We also recommend<br />
using the roller <strong>to</strong> get as close as practicable <strong>to</strong> the edges <strong>to</strong> ensure a uniform finish is achieved. There is always a difference between areas<br />
that are brushed and rolled and this is more noticeable with thick paints like <strong>Resene</strong> <strong>Broadwall</strong> <strong>Surface</strong> <strong>Prep</strong> & <strong>Seal</strong>.<br />
For more ideas and inspiration visit your local <strong>Resene</strong> ColorShop or the <strong>Resene</strong> website.
DIY project #6<br />
Continued >><br />
Application<br />
Work the roller in<strong>to</strong> the paint in the roller tray. You may need <strong>to</strong> flip the roller <strong>to</strong> get an even load.<br />
Load the brush up with paint (we recommend the PAL 50mm Angled Legend brush) and cut in around the edges and any areas the<br />
roller will not easily reach. Despite the paint’s thickness, it brushes easily. When cutting-in, bring the paint out between 30-50mm<br />
from the edge.<br />
Attach an extension handle <strong>to</strong> the roller and remove excess paint.<br />
Now lay the roller against the wall and roll in an upwards direction. Aim <strong>to</strong> complete approximately one third of a square metre with each roller load.<br />
After rolling each area lay off as you progress down and along the wall. With thick paints, like <strong>Resene</strong> <strong>Broadwall</strong> <strong>Surface</strong> <strong>Prep</strong> & <strong>Seal</strong>, this ensures a<br />
smooth finish.<br />
Roll as closely as possible <strong>to</strong> corners and edges, flipping the roller sleeve around as required.<br />
After completing a drop, you will need <strong>to</strong> lay-off the length of the painted area.<br />
To lay-off, first ensure the roller is not fully loaded with paint.<br />
Using only light pressure, lay the roller close <strong>to</strong> the skirting board and roll down <strong>to</strong>wards it before continuing up the wall <strong>to</strong> the <strong>to</strong>p, getting as close as<br />
practical <strong>to</strong> all edges. Now reverse down the wall, again using light pressure before repeating the process as you move across the wall – ensure you overlap<br />
the just completed area.<br />
For more ideas and inspiration visit your local <strong>Resene</strong> ColorShop or the <strong>Resene</strong> website.
DIY project #6<br />
Continued >><br />
Reload your roller before repeating the process as you progress along the wall.<br />
Manipulate the roller <strong>to</strong> ensure the roller gets as close as practicable <strong>to</strong> the edges.<br />
Allow <strong>to</strong> dry for four hours, ensuring the room has good ventilation and warmth <strong>to</strong> ensure the paint cures well<br />
Lightly sand using 220 grit zinc sterate sandpaper <strong>to</strong> remove any surface imperfections. We recommend the use of a flat sanding block as shown or pole<br />
sander.<br />
Then apply the recommended <strong>to</strong>pcoat system.<br />
<strong>Resene</strong> <strong>Broadwall</strong> <strong>Surface</strong> <strong>Prep</strong> & <strong>Seal</strong> will significantly improve the <strong>plasterboard</strong> surface either for new board; after wallpaper has been removed or <strong>to</strong><br />
reduce the effects of critical light.<br />
A second coat can be applied for an ultra smooth surface if required.<br />
The product, despite its thickness, is straightforward <strong>to</strong> apply.<br />
The end results are impressive and will significantly improve the finish and look of the walls.<br />
Key accessories<br />
• A PAL High Solids Roller Sleeve as <strong>Resene</strong> <strong>Broadwall</strong> <strong>Surface</strong> <strong>Prep</strong> &<br />
<strong>Seal</strong> is very thick in the pail and requires a specialist roller sleeve <strong>to</strong><br />
apply successfully and easily.<br />
• A quality Legend brush. We recommend the 50 or 63 mm Legend or<br />
the 50mm Legend cutting-in brush.<br />
• A paint pot. These are incredibly useful and much easier <strong>to</strong> paint<br />
from than direct from the can.<br />
• 220 grit zinc sterate sandpaper <strong>to</strong> sand any imperfections before<br />
applying the <strong>to</strong>pcoat and lightly after the <strong>to</strong>pcoat has dried <strong>to</strong><br />
remove any paint nibs, etc.<br />
• A gap filler such as PAL Contract Series Filler or Selleys No More<br />
Gaps <strong>to</strong> fill any gaps between the <strong>plasterboard</strong> and the skirting<br />
board, scotia or framing.<br />
• A roller tray and 230mm roller handle.<br />
• An extension pole. We recommend investing in a quality extension<br />
pole such as the PAL Extension Pole Metal Masterflow, especially if<br />
future painting projects are planned. The pole also accommodates<br />
most base plates for pole sanders.<br />
You may also need<br />
• A decent drop sheet(s), especially if other painting projects are<br />
planned (on the horizon).<br />
• Painter’s gloves – they are relatively inexpensive and save a lot of<br />
cleaning.<br />
• Masking tape for skirting boards, around light switches etc.<br />
• A hand sander or pole sander.<br />
For more ideas and inspiration visit your local <strong>Resene</strong> ColorShop or the <strong>Resene</strong> website.