Using the SUPER BEAST as a Spreader - Champion Rescue Tools
Using the SUPER BEAST as a Spreader - Champion Rescue Tools
Using the SUPER BEAST as a Spreader - Champion Rescue Tools
You also want an ePaper? Increase the reach of your titles
YUMPU automatically turns print PDFs into web optimized ePapers that Google loves.
Introduction<br />
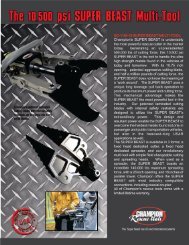
<strong>Champion</strong> <strong>Rescue</strong> <strong>Tools</strong> – <strong>SUPER</strong> <strong>BEAST</strong> Multi-tool Detailed Tool Instructions<br />
Thank you for purch<strong>as</strong>ing <strong>the</strong> <strong>SUPER</strong> <strong>BEAST</strong> Multi-tool –<br />
<strong>the</strong> safest, most powerful and functional rescue tool in<br />
<strong>the</strong> market. For General Operating and Safety<br />
General Safety and Operating Instructions<br />
1. Always turn <strong>the</strong> power unit to <strong>the</strong> “off” position and<br />
place <strong>the</strong> control valve in <strong>the</strong> “off” position for any<br />
service or clearing work. You should also “dump”<br />
<strong>the</strong> valve by pushing it all <strong>the</strong> way to one side and<br />
<strong>the</strong>n <strong>the</strong> o<strong>the</strong>r – this rele<strong>as</strong>es any stored energy and<br />
eliminates tool creep.<br />
2. Familiarize yourself with <strong>the</strong> tool(s) and control<br />
valve, moving <strong>the</strong> control valve back and forth until<br />
familiar with <strong>the</strong> valve action and operation. NEVER<br />
put any part of your body between <strong>the</strong> moving parts<br />
of this or any o<strong>the</strong>r tool!<br />
3. The <strong>SUPER</strong> <strong>BEAST</strong> will cut a broad range of<br />
materials. Inspect <strong>the</strong> cutter blades after each use<br />
to make sure it is in good condition. Inspection of<br />
<strong>the</strong> blades before each use is a MUST! If blades are<br />
suspect in any way, pull <strong>the</strong> tool out of service<br />
immediately and replace <strong>the</strong> blades. Remember<br />
you are cutting with many thousands of pounds of<br />
force.<br />
4. Worn edges can be filed, but NEVER grind <strong>the</strong>m<br />
with a hand grinder. To file <strong>the</strong> blades simply lay a<br />
file on <strong>the</strong> inside, or ground side, of <strong>the</strong> blade being<br />
careful to NOT just file <strong>the</strong> edge. File at le<strong>as</strong>t 2 to 3<br />
inches of <strong>the</strong> blade at a time so <strong>as</strong> to keep <strong>the</strong> blade<br />
edge flat and do not roll it over. If rolled, <strong>the</strong> blade<br />
will be ruined. If this happens, <strong>the</strong> blade will have<br />
to be returned to <strong>the</strong> factory for repair or<br />
replacement. Note: Do not file <strong>the</strong> blades regularly<br />
<strong>as</strong> maintenance – only file if <strong>the</strong> blade is damaged.<br />
© <strong>Champion</strong> <strong>Rescue</strong> <strong>Tools</strong><br />
Instructions ple<strong>as</strong>e refer to <strong>the</strong> “General Operating<br />
Procedures” Booklet furnished with your tool.<br />
Operating Pressure 10,500 psi<br />
Weight (Cutter) 51.9 lbs<br />
Weight (<strong>Spreader</strong>) 45.0 lbs<br />
Length 28 – 34 inches<br />
Width 12.5 inches<br />
Height 8 inches<br />
Blade Opening 10.75 inches<br />
Max Cutting Force 500,000 lbs<br />
<strong>Spreader</strong> Opening 28 inches<br />
Max Spreading Force 140,000 lbs<br />
Hydraulic Fluid Type Specified by Customer<br />
5. If your spreader tips get worn or have dings and<br />
dents you may also file those <strong>as</strong> needed.<br />
6. The Hydraulic Cylinder on your new tool operates<br />
under extreme pressure and is a sealed unit. Under<br />
normal use, it does not require service. The factory<br />
sealed cylinder must NEVER be taken apart. Doing<br />
so will void your warranty and could potentially<br />
result in severe injure or even death.<br />
7. As long <strong>as</strong> <strong>the</strong> cylinder remains sealed and is not<br />
tampered with, any defect or malfunctions are<br />
covered by <strong>the</strong> <strong>Champion</strong> limited lifetime warranty<br />
(to <strong>the</strong> original purch<strong>as</strong>er). See <strong>the</strong> “<strong>Champion</strong><br />
<strong>Rescue</strong> <strong>Tools</strong> Statement of Lifetime warranty” for<br />
additional information.<br />
8. The control valve must be kept clean. Blow off sand<br />
and dirt with an air hose. Use WD-40- on <strong>the</strong> valve<br />
spring. Valve does not need any maintenance.<br />
9. Make sure <strong>the</strong> te<strong>the</strong>red pins or ball detents that<br />
hold <strong>the</strong> head clevis and arms/blades in place stay<br />
adjusted so <strong>the</strong> pins do not work loose.<br />
10. As with all <strong>Champion</strong> <strong>Rescue</strong> <strong>Tools</strong>, <strong>the</strong> operating<br />
speed can be slowed down or incre<strong>as</strong>ed by moving<br />
<strong>the</strong> trigger accordingly. If <strong>the</strong> trigger is opened<br />
partial <strong>the</strong> movement will be slow; If <strong>the</strong> trigger is<br />
opened all <strong>the</strong> way movement will be f<strong>as</strong>ter.<br />
Always use proper safety gear and follow all safety<br />
instruction <strong>as</strong> outlined in this manual


