Maverick Master Angler 21 Owners Manual - Maverick Boat Company
Maverick Master Angler 21 Owners Manual - Maverick Boat Company
Maverick Master Angler 21 Owners Manual - Maverick Boat Company

Create successful ePaper yourself
Turn your PDF publications into a flip-book with our unique Google optimized e-Paper software.
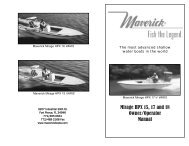
The most advanced shallow<br />
water boats in the world<br />
3207 Industrial 29th St.<br />
Fort Pierce, FL 34946<br />
772/465-0631<br />
772/489-<strong>21</strong>68 Fax<br />
www.maverickboats.com<br />
<strong>Master</strong> <strong>Angler</strong> <strong>21</strong><br />
Owner/Operator<br />
<strong>Manual</strong>
Table of Contents<br />
Welcome..................................................................P.1<br />
General Maintenance..............................................P.2<br />
Bilge Systems..........................................................P.2<br />
Cleaning..................................................................P.4<br />
Livewell Systems.....................................................P.4<br />
Props.......................................................................P.6<br />
GARBOARD DRAIN PLUG<br />
The screw-in Garboard Drain Plug is the small metal plug<br />
located at the bottom of the transom that allows the bilge area to<br />
drain when the boat is not in the water. It is designed so that it<br />
can be easily removed, but can be tightened so that it will not<br />
easily fall out. Once the boat is out of the water, the Garboard<br />
Drain Plug can be removed with a wrench to allow the bilge area<br />
to drain completely. Excess water in the bilge may be an indication<br />
of automatic bilge pump failure. See page 2 of your <strong>Maverick</strong><br />
<strong>Master</strong> <strong>Angler</strong> <strong>21</strong> Owner’s <strong>Manual</strong> for information on your boat’s<br />
bilge systems.<br />
Jackplates................................................................P.6<br />
Self-Bailing Cockpit.................................................P.7<br />
Ditty Bag..................................................................P.7<br />
<strong>Boat</strong> Layout.............................................................P.8<br />
Trolling Motors.........................................................P.10<br />
Transducer...............................................................P.10<br />
Wiring (diagram and fuse panel).............................P.11<br />
Instrument Panel.....................................................P.13<br />
Fuel System.............................................................P.14<br />
Fuel and Water Separator.......................................P.14<br />
Trim Tabs.................................................................P.15<br />
SERVICE, REPAIR AND WARRANTY ISSUES<br />
Your relationship with your Local <strong>Maverick</strong> Dealer should<br />
never end with the delivery of your new boat. Your Local <strong>Maverick</strong><br />
Dealership is where you will take your boat for service and repair,<br />
as well as to address any warranty issues. <strong>Maverick</strong> <strong>Boat</strong><br />
<strong>Company</strong> is fortunate to have an outstanding dealer network selling<br />
and servicing our boats. Our Dealers are knowledgeable in<br />
service and repairs for all our boat models, and have extensive<br />
expertise troubleshooting a wide range of boat related issues.<br />
All warranty claims and repair issues should be addressed<br />
to your Local <strong>Maverick</strong> Dealer. Through our Dealer Network, we<br />
should be able to address and fix repair issues and have you<br />
back on the water in a timely manner. A continued relationship<br />
with your Local <strong>Maverick</strong> Dealer will assure the best service and<br />
parts available, and will create a direct link from the boat owner<br />
to the factory.<br />
Aluminum Backing Plates (Diagram)......................P 16<br />
Garboard Drain Plug...............................................P.17<br />
<strong>Maverick</strong> Owner’s <strong>Manual</strong> -- 17
The above diagram shows all the aluminum backing<br />
plates (trolling motor, hinges originally placed in the deck of a<br />
<strong>Maverick</strong> <strong>Master</strong> <strong>Angler</strong> <strong>21</strong> during the construction process.<br />
Other backing plates indicated are for hinge screw locations.<br />
Dear New <strong>Boat</strong> Owner,<br />
Welcome to the <strong>Maverick</strong> Family!<br />
Thank you for choosing a <strong>Maverick</strong> boat to transport<br />
you to your angling dreams. We believe the <strong>Maverick</strong> <strong>Master</strong><br />
<strong>Angler</strong> <strong>21</strong> is the best all-purpose shallow water boat on the<br />
market, and we’re sure that you’ll be completely satisfied<br />
with the unmatched performance, quality and fishability of<br />
your new boat.<br />
We value your input, not just at the time of the sale,<br />
but throughout the entire boat ownership period, and we’ve<br />
taken steps to allow you to share that information. Over the<br />
next year or so, you will receive at least three questionnaires<br />
to fill out and return, and we’ll send you some great<br />
<strong>Maverick</strong> goodies for your efforts.<br />
You should also receive a gift certificate to Skiff<br />
World, <strong>Maverick</strong>’s On-Line parts and accessories store. Here<br />
you can share your pride of being a <strong>Maverick</strong> owner by purchasing<br />
great <strong>Maverick</strong> clothing and hats, or find small parts<br />
for your boat.<br />
Be sure to visit our website www.maverickboats.com<br />
to find information on company events like our Owner’s<br />
Tournaments and Corporate Calendar. You’ll find a wealth of<br />
information on our Forum, where you can ask questions, get<br />
answers and join other <strong>Maverick</strong> owners to discuss all applications<br />
of your boat. We’re proud to have you as a member<br />
of the <strong>Maverick</strong> family!<br />
Tight lines and screaming drags!<br />
D. Scott Deal<br />
<strong>Maverick</strong> Owner’s <strong>Manual</strong> --16<br />
<strong>Maverick</strong> Owner’s <strong>Manual</strong> -- 1
GENERAL MAINTENANCE<br />
<strong>Maverick</strong> <strong>Boat</strong> <strong>Company</strong>, Inc., advises owners that maintenance<br />
and repairs should be performed at an authorized <strong>Maverick</strong><br />
Dealer. The following information is general in nature and should not<br />
be considered a repair manual or guidelines set forth by <strong>Maverick</strong><br />
<strong>Boat</strong> <strong>Company</strong>.<br />
Bilge<br />
The bilge of your <strong>Maverick</strong> <strong>Master</strong> <strong>Angler</strong> <strong>21</strong> should always<br />
be checked after launch. A small amount of water in the bilge is normal<br />
for this area of the boat. Large amounts of water or any signs of<br />
fuel or oil requires immediate attention. Never pump fuel or oil overboard<br />
while your boat is in the water.<br />
The bilge pump is mounted to ABS Plastic<br />
Large quantities of water in the bilge may be an indication of<br />
a leak, or that your bilge pump is jammed, broken or has blown a 5<br />
amp fuse. First check that your bilge pump is running. Turn the<br />
switch on and listen for the bilge pump to turn on. If the bilge pump<br />
does not come on, check your fuse box to make sure the pump hasn’t<br />
blown a fuse. If the fuse is damaged, replace it, and turn the<br />
switch on again, listening for the bilge pump to come on.<br />
If the fuse is in working order, make sure the pump is turned<br />
off, then unhook the bilge pump from its cradle by squeezing the<br />
blue tabs on the sides of the pump and lifting. The entire bilge pump<br />
and wiring should release from the cradle. Check the underside and<br />
impeller areas for miscellaneous items that might clog the pump.<br />
TRIM TABS<br />
Trim tabs are a standard item on all the <strong>Maverick</strong> <strong>Master</strong><br />
<strong>Angler</strong> models. We use 9 X 12-inch Lenco electric trim tabs which<br />
are recessed in the transom so they can’t interfere with a hooked<br />
fish, yet will enhance the boat’s performance. Because the tabs are<br />
electric, there is no trim tab pump, and the possibility for fluid leaks<br />
as with other trim tab manufacturers.<br />
Trim tabs allow the boat operator to get the maximum performance<br />
from the boat, and are also great for balancing weight in<br />
the boat and for lifting or lowering the hull to accommodate for different<br />
running situations.<br />
Your port trim tab switch will greatly affect the port side of<br />
the boat, and the starboard switch will affect the starboard side,<br />
although they are operating tabs on the opposite sides. For<br />
instance, lowering the port trim tab creates stern lift on the port<br />
side, thus lowering the starboard bow. Raising the starboard trim tab<br />
lowers the stern on the starboard side and lifts the port bow. Use<br />
the tabs to adjust the attitude of the boat so that it sits evenly, and<br />
to raise or lower the bow to control running performance.<br />
Lightly tap the tabs with your fingers to allow the boat to<br />
adjust in response to the tabs without a dramatic change. Once the<br />
bow has lowered or raised to the point the ride has been adjusted<br />
for comfort and safety, tapping individual tabs can even improve the<br />
overall effects.<br />
Pushing on the top of the switch (Down), will lower the trim<br />
tab and force the bow down, which is important for running through<br />
heavy seas or a stiff chop. In most instances, both tabs should be<br />
lowered for an even bow down ride.<br />
Pushing the bottom of the switch (Up) will raise the tabs and<br />
lift the bow out of the water, for better running performance. To<br />
achieve the best running performance with your <strong>Master</strong> <strong>Angler</strong> <strong>21</strong>,<br />
use the engine trim in conjunction with your trim tabs to find the<br />
perfect amount of lift and a safe, comfortable ride.<br />
In cases of severe weather or high winds, it’s possible to use<br />
your trim tabs to lift the windward side of the boat to avoid spray<br />
blowing back onto the passengers. Do this in conjunction with lowering<br />
the bow to improve the overall ride.<br />
<strong>Maverick</strong> Owner’s <strong>Manual</strong> --2 <strong>Maverick</strong> Owner’s <strong>Manual</strong> --15
Fuel System<br />
Your <strong>Maverick</strong> <strong>Master</strong> <strong>Angler</strong> <strong>21</strong> comes with a 62-gallon aluminum<br />
fuel cell stationed midship between the stringers just below<br />
and in front of the console. The fuel fill receptacle is on the port<br />
gunwale forward of the console. There's also a recessed fuel overflow<br />
vent on the port side of the boat just below the fuel receptacle.<br />
We pressure test each fuel system when it is initially received<br />
at the factory and until it leaves the factory as a component on a<br />
new boat. Should you experience any fuel related problems or suspect<br />
problems with the fuel system, immediately take your boat to<br />
your local <strong>Maverick</strong> Dealer.<br />
Items such as monofilament, plastic, rocks and small<br />
clumps of debris can easily clog the impeller and prevent the<br />
bilge pump from operating correctly. Should you find a clog,<br />
remove the item, and turn the pump switch to the “on” position.<br />
If the pump runs, turn the switch “off,” and return the pump to<br />
its cradle.<br />
CAUTION--Be sure to turn off the engine and all electrical<br />
equipment when fueling the boat to prevent accidental<br />
discharges of static electricity. Use only the recommended<br />
gasoline (see Yamaha Owner's <strong>Manual</strong>). Do not use fuels<br />
with alcohol or alcohol-related derivatives that can cause<br />
marine fuel system hoses to deteriorate.<br />
All <strong>Maverick</strong> <strong>Master</strong> <strong>Angler</strong>’s have a two-part fuel cap to prevent<br />
accidental removal. To open the cap, push the cap down and<br />
turn counterclockwise. When the top portion of the cap releases and<br />
pops up, continue turning the cap until it releases from the gas fill.<br />
Fuel Water Separator<br />
Each <strong>Maverick</strong> <strong>Master</strong> <strong>Angler</strong> <strong>21</strong> is equipped with a fuel<br />
water separator to ensure maximum performance and protect the<br />
outboard engine from contaminated gasoline. The fuel separator is<br />
a metal cylindrical unit secured to the transom section of your starboard<br />
aft rigging box.<br />
The fuel separator can be checked by removing it from the<br />
mounting bracket in the rigging locker and dumping it into an<br />
approved waste collection device. If there appears to be an excessive<br />
amount of water, the filter component should be changed. See<br />
your authorized <strong>Maverick</strong> Dealer for replacement parts.<br />
In addition, the fuel separator should be changed as part of<br />
routine maintenance at 20, 50 and 100 hours checks.<br />
<strong>Maverick</strong> Owner’s <strong>Manual</strong> --14<br />
This bilge pump has been removed from it’s cradle and turned upside down.<br />
Inspect the impeller for clogs such as debris or small bits of monofilament.<br />
If the fuse is working and the impeller is not clogged,<br />
the bilge pump is probably bad and needs to be replaced.<br />
See your local <strong>Maverick</strong> Dealer for bilge pump replacement.<br />
If the bilge pump is working, and pumping water, but<br />
the water level in the bilge does not go down, you likely have<br />
a leak which requires immediate attention. Remove your boat<br />
from the water and see you local <strong>Maverick</strong> Dealer to have the<br />
bilge area inspected for possible leaks.<br />
Fuel or oil leaks also require immediate attention. Be<br />
sure to check for fuel or oil leaks frequently and repair any problems<br />
immediately. Any replacement of parts or repairs to the<br />
fuel system should be performed by a trained marine mechanic.<br />
See your authorized <strong>Maverick</strong> Dealer for parts and repair.<br />
Use bilge cleaner products to remove any obvious<br />
stains. Consult your Authorized <strong>Maverick</strong> Dealer for recommended<br />
types of bilge cleaners.<br />
<strong>Maverick</strong> Owner’s <strong>Manual</strong> --3
Cleaning<br />
Each <strong>Maverick</strong> <strong>Boat</strong> is constructed using the finest materials<br />
and components available. However, no material is immune to the<br />
ravages of the saltwater environment. After each use, your boat<br />
should be rinsed thoroughly with fresh water. A mild detergent may<br />
also be used to remove any dirt, silt or stains. A light coat of lubricant<br />
on metal railings, screws, and electrical connections will help<br />
prevent electrolysis. The same holds true for your trailer.<br />
LIVEWELL SYSTEMS<br />
The livewell system on your <strong>Maverick</strong> <strong>Master</strong> <strong>Angler</strong> <strong>21</strong> takes<br />
water through our exclusive Sea Chest system. Water enters the Sea<br />
Chest through the narrow openings in the bottom of the boat.<br />
A shut off valve is in place should there be a leak in the system<br />
or so that you can clean the filter while on the water. Should<br />
Instrument Panel<br />
The instrument panel on your <strong>Maverick</strong> <strong>Master</strong> <strong>Angler</strong> <strong>21</strong> is<br />
composed of two Yamaha digital gauges and a series of dual-activation<br />
switches (see photo below). The switches come with accessory<br />
plug-ins on the back of the panel for wiring additional electronics,<br />
pumps or electrical circuits.<br />
The standard digital gauges include a Yamaha Tachometer<br />
and a Yamaha Speedometer. The tachometer has several built in<br />
features including a water temperature monitor, oil level monitor and<br />
engine trim indicator. The speedometer includes a digital readout of<br />
the speed, an hour meter, trip meter and clock. For more information<br />
on the specifics of your Yamaha gauges, see your Yamaha<br />
Owner's <strong>Manual</strong>.<br />
The dual activation switches are set in a standard grid, with<br />
the first switch dedicated to your navigation lights, which includes<br />
you turn your pump on, and water does not come into the livewell,<br />
check to make sure the filter is not clogged, thus preventing water<br />
flow into the system. To clean the filter, turn the shut-off valve to the<br />
90-degrees off position, unscrew the filter and pull out the screen.<br />
Shown above is the standard console switch panel for the <strong>Master</strong> <strong>Angler</strong> <strong>21</strong>.<br />
your anchor light, and the bottom switch turns on only the anchor<br />
light. The second switch is an on-demand switch to run your bilge<br />
pump, and is used as a backup in case the float indicator in your<br />
bilge pump becomes clogged. The bottom switch turns on your cockpit<br />
courtesy lights. The Livewell 1 switch turns on your main livewell,<br />
which is the aft center well and the Livewell 2 switch and Livewell 3<br />
switch operate your forward livewell and the port aft live/release well.<br />
The final switch is your accessory 1 and accessory 5 switch used for<br />
running add-ons like recirculating pumps and console lights, as are<br />
the other accessory switch hook-ups.<br />
<strong>Maverick</strong> Owner’s <strong>Manual</strong> --4 <strong>Maverick</strong> Owner’s <strong>Manual</strong> --13
TROLLING MOTORS<br />
Your <strong>Master</strong> <strong>Angler</strong> <strong>21</strong> may have come already rigged with an<br />
optional trolling motor system. But even if you did not have the factory<br />
install the wiring and charging system, your boat has been built<br />
with the thought that these items might be added in the future.<br />
An aluminum trolling motor mounting plate was built into the<br />
bow of your <strong>Maverick</strong> during the manufacturing process. All trolling<br />
motors should be attached by drilling through the mounting plate<br />
with a 13/64” drill bit and 1/4” tap, and using 1/4” #20 machine<br />
screws from the trolling motor through the plate. The diagram on<br />
page 16 of your <strong>Maverick</strong> Owner’s <strong>Manual</strong> shows where the plate is<br />
located. The plate is designed to accommodate the mounting patterns<br />
of all trolling motor brands on the current market.<br />
Before your <strong>Maverick</strong> leaves the factory, a nylon rigging string<br />
is run through the stringer tubes to the bow of the boat, and<br />
secured just below the starboard shark eye placement. This nylon<br />
string will allow you to easily run your trolling motor wires to the console<br />
for hookup to any additional batteries. Access to the console<br />
end of the nylon rigging string is available through the access panel<br />
inside the console. This panel unscrews to provide access to the<br />
central hull, fuel and rigging areas.<br />
TRANSDUCER<br />
Your <strong>Maverick</strong> <strong>Master</strong> <strong>Angler</strong> <strong>21</strong> comes equipped with a factory<br />
installed Lowrance model PD-WDX-106-43 thru-hull transducer<br />
mounted in your bilge area. This thru-hull transducer is designed to<br />
work with all current Lowrance products with the exception of the X-<br />
47. Although Eagle is a Lowrance company, your transducer will not<br />
work with Eagle brand fish finders.<br />
The power cord for your Lowrance product connects directly<br />
to the unit and is run to the console fuse panel.<br />
It is possible for your Lowrance transducer to come loose<br />
from its attachment to the hull. If your bottom machine has problems<br />
establishing readings, open your bilge access plate and shine<br />
a flashlight in to see if your transducer has come loose. A loose<br />
transducer requires more than simple glue to fix, and should be<br />
repaired by your local <strong>Maverick</strong> Dealer.<br />
<strong>Maverick</strong> Owner’s <strong>Manual</strong> --10<br />
SELF BAILING COCKPIT<br />
The cockpit on your <strong>Maverick</strong> is designed to be self-bailing,<br />
so that all water that comes into the cockpit can immediately flush<br />
out the sides of the boat. This avoids holding standing water, and<br />
allows the boat to drain at all times, including while docked.<br />
Water drains out of the cockpit through the two aft cockpit<br />
drains located at the junction of your aft casting deck and the gunwales.<br />
The bilge is designed to drain any water entering the inside of<br />
the hull. Livewell and cockpit drains are closed systems that flush<br />
water out the drain scuppers in the stern. All hoses are sealed and<br />
double clamped during construction. Continuous or periodic running<br />
of the automatic bilge pump may be an indication of a hose leak or<br />
break in a seal, and should be investigated by your local <strong>Maverick</strong><br />
Dealer immediately.<br />
DITTY BAG<br />
Your should have received a brown Ditty Bag with your new<br />
<strong>Master</strong> <strong>Angler</strong> <strong>21</strong>. Inside the Ditty Bag are the following items:<br />
3 Large Livewell Standpipe<br />
3 Small Livewell Standpipe<br />
3 1-1/2”Livewell Pacifier Plug<br />
2 ignition keys and Emergency Kill Cord<br />
1 Yamaha Engine Owner’s <strong>Manual</strong><br />
1 Engine Start Cord<br />
1 Garboard Drain Plug<br />
1 Gas Fill Key<br />
2 Console Door Keys<br />
3 Cushions<br />
4 T-Lock Keys<br />
Various Product <strong>Manual</strong>s<br />
Please review the bag and make sure these items have been<br />
included with your new boat. If any items are missing, please notify<br />
your local <strong>Maverick</strong> Dealer immediately.<br />
<strong>Maverick</strong> Owner’s <strong>Manual</strong> --7
PROPS<br />
Prop selection on your <strong>Maverick</strong> <strong>Master</strong> <strong>Angler</strong> <strong>21</strong> is determined<br />
by your local <strong>Maverick</strong> Dealer, but based on recommendations<br />
made by <strong>Maverick</strong> <strong>Boat</strong> <strong>Company</strong> and Yamaha Marine to give<br />
your boat the maximum overall performance. Different prop designs<br />
may improve performance, or can be tailored to enhance specifics<br />
of boat and motor performance.<br />
For instance, a prop with a smaller pitch will increase speed<br />
out of the hole(jumping onto plane), but will produce a decreased<br />
overall speed compared to a prop with a larger pitch. Four or five<br />
bladed props may increase overall speed or allow the boat to run<br />
shallower, and some props can decrease cavitation at high speeds.<br />
Your individual prop needs will determine the prop design and size<br />
that best fits your performance requirements.<br />
Always inspect the engine and prop prior to launching your<br />
boat. Key prop issues include tangled fishing line or other types of<br />
debris, cracked blades or fluid leaking out of the seal. Look for fishing<br />
line tangled around the prop or lower unit seal. Consult your<br />
Yamaha Owner’s <strong>Manual</strong> to address these issues.<br />
JACKPLATES<br />
An optional jackplate may have been installed on your <strong>Master</strong><br />
<strong>Angler</strong> <strong>21</strong> to improve shallow water performance. A jackplate allows<br />
the motor to be trimmed straight up as opposed to the angled trimming<br />
of the stock engine trim motor, thus allowing more prop to<br />
remain in the water while running.<br />
Jackplates have very specific applications and performance<br />
requirements. Before operating your boat, you should carefully<br />
review your Jackplate Owner’s <strong>Manual</strong> and your Yamaha Engine<br />
<strong>Manual</strong>.<br />
*NOTE--The installation of a hydraulic jackplate greatly<br />
increases the amount of stress on the back of the boat. For this reason,<br />
we recommend all boats rigged with jackplates should also utilize<br />
a transom saver or other transom supporting device to minimize<br />
the stress on the entire transom area. Transom supporting devices<br />
can be purchased from your local <strong>Maverick</strong> Dealer or boating and<br />
trailer supply stores.<br />
<strong>Maverick</strong> Owner’s <strong>Manual</strong> --6<br />
WIRING<br />
A wiring diagram of your <strong>Master</strong> <strong>Angler</strong> <strong>21</strong> has been included<br />
to help troubleshoot any electrical problems and facilitate the<br />
attachment of additional electronics or electrical connections. We<br />
recommend you use a trained marine electrician for all electrical<br />
issues.<br />
The wiring diagram follows the wiring from the ATC 10 Way<br />
Fuse Block to their terminal attachments. It also includes a Trim Tab<br />
wiring schematic.<br />
GRN<br />
TRIM TABS<br />
YEL RED<br />
2<br />
ORN/BRN<br />
ORN/BRN/WHT<br />
ORN/GRY<br />
156 BLK<br />
Male BLUE*<br />
Bare--PINK<br />
---- ----<br />
---- ----<br />
10 15<br />
10 20<br />
5 5<br />
10<br />
1 2 1<br />
5<br />
4<br />
2<br />
ORN<br />
BLU<br />
BLK<br />
2<br />
ATC 10 WAY FUSEBLOCK<br />
14<br />
2<br />
14<br />
1 BLK w/1O RING<br />
7 BLK w/PO’S<br />
3<br />
8<br />
8<br />
8<br />
RED<br />
ORN<br />
ORN/BRN/BLU<br />
3<br />
RED<br />
NAV/ANC BILGE LIVEWELL 1 LIVEWELL 2 RED GRN<br />
ORN/GRY BRN BRN/WHT BRN/ORN BLU YEL<br />
NAV/GRY ORN/BRN/BLU ORN/BRN/WHT ORN/BRN ORN<br />
*BLU BLU CTSY BLK BLK<br />
ANC GRY/WHT<br />
A--12 WAY<br />
CAP<br />
B--9 WAY<br />
CAP<br />
C--4WAY<br />
CAP<br />
1 RED<br />
2 BRN<br />
3 PINK<br />
4 GRY<br />
5 GRY/WHT<br />
6 BRN/WHT<br />
7 BLK 12<br />
8 BLK<br />
9 BLK<br />
10 BLK<br />
11 BLK<br />
12 BLK<br />
1 ----<br />
2 BRN/ORN<br />
3 ----<br />
4 BLUE<br />
5 ----<br />
6 ----<br />
7 BLK<br />
8 BLK<br />
9 BLK<br />
1 RED<br />
2 GRN<br />
3 YEL<br />
4 BLU<br />
Red<br />
Black<br />
<strong>Maverick</strong> Owner’s <strong>Manual</strong> --11
Inside the console on the starboard side is the fuse panel<br />
and ground terminal. The ground terminal is the one with multiple<br />
back wires attached. All the grounds lead to the ground terminal,<br />
and then to the battery via a large diameter black wire.<br />
Fuses are color coded for sizing.<br />
5 amp BRN<br />
7.5 amp ORN<br />
10 amp RED<br />
15 amp BLU<br />
20 amp YEL<br />
30 amp GRN<br />
*--NOTE--Be sure to turn the shut-off valve to the 90-degree<br />
off position BEFORE unscrewing the filter cap (see photo below).<br />
Failure to do so will result in outside water entering the bilge area.<br />
Your <strong>Maverick</strong> is shipped with the shut-off valve turned to the<br />
off position (at a 90-degree angle). Turn the shut-off valve clockwise<br />
so that it is in line with the pipe to open the system to water flow. Be<br />
sure to open the directional spray head in your livewell as well. The<br />
directional spray head can be adjusted to increase or decrease the<br />
amount of water flowing into the livewell.<br />
FUSE LOCATION WIRE COLOR<br />
5 amp Bilge Brown<br />
5 amp NAV Lights Grey<br />
5 amp Anchor Light grey/white Stripe<br />
10 amp Livewell 1 Brown/White Stripe<br />
10 amp Livewell 2 Brown/Red Stripe<br />
There are always more available, but these are the primary<br />
fuses used in our electrical systems. Always use the recommended<br />
fuse amp sizes. Oversizing or using larger fuses than required can<br />
lead to electrical shorting and possible damage or destruction of the<br />
entire electrical system.<br />
There are open slots in both the ground and the fuse sides<br />
for additional electrical hook-ups. The accessory switches should be<br />
used for any additional hook-ups to protect the entire electrical system.<br />
All additional electrical hook-ups should be preformed by a<br />
qualified marine electrician.<br />
As a standard practice, we run pull cords forward and aft for<br />
any additional wiring needs. For your convenience and ease we have<br />
included a nylon rigging string that runs through the rigging tubes<br />
and is attached to the bow just below the starboard shark eye placement.<br />
The nylon string will allow you to easily run any additional<br />
wiring through the rigging tubes, thus protecting them from outside<br />
elements. We also run a string aft to the rigging box.<br />
<strong>Maverick</strong> Owner’s <strong>Manual</strong> --12<br />
The livewell system at top is open and allows water to flow freely through the system.<br />
The lower livewell system is closed (90 degrees) to prevent water from entering.<br />
Your <strong>Master</strong> <strong>Angler</strong> <strong>21</strong> comes with two standpipes and a<br />
pacifier-style drain plug to control water levels inside the livewell.<br />
The smaller standpipe is for use with crustaceans like shrimp and<br />
crabs that prefer a lower water level. The taller standpipe is for baitfish,<br />
and the drain plug is to hold water or seal the compartment.<br />
On rare occasions, the livewell will not pump water even<br />
though the switch is turned on, the system is open and the livewell<br />
pump is running. If that occurs and there is not a clog in the filter,<br />
shift the throttle into reverse and back the boat several feet to purge<br />
a possible air pocket in the system.<br />
<strong>Maverick</strong> Owner’s <strong>Manual</strong> --5
<strong>Boat</strong> Layout<br />
Your <strong>Maverick</strong> <strong>Master</strong> <strong>Angler</strong> <strong>21</strong> is designed to create the maximum amount of storage capacity without affecting fishing ability.<br />
Livewells, gasketed and guttered storage compartments and lockers are built to protect your gear from the elements. The poling tower<br />
and your choice of Yamaha engines are optional.<br />
Become familiar with the boat layout and features to take advantage of their special qualities. All <strong>Maverick</strong> <strong>Boat</strong>s are designed by<br />
anglers, for anglers, to offer the best fishing features in the flats skiff market. The <strong>Maverick</strong>’s superior layout offers hands-free fishability,<br />
with the most storage and casting room available.<br />
<strong>Maverick</strong> Owner’s <strong>Manual</strong> --8 <strong>Maverick</strong> Owner’s <strong>Manual</strong> --9