

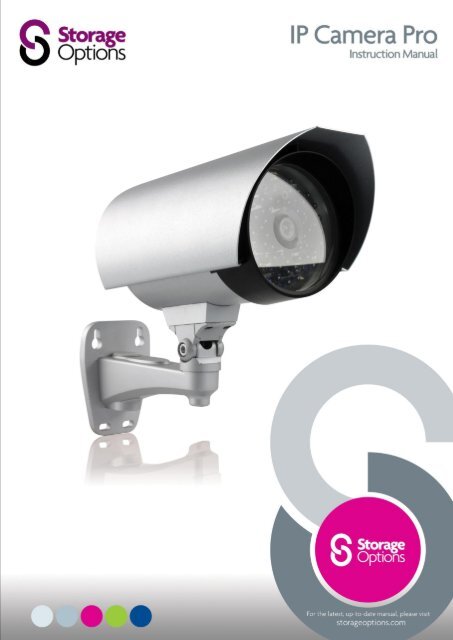
Storage Options SON-IPC2 Pro Outdoor IP Camera
Storage Options SON-IPC2 Pro Outdoor IP Camera
Storage Options SON-IPC2 Pro Outdoor IP Camera

You also want an ePaper? Increase the reach of your titles
YUMPU automatically turns print PDFs into web optimized ePapers that Google loves.
<strong>IP</strong> CAMERA PRO<br />
INSTRUCTION MANUAL<br />
For the latest, up-to-date manual, please visit www.storageoptions.com
IMPORTANT SAFEGUARD<br />
DISCLAIMER<br />
All lead-free products offered by the company comply with the requirements of the European law on<br />
the Restriction of Hazardous Substances (RoHS) directive, which means our manufacture processes<br />
and products are strictly “lead-free” and without the hazardous substances cited in the directive.<br />
The crossed-out wheeled bin mark symbolizes that within the European Union the product must be<br />
collected separately at the product end-of-life. This applies to your product and any peripherals<br />
marked with this symbol. Do not dispose of these products as unsorted municipal waste. Contact your<br />
local dealer for procedures for recycling this equipment.<br />
We reserve the right to revise or remove any content in this manual at any time. We do not warrant or assume any legal liability<br />
or responsibility for the accuracy, completeness, or usefulness of this manual. The content of this manual is subject to change<br />
without notice.<br />
GROUNDING<br />
This is a Safety Class 1 <strong>Pro</strong>duct (provided with a protective earthing ground incorporated in the power cord). The mains plug<br />
shall only be inserted in a socket outlet provided with a protective earth contact. Any interruption of the protective conductor<br />
inside or outside of the instrument is likely to make the instrument dangerous. Intentional interruption is prohibited.<br />
WATER & MOISTURE<br />
Do not expose this product to dripping or splashing and that no objects filled with liquids, such as vases, shall be placed on the<br />
product.<br />
TRADEMARK ACKNOWLEDGEMENTS<br />
Internet Explorer, Microsoft, Windows, Mozilla & QuickTime are registered trademarks of the respective holders.<br />
MPEG4 LICENCING<br />
THIS PRODUCT IS LICENSED UNDER THE MPEG4 VISUAL PATENT PORTFOLIO LICENSE FOR THE PER<strong>SON</strong>AL AND NON-COMMERCIAL USE OF A CONSUMER FOR (i)<br />
ENCODING VIDEO IN COMPLIANCE WITH THE MPEG4 VISUAL STANDARD (“MPEG-4 VIDEO”) AND/OR (ii) DECODING MPEG4 VIDEO THAT WAS ENCODED BY A<br />
CONSUMER ENGAGED IN A PER<strong>SON</strong>AL AND NON-COMMERCIAL ACTIVITY AND/OR WAS OBTAINED FROM A VIDEO PROVIDER LICENSED BY MPEG LA TO PROVIDE<br />
MPEG4 VIDEO. NO LICENSE IS GRANTED OR SHALL BE IMPLIED FOR ANY OTHER USE. ADDITIONAL INFORMATION INCLUDING THAT RELATING TO PROMOTIONAL<br />
INTERNAL AND COMMERCIAL USES AND LICENSING MAY BE OBTAINED FROM MPEG LA, LLC. SEE HTTP://WWW.MPEGLA.COM.<br />
GPL LICENCING<br />
This product contains codes which are developed by Third-Party-Companies and which are subject to the GNU General Public<br />
License (“GPL”) or the GNU Lesser Public License (“LGPL”).<br />
The GPL Code used in this product is released without warranty and is subject to the copyright of the corresponding author.<br />
Further source codes which are subject to the GPL-licenses are available upon request. We are pleased to provide our<br />
modifications to the Linux Kernel, as well as a few new commands, and some tools to get you into the code. The codes are<br />
provided on the FTP site, and please download them from the following site or you can refer to your distributor:<br />
ftp://ftp.dvrtw.com.tw/GPL/AV074/<br />
Page 2
TABLE OF CONTENTS<br />
OVERVIEW 4<br />
1.1 – <strong>Pro</strong>duct Features<br />
1.2 – Package Contents<br />
1.3 – Cable Overview<br />
INSTALLATION AND CONNECTION 5<br />
2.1 – Install The <strong>Camera</strong><br />
2.2 – Connect To Power<br />
BEFORE USING YOUR NETWORK CAMERA 7<br />
ACCESSING THE CAMERA VIA VIDEO VIEWER 8<br />
4.1 – Accessing The <strong>Camera</strong><br />
4.2 – Control Panel Overview<br />
4.3 – Frequently Used Functions<br />
SYSTEM CONFIGURATION 13<br />
5.1 – General<br />
5.2 – Network<br />
5.3 – Video<br />
5.4 – <strong>Camera</strong><br />
ACCESSING THE CAMERA VIA YOUR WEB BROWSER 20<br />
6.1 – Accessing The <strong>Camera</strong><br />
6.2 – Control Panel Overview<br />
ACCESSING THE CAMERA VIA YOUR MOBILE PHONE 23<br />
7.1 – Checklist Before Using<br />
7.2 – <strong>Pro</strong>gram Download / Installation<br />
7.3 – <strong>Pro</strong>gram Setup<br />
CREATING AN ACCOUNT FOR DDNS SERVICE 25<br />
APPENDIX - PRODUCT SPECIFICATIONS 27<br />
4<br />
4<br />
4<br />
5<br />
6<br />
8<br />
8<br />
10<br />
14<br />
16<br />
18<br />
19<br />
20<br />
21<br />
23<br />
23<br />
24<br />
Page 3
OVERVIEW<br />
1.1 – <strong>Pro</strong>duct Features<br />
True Day & Night surveillance & large aperture lens (F1.4)<br />
The best cost / performance outdoor solution with <strong>IP</strong>65<br />
IR effective distance up to 30 metres with 56 IR LEDs<br />
Smart Light Control to avoid overexposure<br />
Excellent outdoor ID design with cable management<br />
Low-latency video streaming with H.264 compression format<br />
Free CMS software with E-Map for multiple devices control & surveillance<br />
Powerful mobile surveillance supporting iPhone, BlackBerry, WinCE & J2ME<br />
Motion detection and alarm notification functions<br />
1.2 – Package Contents<br />
Network <strong>Camera</strong> Installation Sticker<br />
Installation Guide RJ45 Cable Extender Adapter<br />
Mains Adapter RJ45 Network Cable<br />
CD-ROM Disc (including user manuals “Video Viewer” software)<br />
1.3 – Cable Overview<br />
CABLE DESCR<strong>IP</strong>TION<br />
Connect it to the supplied RJ45 cable extender adapter for cable extension, and prepare<br />
RJ45 Network Cable<br />
another RJ45 network cable with suitable length for your connection.<br />
Remove the insulating coating of these two wires, and twist them together to reset to<br />
default. This will reset all parameters, including the <strong>IP</strong> address to factory default settings.<br />
Reset Wires<br />
Note: Disconnect power before twisting these two wires together, and connect to power<br />
again to reset default. When fitting, you may wish to provide internal cabling access to<br />
these wires<br />
Power Cable Connect to DC 12V power supply.<br />
Page 4
INSTALLATION AND CONNECTION<br />
2.1 – Install The <strong>Camera</strong><br />
Paste the supplied installation sticker to the location<br />
where your camera will be installed.<br />
Based on your installation environment, drill a hole in<br />
the middle of the sticker for the power and data cable to<br />
put through later if necessary.<br />
1)<br />
2)<br />
3)<br />
Slightly fasten the screws to (a) and (b) as indicated, and<br />
make sure the screws are not fully tightened.<br />
Based on your installation environment, put the power and data cable through the bracket, and determine the<br />
cabling of your camera:<br />
3-1: The cable walks along the wall<br />
3-2: The cable is hidden on the other side of the wall<br />
Hook the bracket with the camera to the screws fastened in step 2, and push it down to fix the bracket.<br />
Secure the screws on (a) and (b), and fasten the other two screws to (c) and (d) to fix the bracket.<br />
Page 5
Adjust the angles of the camera:<br />
(e)<br />
(f)<br />
Adjust the vertical angle of the camera, and fix it with the screw and wrench supplied with the socket.<br />
Loosen the screw a little on the camera joint with the supplied wrench to adjust the horizontal angle of the<br />
camera, then re-tighten to fix it in place.<br />
2.2 – Connect To Power<br />
Connect the power adapter to the camera’s power connector and power outlet.<br />
Page 6
BEFORE USING YOUR NETWORK CAMERA<br />
Before using the network camera, make sure:<br />
1) You have installed the supplied CMS software, “Video Viewer”.<br />
2) You have configured the network settings, and the network connection is fine.<br />
If not, please refer to the Quick Start Guide for instructions on how to do this.<br />
The camera can be accessed via supplied CMS software “Video Viewer”, or via Web browser such as “Microsoft<br />
Internet Explorer” or “Mozilla Firefox”, depending on different using situations.<br />
To check or configure up to 16 surveillance devices simultaneously with the record function, please use “Video<br />
Viewer”.<br />
For details about using Video Viewer, please refer to “ACCESSING THE CAMERA VIA VIDEO VIEWER” on page 8, and<br />
“SYSTEM CONFIGURATION” on page 13.<br />
To view or configure this network camera only, it’s recommended to use a web browser such as “Microsoft Internet<br />
Explorer” or “Mozilla Firefox”.<br />
For details about using the web browser, please refer to “ACCESSING THE CAMERA VIA YOUR WEB BROWSER” on<br />
page 20.<br />
Page 7
ACCESSING THE CAMERA VIA VIDEO VIEWER<br />
4.1 – Accessing The <strong>Camera</strong><br />
Step 1: Double-click on your PC desktop to open Video Viewer. By default, the “Address Book” panel will be<br />
displayed on the right side of the control panel.<br />
Step 2: Click “ ” to select the <strong>IP</strong> address of the camera you intend to connect, and double-click it.<br />
Step 3: The live view is displayed in the Video Viewer<br />
4.2 – Control Panel Overview<br />
Two control panels are available and can be switched depending on your using habit.<br />
Simple Version:<br />
Page 8
Full Function Version:<br />
Main Button Overview:<br />
Button<br />
Simplified Full Function<br />
Function Description<br />
Address book<br />
Miscellaneous<br />
control<br />
Log<br />
/ / Record / Stop<br />
Snapshot<br />
Click to show the predefined <strong>IP</strong> address(es). You can add, remove or search the <strong>IP</strong> address to log<br />
in the DVR remotely.<br />
Remote<br />
config<br />
Record<br />
setting<br />
Custom<br />
setting<br />
Click to go to the detailed system configuration.<br />
Click to go to the detailed record setting.<br />
Click to choose the language of this program, or set the password when<br />
activating this program.<br />
Click to view all event and recording logs, search the desired log(s) by date, or playback the<br />
recording of the selected log.<br />
Click to start / stop the manual recording.<br />
The record button will be disabled when the reserved disk capacity set in “Record Setting” is<br />
larger than the current disk capacity.<br />
Click to take a snapshot of the current view. The snapshot will be saved in the path you specified<br />
in “Record Setting”.<br />
Information Click to show the current network connection details.<br />
Page 9
4.3 – Frequently Used Functions<br />
Record:<br />
To record, click “ ” or “ ” → “ ” to go to the “Record Setting” page.<br />
In the “Record Setting” page, you can set the following items:<br />
Record type<br />
Pre / post-event record time (0~10 seconds)<br />
Record time setting<br />
Record path<br />
Note: The record function will be disabled when the reserved disk capacity in “Reserved(MB)” is larger than the<br />
current disk capacity in “Free(MB)”.<br />
When “Manual” is checked, click “ ” or “ ” on the main control panel to start the manual recording<br />
immediately, and the recordings will be saved in the location specified in “Record Path”. When “Motion” and / or<br />
“Alarm” are checked, the recording function will be enabled for any motion or alarm event, and the recordings will<br />
be saved in the location specified in “Record Path”.<br />
You can also set a recording schedule from the “Record Setting” page, by setting colour coded blocks of time.<br />
Schedule: Alarm: Motion:<br />
Page 10
Playback:<br />
To play a recording, click “ ” or “ ”, and select the “Record” tab. A list of all the recordings will be shown by<br />
default, and you can also sort the logs by date, start time, end time, etc, by simply clicking the column header.<br />
Page 11
Firmware Upgrade:<br />
This function allows the user to upgrade to the latest version of the camera’s firmware.<br />
Note: Before using this function, make sure you have the correct upgrade files from www.storageoptions.com.<br />
Step 1: Click “ ” and select the <strong>IP</strong> address of your network camera in the address book.<br />
Step 2: Click “ ” to show the upgrade page, “Update Server”.<br />
Step 3: Click “Add” to browse to the upgrade files.<br />
Step 4: Click “Upgrade Firmware” to start firmware upgrade.<br />
Note: The firmware upgrade process should take a few minutes. Do not disconnect the power during this time, or<br />
the upgrade may fail. The camera will reboot after the upgrade.<br />
Page 12
SYSTEM CONFIGURATION<br />
Before using the network camera, make sure you have installed the supplied “Video Viewer” software, and configure<br />
the camera’s network settings. If not, please refer to your installer.<br />
Note: You need to use the administrator account to enter the system configuration page. If you are logged in as a<br />
user, please sign out and re-log into the camera using an admin account.<br />
Click “ ” and select “ ” to enter the system configuration page. All the system configurations are listed as a<br />
tree structure on the left panel as follows.<br />
Main Menu Sub Menu Functionality<br />
General<br />
1. Check the firmware version and MAC address of the camera.<br />
2. Change the camera title.<br />
Log Check the system event logs.<br />
Account<br />
1. Create a new user account with different access privilege.<br />
2. Modify or delete an existing user account.<br />
Online User Check the current online user(s).<br />
Trigger<br />
1. Enable / disable the motion detection.<br />
2. Set the motion detection area.<br />
3. Select the event notification method.<br />
Network Configure network settings.<br />
QoS Limit the data flow for live streaming.<br />
DDNS Enter DDNS information when the network type is PPPOE or DHCP.<br />
SNTP Synchronize your camera time with the networked computer systems.<br />
FTP Enter the FTP information for event notifications when “FTP” is chosen in “General” → “Trigger”.<br />
Mail Enter Email information for event notifications when “Email” is chosen in “General” → “Trigger”.<br />
Filter Choose to permit or block the <strong>IP</strong> address(es) which can access this camera.<br />
UPnP Allow this camera to be detected among devices within the same network area for easy and quick usage.<br />
Video Set the image resolution, quality and frame rate.<br />
<strong>Camera</strong> Adjust the camera parameters if necessary.<br />
Colour Adjust the color performance.<br />
Time Set daylight saving time and the current time.<br />
Page 13
5.1 – General<br />
In “General”, you can check the general information for your<br />
<strong>IP</strong> camera, such as the firmware version and MAC address,<br />
and also modify the identification name of your camera (up<br />
to 15 alphanumeric characters).<br />
Log:<br />
To quickly search the system log by event type, click the<br />
drop-down list to select the system log type you want to<br />
check, and click “Reload” to refresh the list.<br />
To clear all system event logs, click “Clear”.<br />
Account:<br />
You can create a new account with different user access privilege, or delete / modify an existing account setting.<br />
DO NOT ATTEMPT TO DELETE THE ADMIN ACCOUNT.<br />
Step 1: Click “New”, and fill in the following information.<br />
Option Desciption<br />
User Name:<br />
Password:<br />
User Level:<br />
Life Time:<br />
Set a user name that will be used for camera access.<br />
The user name can be up to 16 alphanumeric characters.<br />
Set the password that will be used for remote login.<br />
The password can be up to 16 alphanumeric characters.<br />
Set the permission level of an account to give access to<br />
control different functions. There are four user levels:<br />
Supervisor, Power, Normal and Guest.<br />
Select how long this account is allowed to stay online.<br />
(1 / 5 / 10 / 60 mins / 1 day / infinite)<br />
Step 2: Click “Apply” to save your settings and create the<br />
new account.<br />
Page 14
Online User:<br />
Here you can check which users are currently logged into<br />
the camera.<br />
To refresh the list, click “Refresh”.<br />
Trigger:<br />
You can set the motion or alarm detection and select the notification function.<br />
Trigger Setting:<br />
In this section, you can select to enable or disable the alarm or motion detection.<br />
Item Description<br />
Select to enable or disable the motion detection function.<br />
Motion:<br />
When “Enable” is selected, click “Setting” to enter the motion detection area setting page as<br />
follows:<br />
Sensitivity:<br />
Set the detection sensitivity (High / Normal / Low).<br />
Area Setting:<br />
Set the motion detection area by selecting the area grids with your mouse. Pink grids<br />
represent the area that is not being detected while the transparent grids are the area under<br />
detection. You can set multiple areas under detection.<br />
Click “-” (Clear All) to set the whole area undetected.<br />
Click “+” (Select All) to set the whole area under detection.<br />
Duration: Set the duration time for trigger recording (5 / 10 / 20 / 40 seconds).<br />
Page 15
5.2 – Network<br />
You can set the network configuration of the <strong>IP</strong> camera<br />
depending on your network type.<br />
For more details, please refer to the Quick Start Guide.<br />
QoS:<br />
Quality of Service is the ability to control the data flow for<br />
real-time streaming. This function is important if your<br />
network bandwidth is insufficient and you have other<br />
devices that share bandwidth.<br />
To use QoS, check “QoS Enable” and set the maximum<br />
upload rate from 256 to 10240 kbps.<br />
DDNS:<br />
Select “On” when the selected network type in “Network” is<br />
“PPPOE” or “DHCP”. For details, please refer to “CREATING<br />
AN ACCOUNT FOR DDNS SERVICE” on page 25.<br />
SNTP:<br />
Simple Network Time <strong>Pro</strong>tocol is used to synchronize your camera time with the networked computer systems.<br />
Function Description<br />
GMT: Once users choose the time zone, the network camera will adjust the local area time of the system automatically.<br />
Server Name: Simply use the default SNTP server (For example, tock.stdtime.gov.tw) or change to another server with which users are familiar.<br />
Sync Period: Select “Daily” to synchronize the camera time with the network time every day or “None” to turn off this function.<br />
Sync Server Time: Click and the network camera will synchronize the time with the network time.<br />
Page 16
Mail:<br />
Enter the details of an e-mail account you wish to use for<br />
notifications and click “Apply” to confirm. The information<br />
you set here will be applied when “Email” is selected in<br />
“General” → "Trigger".<br />
Function Description<br />
Server: Enter the SMTP server address provided from your e-mail system supplier.<br />
Port: Enter the port number provided from your e-mail system supplier. If this is left blank, the e-mail server will default to port 25.<br />
Mail From: Enter the entire mail address to ensure e-mails will not be blocked by SMTP.<br />
SSL Encryption: Select “Yes” if your e-mail server is using SSL encryption to protect your e-mail content from unauthorized access.<br />
Verify Password: Some mail servers are required to verify the password. Please enter the “user name” and “password”.<br />
E-Mail Address: Add the e-mail address(s) of the assigned recipient(s).<br />
Filter:<br />
Choose to permit or block the <strong>IP</strong> address(es) which can<br />
access this camera.<br />
Function Description<br />
Error Login Count:<br />
Set the maximum count for login failure. When the maximum count is reached, the <strong>IP</strong> address trying to access the network<br />
camera will be locked.<br />
Error Lock Time: Set the lock time in minutes when the maximum count of error login for an <strong>IP</strong> address is reached.<br />
Echo Request:<br />
Select “Non-Block” to allow other users to use the ping command to detect the <strong>IP</strong> address of your network camera, or “Block” to<br />
deny the ping command request.<br />
Filter: Choose to enable (YES) or disable (NO) the filter function.<br />
Apply:<br />
If “YES” is selected, choose whether you want to permit (Allow) or block (Deny) the <strong>IP</strong> address list below.<br />
To add an item to the <strong>IP</strong> address list, key in the <strong>IP</strong> address in “<strong>IP</strong> Address”, and click “Add”.<br />
To remove an existing item in the <strong>IP</strong> address list, click the item you want to remove, and click “Delete”.<br />
Click “Apply” on the bottom right corner when any change is made in this menu, or the change will not be recorded in the<br />
system.<br />
Page 17
UPnP:<br />
Universal Plug and Play allows devices to connect seamlessly<br />
in the home and corporate environments and simplify<br />
installation of computer components.<br />
Check “Enable UPnP” to allow the network camera to be<br />
detected among devices within the same network area, and<br />
set the identification name of the camera in “Friendly<br />
name”.<br />
5.3 – Video<br />
Set the image resolution, quality and frame rate.<br />
Item Description<br />
JPEG / MPEG / H.264:<br />
Frame Rate:<br />
Select the image resolution and quality.<br />
Image Resolution: CIF / 4CIF<br />
Image Quality: BEST / HIGH / NORMAL / LOW<br />
The frame rate allowed to each viewer can be adjusted to adapt to the bandwidth on the network. Set the desired image<br />
frequency to the maximum (FULL) or to a specified frame rate: (1/2; 1/3; 1/4; 1/5; 1/10; 1/15; 1/20; 1/25; 1/30).<br />
The actual frame rate depends on the actual network connection, and may be lower than the specified one.<br />
Page 18
5.4 – <strong>Camera</strong><br />
Adjust the camera parameters if necessary.<br />
Note: To preview changes, click “Apply”.<br />
Item Description<br />
Backlight:<br />
Mirror:<br />
IR Control:<br />
White Balance:<br />
Brightness:<br />
Sharpness:<br />
Colour:<br />
AGC:<br />
The backlight is adjustable to compensate for an area that is overpowered by brightness because of excessive light. The image<br />
will be properly exposed for clearness. Select to activate (ON) or disable (OFF) this function.<br />
Note: This function is only available in day mode.<br />
Mirror is used when you want to flip the images horizontally based on your installation situation.<br />
The options are: ON / OFF.<br />
Select “IR PRO” to smartly activate the IR LEDs when needed, “Always On” to always activate the IR LEDs, or “Always Off” to<br />
deactivate the IR LEDs.<br />
The white balance function processes the current image to retain colour balance over a colour temperature range. According to<br />
different colour temperatures and installation situations, set the white balance function to a suitable mode.<br />
The options are: Auto / AWB1 / AWB2 / AWB3.<br />
Brightness helps to adjust the image based on different lighting conditions. Click and drag the slider to adjust the brightness.<br />
Applicable values are from 0~127. The larger the value, the brighter the image.<br />
Sharpness enhances the clarity of image detail by adjusting the aperture and sharpening the edges in the pictures. Click and<br />
drag the slider to adjust the sharpness. Applicable values are from 2~15. The larger the value, the sharper the image.<br />
Colour helps to adjust the image saturation through the camera. Click and drag the slider to adjust the colour level. Applicable<br />
values are from 0~127. The larger the value, the thicker the image.<br />
Adjusts the amplitude of the signal input according to different light conditions. Click and drag the slider to adjust the amplitude<br />
of the signal input. Applicable values are from 0~255. The larger the value is, the more the signal noise there will be.<br />
Default: Click to restore all changes to default values.<br />
Colour:<br />
Adjust the colour performance of the camera, including Brightness,<br />
Contrast, Hue and Saturation. Click and drag the slider to preview<br />
the colour change on the live view panel and adjust the image<br />
colour. Click “Apply” to confirm the change.<br />
To restore the default values, click “Default”, and click “Apply” to<br />
confirm the change.<br />
Time:<br />
Set daylight saving time and the current time.<br />
Page 19
ACCESSING THE CAMERA VIA YOUR WEB BROWSER<br />
It is also possible to access the <strong>IP</strong> camera via a web browser, such as Microsoft Internet Explorer or Mozilla Firefox.<br />
However, you can only access one camera at a time through a Web browser. If you wish to view multiple cameras,<br />
please use the included “Video Viewer” software. Alternatively, you can open separate tabs / windows for each<br />
camera in your Web browser.<br />
Before using the network camera, make sure you have configured the network settings and have the camera’s <strong>IP</strong><br />
address, user name and password to hand. If not, please refer to the installation guide.<br />
6.1 – Accessing The <strong>Camera</strong><br />
Step 1: Open your web browser, and key in http://ipaddress:portnum in the URL<br />
address box.<br />
For example, for <strong>IP</strong> address 192.168.1.10 and port number 81, please key in<br />
”http://192.168.1.10:81” into the URL address box, and press “Enter”.<br />
Step 2: In the login page, key in the user name and password, and enter the<br />
security code from the image below. Click “LOGIN” to access camera controls.<br />
Step 3: The wizard will analyze your network environment.<br />
To continue setting the password, date & time, and<br />
network, click “Next” and follow the step-by-step<br />
instructions.<br />
To skip the wizard and directly access the camera<br />
live view, click “Close”.<br />
To directly access the camera live view without<br />
starting the wizard for the next login, check “Do not<br />
start wizard at login”.<br />
Step 4: When you have logged in successfully, the camera’s<br />
live view is shown.<br />
Page 20
6.2 – Control Panel Overview<br />
Live View Panel:<br />
Function Icon User Level Description<br />
Media Type<br />
Video Quality<br />
Video Resolution<br />
Snapshot<br />
Flip<br />
Full Screen<br />
Supervisor<br />
Power / Normal User<br />
Guest<br />
Supervisor<br />
Power / Normal User<br />
Supervisor<br />
Power / Normal User<br />
Supervisor<br />
Power / Normal User<br />
Supervisor<br />
Power / Normal User<br />
Supervisor<br />
Power / Normal User<br />
Select the web transmission format from the drop-down list:<br />
H.264 / MPEG-4 / Motion JPEG / QuickTime<br />
For users using Mozilla Firefox, only “QuickTime” is selectable.<br />
QuickTime is Apple Inc.’s multimedia software. You need to have QuickTime<br />
installed on your operating system before selecting “QuickTime”. When it is<br />
selected, you will be promoted to enter the user name and password to access the<br />
camera.<br />
Click & drag the slider to select the video quality:<br />
Basic / Normal / High / Best<br />
Select the video resolution from the drop list:<br />
4CIF / CIF.<br />
Click to take a snapshot for the current view, and a new browser window will be<br />
opened to display the captured image.<br />
Click to flip the image 180 0 anti-clockwise when necessary.<br />
Click to display the image in full screen.<br />
Page 21
System Configuration Panel:<br />
Click “Configuration” to enter the configuration page.<br />
Note: You need to be the supervisor to enter the system<br />
configuration page. If not, please re-log into the camera with<br />
an admin account.<br />
The functions are categorized into three menus: Network,<br />
<strong>Camera</strong> and General.<br />
For details about “General”, please refer to “5.1 – General” on page 14, and “5.3 – Video” on page 18.<br />
For details about “Network”, please refer to “5.2 – Network” on page 16.<br />
For details about “<strong>Camera</strong>”, please refer to “5.4 – <strong>Camera</strong>” on page 19.<br />
Main Menu Sub Menu Reference<br />
Network Network � Remote Config � Network<br />
QoS � Remote Config � Network � QoS<br />
DDNS � Remote Config � Network �DDNS<br />
SNTP � Remote Config � Network �SNTP<br />
FTP � Remote Config � Network �FTP<br />
Mail � Remote Config � Network �MAIL<br />
Filter � Remote Config � Network �Filter<br />
UPnP � Remote Config � Network �UPnP<br />
<strong>Camera</strong> Colour � Remote Config � Colour<br />
Time � Remote Config � Time<br />
Advance � Remote Config � <strong>Camera</strong><br />
General General � Remote Config � Custom Setting<br />
Server Log � Remote Config � General � Log<br />
Login � Remote Config � General � Account<br />
Account � Remote Config � General � Account<br />
Trigger � Remote Config � General � Trigger<br />
Video � Remote Config � Video<br />
Upgrade �<br />
For details, please refer to “Firmware Upgrade” on page 6.<br />
Page 22
ACCESSING THE CAMERA VIA YOUR MOBILE PHONE<br />
7.1 – Checklist Before Using<br />
Make sure your PDA or mobile phone conform to the following requirements:<br />
Device Make Sure...<br />
WinCE-Based PDA<br />
J2ME-Based Mobile Phone<br />
iPhone<br />
The operating system is<br />
Windows Mobile 5.0 Packet PC / 6.0 <strong>Pro</strong>fessional*.<br />
Windows Mobile 5.0 Smartphone / 6.0 Standard is NOT supported.<br />
J2ME MIDP2.0 is supported.<br />
Internet services via Wireless or GPRS / 3G networks are subscribed and available to use.<br />
For details, please check with your local network operator or service provider.<br />
J2ME is supported.<br />
Internet services via GPRS / 3G networks are subscribed and available to use.<br />
For details, please check with your local network operator or service provider.<br />
The port number of the connected device is NOT 80. The suggested port number is 88.<br />
Internet services via 3G networks are subscribed and available to use.<br />
For details, please check with your local network operator or service provider.<br />
Your mobile phone is available to access “App Store”.<br />
* We do not guarantee the compatibility of the mobile surveillance software in every touch panel PDA brand with the operating system of Windows Mobile 5<br />
Packet PC / 6.0 <strong>Pro</strong>fessional. Please check with your distributor for details.<br />
7.2 – <strong>Pro</strong>gram Download / Installation<br />
For iPhone:<br />
Step 1: Go to “App Store” via your iPhone, and search our program with one of the following keywords:<br />
EagleEyes<br />
PTZ<br />
<strong>IP</strong>CAM<br />
Surveillance<br />
Note: You might be charged for Internet access via wireless or 3G networks. For the Internet access rate details,<br />
please check with your local network operator or service provider.<br />
Step 2: Follow the on-screen instructions to download and install the program. “ ” will be shown on the iPhone<br />
desktop for quick access when the program is installed successfully.<br />
Page 23
For WinCE & J2ME Based Mobile Phone:<br />
Step 1: To download the program for mobile surveillance, please visit the following website address from your PDA<br />
or mobile phone: http://www.storageoptions.com/mobile<br />
Note: The Internet access setting via wireless or GPRS / 3G networks varies depending on different PDA or mobile<br />
phone brand. For details, please refer to its individual user manual, or check with your local network operator or<br />
service provider.<br />
Note: You may be charged for Internet access via wireless or GPRS / 3G networks. For the Internet access rate<br />
details, please check with your local network operator or service provider.<br />
You will see the following four programs are available:<br />
GPRS_3G_Software:<br />
EagleEyes (J2ME_NewVersion):<br />
EagleEyes (for WinCE):<br />
EagleEyes (for WinCE NewVersion):<br />
Step 2: Download the program as instructed:<br />
J2ME AP for Network MJPEG format DVR<br />
J2ME AP for Network MPEG/H.264 format DVR & <strong>IP</strong> camera<br />
WinCE AP for Network MJPEG format DVR<br />
WinCE AP for Network MPEG4/H.264 format DVR & <strong>IP</strong> camera)<br />
Select “EagleEyes (J2ME New version)” if you’re using the J2ME-based mobile phone.<br />
Select “EagleEyes (For WinCE New Version)” if you’re using the WinCE-Based PDA phone.<br />
Step 3: Follow the on-screen instructions after downloading.<br />
For mobile phones, the program will be saved to the location you specified.<br />
For WinCE-Based PDA, the program will be saved in “<strong>Pro</strong>grams”.<br />
7.3 – <strong>Pro</strong>gram Setup<br />
Step 1: Get the necessary information for accessing your network camera, such as the <strong>IP</strong> address, user name,<br />
password, port number, etc.<br />
Step 2: Activate the program, and go to its setting page to fill in the information needed.<br />
Step 3: Try to access your network camera to see if the connection works.<br />
Page 24
CREATING AN ACCOUNT FOR DDNS SERVICE<br />
For PPPOE or DHCP, you should enter the host name which points to the <strong>IP</strong> address of your network camera for login<br />
first. Besides using the default DDNS service, you can also apply for new DDNS services.<br />
There are many websites that offer free DDNS service application. Below is an example of DDNS account application<br />
from the website http://www.dyndns.com.<br />
1) Go to http://www.dyndns.com, and click “Create<br />
Account” to sign up a DDNS account.<br />
2) Enter all the information necessary for signing up an<br />
account according to the website instructions.<br />
Key in a user name for login, for example,<br />
headoffice523.<br />
Set the password and input it again to<br />
confirm.<br />
Key in your E-mail address and input it again<br />
to confirm.<br />
Then, click “Create Account”.<br />
3) The system will automatically send a confirmation<br />
email to your email account.<br />
Please read this email within 48 hours and complete<br />
the procedure to activate your account according to<br />
the instructions in the email.<br />
4) Click “login”, and enter the user name and password.<br />
Page 25
5) Click “Add Host Services”.<br />
Input a meaningful host name.<br />
Choose a host system name.<br />
Enter the <strong>IP</strong> address you want to redirect.<br />
Note down the whole host name, for example,<br />
headoffice523.dyndns.org.<br />
Then, click “Add To Cart” for billing.<br />
Note: This service is free. Just finish the billing process, and NO payment information is required.<br />
6) Click “Activate Services” after checkout, and your to use DDNS services will be ready to use.<br />
7) Return to Video Viewer, and go to “Network” � “DDNS”.<br />
Select “On” for DDNS.<br />
Select the system name you set when subscribing the DDNS service from the drop-down list, for<br />
example, “dyndns”.<br />
Enter the user name and password you used to log into the DDNS service.<br />
Enter the host name you set when subscribing to the DDNS service, for example, headoffice523.<br />
Page 26
APPENDIX - PRODUCT SPECIFICATIONS<br />
Network<br />
Network Compression H.264, QuickTime, MPEG4, M-JPEG<br />
LAN Port Yes<br />
LAN Speed 10/100Mbps Ethernet<br />
Supported <strong>Pro</strong>tocols DDNS, PPPoE, DHCP, NTP, SNTP, TCP/<strong>IP</strong>, ICMP, SMTP, FTP, HTTP, RTP, RTSP<br />
Frame Rate<br />
Number Of Online Users 10<br />
NTSC: 30<br />
PAL: 25<br />
Security Multiple user access levels with password<br />
Web Management<br />
<strong>Camera</strong><br />
Image Sensor 1/3" HR colour CCD image sensor<br />
(1) Web browsers, such as Internet Explorer, Mozilla FireFox, or Google Chrome for single device access<br />
(2) Free CMS software, Video Viewer, for up to 16 network cameras control simultaneously<br />
Pixels 768(H) x 494(V) / 752(H) x 582(V)) <br />
Minimum Illumination 0.05 Lux / F1.4, 0 Lux (IR ON)<br />
Shutter Speed 1 / 60 (1/50) to 1 / 100,000 sec.<br />
S/N Ratio More than 48dB (AGC off)<br />
Lens f6.0mm<br />
Viewing Angle 48 0<br />
IR LED 56 units<br />
IR Effective Range Up to 40 metres<br />
Smart Light Control Yes<br />
White Balance ATW<br />
AGC Auto<br />
IRIS Mode AES<br />
<strong>IP</strong> Rating <strong>IP</strong>65<br />
Power Source (±10%) DC 12V / 1.5A<br />
Others<br />
Mobile Surveillance iPhone, BlackBerry, J2ME & WinCE<br />
Motion Detection Yes<br />
Alarm & Event Notification FTP and E-Mail<br />
Minimum Requirements<br />
Pentium 4 CPU 1.3 GHz or higher, or equivalent AMD<br />
256 MB RAM<br />
AGP graphics card, Direct Draw, 32MB RAM<br />
Windows Vista, XP, Windows 2000 Server, ME, 98, DirectX 9.0 or later<br />
Internet Explorer 6.x or later<br />
Page 27
Page 28