Create successful ePaper yourself
Turn your PDF publications into a flip-book with our unique Google optimized e-Paper software.
safety<br />
caution statements<br />
safety precautions<br />
• Do not drop, puncture, or disassemble the cameras or DVR.<br />
• Do not tug on the power adapter. Use the plug to remove it from the wall.<br />
• Do not expose the cameras or DVR to high temperatures.<br />
• For your own safety, avoid using the DVR when there is a storm or lightning in your area.<br />
• Use the cameras and DVR with care. Avoid pressing hard on the cameras or DVR body.<br />
• Do not use power cable if it is crushed or damaged<br />
fcc compliance<br />
FCC Compliance Class B Digital Device<br />
This equipment has been tested and found to comply with the limits for a Class B digital device, pursuant to Part<br />
15 of the FCC rules. These limits are designed to provide reasonable protection against harmful interference<br />
in a residential installation. This equipment generates, uses and can radiate radio frequency energy and, if not<br />
installed and used in accordance with the instructions, may cause harmful interference to radio communications.<br />
However, there is no guarantee that the interference will not occur in a particular installation. If this equipment does<br />
cause harmful interference to radio or television reception, which can be determined by turning the equipment<br />
off and on, the user is encouraged to try to correct the interference by one or more of the following measures:<br />
• Reorient or relocate the receiving antenna.<br />
• Increase the separation between the equipment and receiver.<br />
• Connect the equipment into an outlet on a circuit different from that of the receiver.<br />
• Consult the dealer or an experienced radio or TV technician for help.<br />
Notice: Only peripherals complying with FCC class B limits may be attached to this equipment. Operation<br />
with non-compliant peripherals or peripherals not recommended by <strong>First</strong> <strong>Alert</strong> / BRK Brands, Inc. is likely<br />
to result in interference to radio and TV reception. Changes or modifications to the product, not expressly<br />
approved by <strong>First</strong> <strong>Alert</strong> / BRK Brands, Inc., could void the user’s authority to operate the equipment.<br />
We, <strong>First</strong> <strong>Alert</strong> / BRK Brands, Inc. declare under our sole responsibility that the device to which this<br />
declaration relates: Complies with Part 15 of the FCC Rules. Operation is subject to the following<br />
two conditions: (1) this device may not cause harmful interference, and (2) this device must accept<br />
any interference received, including interference that may cause undesired operation.<br />
FCC Certification (if applicable)<br />
This device contains a radio transmitter. Accordingly, it has been certified as compliant with 47 CFR Part 15 of<br />
the FCC Rules for intentional radiators. Products that contain a radio transmitter are labeled with an FCC ID.<br />
fire and electric shock hazard statement<br />
CAUTION<br />
RISK OF ELECTRIC SHOCK<br />
CAUTION: TO REDUCE THE RISK OF ELECTRIC SHOCK.<br />
UNPLUG ALL POWER SOURCES, INCLUDING CAMERAS FROM<br />
THE DVR BEFORE REMOVING COVER. FAILURE TO DO SO CAN<br />
RESULT IN DAMAGE TO THE DVR OR ITS COMPONENTS AS<br />
WELL AS INJURY OR DEATH.<br />
The lightning flash with arrowhead symbol, within an equilateral<br />
triangle, is intended to alert the user to the presence of un-insulated<br />
“dangerous voltage” within the product’s enclosure that may be of<br />
sufficient magnitude to constitute a risk of electric shock.<br />
The exclamation point within an equilateral triangle, is intended to<br />
alert the user to the presence of important operating and maintenance<br />
(servicing) instructions in the literature accompanying the appliance.<br />
WARNING: TO PREVENT FIRE OR SHOCK HAZARD, DO NOT<br />
EXPOSE THIS UNIT TO RAIN OR MOISTURE<br />
CAUTION: TO PREVENT ELECTRIC SHOCK, MATCH WIDE<br />
BLADE OF THE PLUG TO THE WIDE SLOT AND FULLY INSERT<br />
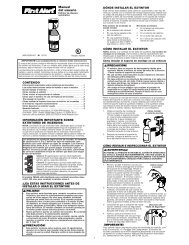
Installing cameras<br />
connecting cameras<br />
Page 4 Page 5<br />
product overview<br />
cAMERA AND pOWER cONNECTIONS<br />
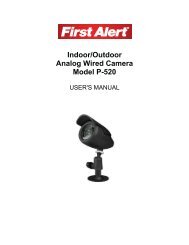
Mounting Cameras and Running Cable<br />
Select the position for the camera and secure the camera stand. Screw the camera onto the stand. Adjust camera to the proper<br />
view angle. Make sure the lens is upright relative to the subject. Tighten the thumb bolt. <strong>First</strong> <strong>Alert</strong> cameras can be either ceiling or<br />
wall mounted by simply reversing the camera stand mounting. See “Camera Orientation” Info box. Holes are provided on both the<br />
bottom and back of the camera housing to accommodate most mounting requirements. Run cable from camera to DVR location.<br />
See Information box below on “Longer Cable Runs”.<br />
Camera - Wall Mounted Camera - Ceiling Mounted<br />
Follow this diagram to connect camera to a DVR or other device using a BNC connection. Note:<br />
DVR Power Adaptor is for illustration purposes only. Your power adaptor may be different.<br />
Option 1<br />
Power from DVR (Not Supplied)<br />
Power from 120V<br />
12V DC<br />
Converter<br />
From DVR<br />
Power to DVR<br />
DC 12V Input<br />
Splitter from DVR<br />
Camera & Power<br />
Camera Orientation<br />
It’s important the camera is mounted correctly<br />
to ensure the image is not upside down as the<br />
camera lens can only be positioned one way.<br />
Longer Cable Runs<br />
Longer cable runs may require an upgrade<br />
to RG59 Coax cable. <strong>First</strong> <strong>Alert</strong> kits ship with<br />
economical AV cable that is designed to work<br />
well up to the length of cable provided, usually<br />
around 60 feet. If longer distances between<br />
camera and DVR are required, you will need to upgrade to RG59<br />
Coax cable. We provide several lengths up to 300 feet. In addition, if<br />
you need to run cable for in-wall installations, then you may require<br />
fire rated cable, FT-4/CMR UL approved for in-wall installations.<br />
Video to DVR<br />
Video In<br />
Power to Camera<br />
Option 2<br />
Power from Supplied Adaptor<br />
Video to Camera<br />
Power to Camera<br />
AV Cable: BNC/<br />
DC Power<br />
Supplied 12V<br />
DC Adaptor