Programming For Lithionics Battery⢠Lithium Ion Batteries
Programming For Lithionics Battery⢠Lithium Ion Batteries
Programming For Lithionics Battery⢠Lithium Ion Batteries

You also want an ePaper? Increase the reach of your titles
YUMPU automatically turns print PDFs into web optimized ePapers that Google loves.
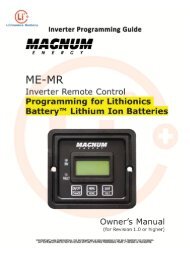
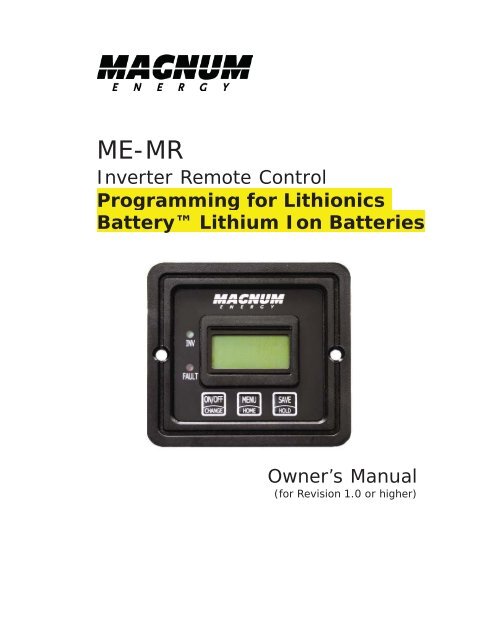
ME-MR<br />
Inverter Remote Control<br />
<strong>Programming</strong> for <strong>Lithionics</strong><br />
Battery <strong>Lithium</strong> <strong>Ion</strong> <strong>Batteries</strong><br />
Owner’s Manual<br />
(for Revision 1.0 or higher)
Setup<br />
• SETUP: 03 Batt AmpHrs - Used to select the most approximate capacity<br />
of the battery bank connected to the inverter. This setting determines the<br />
time the battery charger is in the Absorb Charging stage (i.e. Absorption<br />
Time). See Table 3-1 to correlate the battery capacity to the Absorption<br />
Time.<br />
Default setting: Batt AmpHrs= 400<br />
Table 3.1, Battery AmpHrs to Absorb Charging Time<br />
Battery AmpHrs Selected<br />
Batt AmpHrs = 200<br />
Batt AmpHrs = 400<br />
Batt AmpHrs = 800<br />
Absorb Charging Time<br />
60 minutes<br />
90 minutes<br />
120 minutes<br />
<strong>Lithium</strong> <strong>Ion</strong> Battery Settings:<br />
<strong>For</strong> a 40 <strong>Lithium</strong> Amp-Hour Battery, Set to Ahr of 200 and 60 Minutes Absorb Charging Time<br />
<strong>For</strong> a 60 <strong>Lithium</strong> Amp-Hour Battery, Set to Ahr of 400 and 90 Minutes Absorb Charging Time<br />
<strong>For</strong> a 100 <strong>Lithium</strong> Amp-Hour Battery, Set to Ahr of 800 and 120 Minutes of Absorb Time<br />
WE DO NOT RECOMMEND THE USE OF A 200 LITHIUM AMP HOUR BATTERY WITH THE ME-MR<br />
SYSTEM. UPGRADE TO THE ME-RC SYSTEM)<br />
Where do I set the Battery Amp-Hour setting Select the setting based<br />
on the 20-hour Amp-Hour (AH) capacity of your battery bank.<br />
How do I determine my Battery Amp-Hour capacity The inverter<br />
requires deep cycle batteries, which are specifically made for continuous<br />
use. Deep cycle batteries are rated either by a) amp-hours or b) reserve<br />
capacity in minutes.<br />
• Amp-hour (AH) capacity is a measurement of how many amps a battery<br />
can deliver for a specified length of time (usually 20 hours) until the<br />
voltage achieves 1.75 VDC / cell at 80° F.<br />
• Reserve Capacity (RC) is a measure of how many minutes a battery can<br />
deliver a certain amount of current (usually 25A) and maintain a voltage<br />
above 1.75 VDC/cell at 80° F.<br />
Info: If using the Reserve Capacity (25A), the 20-hour AH capacity<br />
can be estimated by multiplying “minutes reserve capacity” by 25%.<br />
Bottom line shows<br />
current “saved” setting<br />
If a diffe ren t se ttin g is<br />
required:<br />
To save the current<br />
se ttin g d isp la ye d :<br />
MENU<br />
BAT AHRS<br />
400 AH<br />
ON /O FF<br />
SAVE<br />
HOME<br />
CHANGE<br />
If th is se ttin g is co rre ct , press<br />
men u butto n to acce ss<br />
different m enu item s<br />
press press press<br />
HOLD<br />
BAT AH R S<br />
BAT AH R<br />
200 AH ....... 400 AH .......<br />
BAT AH R S<br />
800 AH<br />
Figure 3-3, SETUP: 03 Batt Amphrs Selections<br />
©2009 Magnum Energy
Setup<br />
• SETUP: 04 Battery Type - Used to select the battery type, which<br />
determines the battery charge profile and ensures the batteries are receiving<br />
the proper charge voltage. The fixed voltage selections are GEL (for Gel<br />
batteries), Flooded (for liquid lead acid batteries), AGM 1 (for Lifeline AGM<br />
batteries) and AGM 2 (for East Penn/Deka/Discover/Trojan AGM batteries);<br />
See Table 3.3 to determine the specific charge voltage based on the Battery<br />
Type selected.<br />
Default setting: BattType = Flooded<br />
Info: The voltage settings shown in Table 3.3 are based on the Battery<br />
Temperature Sensor (BTS) being disconnected or at a temperature of<br />
77° F (25° C). If the BTS is connected, the actual charge voltage will<br />
increase if the temperature around the BTS is colder than 77° F (25°<br />
C) and decrease if hotter than 77° F (25° C). This ensures the batteries<br />
receive the correct charge voltage even if they become cold or hot.<br />
Table 3.3, Battery Type to Charge Voltages<br />
Battery<br />
Type<br />
GEL<br />
Flooded<br />
Inverter<br />
Voltage<br />
Absorption<br />
Voltage<br />
Float<br />
Voltage<br />
Equalization<br />
Voltage<br />
12 VDC 14.1 VDC 13.6 VDC 14.1 VDC 1<br />
24 VDC 28.2 VDC 27.2 VDC 28.2 VDC 1<br />
48 VDC 56.4 VDC 54.4 VDC 56.4 VDC 1<br />
12 VDC 14.6 VDC 13.4 VDC 15.5 VDC<br />
24 VDC 29.2 VDC 26.8 VDC 31.0 VDC<br />
48 VDC 58.4 VDC 53.6 VDC 62.0 VDC<br />
AGM 1 2 24 VDC 28.6 VDC 26.2 VDC 31.0 VDC<br />
12 VDC 14.3 VDC 13.1 VDC 15.5 VDC<br />
48 VDC 57.2 VDC 52.4 VDC 62.0 VDC<br />
AGM 2 3 24 VDC 29.0 VDC 27.0 VDC 29.0 VDC 1<br />
12 VDC 14.5 VDC 13.5 VDC 14.5 VDC 1<br />
48 VDC 58.0 VDC 54.0 VDC 58.0 VDC 1<br />
Note 1: voltage same as absorption voltage - to prevent equalization.<br />
FOR LITHIUM ION BATTERIES, CHOOSE AGM 2 FOR BATTERY<br />
TYPE<br />
Note 2: specifications for Concord (Lifeline Series) AGM batteries.<br />
Note 3: specifications for East Penn, Deka, Discover and Trojan AGM batteries.<br />
Bottom line show s<br />
current “saved” setting<br />
If a different setting is<br />
required:<br />
To save the current<br />
setting displayed :<br />
MENU<br />
BAT TYPE<br />
Flooded<br />
ON/OFF<br />
SAVE<br />
HOME<br />
CHANGE<br />
If this setting is correct, press<br />
menu button to access<br />
different menu items<br />
press press press<br />
HOLD<br />
BAT TYPE<br />
BAT TYPE<br />
Gel ....... Flooded .......<br />
BAT TYPE<br />
AGM 1 .......<br />
BAT TYPE<br />
AGM 2<br />
Figure 3-4, SETUP: 04 Battery Type Selections<br />
©2009 Magnum Energy
Setup<br />
• SETUP: 05 Charge Rate - Used to set the maximum charge rate<br />
allowed to charge the batteries during bulk, absorption, float and equalize<br />
charging. Selections are ‘Max Charge = 10%’ up to ‘Max Charge = 100%.<br />
The Max Charge = 10% setting is available to help minimize charging while<br />
continuing to allow pass-thru power.<br />
The Max Charge selections are provided as a percentage of the inverter/<br />
charger’s maximum charging capability. Refer to label on the side of the<br />
inverter or the operator’s manual for the inverter/charger to determine its<br />
maximum charge rate. Once you find this maximum charge rate, determine<br />
the percentage needed to limit the charge rate to your battery bank.<br />
<strong>For</strong> example, if the maximum charge rate of your inverter/charger is 100 amps<br />
and you need to limit the charge rate to 50 amps, choose the Max Charge =<br />
50% selection (50 amps = 50% of 100 amps).<br />
Default setting: Max Charge = 100%<br />
CHOOSE 100% FOR LITHIUM ION<br />
BATTERIES<br />
Info: The topology of the Magnum inverter, when connected to an<br />
AC source, will override the setting and start charging if the battery<br />
voltage is
Setup<br />
• SETUP: 08 Power Saver TM - This setting allows you to turn on/off the<br />
Power Saver feature.<br />
Default setting: Pwr Save = On<br />
What is the Power Saver TM feature The Power Saver TM feature causes<br />
the LCD backlight and LED’s on the remote display to turn off to conserve<br />
energy. The remote goes into Power Saver TM mode if there hasn’t been a<br />
pushbutton press or fault message for 15 minutes. Whenever the remote<br />
goes into the Power Saver TM mode, the LCD backlight and LED’s can be<br />
reactivated by pressing any menu pushbutton. If you have a fault during<br />
the Power Saver mode, the LCD backlight and Fault LED will come on and<br />
stay on as long as the fault is detected. If you want the LCD backlight and<br />
LED’s to always be on, you will need to turn the Power Saver feature off by<br />
selecting PwrSave = Off.<br />
Bottom line shows<br />
current “saved” setting<br />
If a d iffe re n t se ttin g is<br />
required:<br />
To save the current<br />
se ttin g d isp la ye d :<br />
MENU<br />
PWR SAVE<br />
On<br />
ON /OFF<br />
SAVE<br />
HOME<br />
CHANGE<br />
If this se ttin g is co rrect , press<br />
menu b u tto n to a cce ss<br />
different menu item s<br />
press press press<br />
HOLD<br />
PWR SAVE<br />
Off .......<br />
PWR SAVE<br />
On<br />
Figure 3-8, SETUP: 06 Power Saver TM Selections<br />
• SETUP: 09 Equalize - This setting allows you Equalize the batteries<br />
after a Float Charge is achieved. Equalize is a controlled overcharge of the<br />
batteries and should only be attempted by experienced users.<br />
Default setting: Equalize = Disabled BE SURE THAT EQUALIZE IS<br />
DISABLED FOR LITHIUM ION BATTERIES<br />
MENU<br />
HOME<br />
Bottom line shows<br />
current “saved” setting<br />
EQUALIZE<br />
Disabled<br />
If a d iffe r e n t se ttin g is<br />
required:<br />
ON/OFF<br />
CHANGE<br />
T o sa ve th e cu r<br />
se tting displa y<br />
SAVE<br />
If th is se ttin g is co rre ct , p r e ss<br />
menu button to access<br />
different menu ite m s<br />
press press press<br />
HOLD<br />
EQUALIZE<br />
D isabled .......<br />
Figure 3-9, SETUP: 08 Equalize Selections<br />
EQUALIZE<br />
R equested<br />
What is the Equalize Equalize is a controlled overcharge of the batteries.<br />
There will be excessive gassing of the batteries during the Equalize process.<br />
This condition is corrosive and emits dangerous hygrogen gasses during the<br />
charging process.<br />
Warning: Only Equalize in well ventilated areas. Consult<br />
your battery manufacturer for recommendations on Equalizing<br />
batteries.<br />
Info: Equalization charging is not available if GEL or AGM 2 is selected<br />
under the SETUP: 04 Battery Type menu.<br />
©2009 Magnum Energy
Setup<br />
3.3 TECH Menu<br />
The TECH menu pushbutton provides access to selections that are used to<br />
assist service technicians in troubleshooting. It provides access to system information<br />
along with a selection that allows all system settings to be returned<br />
to the original factory default values.<br />
Scroll to the end of the SETUP menus until “TECH, Press ON” appears. Push<br />
the ON-OFF / Change button to access the tech menus. Continue to press<br />
the ON-OFF/Change button to see more tech menus.<br />
TECH: 01 Temperatures – This “read only” menu displays temperature<br />
readings of the battery temperature sensor (if connected), BE SURE TO<br />
DISCONNECT THE BTS OR BATTERY TEMPERATURE SENSOR BY REMOVING<br />
THE GRAY PHONE TYPE WIRE WITH A YELLOW TAG FROM THE INVERTER<br />
HOUSING. the transformer, the FET’s (Field Effect Transistors).<br />
TECH: 02 Revisions – This “read only” menu displays the firmware revision<br />
level of the inverter and remote.<br />
TECH: 03 Inv Model – This “read only” menu displays the model number of<br />
the connected inverter.<br />
MENU<br />
HOME<br />
press<br />
TECH Menus press the O N/<br />
OFF button to continue to<br />
scroll through tech menus<br />
TECH<br />
Press ON<br />
T e ch In fo scr eens are “read<br />
only” scr eens no changes ca n<br />
be made to these screens<br />
Scroll to the next<br />
scr e e n<br />
ON/OFF<br />
CHANGE<br />
press<br />
Bat Temp<br />
xx C ....<br />
Xfm Temp<br />
xx C ....<br />
FET Temp<br />
xx C ....<br />
Inverter<br />
Rev x.x ....<br />
Remote<br />
Rev x.x ....<br />
Model<br />
MExxxx<br />
Figure 3-10, Tech Menu.<br />
Info: When “Model: UNKNOWN” is displayed, the remote is not able to<br />
determine the inverter model, this is due to an older inverter model or<br />
an inverter revision newer than the remote; all remote menu selections<br />
and features that are available in the inverter will function normally.<br />
©2009 Magnum Energy